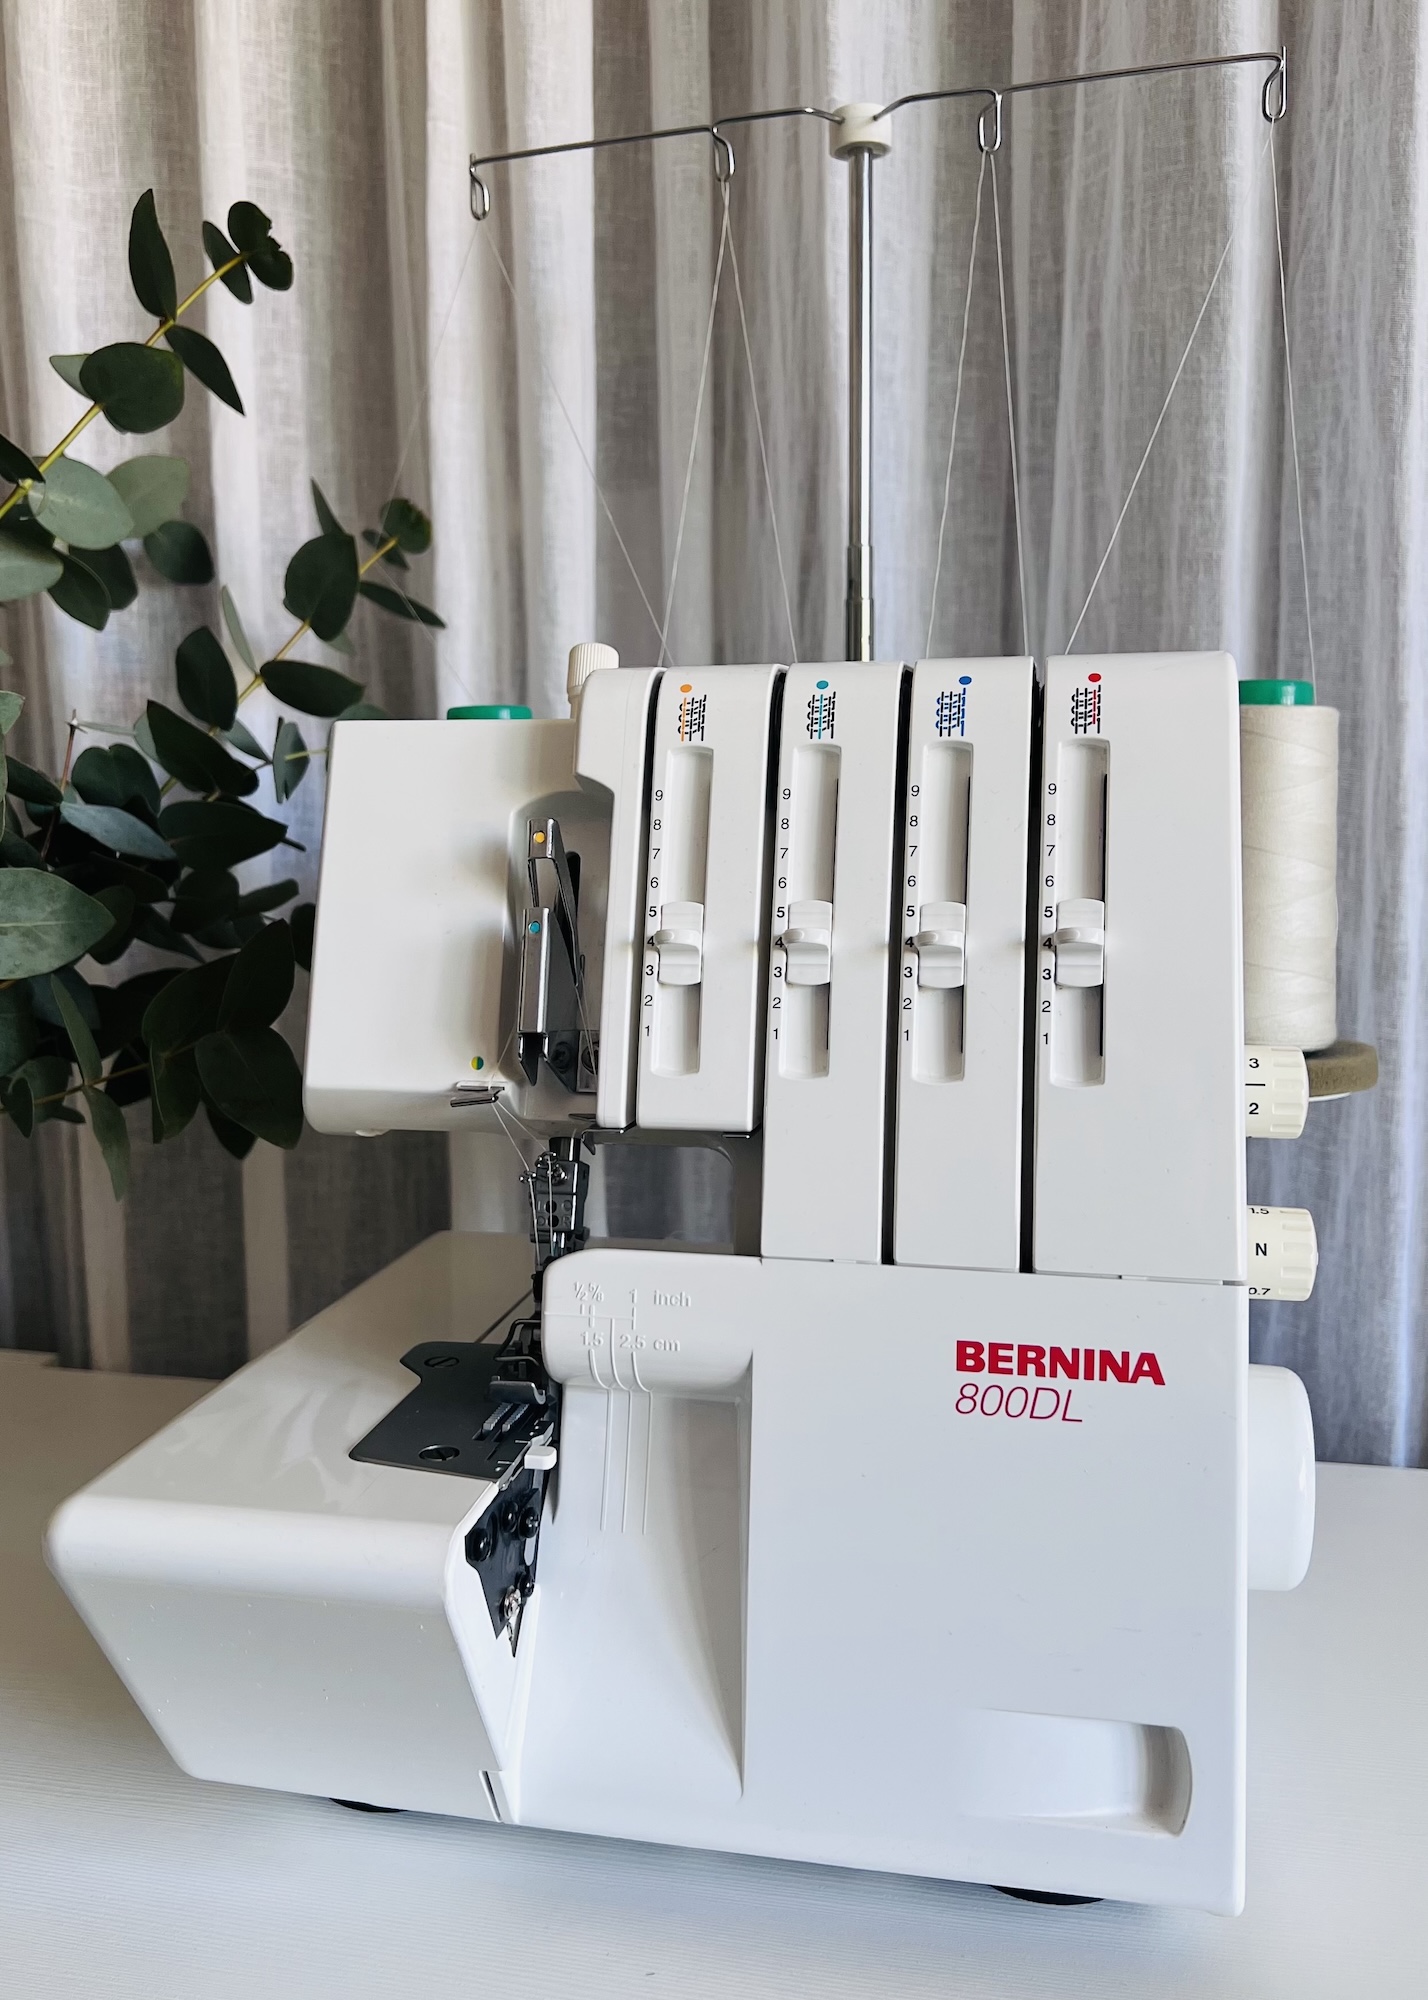
 Hopefully, after reading my Part 1 on starting to use an overlocker you have a better idea of what they are and what they can actually do. However, once you start using one regularly, you might notice that things don’t always go smoothly. Stitches can look too loose or too tight, the fabric can curl, and the threads can break. While these sorts of things can be super frustrating, it’s pretty normal. Overlockers can be a bit sensitive, and even small adjustments can make a big difference.
Therefore, in this Part 2, I will look at some of the key settings of an overlocker, and how to make adjustments to these when things just don’t look or feel right, troubleshooting some of the more common issues that can arise.
Again, I will be demonstrating on my Bernina 800DL. But, if your machine looks a little different or doesn’t have one of the settings, the basic process is hopefully pretty similar. You may just need to tweak a thing or two depending on your machine.
Understanding the Make-Up of an Overlocker Stitch
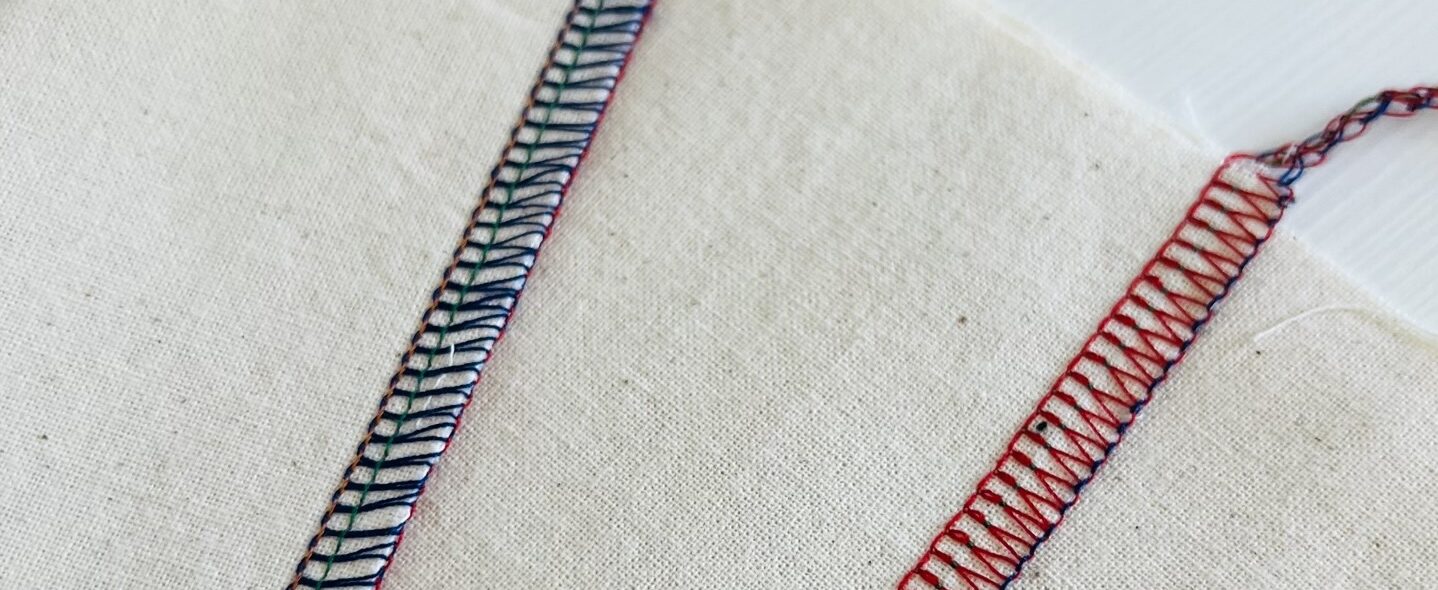
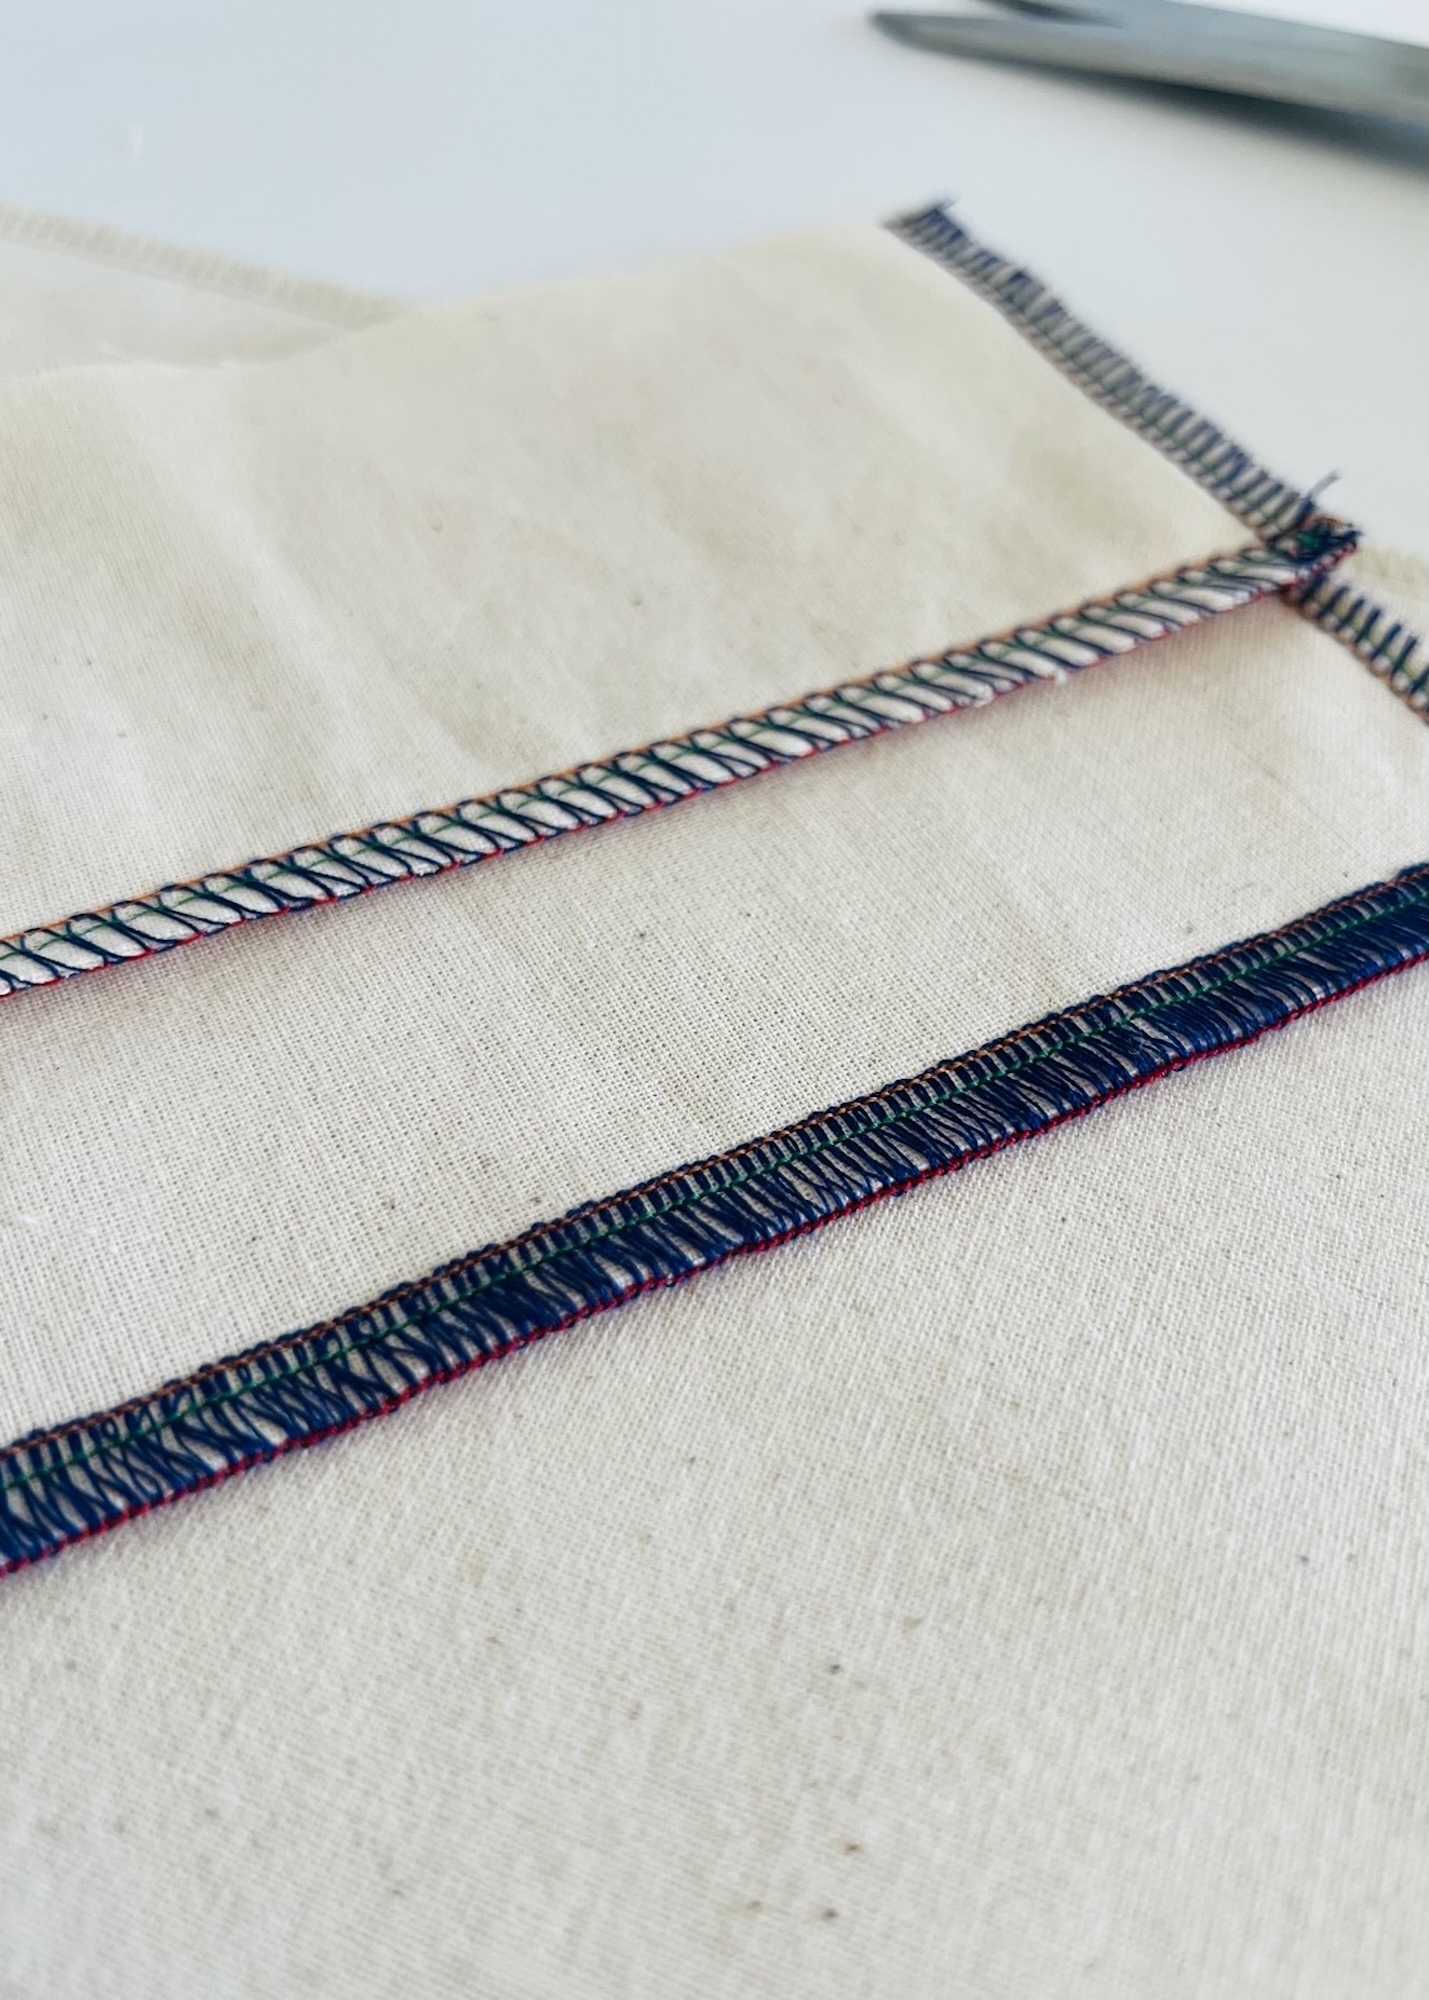
Let’s take a look at the make-up of a standard four-thread overlocker stitch:
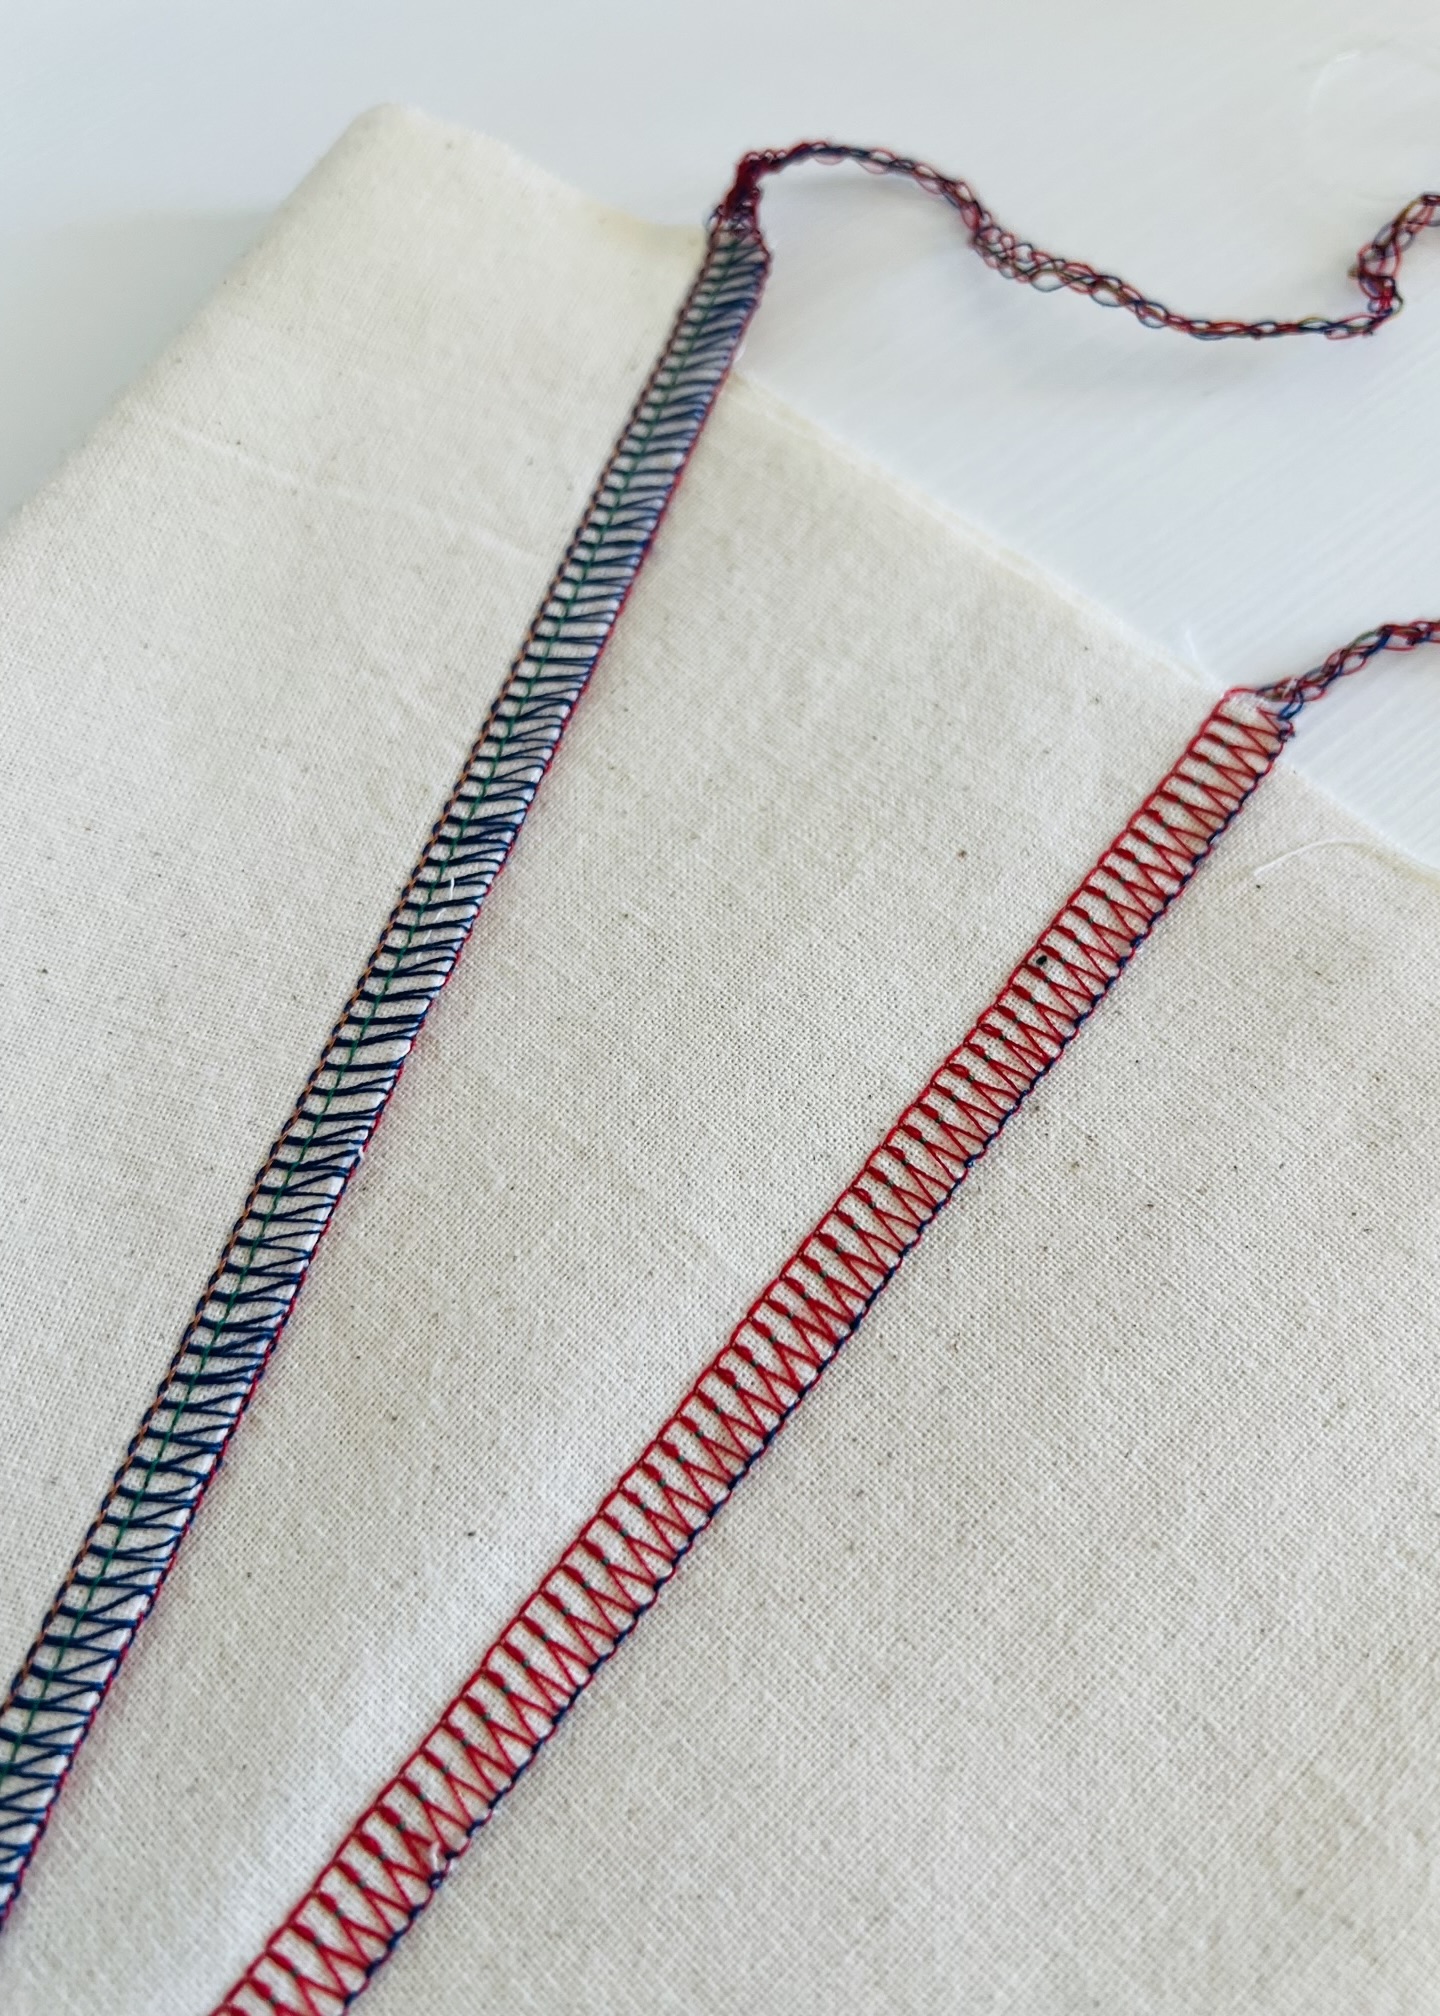
- Left needle thread = orange
- Right needle thread = green
- Upper looper thread = blue
- Lower looper thread = red
What Should a Balanced Overlocker Stitch Actually Look Like?
I feel a good place to begin this article is by understanding what a balanced and neat overlocker stitch should actually look like, so you know what you’re aiming for. Here are a few things to look out for.
Looper threads should:
- Interlock neatly at the edge of the fabric
- Hug and wrap the edge evenly and consistently
- Not hang off the edge or form loose loops
- Not pull the fabric edge inward
- Be visible only on the right side of the fabric for the upper looper, and visible only on the wrong side of the fabric for the lower looper
Needle threads should:
- Form two straight and consistent parallel rows of stitching
- Sit flat against the fabric without being too tight and pulling to the other side, or being too loose and sitting above the fabric
- Not be too visible from the wrong side of the fabric, only small little dots at most
The fabric should:
- Lie flat without puckering, wavering, or stretching
- Not curl or tunnel at the edge
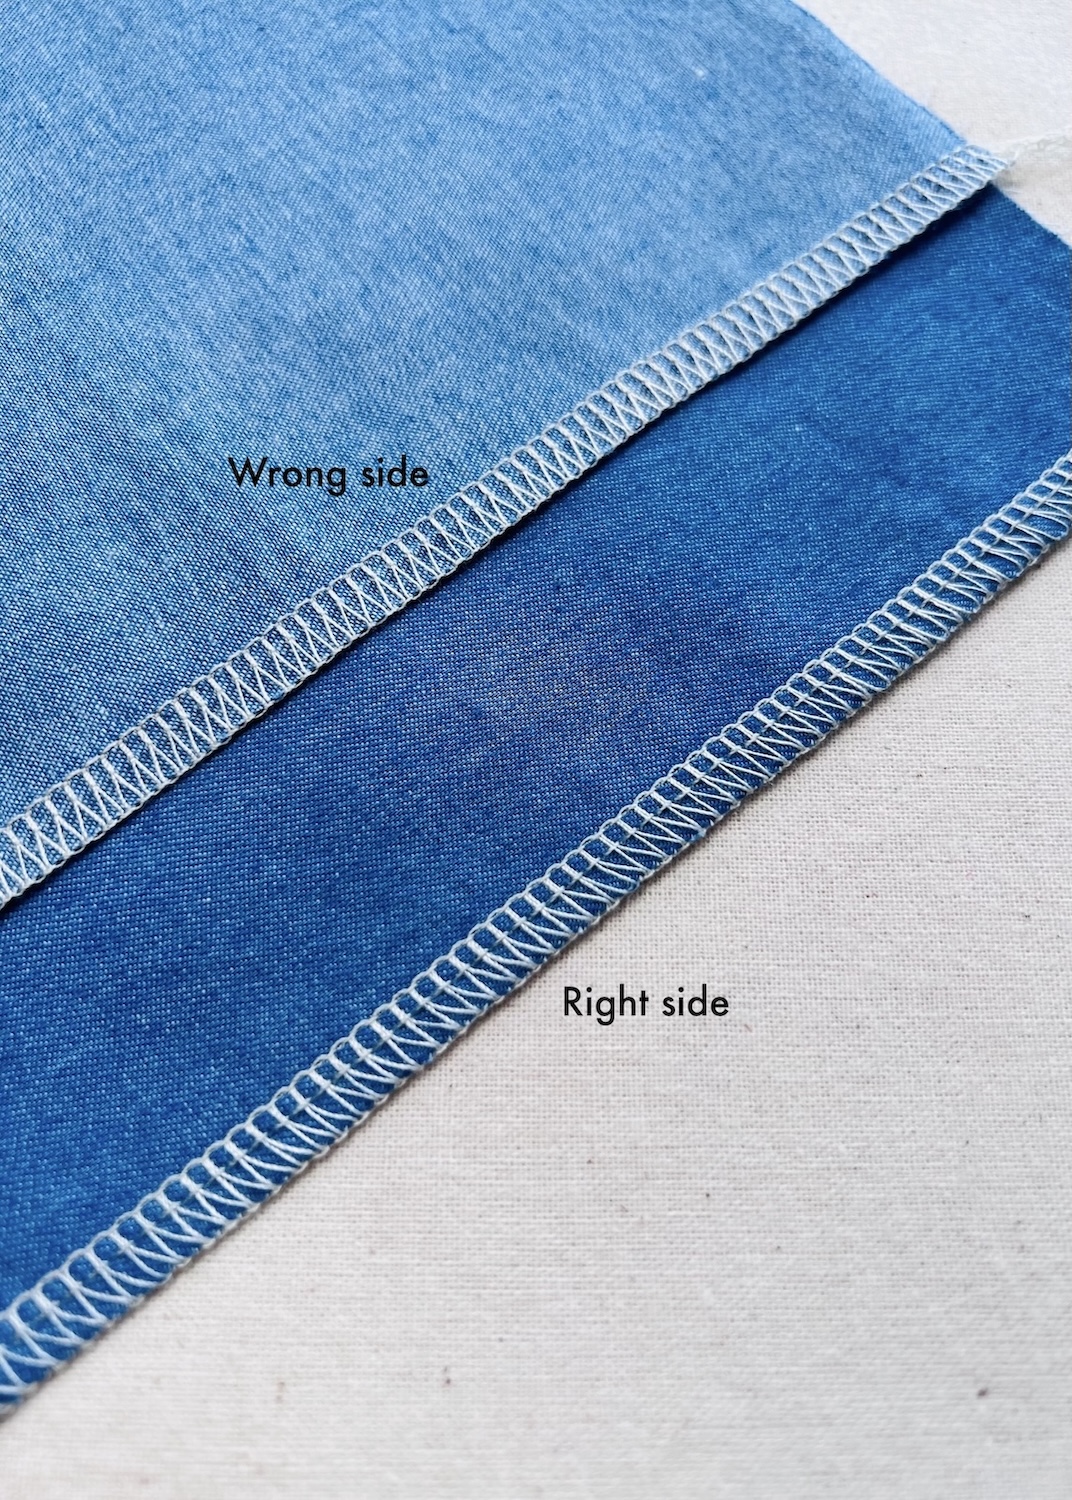
Did You Know That Overlocking Has a Right Side and a Wrong Side?
I always sew with this right and wrong side in mind, and it’s pretty easy to tell the difference.
For a standard, four-thread overlocker stitch, the right side will feature the two rows of parallel, straight stitching created by the needle threads (orange and green), along with the upper looper thread (blue). The wrong side of the fabric will consist of the lower looper thread (red).
If I were to overlock a shoulder seam that would get pressed toward the back of the garment, I would overlock accordingly—the right side of the overlocking stitch would face outward, while the wrong side would be hidden underneath.
Key Machine Settings
Now let’s take a look at some of the most common settings on an overlocker before exploring how to adjust them if any issues arise.
Thread tension
The thread tension essentially controls how tightly each thread is pulled through the machine. It has a big influence on the balance, appearance and neatness of the stitching.
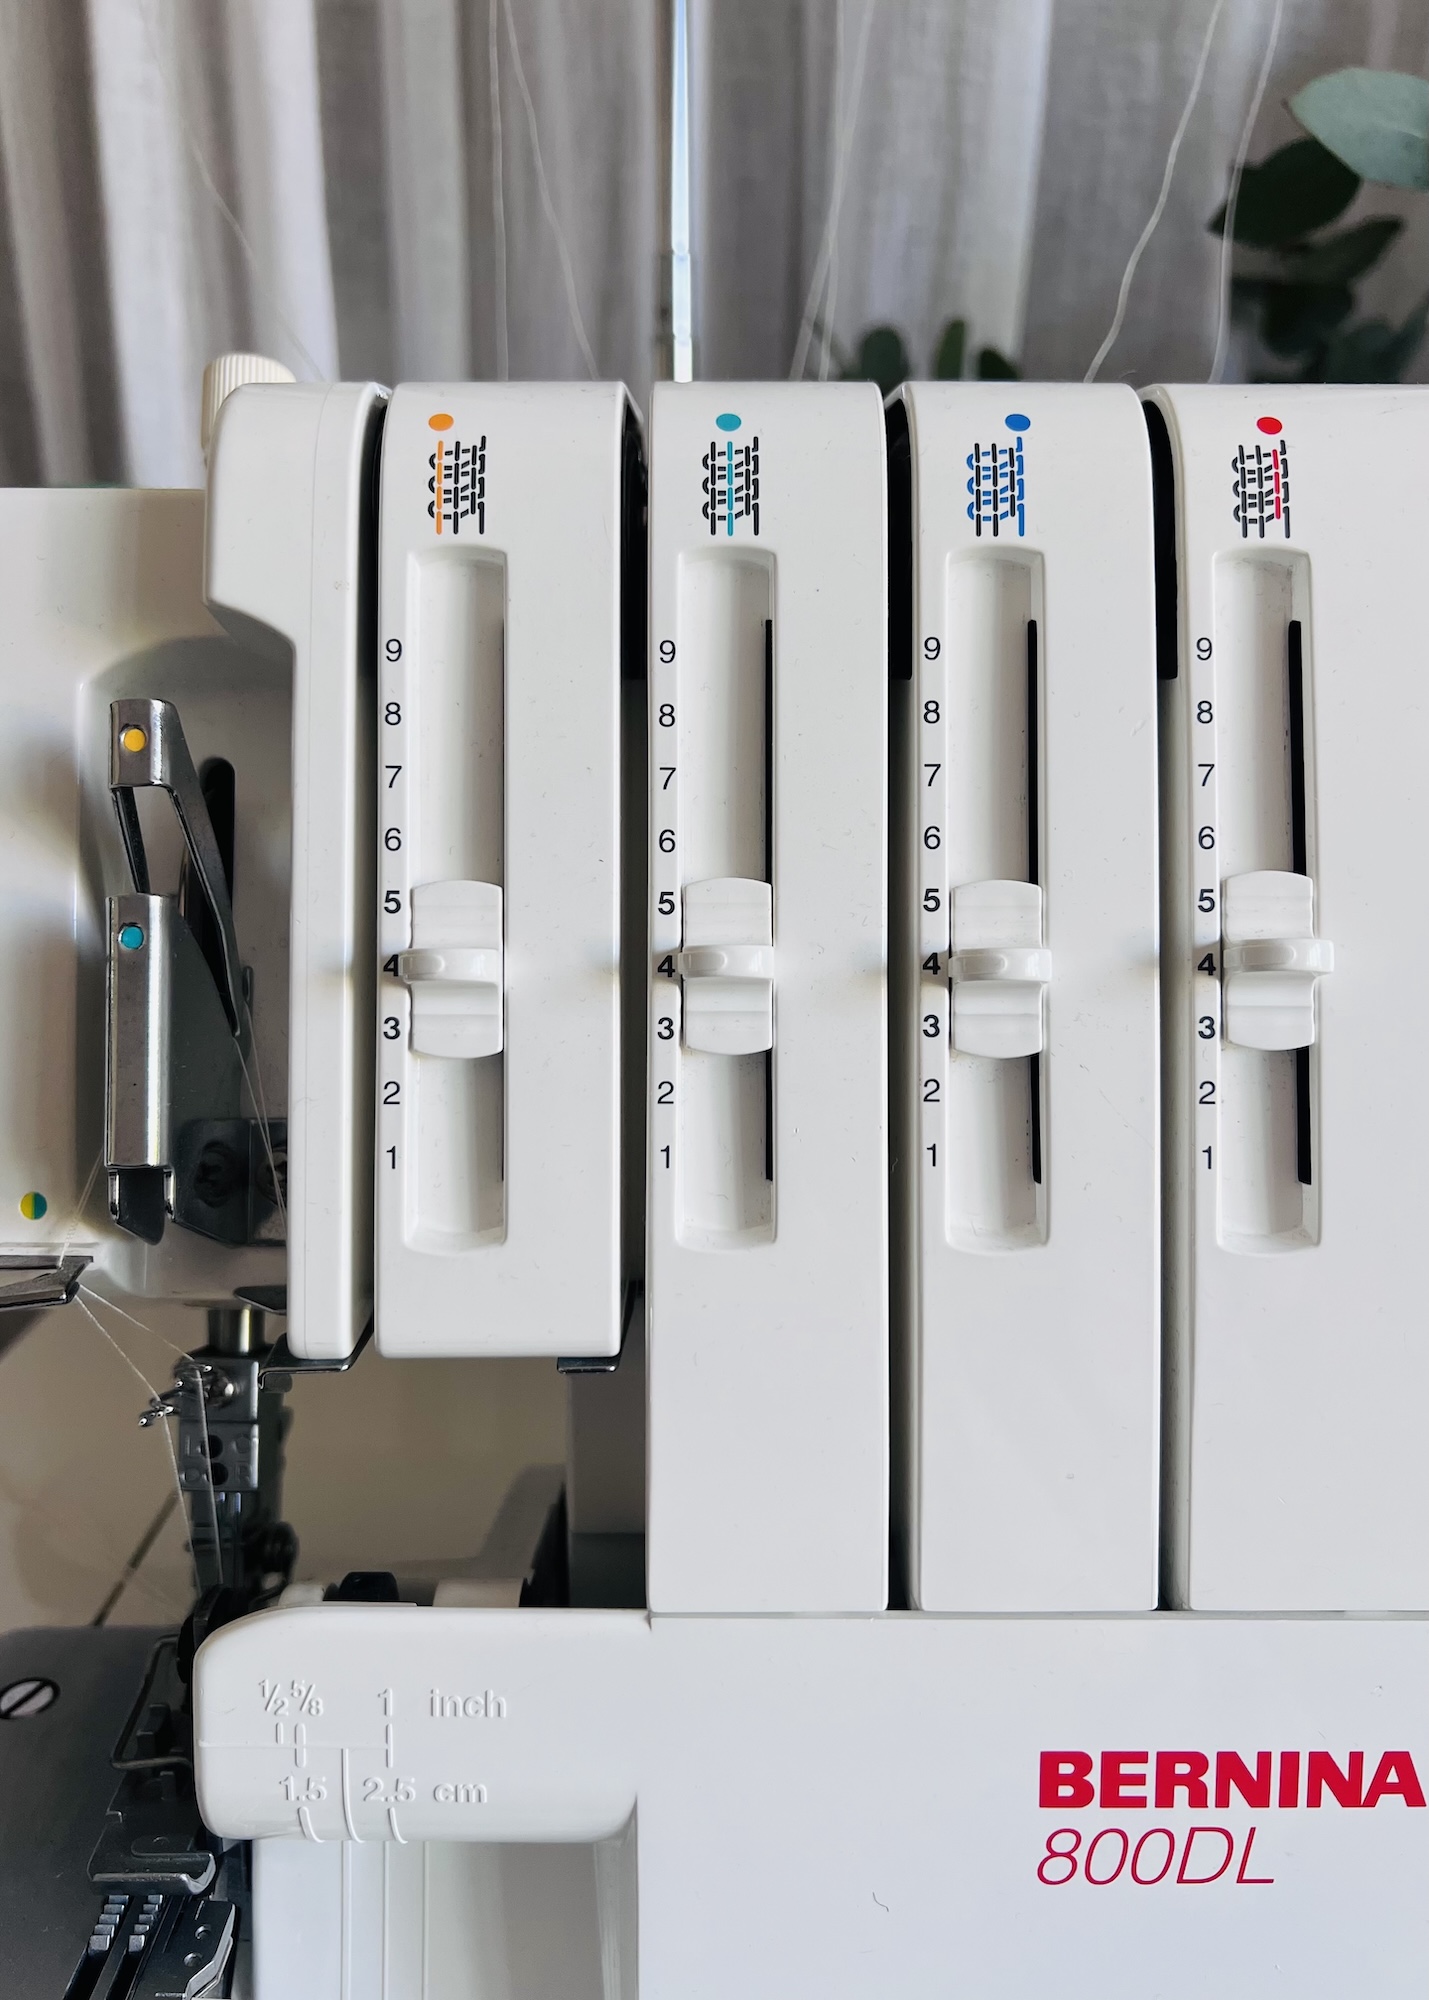
Most machines have tension controls for each thread. My machine has sliders at the very front that you either slide up or down to adjust. A higher number means more tension (i.e. a tighter thread), and a lower number means less tension (i.e. a looser thread). I usually keep mine around the middle at 4 for most of the sewing I tend to do.
Stitch length
The stitch length controls how long each stitch is from front to back. It is essentially the distance between each time the needles penetrate the fabric, similar to a sewing machine.
Machines may differ when it comes to the stitch length. On my machine, the stitch length can vary from 1–4mm, and a good general guide is:
- 2.5mm (default): Suitable for most general sewing
- 1–2mm: Best for finer fabrics or rolled hems creating a denser, smoother, and satin-like stitch
- 3–4mm: Best for heavier fabrics helping to ensure smooth feeding of the fabric and preventing bunching
 Differential feed
The differential feed controls how the feed dogs move the fabric through the machine. The feed dogs are the metal teeth you can see underneath the presser foot (similar to those found on a sewing machine).
On my machine, there are two feed dogs, a front and a rear, that move independently.
- Front feed dog: Positioned just in front of the needles, guides the fabric through to the needles.
- Rear feed dog: Positioned behind the needles, helps pull the fabric through, out and away from the machine.
The movement of the feed dogs can be a little confusing to understand. It took me a while to get my head around it, but hopefully this explanation makes sense, as it’s quite useful to understand when wanting to make adjustments.
The key thing to remember is that the differential feed is not about speed, but about how much fabric each feed dog moves per cycle. What does this mean in practice? I like to picture each feed dog tracing a rectangular path. There is one rectangular path in front of the needle area (the front feed dog) and one behind the needle area (the rear feed dog). It is the size of these rectangular paths, and therefore the distance each feed dog moves the fabric, that can be adjusted.
Confusing, I know, so let’s break it down with the different settings:
- 1 (neutral): Both feed dogs travel the same distance, tracing rectangles of the same size. In doing so they transport the same amount of fabric during each feed cycle through the machine. The fabric enters and leaves the needle area at the same rate, so it is neither stretched nor compressed. Honestly, I tend to leave it on this setting, as I find it suitable for most of the woven fabrics I sew.
- 0.7 (reduced differential feed): You may also want to reduce the differential feed when working with some woven fabrics. In this case, the rear feed dog traces a slightly larger rectangle, travelling a little further during each cycle, while the front feed dog traces a smaller rectangle and travels a shorter distance, moving a little less fabric.
For example, the front feed dog may move the fabric 7mm per cycle, while the rear feed dog moves it 10mm. This essentially means that the rear feed dog is pushing more fabric out than the front feed dog is bringing in. Why is this good? It creates a little tension through the stitching area, which helps keep the fabric flat and reduces the chances of puckering. - 1.5-2 (increased differential feed): When working with knits and stretch fabrics however, you kind of want the opposite, so you need to increase the differential feed. In this instance, the front feed dog is tracing a larger rectangle, travelling a little further each cycle, while the rear feed dog is tracing a smaller rectangle and moving a shorter distance.
For example, the front feed dog may move the fabric 10mm a cycle, while the rear feed dog may move it 7mm. The front feed dog is consequently feeding more fabric into the stitching area than the rear feed dog is able to feed through. This extra fabric in front means that there is no tension on the fabric as it moves through the needle area, helping prevent it from being stretched.
Note: The use of 7 and 10 millimetres in these examples have been randomly selected to simply help demonstrate the difference in the amount of fabric being transported per cycle.
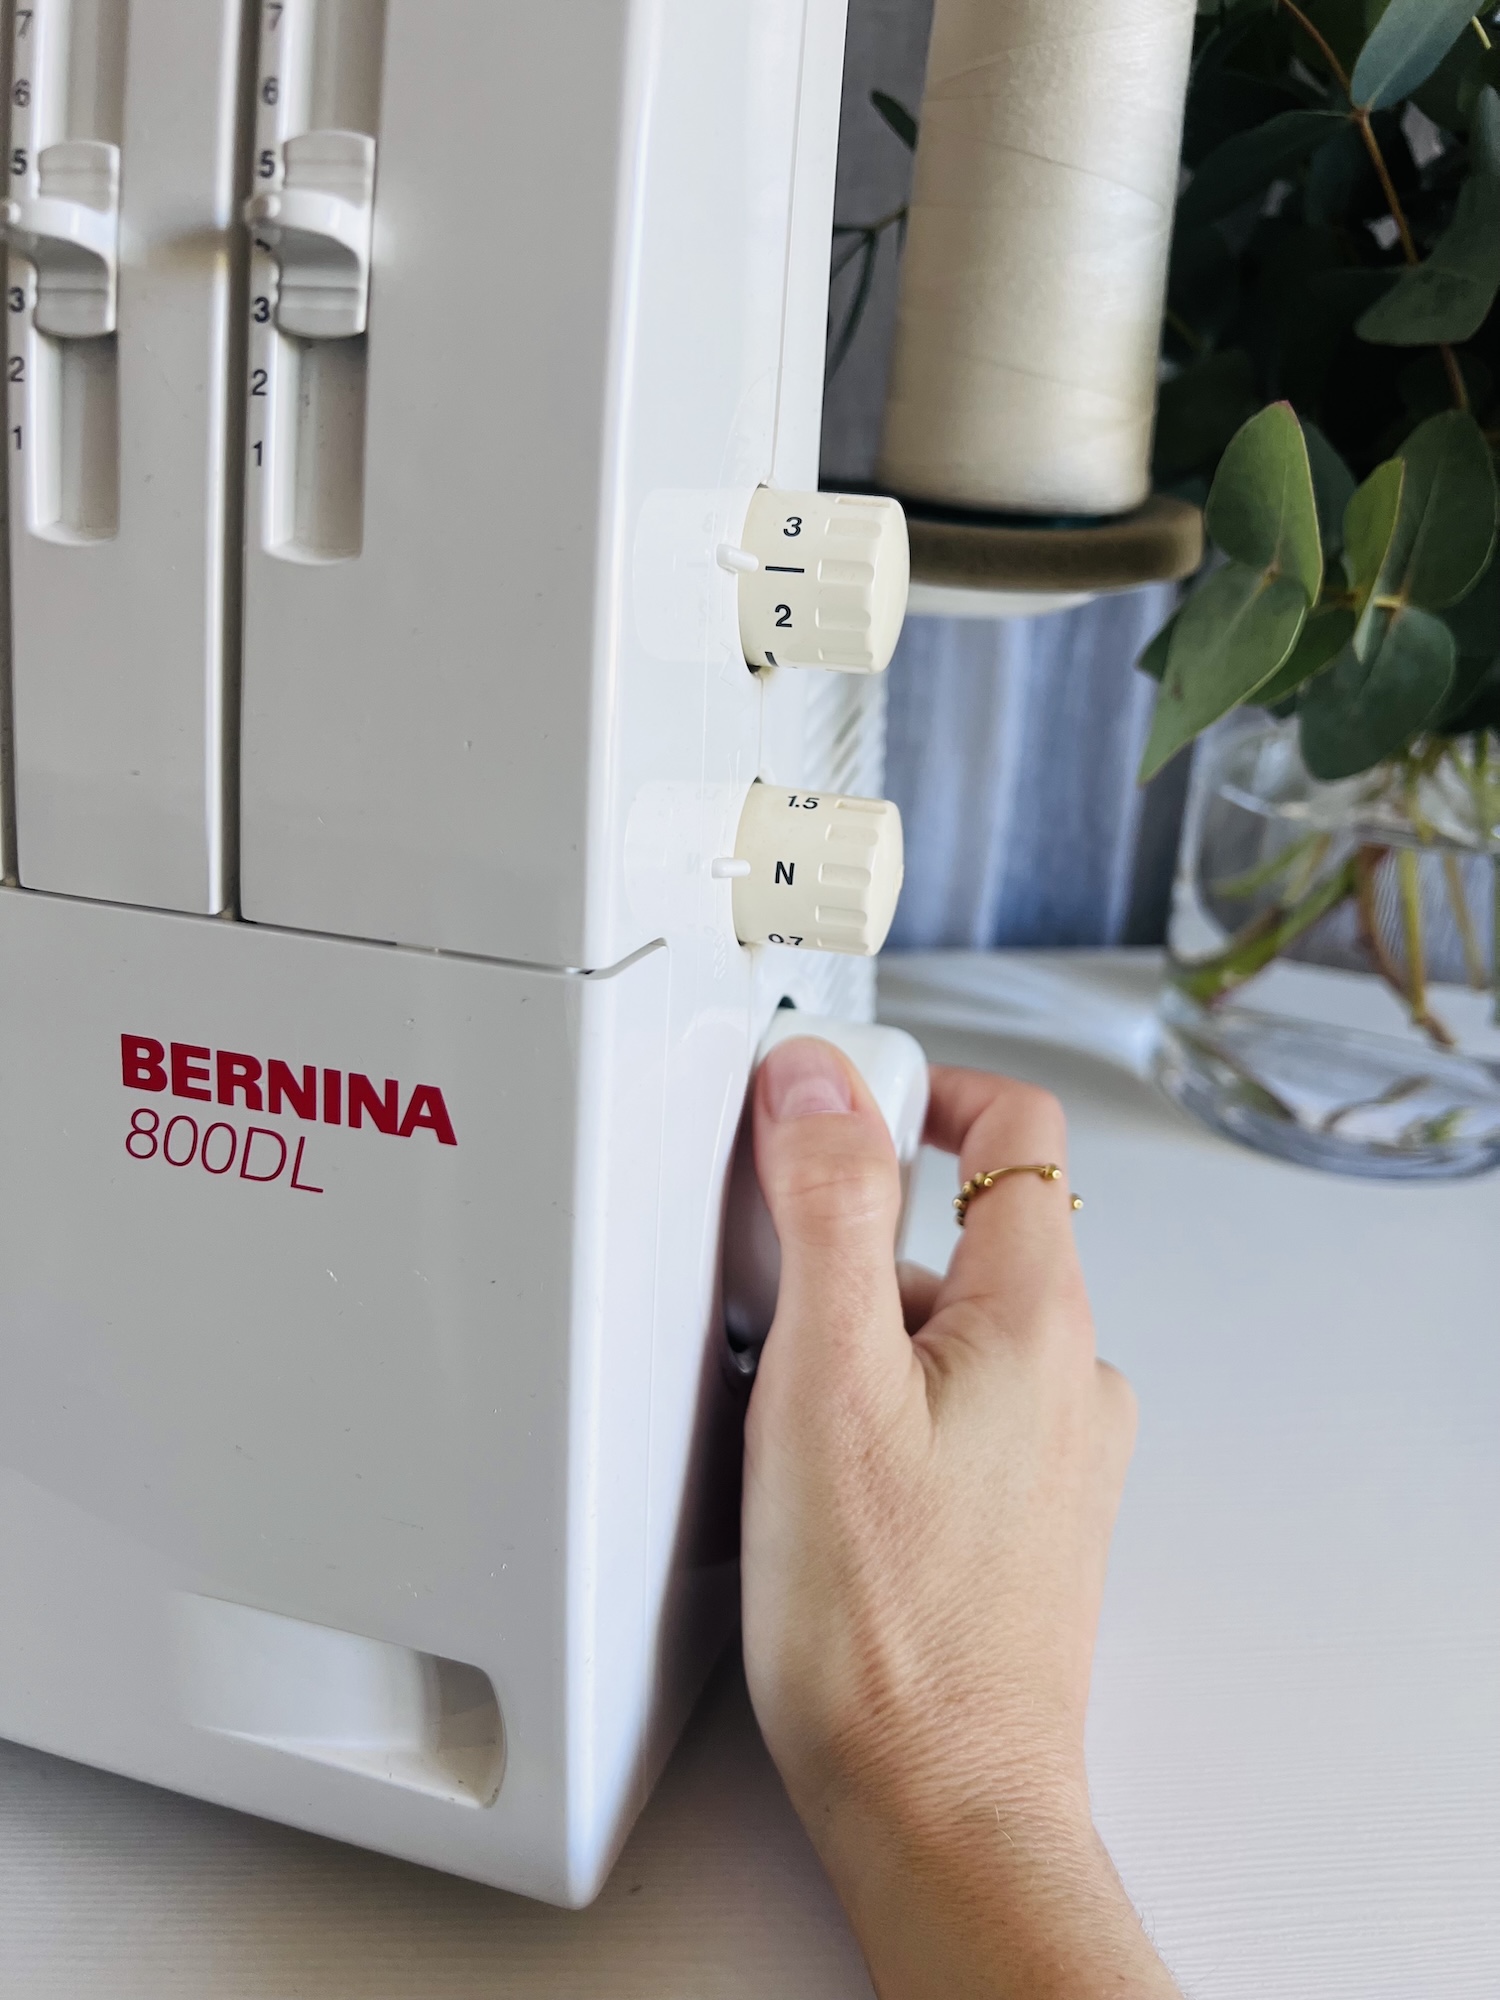
On my machine, stitch length and differential feed are simply controlled by a dial at the side of the machine. The top dial controls the stitch length, and the middle dial controls the differential feed.
Cutting width (i,.e. the blade position)
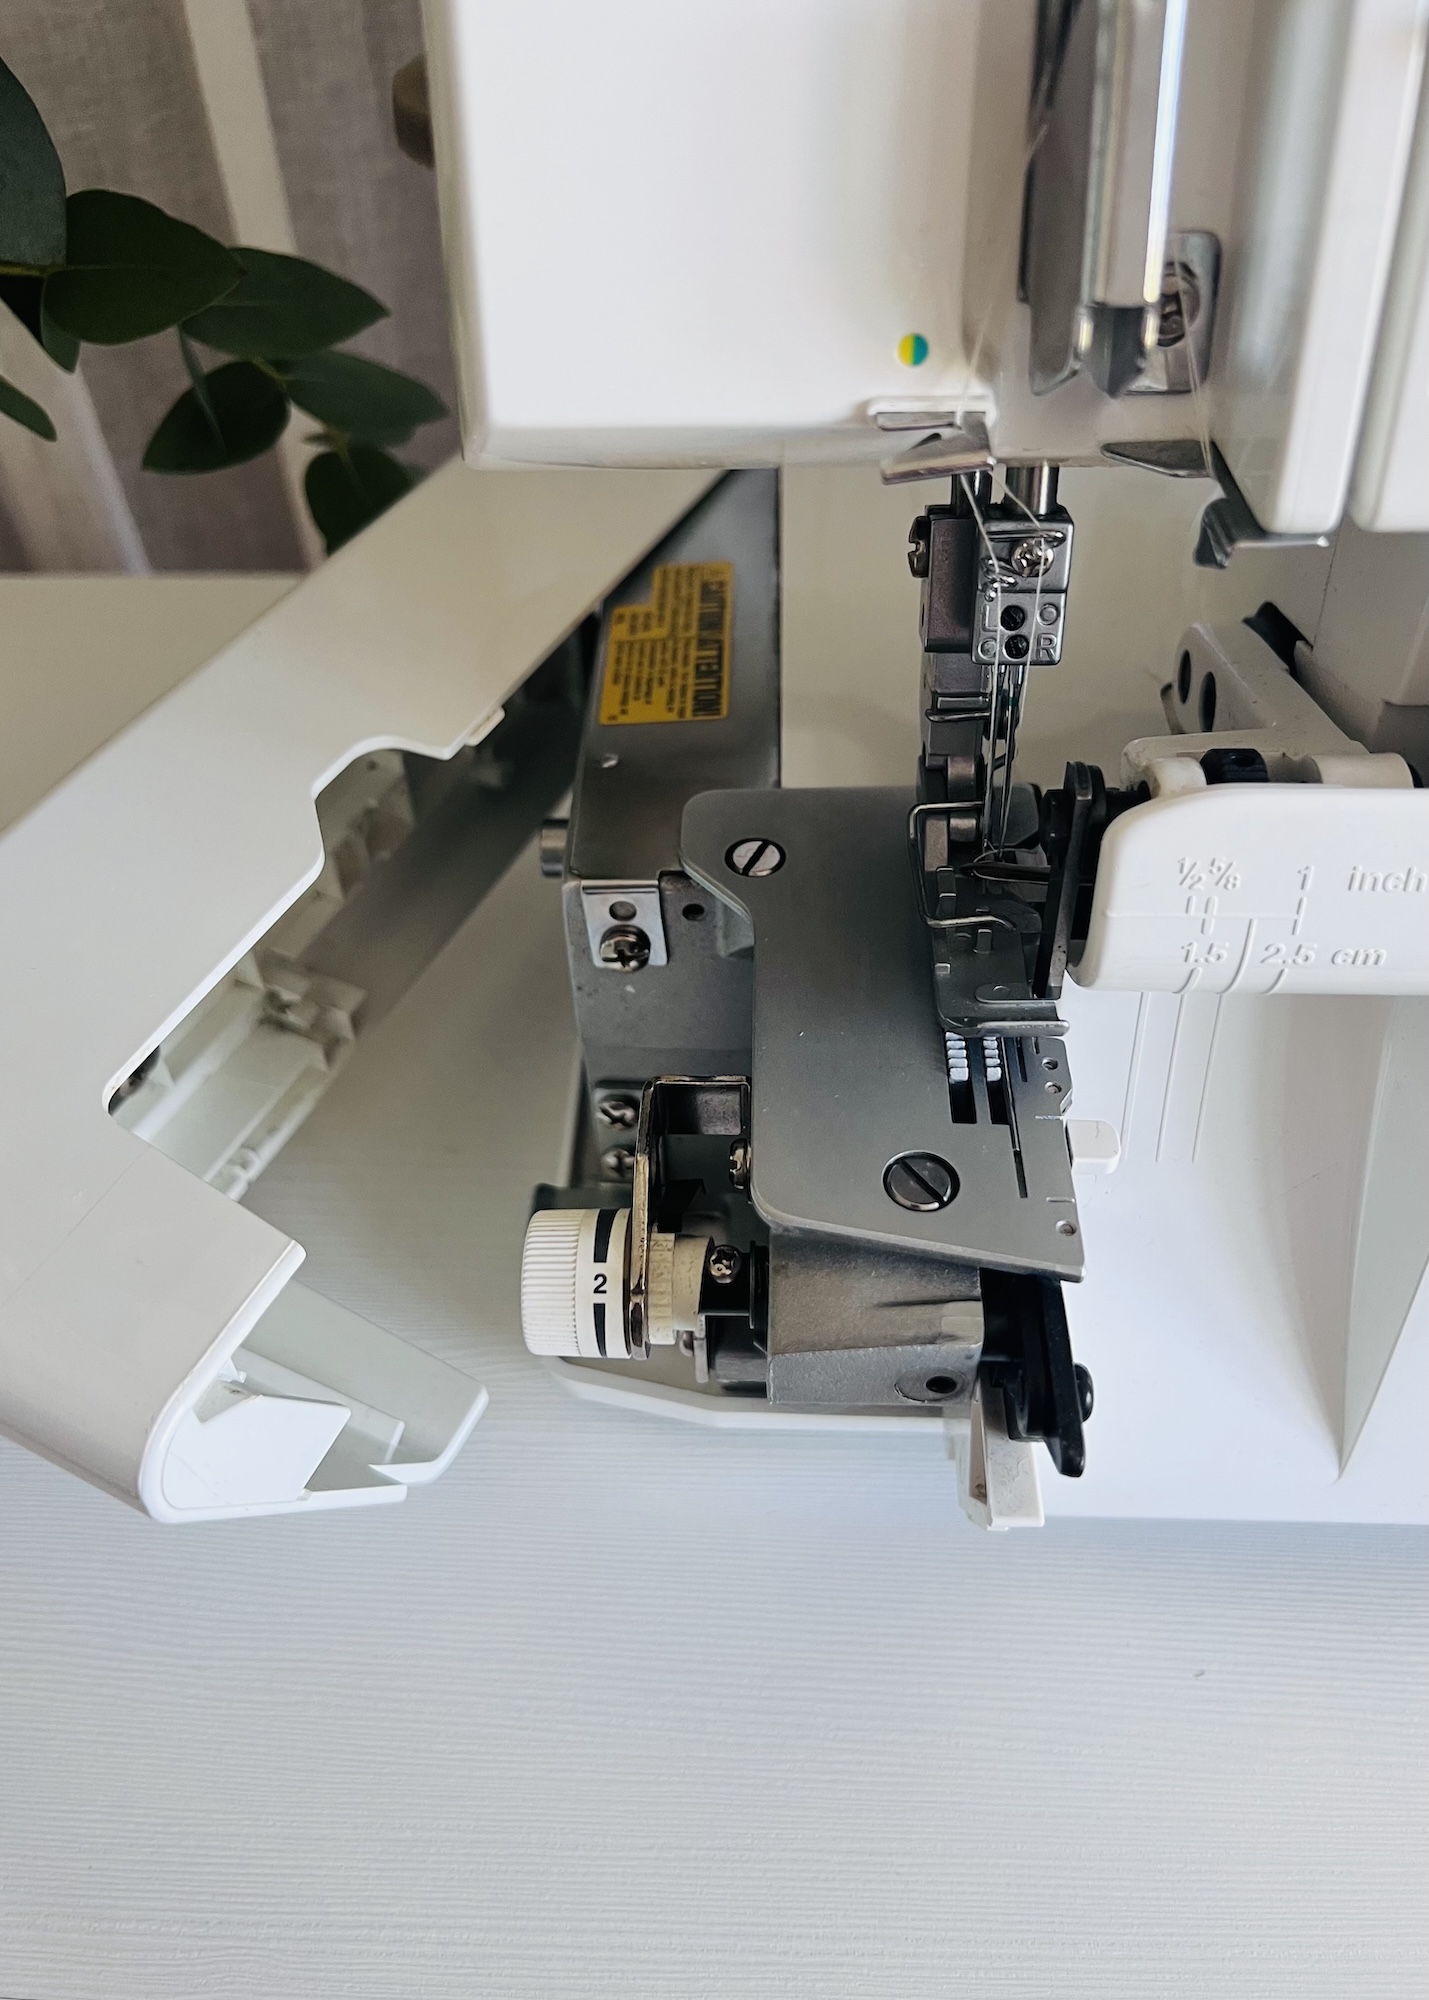
The cutting width refers to how much of the fabric will be trimmed by the blade in relation to the stitching. This setting directly affects how much of the raw edge of the fabric edge is enclosed by the looper threads.
As a guide, I tend to leave the cutting width at 2 on my machine, which creates a 4-6mm seam width. If I wanted to reduce that to a 1, I would create a smaller 3-5mm seam width, or increase to a 3 in order to create a wider 5-7mm seam width.
 Presser foot pressure
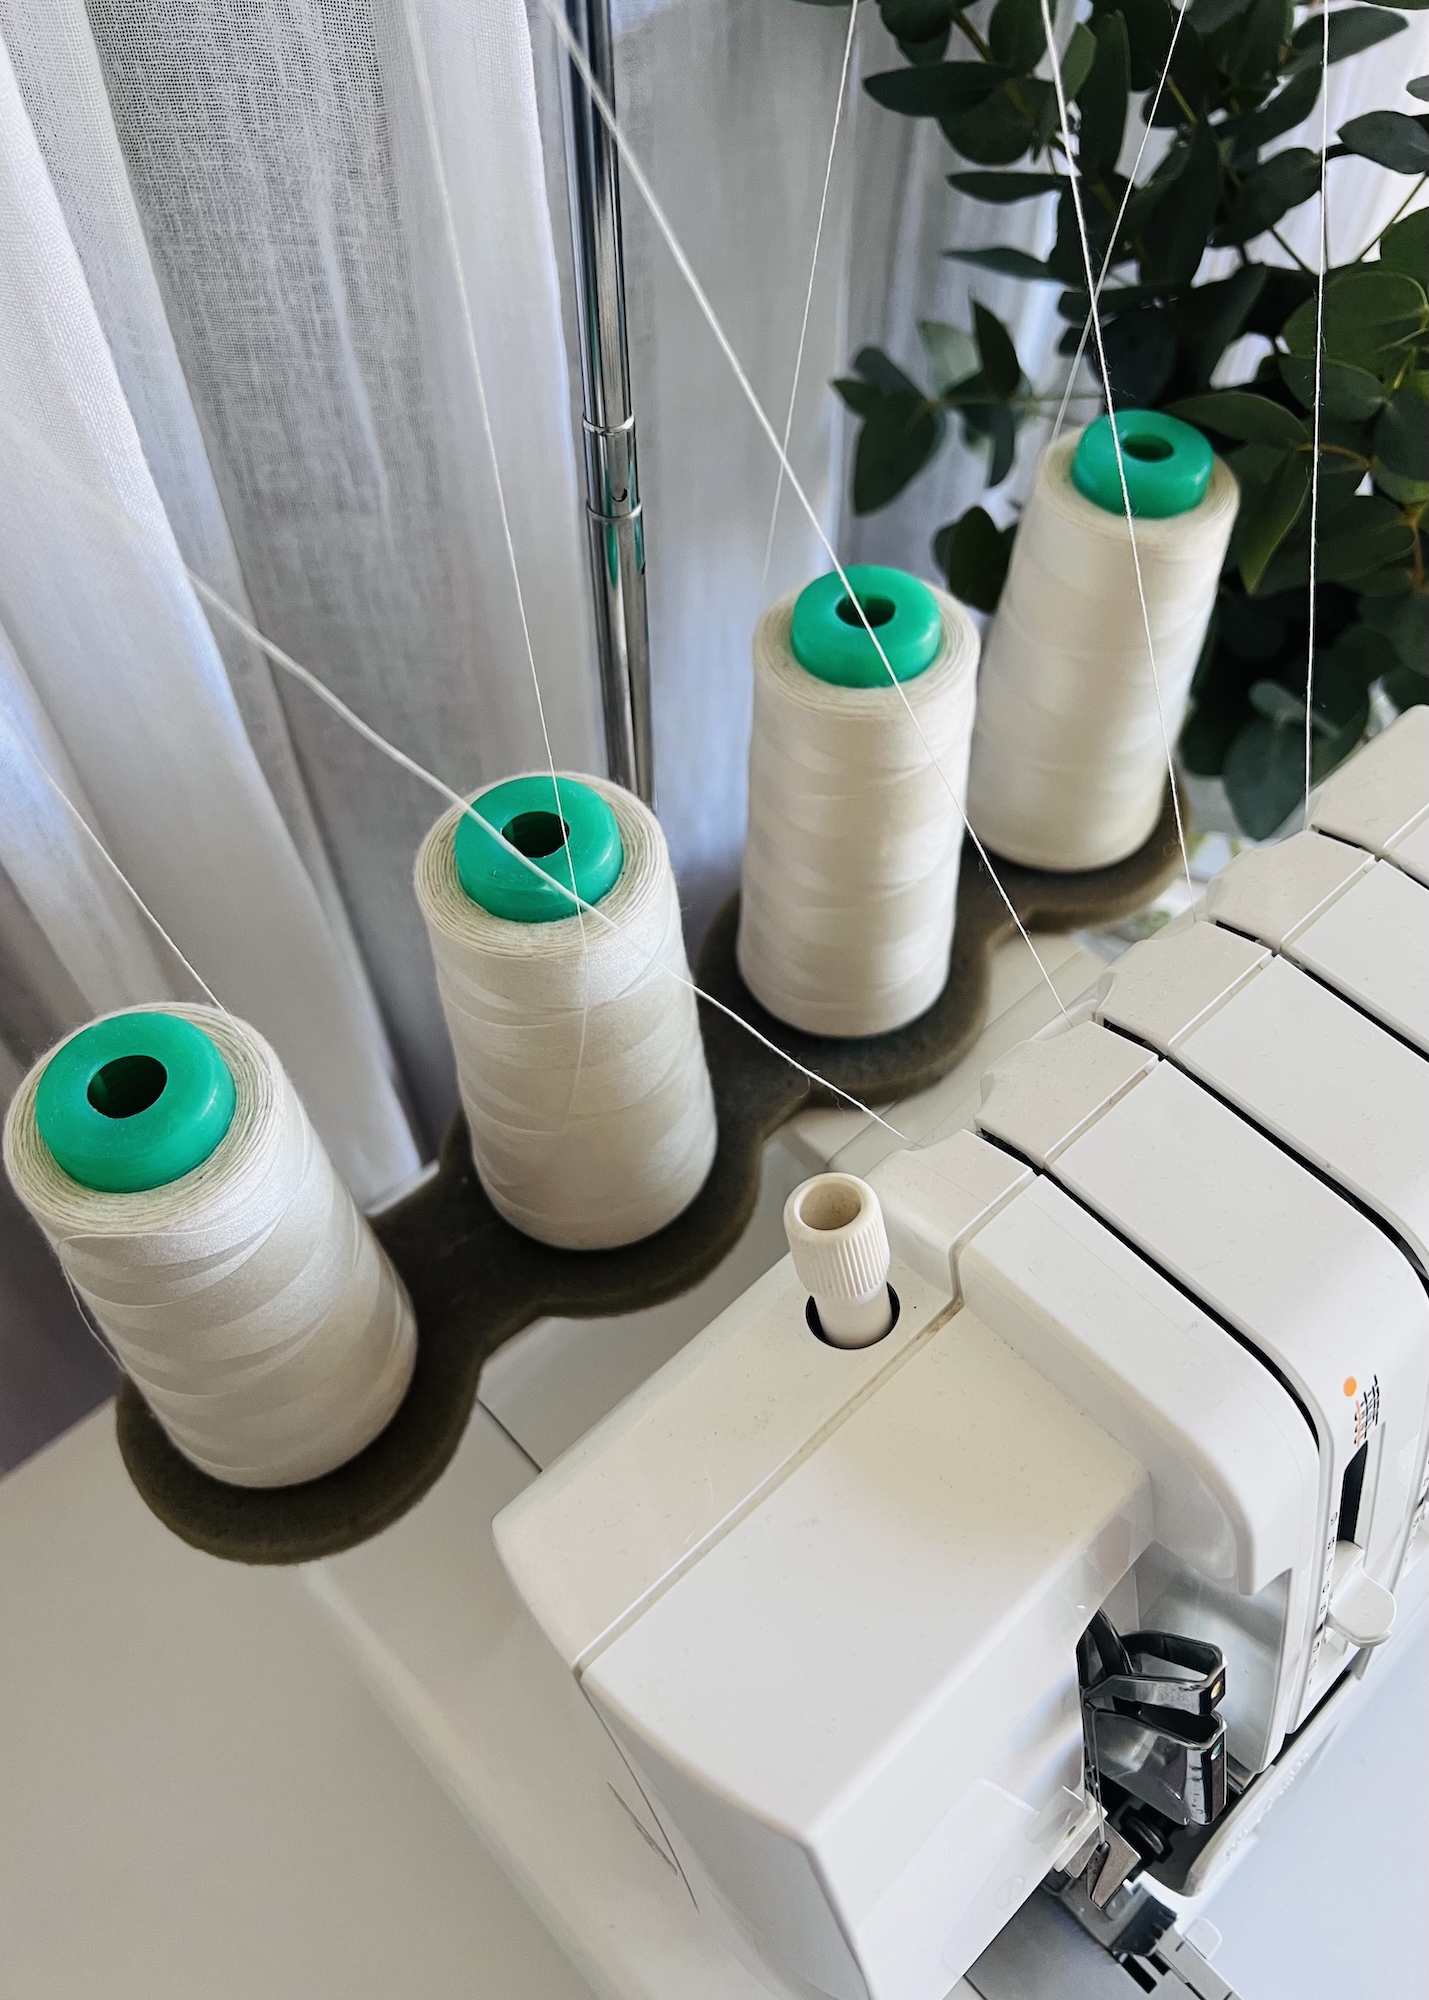
The presser foot pressure controls just that, the amount of downward pressure the presser foot applies, pressing the fabric down against the feed dogs. There is a dial on the top of my machine, near the tension discs, that controls this. This influences how the fabric feeds through the machine, how evenly the stitches are formed, and helps ensure the fabric sits flat without stretching, puckering or shifting.
Generally speaking, you want more pressure for thick or stiff fabrics such as denim, and less pressure for lightweight or sheer fabrics and knits.
Troubleshooting Some Common Overlocker Stitch Problems
Now it’s time to troubleshoot!
This section aims to bring everything together. I will outline 10 typical issues (ones I have certainly comes across), how they appear, and how you can go about trying to correct them using some of those settings I mentioned previously.
Note: With all adjustments for your overlocker, remember that even minor changes can make a big difference. Always adjust things one by one, not all at once. And as always test, test, test on a scrap of the fabric first.
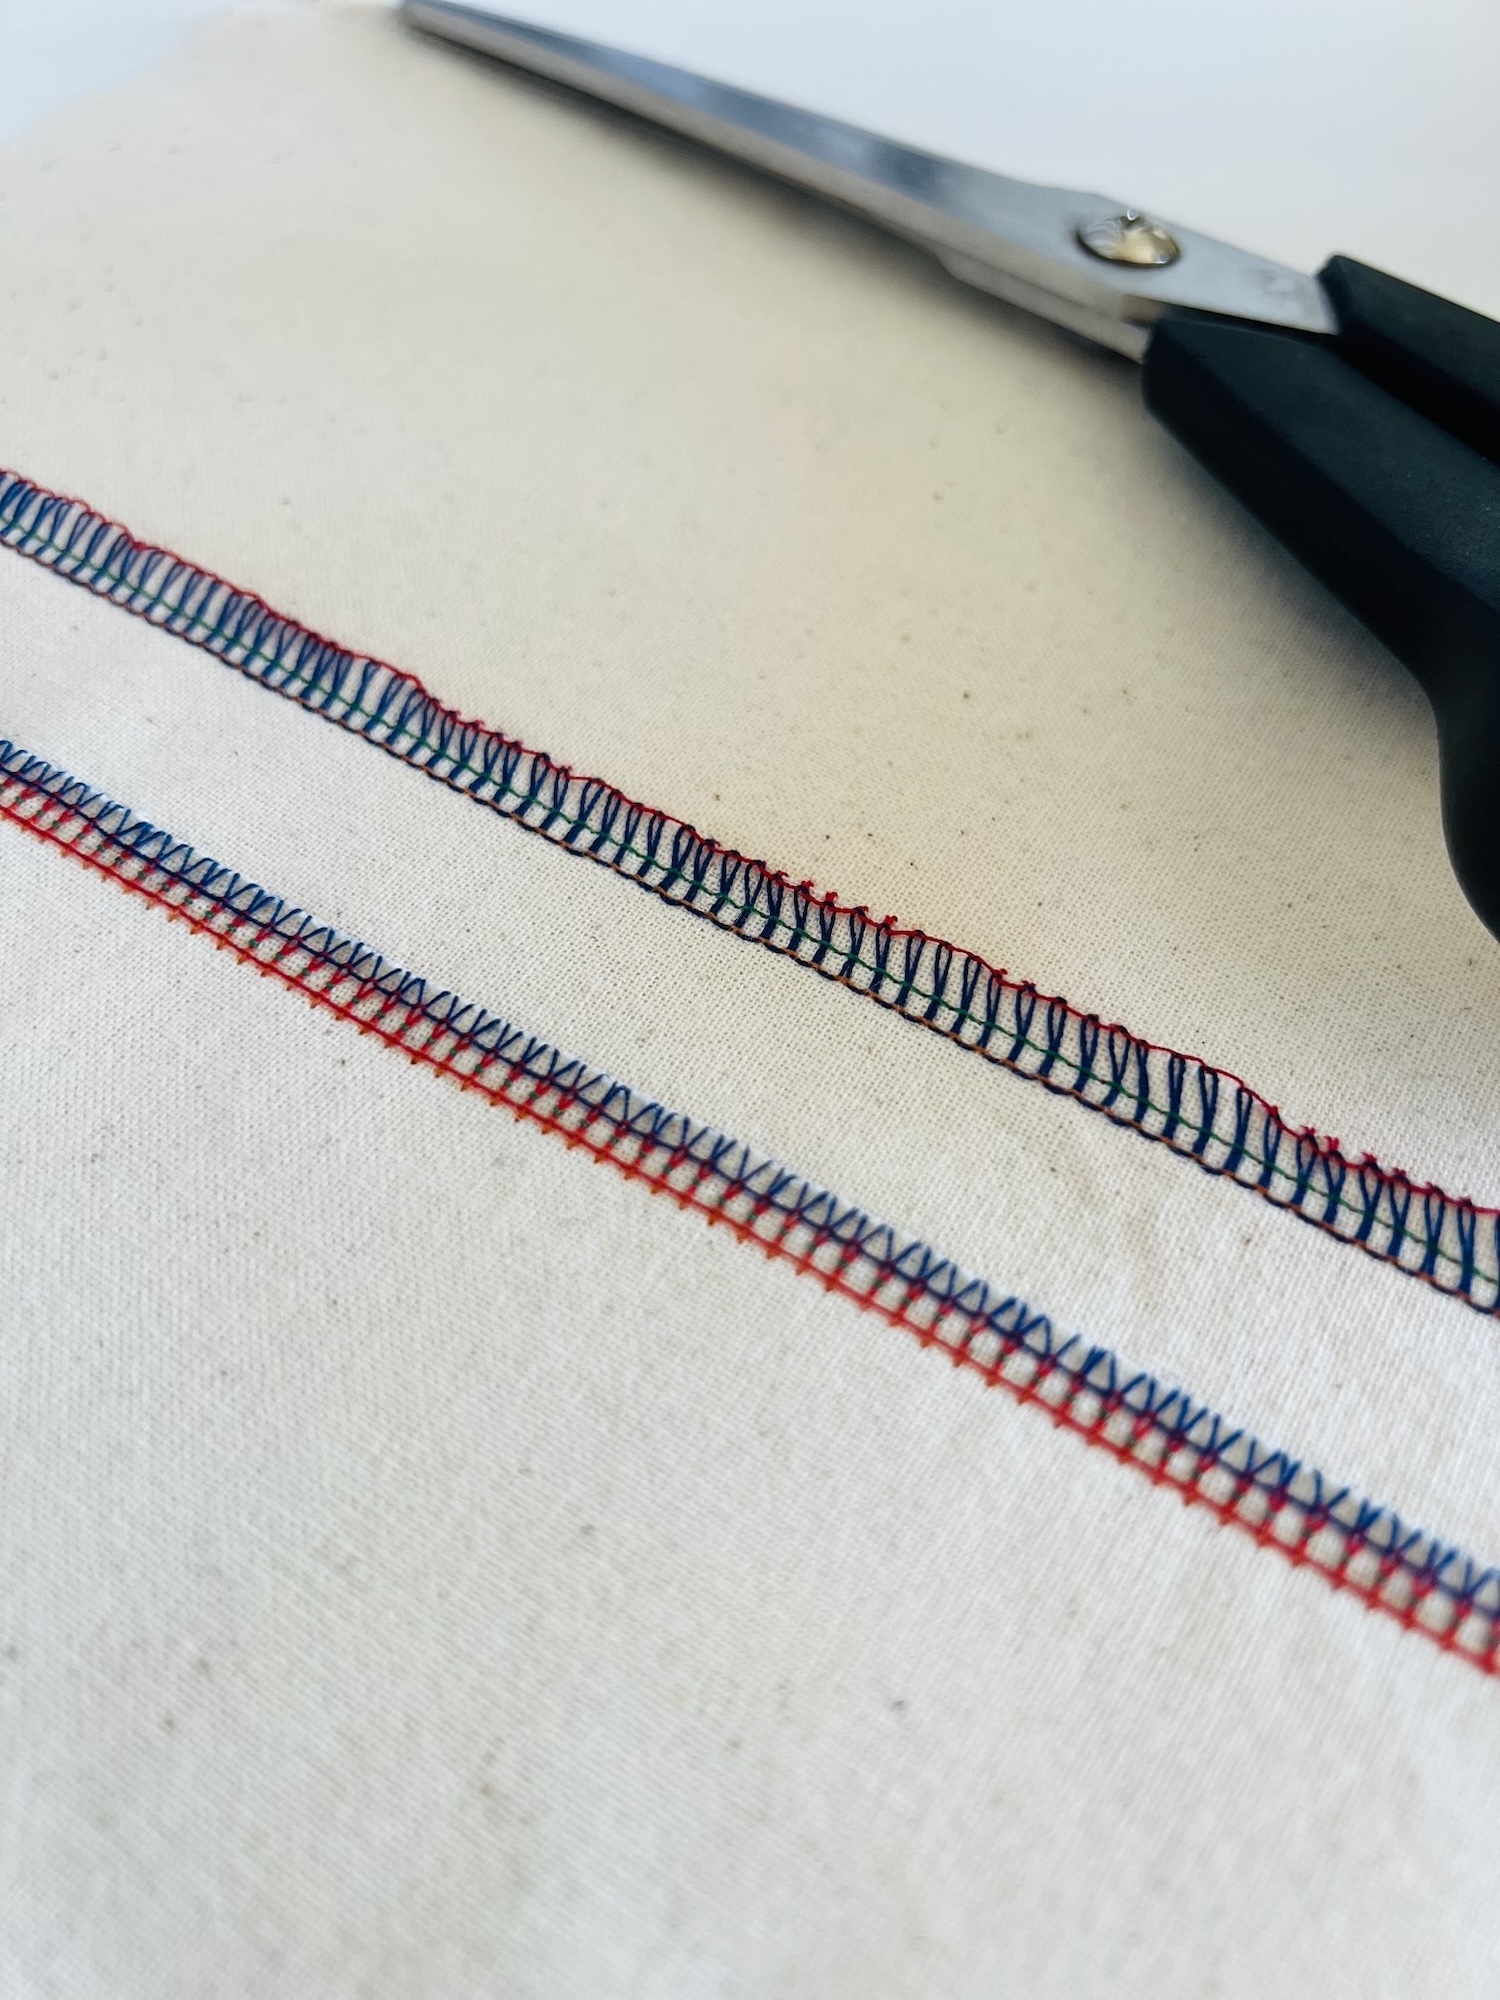
Problem 1: Looper threads pulling to the opposite side
When the looper thread tension is off, the threads may pull to the other side of the fabric. This is usually a fairly straightforward fix.
For example, if the lower looper thread is creeping out and around onto the right of the fabric, this could mean that:
a) The lower looper tension is too loose, or
b) The upper looper tension is too tight and is pulling the lower looper thread across.
To fix try increasing (tightening) the lower looper tension, or decreasing (loosening) the upper looper tension.
Conversely, if the upper looper thread is creeping out onto the wrong side of the fabric, this may mean that:
a) The upper looper tension is too loose, or
b) The lower looper tension is too tight and pulling the upper looper thread across.
In order to fix, you could try either increasing (tightening) the upper looper tension, or decreasing (loosening) the lower looper tension.
Problem 2: Thread breakage
Thread breakage can occur at a few different stages.
1. Immediately when you start sewing
The thread breaking right at the start is a really common issue and understandable considering that when you put your foot down on the pedal, all four threads are suddenly being put into motion and are under a lot of pressure at once.
The most likely cause at this stage is incorrect threading. Therefore, check that each thread is threaded correctly, following the right path and is threaded through the necessary guides and holes. Each thread should move smoothly through the machine when gently pulled, and not catch.
It is also worth checking that the threads haven’t slipped out of the tension discs. This happens to me all the time as I simply bump the threads without even noticing.
If the threads keep breaking, then I recommend rethreading the machine completely.
2. During sewing
The thread breaking while sewing can often be the result of the tension being too high, meaning that the thread is being pulled too tightly through the machine. Try reducing the tension a little.
Another common cause may be the thread. Again it could simply be incorrect threading and the thread may be catching somewhere. Or it may be the thread itself. Maybe it’s poor quality or old and simply snapping under the pressure.
Incorrect needle type or size for the fabric can also cause breakage, as can sewing fabric that is too thick, so ensure you are using the appropriate needle.
3. After you have sewn the seam
If the thread breaks after sewing when pressure is applied to the seam. It could be the result of the tension being too tight so when the fabric stretches the thread simply snaps. Try decreasing (loosening) the needle thread tension.
Thread quality may also be a factor, as weaker thread may not withstand the normal movement and stretching of wear.
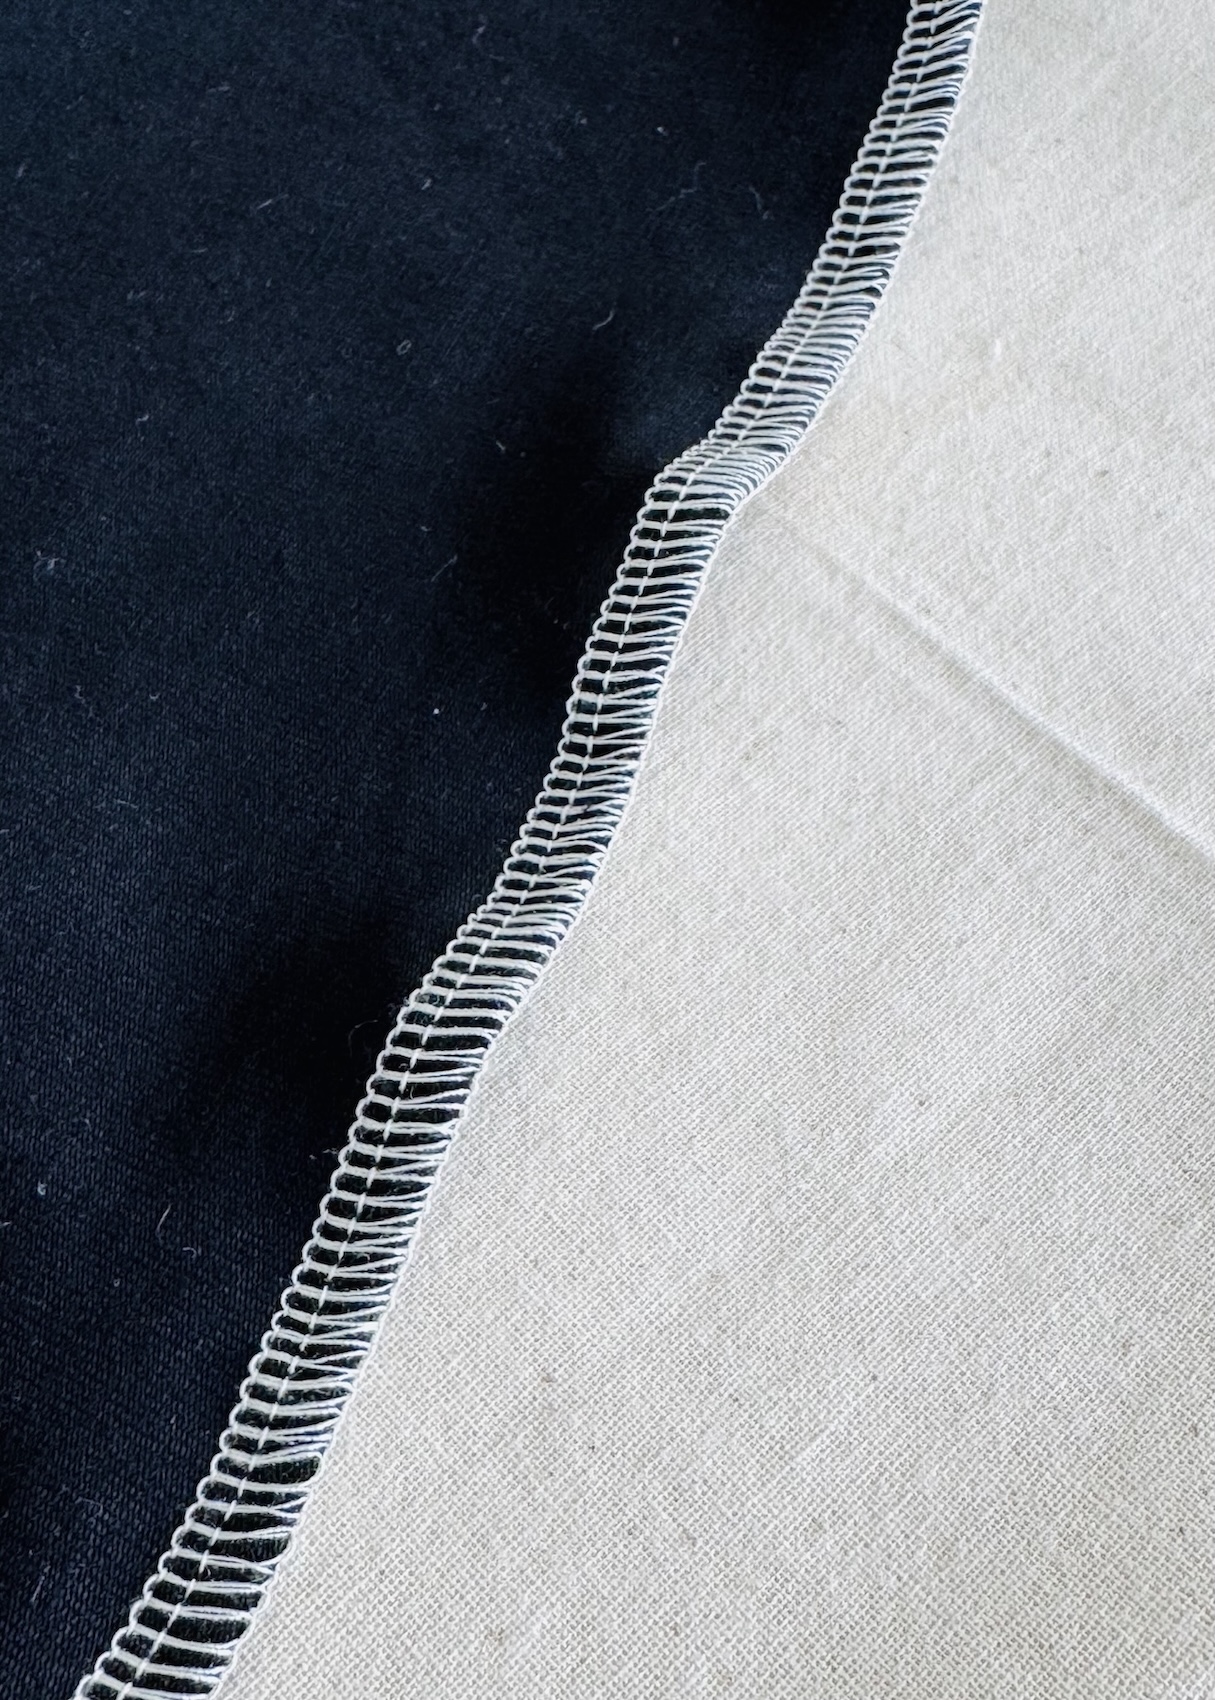
Problem 3: Seam appears wavy or stretched
Wavy or stretched seams could be the result of the fabric being fed through the machine too much at the back. If this happens, try increasing the differential feed in order to help stop the back feed dog from pulling the fabric out from under the presser foot more than it is being pulled in.
Another cause could be too much pressure from the actual presser foot. Therefore, try reducing the presser foot pressure.
 Problem 4: Marks on the fabric
This happened to me only recently on a project I was working on. The presser foot was leaving a shiny line parallel to the edge of the fabric. The presser foot pressure was simply too high, so reducing it fixed the problem.
Problem 5: Gathered, puckered seam
Sure, gathering with an overlocker can be intentional. But if not, this could be the result of the front feed dogs feeding too much fabric into the needle area. Therefore more fabric is being pushed in than being pulled out at the back. In this case, try turning the differential feed down.
It could also be that the presser foot isn’t applying enough pressure and the fabric isn’t being fed through quickly enough. Therefore try increasing the presser foot pressure.
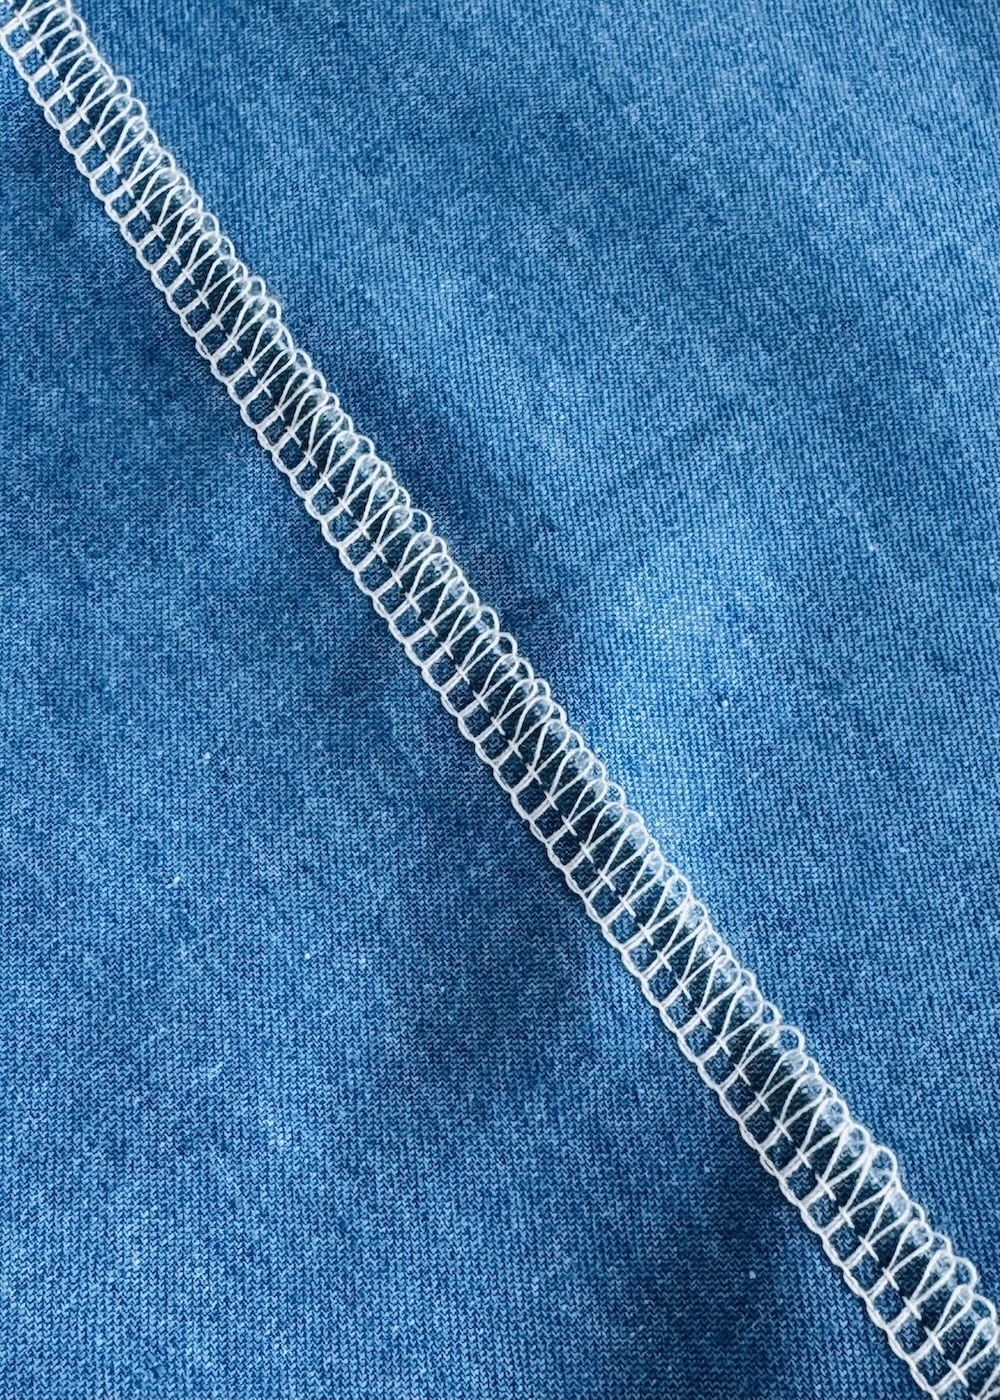
Problem 6: The looper threads are hanging off the edge
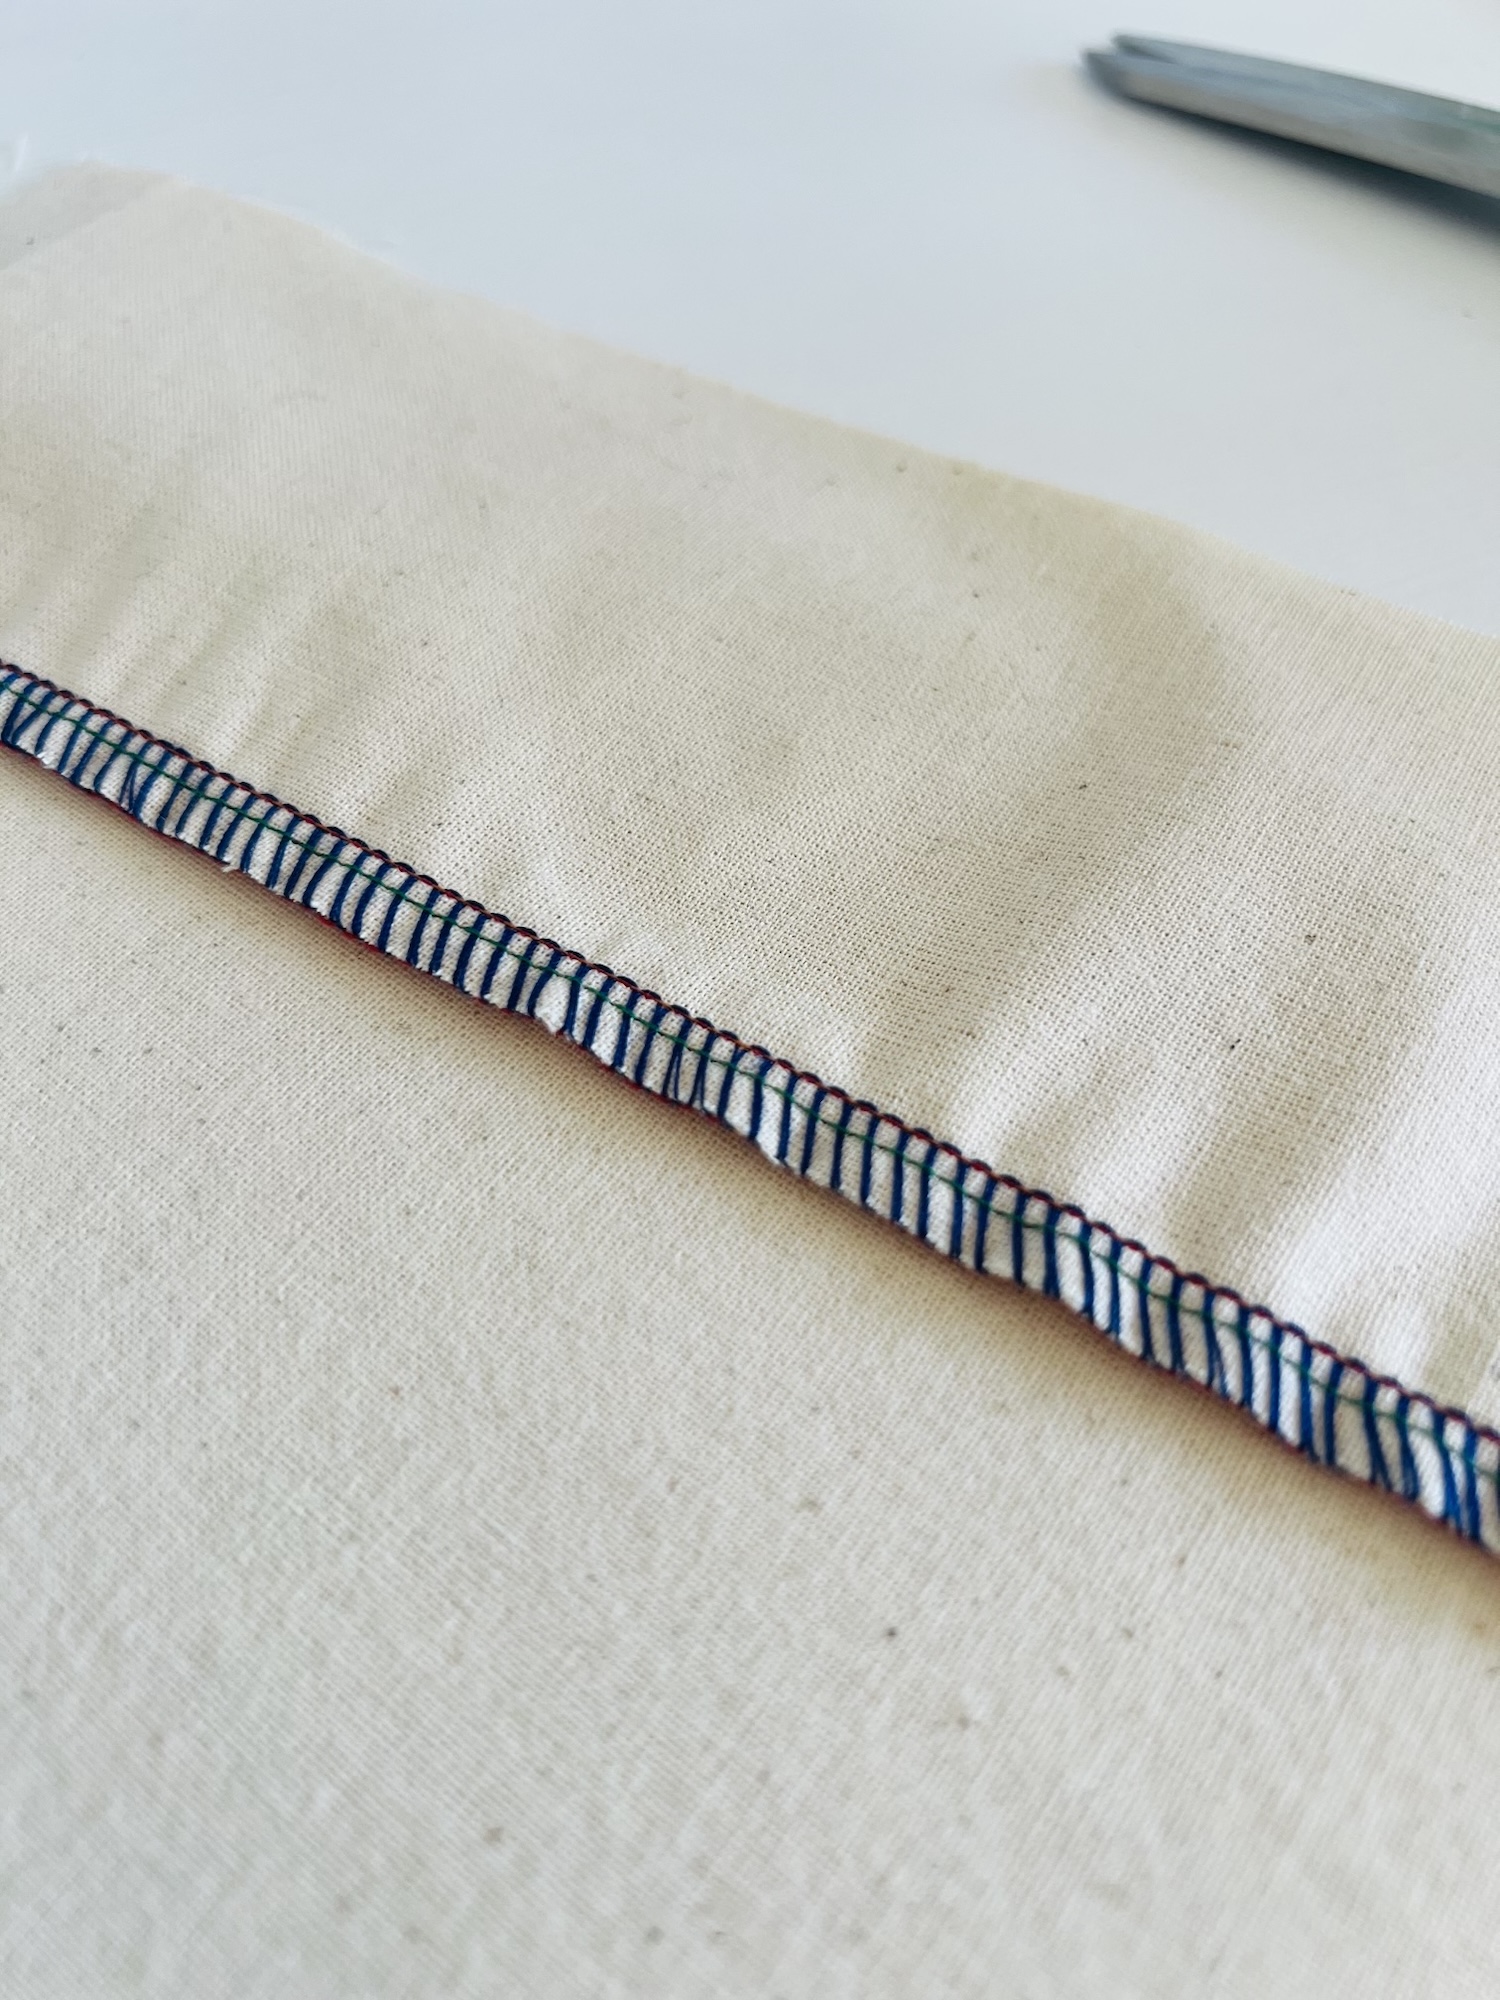
If the looper threads are extending beyond the edge of the fabric, kind of just hanging there, this could be linked to the tension of the looper threads being too loose (i.e. too low), so try increasing the looper threads tension.
It could also be due to the cutting width being too narrow, meaning that the too much fabric is being trimmed away. Therefore, try increasing the cutting width which will move the blade towards the right.
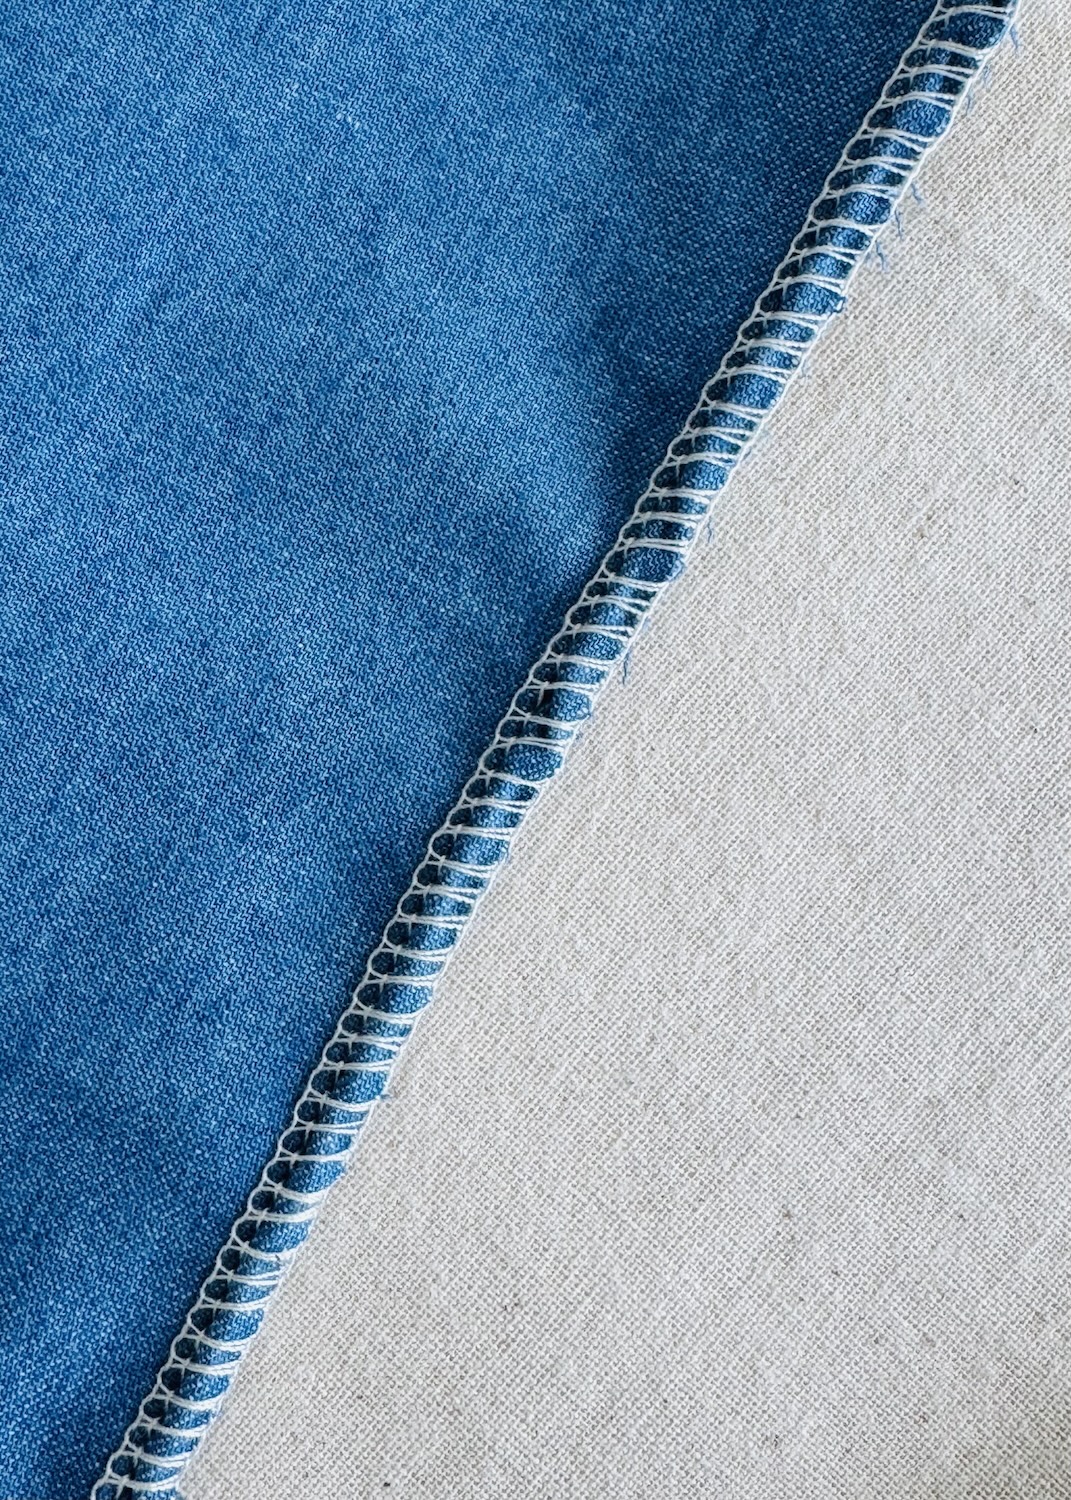
 Problem 7: The fabric is curling or tunnelling
If the edge of the fabric is being pulled inwards and creating a bit of a tunnel, this could be the result of the tension of the looper threads being too tight, pulling in the edge of the fabric. Try decreasing the looper thread tension.
It could also be that the cutting width is too wide, meaning that the blade isn’t trimming enough fabric. You could try fixing this by decreasing the cutting width, moving the blade towards the left.
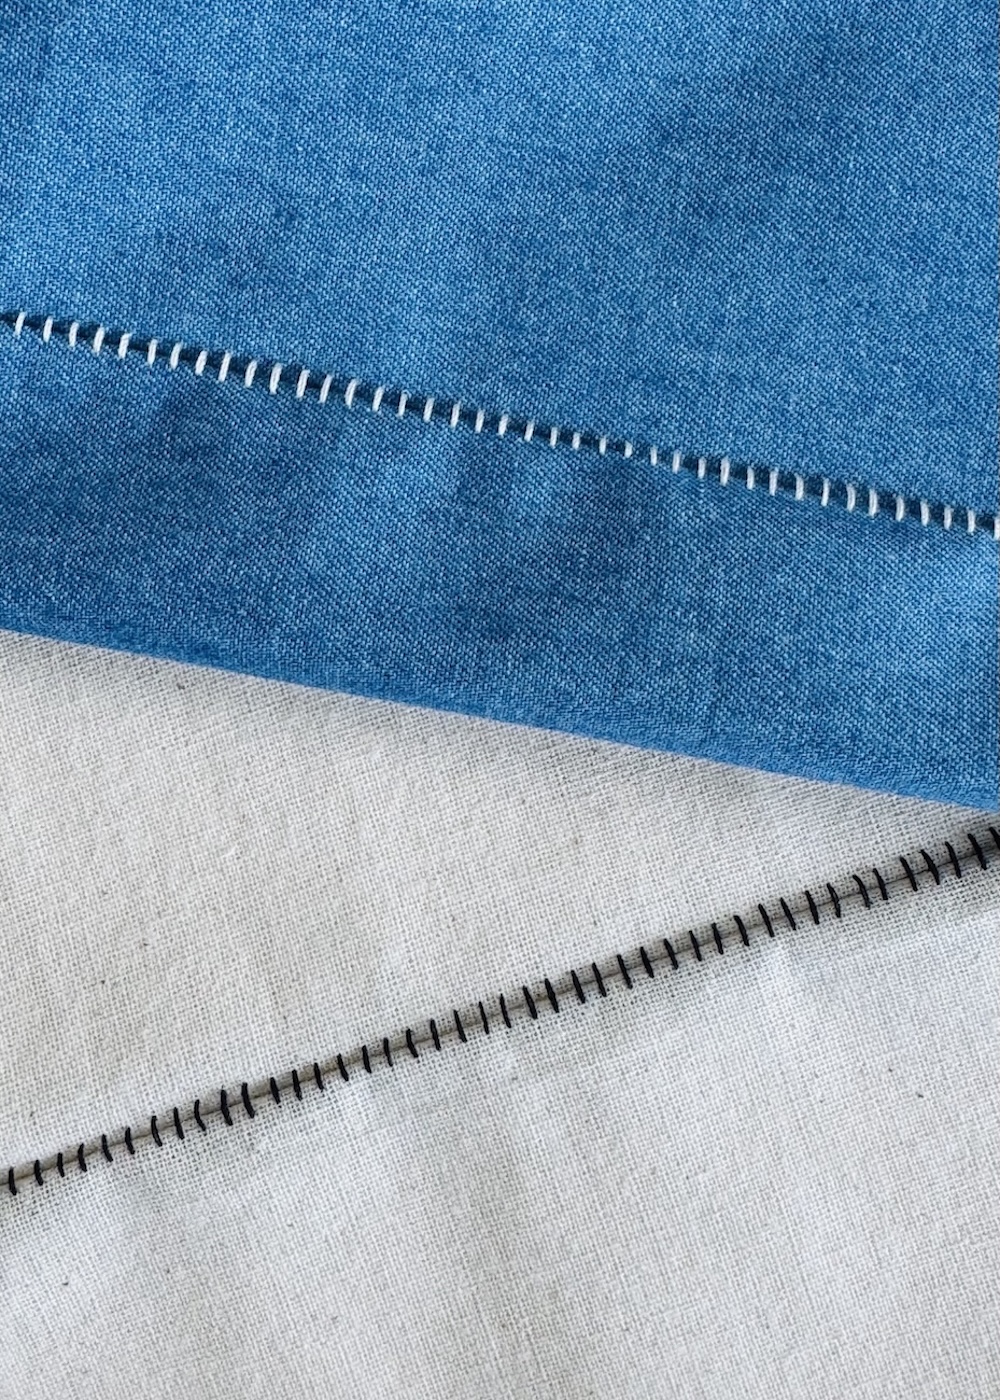
Problem 8: Needle threads visible when the seam is stretched
If you notice that when you pull a seam taut the stitching is visible from the right side (I think I have heard this referred to as grinning), this could mean that the tension of the needle threads is simply too loose. Therefore, try increasing (tightening) the needle threads tension.
 Problem 9: Skipped stitches
If the stitching isn’t continuous and you notice that there are gaps or it looks uneven, there may be a problem with the needle. It could be the wrong type, it may be blunt, or inserted incorrectly. Therefore, I suggest checking in with the needle you are using.
Problem 10: No thread chain or tail is being created
If you test the overlocker by sewing nothing for a few centimetres, but no thread chain is formed, the most likely culprit is a threading issue. Again, just check each thread one by one to ensure they have been threaded correctly, and inserted into all the required guides. If you’re still having no luck, I recommend just rethreading the machine.
Extra Tips For When Using an Overlocker
- Use your overlocker on a sturdy, stable surface as overlockers are fast and can bounce around while sewing.
- Keep your workspace clear ensuring the fabric can lie flat, and always check underneath before you start. Overlockers cut as they sew, so mistakes can’t be undone and fabric can easily slip under the blade and be snipped by accident (I have sadly done this on multiple occasions and it can ruin projects).
- Invest in good-quality thread!
- Change your needles regularly just like you would with your sewing machine. Between each project is a good guide.
- Clean and oil your overlocker regularly. Again, between projects is a good guide because lint can build up quickly, especially when sewing fabrics like fleece.
- Watch out for pins! We are all guilty of doing it with our sewing machines, but do not sew over pins when overlocking, as they can damage the blade and break the needles.
- As always test any adjustments on a scrap piece of fabric before sewing the final piece.
- Trust your gut, and if something doesn’t feel or sound right it probably isn’t.
- Accuracy is key because often there is no going back with overlockers once the fabric has been trimmed. For knit or stretch fabrics, I often sew the seam first on a sewing machine using a long stitch or zig-zag. This allows me to try the garment on first, and adjust if needed, before finishing with the overlocker.
- Colour code your threads if you are new to overlocking to help identify which parts of the overlock stitch each thread creates and where any issues may be stemming from.
- Safety first! Overlockers are fast and the blade is sharp. Keep your fingers away from the blade and needles at all times. Turn the machine off when threading or making adjustments as it’s easy to accidentally press that foot pedal. I am guilty of this and have learnt the hard way. Ouch!
Like most things in life, it’s not always smooth sailing when it comes to using an overlocker. Hopefully, though, this article has demonstrated that with a basic understanding of the key settings, troubleshooting can become quite logical and intuitive.
I used to be particularly intimidated by thread tension. But, to be honest, after deliberately messing around with the settings, seeing what they control, and gaining a better understanding of how they affect the stitch, I no longer find myself avoiding making adjustments.
I really hope this article becomes a useful reference that you can come back to whenever you need it.
Happy overlocking (or serging)!