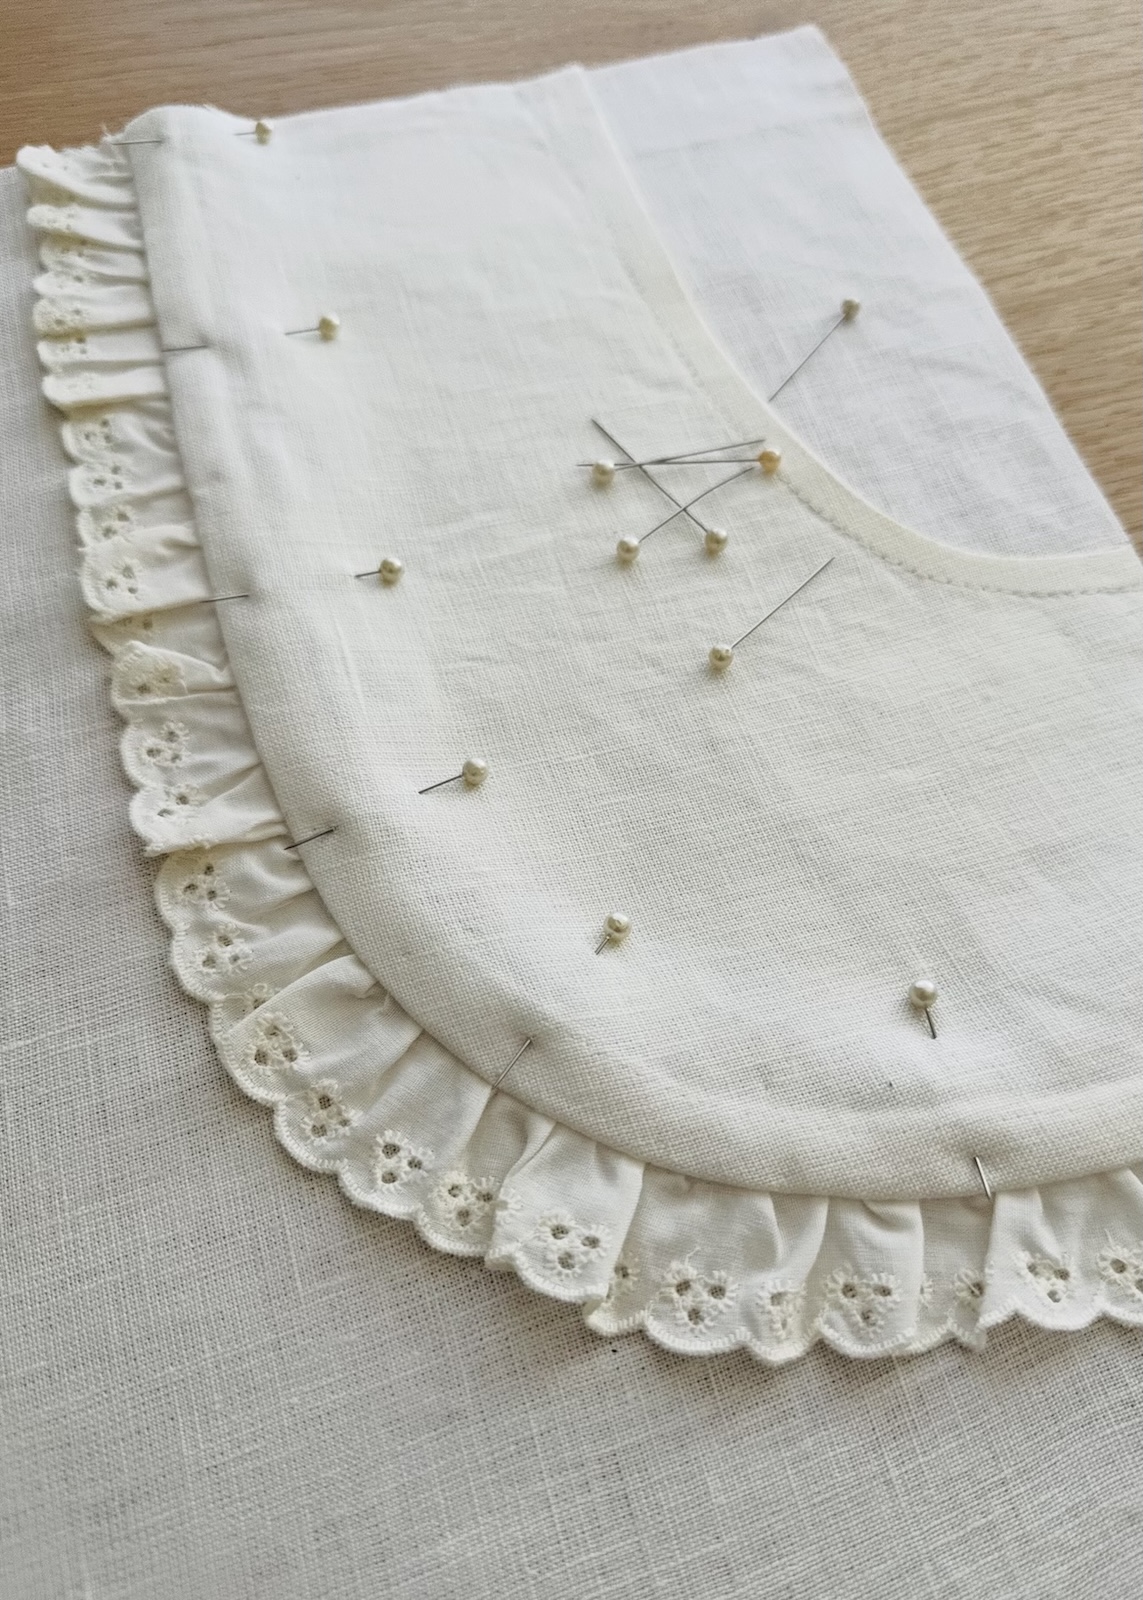
Pockets are such a simple and accessible way to customise and personalise your sewing patterns and garments. There are so many variations to play with (something I hope to explore in a future piece). Plus, you can add pockets to all kinds of designs, position them in a variety of places, and they often use surprisingly little extra fabric.
When I was recently shown this particular style of pocket and asked to put together a bit of a tutorial on how to pattern make and sew one, I thought it was a great idea. This is such a cute style, suitable for both adults and children, and ruffles are definitely having a bit of a moment!
What Is a “Scoop Patch Pocket With Ruffle Trim”?
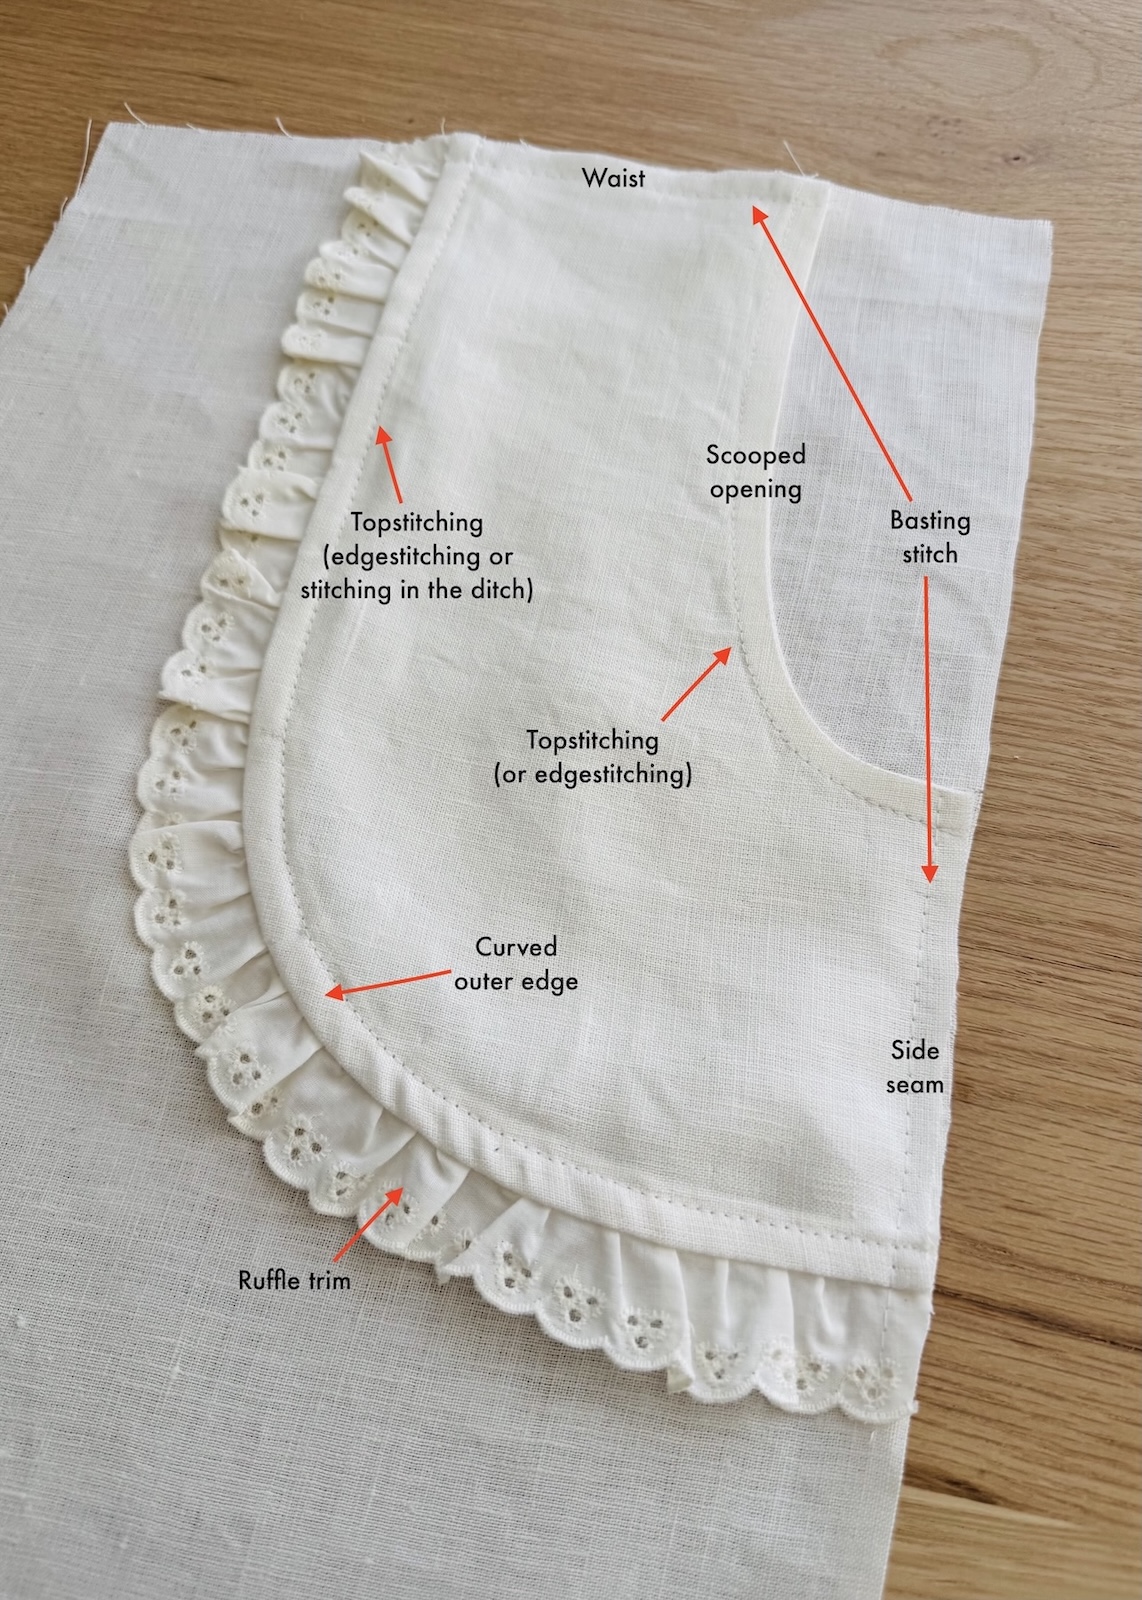
This pocket sounds more complicated than it is!
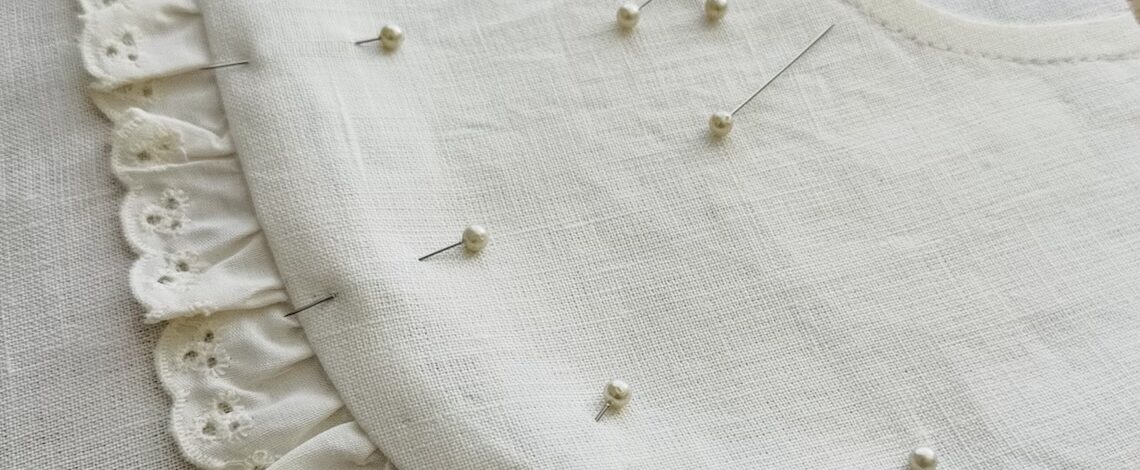
When you break it down, it’s essentially a patch pocket that sits on the outside of a garment, with a scooped opening and a curved outer edge. A ruffle is sandwiched between the pocket patch and the garment, creating a cute decorative edge.
You can make your own ruffle or use a pre-made trim, such as the broderie anglaise trim I’ll be demonstrating with.
There are a couple of ways to finish this style of pocket too. Depending on the fabric weight and the style of garment, you can use either a simple facing or a lining. I’ll walk you through how to pattern-make and sew both options.
Although I’ve made all the individual elements of this pocket before, I haven’t put them together in quite this way. So let’s dive into how I’d approach pattern making and sewing one.
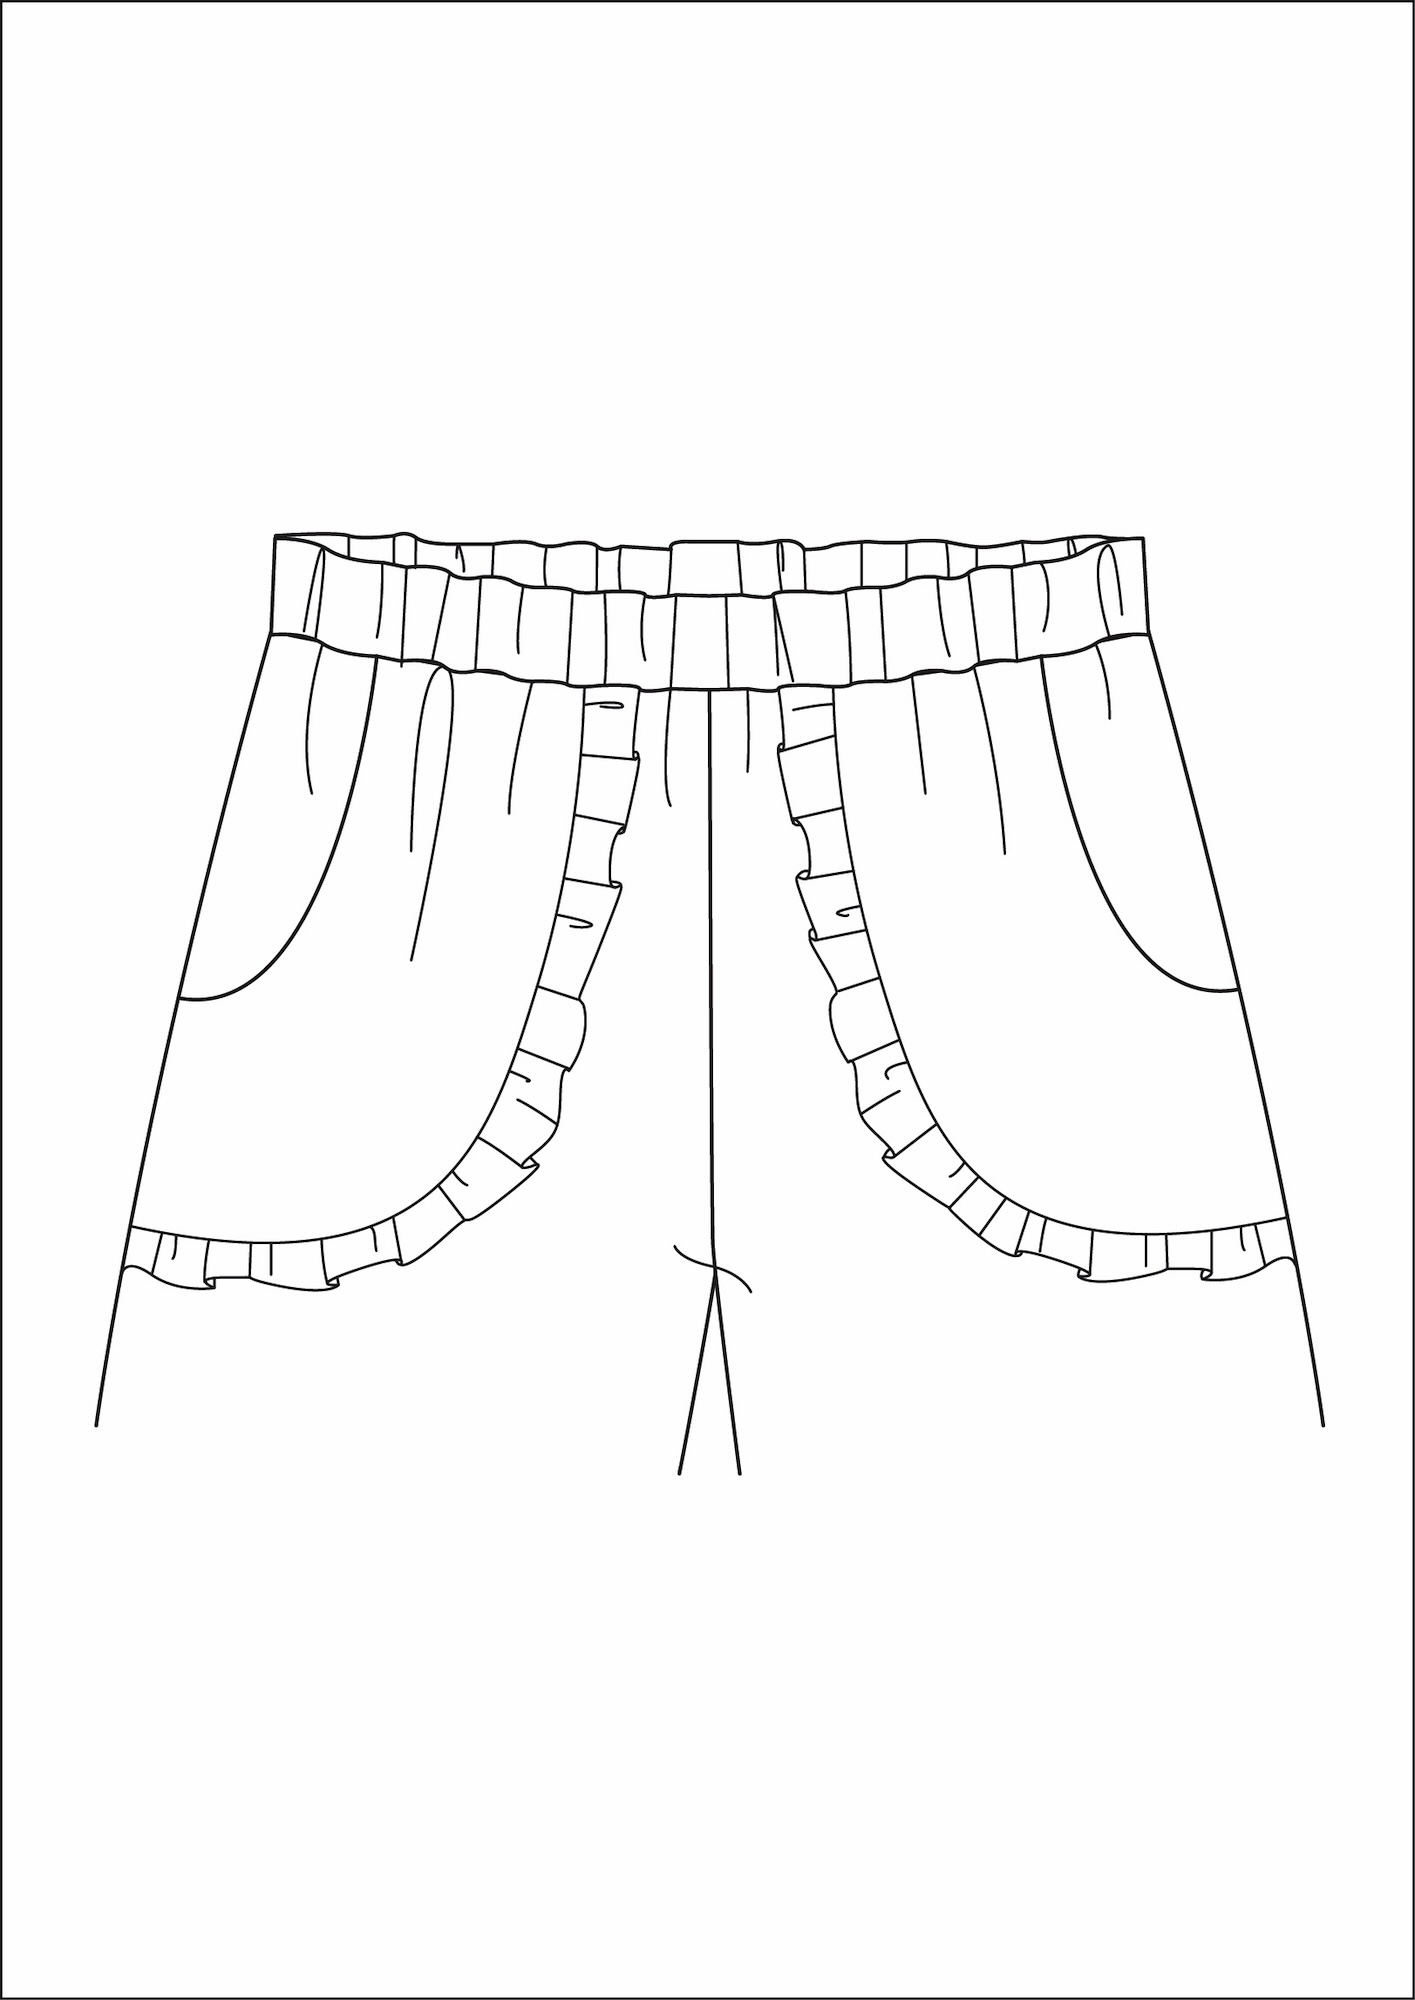
For this tutorial, I’ll be adding the pocket to the front of a simple pair of shorts that are intended to be finished with a separate elasticised waistband. You can, of course, adapt the pocket for other styles of garments, you may just need to make a few small adjustments to suit the design and construction.
Materials and Equipment
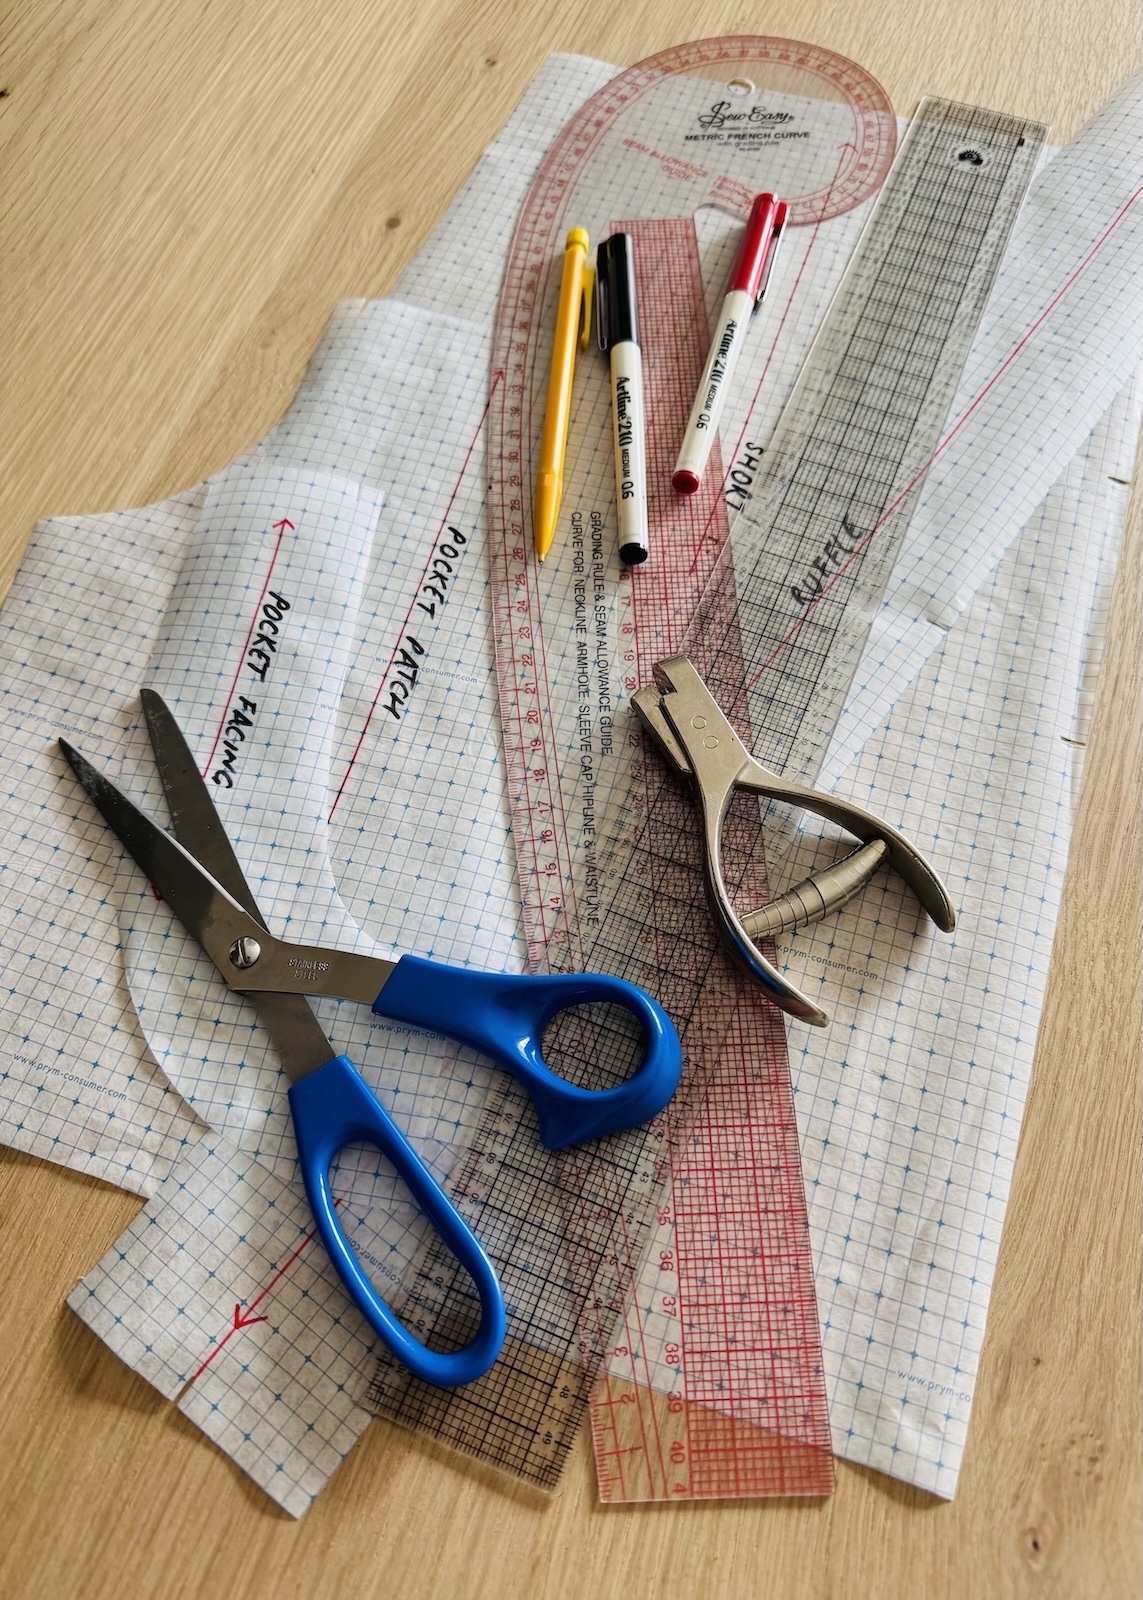
For the pattern making side of things you will need:
- The original pattern
- Tracing paper (I love the gridded kind for easy alignment)
- Pen and/or pencil
- Rulers (both curved and straight)
- Paper scissors
- Notcher (optional)
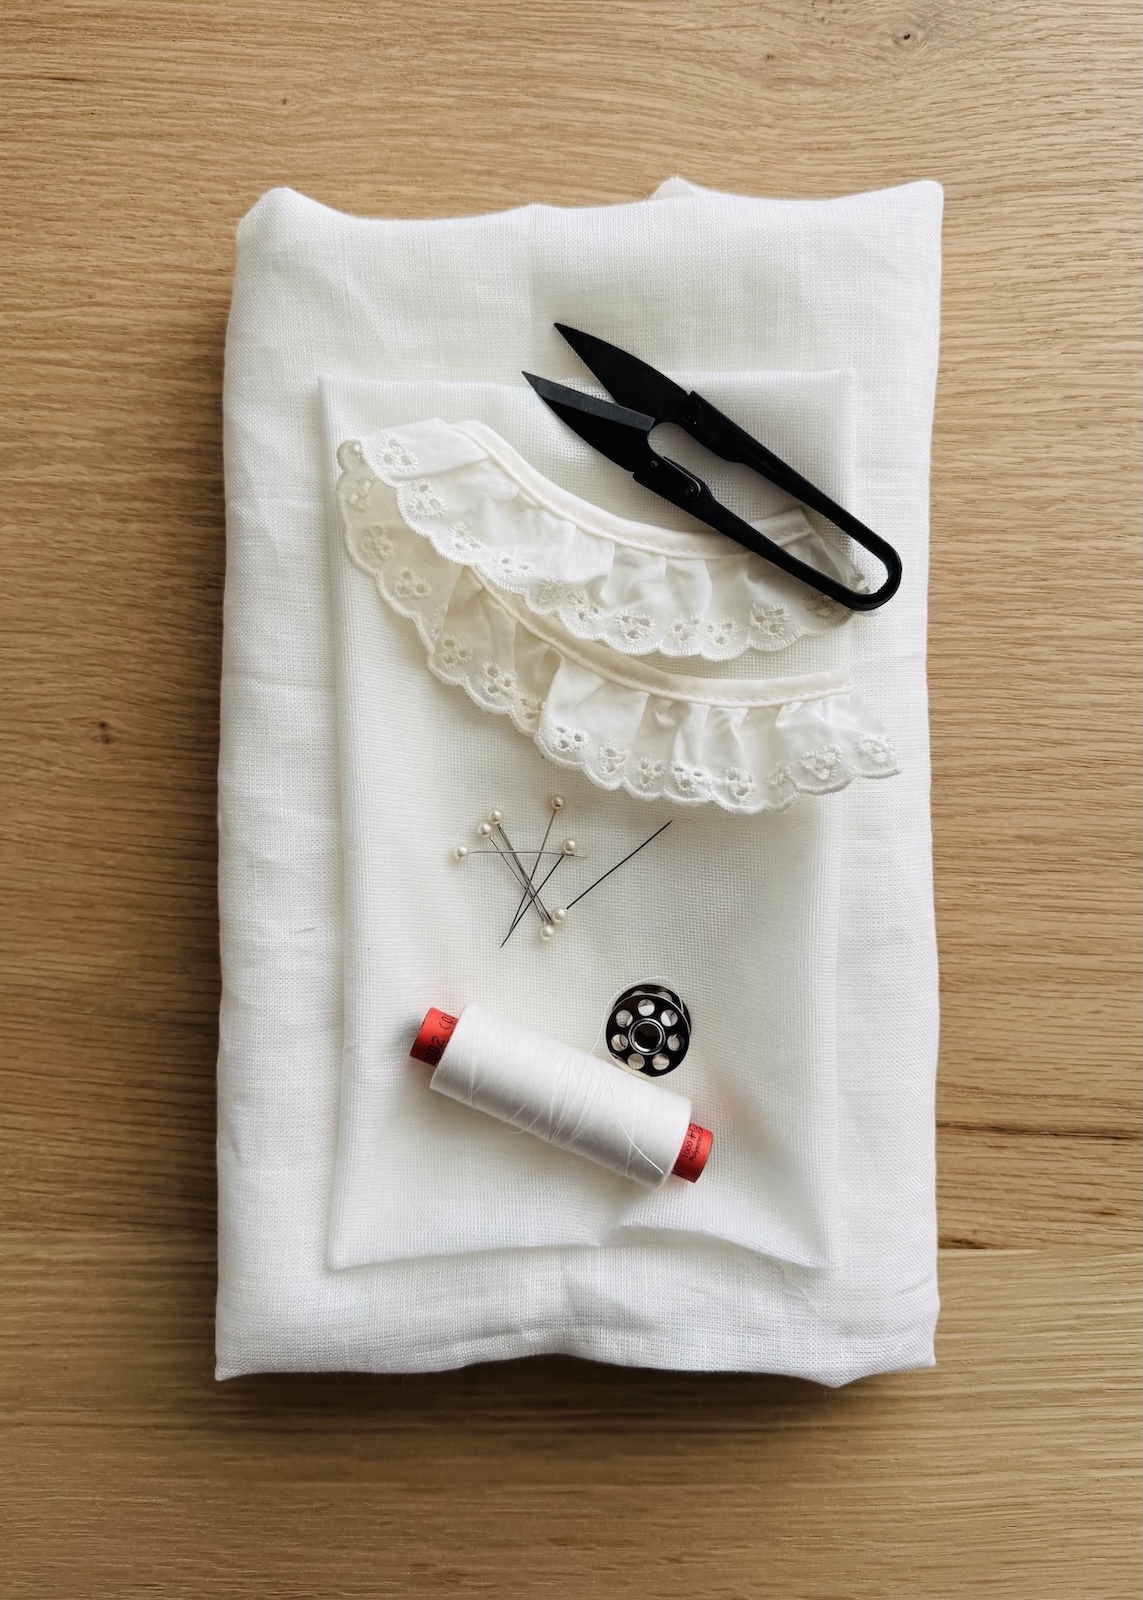
And for the sewing side of things:
- Main garment fabric
- Lightweight interfacing for faced version
- Lining fabric for lined version
- Pre-made ruffle trim or fabric for trim
- Matching thread
- Scissors (fabric and snips)
- Iron
- Pins or clips
How to Pattern Make a Scoop Patch Pocket with Ruffle Trim
Step 1: Check in with the pattern
On the original pattern piece (the one the pocket will be attached to) identify the stitching line rather than the cutting line. Use this to position and draft the pocket.
Decide on the pocket’s location, taking into account how the pocket’s position relates to the surrounding pattern pieces. In my example, the top edge of the pocket would eventually be caught within the waistband seam, and the side edge in the side seam.
Step 2: Mark the pocket opening
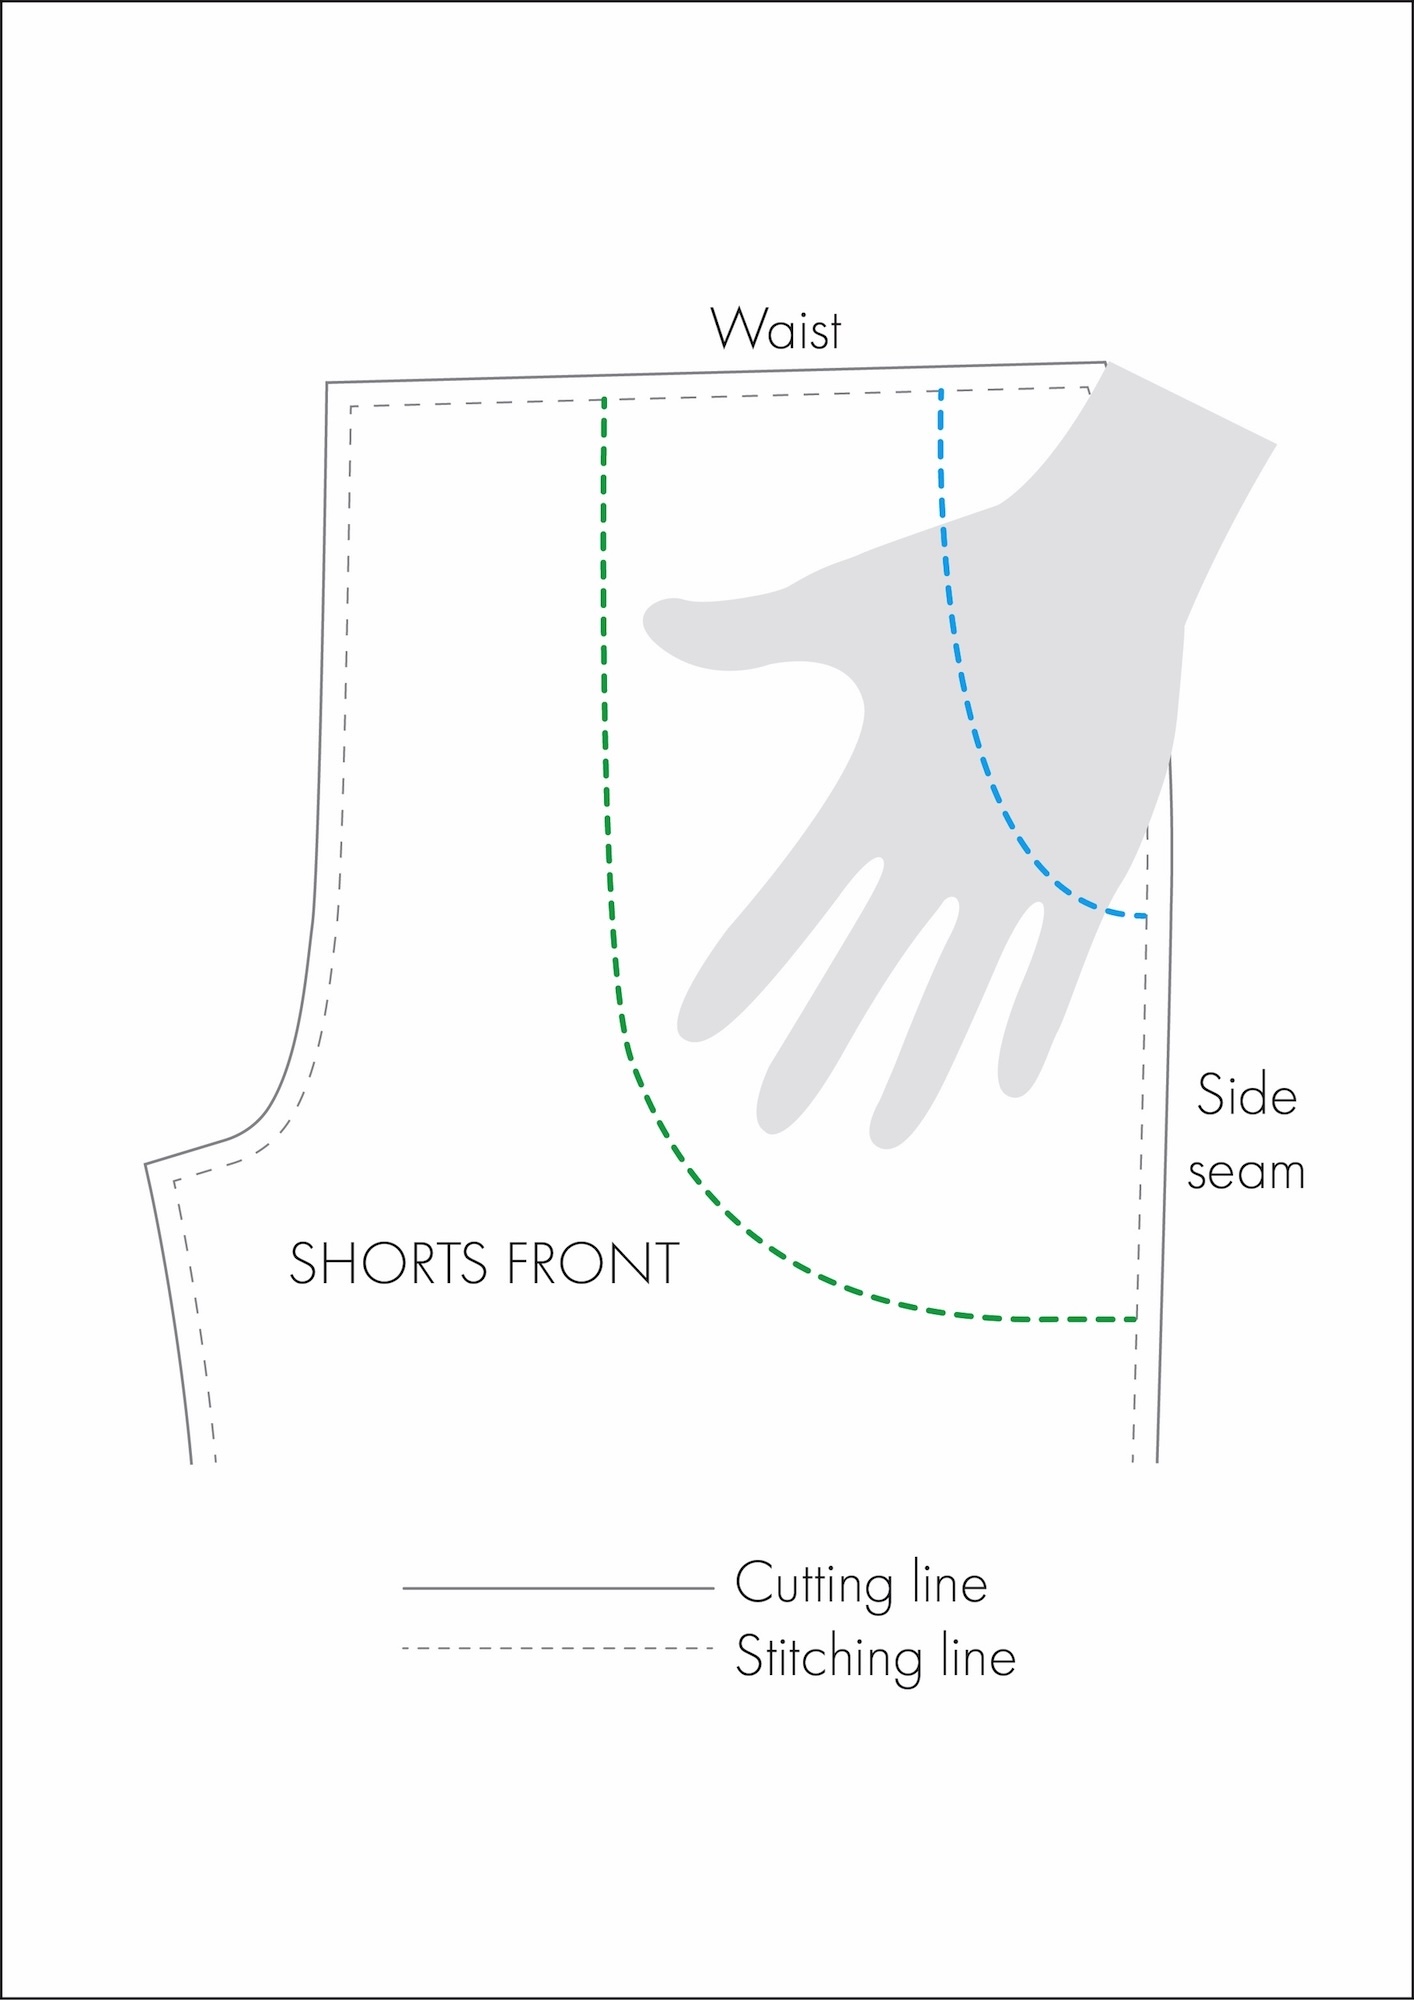
To work out a comfortable and practical size and position for the patch pocket opening, I like to use my hand (or the hand of whoever will be wearing the garment) as a guide. Position it on the pattern as though you were slipping it into a pocket, then draw a smooth curve around it, becoming straighter at the top and side (see green dashed line below).
Then create the opening by drawing a scooped line that almost mirrors the outer edge. If you want the pocket to be functional, check that the opening will fit a hand comfortably (refer to the blue dashed line below).
Step 3: Create the pocket pattern pieces
Pocket patch:
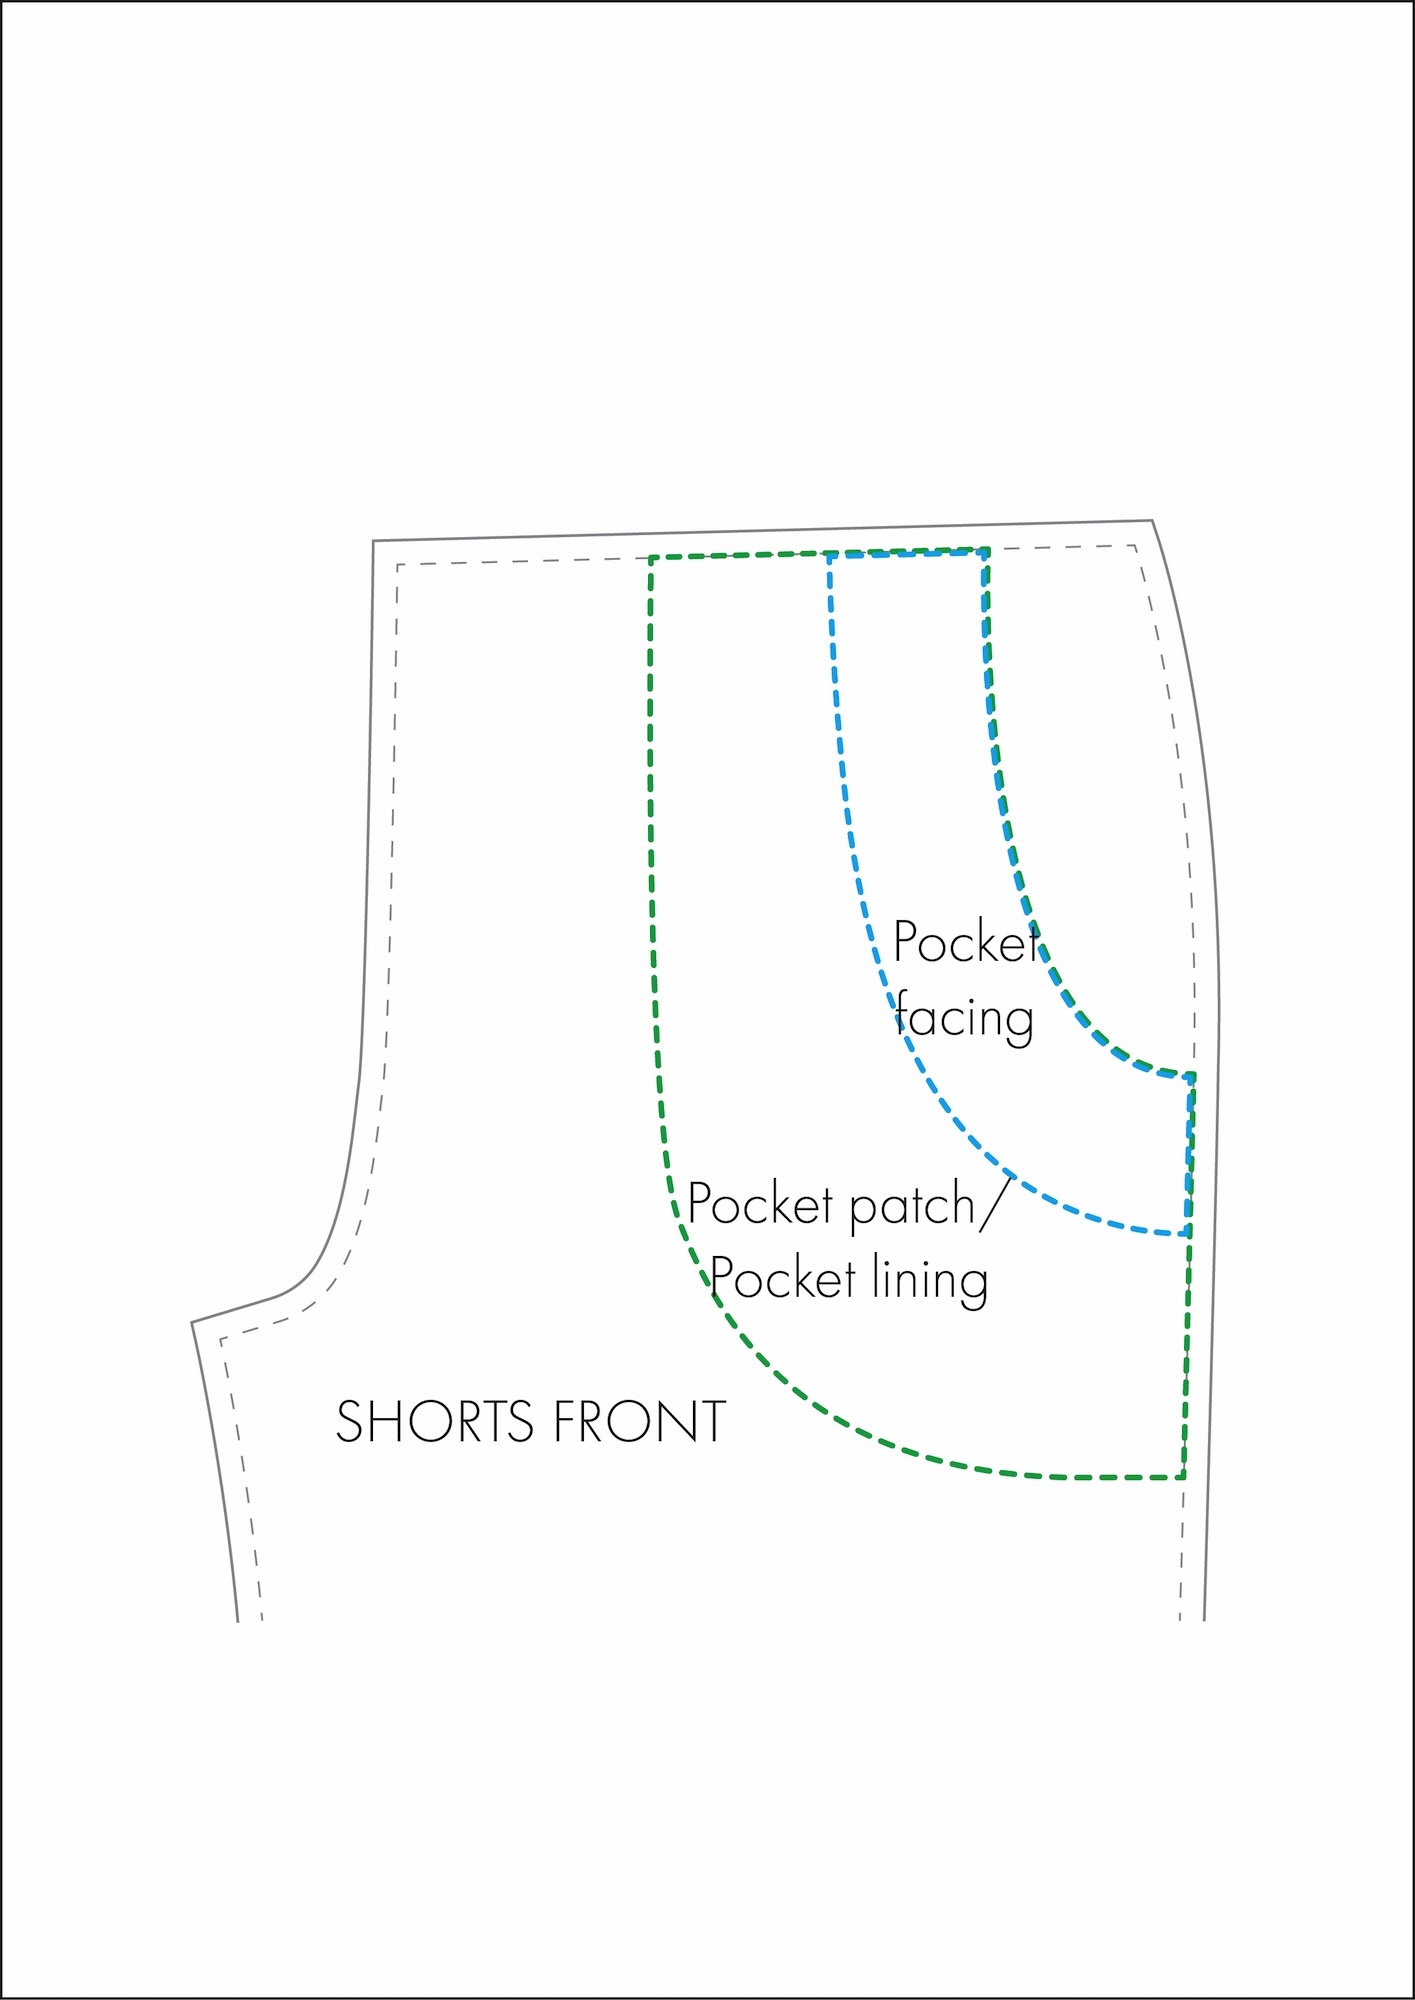
Using the pocket opening you drafted in Step 2 as your starting point, trace around the scooped opening, down along the side seam, the curved outer edge, and finish by joining it back to the waist edge.
This will become the main pocket patch pattern piece (refer to the green line below).
Pocket facing (option 1):
This piece will neatly finish the pocket opening without the need for a lining. This is my preferred method, and it works well with most fabric weights. I would avoid this, however, for sheerer fabrics, as you will see the outline of the facing.
To create the facing, start by drawing a curved line mirroring the shape of the scooped pocket opening, approximately 5 cm from the edge. You can of course adjust this measurement slightly depending on the size of your pocket and personal preference.
To create the pattern piece, start by tracing around the new curved line, the waist edge, the scooped pocket opening and the side-seam edge (refer to blue line).
Pocket lining (option 2):
I would only recommend this option if you are using a lightweight fabric, as it can become quite bulky once the ruffle is sandwiched and attached.
This pattern piece is easy to pattern make! Simply use the same pattern piece as your pocket patch.
Ruffle:
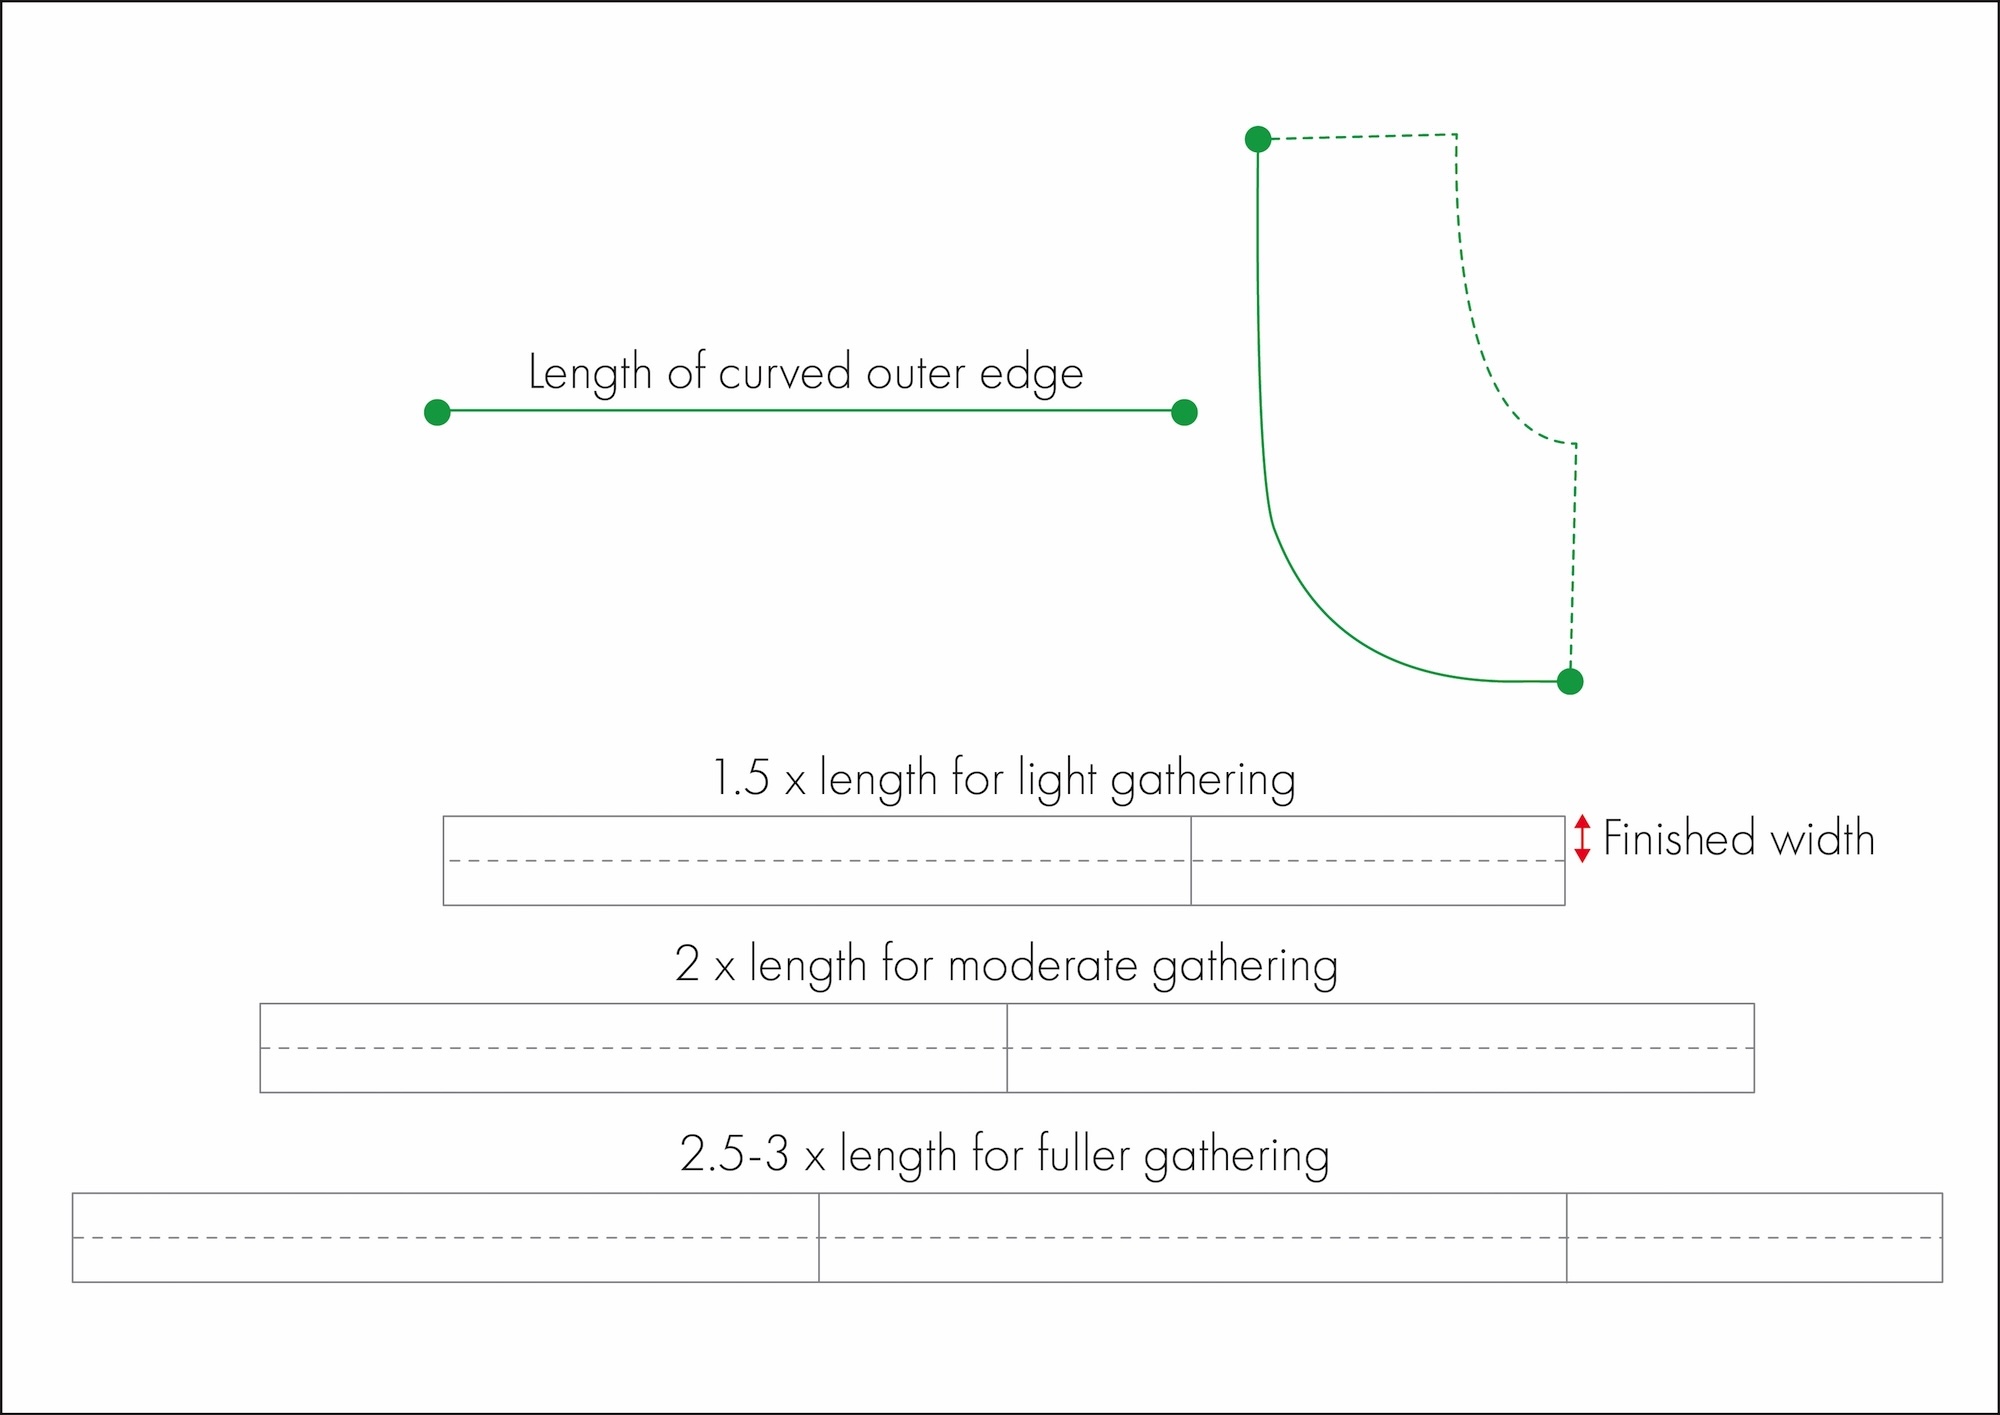
If you’re making your own ruffle from scratch or gathering a pre-made trim, start by measuring the curved edge of the finished pocket patch (the solid green line between the two dots in the diagram below). Then multiply this measurement by your desired amount of fullness.
A good reference is:
- 1.5 times the pocket edge for light gathering
- 2 times the pocket edge for moderate gathering
- 2.5–3 times the pocket edge for fuller gathering
For example, if the curved outer edge of the pocket patch measures 40 cm and you want a lightly gathered ruffle, multiply this by 1.5 to calculate the cut length of the ruffle.
40 cm x 1.5 = Ruffle length of 60 cm
Then decide how wide you want the ruffle to be when finished, and simply double this measurement to allow for the fabric to be folded in half.
Draft a rectangle according to these measurements.
Step 4: Add seam allowance and notches, and label pattern pieces
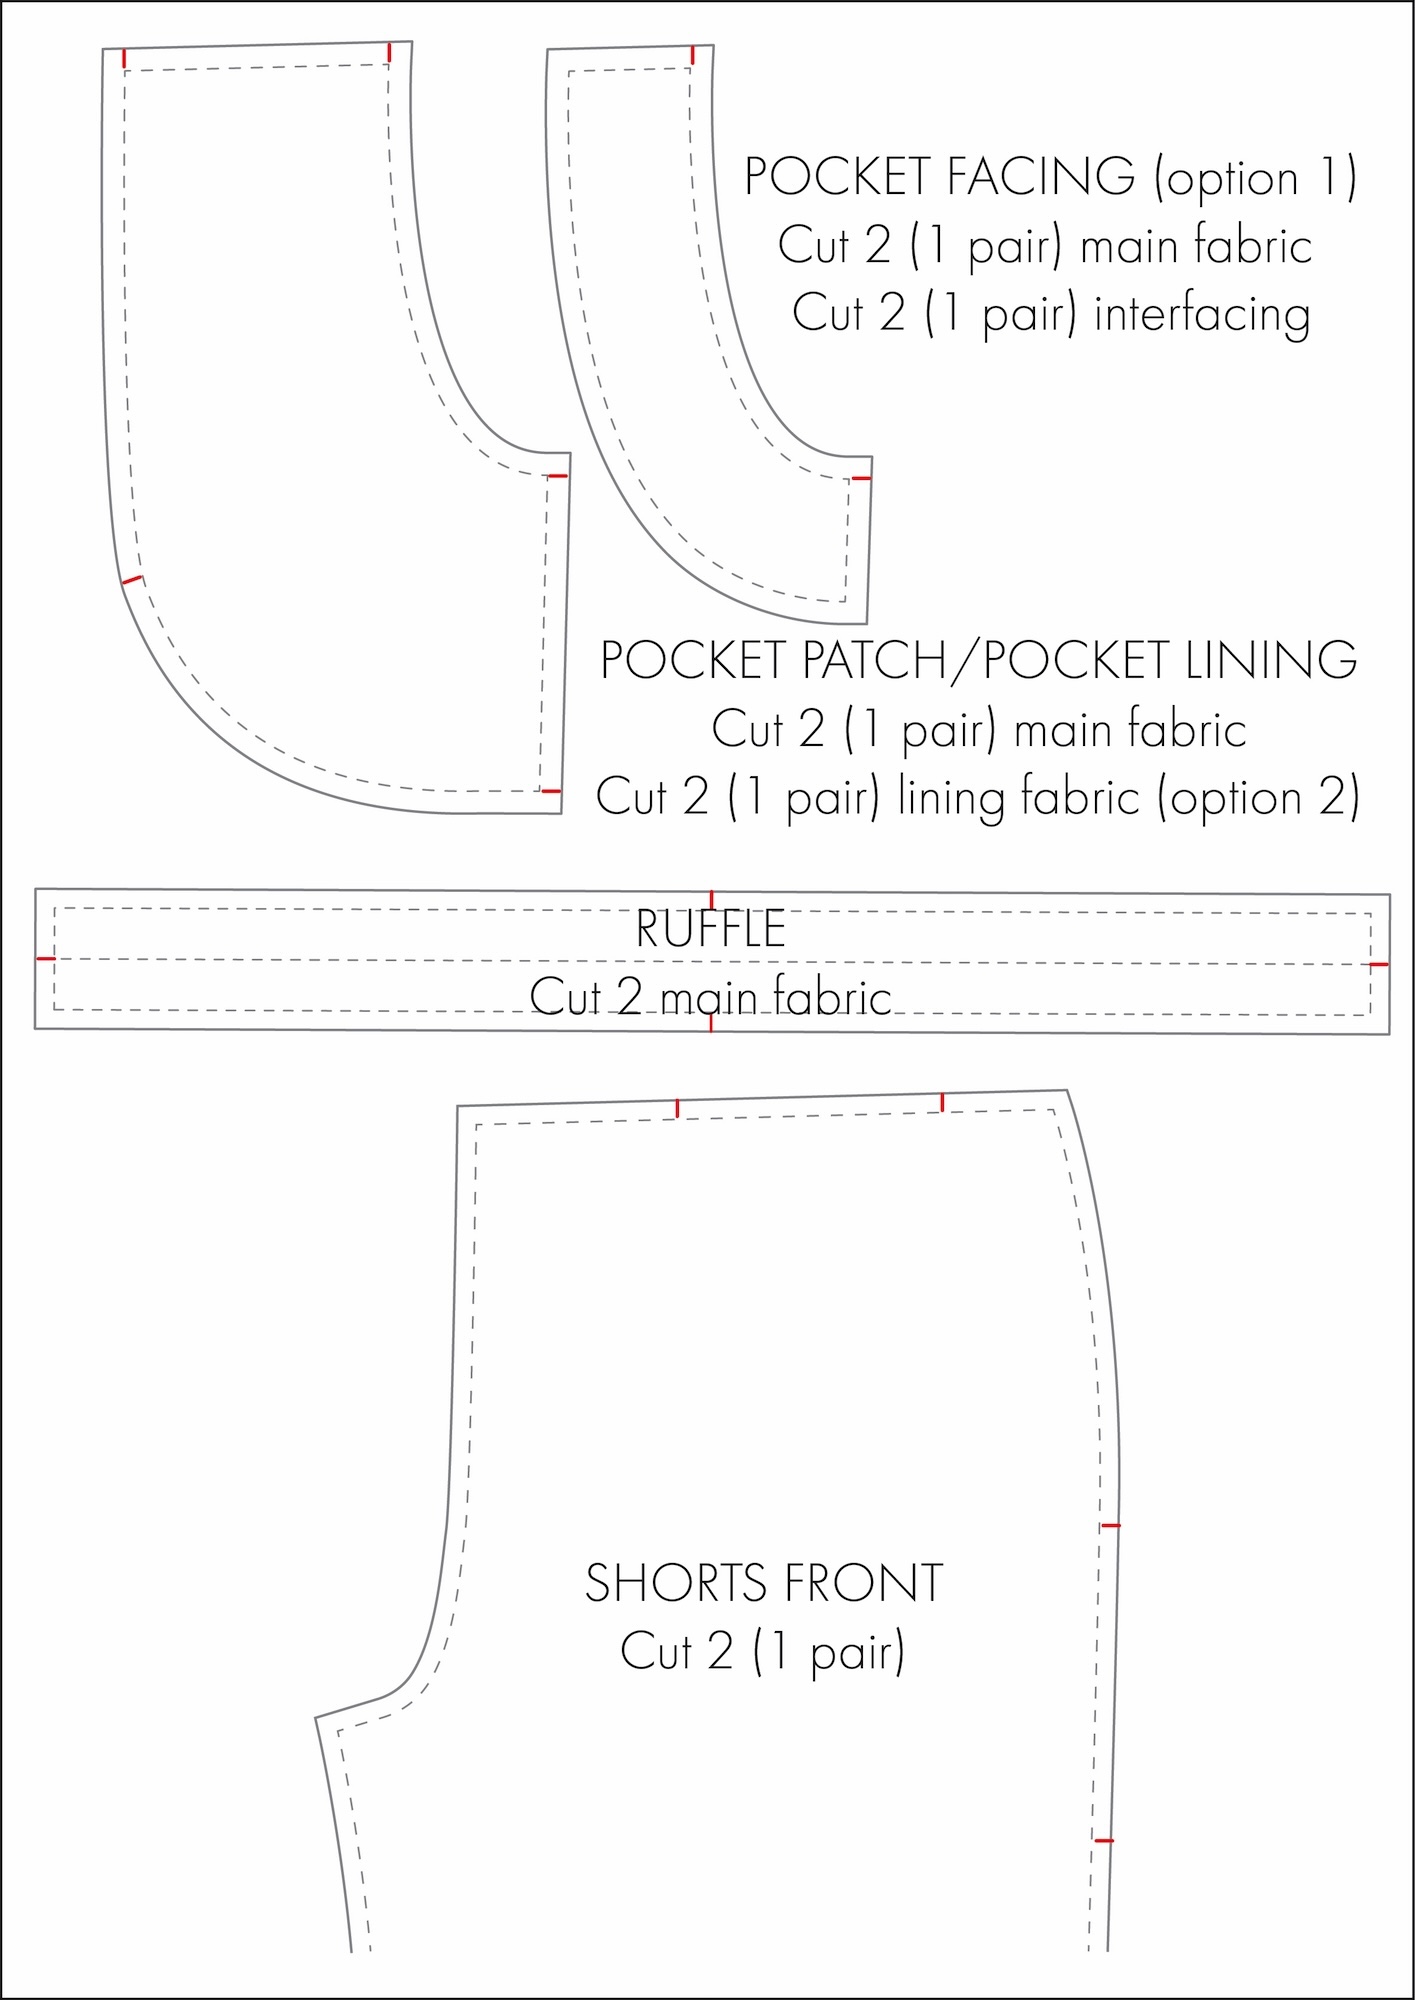
When it comes to seam allowance, obviously, if your are working with an existing pattern, just follow the seam allowances already specified on the pattern. Or simply use your preferred allowance.
For the notches, there are a few key locations I would recommend adding them:
- The top and side of the pocket patch, lining and/or facing, and the leg of the shorts to ensure they line up accurately.
- The halfway points of the outer patch pocket edge and the ruffle to ensure the gathering is distributed evenly.
Step 5: Blend and true pattern pieces
I have covered blending and truing sewing patterns in the articles ‘Blending Between Sizes on a Sewing Pattern – Part 1: When to Blend’, and ‘Part 2: How to Blend’.
How to Sew a Scoop Patch Pocket with Ruffle Trim
Prepare the ruffle
If making your own ruffle:
1. Fold the ruffle strip in half lengthwise, wrong sides together, and press.
2. Pin the edges together.
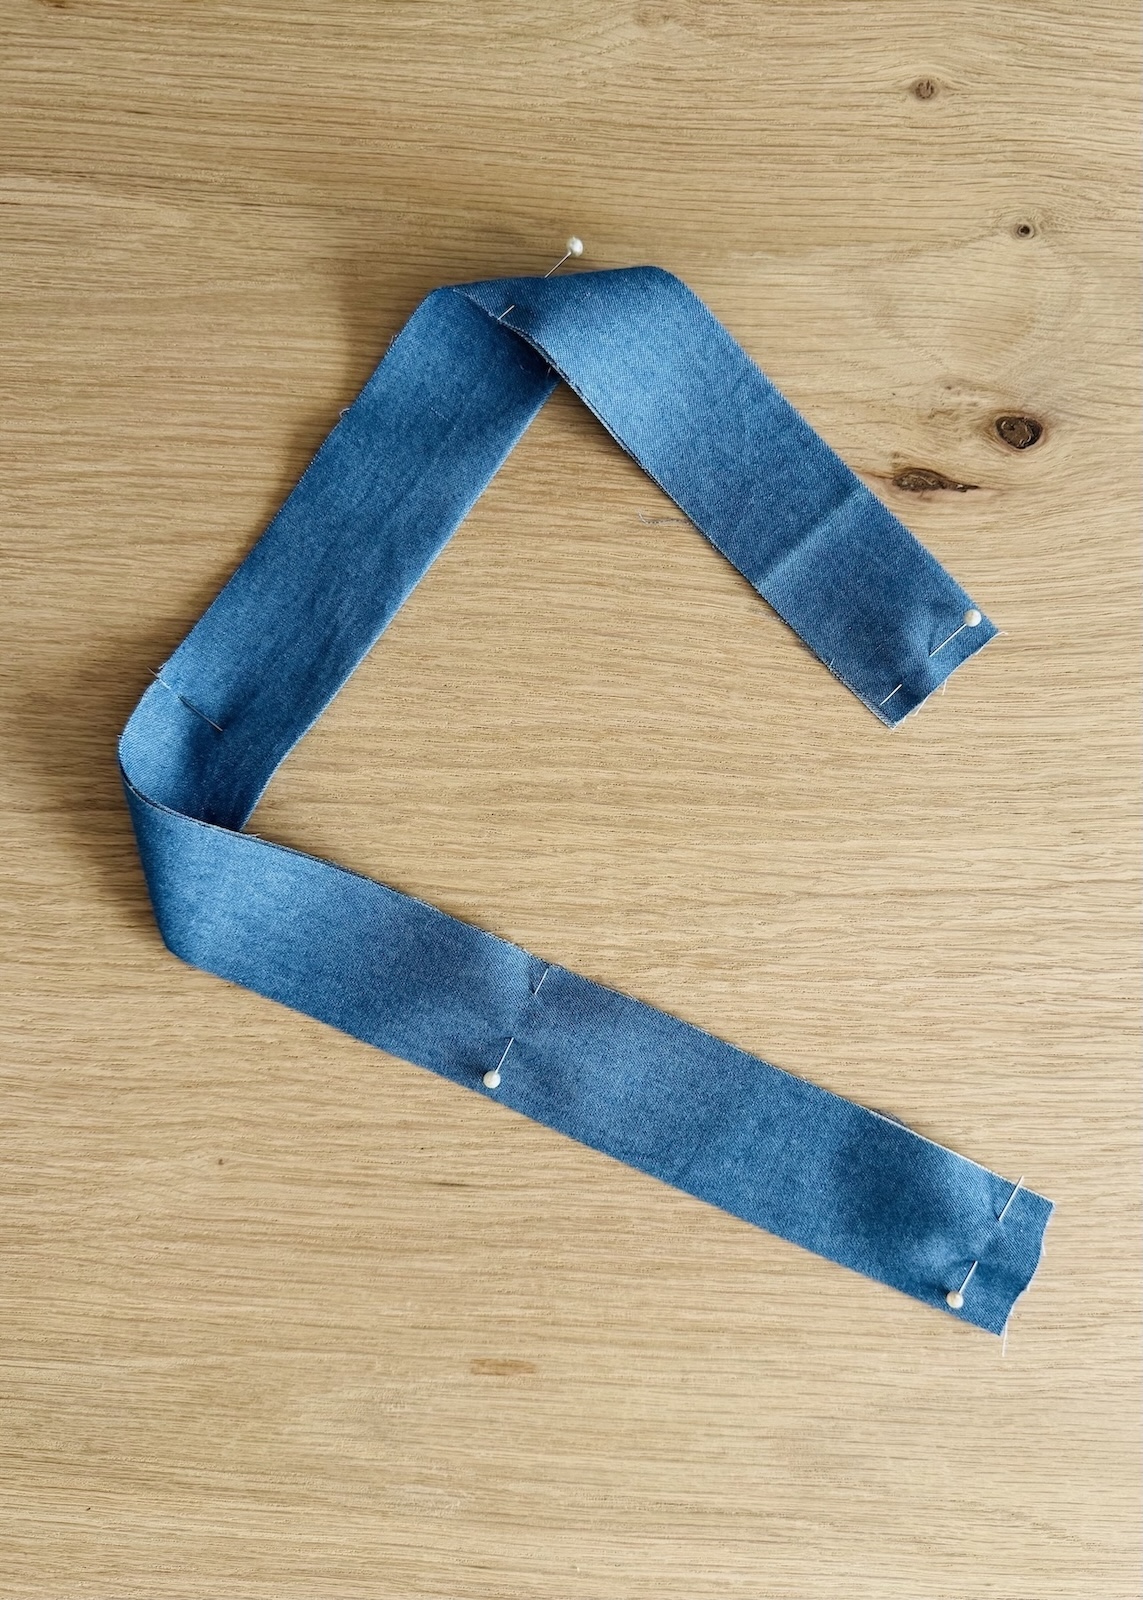
3. Sew two rows of gathering stitch along the raw edge, one row within the seam allowance and one row just outside.
4. Gently pull the bobbin threads to gather the fabric until the ruffle matches the length of the curved outer edge of the pocket patch.
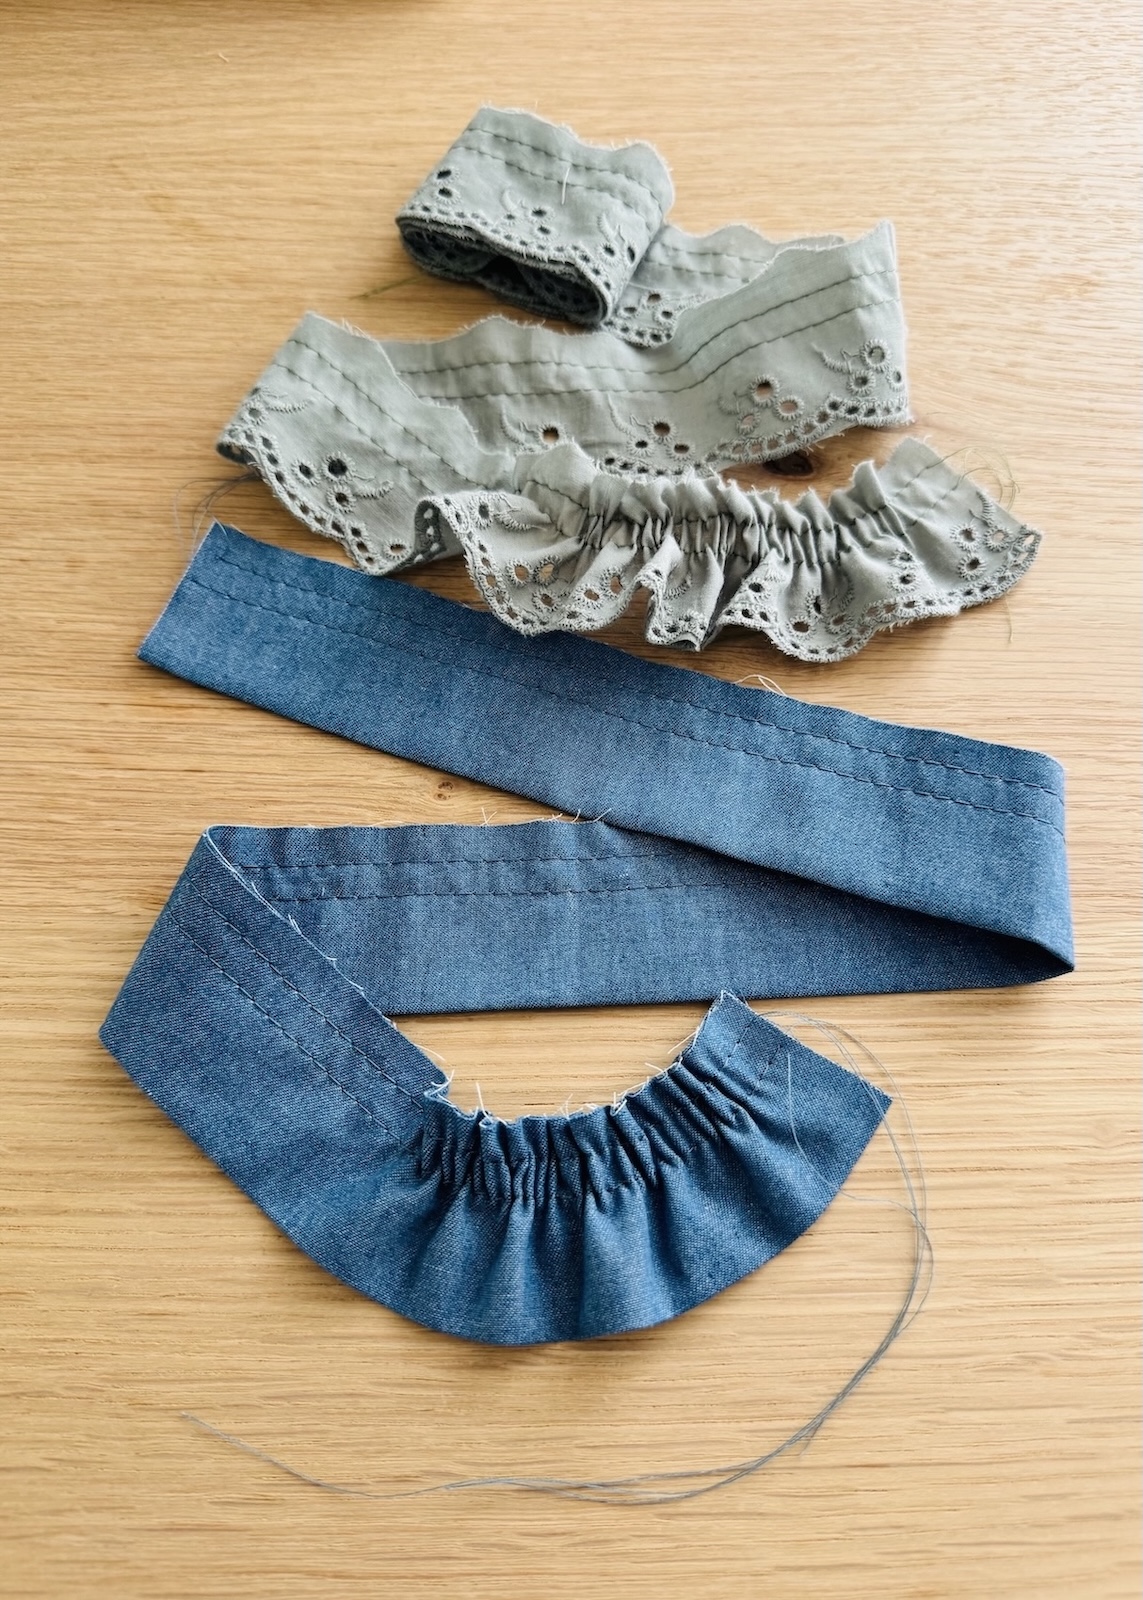
If using pre-made, but ungathered trim, such as the green example below, simply repeat steps 3 – 4 from above for making your own ruffle.
Option 1: With a facing
1. Stay stitch the scooped edge of the pocket patch and facing to help prevent the edges from stretching.
2. Apply interfacing to the wrong side of pocket facing if required.
3. Finish the outer edge of the facing with an overlock or zig zag stitch.
4. Position the facing on top of the pocket patch, right sides together, aligning the scooped edges.
5. Pin in place.
6. Sew along the scooped edge.
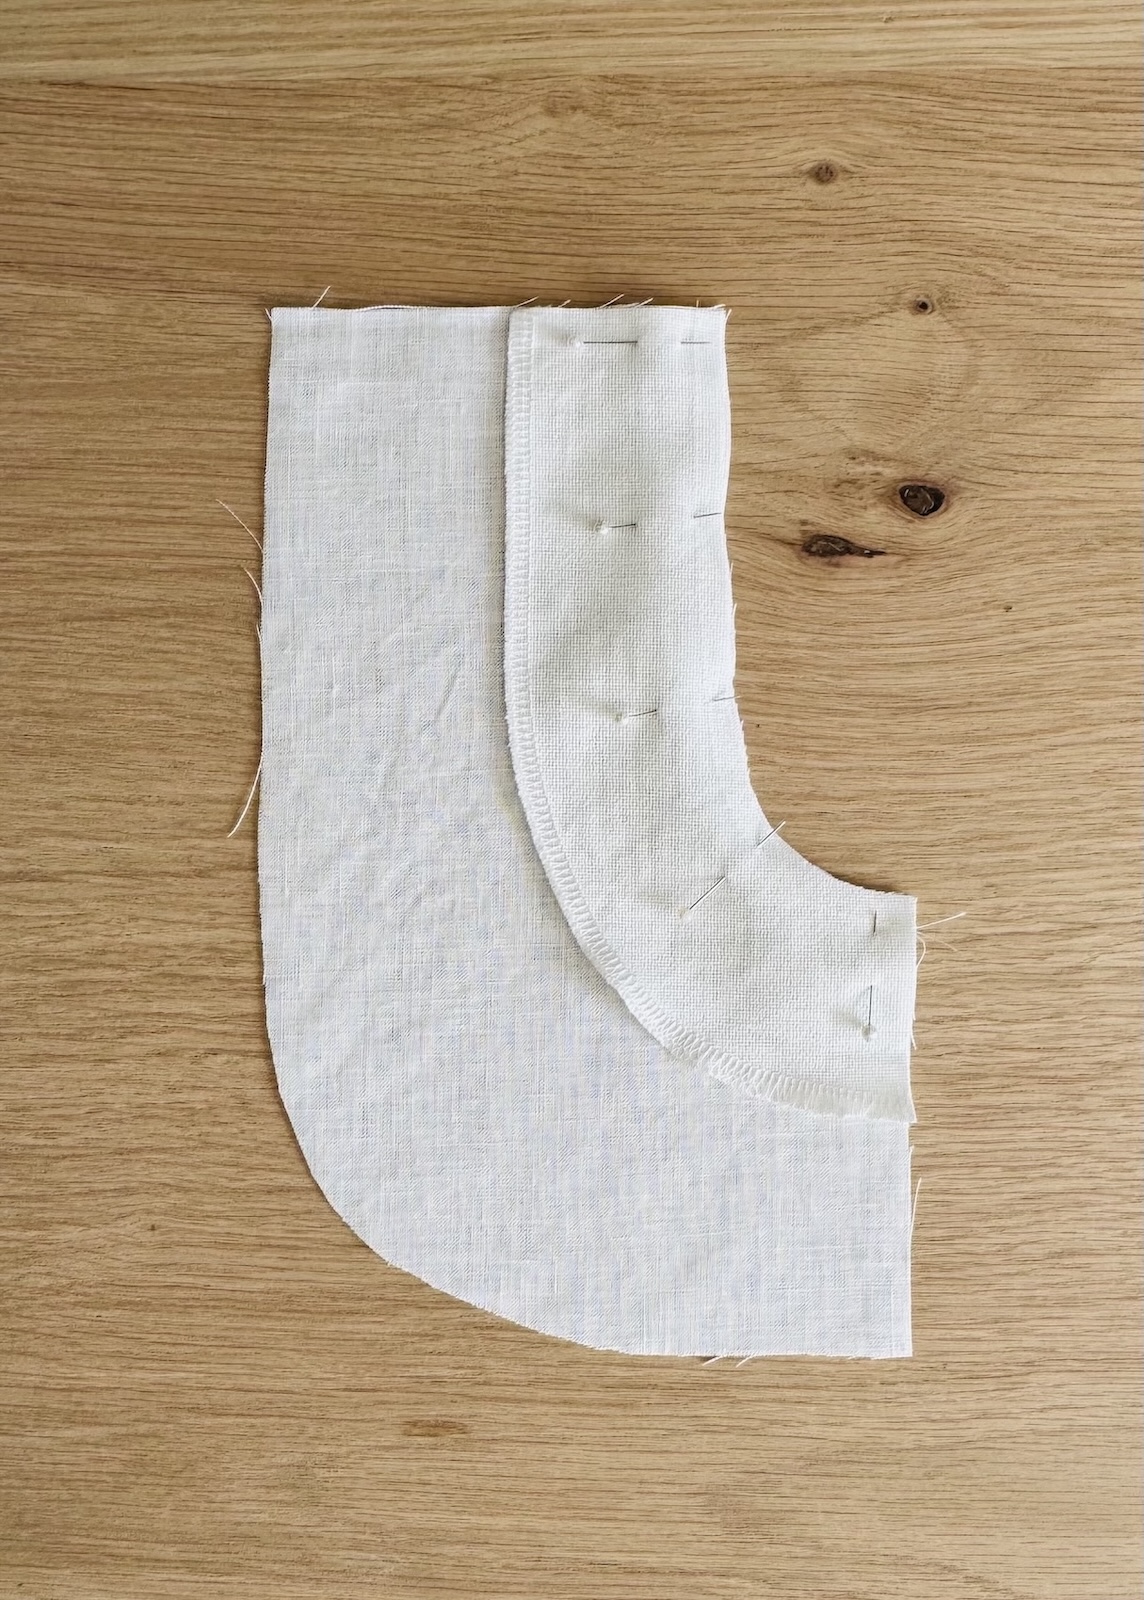
7. Press the facing and seam allowances outwards, away from the pocket patch.
Tip: If your seam isn’t sitting nicely along the curve, you can trim or grade the seam allowance, and clip the curved seam where necessary. Personally, I try to avoid clipping into seams simply because it creates weak points.
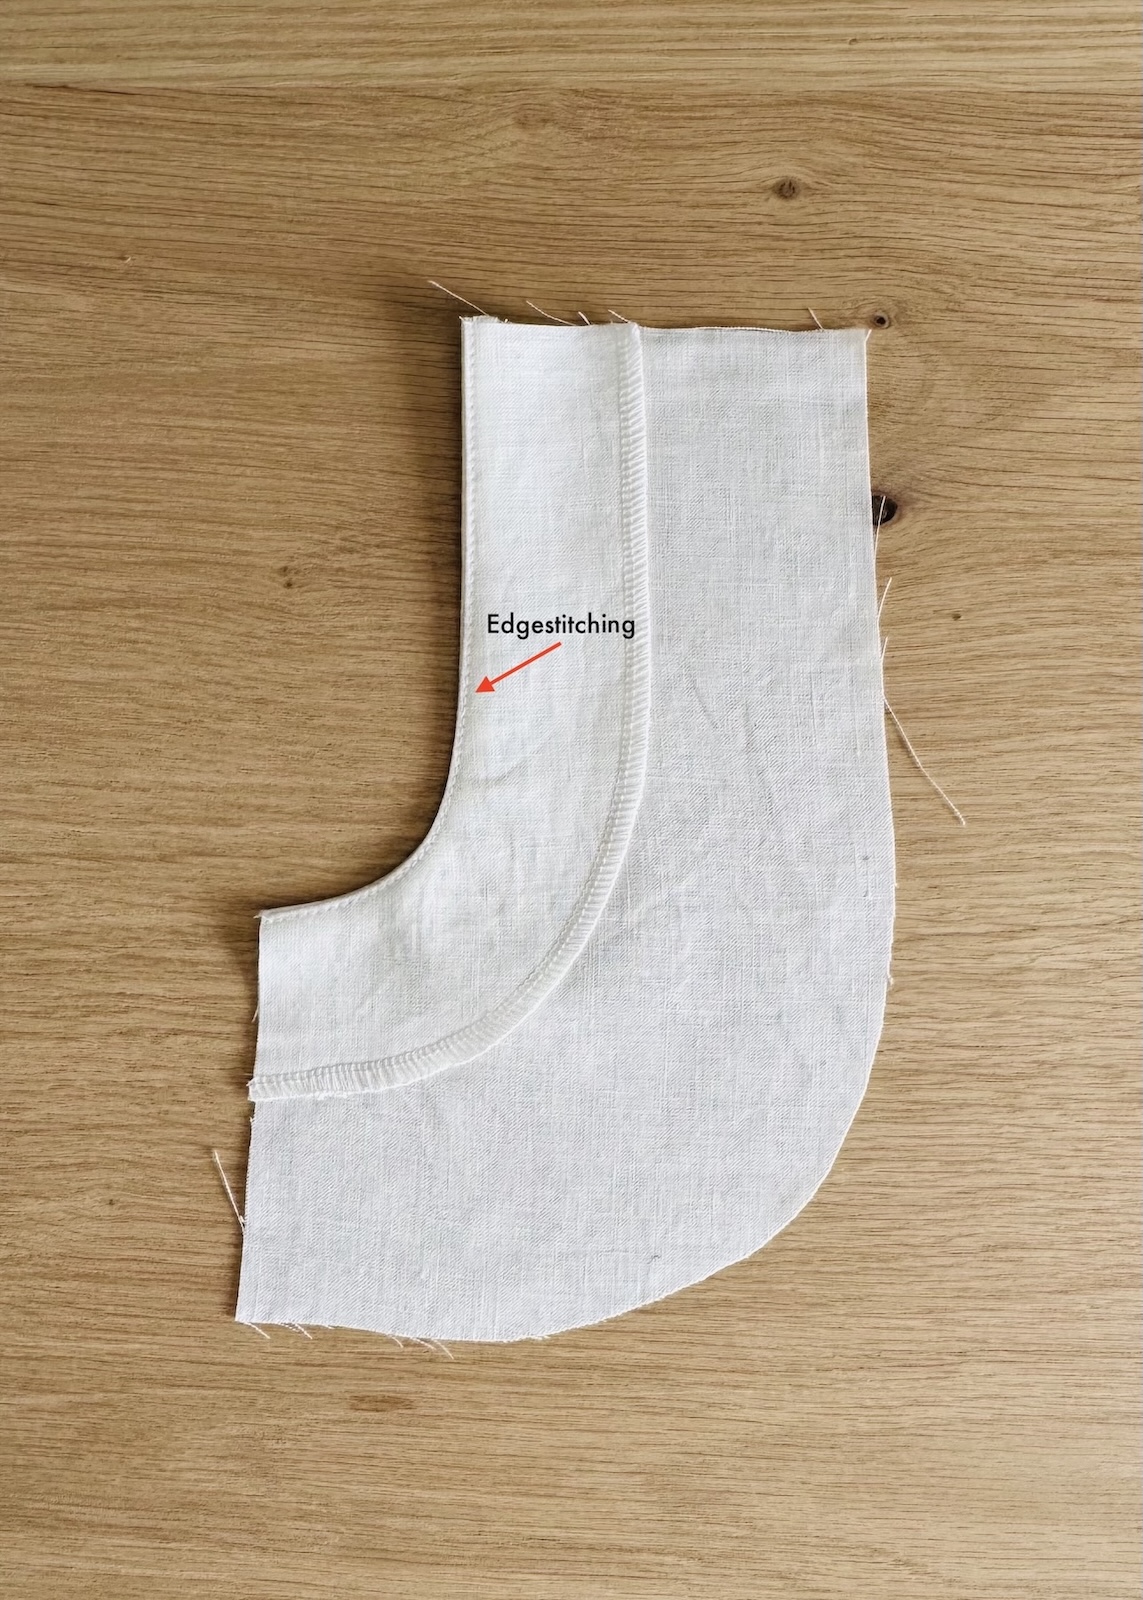
8. For a more invisible finish, edgestitch the facing to the seam allowance, sewing close to the seam. This is what I have done in this example.
Alternatively, topstitch all layers together for a more decorative and visible finish. You can reference this article on different types of stitches used here.
9. Position the gathered ruffle on the right side of the pocket patch’s curved outer edge, with the edges aligned and the ruffle facing inwards towards the pocket. Check alignment at the notches.
10. Pin in place.
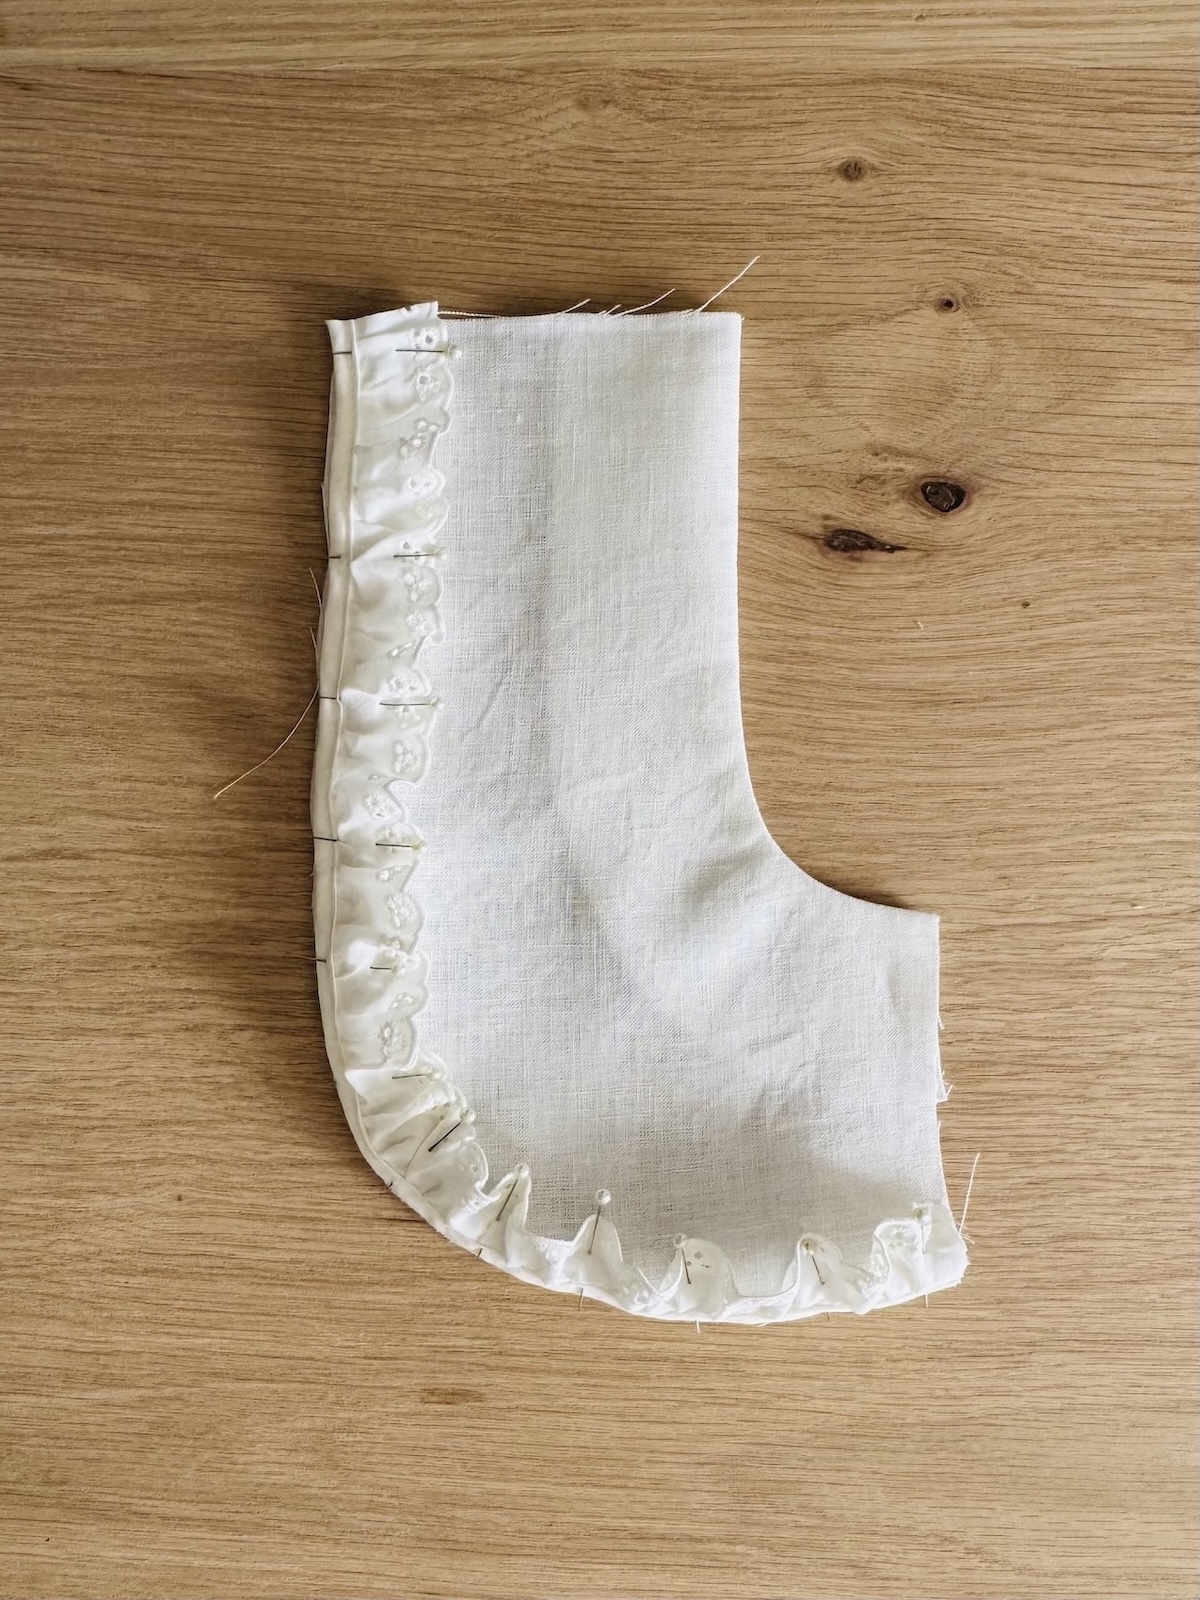
11. Sew the ruffle to the pocket patch around the curved outer edge.
12. If you gathered the trim yourself, this is a good time to remove the gathering stitches.
13. Gently press the ruffle away from the pocket patch, and the seam allowance inward towards the pocket patch, but avoid pressing gathers directly, as you don’t want to flatten them.
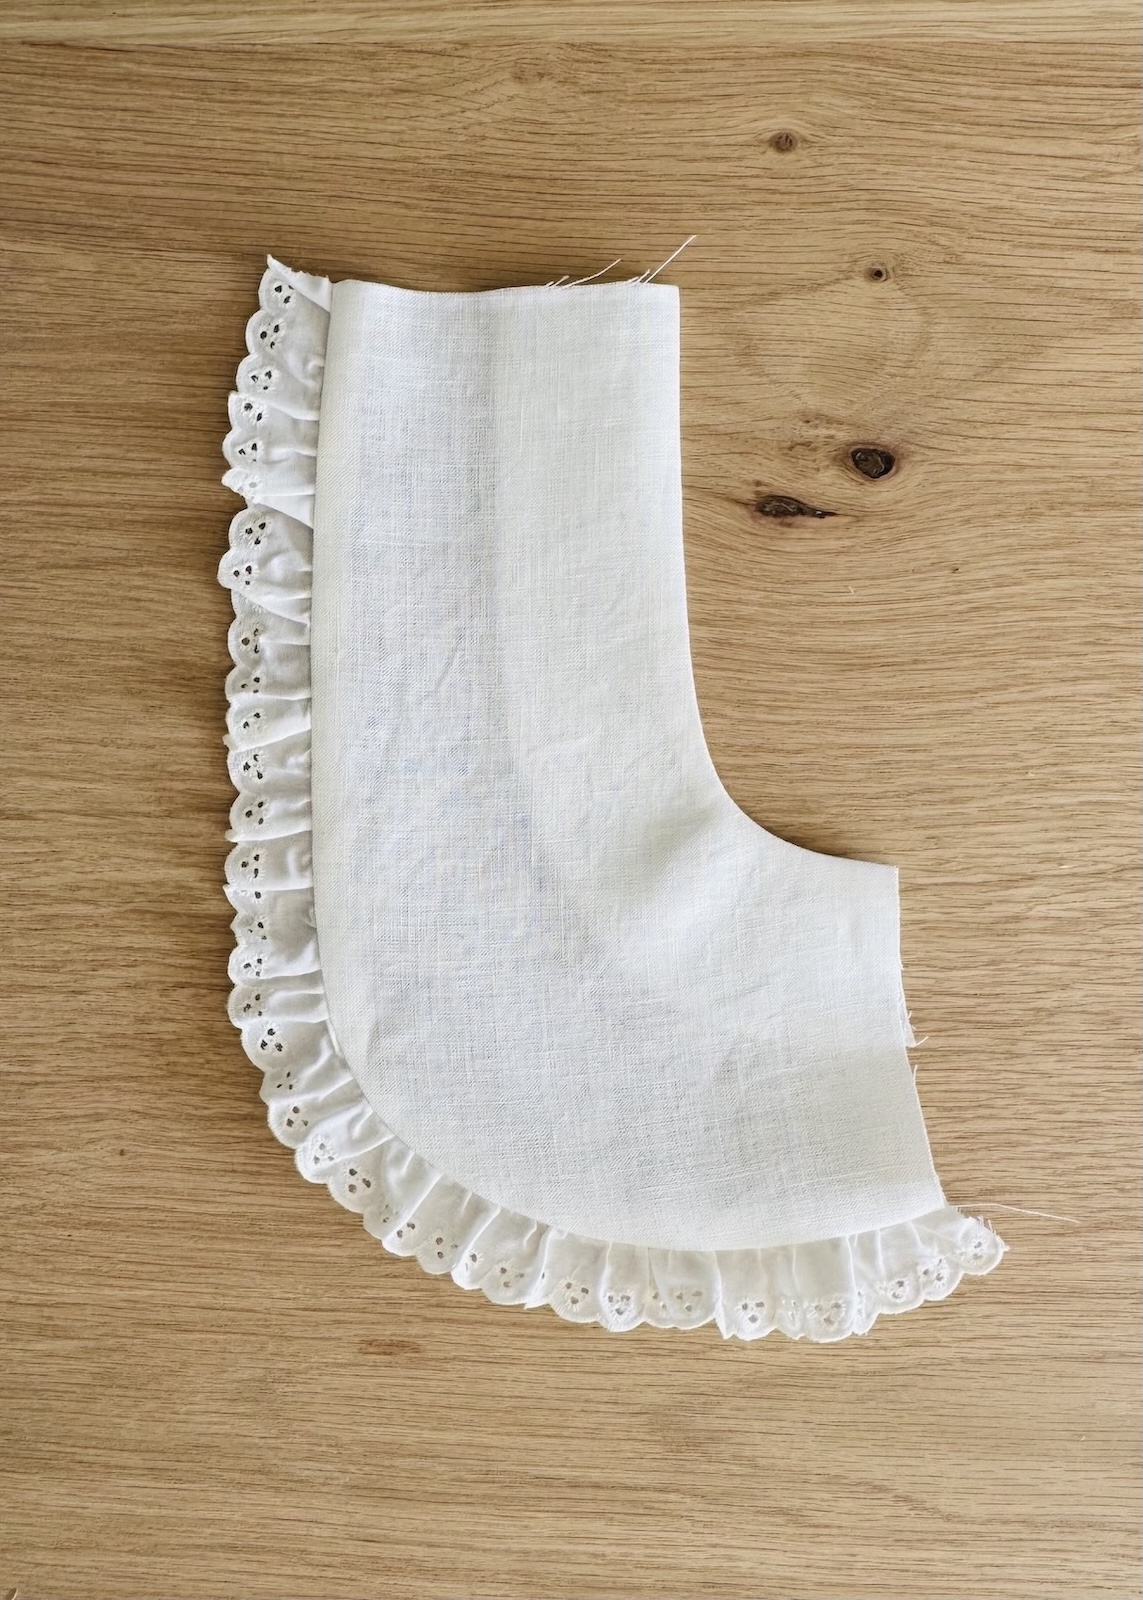
14. Finish the pocket patch’s curved outer edge with an overlock or zig zag stitch.
Option 2: With a lining
1. Stay stitch the scooped edge of the pocket patch and lining to help prevent the edges from stretching.
2. Position the lining on top of the pocket patch, right sides together, aligning the scooped edges.
3. Pin in place.
4. Sew along the scooped edge.
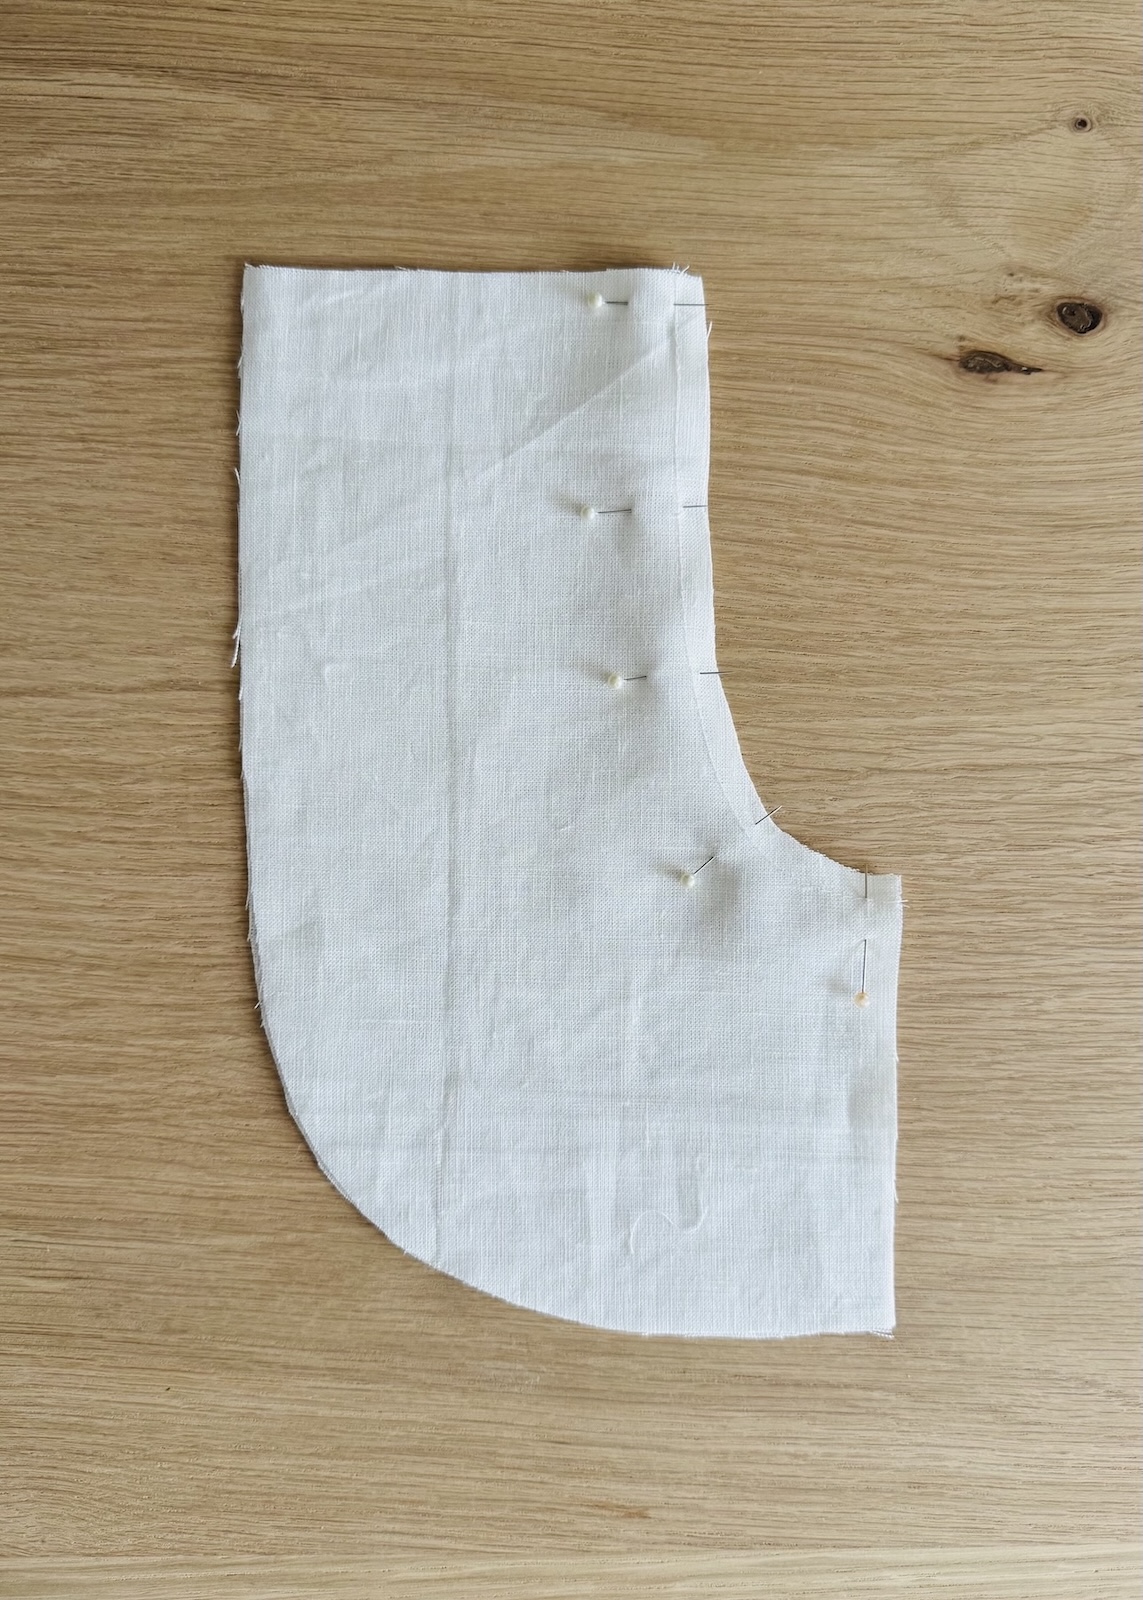
5. Press the lining and seam allowances outwards, away from the pocket patch.
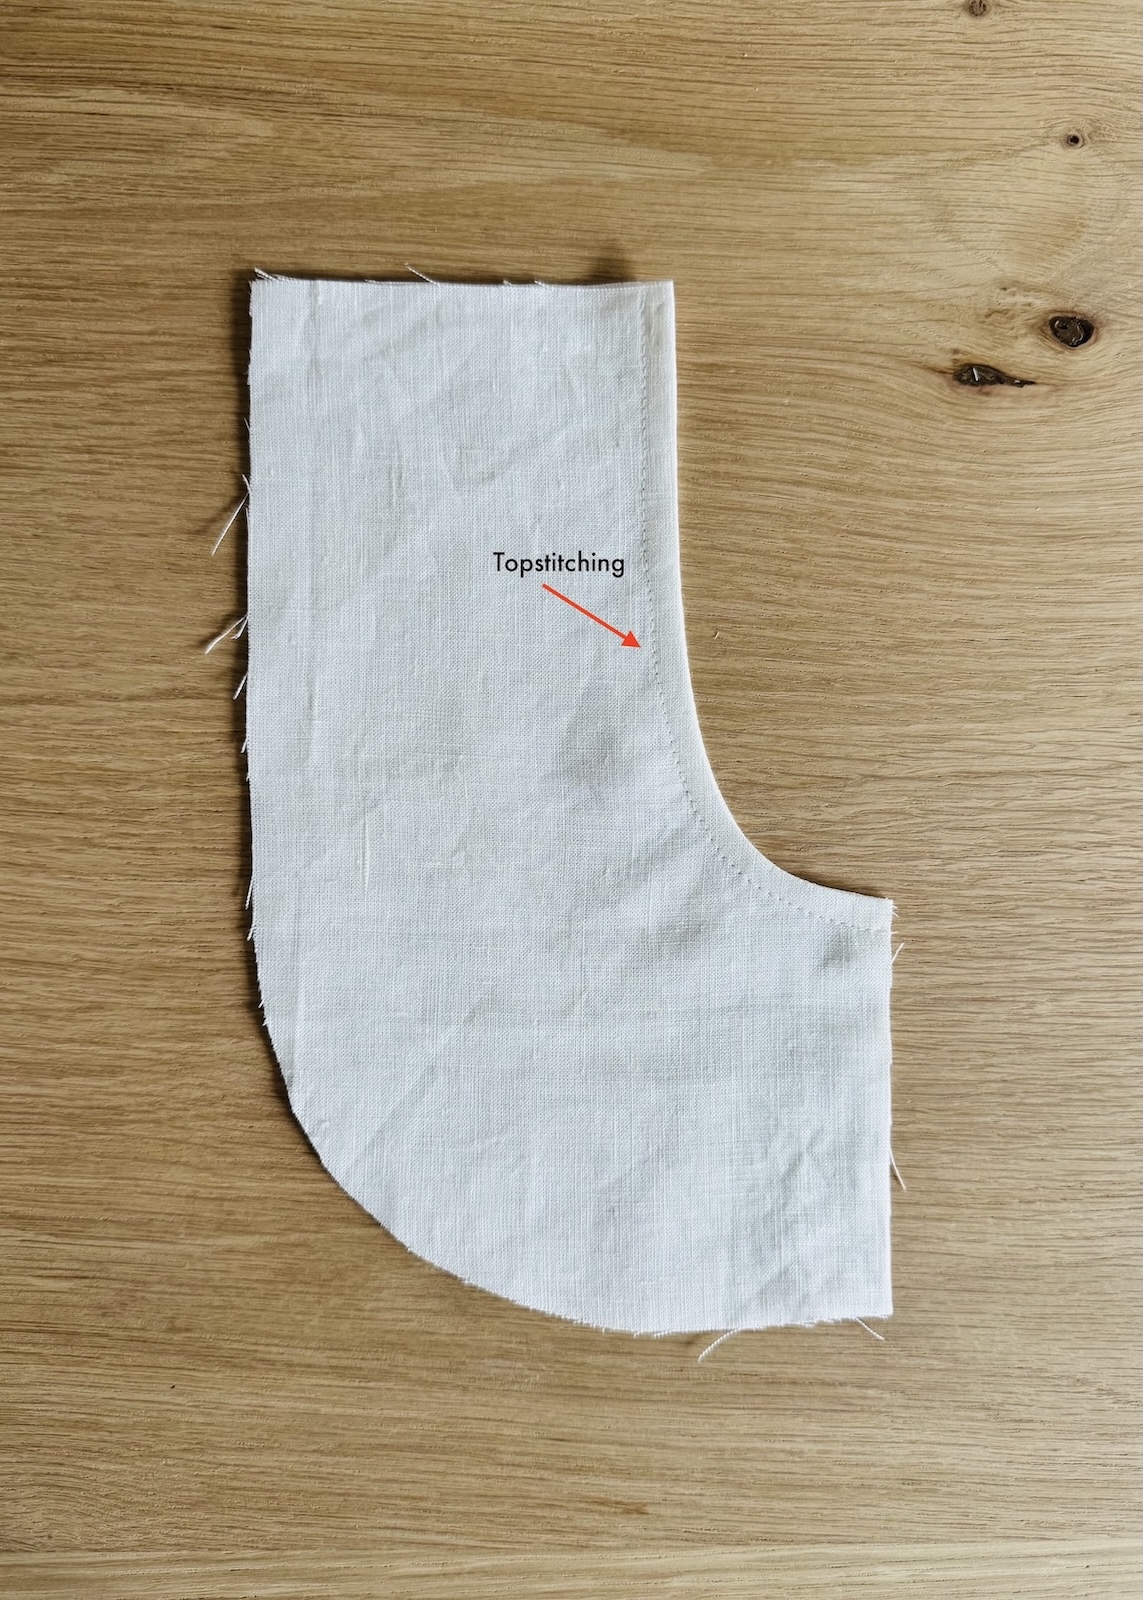
6. Edgestitch or topstitch along the scooped edge. In this example, I have gone with topstitching.
7. Position the gathered ruffle on the right side of the pocket patch’s curved outer edge (not the lining), with the raw edges aligned and the ruffle facing inwards towards the pocket. Check alignment at the notches.
8. Pin in place.
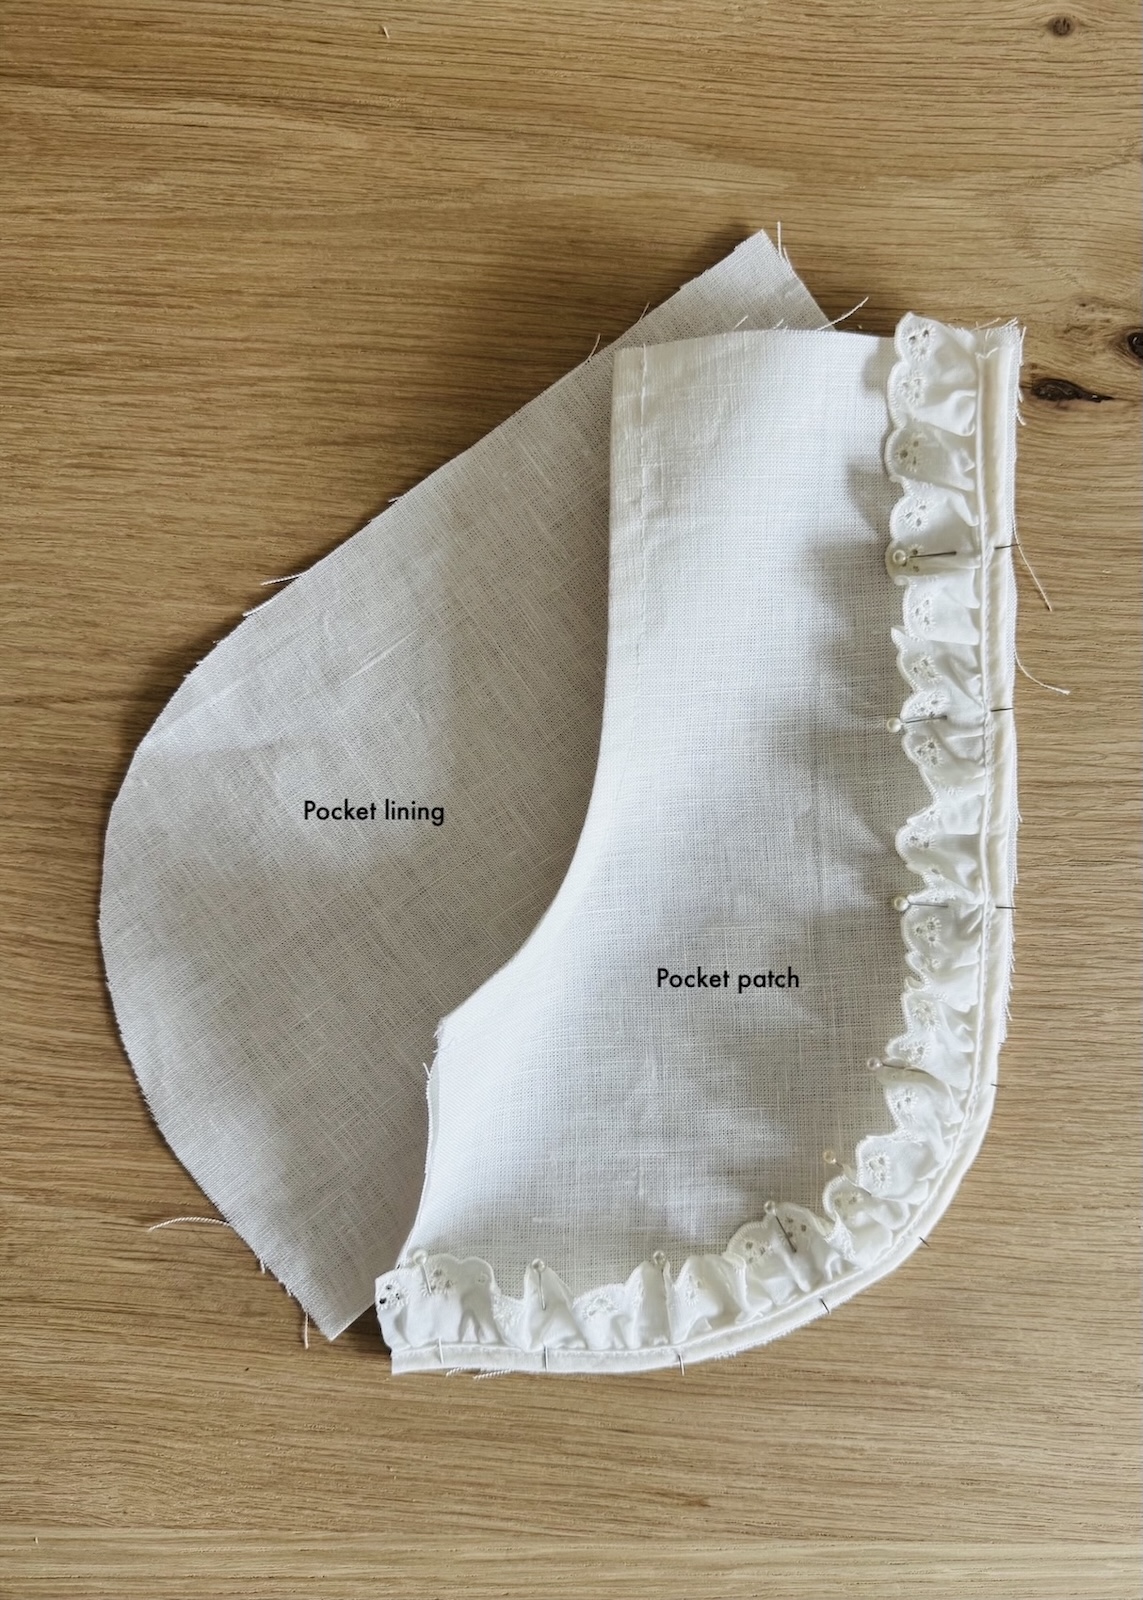
9. Baste the ruffle in place, sewing with a long stitch length and within the seam allowance.
10. Fold the lining piece back on itself so that the right sides of the pocket patch and the lining are now facing together. This will sandwich the gathered ruffle in between.
11. Pin in place.
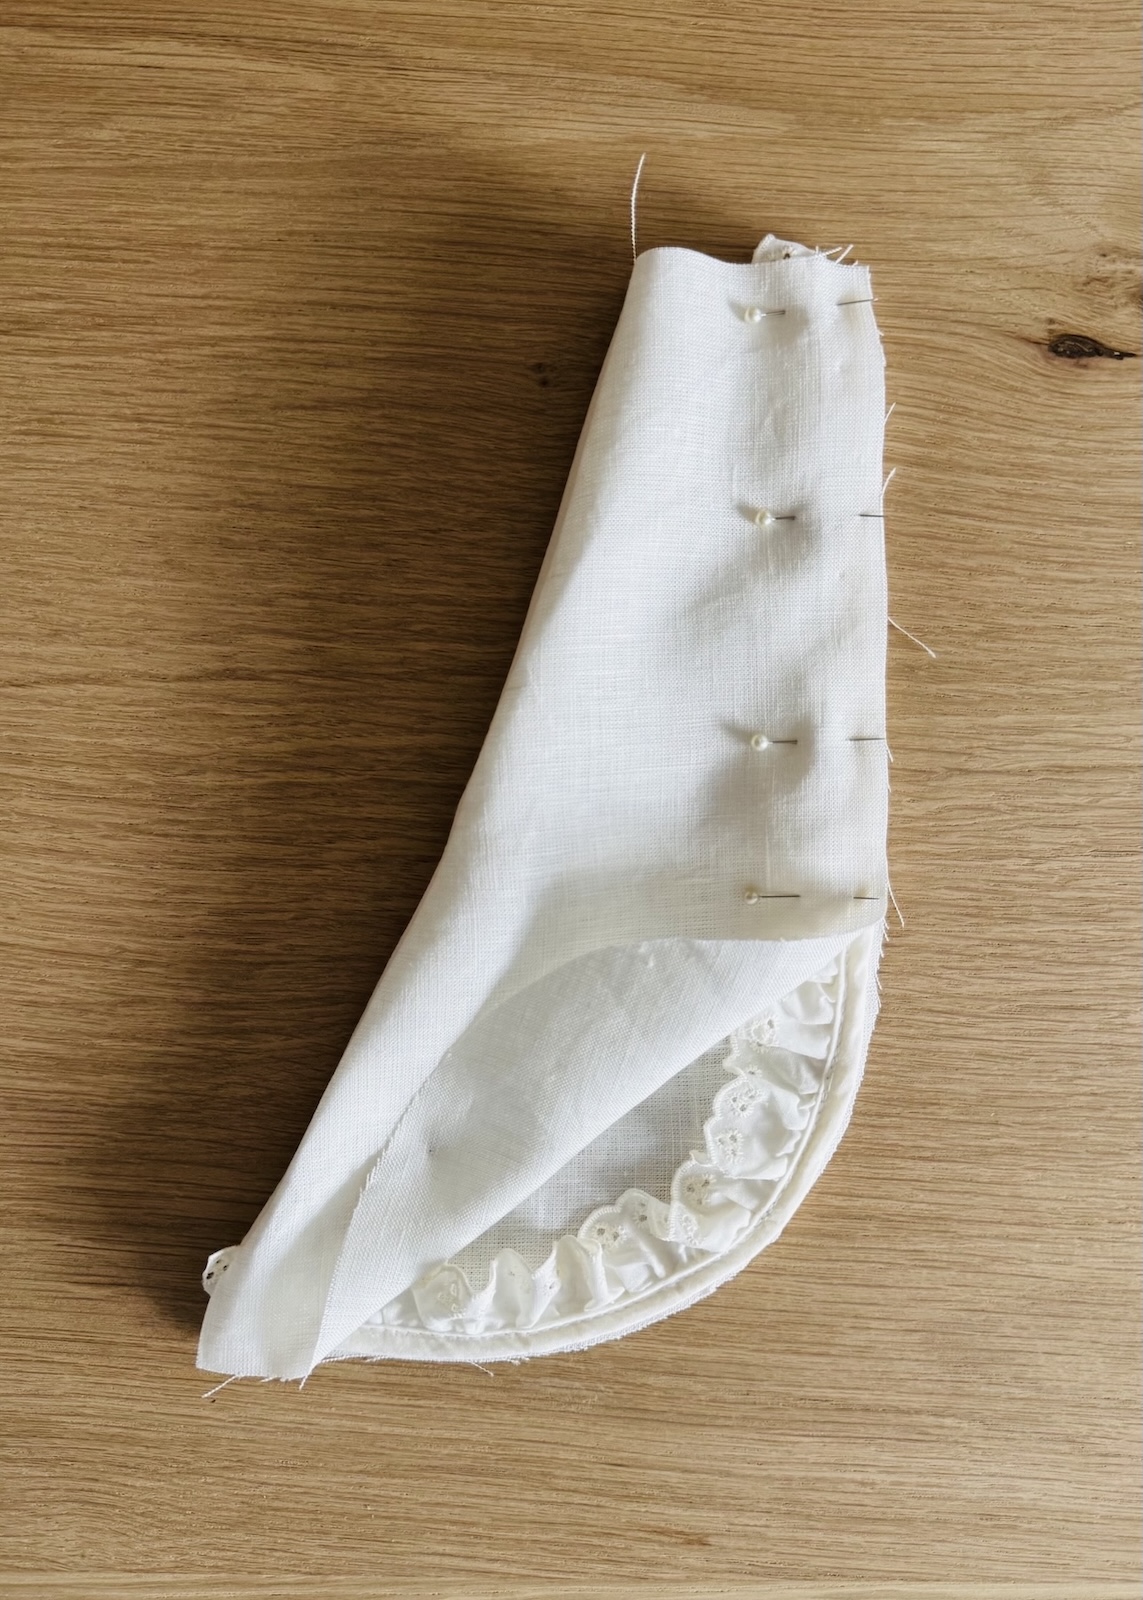
12. Sew through all three layers around the curved outer edge.
13. Turn the pocket bag through itself through, right side out, either the waist or side seam opening.
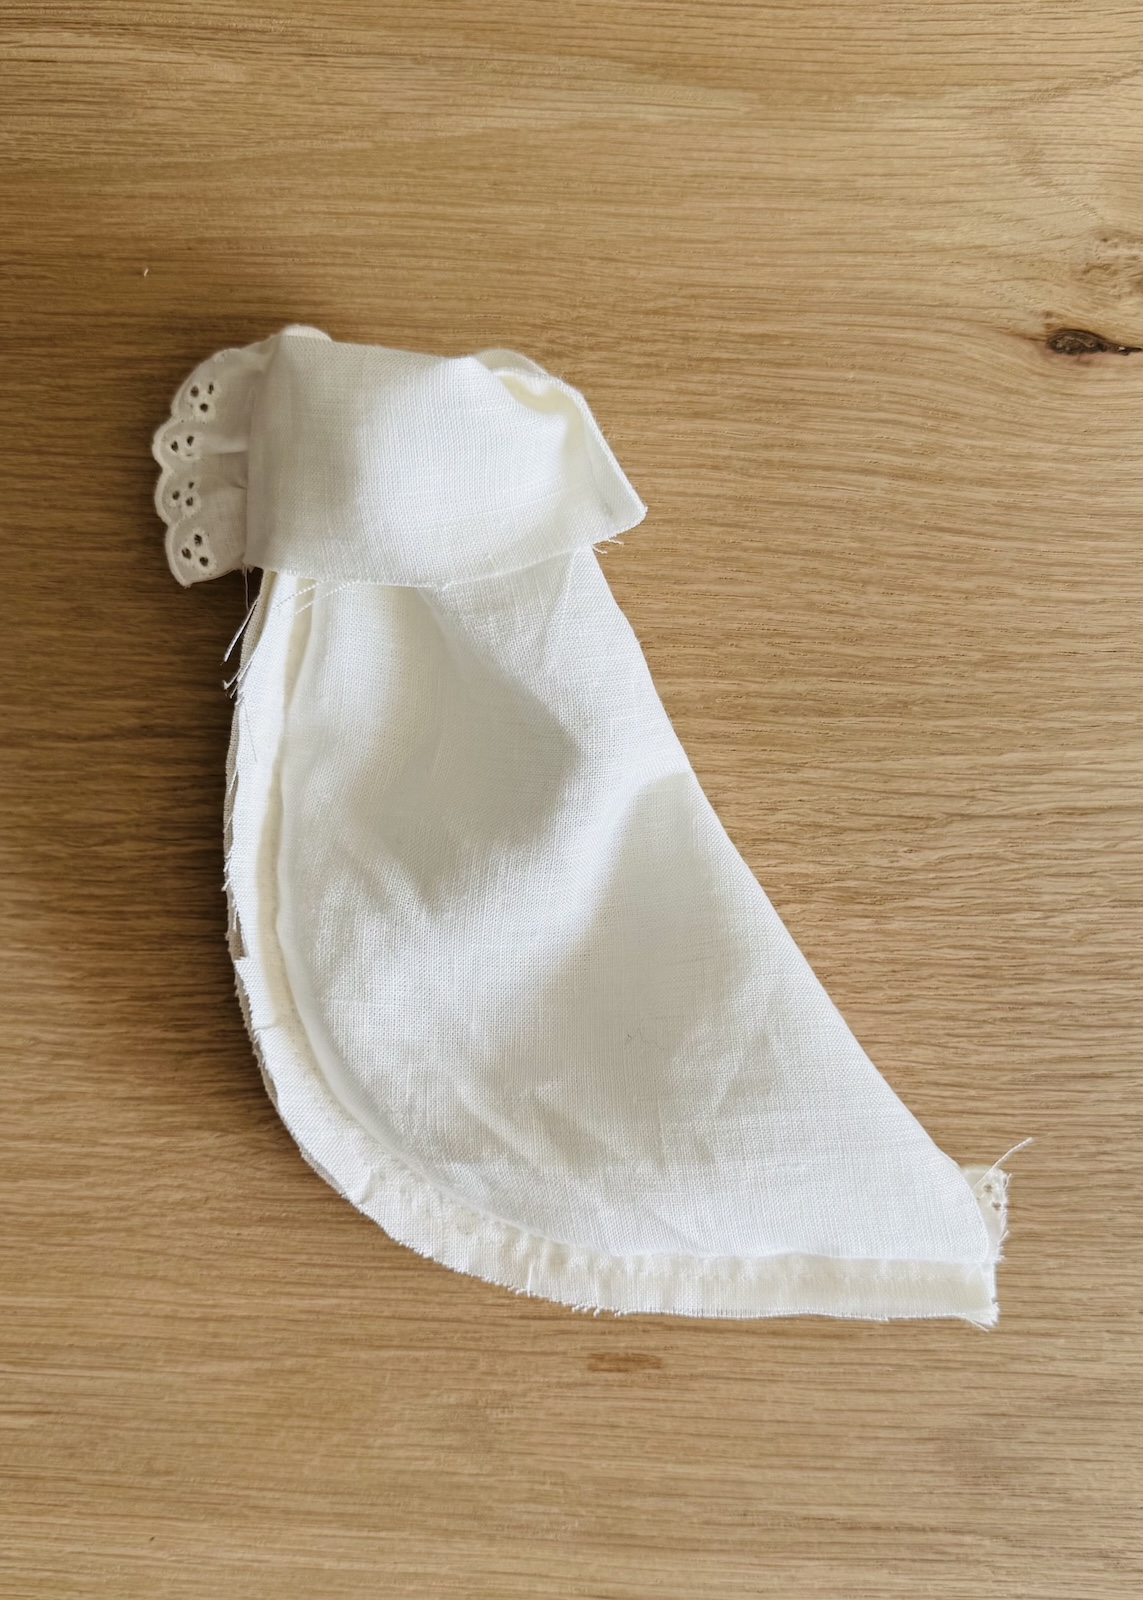
14. Gently press the ruffle away from the pocket patch, but avoid pressing gathers directly, as you don’t want to flatten them.
Attach the pocket patch to the garment
This is the same for both options, with a facing or with a lining.
1. Position the completed patch pocket onto the garment, aligning at the relevant notches at the waist and side. This is best done on a flat surface.
2. Pin the pocket in place along the curved outer edge, waist and side seams.
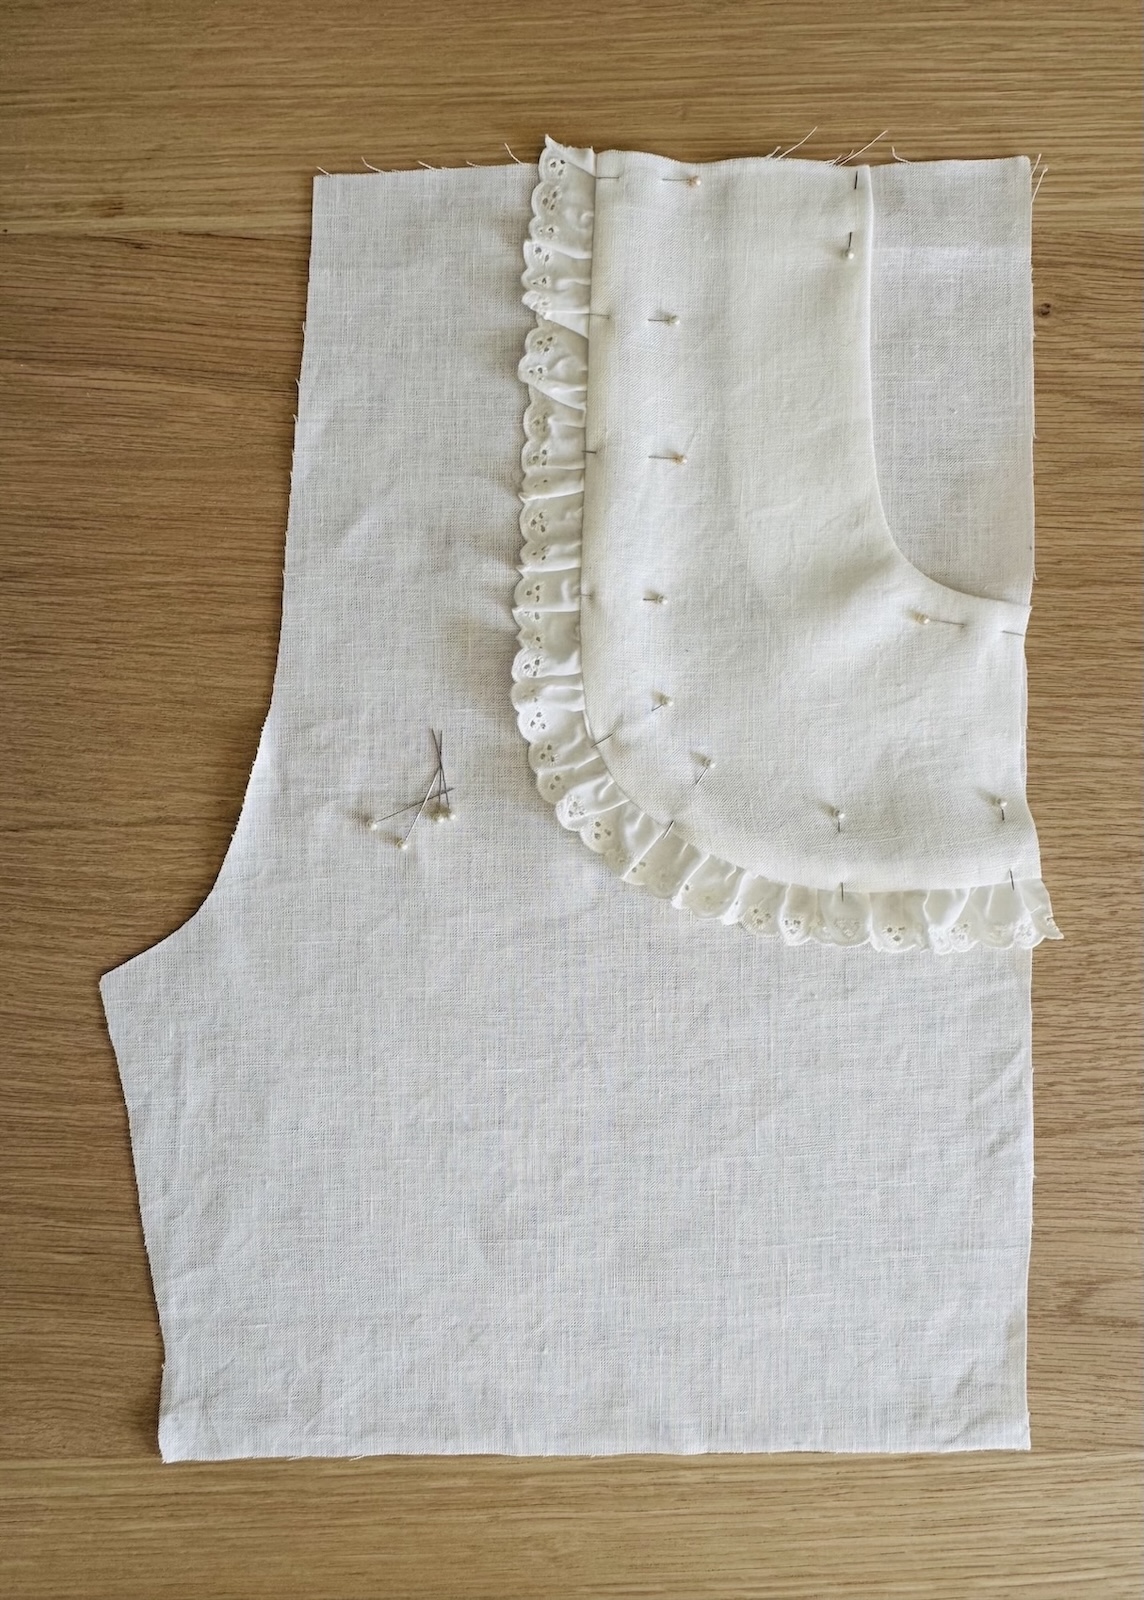
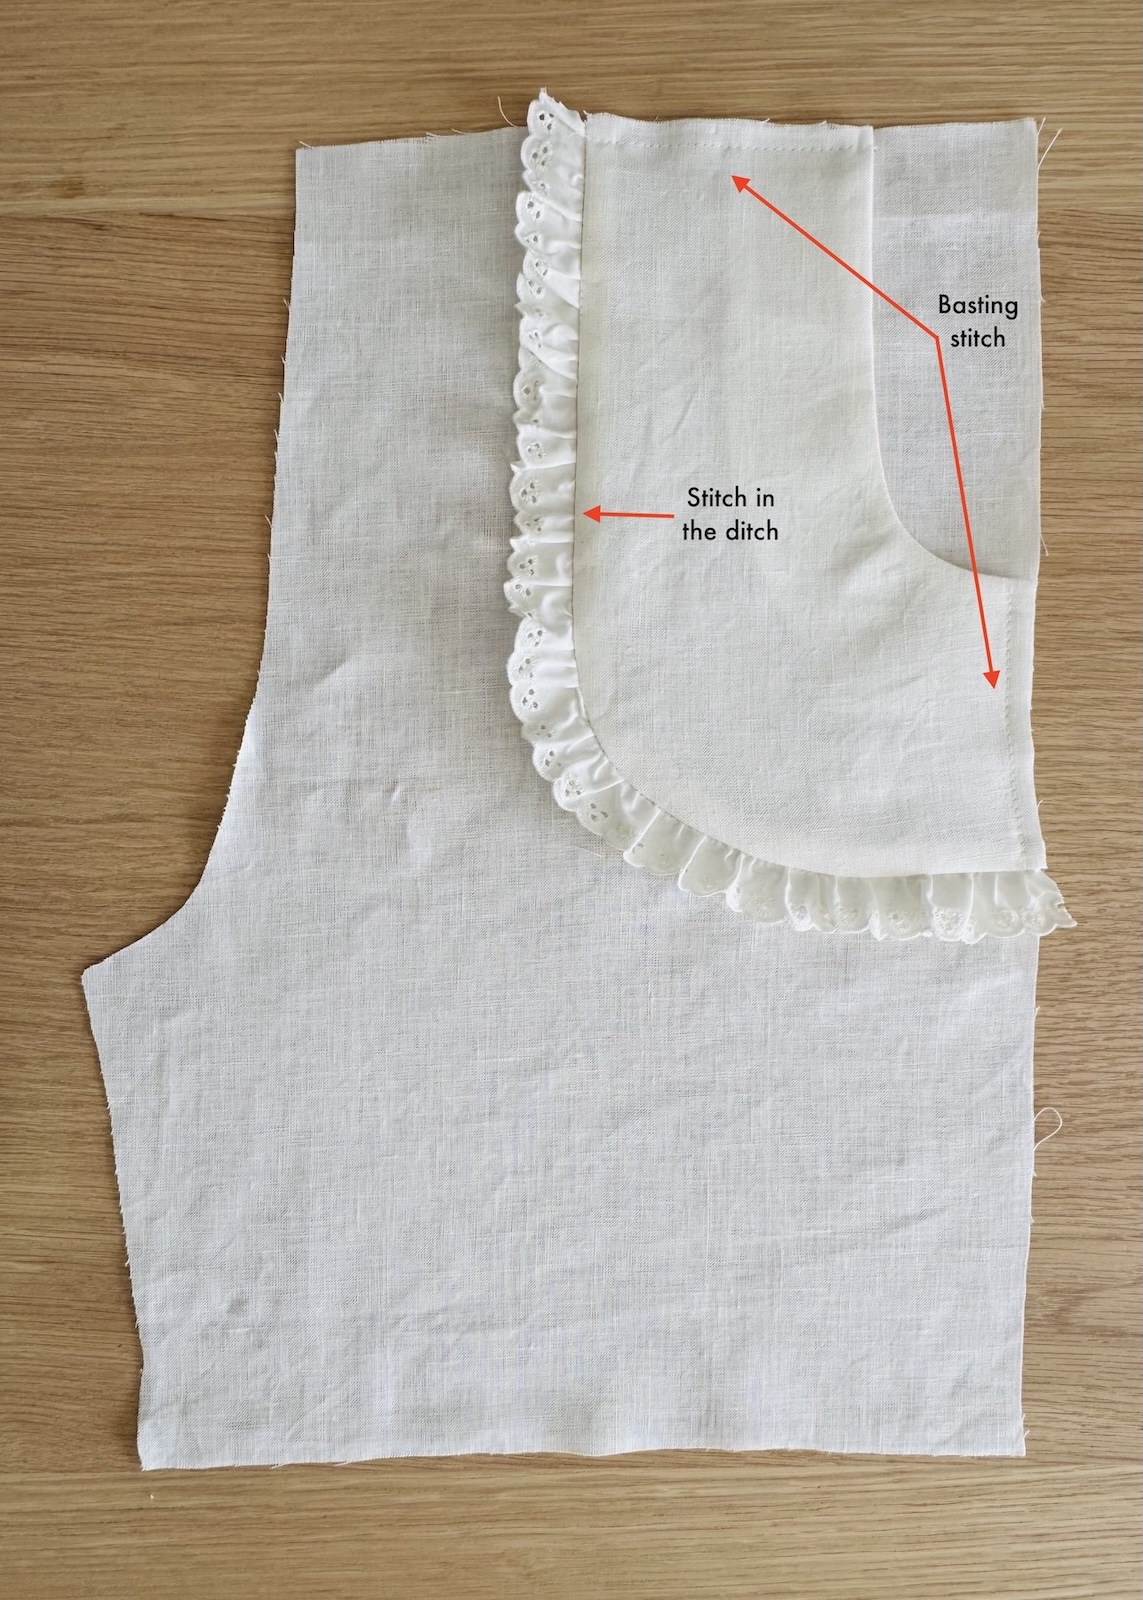
3. Sew in place. There a few ways you could do this:
-
- Stitching in the ditch, between the ruffle and the pocket patch, for a more invisible finish. This is what I have done in this example.
- Edgestitching or topstitching along the outer curved edge of the pocket patch.
4. Baste stitch, sewing with a long stitch length and within the seam allowance at the waist and side seams. This will just help keep the pocket in place when finishing the garment.
Complete the rest of the garment
Continue sewing the garment according to the design and pattern instructions.
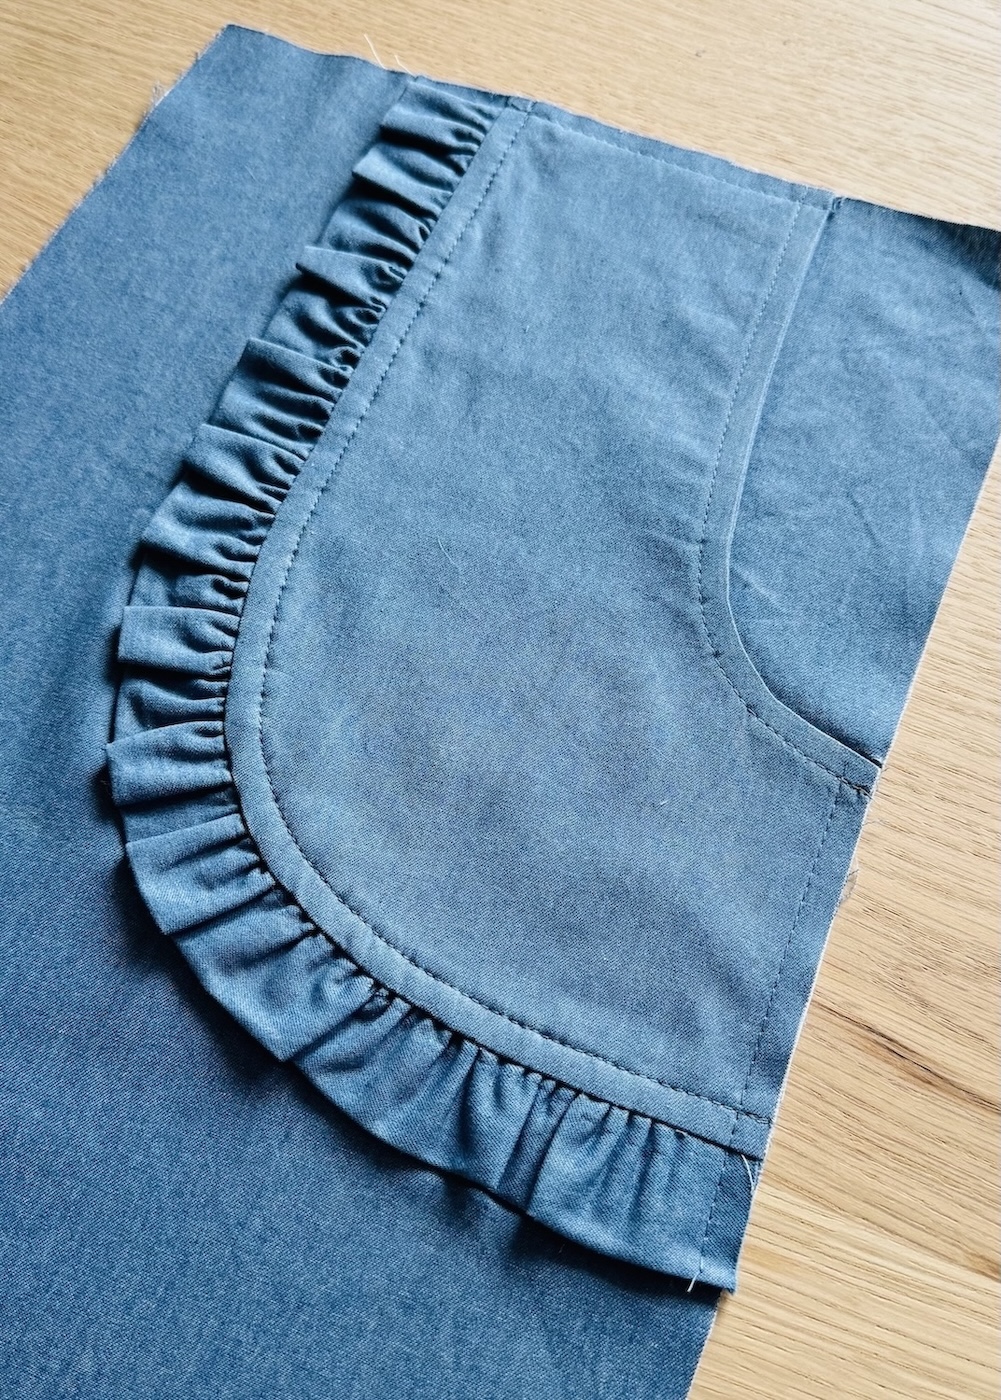
Pockets really are a simple, fun way to personalise your sewing patterns and garments. Hopefully this tutorial has inspired you to play around and customise this cute design!