
When you are sewing with a regular sewing machine, finishing and securing your stitching is pretty simple: you just backstitch for a few stitches at the start and end, then trim the thread. Easy!
However, things are a little different when working with an overlocker. Backstitching isn’t possible because an overlocker is unable to reverse.
So how do you finish and secure the thread tails?

Fortunately, there are a few simple methods you can choose from to keep your stitching neat and, most importantly, prevent it from unravelling.
What do I mean by a thread tail and how do you create one?
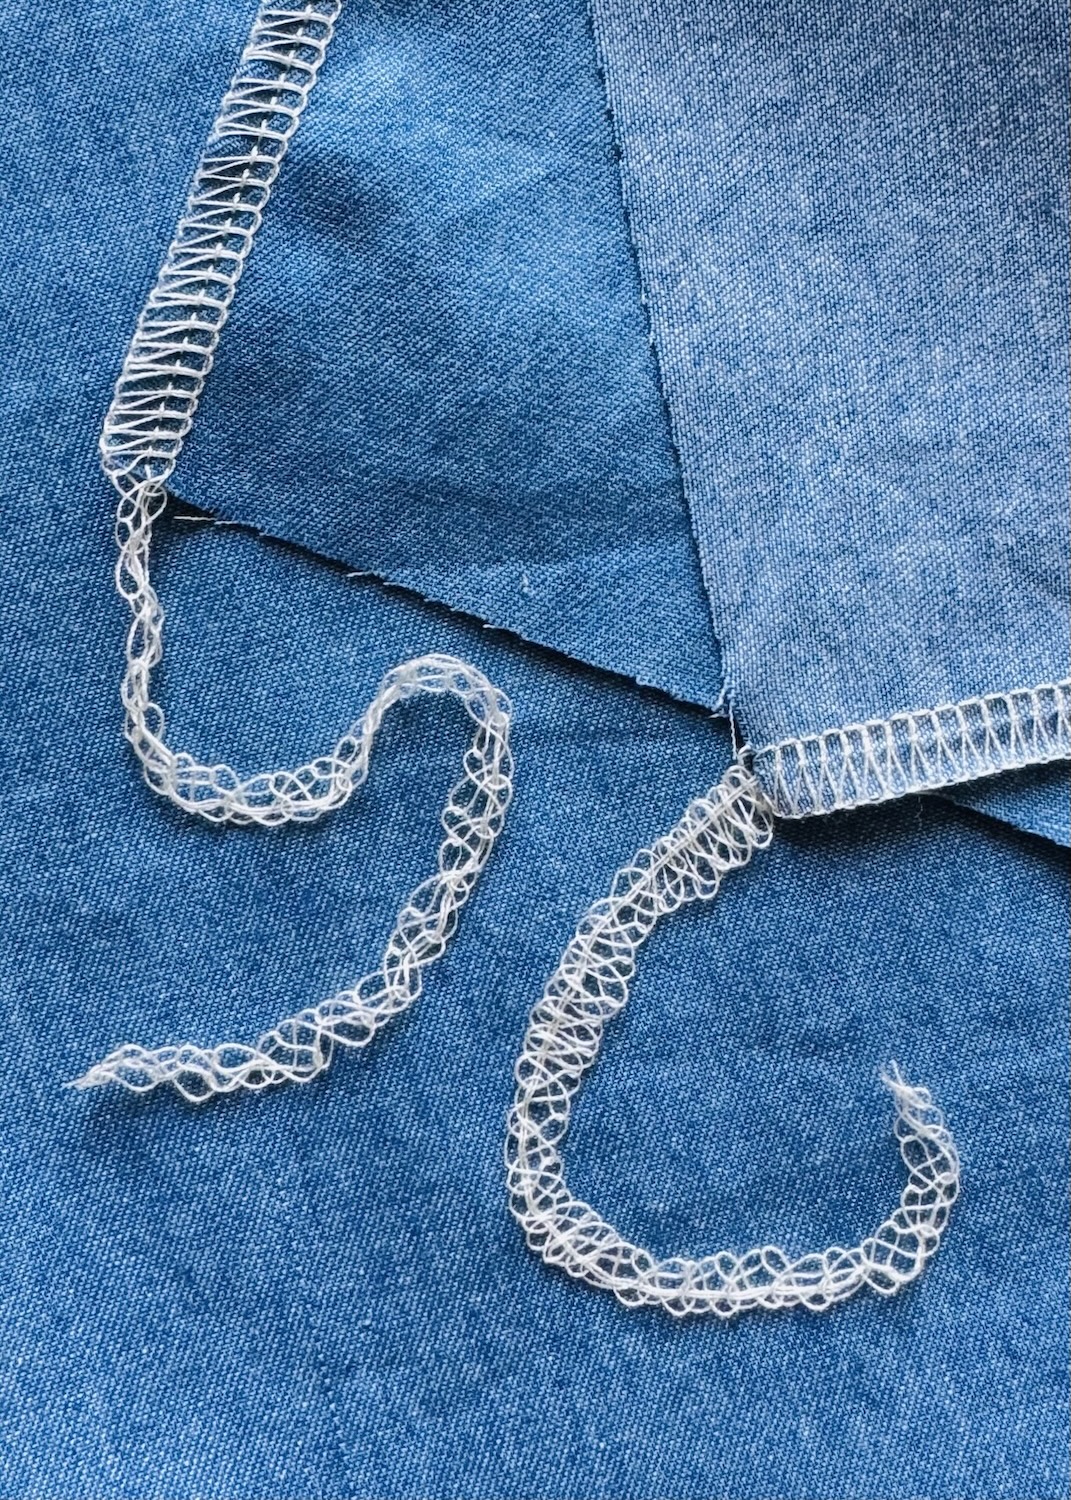
When I say thread tail, I am simply referring to the length of thread (looks a bit like a chain) that is left at the start and end of your overlocking.
These thread tails are really handy because they are what allow you to secure the ends of your stitching and prevent things from coming undone.
So how do you make a thread tail?
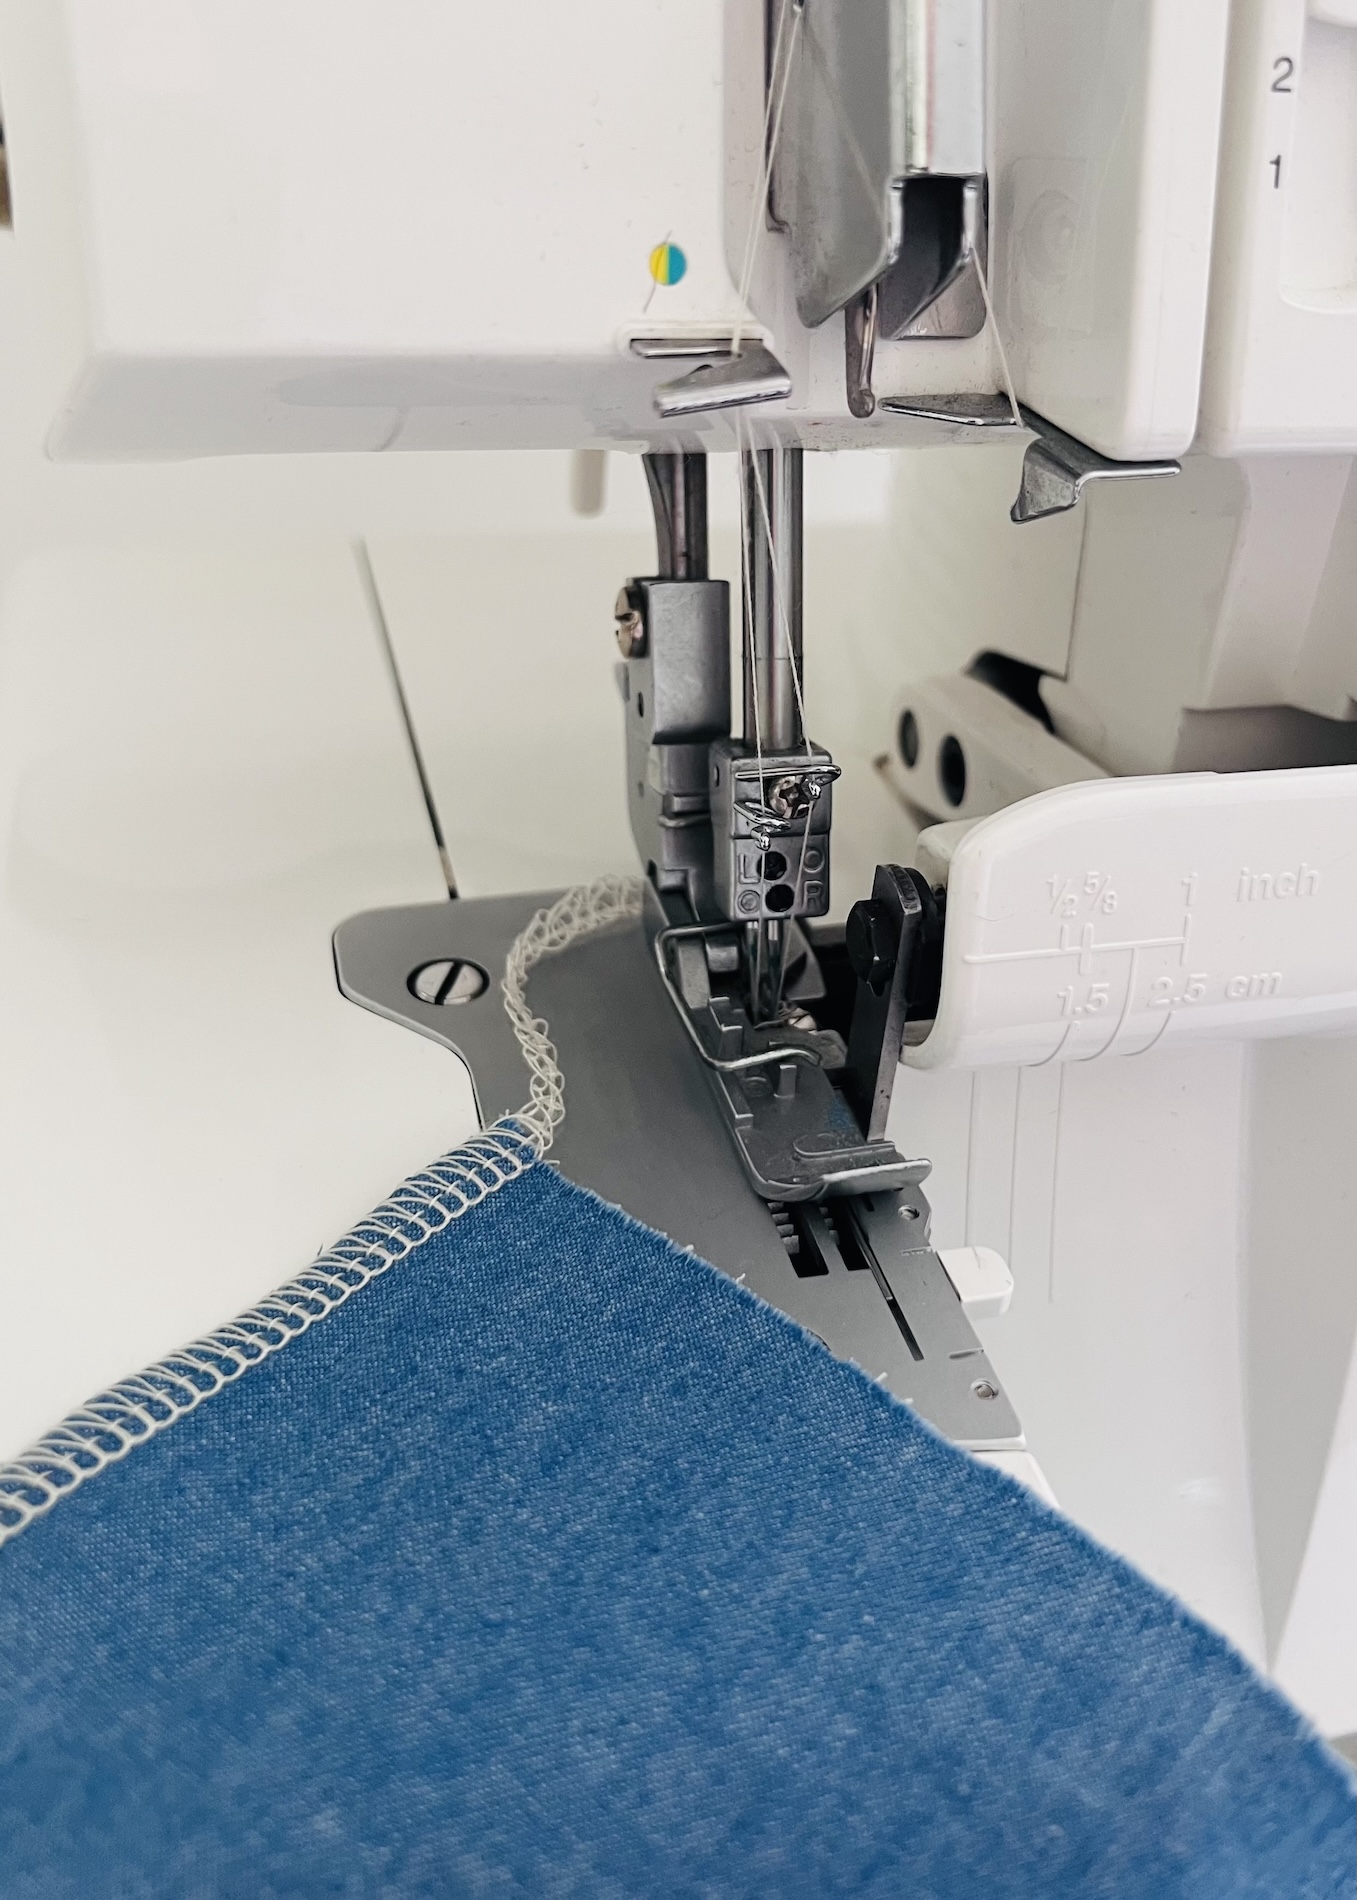
Simple! Just keep sewing beyond the edge of the fabric, gently guiding the fabric under the presser foot and towards the back of the machine. As you do this, the overlocker is essentially sewing nothing (just air). I always aim to sew for around 10cm so you have a long enough tail to finish and secure.
 Here are five simple methods for finishing your overlocker thread tails.
Method 1: Overlocking over the thread tail
This method is my favourite as it is quick, it doesn’t matter how long your tail is, and it is secure. However, unfortunately it isn’t always possible.
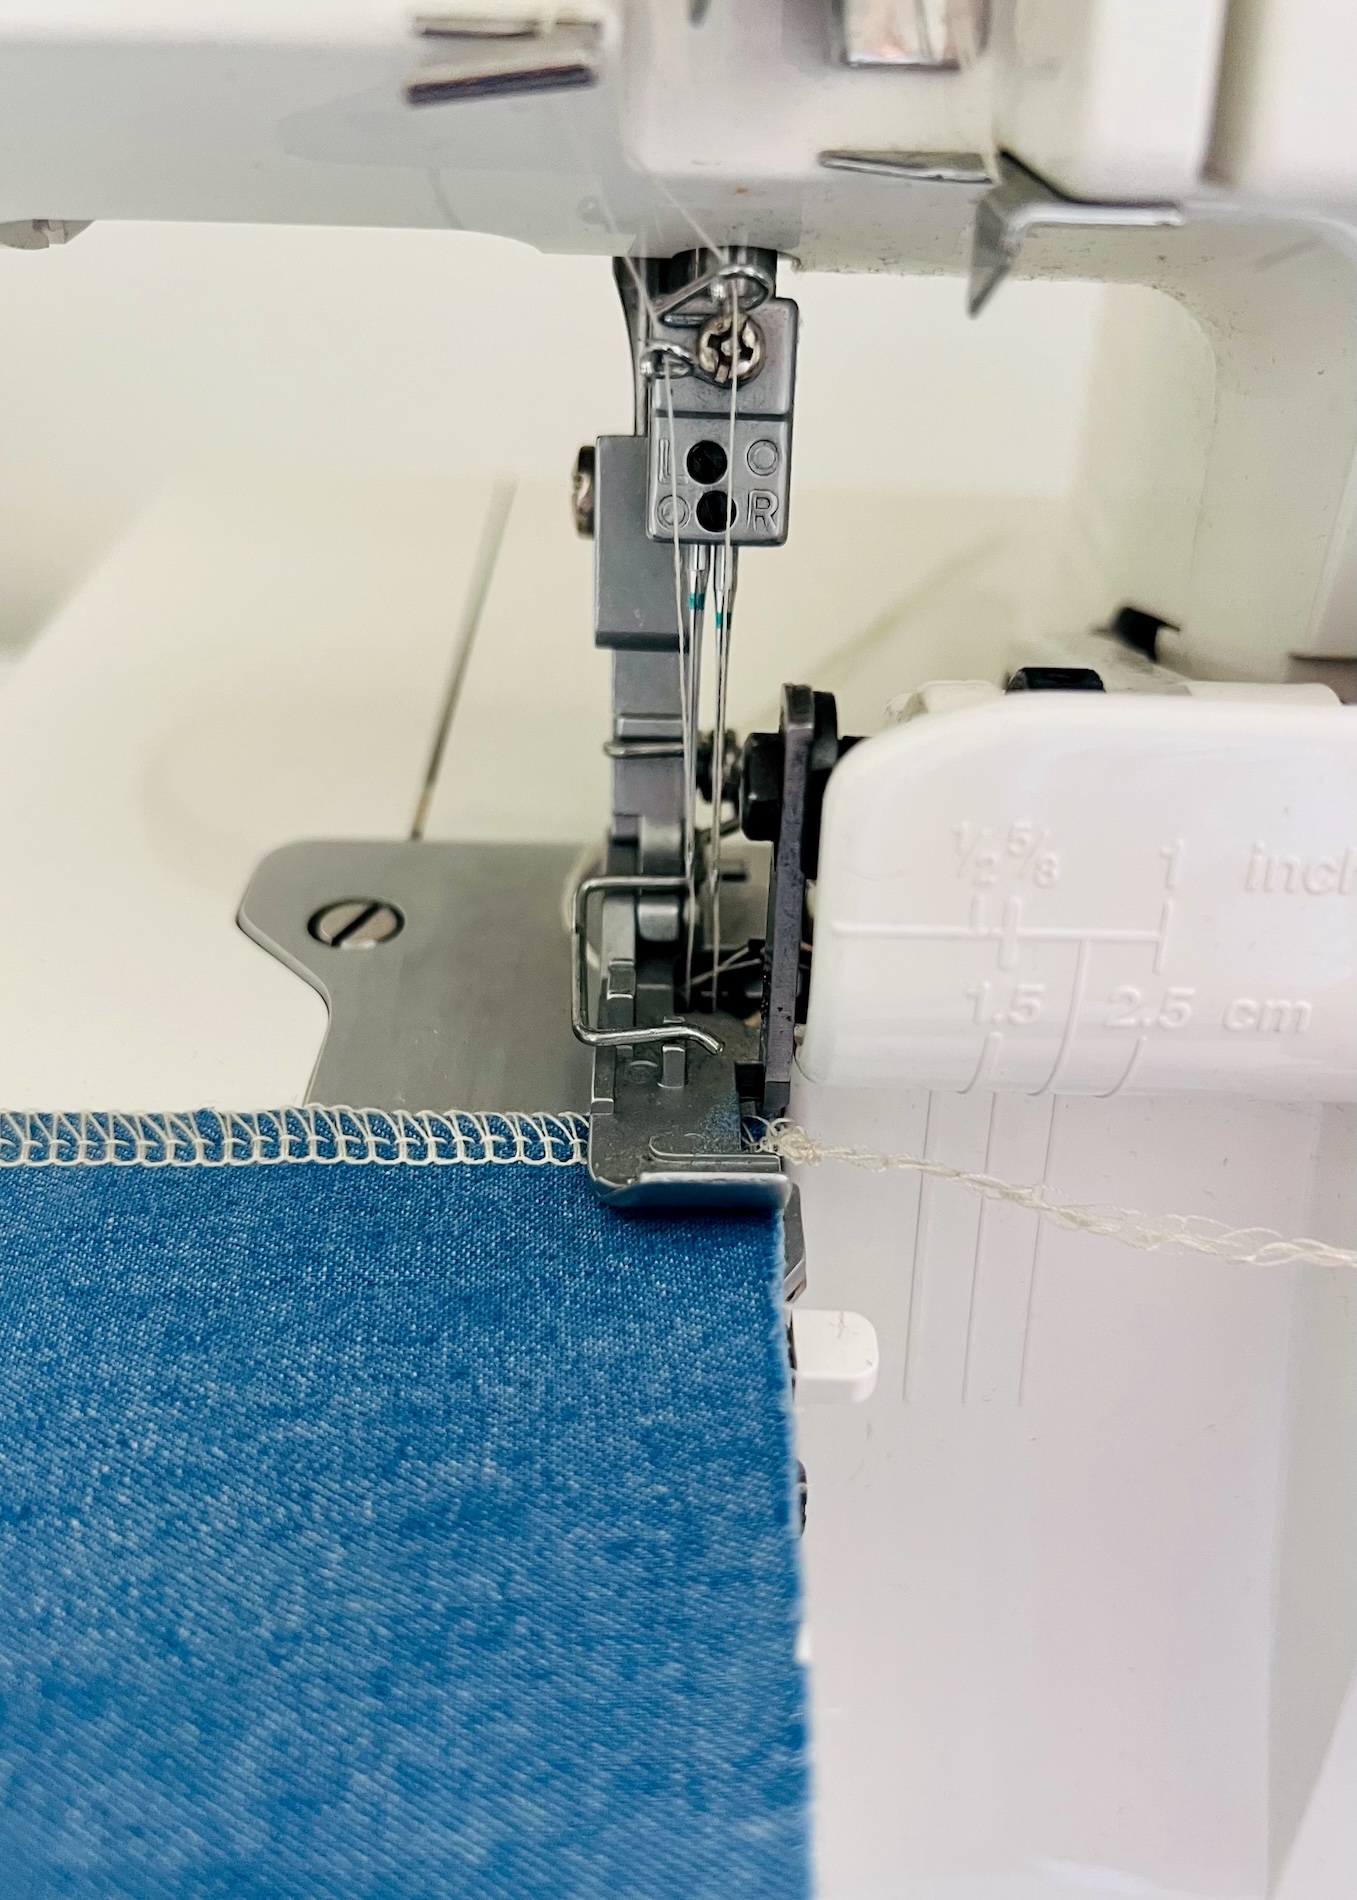
It involves using your next row of overlocking to trim and secure the thread tail from the previous seam. You are essentially “running over” the thread tail.
A good example to explain this is securing and trimming the inner leg seam thread tail when you overlock the crotch seam or hem.
This approach is really efficient and creates a clean finish, but it relies on having another intersecting edge to overlock. If the edge is the final one, you can use one of the following methods to secure the thread tail.
Method 2: Tie off the thread tails
This method couldn’t be simpler and it is probably the one I opt for the most if I can’t use the first method. It just involves securing the stitching by tying off the thread tail. While it is quick and easy, it is best reserved for lower stress or more hidden areas as it can come undone.
To do this:
1. Create a thread tail of at least 5cm, giving you enough length to tie a knot.
Option 1: Knotting the chain
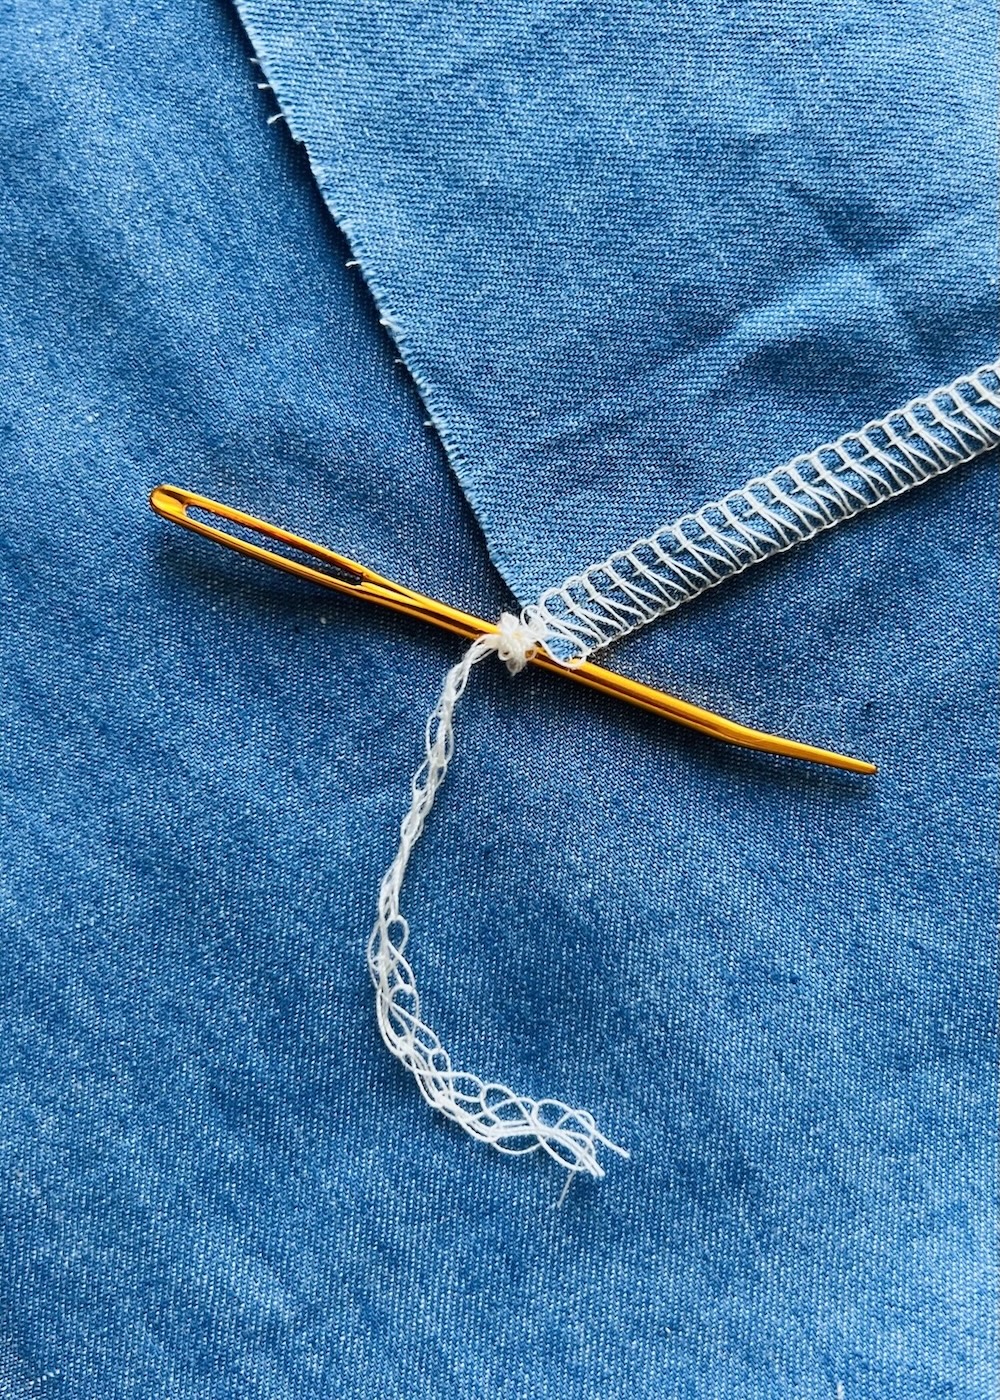
2. Keep the thread tail as a chain.
3. Form a loop and tie a small overhand knot close to the edge of the fabric. Inserting a needle or pin into the loop before tightening can help position the knot neatly against the fabric edge.
4. Pull the thread tail snug to secure.
5. Trim the excess.
Option 2: Separating the threads
2. Gently run your fingers over the thread tail to begin to unravel the chain. Then separate the remaining chain into individual strands by undoing the loops with a quick-unpick or pin, or simply your fingers.
3. Tie the threads together as a whole similar to the above option, or in pairs using a double knot. For example, you might tie the two needle threads together and then the two looper threads together. It doesn’t really matter.
4. Trim the excess thread.
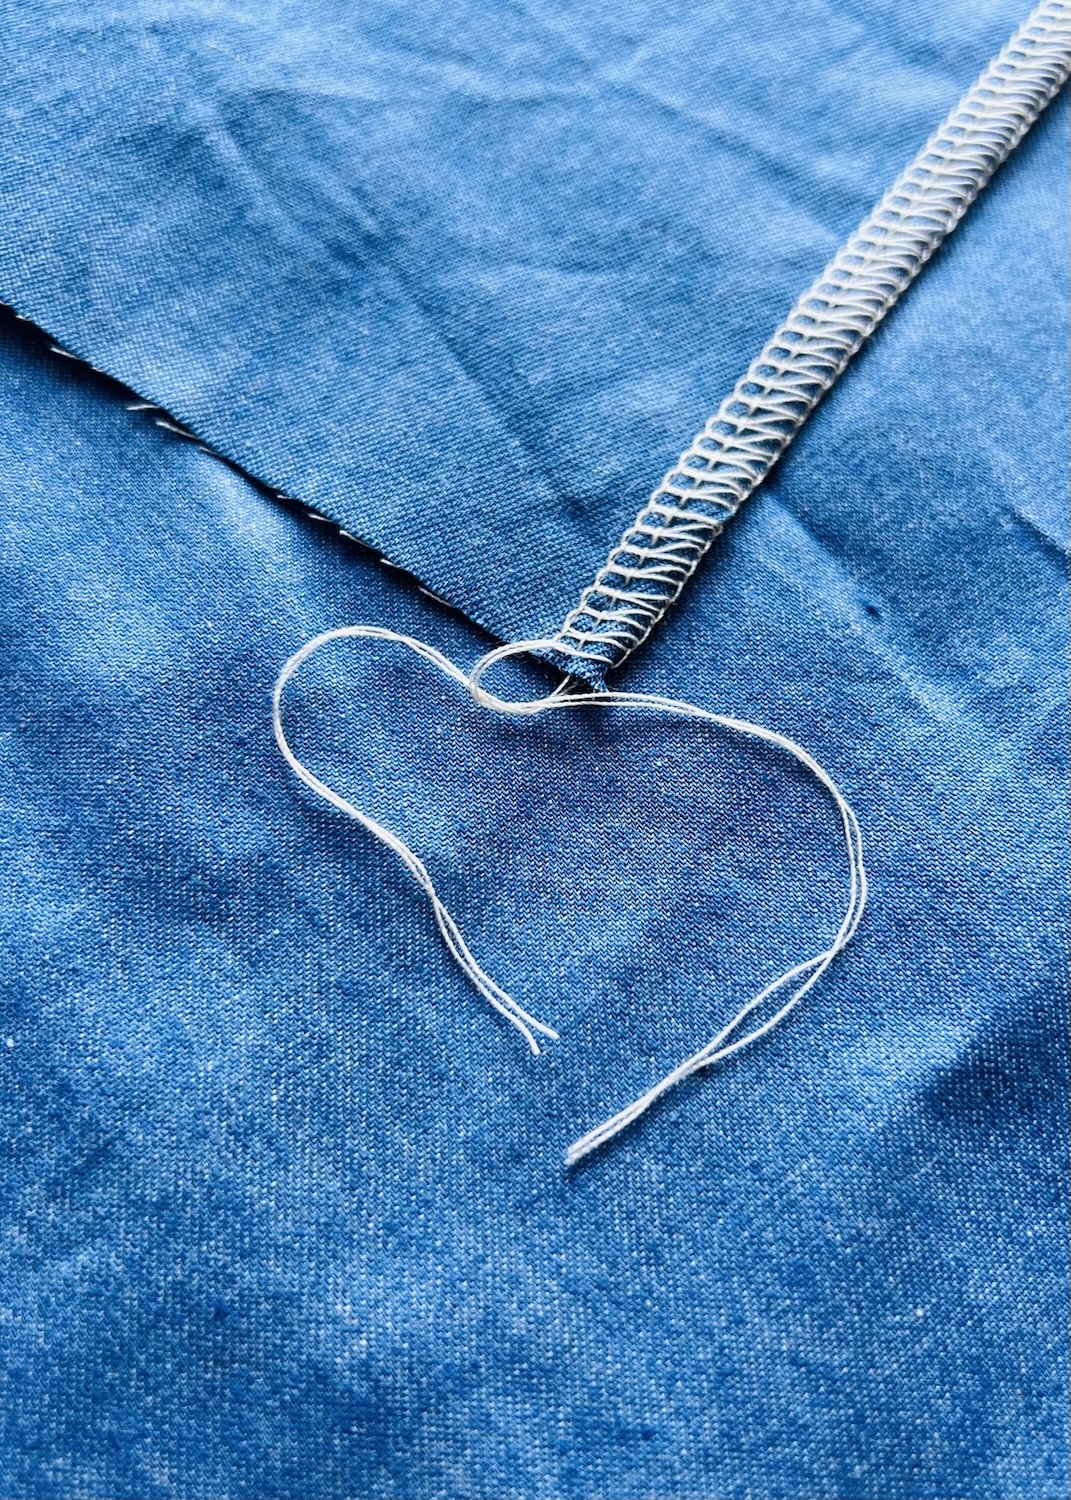 Method 3: Weaving the thread tail back through the overlocking
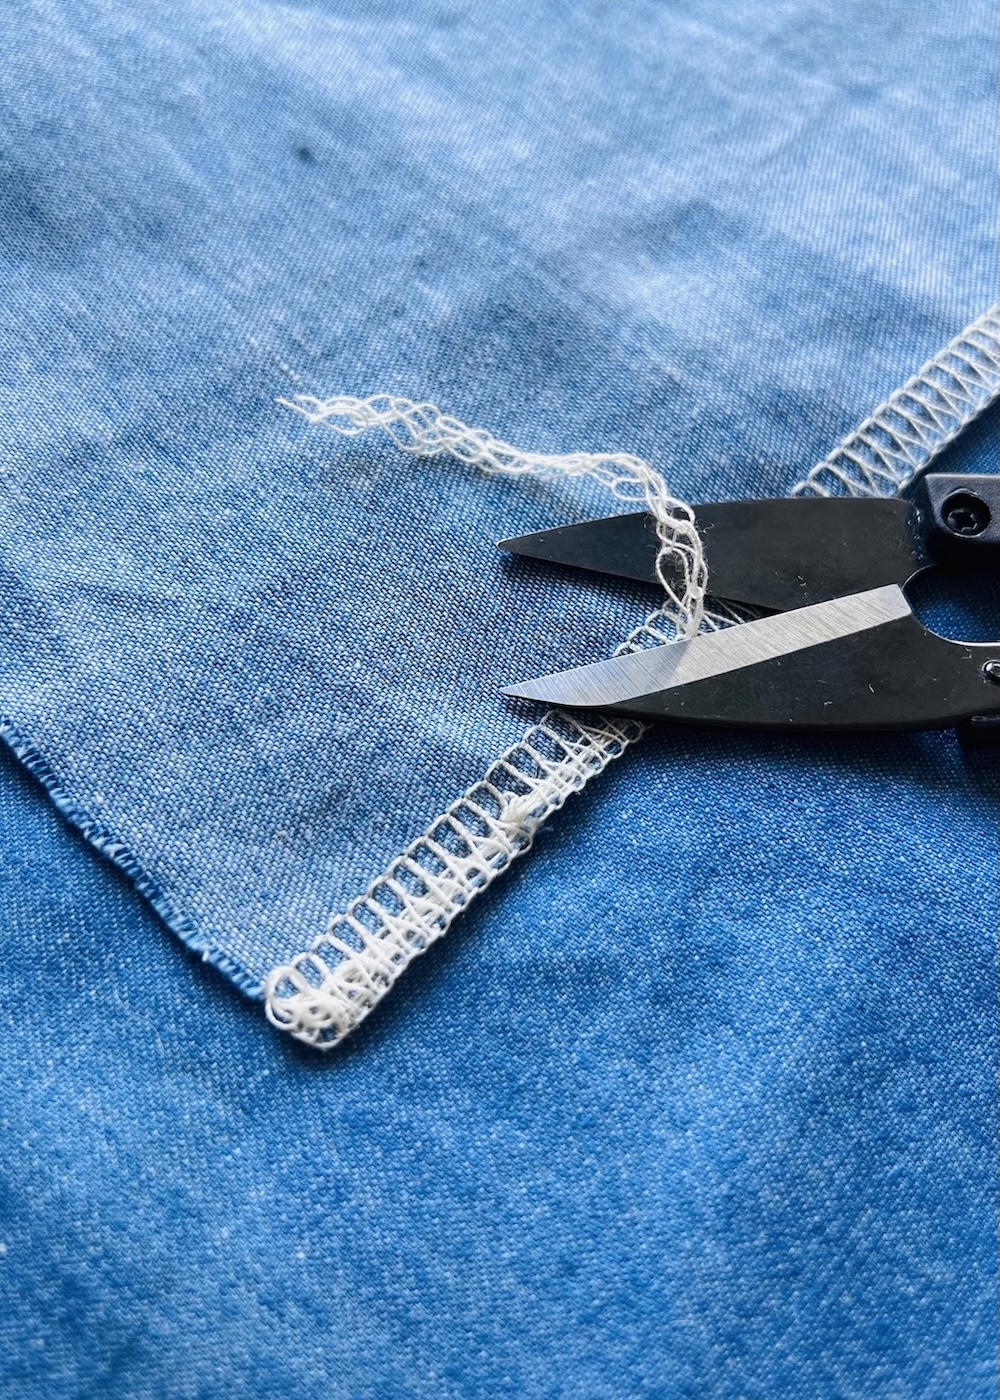
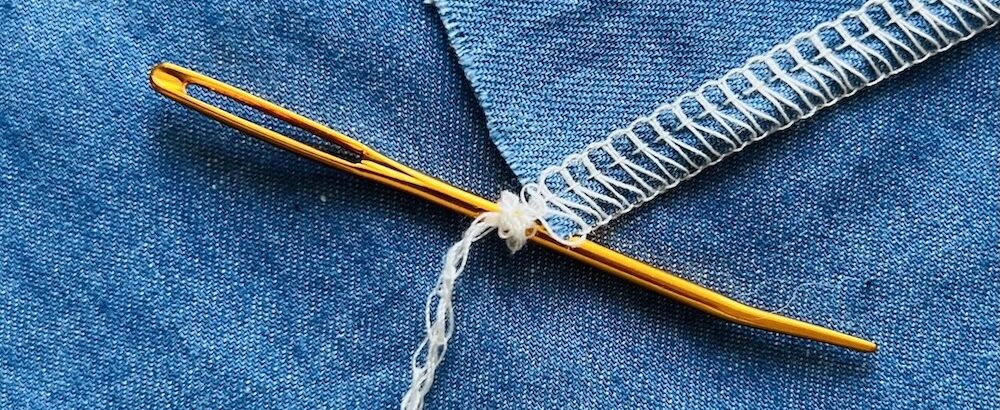
This method uses a large-eye needle (such as a tapestry or darning needle as I have used) to weave the thread tail back through the stitching. This method can add a little bulk, but it is a neat and secure finish, especially for more visible seams.
This method involves:
1. Creating a thread tail of around 10cm, giving you enough of a tail to thread through the needle and weave back through the stitching.
2. Threading the needle with the thread tail. I recommend leaving the tail as a chain for ease of threading, but you could seperate the threads if you wish.
3. Weaving the needle back through the overlocker stitching for a few centimetres. I suggest doing this on the wrong side to make it less visible.
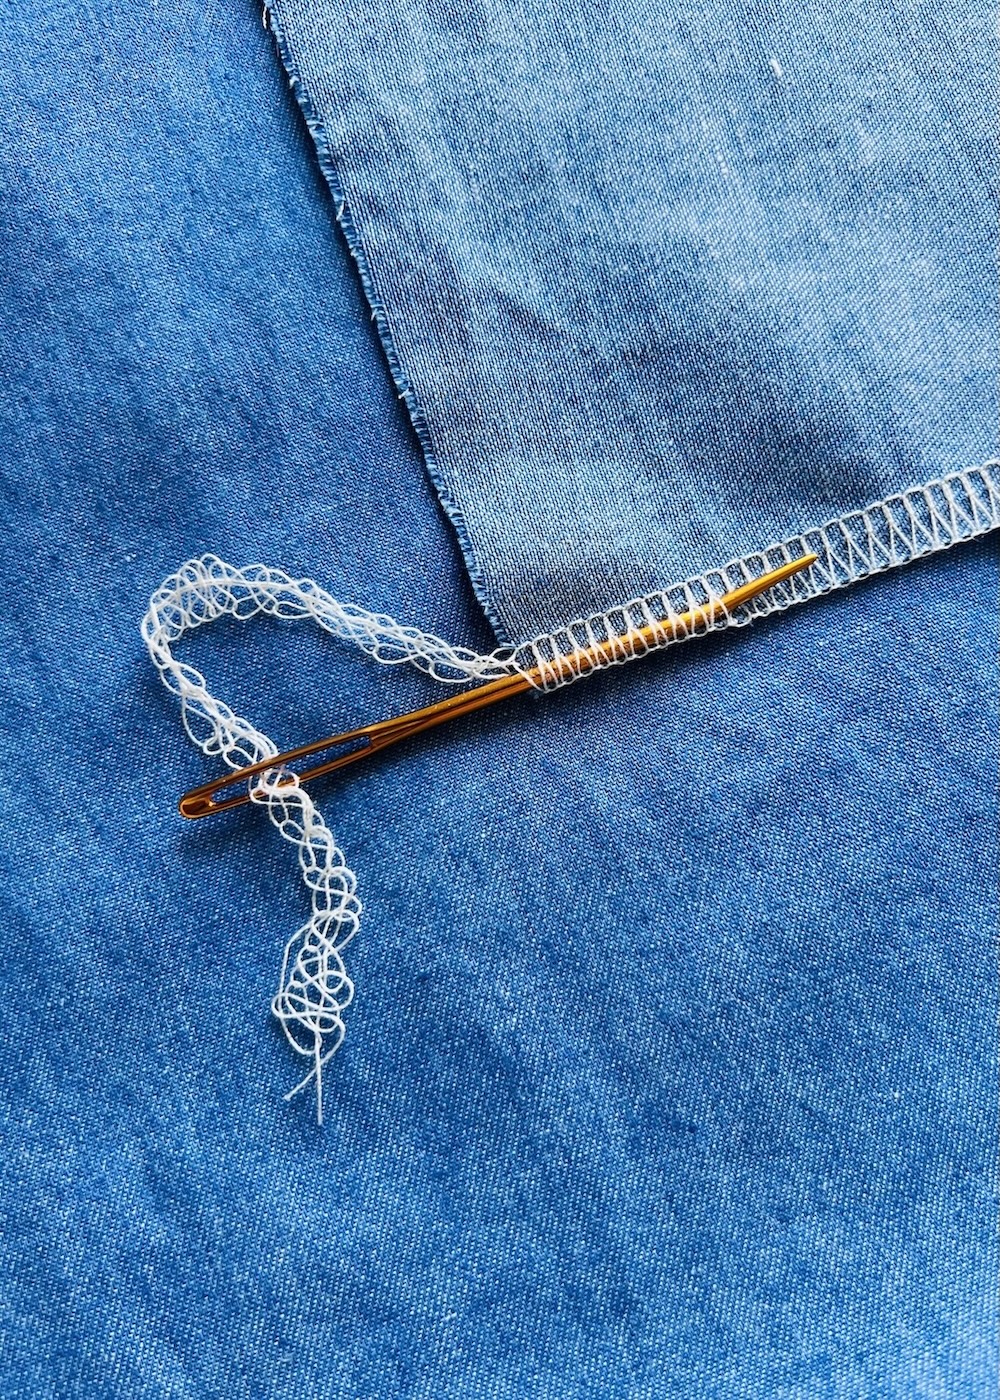
4. Pulling the needle out and winding the thread around a couple of stitches and tying a knot to secure it.
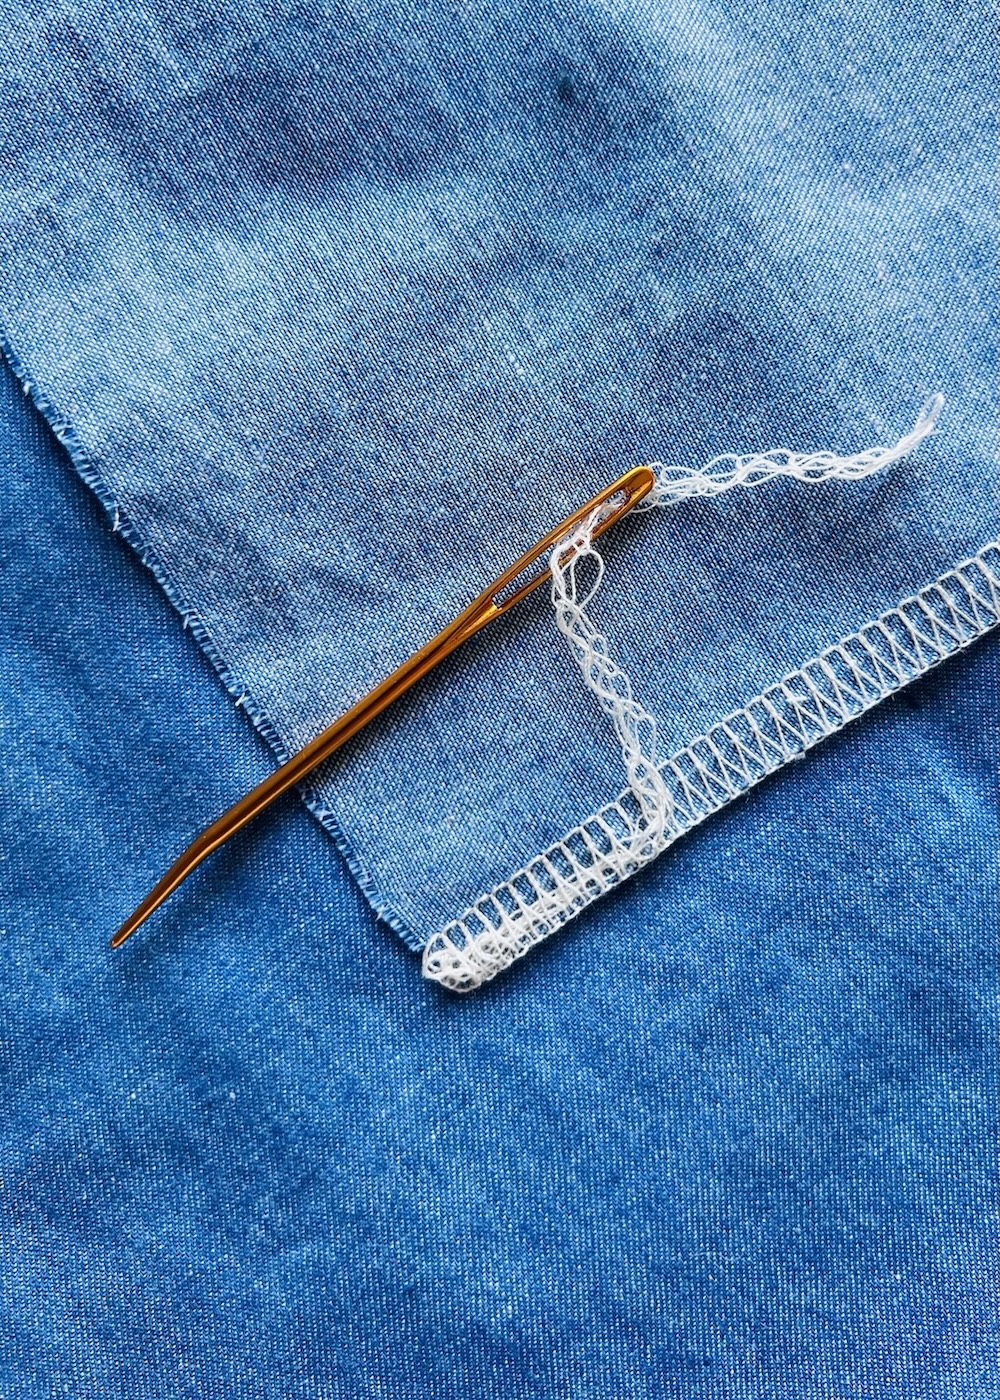
5. Repeating step 3 for another couple of centimetres.
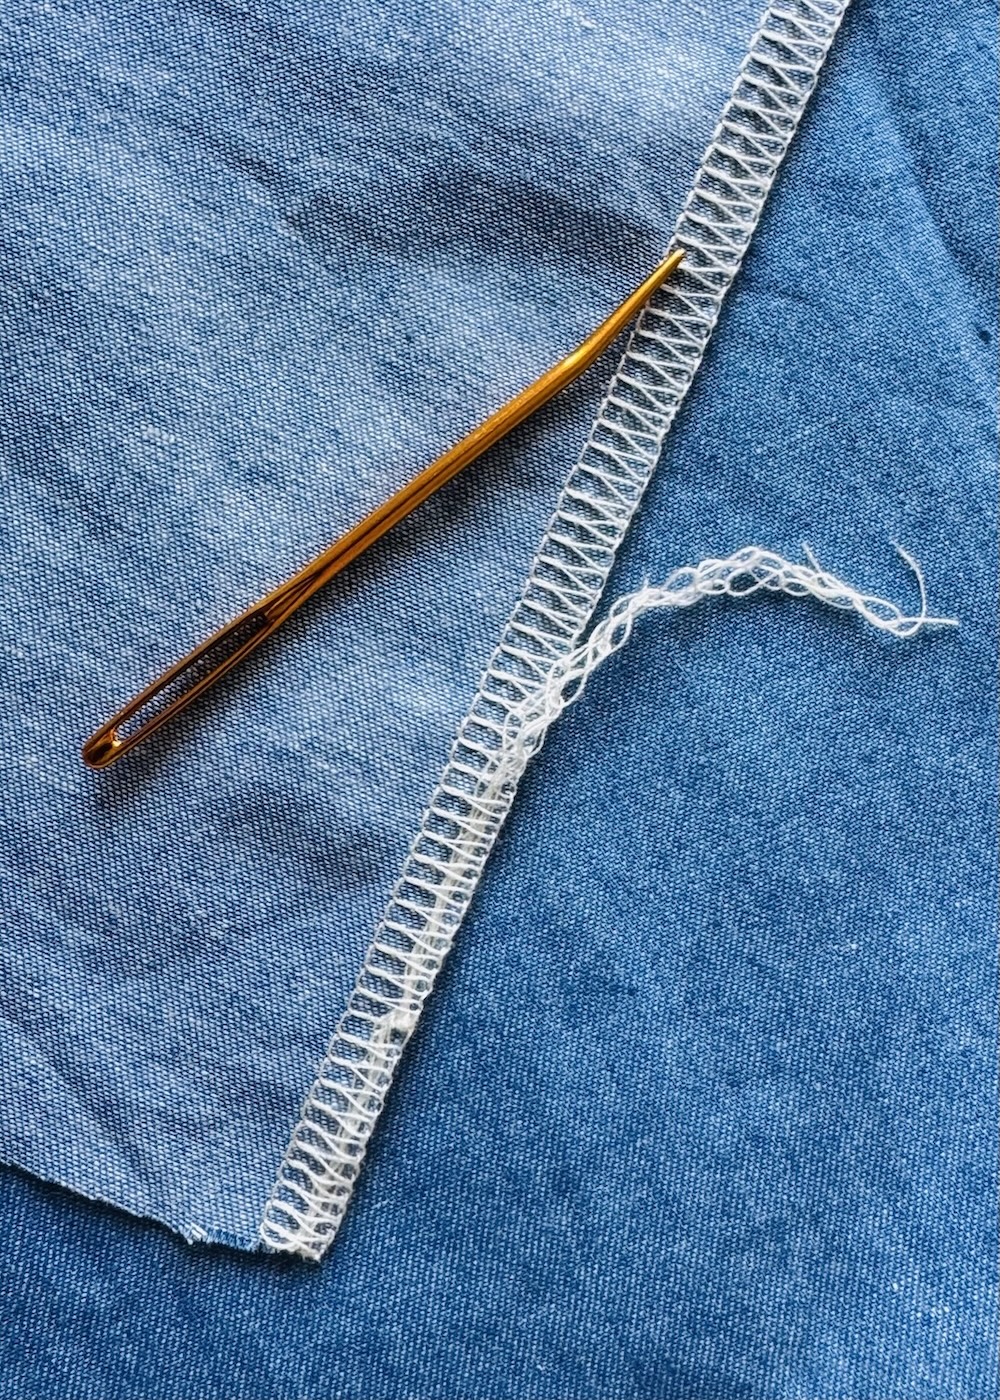
6. Pulling the needle back out, and trimming the ends.
Method 4: Flipping the fabric and re-overlocking
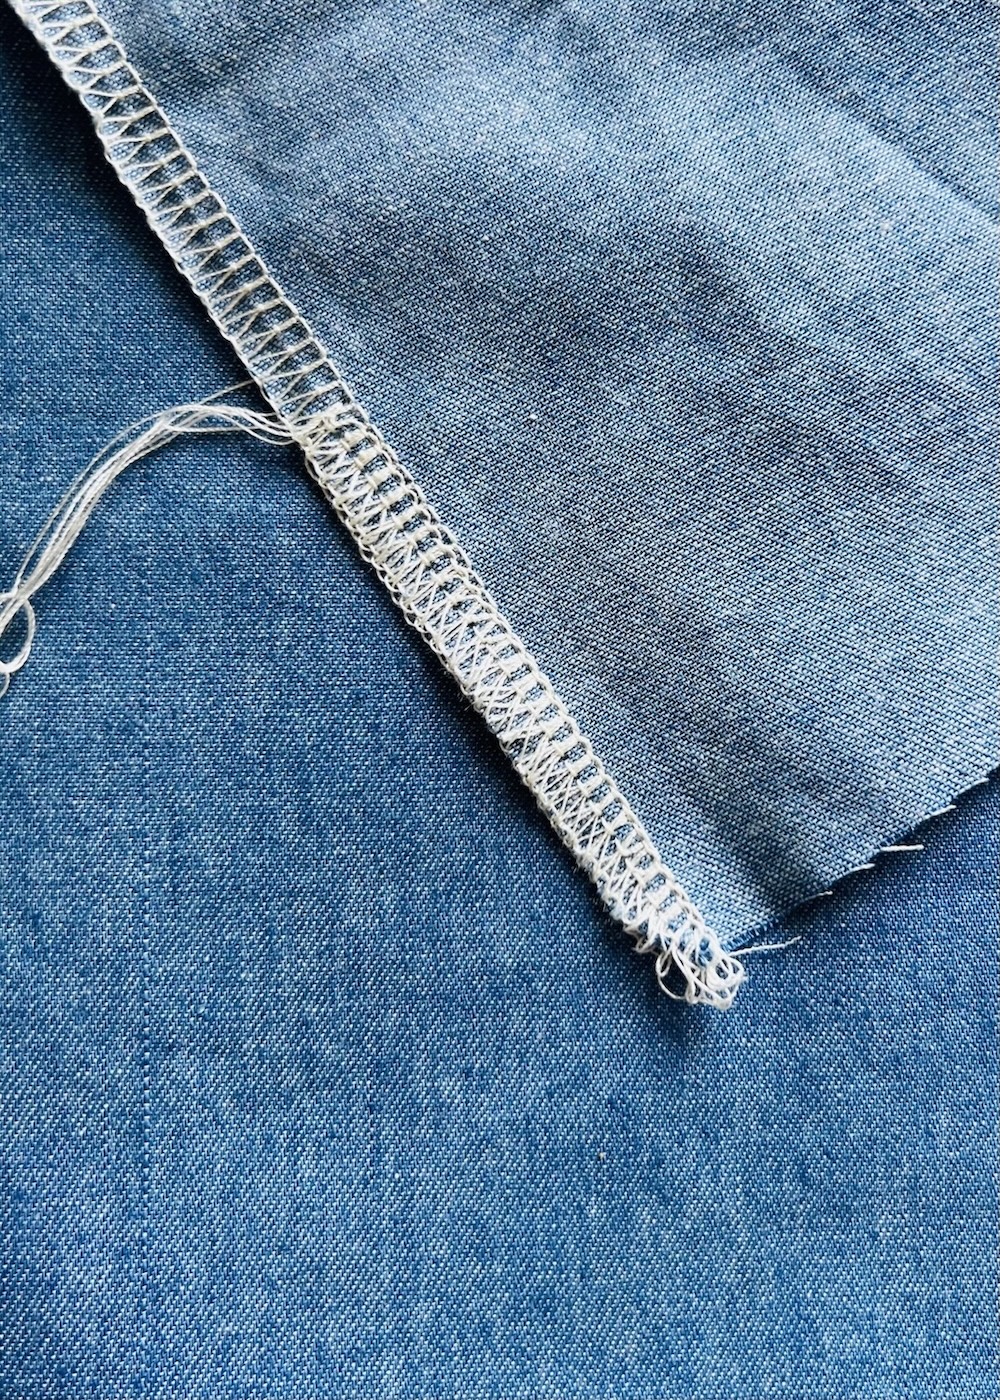
When done correctly this method is super neat and secure. However, it does take a bit of practice to not only get comfortable with the steps, but also to avoid accidentally snipping the original overlocker stitching with the machine’s cutting blade.
To do this method:
1. Overlock the edge as normal, stopping just one stitch beyond the fabric edge. I tend to use the hand wheel to help with this.
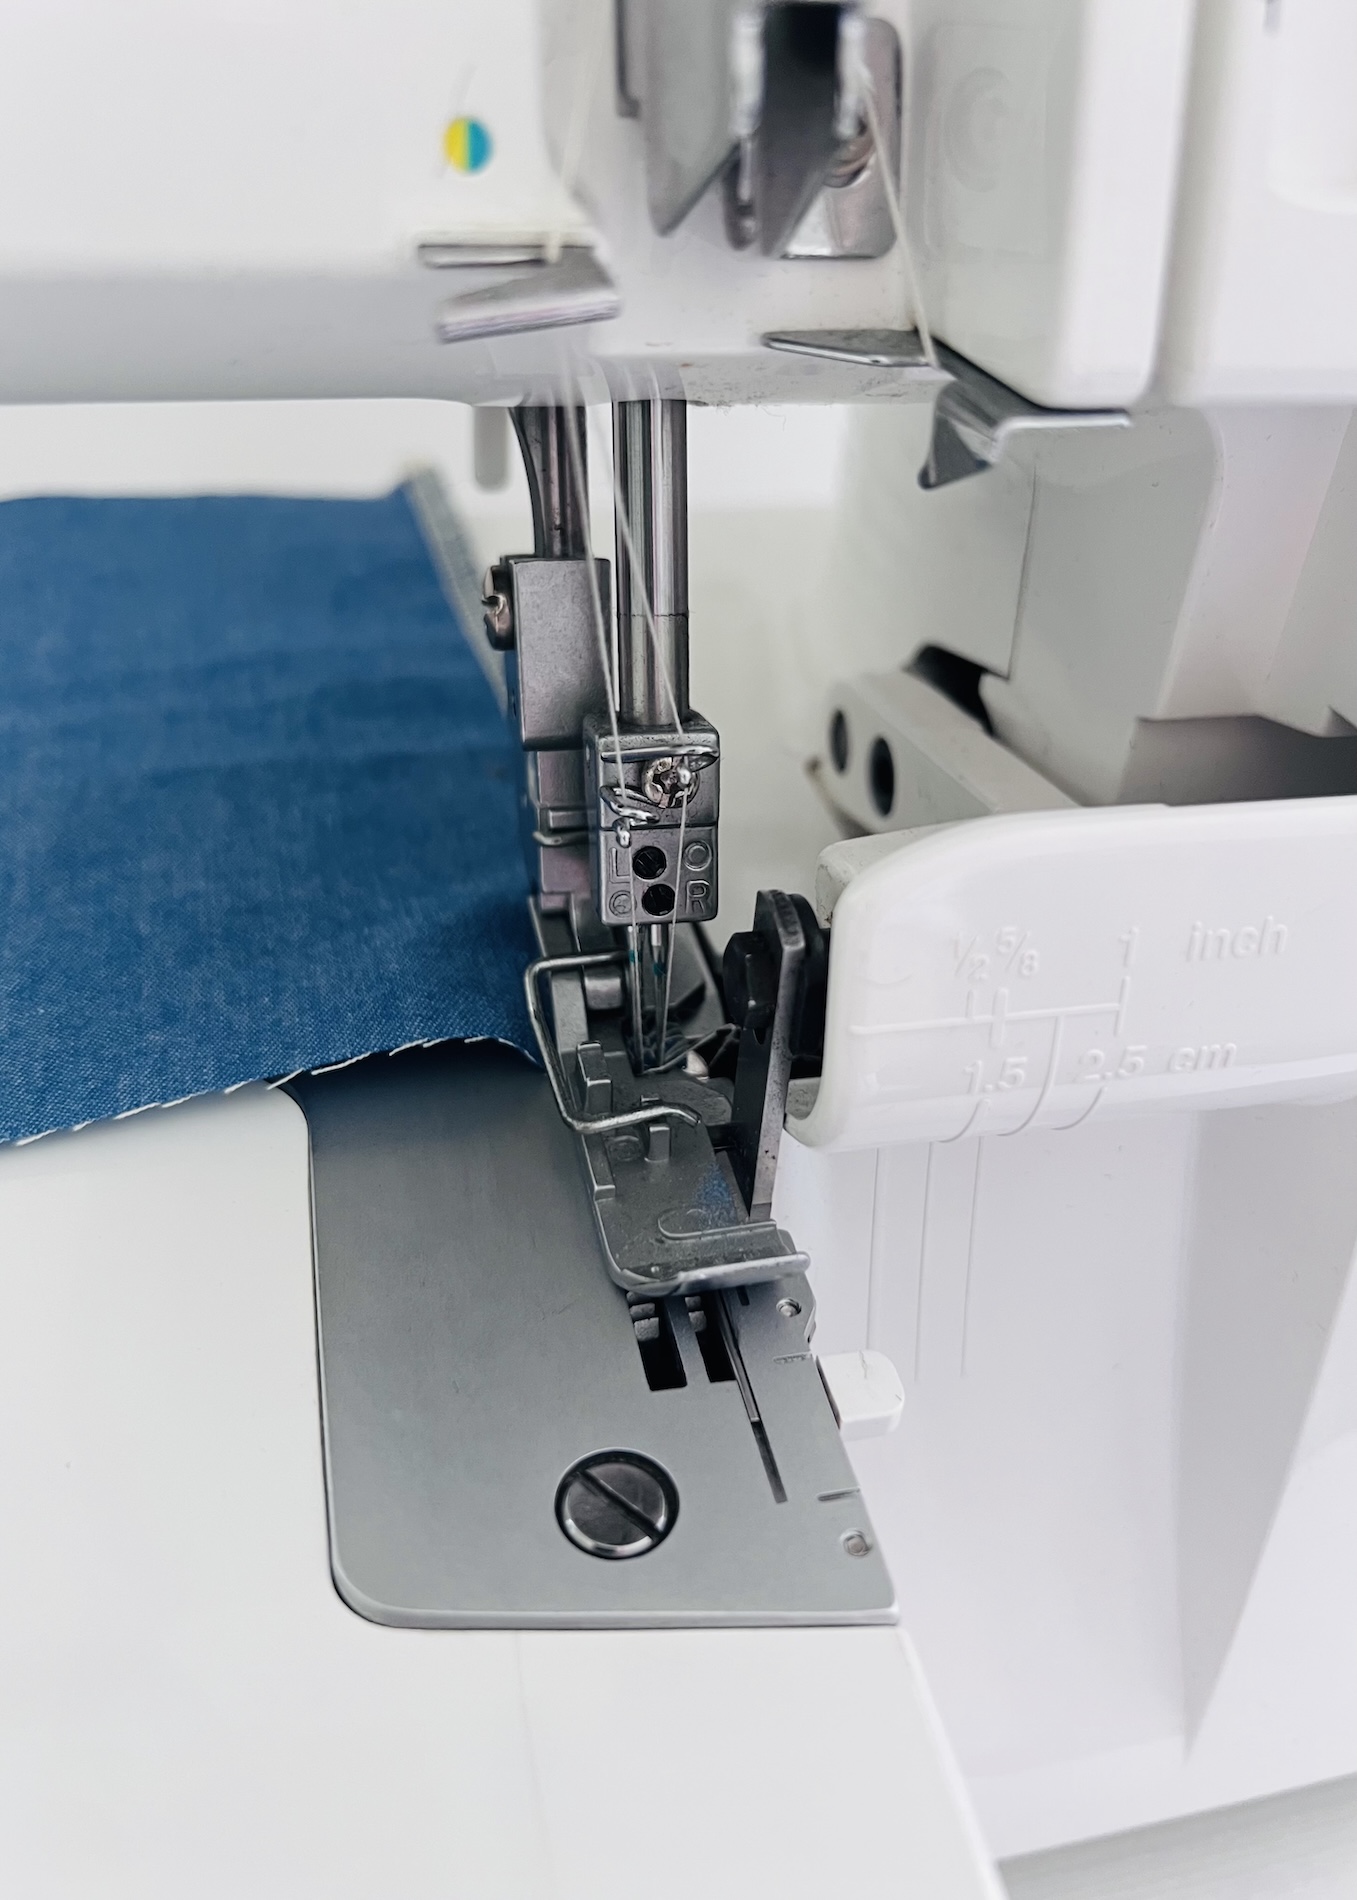
2. Leave the needles down in the fabric, and raise the presser foot. You should be able to almost swivel the fabric from side to side.
3. Flip the fabric over towards you so that the stitched edge is back under the presser foot but facing the opposite direction. If the fabric is bunching or simply not sitting flat under the foot at this point, you can try using a pair of tweezers or a pin to help flatten the fabric. I would suggest you turn your machine off at this point, or ensure your foot is off the foot pedal to avoid any accidents.
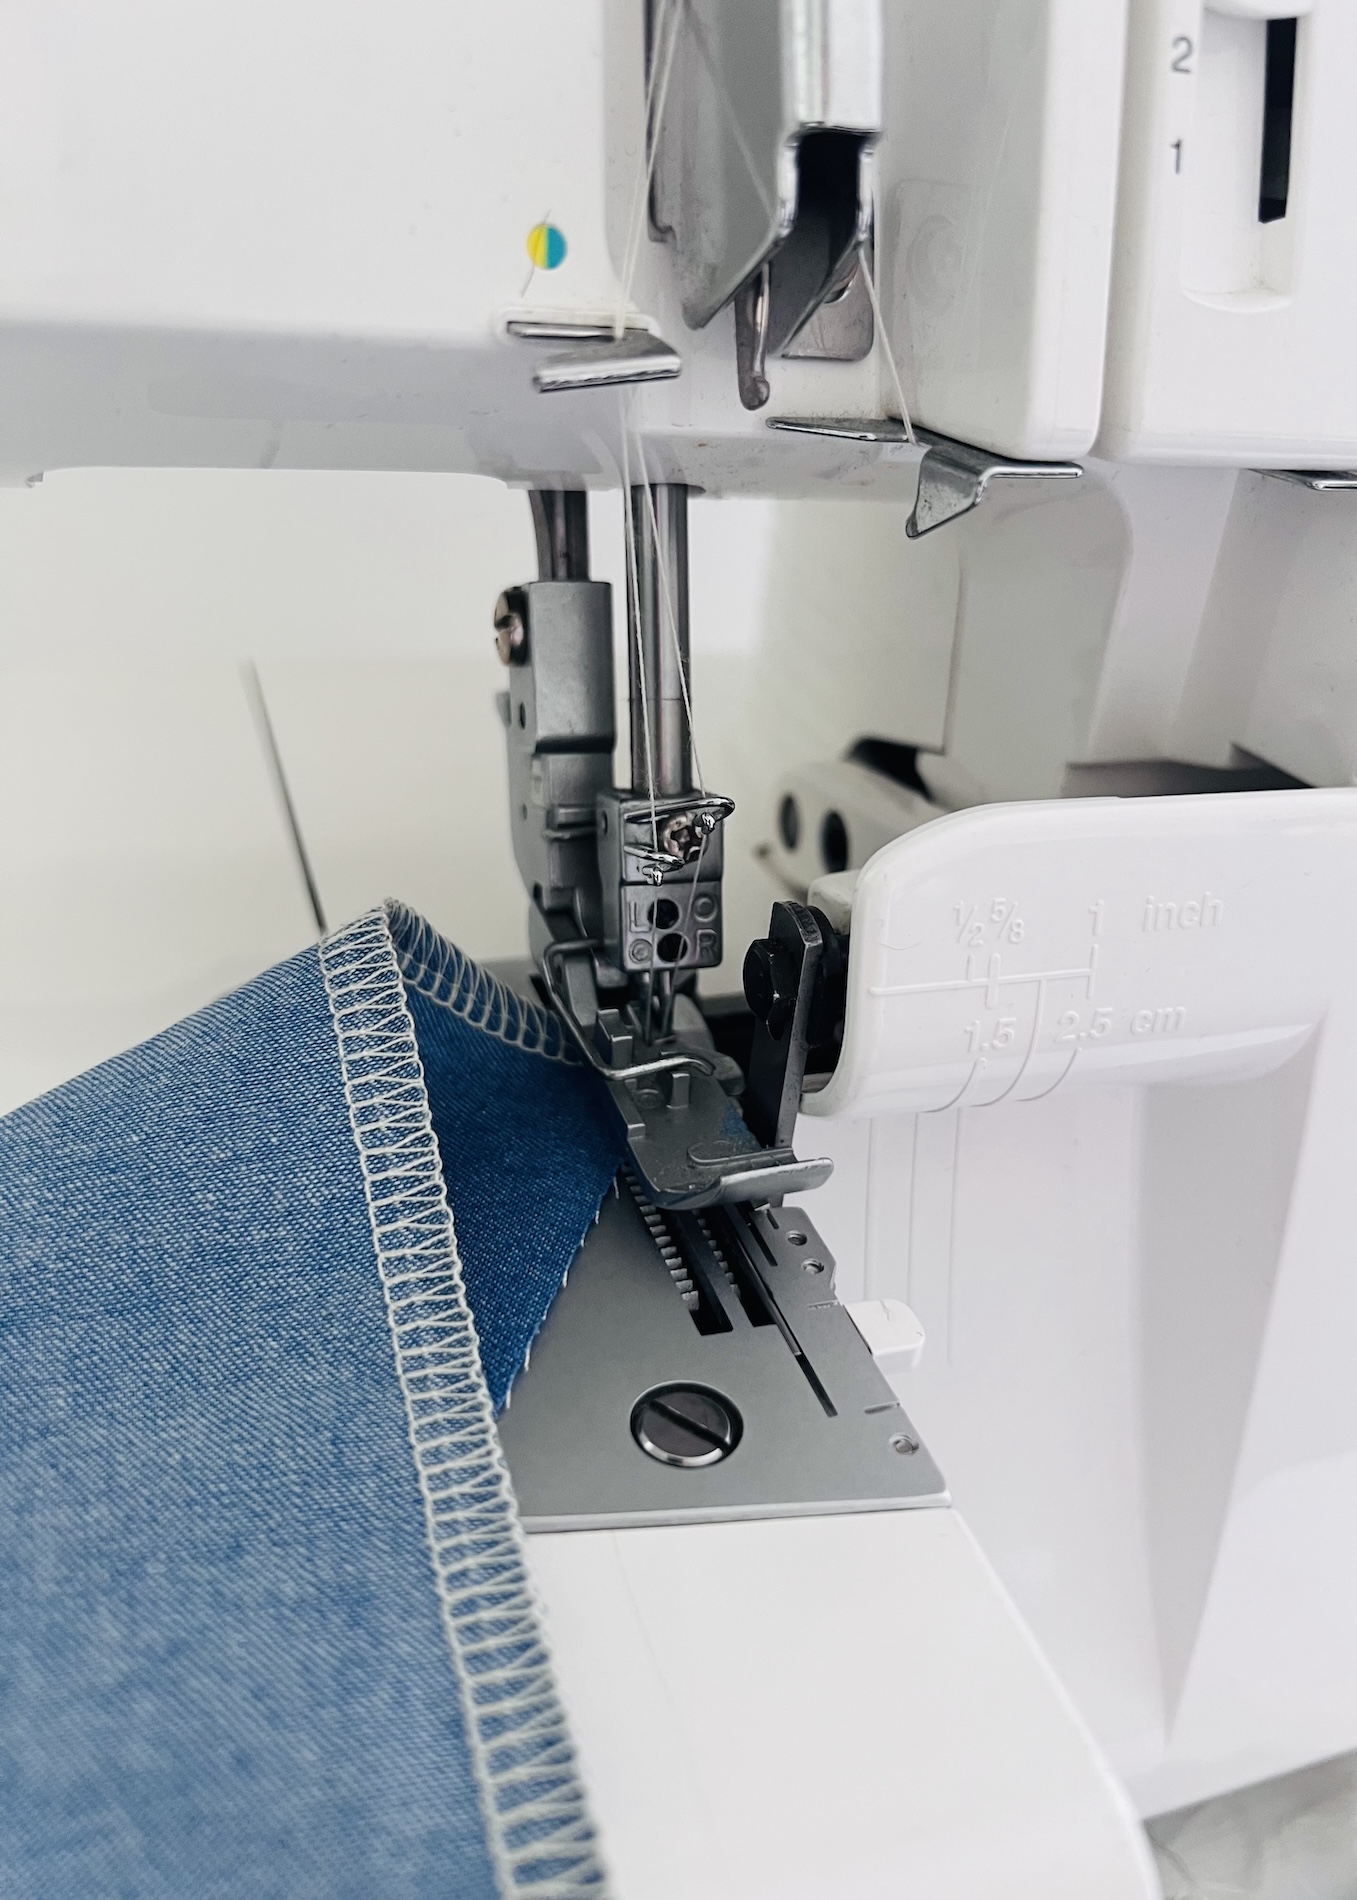
4. Lower the presser foot once you are happy with the positioning, and overlock as normal for a few centimetres. In doing so, you will essentially be sewing back over the original row of overlocking stitching but from the wrong side. Guide the fabric slightly to the left if needed, to ensure that the cutting blade doesn’t trim the existing looper threads.
5. Trim the excess thread.
Method 5: Using fray stop
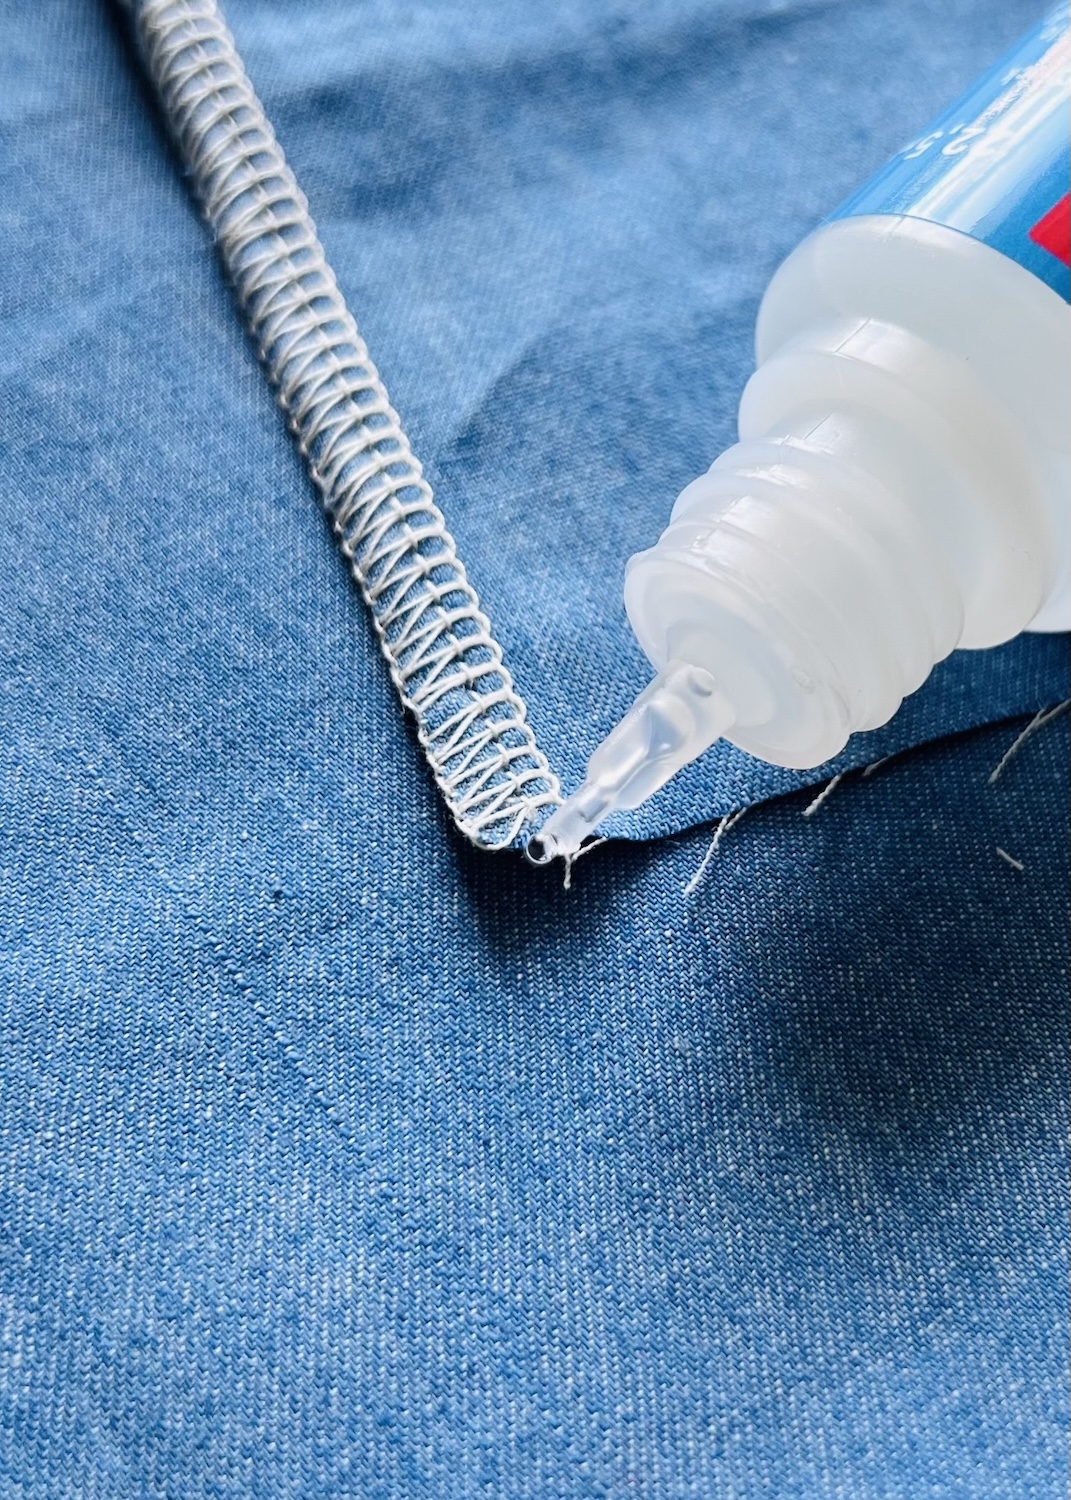
Fray stop (or fray check) kind of reminds me of clear nail polish. While I personally don’t use it to secure my overlocker thread tails, it is an effective method, especially when used in combination with one of the above methods.
To use, simply trim the thread tail close to the fabric edge and apply a small amount of fray stop to the ends. Allow it to dry completely.
If using it on its own, I recommend reserving it for areas that won’t be under a lot of stress or that are more hidden to avoid it coming undone over time.
I would also recommend testing this on a scrap of fabric to ensure it doesn’t leave a mark.
While you can’t simply backstitch with an overlocker, securing the ends isn’t difficult, it just takes a little more time. The best method often depends on your preferences, its position in the garment, how visible the seam is, and the fabric.





3 Comments
Thanks for all the very helpful ideas. On the towels, I really like fringing one or both ends. It isn’t hard and is so easy.
My favorite is weaving the thread back through, although I have on occasion used the other methods.
Hi Lynn, thanks for sharing! Weaving the thread back through is definitely a reliable favourite.