


Noa Linen Shirt Tutorial and Pattern


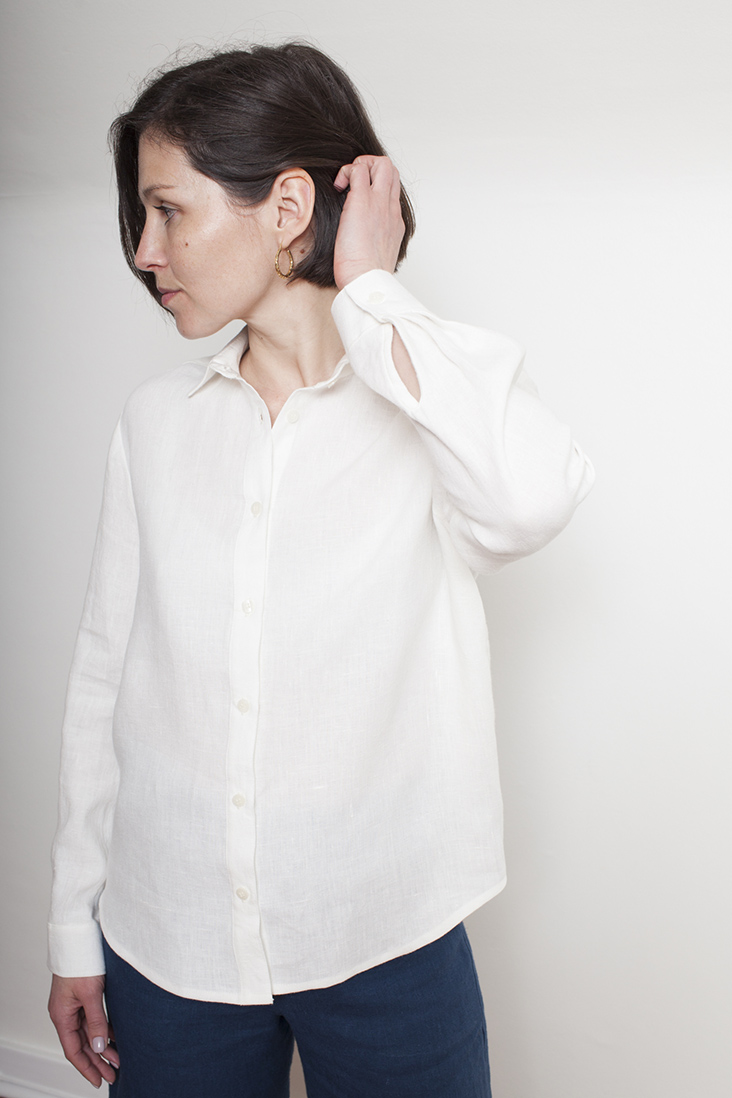
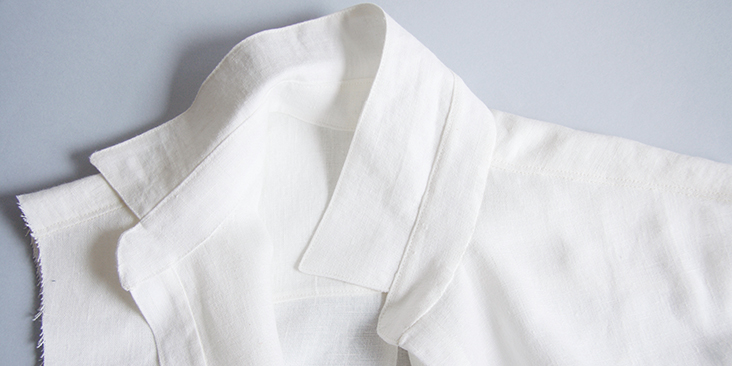
Channeling the minimalist spirit of a modern woman, the Noa shirt is a modern classic. This simple shirt combines relaxed silhouette with classic tailored styling, like a point collar, sleeve cuffs and a back yoke. One of the most foundational and versatile pieces of any wardrobe, it can be dressed up or down so easily and pairs really well with just about anything. Made out of our finest linen, it’ll get softer and softer with every wash.
Sharpen your sewing skills and make a worthwhile addition to your handmade wardrobe!
Materials

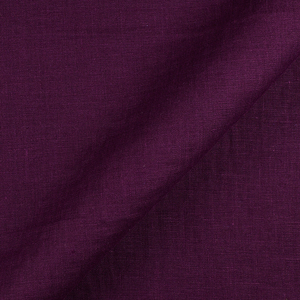
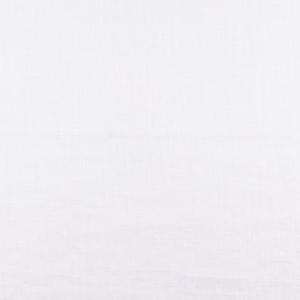
2 yards of IL019 BLEACHED FS Signature Finish Medium Weight Linen
Matching sewing thread, medium weight fusible interfacing, 9 buttons (3/8”-1/2” wide)
Tools

Scissors, pins, ruler, seam ripper, fabric marker, chalk, buttonhole foot, measure tape, needle, sewing machine
Difficulty
Intermediate
Sewing Time
5-6 hours
Pattern
You can access the multi-sized printable PDF pattern by following this link HERE. All seam allowances are included. The model is wearing size US size 6.
Remember to transfer all the notches onto your fabric.
Steps
Note: Prewash your fabric and tumble dry it until it is still slightly moist, dry at room temperature. Iron the fabric so it is easier to work with.
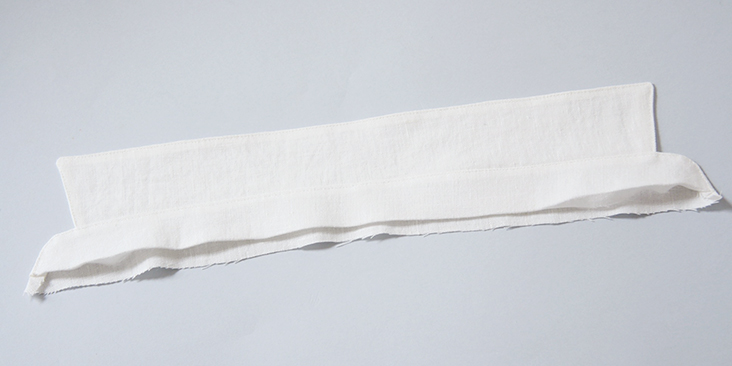
As always, we start with the button bands.
1. Follow our detailed tutorial and complete the button bands. Remember that in women’s shirts the buttonholes are placed on the right and the buttons – on the left. So make sure that the left side of your front pattern (the wider one) is folded twice towards the wrong side, whereas the right side is finished with a separate button band.
Remember to interface the button bands for more structure and support. Do not sew the buttonholes and attach the buttons yet, we’ll do it at the very end of our tutorial.
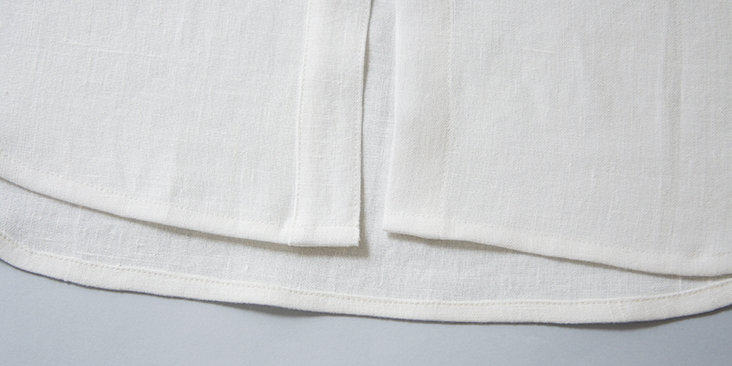
2. Usually, the bottom hem is the last thing you sew. But since this shirt’s hem is rather curvy, we’ll sew the hem now and assemble the shoulder/side seams after. Finish the bottom hem using the great technique for curvy edges explained in this tutorial.
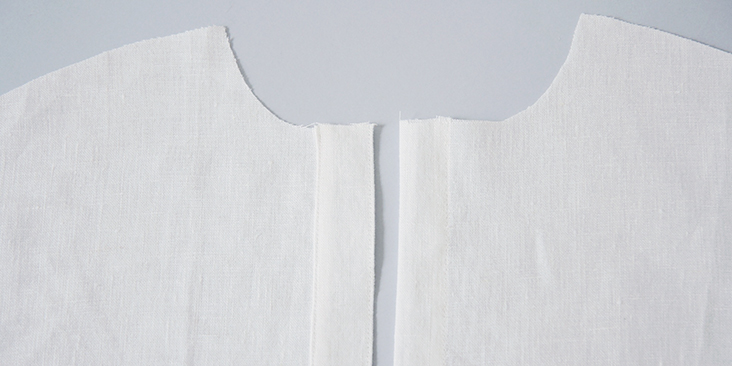
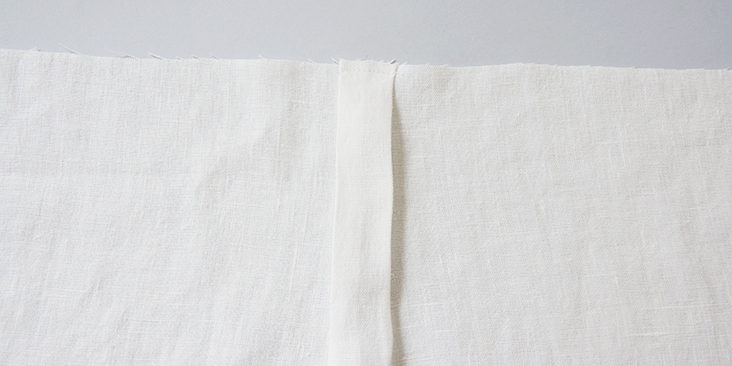
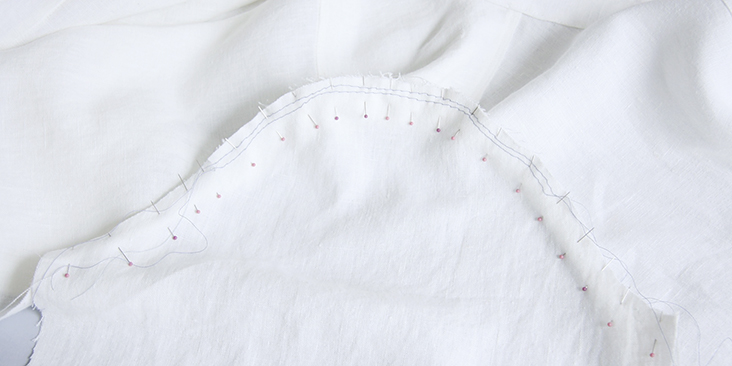
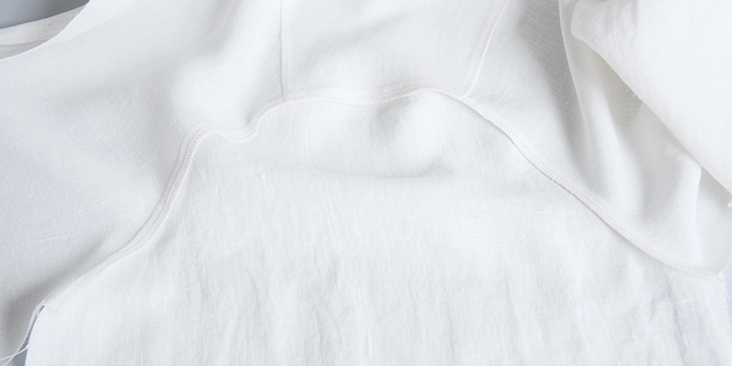
Now that the preparation is over, we can finally assemble the back and the fronts of the shirt with a yoke.
3. You’ll find the detailed instructions on how to attach the yoke in this step-by-step tutorial.
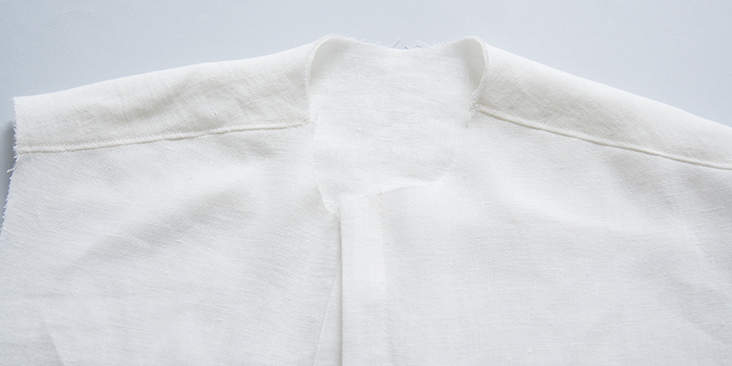
First create a 1″-wide box pleat:
Then attach the yokes to the lower back:
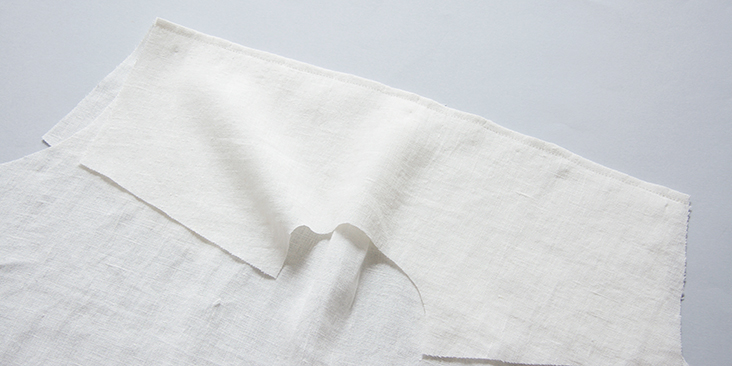
Run a line of topstitching 1/8″ from the seamline:
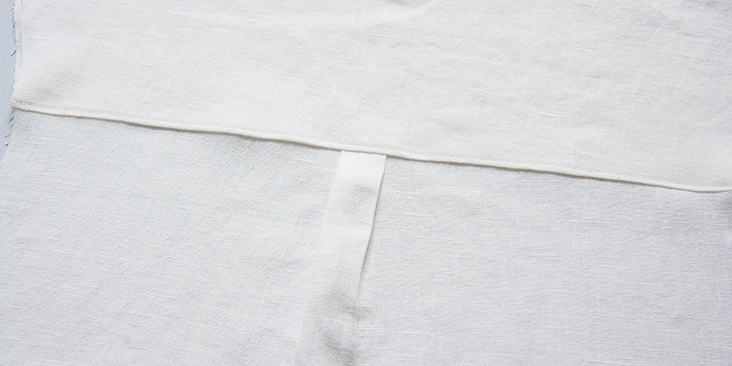
Attach the shoulder seams:

4. Time to sew and attach the collar. You’ll find the step-by-step instructions in this tutorial.
Next up – the sleeves!
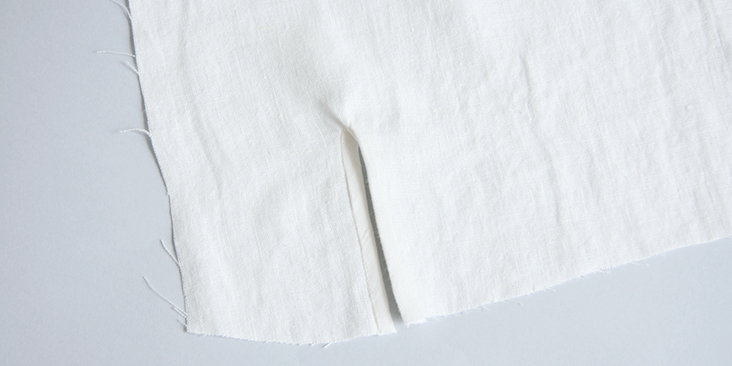
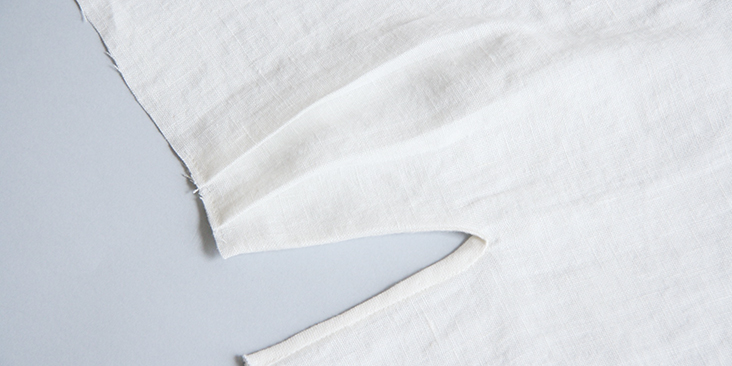
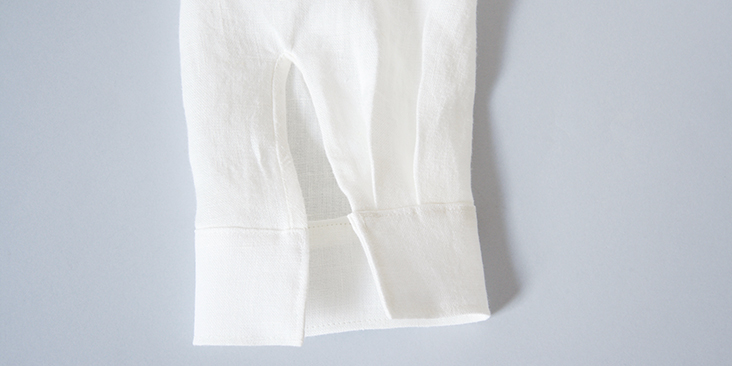
5. Before attaching the sleeves, sew the continuous bound plackets on each sleeve following this tutorial (steps 1-11).
6. Working from the right side, form two pleats at cuff edge following the arrows printed on the pattern. Baste the pleats and the front placket (turned to the underside) in place 1/4″ from the edge.
7. The sleeves have a little bit of ease around the shoulder area. Run two lines of basting stitches on each sleeve cap, 1/2″ away from back armhole notch to 1/2″ from front armhole notch. If you don’t know how to gather, please check our detailed tutorial HERE.
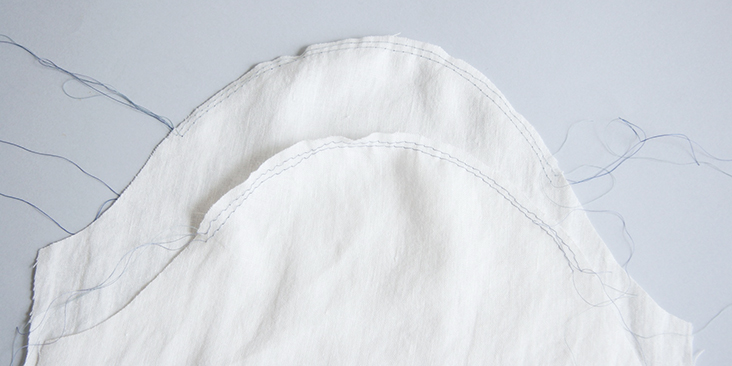
8. Pin sleeves to corresponding armholes right sides together and matching the notches. Pull basting threads to gather sleeve cap ease.
9. Stitch the sleeves to the bodice at a 3/8” (1 cm) seam allowance, remove basting stitches and finish the raw edges with a serger or a zigzag stitch. Press seam allowance towards the sleeve.
10. Pin the side seams and the underarms and stitch right sides together all in one seam. Grade and serge/zigzag the raw edges together. Press the seam allowances towards the back.

11. Following the same tutorial, sew and attach the cuffs to each sleeve.
12. Lastly, sew the buttonholes and attach the buttons. Remember, that the buttonholes are sewn on the right button band and the tower side of the cuff, whereas the buttons – on the left side of the button band and the left side of the cuff.
For the buttonholes, you can follow our detailed tutorial HERE. As for the buttons, check our tutorial HERE for instructions. Overlap the shirt and place a pin into the center of each buttonhole. This is where you’ll need to attach the button.
The number and the spacing are really up to you. If you want your buttons closer, just leave smaller gaps between them. We decided to space our buttons 3” apart.


13. Give your shirt a good last press and you are all done!
A classic piece on its own, this simple white linen shirt also works well as a canvas for any number of cute embellishments. Add a contrasting pocket, colored buttons or even customize it with some hand embroidery.
We love seeing what you make! Don’t forget to share your pictures and tag your creations with #FabricsStoreNoaPattern hashtag.
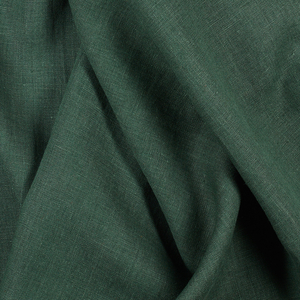
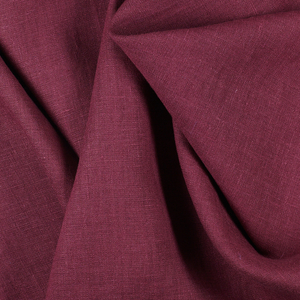
Browse our selection of linen fabrics and find the fabric that inspires you for this project!
Leave a comment
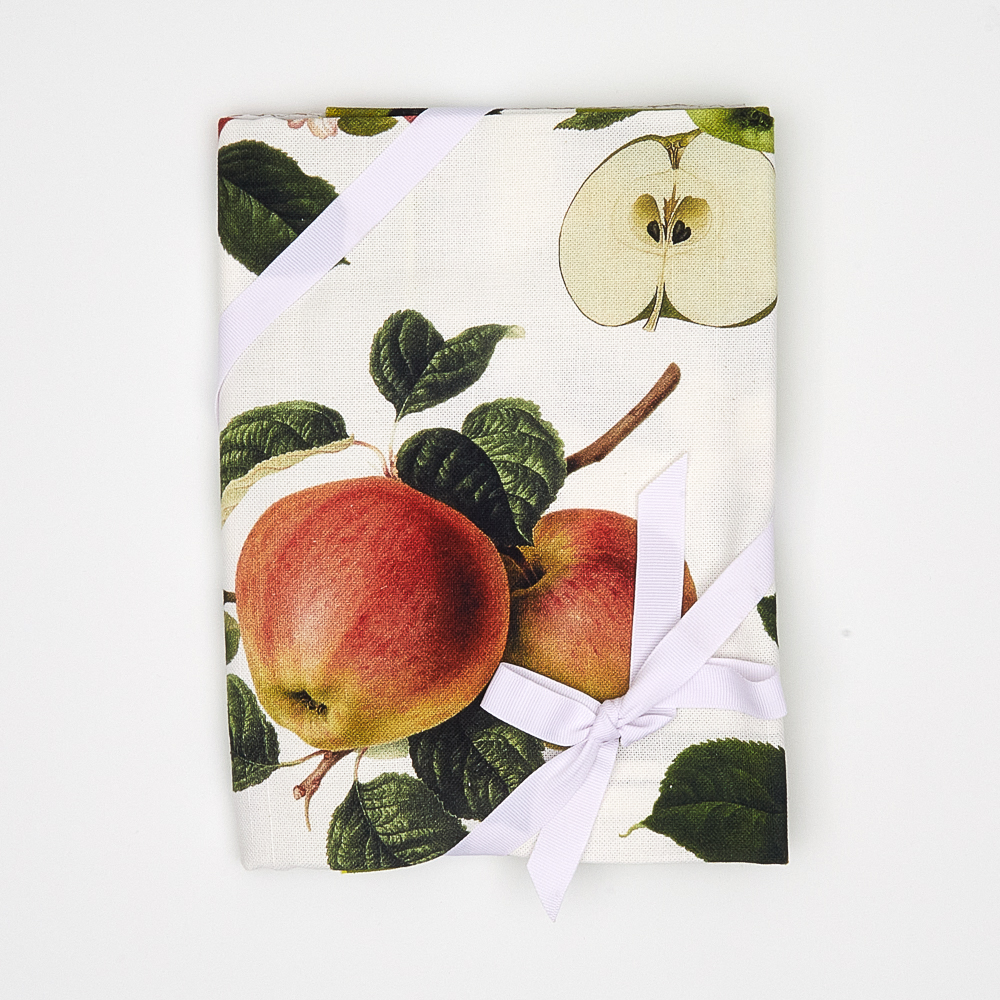
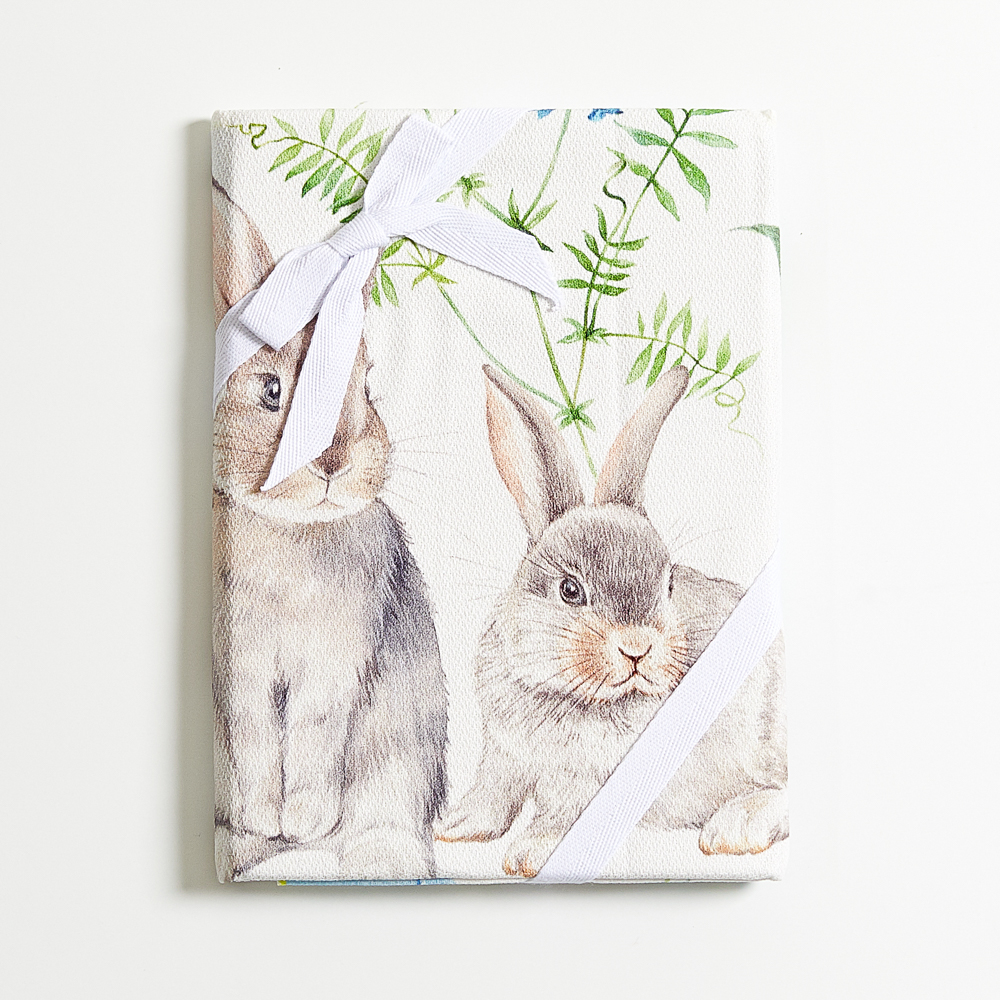
Related posts

Sewing Essentials: Stitch Width, Stitch Length & Needle Position
Thinking back to my high school textiles days, I remember having to test stitch settings on every fabric we planned to use for our projects. We would cut out little squares of fabric and experiment with different stitch lengths and widths, and edge-finishing techniques. At the time, it felt unnecessary, not to mention tedious….

Sewing Essentials: A Simple Guide to Notches
I love a notch, so much so that I’ve decided to dedicate this article to these small but important markings. Here, I’ll explain why they’re so helpful, when to use them, and how to add them to your own patterns or adapt them for existing ones. What exactly are notches? Notches are small markings found…

How to Select and Use Interfacing: A Simple Guide
Iron-on or sew-in, woven or non-woven, lightweight or heavyweight. With so many different types, weaves, and weights to choose from, how do you know which interfacing is best for your project? In this article, I will explain the two main types of interfacing before diving into the differences in weave and weight. Hopefully by the…

Sewing Essentials: A Simple Method for Reversible Seams
There are so many ways to finish a seam, from good old overlocking to French seams and binding. I recently stumbled across another method that’s pretty nifty, and honestly, I kind of wish I had known about it sooner. It is a bit like binding, but topstitched in place so it doesn’t move or flap…

An Introduction to Common Crotch Adjustments
Recently, I drafted a pattern and made a toile of a pair of drop-crotch pants. When I tried them on, I straight away noticed (and felt) they weren’t quite right. The most obvious issue was that the back crotch felt tight and pulled uncomfortably, especially when bending over. Walking also felt a little restricted, with…


SEW THIS LOOK


Latest Posts


51 Comments
Pingback:
Fabrics Store – Noa Shirt (Free Pattern!) – The Sewing Things BlogDavid Cottrell
I’ve noticed many people commented that the collar band is too short. I’ve also noticed that the instructions do not mention stay stitching. I wonder if this could be the source of the problem. The curved edges of the collar should be stayed to prevent stretch along the bias. Which might account for the 1.5 cm variance. Just wondering as I have not yet worked with this pattern.
Maxien Gorry
The collar stand is too short. I’ve read some of the comments here and it seems others have had the same issue. It might be worth updating the pattern.
I’m a beginner and this is the first shirt I’ve ever made so I thought I had done something wrong until I came here and read the comments.
Susan Baggett
Hello and thank you for the lovely pattern, Noa Shirt.The tutorial for the cuffs is not the same as the cuff in the pattern. Please advise. THANK YOU
Jean Weil
I have almost completed this shirt. I like the pattern and will make it again, but it is disappointing that there is an obvious error in the pattern piece for the button band. It needs to be trice the width in order to work. This has been pointed out many times on the blog but the pattern has not been corrected. When I realized it, I had already interfaced so instead of cutting a new band, I cut an identical, piece to use as a facing. Also, the instructions and pattern pieces do not call for collar interfacing, a minor error. I realize the pattern is free but the errors make me reluctant to invest in other patterns.
Ann Cook
Hello, how can I calculate the true location of the center front line on either the front left or right pattern piece ? Thank you !
Lauren Linen
The center front corresponds with the mid point on the button bands. This will be located on the left front piece approximately 1/2″ past the second notch from the front. The center front is not located on the Right front as this will be in the middle of the applied button band.
Jaime Delano
Hi There, I also had trouble with the collar stand being too short for the neckline.
I’ve measured the finished neckline length on the pattern along the seam/stitching line, accounting for all the sea allowances and button placket folding. I compared it to the length of the finished collar stand and found the collar stand is about 1.2 cm (0.5 inch) shorter than the neckline (for size 4/6, collar stand is 44 cm and the neckline is 45.2 cm). I know a lot of people had trouble with that, but I wonder if the neckline length has been double-checked by the pattern makers.
In the next version, I will just lengthen the collar stand and collar pattern pieces by 0.6 cm to make up the 1.2 total length mismatch.
Mon Mon
I’m having the same issue with the collar stand size 12/14. I followed the instructions very carefully after seeing that some people have had problems and the shirt looks correct but the stand is too short. The button band was also short, as pointed out by another sewer (it was more like the interfacing length). If so many people are having problems it would be helpful to update your instructions or the pattern. Are you able to provide further advice please? Thank you !
Kate Llewelyn
I’ve been working on my Size 22 muslin. Thank goodness I didn’t start with my linen! I’ve gotten far enough to pin the sides to check for hip fit. YIKES! The pattern says the finished garment should finish at 57″. Mine is 51″. What happened?
Lisa G Sickles
I am one step away from having the Noa shirt complete. And I am so happy with it! I just have to do the buttonholes and buttons and I am done. I have tried it on, and it is a perfect fit. I also am so proud of myself as it is my first collared button down shirt ever. This website has been amazing for me to learn how to expand my sewing skills. Thank you so much for all of the patterns and tutorials!
Lauren Linen
We’re so glad to hear this Lisa! We hope you’l share a photo of your finished Noa on the website 🙂
Jane Crowley
Hi, I am working on the Jade shirt pattern. Are there pleats for the sleeves? My sleeve is wider than the cuff. There are no markings on the sleeve pattern for pleats. Looks like the sleeves do have pleats looking at the tutorial. Where do I place the pleats? Thanks for your help. I love your linen and website.
Lauren Linen
Hello,
Yes there is a small pleat to fit the sleeve into the cuff. You can position this where you feel more comfortable, or, you could simply gather the sleeve to fit into the cuff.
Susan Fargione
Hello, Lauren.
I’m thinking of making the Noa shirt as well and am new to all this…
I wasn’t sure where to message you my question so I hope sending a message here is alright…
I noticed in the institutions in the blog are for a size 6 and indicate 2yds of fabric will be needed. I’ll be making a size 12 and imagine I will need more fabric but I couldn’t locate that information on the pattern or here in the instructions.
Grateful for all the patient help you provide those of us who are new to the FS, and all the awesome resources it provides. Susan.
Lauren Linen
Hello Susan, For sized up to 12/14 you’ll need 2 yard, sizes above that require 2.5 yards. This is on page 4 of the pattern information booklet. If you can’t see it you may have an older version downloaded.
Please reach out if you need any assistance, I’m always here to help every level of sewist 🙂 the best way to contact me is through our main website, or by email which is ask@fabrics-store.com
Parvi K
Hello, Thank you for the incredible pattern. I am working on the sleeves and I am wondering which side is the front; and which is the back. They aren’t symmetric cause the pattern asks us to cut mirror images but doesn’t have Front/ Back markings on it. Is the double notched the back of the sleeve?
Lauren Linen
Hello, yes the back of the sleeve is the side with the double notches. Happy sewing 🙂
liko lop
Hello !
The blouse is very gorgeous, but the pdf pattern is not available anymore. Where can I download it please?
Thank you.
Lili
Lauren Linen
Hello, You can download the pattern from our website here:
https://fabrics-store.com/sewing-patterns/noa-noa-linen-shirt-pattern
liko lop
Hello,
Yes I try to download from the website but when I open it, there is only 6 pages with no patterns :'(
liko lop
My baaaaaad !!!! I found it ! Sorry I squint
Lauren Linen
Hello, I have sent you an email with some tutorials which will help you out 🙂
Karen Hurst
Will you please send the tutorials to me as well? This is my first ever shirt and first ever button holes. Thank you so much.
Poua Yang
update on my post: I realize I was reading the instructions wrong. It would help if your extended instructions had a clear right and wrong side to the fabric.
Laurie Brooks
Regarding the too narrow button band…. I haven’t figured out any other way to make it work as is. I also think it should be twice as wide. What am I getting wrong? I have read and reread the instructions so many times and don’t see how the photos can be depicting the button band I am making. Any insight would be helpful.
Lauren Gates
Hello Laurie,
Please look out for an email from me. I’d be happy to help you figure it out.
Gil Hallel
Did you fix the pattern button band measurements? Can you add details about the right measurements?
Charlotte Brooker
Hi Lauren, has the short button band issue been corrected on the pattern? I’m about to start cutting the material for this shirt and dont want to get it wrong. Thank you! 🙂
Poua Yang
The pattern of the right button band needs to be twice the width that it currently is. unless, it is intended to be finished at 1/2 inch, which is very narrow and doesn’t seem to be consistent with your photos.
Lynette Nigh
I am making the noa shirt. My first ever shirt. The tutorials are lovely and clear and I’m doing fine. However having assembled the collar and stand, I found it’s not the same length as the neckline and is about 2/3 cm shorter. I have rechecked the pattern pieces and I seem to have cut them correctly. I seem to have assembled the button plackets correctly too. I’m doing the 24/6 pattern. Have you any advice to give?
Lauren Gates
Hello Lynette, I’d be happy to help you out with your Noa Shirt, look out for an email from us.
Maaike van Stratum
Hi, I’m having the same problem as Lynette: a too short collar stand. Could you perhaps advise me as well?
Lauren Gates
Sure thing Maaike, look out for an email from me 🙂
Sammie Choy
I am having the same issue with the collar stand, size 8/10. Could you advise? Thank you.
Lauren Gates
Hello Sammie, Please look out for an email from me. When I had emailed the other two customers, I sent a photo of my Noa shirt, which may help you visualize if you’ve made any errors. You can also send me a photo so I can see what your Noa is looking like.
When I emailed Lynette I made mention the following:
“The left front button band is folded 3/8″ then 1″, and the right button band consumes 3/8″ as you fold the button band piece back onto the shirt front.”
Eleanor Rose Matthews
Hi Lauren, I’m also having the same issue with the collar, are you able to help me? I was fairly sure I’d followed the button band instructions properly.
Thank you!
Lauren Gates
Sure thing Eleanor,
Look out for an email from me 🙂
Caitlin L
Hi Lauren, I’m having the same issues with the collar stand, which is about 1/2 cm short I have followed the instructions with 3/8″ fold and 1″ band.
Thanks!
Lauren Gates
Hello Caitlin,
I will also send you an email with the instructions I have sent to our other customers. Please look out for it 🙂
Unfortunately, I’ve never heard back from any of the other customers letting me know if my instructions have helped or not! I’d love to know if my email or comments have been helpful and if we need to add extra clarification to a step in our tutorial.
The button band on the right side will be sewn with a 3/8″ seam allowance to the right front, then folded to lay flat on top of the right front, and topstitched down. the 1″ band is not an addition to the seam allowance or the edge on this side.
The left front does not have a button band attachment, and will be folded 3/8″ then again 1″.
You can also run a staystitch around the neckline to stop the fabric from stretching here which may be adding to your excess Fabric.
Elise Dwyer
Hi , I have enjoyed making this shirt- I sized down and the shirt is just right in fit! I found belatedly that the pattern piece for the buttonhole band is about 1/2” short- so I had to creat a patch on the fly for the bottom of the band. . I am inexperienced enough to not have noticed that the band is not the same length as the tight front. Other than that, loved this pattern for the tutorial which walked me through all the steps that were new to me! Thanks! Elise
Elise Dwyer
I meant the right front! Sorry for the typo!
Lauren Gates
Thanks for your lovely review Elise, We are investigating if the button band was supposed to be short for a particular reason, or if this is a pattern error. Thanks for letting us know.
Pingback:
30 Gorgeous Free Sewing Patterns for Tops (Women)Bridget Ruff
I just finished up making this shirt. My measurements pretty cleanly fit into the smallest size but it’s huge. Not oversized wearing my boyfriends shirt in the morning, more like little kid playing dress up. Id recommend taking AT LEAST one size down, maybe 2. My shoulders are relatively broad and I’ve got a good inch on either side. Personally a bit disappointed with this one, although I usually love your patterns. Normally I’d make fitting Adjustments as needed, but this would essentially require it to be redrafted.
However, I’d still recommend the pattern to learn to make a button down shirt. The tutorial is very clear and I only struggled with the sleeve placket. The finish on this is fantastic and I’ll be using the techniques I learned many more times in future shirts.
3/5 for me (fit is a 1, tutorial a 4.5)
Petra Zabickova
I made my first shirt today and I am very happy with the result. Great pattern and great tutorial. Will make another one in different colour. Pattern is very suitable for linen fabric. Thank you.
VALERIE VATIN
Good afternoon,
I am experiencing troubles too with the pattern download. The PDF contains only the first 6 pages as it was an introduction.
Thanks in advance for your help.
Stefania Allemano
Good afternoon,
I am experiencing troubles too with the pattern download. The PDF contains only the first 6 pages as it was an introduction.
Thanks in advance for your help.
Helen Holman
Good afternoon. I printed the pattern for the above shirt and I am missing pages 8, 16, 24 and 32 to complete the pattern. I am missing top portion of sleeve and portion of back. Please help. I want to make this shirt. Thank you.
Helen
Masha Karpushina
Helen hello, please download the pattern again, we had some issues which have now been resolved. Thank you for being patient. Masha
Ditte Randløv
How do I find the right place for button in the collar? It looks Very wrong and I dont Know how to include a picture. Very frustrating as I spent so much time on this