


Cass Wide Leg Culottes Tutorial and Free Pattern
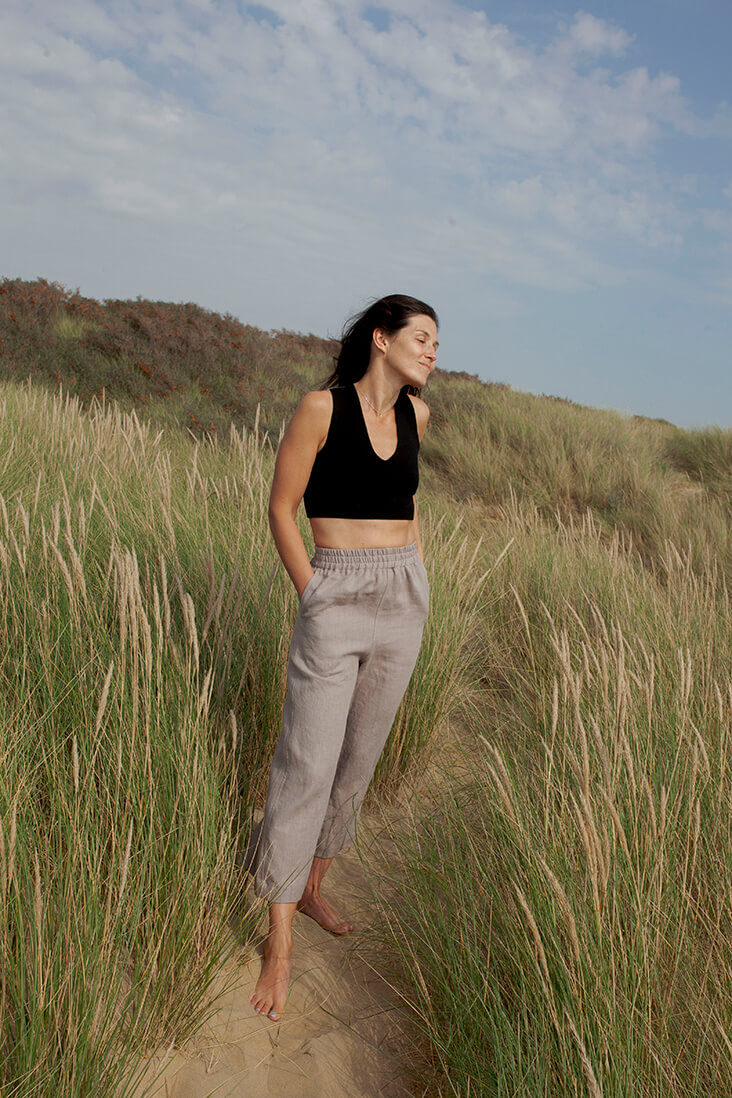

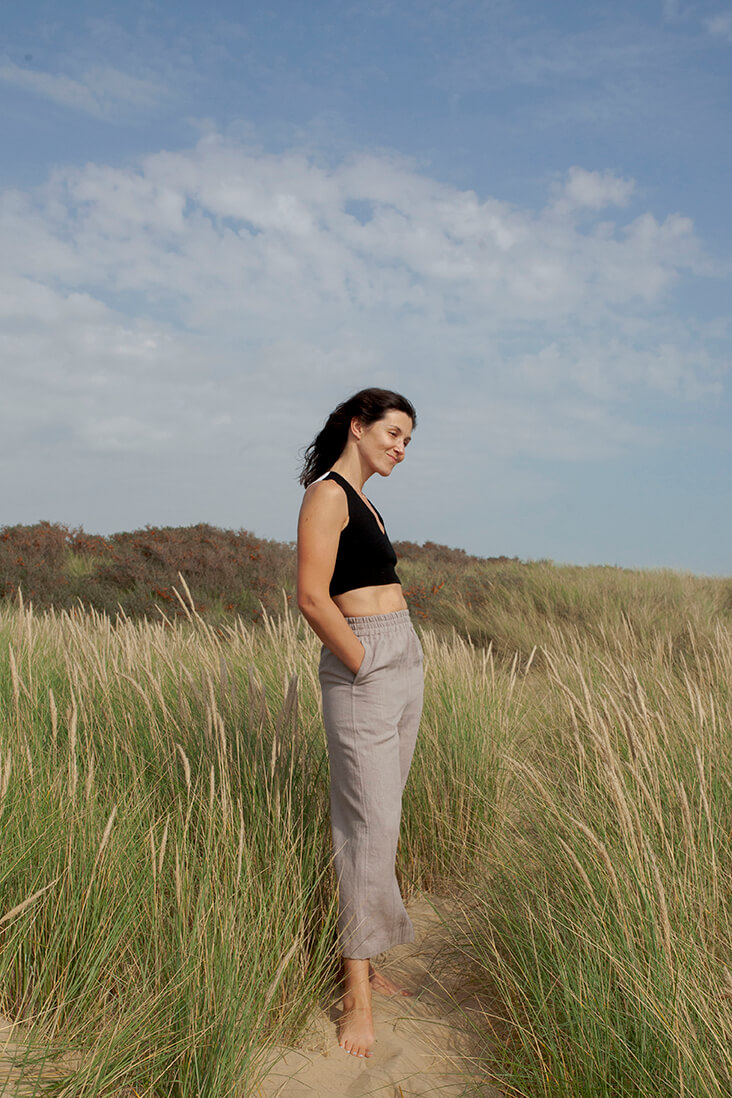
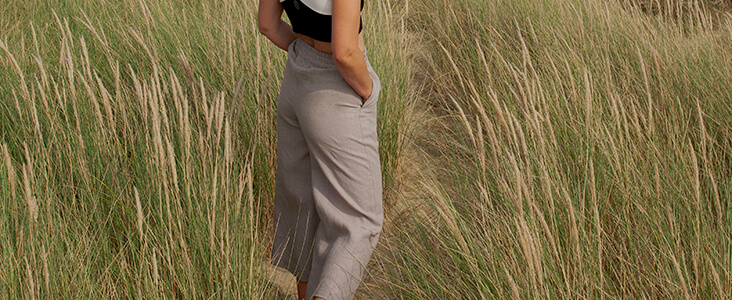
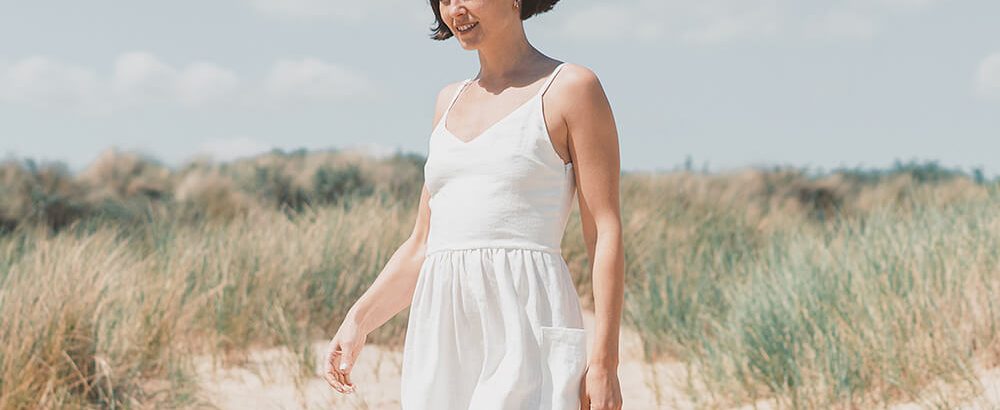
As advertised by nearly every minimalist-chic clothing brand, culottes are making a major comeback and becoming an indispensable wardrobe item. But there is one style the fashion world is most crazy about – the high-waisted, wide-leg culottes. Charged with the ability to skim over curvy hips and elongate the silhouette, the wide-leg culottes are as comfortable as they are versatile.
If you are interested in trying out this cool style without paying the store price tag, then our Cass Culottes sewing pattern is for you! With its high rise, wide legs, hidden inseam pockets, and elastic waistband, it is probably the most comfortable pair of culottes you’ll ever own.
Follow this easy tutorial and sew your own pair of custom made culottes that look great on you!
Materials

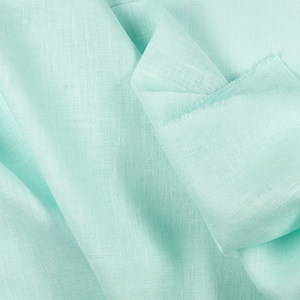
For our sample size XS pictured in this tutorial we used 2 yards of 4C22 NARURAL Softened Heavy Weight Linen
For other sizes, please refer to the yardage table in the PDF pattern to determine the required amount of fabric.
Matching sewing thread, 1 7/8” to 2”-wide elastic.
Tools
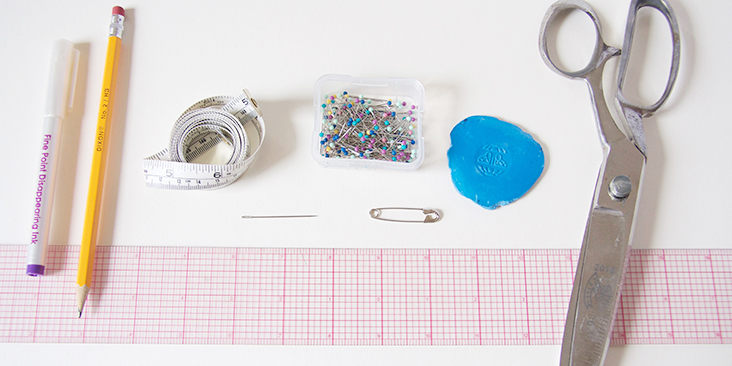
Scissors, pins, ruler, chalk, measuring tape, seam ripper, safety pin, sewing machine
Difficulty
Beginner
Sewing Time
3-4 hours
Pattern
You can access the multi-sized printable PDF pattern by following this link HERE. All seam allowances are included and are 3/8” unless otherwise specified. The model is wearing size XS.
Remember to transfer all the notches onto your fabric.
Steps
Note: Prewash your fabric and tumble dry it until it is still slightly moist, dry at room temperature. Iron the fabric so it is easier to work with.
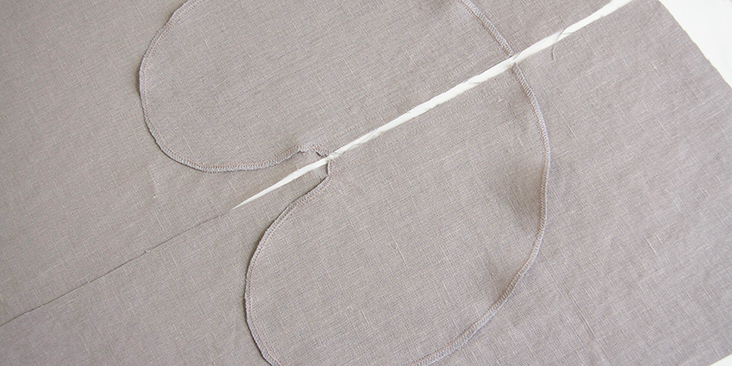
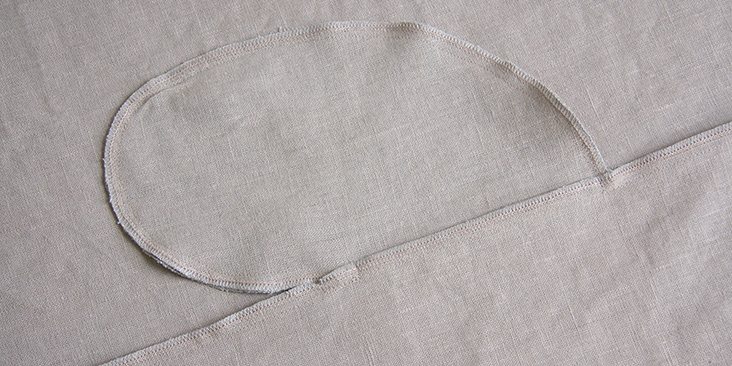
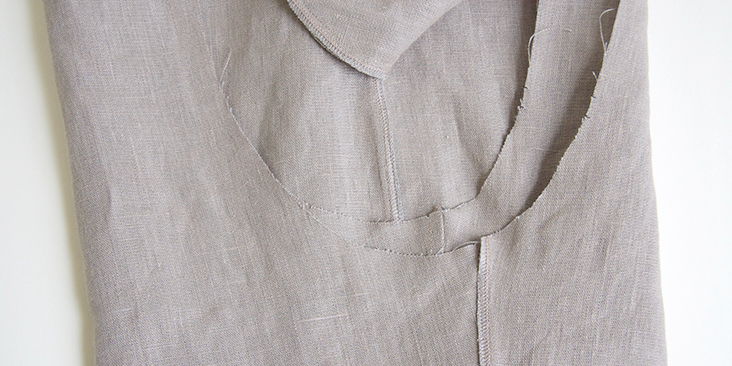
1. The very first thing to do is to attach the inseam pockets. Follow this step-by-step tutorial and attach your pockets. Prepare your pockets by serging along the outer curve. Match the top and bottom edge of each pocket to the pocket notches in the pattern and sew right sides together at a 3/8” seam.
2. Complete the rest of the steps in the tutorial to assemble your pockets and side seams.
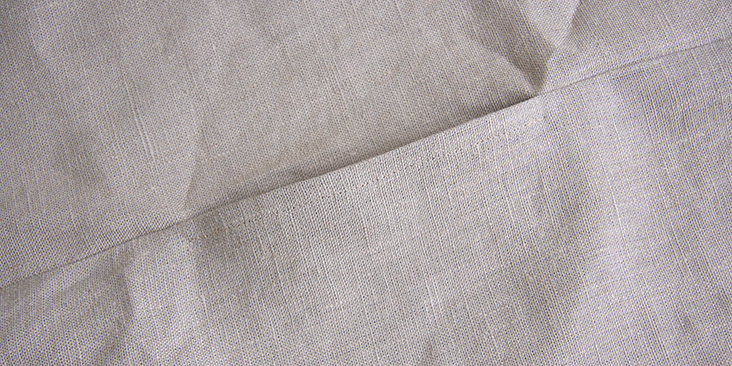
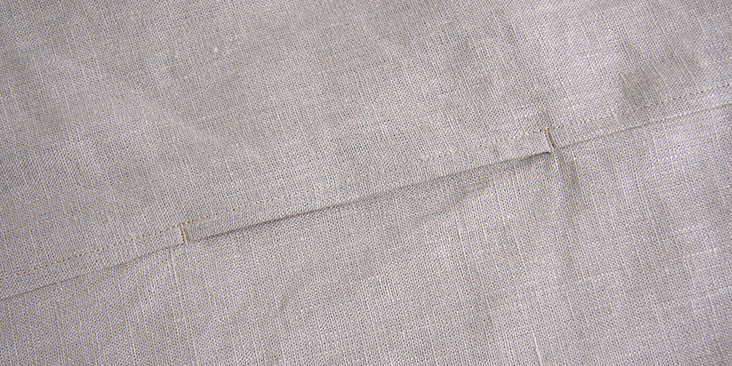
3. Press the pockets and the seam allowances towards the front leg. Turn the garment right side facing up and sew a 1/4″ topstitch along the front side of the pocket opening. Then topstitch 1/4″ along the remaining edges of the outseam, from waist to pocket opening and from opening to hem. This will secure the seam allowances to the front leg and add decorative detail.

4. Reinforce the pocket openings with two bartacks.
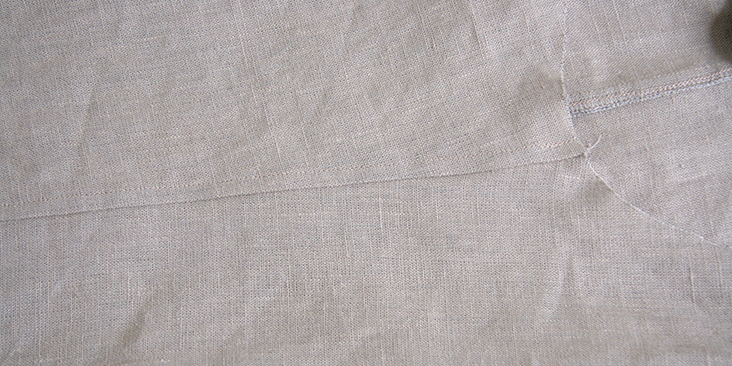
5. Pin each pant front to the corresponding pant back at the inseam right sides together and sew at a 3/8” (1 cm) seam allowance. Serge or zigzag the raw edges together to prevent the fabric from fraying.

6. Press the seams flat folding the serged/zigzagged edges towards the back of the culottes. Topstitch ¼” from the seamline.
7. Turn the right leg right side out and slip it into the left leg, right side to right side.
8. Pin the crotch seams together matching the side seams and inseams.

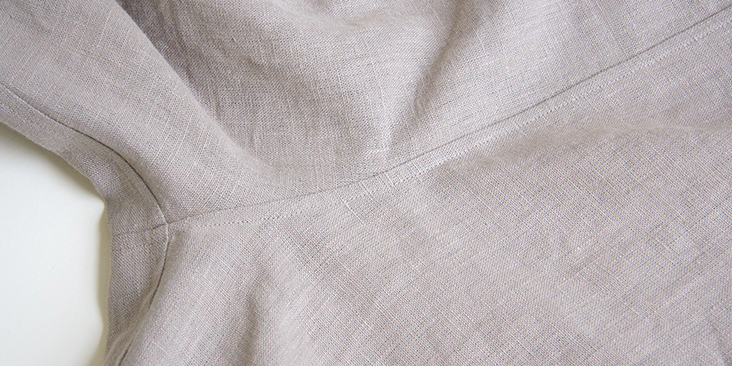
9. Sew along the crotch seam at a 3/8” (1 cm) seam allowance. Serge or zigzag the raw edges together and press the seam allowances towards the left leg.
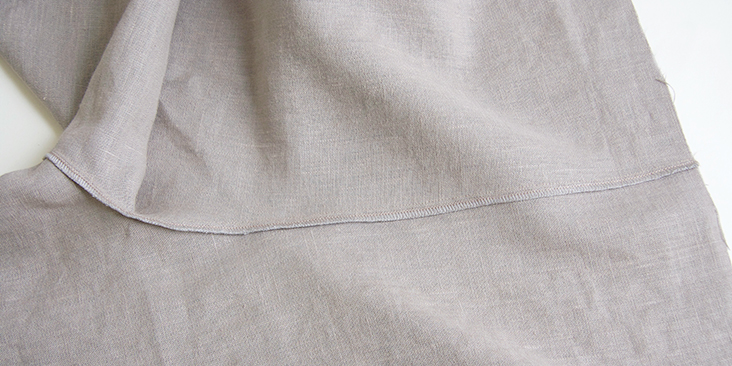
10. Topstitch ¼” from the seamline along the front and back rise.
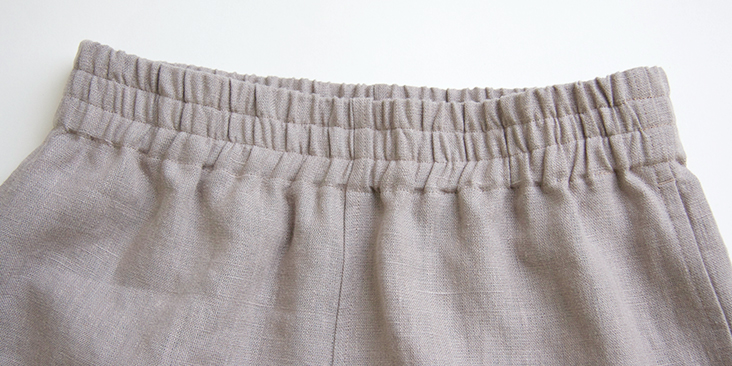
11. To create the casing for the elastic, fold the raw edge 3/8” to the wrong side and press. Then press another 2 1/8” and pin in place.
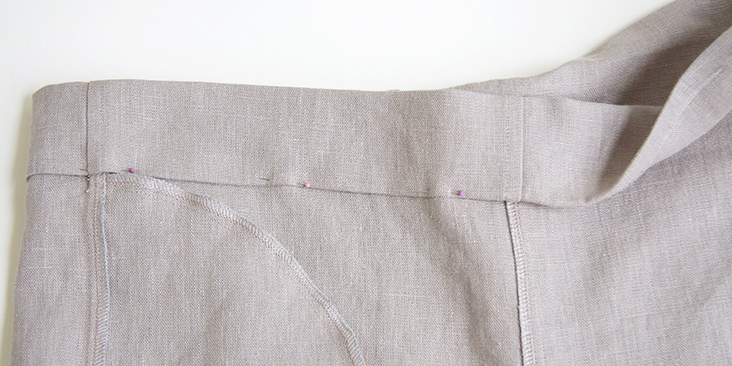
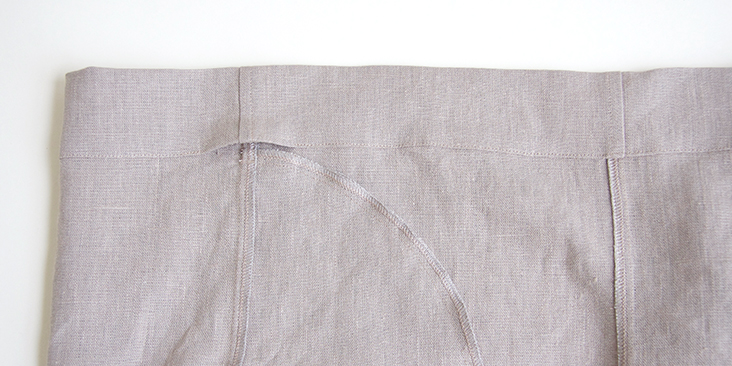
12. Stitch around the lower edge of the casing, 1/16” from the edge, leaving a small (about 2” wide) opening at the side seam for the elastic to be inserted. Remember to backstitch at both ends.
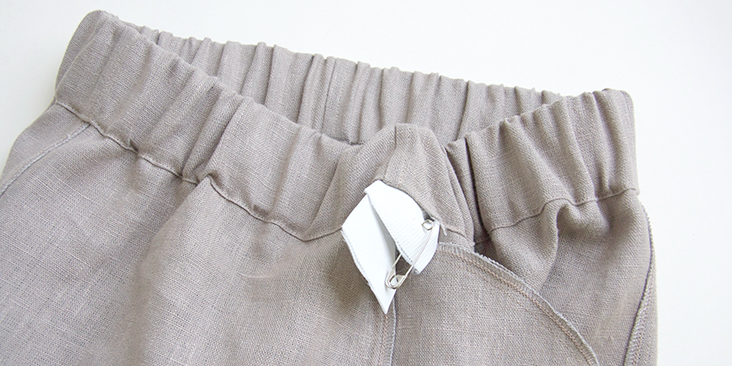
13. Using your safety pin, insert the elastic (cut to a comfortable length plus 1” seam allowance), stitch the elastic ends together and close the opening.
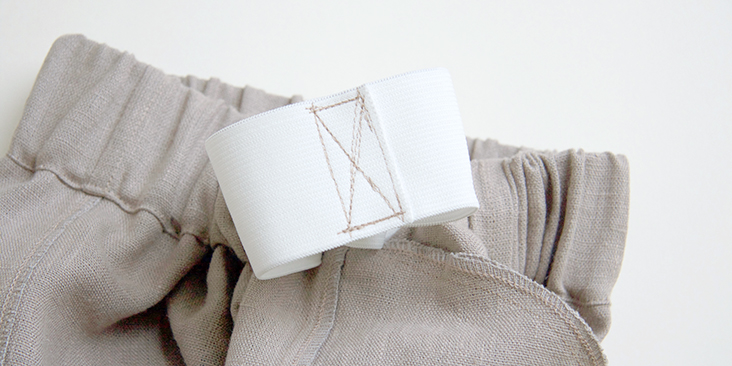
14. Sew the opening closed with the same seam allowance used before. Make sure not to sew into the elastic itself!

15. Pull gently on the waistband fabric so that the joined elastic ends slip inside the casing. Distribute the gathers evenly.
16. To create the tiered effect, divide the casing into three equal parts and run two lines of topstitching stretching the elastic as you go.
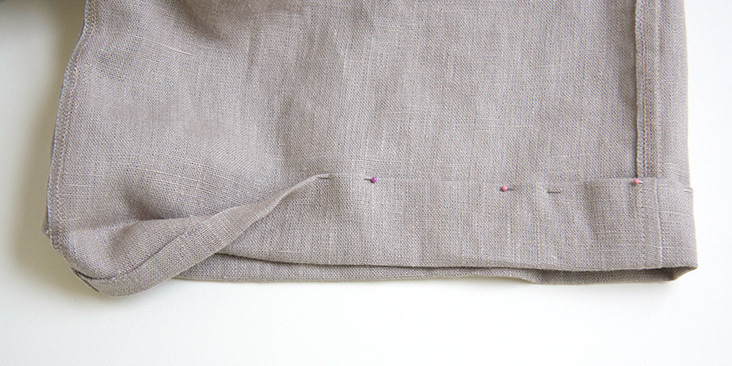
17. Lastly, hem the legs by folding the fabric twice to the wrong side. First, fold 1/2″, then another 1 1/2″, press and pin in place.
18. Edgestitch 1/16” from the folded edge.
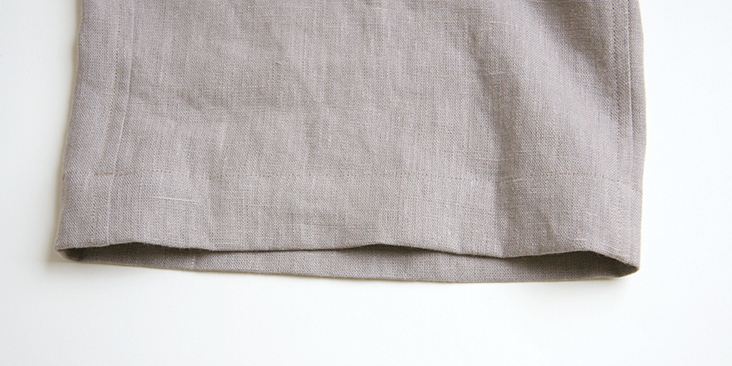
Congratulations! You have successfully completed your pair of culottes!
We love seeing what you make! Don’t forget to share your pictures and tag your creations with #FabricsStoreCassPattern hashtag.
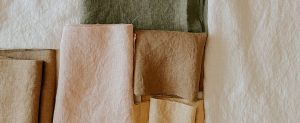
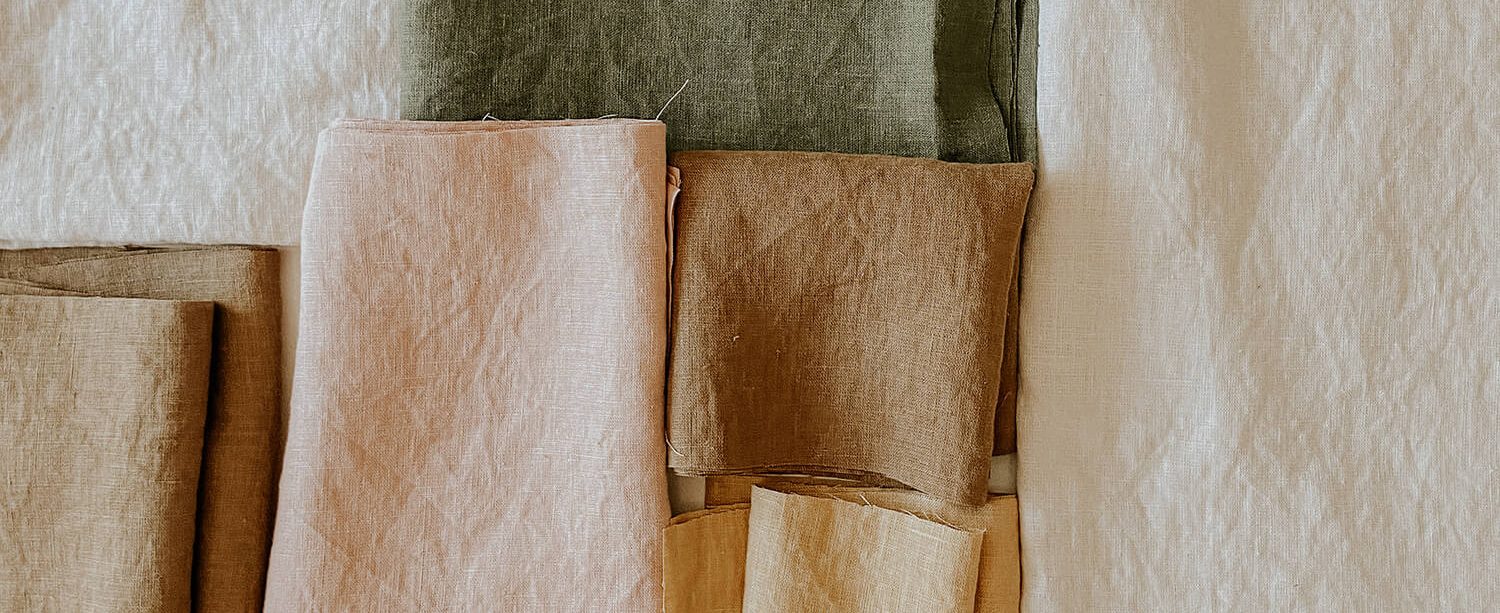
Whether you are looking for natural or bright colors, heavier or lighter linen, we have something for everyone. Browse our selection of linen fabrics and find the color that inspires you for this project!
Leave a comment
Related posts

Blending Between Sizes on a Sewing Pattern – Part 2: How to Blend
If you’ve already read Part 1 of this tutorial, you will hopefully have a good understanding of when blending between sizes on a sewing pattern can come in handy. Let’s get into how to actually do it. In this Part 2, I will walk you through the basic process using a few different examples. I’ll…

Blending Between Sizes on a Sewing Pattern – Part 1: When to Blend
Let’s be honest—finding a sewing pattern that perfectly matches your measurements is pretty rare. And that makes sense! Every body is unique, fit preferences vary, and each pattern brand uses its own sizing system. If you find yourself falling between sizes, you’re not alone. But the beauty of sewing is that in these situations, you…

How Much Fabric Do You Need? A Simple Estimation Guide
Starting a new sewing project is always exciting. But there is nothing more frustrating than running out of fabric halfway through… or ending up with scraps that aren’t quite big enough for anything useful (trust me, I’ve been there! I have a whole drawer full of pieces like this). If you’re working with a commercial…
Understanding Seam Allowance: A Simple Guide
Every garment needs seam allowance—it’s a crucial part of garment construction. Sometimes it’s already included in the pattern; other times, it may need to be added, especially when working with a self-drafted pattern or after making adjustments. Seam allowance is the extra fabric added around the edges of a pattern piece. It creates space between…

Sewing Essentials: Dart Manipulation
Dart manipulation is a pattern making technique used to reposition a dart on a garment without altering or adjusting its overall fit. Essentially, it’s a way to move the shaping in your pattern to a new location. Dart manipulation lets you customise a sewing pattern to suit your design preferences. Whether you want to move…


SEW THIS LOOK


Latest Posts


71 Comments
Pingback:
Weite Sommerhose nähen – Gratis Schnittmuster & AnleitungPingback:
Coudre un pantalon d'été ample – Tutoriel, patron gratuit & astuces pour débutants » BERNINA BlogBeka Contreras
I would technically be a beginner and self taught at sewing completely from scratch. I tried your tutorial for my first pair of pants and it was a bit confusing but completed them with an inside out pocket on one side and mismatched crotch area. I have come back to make me a pair of shorts now with the pattern and once again found it very confusing only because I can’t see all of the photos and what things should look like exactly from a full view. I didn’t know that the pockets had to be done a totally different way from one leg to the other and sewing the crotch and back is very confusing as well. Honestly, if you guys made some videos to help explain the patterns a little better with very specific directions for those that are truly beginner, that would be so helpful!
Micaela Cruikshank
These were easy to make. Unfortunately the size 0/2 fits more like a 2/4, there is too much material in the front, and they are overall unflattering. Such a waste of linen.
zac bar
Hi. First of all, thank you so much for the pattern! This is the first time for me to make pants from a pattern and it all seems pretty straightforward – except I ended up with a low hanging crotch! Not sure how that happened and now I’m trying to figure out how to alter the pants. Do you have a suggestion?
Again, thanks so much!
Mykiah Scarborough
it’s best to keep trying on the clothes you are sewing (if possible) to make sure it fits you correctly! Hope thats helps
Pingback:
25+ Free Sewing Patterns for Fall 2023 - simplygoldstudio.comPatrizia Momigliano
Thank you for this amazing pattern and tutorial! I just finished a pair of Cass culottes and it fits so well! I am not an expert but was able to go through the process smoothly. I went down one size, because I measured a pair of culottes I already had in my closet, and comparing the pattern pieces to it I realized that the smaller size would have been ok. Thanks again!
Lucy Flint
I purchased quite an expensive pair of trousers almost identical to these which I returned as the waist was too tight . . . got me thinking that they can’t be too difficult to make and that’s when I stumbled upon your pattern! Only the second item I’ve made following a pattern and they turned out perfectly – thank you so much. I love the trousers, enjoyed the process of making them and, as a bonus, it’s saved me money too. Really keen to make another pair in a different colour now . . .
Helene Hein
Hey Lauren, I really want to make this pair of pants, but I just cant figure out the sizes, what are the measurements for size a-size j? This would really help!
Lauren Linen
Hello, to figure out your best size, I would compare your body measurements to the size chart in the downloadable file.
Ann Murphy
I am about to try this pattern; it seems pretty straightforward. Thank you for this pattern! I wonder if this could be lengthened into a full length pant style but extending the bottoms a bit? Would that alter the drape too much?
Maja Salte
Hi, I have made it longer and I think it looks perfect, I just followed the same lines into full length. I also moved the pockets down a bit and added a tie waist.
Ann Murphy
Thank you for your reply! I am going to make a muslin with the full-length version to test the size. What was the reason you moved the pockets? The tie-waist idea is intriguing; you mean you didn’t put the elastic in, but rather a tie in the casing coming through some finished edges in the front. Interesting and much more adjustable!
Lauren Linen
Hello An, yes you can alter these pants to be full length. As always to check the drape and fit of all alterations, please sew a trial/muslin.
Nancy Spry
I downloaded the pdf file all that was there was instructions no pattern pieces.
I would like to make these for a cruise I’m going on.
Please where’s the pattern.
Thank you for sharing with all of us
Lauren Linen
Hello Nancy,
The pattern pieces are attached to the .pdf you have downloaded, and are accessible when opened in Adobe Acrobat Reader.
Here are links to tutorials which will help you find them:
Computer (PC/MAC)
https://support.fabrics-store.com/hc/en-us/articles/360057105032-Downloading-and-Opening-Free-pdf-Patterns-on-a-Computer-PC-and-Mac-
Android Devices and some Chromebooks
https://support.fabrics-store.com/hc/en-us/articles/360057356212-Downloading-and-Opening-Free-pdf-Patterns-on-a-Mobile-or-Tablet-Android-
Apple iPhones and iPads
https://support.fabrics-store.com/hc/en-us/articles/360058020091-Downloading-and-Opening-Free-pdf-Patterns-on-an-iPhone-or-iPad-Apple-IOS-
I hope this helps, if you are still having trouble please email us directly ask[at]Fabrics-Store[dot]com
Sharon Clarke
Perhaps like me you downloaded a pdf of the tutorial only. The pattern link is embedded in the tutorial page and not easy to notice right away.
https://fabrics-store.com/pants-and-shorts/cass-wide-leg-culottes-patterns-type-pdf
Kelly Potocki
Hi Lauren,
I love this pattern and want to try to make it. I would like the legs to be tapered or straight instead of wide. How should I accomplish that?
Thank you so much!
Kelly
Lauren Linen
Hello Kelly,
You may like our Magda or Alexandra pants patterns which are drafted to be straight/ tapered with a slimmer leg 🙂
Link to Magda: https://fabrics-store.com/sewing-patterns/magda-crisp-linen-pants-pattern
Link to Alexandra: https://fabrics-store.com/sewing-patterns/alexandra-linen-morocco-pants-pattern
Molly Hopkins
Hi 🙂
Is there anywhere I can find a more detailed description of how to do the pockets and side seams? This is my first time trying them and I’m a little confused.
Ellisa Hartman
Hey! I had the same question and then I found this pocket tutorial on their blog. Hope it helps!
https://blog.fabrics-store.com/2016/10/14/sewing-glossary-how-to-sew-inseam-pockets-tutorial/
Lauren Linen
Yes, Here is a link to the tutorial for sewing the pockets and side seams:
https://blog.fabrics-store.com/2016/10/14/sewing-glossary-how-to-sew-inseam-pockets-tutorial/
Jewel Peters
THIS IS EXTREMELY HELPFUL! IM SO GLAD I RAN INTO THIS BLOG. I UNDERSTAND EVERYTHING PERFECTLY AND I CAN’T WAIT TO TRY IT OUT, THANK YOU SO MUCH, YOU HAVE SAVED ME SO MUCH HASSLE. KEEP UP THE GOOD WORK
Lauren Linen
Our pleasure Jewel 🙂
Lisa G Sickles
I just finished making my first pair last night, and I found it so satisfying to realize I could figure out how to do new techniques! I have never attempted pants before, and my experience with elastic waists have never been so good. This tutorial is super helpful! Thank you!
Bailey Andrews
Is there a video instructional coming for this pattern by any chance?
Lauren Gates
Hello,
We don’t have video tutorials sorry. if you would like extra assistance sewing this up, please reach out to us via email and I can help you 🙂
Sumit Gill
Hi Lauren,
I am a little confuesd. The pocket tutorial attached to this link does not include the top seam.
Is the pocket made using a flat-felled seam? Should I follow that tutorial in order to topstitch the rest of the pants, including bags?
Lauren Gates
Hello Sumit, I’m not sure what you mean by a top seam? The pockets are serged before sewing to your pants pieces, and they are seamed in the usual way. I’m going to send you an email so I can get some more information to help you out.
genea padilla
I have the same question. After following the pocket tutorial, I went back to this page and instruction number 3 says to “Turn the garment right side facing up and sew a 1/4? topstitch along the front side of the pocket opening.” I have sewn the side seams together and don’t know how I’m supposed to topstitch the pocket without sewing it shut.
Lauren Linen
Hello Genea, What you are going to do here is open up your pocket, and place the top layer under your sewing machine needle, keeping the other edge out of the way. Sew as close as you can to the top and bottom of the opening and be sure to back tack.
If you’d like more assistance with this step, please send an email to me, and I’d be able to help out. Ask[at]fabrics-store[dot]com
Louise Audino
Hello – I am little confused as the patten includes a waistband – yet the instructions instruct to just fold down the main pant to make an encasing for the elastic. Do you have a another tutorial for attaching the separate waistband? thanks
Lauren Gates
Hello Louise, the pattern’s waistband is included in the front and back pants pattern, they are not separate and should be cut together.
Kristin Culbertson
Hello! This is my first time making pants and I have a construction question: when sewing the legs together on the outside seams, the legs should mirror each other right? I think I sewed the pockets on incorrectly, so the legs are identical, but when I switched the pockets to the “wrong side” of the fabric, thinking that should fix the orientation, it was still wrong. How do I make sure that I have a right and left leg that will fit each other?
Thank you for your help!
Lauren Gates
Hello Kristin,
Yes, you should have two opposite, mirror-image legs. When sewing on the pocket pieces, be sure you are sewing these onto your front pants pieces as mirror images too. If you are still stuck, please reach out to me directly via email which is ask[at]Fabrics-store[dot]com
Kristin Culbertson
Hello! I have a quick question about the waistband. As I was cutting out the legs I noticed there was a shorter line and a taller line for the waistband. I cut on the taller line just to be safe, but I was wondering what the different lines mean. I am cutting a 4/6 if that helps.
Lauren Gates
Hello Kristin, the shorter line is the fold line for your waistband. So you were right to cut at the top line 🙂
Kristin Culbertson
Perfect, thank you!
Jennifer Kee
Thank you for clarifying. I, unfortunately, cut along the fold line since I printed all the sizes (and got confused I guess) and I wasn’t even aware that there was a fold line. Also it’s identical to the cutting line. It would have been less confusing if it were gray or somehow different from the cutting lines.
Lauren Gates
Hello Jennifer, there is a marking next to the pattern line which denoted cutting on the fold, it looks like a long backward ‘C’ with arrows on each end.
Anna Bateson
I wondered if you had any advice for making the bottom of the pants wider? I should confess I’m not making your culottes but a different culottes pattern. The fit is great at the waist and crotch so I don’t want to mess with that, but I’d like wider pant legs at the bottom. I want to use a drapy viscose twill and have maximum swish! Is it just a case of grading the side seam gently out, starting from parallel to the crotch point, until I get the desired width at the hemline? Say I wanted the bottom of the pant legs to be 5cm wider, would I add 2.5cm to the side seam on the back pattern piece and 2.5cm to the front (rather than adding the full 5cm to either front or back)? Any guidance greatly appreciated! I know I’m being cheeky but I’m struggling to find help anywhere else on the Internet and you’ve been giving out great advice to people on here xx
Lauren Gates
Hello Anna,
The reason we can give out such accurate advice is that we are advising on the patterns that we have created in-house and in our linen, which we work directly with the Mill to create. Without knowing the ins and outs of the pattern you are using and, given you aren’t using linen I couldn’t accurately give you advice here. I would recommend contacting your pattern manufacturer for questions or picking up a book on pattern alterations. These are usually really comprehensive and detailed. I used to use How To Use, Adapt, and Design Sewing Patterns by Lee Holman while I was teaching sewing and pattern alterations to my students back when I was a sewing teacher.
And, if I may be cheeky, why not give one of our patterns a try? Most of them are free 😛
Anna Bateson
Hi Lauren
Thanks so much for replying. Unfortunately the pattern manufacturer is no longer in business which is why I’ve been trawling the internet and reached out to you. No problem, I totally understand. I’ll check out that book you recommend and now I’ve found you I’ll look at your patterns too!
Thanks again,
Anna
Josi Reece
How do I get the pattern for this? I don’t see a way to purchase, just a free download that doesn’t include how to cut the fabric.
Lauren Gates
Hello Josi,
This is indeed a free pattern download and the pattern files are included as an attachment which can be viewed on Adobe Acrobat Reader. The instructions for accessing your pattern pieces are on the first page of the pattern download booklet, but if you’re still having trouble locating your pattern pieces, I have created an in-depth tutorial for our Help Center. Here is the links to the tutorial;
https://support.fabrics-store.com/hc/en-us/articles/360057105032-Downloading-and-Opening-Free-pdf-Patterns-on-a-Computer-PC-and-Mac-
Bhargavi Rajan
For a beginner sewer, I had to read the instructions a few times and still made some mistakes, but its a good tutorial to get familiarized with beginning sewing project.
1. It would be good to know what face-to face meant before cutting fabric and all the markings in the pattern would be good to know ahead of time. So some instructions going over the fabric cutting process would be extremely helpful.
2. I would like to know what length elastic to cut, should it be shorter than my hip measurement and if so much much shorter- 10%/20%? Would it depend on elastic type or comfort level of tightness desired?
Thanks for the free tutorial and pattern.
Lauren Gates
Thanks so much for the feedback, I will pass these onto our design team to help them create clearer patterns in the future 🙂
As for elastic, It’s a great idea to pass the elastic around your waist/hip and cut the amount that feels comfortable for you, it shouldn’t be loose, and shouldn’t be too tight. Comfortable enough that your pants will be able to hold up and not drop down under the weight of the fabric. Amounts can definitely vary between peoples’ preferences and the firmness/ type of elastic chosen 🙂
Pamela Power
Is there a diagram for the cutting layout? I can’t seem to find one anywhere.
Lauren Gates
Hello, we don’t include cutting layouts in our free patterns. What you can do, is start by laying your largest pattern pieces on your fabric, which is folded with selvages together, then placing pattern pieces that need to go on the fold, and then finally laying your remaining pattern pieces on the spare spaces of fabric.
Jayoung Suh
I am an absolute beginner and really want to try this one as my first project. Is there any way I can find an actual pattern for this pair of pants? I would greatly appreciate any help!
Nicole Combs
The Pattern section (just above the Steps section with the instructions) has the link. It’s easy to miss, because it’s a short one word hyperlink… In the sentence that says “ You can access the multi-sized printable PDF pattern by following this link HERE,” click on the underlined word HERE, and that will take you to the pattern. : )
Lauren Gates
Here is the link 🙂
https://fabrics-store.com/sewing-patterns/cass-cass-wide-leg-culottes
Carol Rieger
I love these pants, but have one piece of advice which for experienced sewers really doesn’t need to be said; Measure and try-on, measure and try-on. I saw a post that one person thought these pants were a bit snug in the hips for the pull-up and made a note of that. I usually wear a 12 as I am about 5.5″ and around 160 lbs. I made the 12/14 and it was sooooo big I had to take in at least an inch on every seam and they are still very generous. I wish I had cut to the size 10. I made them with a gifted piece of heavier linen. Beautiful drape and no issues on bulkiness in the waistband…but wowie….big for me. I may take them in again, except with the inset pockets it makes the shaping of the hip area difficult to adjust.
Cindy Lin
Hi! I’m confused by the first part of step 3: “Press the pockets and the seam allowances towards the front leg. Turn the garment right side facing up and sew a 1/4? topstitch along the front side of the pocket opening.”
I’m not sure how to physically do that without stitching the pockets close..
On the other hand, this is my second time making these and the first time I skipped step 3 entirely. The first one turned out so well I’m in love!
Lauren Gates
Hello Cindy, You will need to open up your pocket and place just the outer layer under the machine. Its takes a bit of maneuvering, but it is possible to do 🙂 If you need more help, please email me: Ask@fabrics-store.com
Cindy Lin
Hi Lauren, thanks, the pocket opening just about fit the arm of the machine, phew!
Lauren Gates
I’m glad Cindy. I was also sewing something with this style pocket this weekend, and it is quite a fiddly thing to sew, but looks great once it’s done! I’m glad I was able to help. Enjoy your culottes 🙂
kim Hansing
Also, how do you determine the right and wrong side of Linen? I’m using the signature finish
Susan Hagloch
I often sew pants with fabric that is the same on both sides. I put a silver safety pin on the left-side fabric pieces, and a gold one on the right side. The clasp side of the pin is the right (outside) of the garment, and the pin-through is the wrong side. Be sure to mark all of your fabric pieces.
kim Hansing
Hello, I’m just getting started with this pattern. what does cut 2 “face to face” mean?
Christy Boyken
it means to fold the fabric right sides together. Fold the pretty sides toward each other, and then pin the pattern piece on top and cut so the you have two pieces that mirror each.
Jinx Gilbert
Hi. for some reason I can not find the pattern for this! Could anyone please assist me please? ??
Lauren Gates
Hi Jinx,
I’m going to send you an email that should help 🙂
McKenzie Reints
Loving all the pants tutorials. Just a pattern suggestion, but it would be great to learn how to do the on trends jogger pants and a utility/boiler suit made specifically for woven fabric such as linen. Tons on knits tutorials out there, but none for woven. these two types of garments would be great to learn!
Kei Mag
i am a beginner but i found these instructions confusing and had to go to youtube. there are also no explicit instructions on when to sew the sides. making shorts instead of pants, hopefully it works out!
Lauren Gates
Hi Kei, I’ve sent you an email. You can find the instructions for sewing the side seams in the tutorial for sewing the pockets. It is step 9.
https://blog.fabrics-store.com/2016/10/14/sewing-glossary-how-to-sew-inseam-pockets-tutorial/
Jaime Delano
The description says the model is wearing size XS, but the pattern has numeric duo sizes. Do you know what size she is wearing?
Dr Lucille Craig
Thanks Lauren, I have to look at the pattern, but I think I would just adjust the the height of the waistband ‘fold over’, therefore not have to compensate elsewhere. Right now I am making a caftan with asphalt 5.3 oz,
Thanks for your help.
Lucille
Dr Lucille Craig
CAN THESE CULOTTES BE MADE WITH DRAWSTRING, RATHER THAN ELASTIC?
Lauren Gates
Yes, I’m sure you can Lucille. I would adjust the width of the waistband to make it thinner so that you don’t have a lot of excess fabric that bunches up below your drawstring. From what you remove from the waistband, be sure to add to the length of the crotch and top of the pant. Then add buttonholes to the CF for the drawstring to come out of.
We’d love to see how your drawstring variation looks, so be sure to share it.