Anca High-Low Hem Collarless Shirt Tutorial and Pattern
This week’s pattern is all about updating the classic style and showing you ways to transform the simplest shirt into a piece of contemporary clothing.
Constructed from our beautiful yarn-dyed linen, Anca is a minimalist collarless shirt featuring button closure, cuff sleeves and a slightly cropped silhouette with a high-low hem. We’ve also added front oversized patch pockets for a modern twist. All these small details are what make this design unique. Whether it is a new seam finish or a fun embellishment, take the time to make your next me-made item one of a kind.
Materials
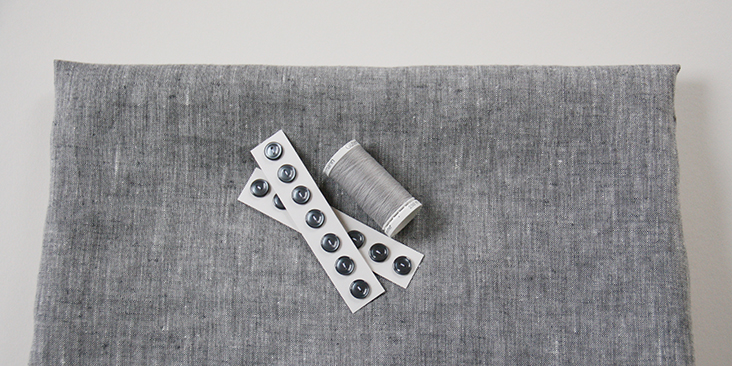
2 yards of IL042 900 FS Premier Finish
Matching sewing thread, 10 1/2″-wide buttons
Tools
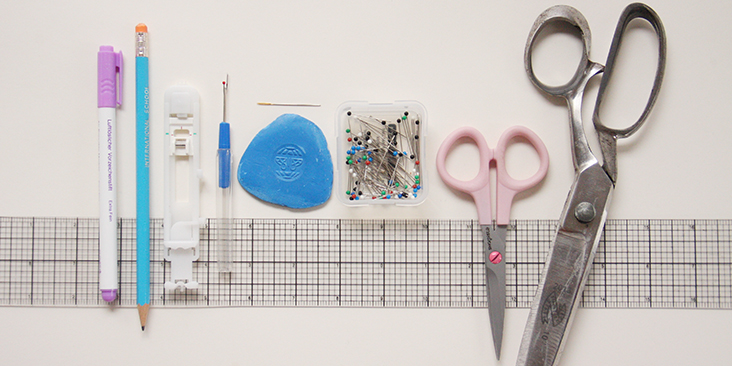
Pattern paper, pen, fabric marker, scissors, pins, seam ripper, chalk, ruler, buttonhole foot, needle, sewing machine
Difficulty
Advanced Beginner
Time
5-6 hours
Pattern
You can access the multi sized printable PDF shirt pattern by following this link HERE.
Please note that you’ll also need to cut one continuous strip of fabric on the bias (1.5″ wide x 26″ long) for the neckline binding. For more instructions on how to cut your fabric on the bias please follow this tutorial.
If you need help adjusting the pattern for a fuller bust, we have a great Full Bust Adjustment tutorial HERE.
Steps
Note: Prewash your fabric and tumble dry it until it is still slightly moist, dry in room temperature. Iron the fabric so it is easier to work with.
Let’s start with the button bands. The medium weight linen we are working with is pretty crispy so we decided to not interface the button bands. However, if you are working with a lighter fabric or want to add some additional support to this area, consider interfacing the button bands with fusible interfacing.
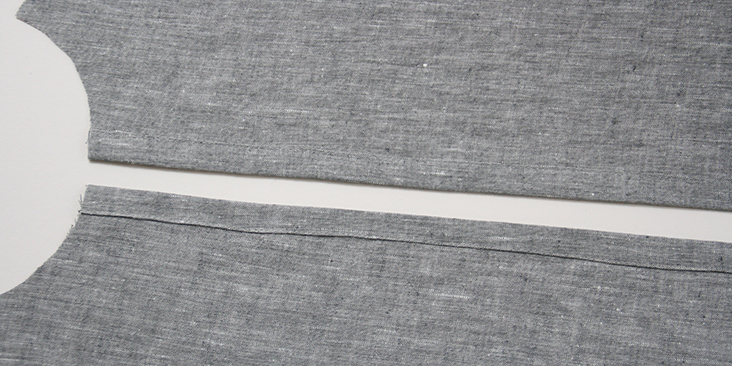
1. Fold the center front’s raw edge 3/8″ (1 cm) to the wrong side and press. Then fold it another 3/4″ (2 cm) to form a button band. Press and pin.
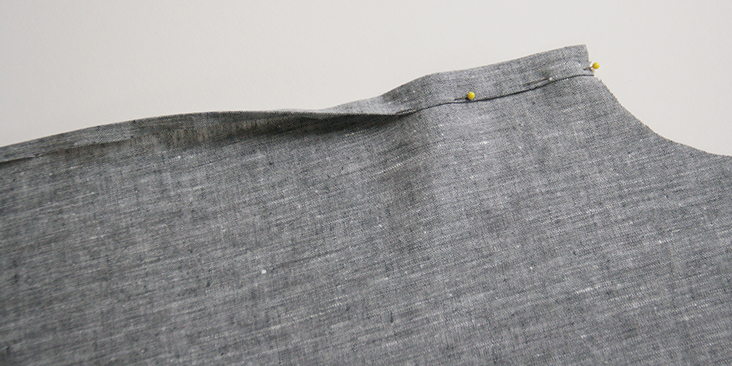
2. Stitch as close to the folded edge as possible (remember to backstitch). Press the finished button bands to ensure the fabric sits flat.
Repeat with the other button band.
It’s time to attach the patch pockets to the front of your shirt. We have a great tutorial about patch pockets HERE that might offer some additional information on the process.
3. Serge or zigzag the bottom and side raw edges to prevent the fabric from fraying. Leave the top edge raw.
4. Fold the serged/zigzagged edges up 1/4″ towards the wrong side and press. Be careful to press the bottom corners so they do not stick out beyond the sides of the pocket.
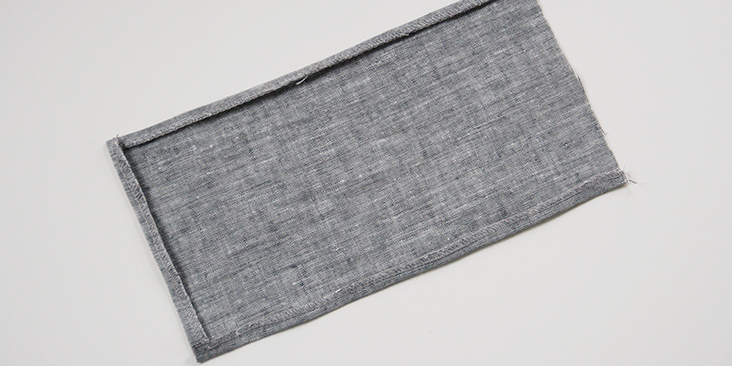
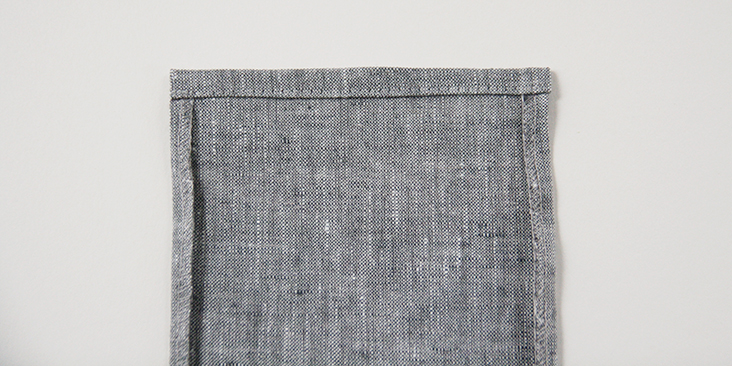
5. To create the top fold, simply fold your fabric twice to the wrong side: first 1/4″ and then another 3/8″. Press and stitch in place.
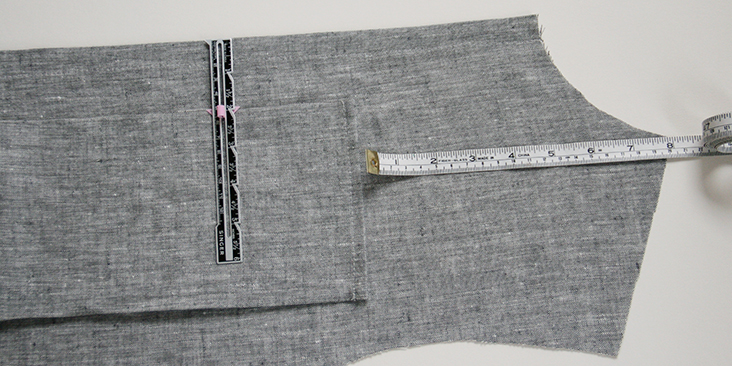
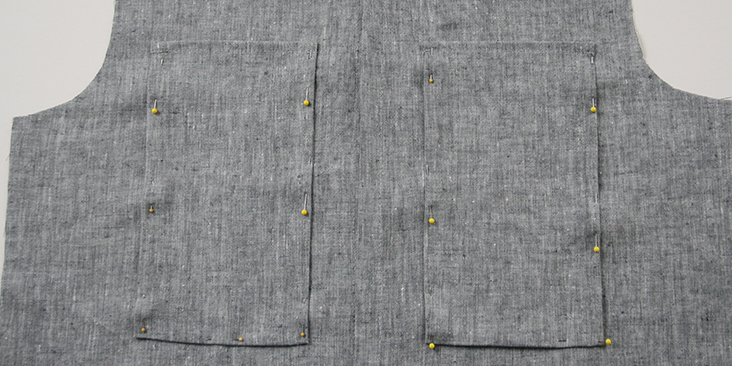
6. Pin your pocket to the right side of your garment 8″ from the highest shoulder point and 2″ from the outer button band edge. Double check that both pockets are on the same level and then topstitch them in place 1/8″ from the fabric’s edge. Remember to backstitch and press when you’re finished.
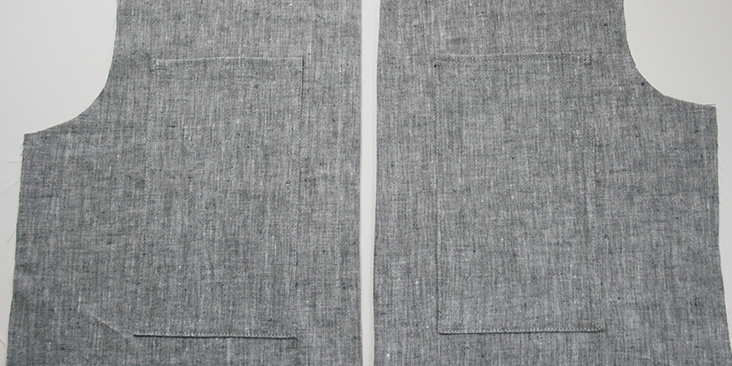
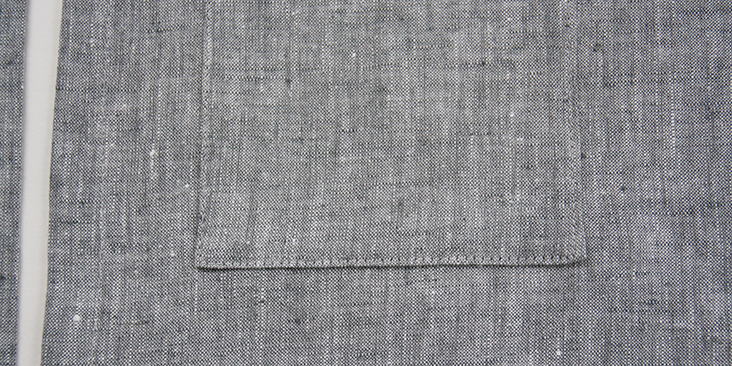
7. Before you start assembling the front and the back pieces together, finish the bottom edge of your fronts & back pieces with a rolled hem. HERE is a detailed tutorial on how to finish curved edges with a rolled hem.
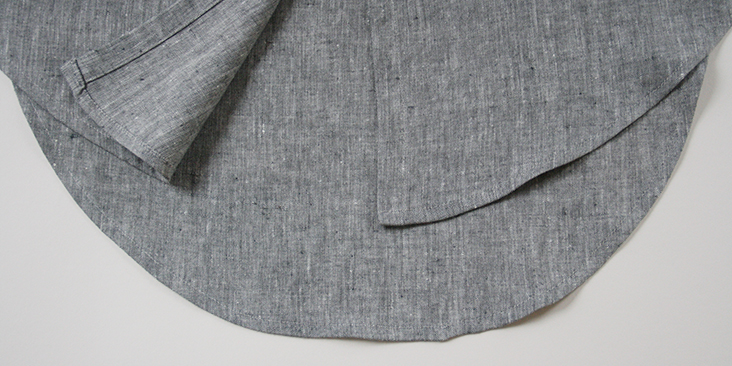
8. Pin the front and the back of your shirt right sides together at the shoulders.
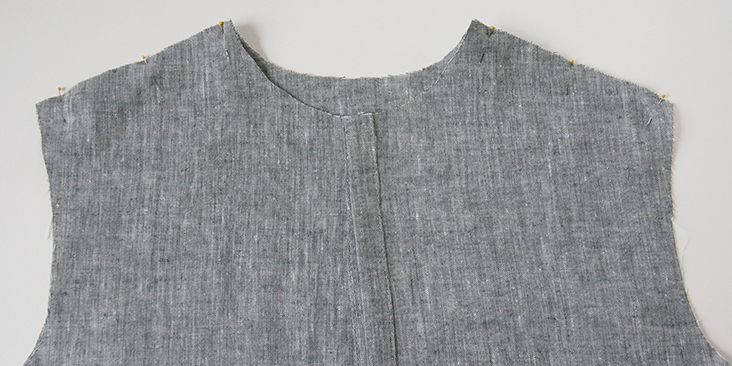
9. Sew the shoulder seams right sides together at 3/8″ (1 cm) seam allowance, remember to backstitch. Trim the seam allowance down to 1/4″ (6 mm) and serge or zigzag the raw edges together to prevent the fabric from fraying. Press the seams flat folding the serged/zigzagged edges towards the back of your shirt.
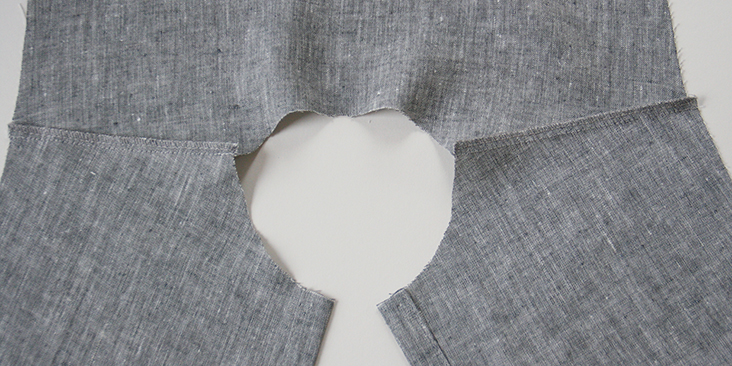
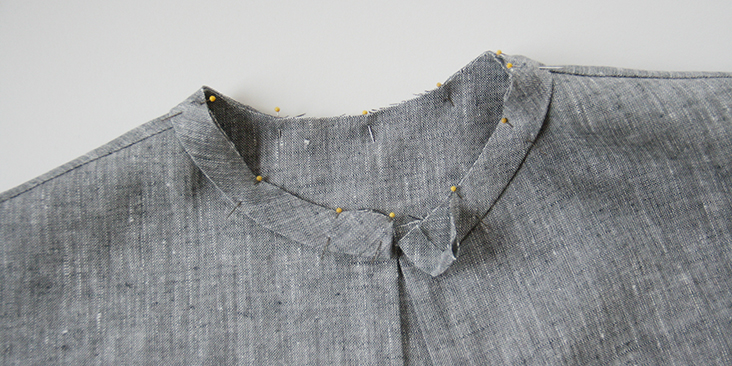
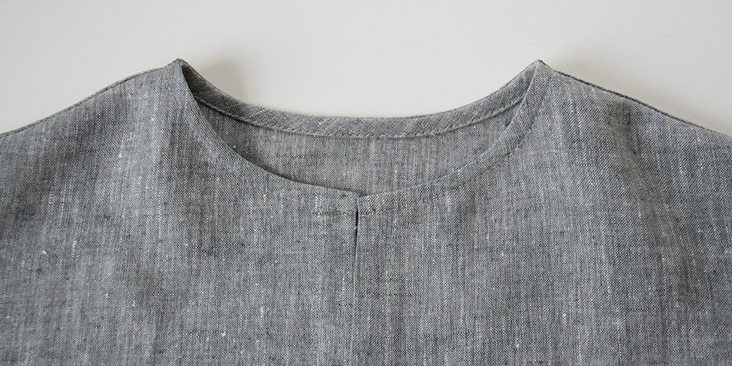
10. Bind the neckline following this tutorial. Make sure that when you attach the binding the serged/zigzagged shoulder seam edge is folded towards the back of your dress.
When you come to the front opening, tuck in the ends of your bias band as shown below:
Now comes the time to sew the sleeve plackets and attach the cuffs.
11. Make a 4″ tall incision on the right side of your sleeves as shown below and bind them with bias tape. Follow this step-by-step tutorial that will guide through the process of sewing continuous bound sleeve plackets.
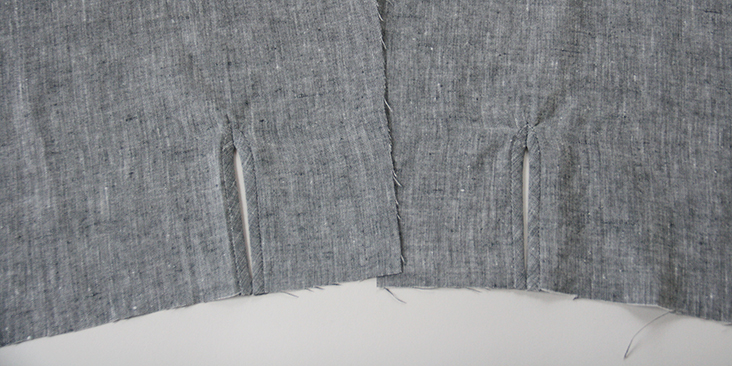
12. When you’re done binding the plackets, pin the sleeves to the armholes right sides together and your bias bound sleeve plackets towards the back of your shirt.
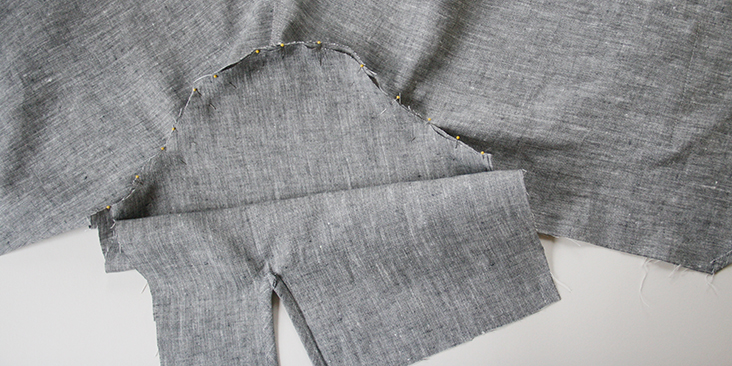
13. Sew at a 3/8” (1 cm) seam allowance. Serge or zigzag the raw edges together to prevent the fabric from fraying. Press the serged/zigzagged seam allowances up towards the sleeves.
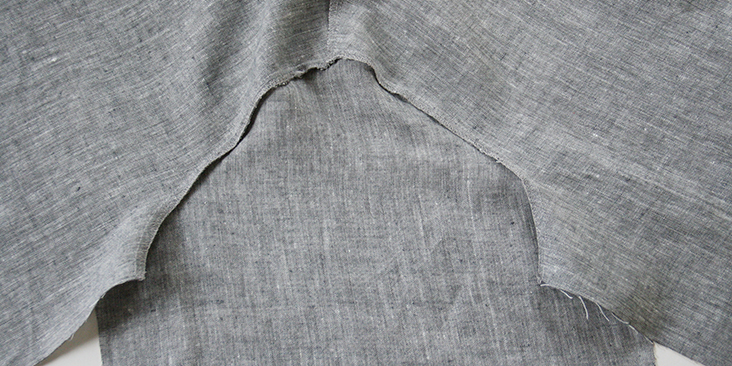
14. Pin the sleeves and the side seams right sides together.
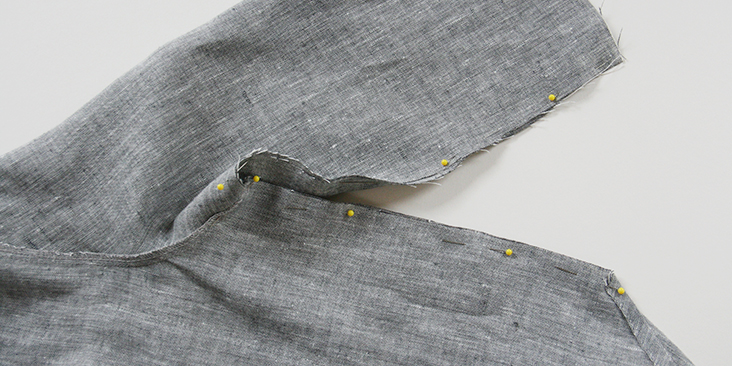
15. Sew the pinned edges at a 3/8” (1 cm) seam allowance (the underarm and the sides all in one seam) and finish the raw edges with a serger or a zigzag stitch. Press the seams flat folding the serged/zigzagged edges towards the back of your shirt.
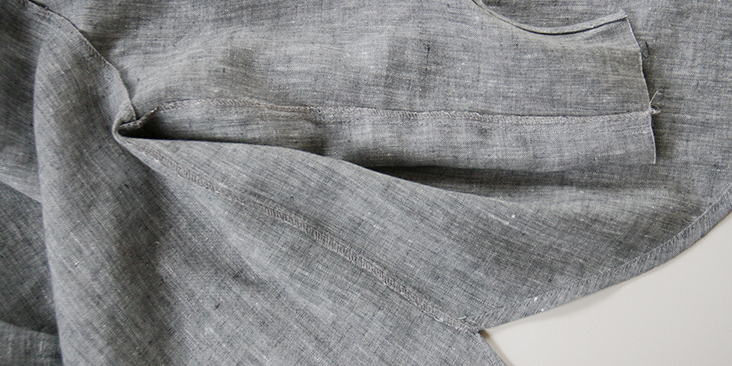
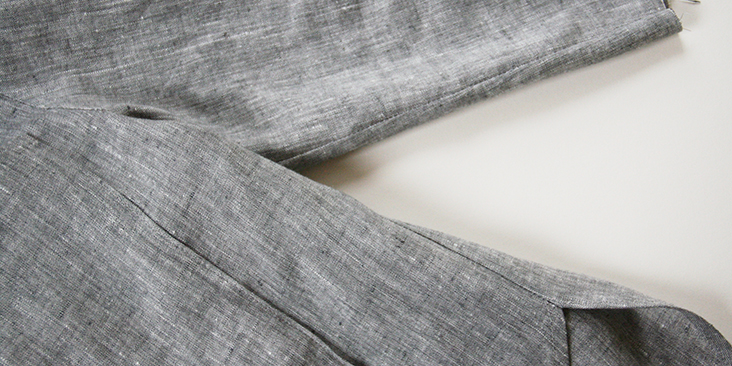
Time to sew and attach the cuff.
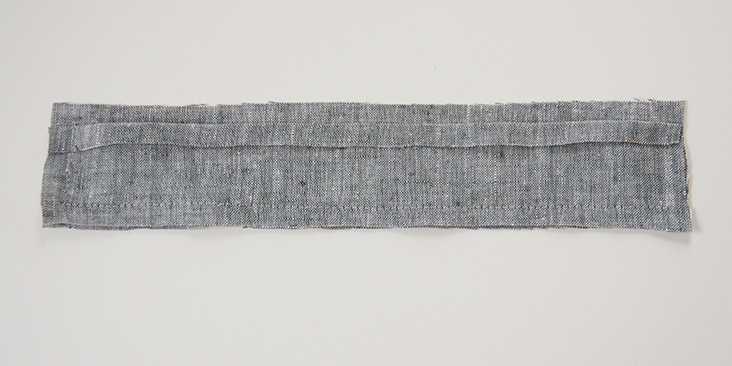
16. Press the top edge of one of your cuff pieces 3/8″ (1 cm) to the wrong side and then align, pin and sew the raw edges around it.
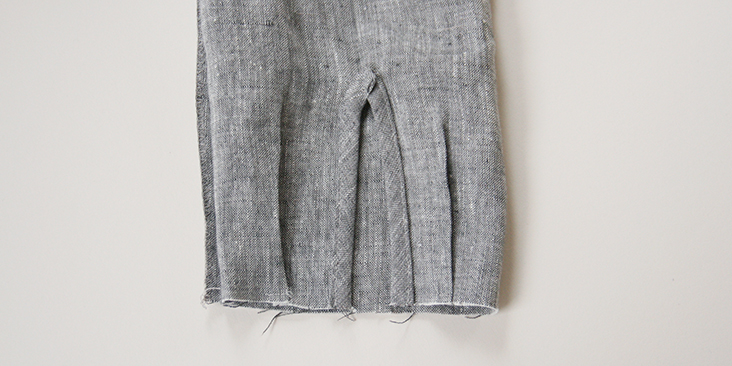
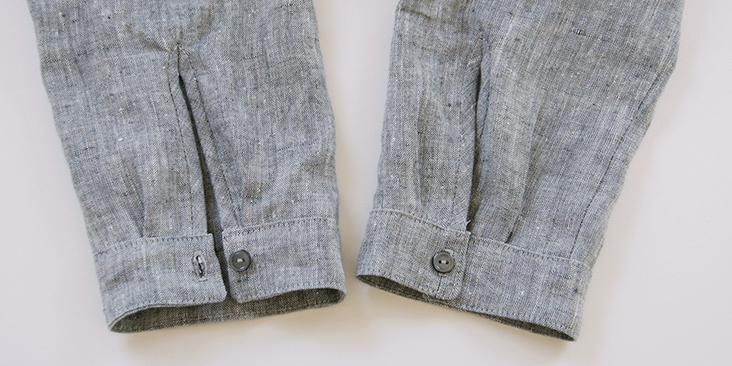
17. Pleat your sleeve fabric to the width of your cuff (to the length between the two lines of stitching on your cuff opening) and secure the pleats by running a line of stitching over the pleats very close to the raw edge.
 18. On the wrong side of the sleeve, pin the long cuff panel to the sleeve sandwiching the folded cuff panel in between but making sure not to catch it when you pin. Both wrong sides should be facing you.
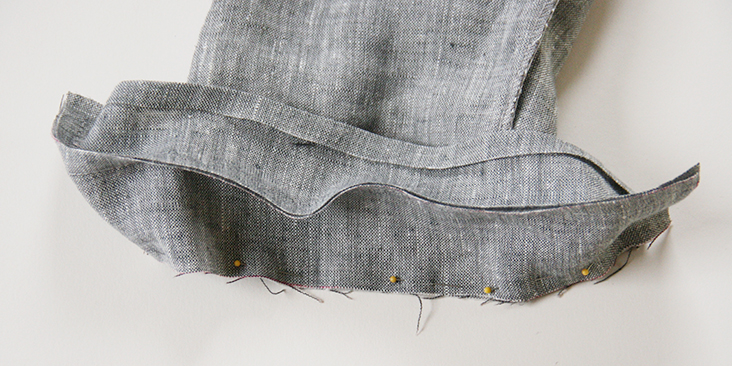
Match up the finished sleeve edges to your cuff’s line of stitching so that when you turn your cuff right side out, they’ll be aligned.
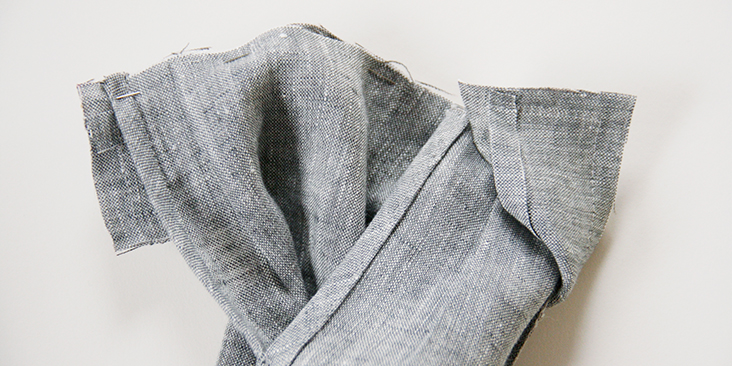
19. Stitch the cuff to the sleeve making sure that the folded cuff edge is not caught.
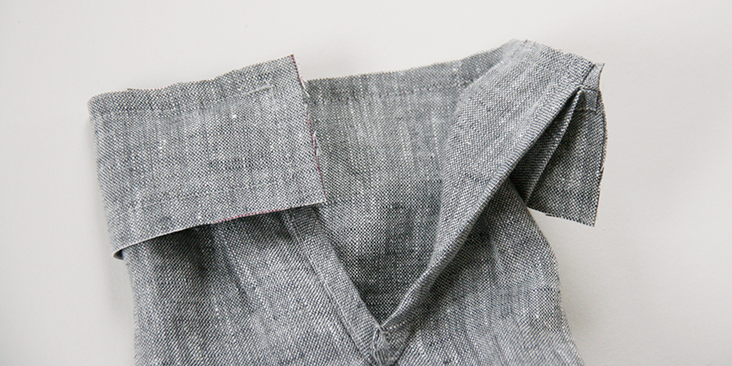
20. Turn the cuff right side out and press the seam flat folding the seam allowances towards the cuff.
Use a dull pointed object like a chopstick to get the corners.
21. Pin the other raw edge to the right side of your sleeve covering the line of stitching and edgestitch through all layers.
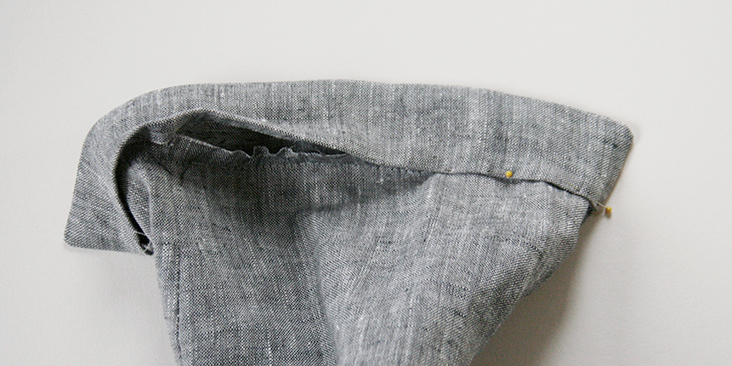
22. To make sure that your sleeve cuff stays in place, topstitch around the curved outer edge 1/8″ from the edge.
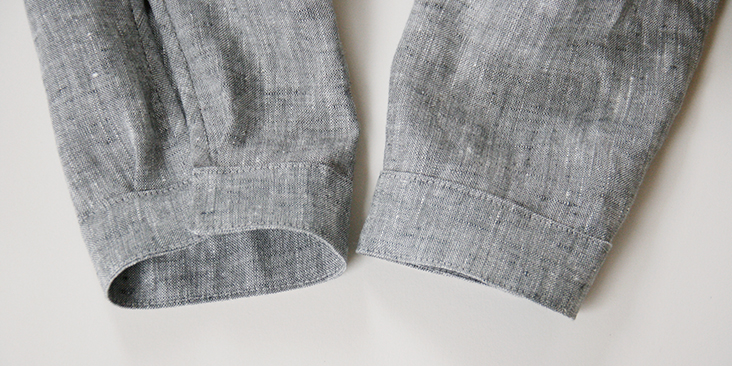
23. Lastly, sew the buttonholes and attach the buttons.
For the buttonholes, you can follow our detailed tutorial HERE. As for the buttons, check our tutorial HERE for instructions.
Overlap the cuff and decide where you want to place your button. Make a small mark and sew a buttonhole and attach a button.
The number and the spacing on the front button bands are really up to you. If you want your buttons closer, just leave smaller gaps between them. We decided to space our buttons 2,5″ (6 cm) apart. Overlap the shirt and place a pin into the center of each buttonhole. This is where you’ll need to attach the buttons.
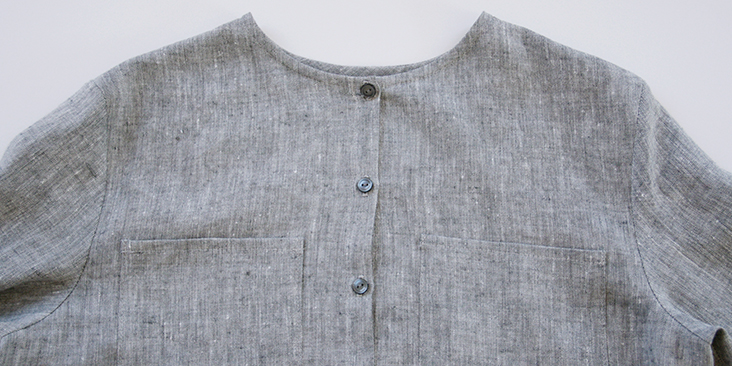
24. Give your shirt a good press and you are all done!


31 Comments
Melissa Domax
I loved making this pattern. I used my projector to project the pattern right on the fabric. Super grateful for such a beautiful pattern being free to use.
Colleen Spencer
I just finished making this pattern and it turned out awesome! Perfect fit and the high low hem is such a fun look. The sleeve opening and pleats challenged me some because they weren’t indicated on the pattern but nevertheless I persevered and got the job done. I’ll xfer my sleeve slit and pleat locations and dimensions to my printed pattern so next time I make this (and there will be next time) all that freestyle measuring will be replaced with transferable pattern markings.
Cathy Regan
It would have been helpful to have the bias strip on the cutting layout. I don’t see a way to get it out of the yardage and layout given. This is a non-trivial amount of fabric to add.
Lauren Linen
Hello Cathy,
Our Free patterns only come with a printing layout used to help you assemble your printed A4/letter pages. We haven’t included fabric layouts in our free patterns and try to keep our pattern file sizes small and to help us offer so many patterns on our website for free.
Christine Davis
In working my way through this pattern, there are a a couple of things I would have found helpful. It would be helpful to indicate (in the sleeve placket tutorial) that the 4″ slit is to be located on the back side of the sleeve. Unless I missed it, I couldn’t find that anywhere. (After looking at sleeve patterns online, I figured it out, but not with a lot of hunting.) Also, in the third full model shot, it appears that the sleeve cuff is wrapping to the front (her right arm). Isn’t that normally just the opposite? Don’t cuffs wrap toward the back? It almost looks like her other sleeve (left arm) wraps the correct way in the picture below that. ?? I think it would also be helpful in the neck binding tutorial to have the suggestion to trim the 3/8″ seam allowance down to 1/4″ on the neck binding before turning, pressing and stitching in place so that the remaining binding width will cover the seam allowance without issues.
Thank you for providing this free pattern. I’m making it up in bleached IL020 for a nice light summer layer. Would love to make it in a heavier weight for over leggings in the fall.
Edna Moriah
Hi, this is such a pretty shirt- Does the pattern include the seam allowance?
Lauren Gates
Yes Edna, this pattern, and all of our patterns which are downloadable from our website include seam allowance 🙂 Happy sewing!
Kitty Kilian
Hi! Lovely pattern! Alas, the link to the pdf seems to be broken.
Such a pity. I hope you can repair it.
Thanks, Kitty Kilian
Lauren Gates
Hello Kitty, Thanks for letting us know about the broken link. I’ve repaired it and should be working now 🙂
Pingback:
30 Gorgeous Free Sewing Patterns for Tops (Women)antje fleischhauer
Hello,
which size is shown on the pictures?
Thanks a lot!
Best regards,
antje
Kirsti Adkins
WHERE IS THE ROLLED HEM TUTORIAL? I finally got started with this shirt today and now that I have begun, I find that the information promised is NOT there . I get a “OOPS, PAGE NOT FOUND” message and when I click on the link and then look through all the tutorials, clearly it isn’t there, even by another name. I have not sewn for many years and was excited at the prospect if sewing again with your lovely linen, but the frustration of “Oops, page not found” is getting me down. Kirsti Adkins
Andrea Andre
Hello Kirsti, I have often found broken links on this site and in the pattern PDFs. I used the search in the top right (searching “hem”) and it led me here https://blog.fabrics-store.com/2018/02/27/sewing-glossary-how-to-hem-a-curved-edge/. Hope that helps!
Monica Powell
I just love your patterns and the fit is so amazing – thank you for your very clear instructions too.
Hilary Ainslie
Your patterns are astonishing! The first one I tried to put together did not have a numbered chart, but I opened another that had a Layout grid with numbers on it referring to the numbered pages I had printed. Once I had seen that I could use ther unnumbered gri9d in my first pattern. I find the patterns to be the styles I like and I am waiting until I have finished the Peasant blouse so I can start on yjr Jihju LOow Hem Shirt. I have some natural coloured linen and I am so impatient to begin. Thank you for your website,. The myriad colours you have for linen are amazing
Rima Khusainova
Thank you so very much for your kind words Hilary! We are always so happy to hear that people like what we try to do here 🙂 Good luck with your sewing and we have so many new beautiful projects coming up!
Donna Nolte
I just wanted to share that I was intimidated by the download patterns at first (and I’m an intermediate sewer at best). But I’ve done a couple and I really think I’m beginning to like it. While it does take a little while to tape together and then cut out, it’s still less time than going to a store and getting the pattern and then cutting out all the tissue pieces. And it’s FREE which, to me, offsets the paper and ink cost! Patterns in the stores are SO expensive.
I’m excited to try this shirt. My fabric is on the way so I’ll let you know. If it goes well, I’m going to make it for my 12 year old in denim as a jacket.
Thanks!
Donna Nolte
oh and I store them in a gallon size ziplock bag with a pic of the pattern on the front. They don’t seem to take as much room as the tissue patterns with all the sizes and versions in one.
Rima Khusainova
Wow that’s a genius idea! I’m sure a lot of sewists will find this great tip extremely useful! Thanks!
Regina Hyatt
Thanks for the tip on saving patterns. It takes a village…
Rima Khusainova
Dear Donna, thank you so much for your comment! We are so happy to hear that you like our patterns! Yes please, keep us posted and happy sewing!
Stacy
One quick question, how far in from the right hand side do you make a 4? tall incision on the sleeves. I see it’s four inches high but how far in from the edge? Great pattern. I already have my lilac light weight linen all prepared to sew this pattern. Great for summer here in South Florida. As always look forward to all of the pdf patterns that you have available
Rima Khusainova
Dear Stacy, to answer your question about the placement of that incision, you need to divide your sleeve opening into four equal parts and place your incision about 1/4 from the raw edge. We have a great tutorial about this technique here https://blog.fabrics-store.com/2018/01/23/sewing-glossary-how-to-sew-a-continuous-bound-sleeve-placket/, you’ll find detailed instructions there. Hope this helps!
Connie Spencer
Thanks so much for your prompt reply to my call for help to get this free pattern. I have successfully downloaded and printed the high-low hem linen shirt. Thanks again.
Ettel
Fabulous tutorial!! It’s not complicated and inspired me to give it a whirl. Thank you.
Rima Khusainova
Thank you so much Ettel! We’d love to see what you make of it, please share the pics of your finished project with us!
Darlene De Vries
How can I get a paper pattern please?
Rima Khusainova
Dear Darlene, this pattern is available for free as a multi size PDF file that you can download (click on the link in the patten section of this tutorial) and print out at home.
Ruth Morrisson
Except that I haven’t been able to (and I’ll bet Darlene hasn’t either). I had trouble with the pattern downloading (because Yahoo is being flaky). And then sent email and got a robo-response. And then tried to download it again this morning, only I got this popup saying I needed to open it in Adobe Acrobat. So I downloaded the Acrobat installer, but it won’t open/install. So I CALLLED your 866 number and got nobody. I could hear someone in the background so I know you had operators. And then it hung up on me. So I called AGAIN, left a message saying in part that I needed to get it as hard copy (not a download). And also asking why I should even continue to subscribe to your emails, if this is how you treat customers. You can call me back now….
Regina Hyatt
I had a similar problem with downloading patterns, but I sent an email. Within a couple of hours, due to time changes, I received a step by step tutorial with screenshots from Maureen. It was so helpful for this oldie but goodie. I hope you worked it out.
Elizabeth Laboda
I prefer paper too. These patterns I have to tape up are costly, in the paper, ink, tape, and time. Then, you have to find some place to store them. I just hate those things. Adding insult to injury…I get a paper cut every time I try to assemble one of them. Cute designs but not worth the hassle.