Jade Relaxed Linen Shirt Tutorial and Pattern
In a closet full of different styles, the white linen shirt is the very definition of a wardrobe staple. Paired easily with anything from jeans to trousers or a simple skirt, it instantly adds a touch of sophistication and cool masculinity. And even though your standard button-down will always do the trick, today we’d like to show you our modern update on the classic white linen shirt.
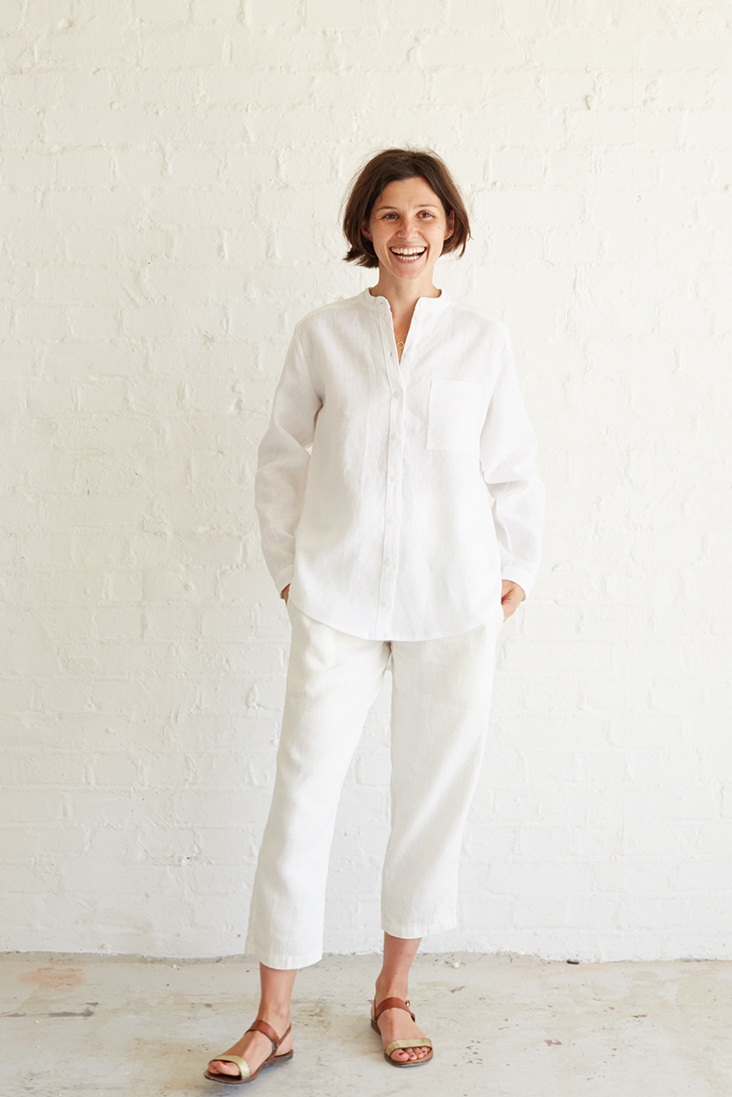
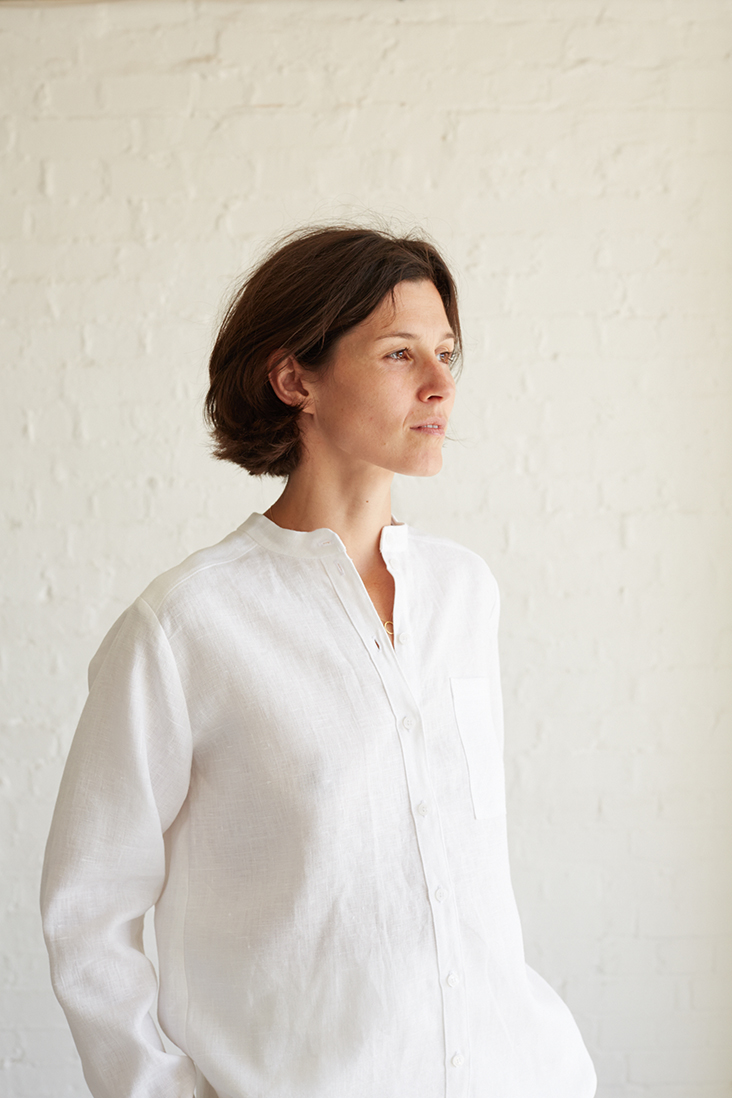
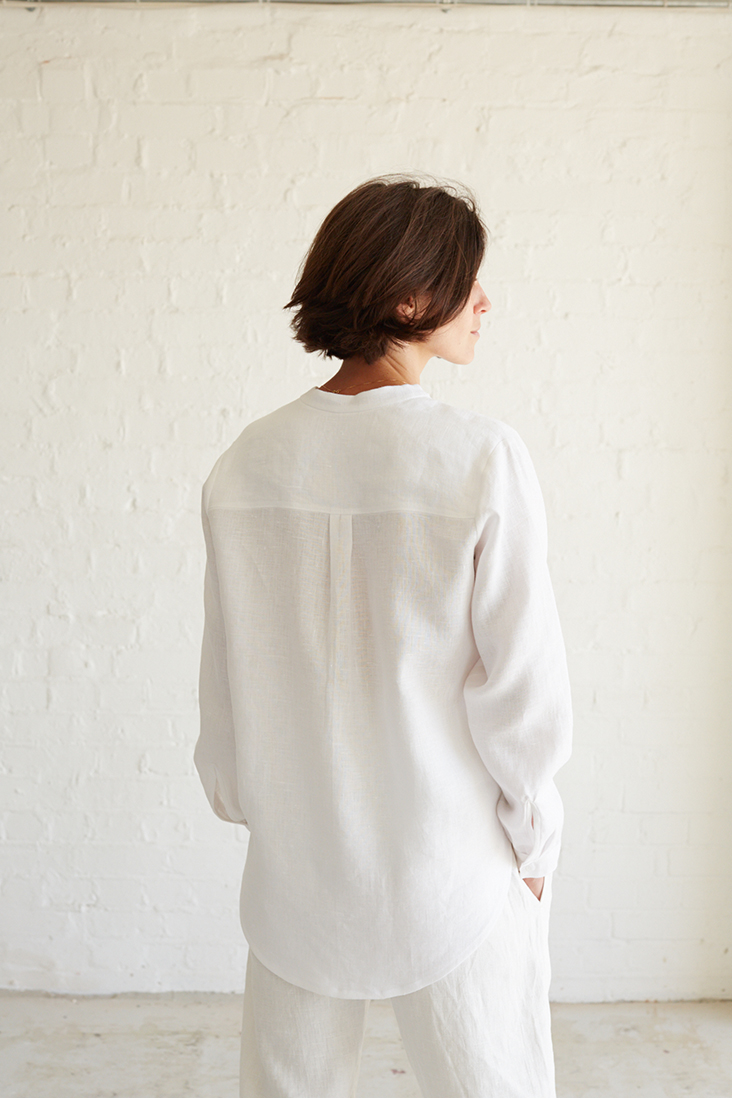
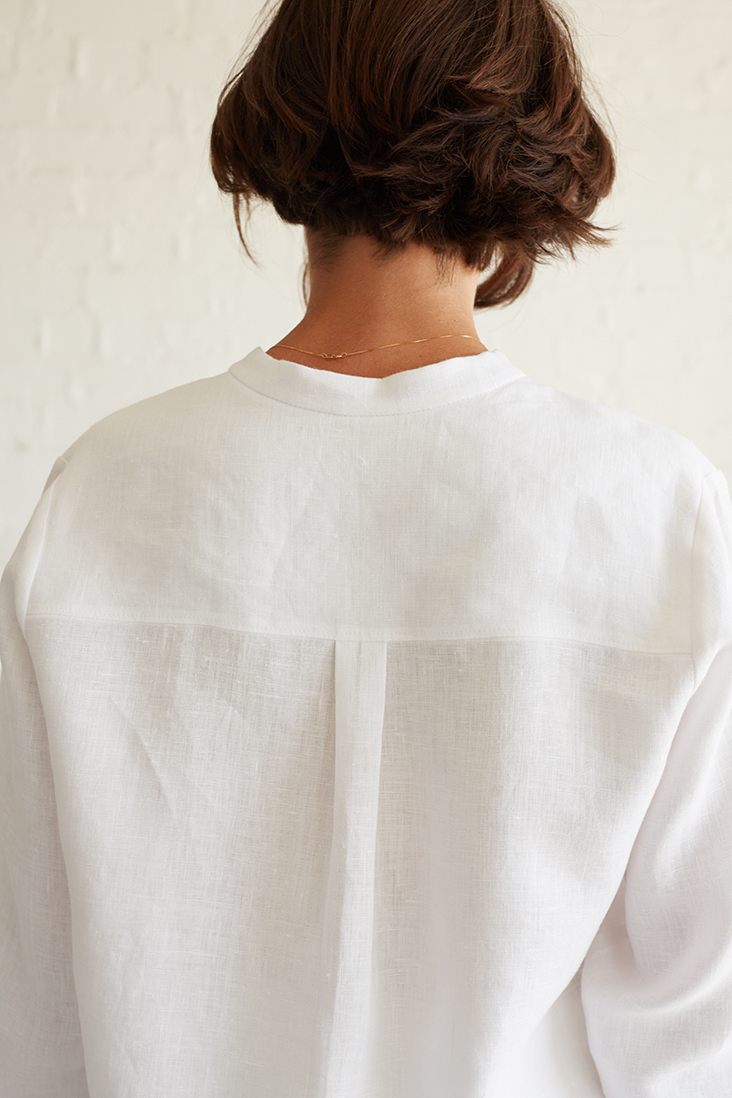
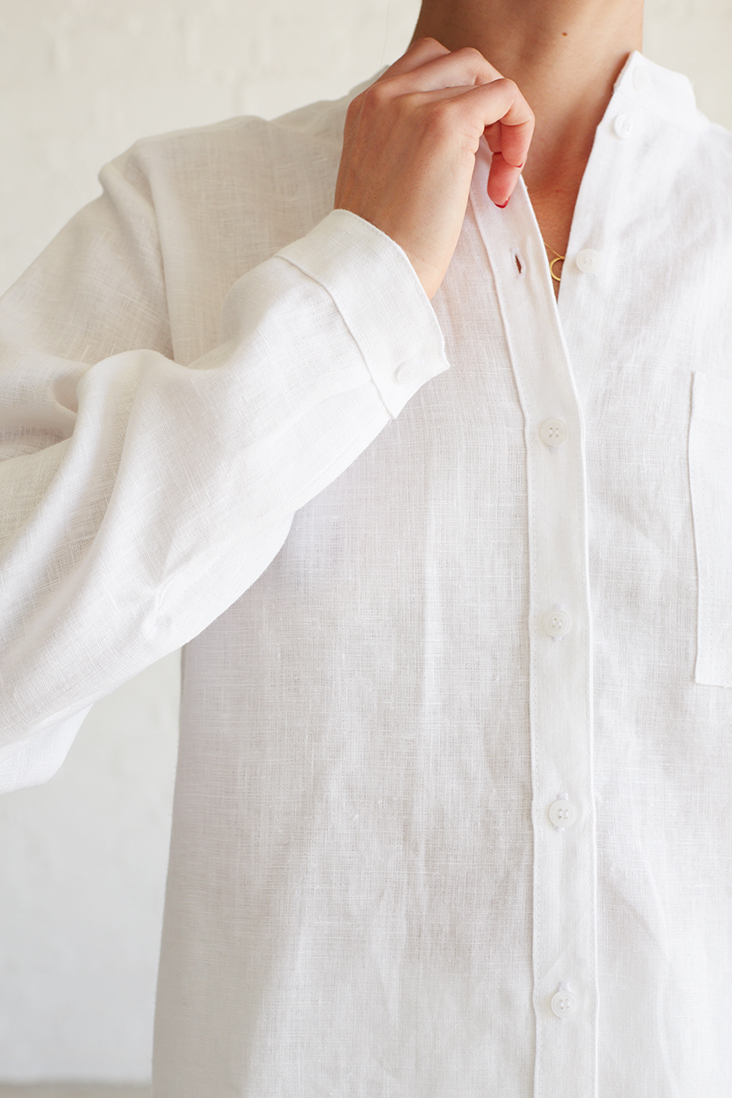
The shirt we imagined combines traditional tailored features like button bands, sleeve cuffs and a yoke with a minimalist styling, relaxed fit and a stand up collar. It falls perfectly, looks sharp and feels luxuriously soft due to our high quality linen.
Follow this step-by-step tutorial and make this beautiful shirt that every woman should own.
Materials
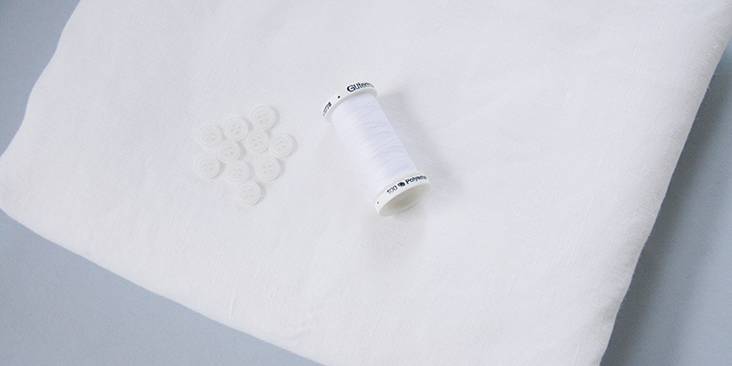
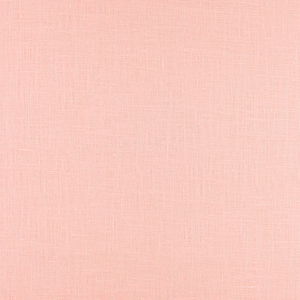
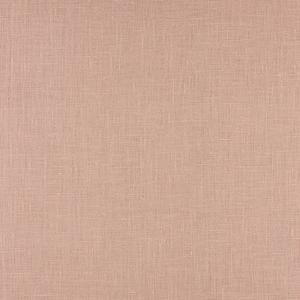
2 yards of medium weight 100% linen in IL019 OPTIC WHITE Softened
Matching sewing thread, 10-12 buttons
Tools
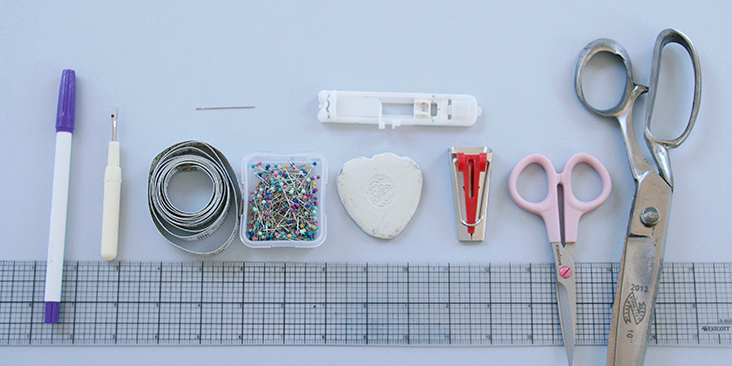
Pattern paper, scissors, pins, ruler, seam ripper, fabric marker, chalk, buttonhole foot, measure tape, 18 mm bias tape maker, needle, sewing machine
Difficulty
Intermediate
Time
5-6 hours
Pattern
You can access the multi-sized printable PDF pattern by following this link HERE. All seam allowances are included. The model is wearing size 4/6.
Steps
Note: Prewash your fabric and tumble dry it until it is still slightly moist, dry in room temperature. Iron the fabric so it is easier to work with.
As always, we start with the button bands.
1. Follow our detailed tutorial and complete the button bands. Remember that in women’s shirts the buttonholes are placed on the right and the buttons – on the left. So make sure that the left side of your front pattern (the longer one) is folded twice towards the wrong side, whereas the right side (the shorter one) is finished with a separate 1″ wide piece of fabric.
As for the interfacing – this step is optional. You don’t need to interface the button bands unless you want to give it more support and a crispier look.
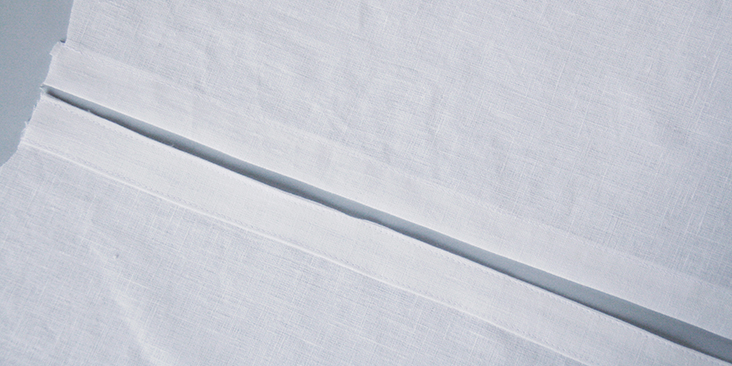
Do not sew the buttonholes and attach the buttons yet, we’ll do it at the very end of our tutorial.
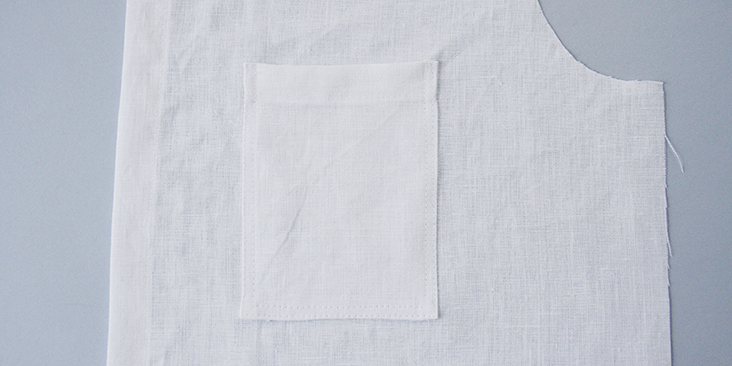
2. Sew the patch pocket to the right side of your left front piece following the first method explained in this tutorial.
Place your pocket 5.5” down from the neckline and 2.5” from the folded button band.
Usually, the bottom hem is the last thing you sew. But since this shirt’s hem is rather curvy, we’ll sew the hem now and assemble the shoulder/side seams after. As you can see, there’s a pretty sharp inverted corner at the side seams where the curves meet, so it would be impossible to just fold and stitch along the entire hem at once.
3. Finish the bottom hem using the great technique for curvy edges explained in this tutorial.
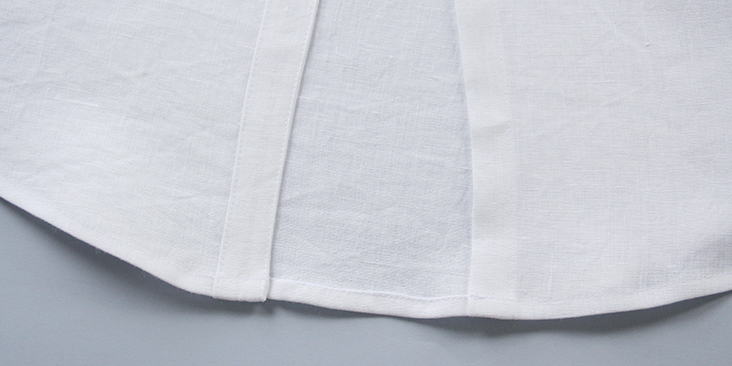
Now that the preparation is over, we can finally assemble the back and the fronts of the shirt with a yoke.
4. You’ll find the detailed instructions on how to attach the yoke in this step-by-step tutorial.
First create a 1″-wide box pleat:
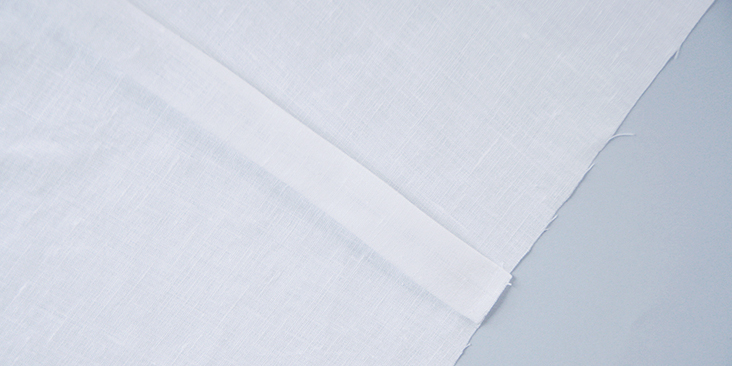
Then attach the yokes:
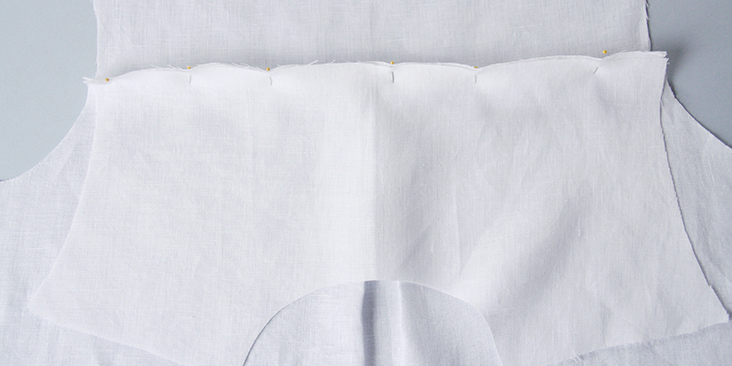
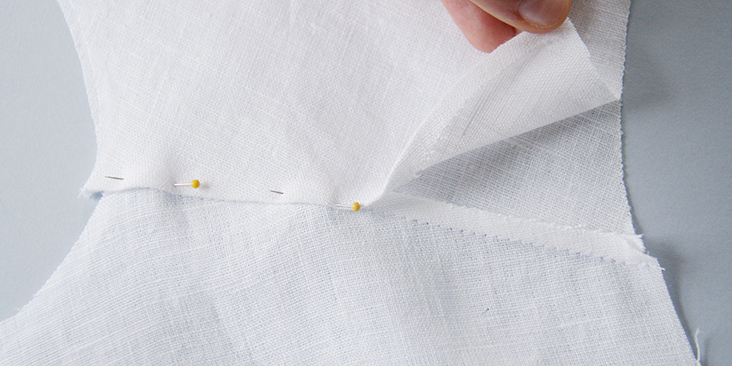
5. Time to draw and attach the collar. You’ll find the detailed explanation in this tutorial.
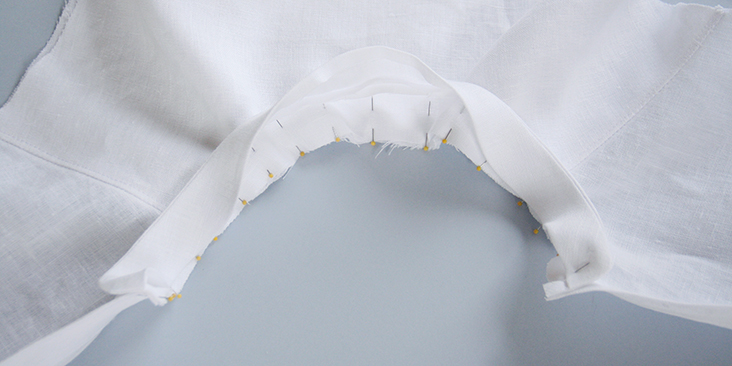
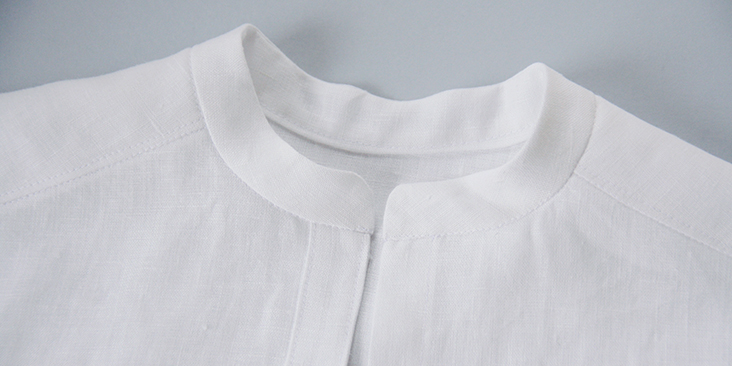
Next up – the sleeves!
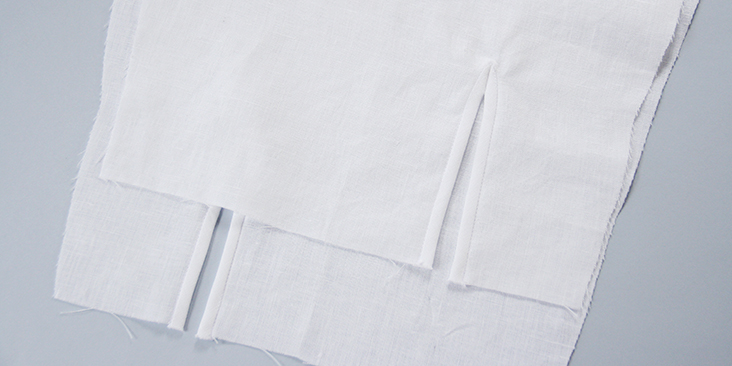
6. Before attaching the sleeves, mark and cut your sleeve slits, then draft and sew the continuous bound plackets on each sleeve following this tutorial (steps 1-10 for sewing only).
7. Pin the sleeves to the armholes right sides together. Make sure that the bound slits are positioned towards the back of your shirt.
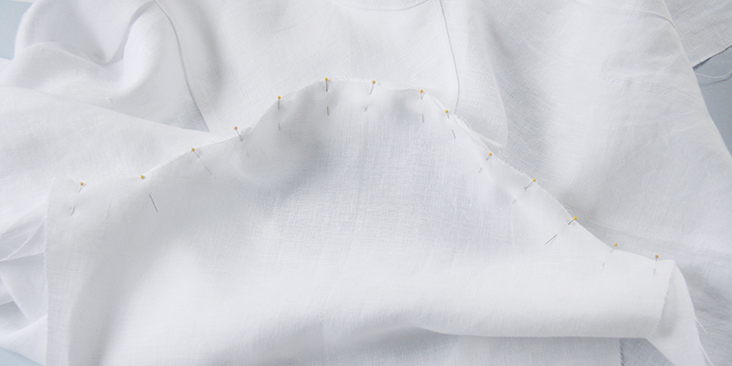
8. Stitch at a 3/8″ (1 cm) seam allowance then grade and serge/zigzag the raw edges together. Press the seam allowances towards the sleeve.
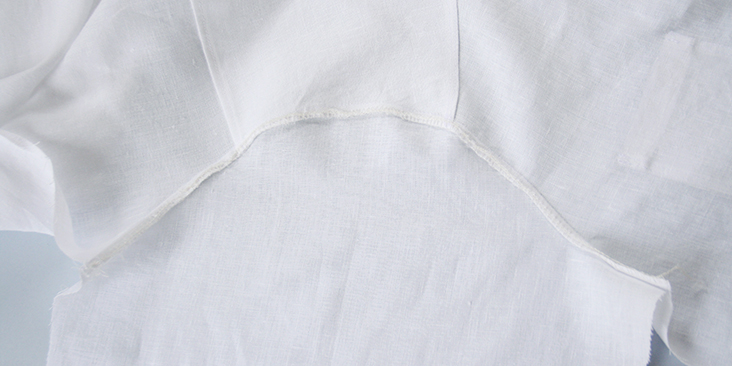
9. Pin the side seams and the underarms.
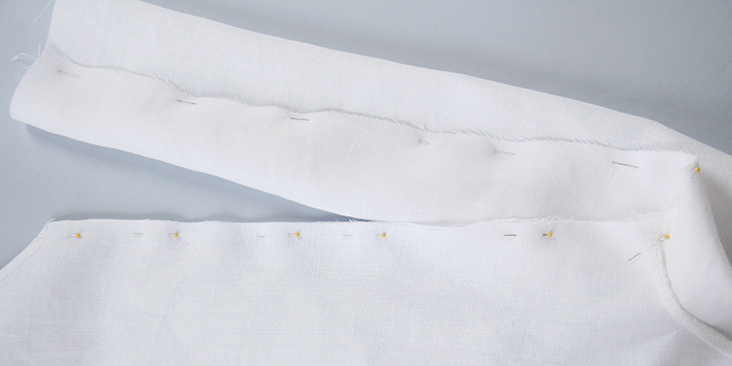
10. Stitch the side seams and the underarms all in one seam at a 3/8″ (1 cm) seam allowance then grade and serge/zigzag the raw edges together. Press the seam allowances towards the sleeve.
11. Following the same tutorial, sew and attach the cuffs to each sleeve.
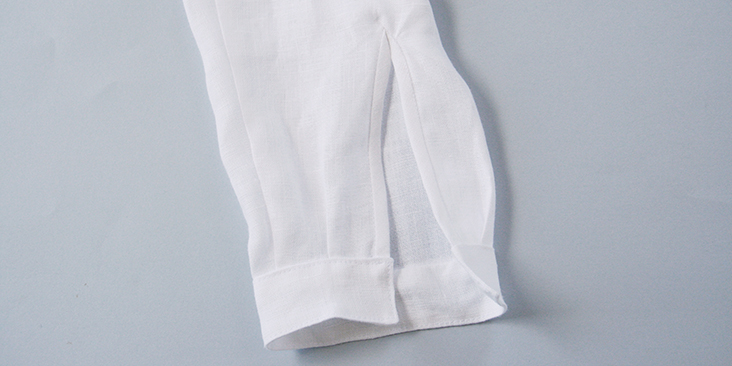
12. Lastly, sew the buttonholes and attach the buttons. Remember, that the buttonholes are sewn on the right button band and the tower side of the cuff, whereas the buttons – on the left side of the button band and the left side of the cuff.
For the buttonholes, you can follow our detailed tutorial HERE. As for the buttons, check our tutorial HERE for instructions. Overlap the shirt and place a pin into the center of each buttonhole. This is where you’ll need to attach the button.
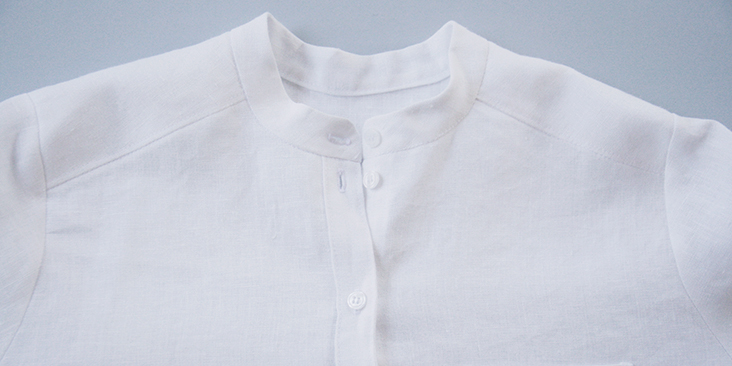
The number and the spacing are really up to you. If you want your buttons closer, just leave smaller gaps between them. We decided to space our buttons 2,5″ (6 cm) apart.
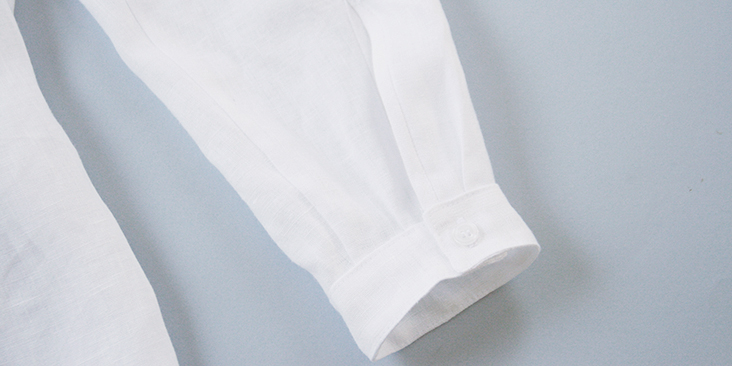
13. Give your shirt a good last press and you are all done!
A classic piece on its own, this simple white linen shirt also works well as a canvas for any number of cute embellishments. Add a contrasting pocket, colored buttons or even customize it with some hand embroidery.










48 Comments
john smith
Thank you very much for your post! If you want to do online shopping, visit this website: Apparel Shop USA.
Aramis Allen
I’m so glad I’ve found this blog. Great information here. I love the way this shirt is constructed and it came together perfectly for this newbie. I did not like the fabric I used so I will be making a purchase of some linen here soon. Thank you for the resources. I wanted to add that I originally thought the collar was off but it was not when attached and sewn on. Thank you!
Barbora Keckesova
I had a problem with the collar. I have tried making this shirt twice now and both times the collar was at least 4cm longer then the neckline. I don’t know if it’s possible that I have cut it too long twice. I was wondering if anybody else experienced this?
Anne Florio
Yes, i had the same issue with the collar last night. I ended up pinning the collar from the center neck then making sure where it should end. then I used the curve of the pattern piece from that spot to get the right shape. no problems after that. Best of luck.
Jo Lamb
Is there a cutting pattern for this shirt? I’m having difficulty mapping it out with the pieces that need two cutting on a fold… I also need to reduce the size by about a cm as I made a toile and its a little big – I printed the 16-18 – should I just take a cm of all pattern pieces? Sorry for the amateur questions…
Lauren Gates
Hi Jo, Not amateur questions at all 🙂
We recommend folding your fabric in half with your selvages meeting, then placing your patterns on the fabric, starting with the largest pieces and those that have to sit on the fold. You can then place your other patterns pieces on the fabric paying close attention to the grainlines. The grainlines on your patterns will away sit parallel to the selvages.
If your top is a little too big, start by pinning your toille to your ideal fit, then remove that amount from your pattern. I’d be happy to help with this further via email if you’d like. Just send me an email to ask@fabics-store.com Attn: Lauren
Jo Lamb
Hi Lauren, my email bounced back from that address… thanks for your reply on the blog regarding my questions about the Jade shirt. What I’ve realised since I posted is that I printed and cut out the 16-18 size pattern, not realising it was US size not UK size! It’s only just clicked why it’s so much bigger… so I’m thinking I’ll have to start all over again… doh!
Tabitha Thompson
I’m enjoying making this shirt but now that I’ve reached the sleeve placket part, I’m not sure how to put them on. The instructions here refer me to another tutorial using bias tape. Since I already cut out the plackets included in the pattern I’d like to use them. Do you have instructions on how to do that somewhere else? Thansk!
Lauren Gates
Hello Tabitha, The pattern piece you have is part of an older version of this pattern, and we have since removed it. You can use this tutorial we made if you’d like to use that pattern piece:
https://blog.fabrics-store.com/2017/12/05/sewing-glossary-how-to-draft-and-sew-a-sleeve-placket-with-cuff/
Chantal Gaud
I’m not sure what size to choose, there’s only the Finished garment size chart. My bust is 40 inches, so I would pick the 0/2 size which is 44 (which I find is plenty of ease). But then the model is wearing size 6 (finished bust size 46) and she is thin compared to me… Also, for what cup size is this pattern drafted for? Should I do a FBA if it’s a relaxed fit? Thank you for your help!
Lauren Gates
Hi Chantal, I’ve already sent you an email but for others who are also curious; We recommend choosing your size based on what size you would like your finished garment. The model is wearing the 4/6 and is a loose fit on her body. If you have a top that you love the fit of, I would recommend measuring that top and comparing those measurements to the patterns size chart to pick your perfect size.
Our patterns are drafted for a B-cup and have a great tutorial for Full Bust Adjustments here: https://blog.fabrics-store.com/2017/01/10/sewing-glossary-full-bust-adjustment-tutorial/
Simon Pease
I’m probably the only male here! I’ve been learning to sew during lockdown. I want to be able to say I can build a brick wall and sew. ? I’ve made one of your Hi Low hem shirt for my wife, which is really good. Now I’m doing Jade. I have one question on the pattern. The picture at Step 3 seems to show an insert which I can’t see on the pattern. What am I missing. Help please!
Rima Khusainova
Hi Simon! So great to hear that you are enjoying sewing! I wish I could learn how to build a brick wall, I’m in the middle of house renovation right now and that would certainly come in handy 🙂 To answer your question, there’s no insert in this pattern, I think that what you are seeing is the back of the shirt between two open fronts. Let me know if this helps, as I’m not quite sure what insert you are talking about. Rima
Simon Pease
Of course. That is what I’m seeing. Sorry to be so dumb. Onwards then. Good luck with your renovation.. Bricklaying is very satisfying, give it a try ?
Anne Brown
Hello,
What size buttons should I get for this blouse? I can’t find anywhere where it states the size of buttons.
Thank you in advance!
Lauren Gates
Hello Anne,
The button size is up to your preference. Usually, a shirt button is approximately 1/2″ or 12mm, but of course, you can opt for something larger if you prefer.
Hege Underdal
I’m about to start piecing this beautiful shirt together, but the button band tutorial confuses me. Am I supposed to use the measurements from the tutorial? If so: What are the horisontal lines running along side the button band ends of the two front pieces? Also: The pattern piece for the arm plackets are not covered in the sewing description or in the tutorial.
Thanks for helping out – and thanks for all your beautiful free patterns!
Hege Underdal
Since posting my comment I have discovered that the tutorial links to the wrong type of cuff and placket. The correct one should be this one: https://blog.fabrics-store.com/2017/12/05/sewing-glossary-how-to-draft-and-sew-a-sleeve-placket-with-cuff/
Pingback:
30 Gorgeous Free Sewing Patterns for Tops (Women)Diana Healy
How do you access the actual pattern? I have followed the links, and downloaded the PDF, but it has instructions only, and no pattern. Thanks.
Diana Healy
Never mind, found it!
Mar Iana
I am so sorry, but I have the same problem, where do I find the pattern?
Lauren Gates
Hello Mar,
The pattern can be downloaded here: https://fabrics-store.com/sewing-patterns/jade-jade-relaxed-linen-shirt-pattern
To access the pattern attachment, please see this article here which will step you through finding it: https://support.fabrics-store.com/hc/en-us/articles/360057105032-Downloading-and-Opening-Free-pdf-Patterns-on-a-Computer-PC-and-Mac-
Adrienne Brimer
This is the first time I’m using your patterns and I’m impressed! My only comment is sizing goes by finished measurements only on Jade shirt, and this shirt ISN’T LOOSE. I should have gone up at least 1 size for a more comfortable loose fit. I normally wear a RTW XL). Very professional finished product. I’m ready to try the Harley next.
Sarah Barton
Adrienne,
I find sewing patterns never match ready to wear sizing. I have learned through Peggy Sagars who runs Silhouette patterns suggests taking your measurements but look at the finished garment measurements. Try measuring a garment similar (woven fabric) that you like the fit of and choose your size from there. Everybody likes a different fit so that is the beauty of sewing and styling your garment. I just received my linen fabric today and can’t wait to make this blouse. Happy sewing!
Migdalia Yika
I haven’t been able to access the actual pdf pattern. I have downloaded, viewed through adobe reader, clicked on the link within the story various times but it only takes me to the tutorial. The link for the pattern is not working. This also happens with the pattern for the wide leg black slacks. What am I doing wrong?
Migdalia
Mardee Sherman
It’s easy – I just did it. When you open it in Adobe, click on the “paper clip” icon in the left hand column, and a PDF link should appear. Double-click on that and the pattern should open. If it doesn’t, it might be an issue with your PDF reader.
Brenda Perkins
I printed the pattern for the Jade shirt and taped it together. It doesn’t indicate where the slit for the sleeve placket should be. How many inches from the seams? Also, I agree with the question above regarding the sleeve placket. Although I haven’t tackled it yet, the tutorial link doesn’t take me to instructions for this type of placket – the single piece to be sewn around the placket. I’ll try to figure it out before I cut a bias strip.
Thanks.
Brenda
Brenda Perkins
AHA! I figured out the placket! I wasn’t able to do the diagonal folds on the tab – too bulky. I followed the folds, and the steps became clear. I also found the instructions for the cut for the placket in the sleeve. The print is small and fuzzy when enlarged, but I managed to read it. I’m on the right track.
Charlene Marietti
There is a Jade pattern piece for the sleeve placket that although I am a very experienced sewer, I can’t make heads or tails of. I’m always game to try a new technique, but the tutorial for sleeve placket is the tried-and-true bias tape method. When you have some guidance for this pattern piece, I look forward to trying it. In the meantime, guess I’ll rely on bias strips.
Tannaz Daraei
Hi
I made this shirt and I don’t understand where I had made a mistake. My collar was shorter than the neckline so I had to trim it. I guess it’s because of the button band. The instruction wasn’t clear enough in this link:
https://blog.fabrics-store.com/2017/10/03/sewing-glossary-how-to-draft-and-sew-button-bands-the-shirtmaking-way/)
I searched a lot but I didn’t find a good guidance for this part on the internet.
I’m so sad!
Tannaz Daraei
I thought about it last night before falling asleep.
I suggest to add an extra line to the front right bodice just the size of the right button band. So, when we add the band to the bodice, it would perfectly match with the collar.
Next time I will try it. I hope it works.
Any other ideas wold be appreciated !
Thanks for your help.
Linda P
What does your mean a “line” ? How wide and how long are the line you suggested? I am ready to make this shirt.
Thanks!
Tannaz Daraei
Dear Linda
What I meant was to add a rectangle with 1.5″ wide and a length even to the right front bodice (I used size 0/2) where the right button band is added to the right bodice.
I hope I could define it clearly.
I didn’t try it yet., so I suggest to make this shirt with a low-cost fabric at first to realize if this trick works or not.
Hope it helps
Cheryl Tobey
I’m a bit confused. I downloaded what is clearly labeled on the pattern pieces the Genia Pattern (within the last month.) Loved the blue shirt pictured. Then ordered my linen – love that too. Printed pattern and put together – great directions. Went to find the tutorial for the pattern – pattern gone. Finally found the tutorial for the pattern from 2017. Different pattern! No yoke etc. Looked back at the pattern on Adobe and it sent me to the Jade Pattern which fits more the pattern pieces I have. Can you explain? Have you renamed the pattern?
Kathleen Nelson
I read the pattern was free. Where do I get this?
Ceri
Love this pattern and tutorial, can’t wait to make this shirt for myself. I’d also like to try making some mens shirts and I think this pattern could work too. Do you have any suggestions on how I could alter the pattern/sizing to make a mens shirt from this?
Rima Khusainova
Dear Ceri, I have a great suggestion for you! Try copying one of the store-bought shirts that fits well the person you are making it for. Lay it flat on the table and get all the necessary measurements with a measure tape (note that the back of the shirt should be measured on fold) and draw your own diagram. Then follow all the steps in this tutorial to make your mens shirt. Hope this helps!
Orilee
One suggestion I make for those making or modifying a pattern is to do it first in a cheap fabric – an old sheet, cheap muslin, etc. That allows you to test the changes and fit before you make it in the expensive fabric. And your cheap fabric test can then become your pattern for future!
Rima Khusainova
Great suggestion Orilee! Thank you!
TigerKim
Awesome!
Rima Khusainova
Thank you! 😉
Diana Ilieva
Why every plus sized person thinks that if you`re size 6 or 8, or 10 is easy to buy clothes ? I am skiny, but that doesn`t mean that I don`t adjust patterns or everything looks perfect on me. I sew mostly because I am very disapointed of what I find in the stores – cheap fabrics, absence of idea – in every store or boutique you find the same ruffle blouses and dresses.And I need some new pants – that` s my shopping drama. And I need to say – there` s nothing unusual in my body shape.
It ` s not always easy to alter or change a pattern, but it` s not impossible. And the result – my idea, my choice of fabrics, my plesure to learn new skills in sewing and not only….
And sometimes may be you can`t use the concrete pattern, but It gives you so much inspiration, which makes it even more valuable.
So I will say Thank you for the another inspiring pattern.
Rima Khusainova
Dear Diana, thank you very much for your comment! This is exactly what we are trying to do here – give some ideas and hope that they will inspire people to create something of their own!
Lynda Moseley
I wish you all would consider that many of us who sew our own clothes have to so do so because we are not the standard size 6, or 10, or even 12, and can’t find nice reafy-made clothes. I am a plus size 22. I love this blouse and would love to make it, but I would not attempt to try and add 10 or more inches to that pattern and ruin expensive linen. I guess I will just stop receiving these emails from The Thread. I am tried of being disappointed in seeing only skinny people patterns.
Rima Khusainova
Dear Lynda, we totally understand how frustrating that might be. But luckily, there’s always a solution to any problem! This shirt pattern is very similar to out high-low hem shirt demonstrated here https://blog.fabrics-store.com/2018/03/06/high-low-hem-collarless-shirt-tutorial/ that is available as a free downloadable multi-size PDF pattern in sizes 0-30. You could totally take this pattern as your base, you’ll just need to even the hem, add a mandarin collar (you’ll find all the steps in this tutorial – https://blog.fabrics-store.com/2016/12/06/sewing-glossary-how-to-draft-and-sew-a-mandarin-collar-tutorial/) and a back yoke (also explained in a detailed tutorial here – https://blog.fabrics-store.com/2018/02/20/sewing-glossary-how-to-draft-and-sew-a-shirt-yoke/). Not only you’ll practice some new sewing skills, but also make a custom made shirt! I sincerely hope that this helps!
Trysta Schwenker
you can add width to patterns like this fairly easily. starting with the largest size, in many commercial patterns it is 18 or 1x. If you don’t have a dress dummy, then you should consider making a pattern sloper; which is a sort of blank template for you, a kind of short sleeveless blouse that you take apart and use to compare pattern pieces. Many books have tailoring advice, again, internet is a wonderful resource. It would be a great Thread article too.
Rima Khusainova
Dear Trysta, thank you so much for your precious advice! As for writing a series of articles about drafting your own basic slopers – I’ve had that idea for a while now so hopefully it’ll be available on the blog soon.