Skirting the Issue
By Kass Mc Gann
History
Possibly the most ubiquitous female garment in every time period is the skirt. Allied so closely to femininity, “skirt” became a slang term for women in the 1930s. But it was not always so. At its beginning, the word “skirt” didn’t refer to a female garment at all. The modern English word “skirt” comes from the Old Norse word skyrta, meaning a shirt, a man’s garment. During the Renaissance, “skirts” referred to the bottom part of a man’s tunic or doublet — the skirts or tabs around the waist of the garment. Until the 19th century, the proper term for what we call a woman’s skirt was “petticoat”.
The word “petticoat” too did not always refer to a woman’s undergarment either. Like the skirt, the petticoat was originally a male garment — a padded upper-body garment worn under armour, a small coat when “coat” was the word for the man’s upper-body garment or gown in the 1300s. By 1464 it was applied to a garment worn by women and young children. By 1593, it meant the typical feminine garment, hence a symbol of female sex or character.
In the 15th century, the introduction of a waist seam in women’s clothing led to a difference in construction of body and skirts. By the 16th century, petticoats were what we modernly call skirts. Worn under gowns as extra layers for warmth or to give more body to the gown skirts or worn in multiples themselves with jackets and doublets, petticoats are essential to female living history impressions from the 16th through the 18th centuries.
The length of petticoats varied wildly. We often think that proper women did not show their ankles, but this is not true for all classes and all time periods. Among the working classes, wearing a petticoat that reached the shoes was simply cumbersome. There are pictures and accounts of petticotes that just cover the knees. Upper class ladies, however, had petticotes that piled on the ground around them and trailed feet behind them.
Petticoats are so simple to make that few companies make patterns for them. But though materials and methods of decoration varied wildly over the decades of those centuries, the shape of petticoats changed little. Petticotes were made by gathering, knife pleating, cartirdge pleating, box pleating and other methods. The following instructions are for a knife-pleated petticote.
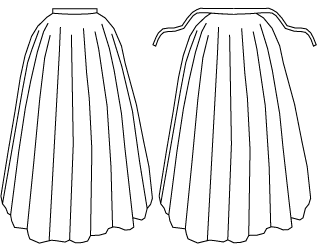
The Basic Petticote Silhouette
Cutting
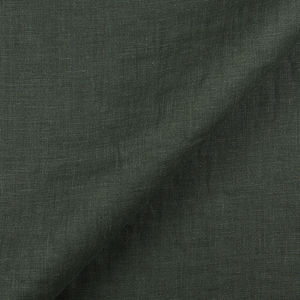
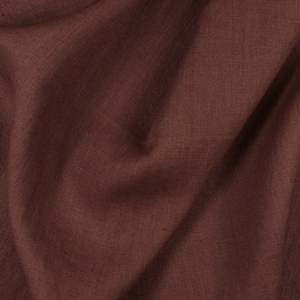
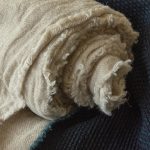
- Get some lovely medium weight linen from fabrics-store.com. IL019 is terrific for petticoats.
- Measure from your waist to where you want the petticoat to end. Call this measurement A.
- Cut two rectangles at full fabric width (~58″ wide) and measurement A + 2″ long from your fabric.)
If you wish to line your petticoat, cut two more rectangles of the same size and sew them to the first pair along their lower egdes. Follow all the rest of the instructions as if they are one piece.
Pleating
- Sew the two rectangles together, right sides to right sides, from the bottom, along the measurement A sides, stopping 8″ from the top.
- Roll hem the last 8″ of the side seams. These will be your pocket access slits.
- Roll hem the top of the rectangles.
- Fold the petticoat rectangles in half to find the center front at the top edge of the fabric. Mark this spot on both front and back pieces.
- Snip a small notch 1″ to the right of the center front point. Next snip a notch ‘½” to the right of the 1″ notch. Then snip 1″ to the right of the ‘½” one and so on until you reach the right edge.
- Repeat from the center point travelling to the left edge.
- Turn the left side of the apron so that it is away from you. With your fingers, crease the fabric at the second notch from the top. You should now have a “peak” pleat (shown as a dashed line in fig 11 at left). Fold this peak pleat away from you so that the first notch is creased into a “valley.”
- Place this first pleat under the presser foot of your machine and tack. Lower your needle into the fabric. Raise the presser foot. Crease the fabric at the fourth notch into a mountain pleat and fold it away from you, creating a valley pleat at the third notch. Continue creasing at the even notches as far as you can comfortably hold in place with your hand. Lower the presser foot, being careful that the pleats remain folded away from you. Slowly sew down the pleats, sewing less than ‘½” from the top edge of the Petticote piece. As you near the end of the pleats you’ve made, repeat the process. You can stop after sewing each individual pleat or sew a few at a time. When you reach the end and there are no more notches, tack and cut your threads.
(To pleat by hand, you may want to pin the pleats in place so they don’t move as you sew them. Pressing the pleats with an iron will also help avoid slippage. Again, sew less than ‘½” from the top edge of the Petticote piece. Make your stitches small enough to keep the pleats in place. Backstitching will hold the pleats better than a regular basting stitch.)
Do this with both rectangles.
Waist Treatment
- Cut a piece of twill tape or narrowware long enough to comfortably wrap around your waist and tie in a bow. Cut a second piece the same length. (Alternately, you can cut only one piece 2″ longer than your waist and close it with hooks, but the double waistband is more convenient.)
- Find the center point of the petticoat front and mark it with a pin. Do the same with the back.
- Fold the waistbands (twill tape or narrowware) in half and find the center point. Mark it with a pin.
- Lay a waistband on top of the petticoat front, right sides to right sides. Align the center points.
- Keeping the edge of the waistband aligned with the top edge of the front, sew over the pleats starting from the center of the front across to the right edge and then from the center to the left.
- Fold the waistband up and over the Petticote front top edge, catching all the raw edges inside it. Stitch the waistband down on the inside of the petticoat front. A blind stitch works nicely here.
- Repeat steps 4-6 for the petticoat back.
- Continue folding the part of the waistband that’s not attached to the petticoat. Tuck the raw ends inside the waistband and whipstitch closed.
Wearing
Step into the petticoat and pull the back panel up to your waist and center it. There are two ways your petticoat can be tied. One way is to tie the back waistband around your waist in front, and to tie the front waistband around your waist and knot them in the back. This makes your petticoats very secure. The other way is to tie the waistbands to each other at the sides.
References
- “petticoat.” Online Etymology Dictionary. Douglas Harper, Historian. 11 May. 2007.Dictionary.com
- “skirt.” Ibid.
- Fabrics-store.com

















Leave a comment