


Sara Pleated Pants Tutorial and Pattern
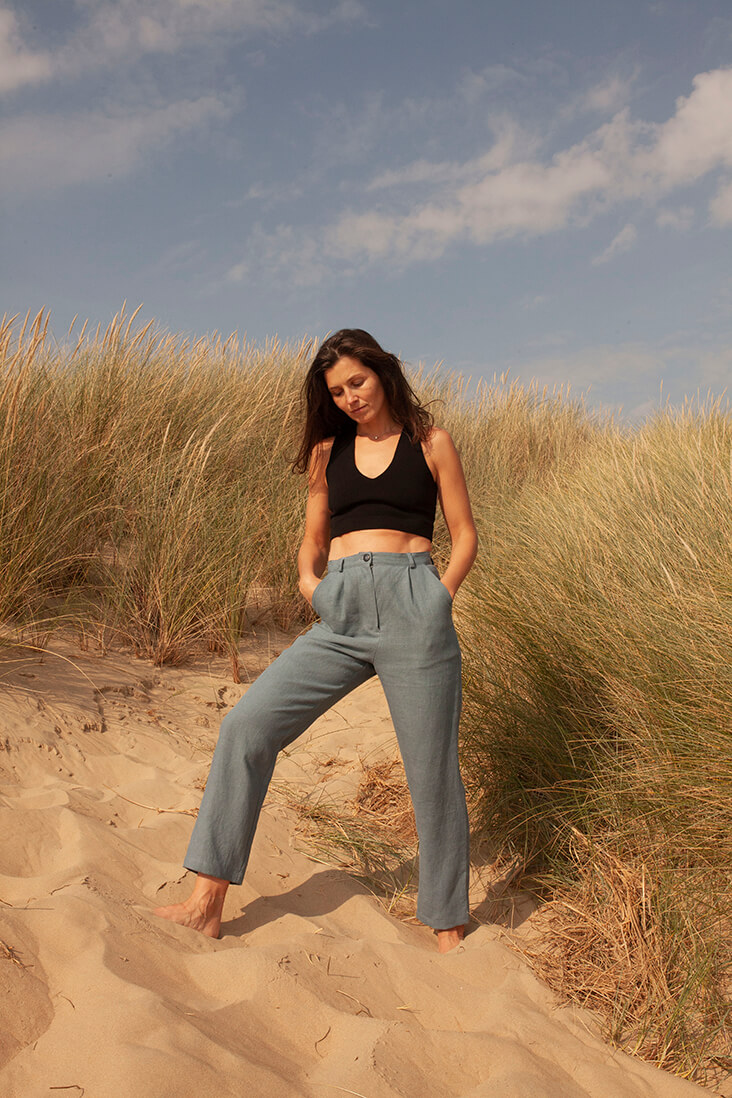
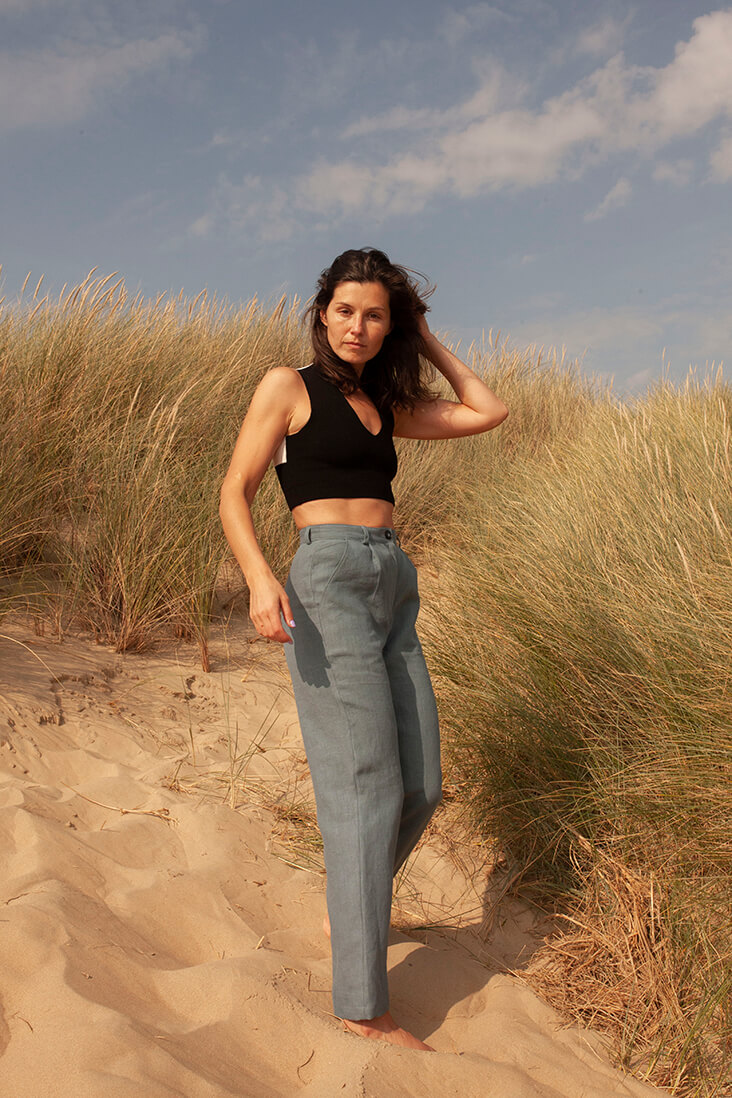
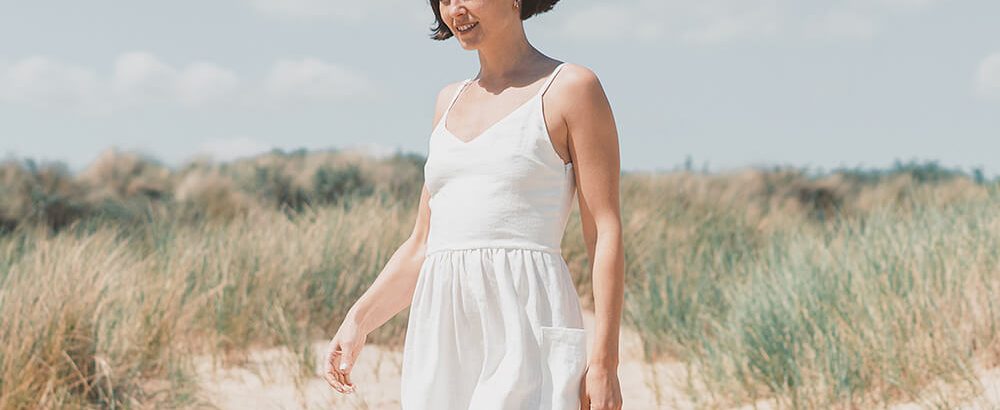
If something about pleats reads as old-fashioned or formal in your mind, let our Sara Pleated Pants sewing pattern be the proof they can be anything but. Everything about these pants is as effortlessly chic as it gets. They are relaxed and airy, the sort of pants you’d want to wear all summer long on all your adventures.
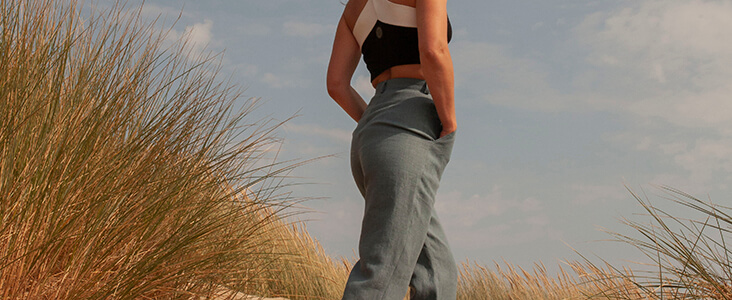
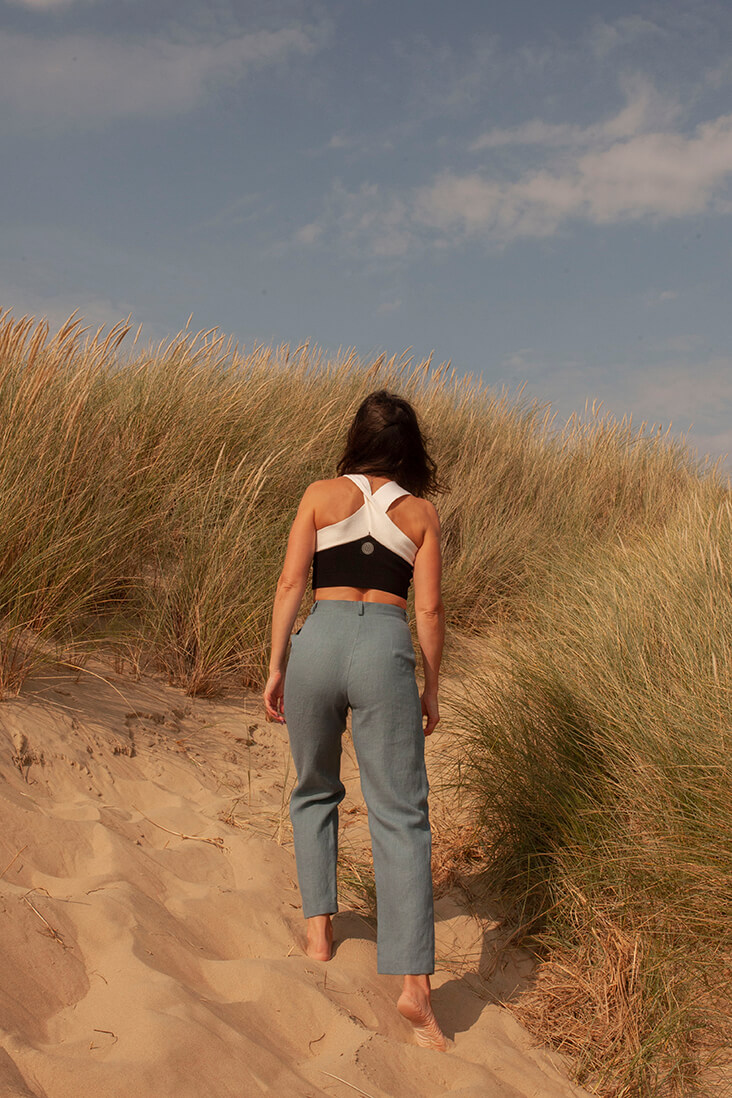
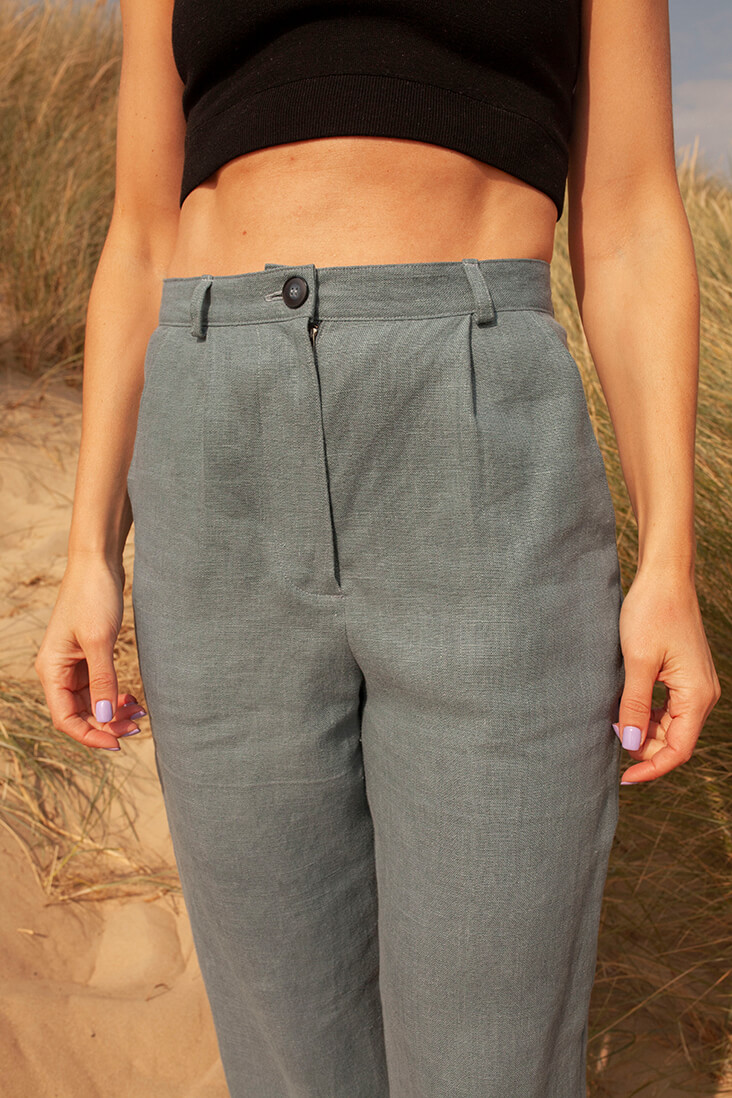
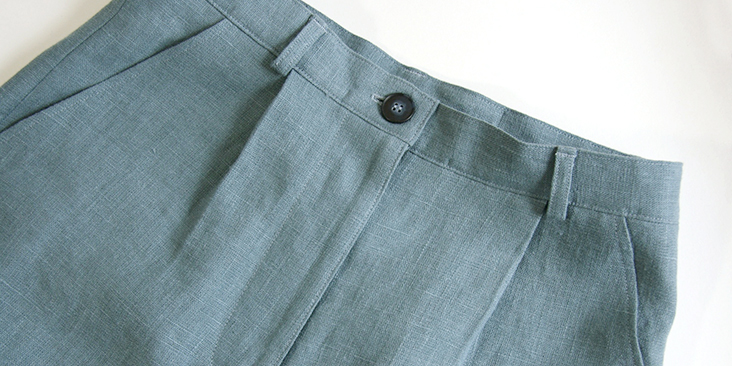
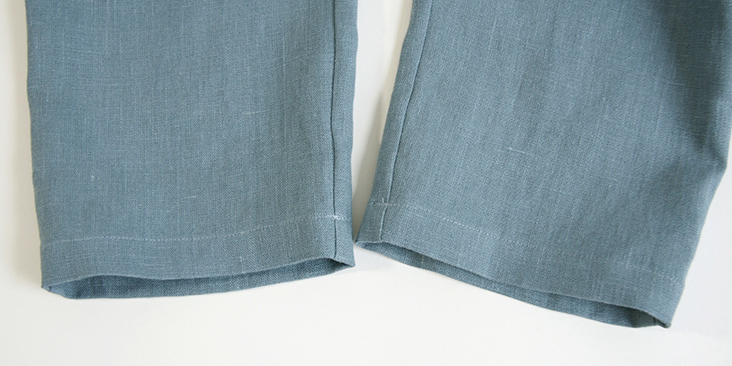
The Sara Pleated Pants is our modern take on the classic pleated pants style. Designed to sit on your natural waist, It has two small pleats at the front, back darts for shaping, useful hip pockets, a zipper front fly and belt loops. The legs are slightly tapered and hit right above the ankle bone.
Due to the number of techniques involved in this project, the pattern is labelled as intermediate. But even a beginner sewist can give it a try because we will guide you through the process step-by-step. It’s amazing what sewing a pair of pants can do to your sewing confidence! Follow this easy tutorial and make your own pair of pleated pants!
Materials
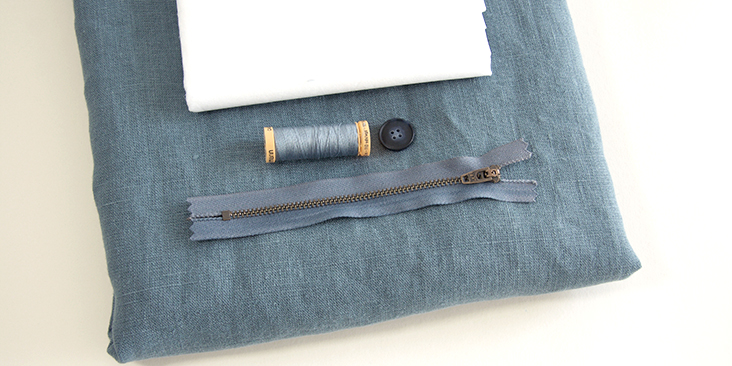
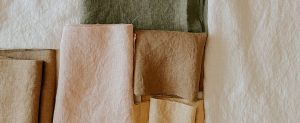
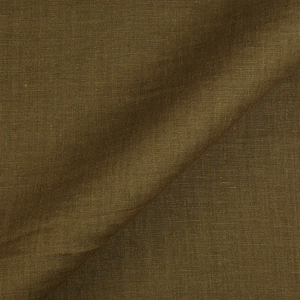
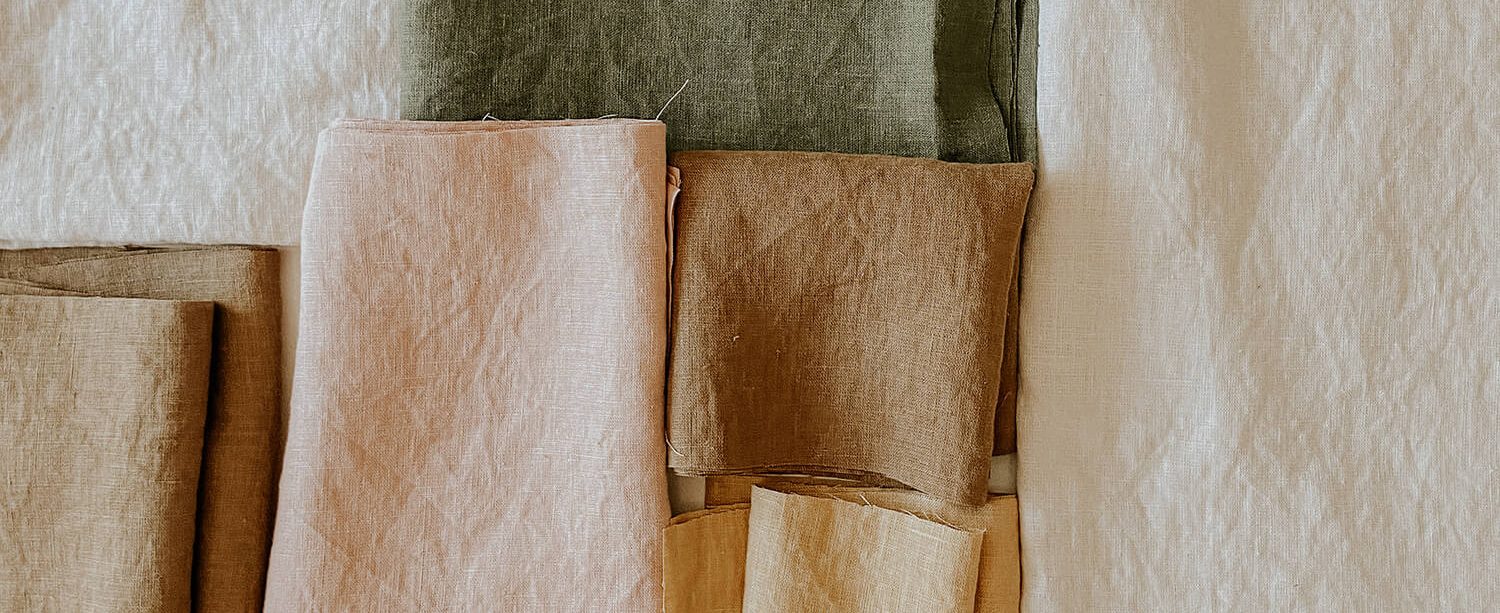
For our sample US size 6 pictured in this tutorial we used 2 yards of our 4C22 REED Softened Heavy Weight 100% Linen
For other sizes, please refer to the yardage table in the PDF pattern to determine the required amount of fabric.
Matching sewing thread, 7-8” pant or trouser zipper, one large button (36-40L), medium weight fusible interfacing.
Tools
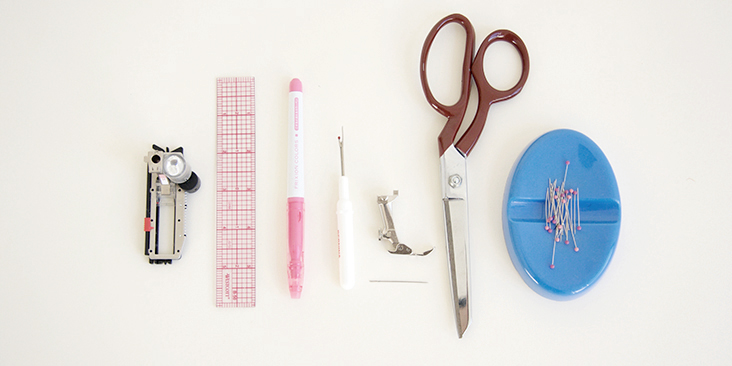
Scissors, pins, ruler, chalk, measuring tape, fabric marker, zipper foot, buttonhole foot, seam ripper, needle, sewing machine
Difficulty
Intermediate
Sewing Time
6-7 hours
Pattern
You can access the multi-sized printable PDF pattern by following this link HERE. All seam allowances are included and are 3/8” unless otherwise specified. The model is wearing US size 6.
Remember to transfer all the notches onto your fabric.
Steps
Note: Prewash your fabric and tumble dry it until it is still slightly moist, dry at room temperature. Iron the fabric so it is easier to work with.
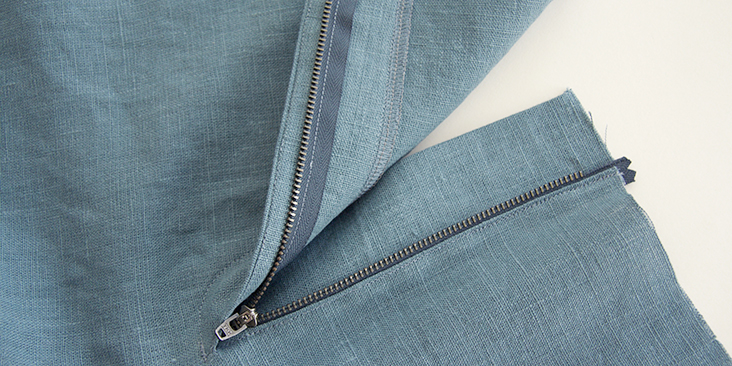
1. We’ll start with the construction of the front zipper fly. Follow the instructions in this detailed tutorial and sew in a zipper fly.

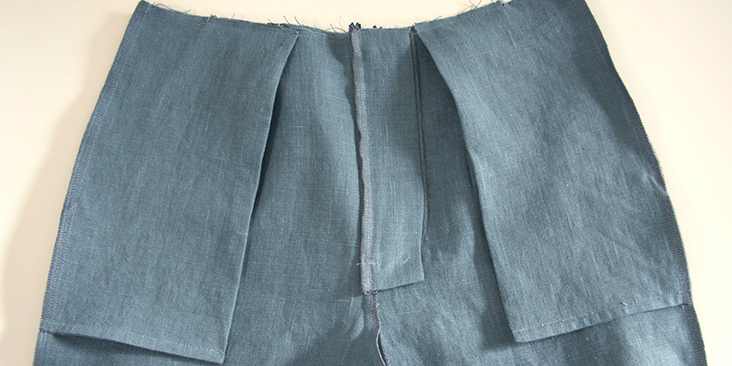
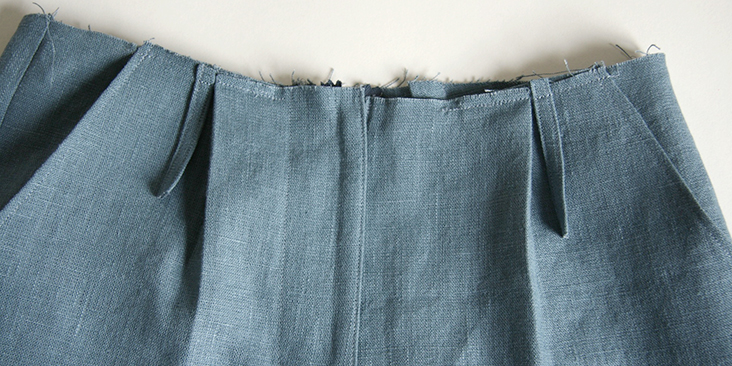
2. Following the notches on the pattern, fold the pleats on the front pants towards the side seams and press. Stay stitch in place with a ¼” seam allowance.

3. Now take your front pocket pieces, fold them in half wrong sides together and stitch along the bottom edge at a 1/4” (6 mm) seam allowance. Clip the corner to reduce bulk.
4. Turn the pocket right side out, press and stitch again 3/8” from the bottom edge.
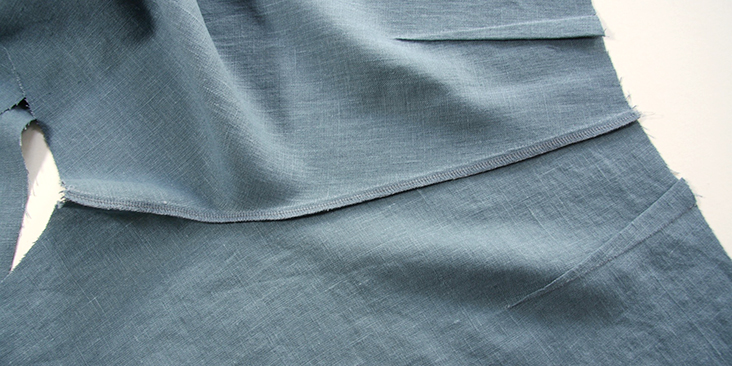
5. Pin the diagonal edge of the pockets (right side) to the diagonal edge of the front pieces (right side) and stitch at a 3/8” seam allowance. Remember to backstitch.

6. Trim the seam, turn right side out and press flat. Topstitch 1/4” (6 mm) from the folded edge.

7. Baste the side and top of the pocket ¼” from the edge to keep it in place.

Set your front legs aside for now and take your two back legs.
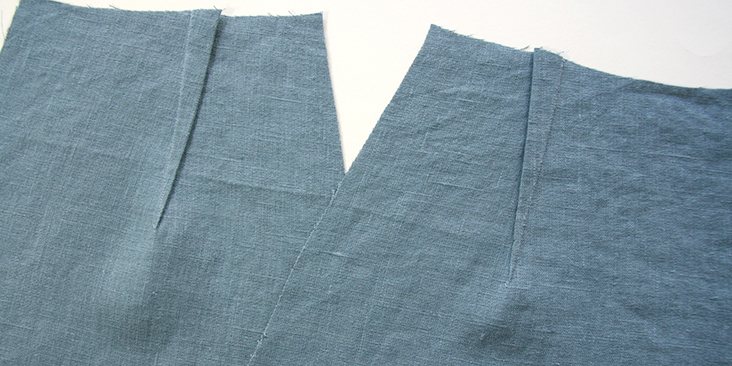
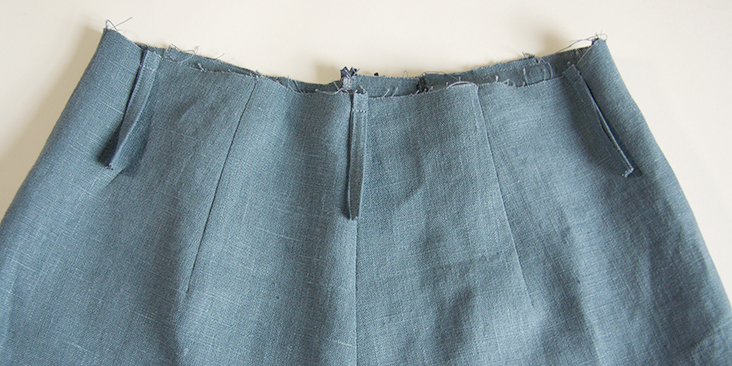
8. Sew the waist darts. Detailed instructions on sewing darts can be found here.
Press darts towards center back.
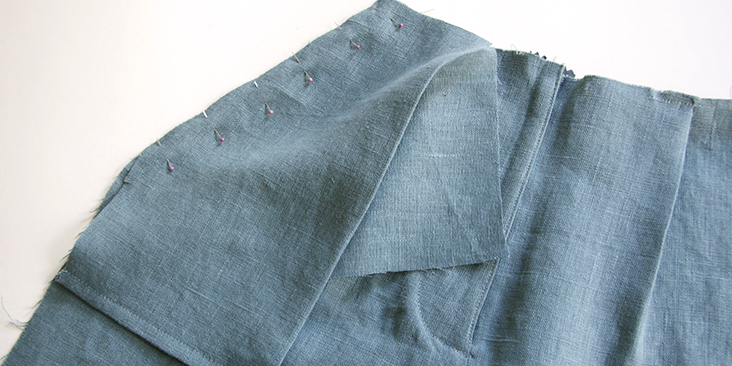
9. With right sides together, pin the two back legs at the crotch matching the two notches and stitch at a 3/8” (1 cm) seam allowance. Serge/zigzag the raw edges together and press seam to the left.
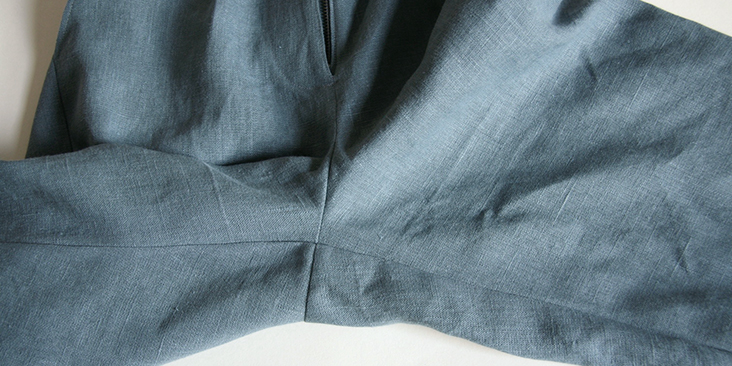
10. Pin corresponding front and back legs right sides together at side seams catching the sides of the pockets and matching the hip and knee notches. Stitch the side seams, serge/zigzag the raw edges together and press towards the back.
11. Pin corresponding front and back legs right sides together at the inseam matching the notches. Stitch together at a 3/8” (1 cm) seam allowance, serge/zigzag the raw edges and press towards the back leg.
Next up – the waistband!
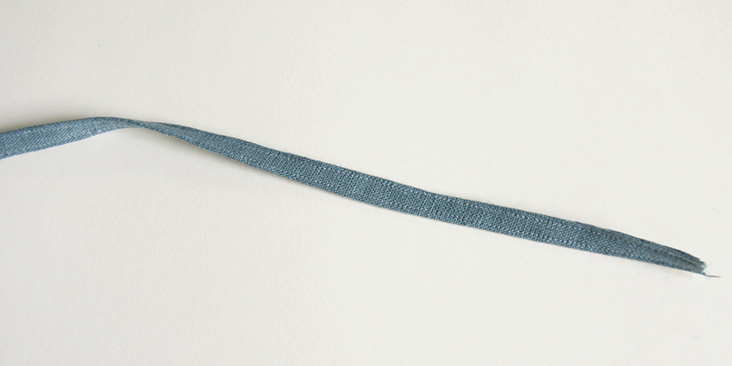
12. Prepare your belt loops as explained in this tutorial.
Cut your long strip of fabric into five individual loops each measuring 3 inches.
13. Position your belt loops as follows: to the inside of each front pleat, 1” away from side seams and at center back. Align the raw edge of each loop to the top/waist edge of your garment, right sides together. Baste to keep them in place.
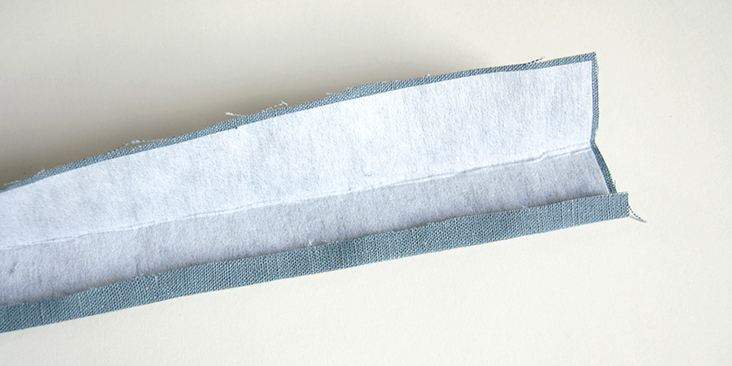
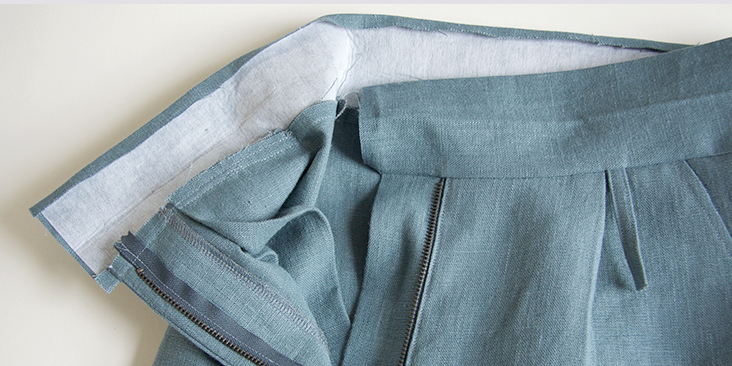
14. Apply fusible interfacing to the wrong side of your waistband. Then fold in half lengthwise wrong sides touching and press one long seam allowance 3/8” to the wrong side.
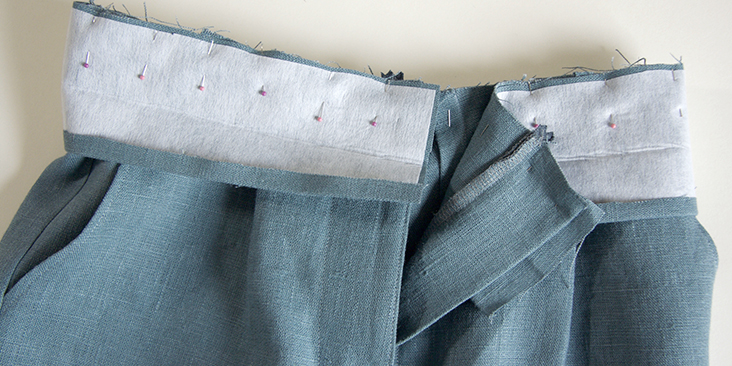
15. Pin the non-folded edge of your waistband to the pants right sides together, aligning raw edges and matching the notches. Make sure that the side seam allowances of your waistband are extending 3/8” beyond the fly edges.
16. Sew at a 3/8” seam allowance. Trim the seam to 1/4” and press waistband up.
17. Tuck in the short edges of the waistband. Fold the waistband in half and pin the other long edge to the wrong side of your pants, covering the seam line.
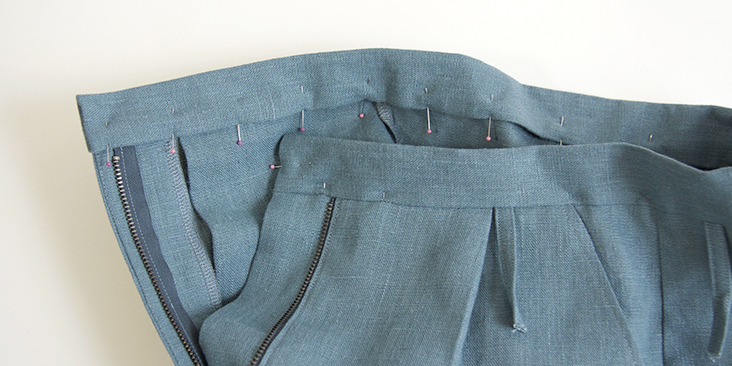
18. Working from the right side of your pants, topstitch along the pinned edge, catching the underside of the waistband. Continue edgestitching around the entire waistband.
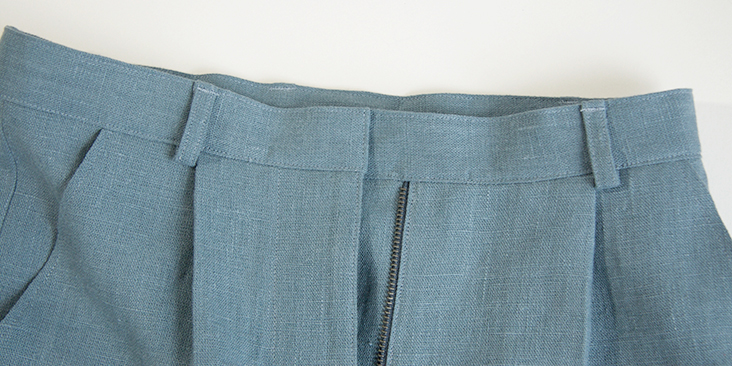
19. Now press your belt loops up, fold over about 1/4” at the top and use a narrow zigzag stitch to make a small bar tack that will secure the loop to the top of the waistband and reinforce the area. You could also use a regular straight stitch and backstitch back and forth a couple of times to make sure the loop is attached securely.
For more instructions, please check this step-by-step tutorial.
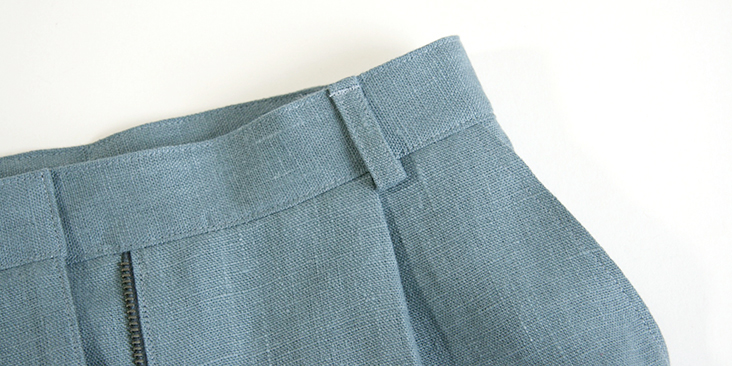
20. Overlap the waistband, mark and sew a buttonhole on the right leg. Mark the button location through the buttonhole and sew one button on the left side.
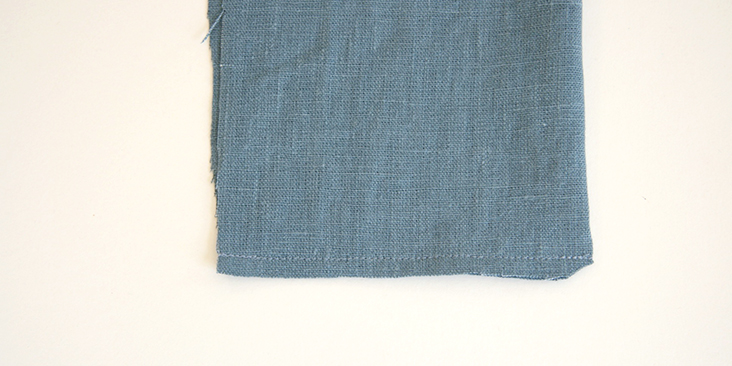
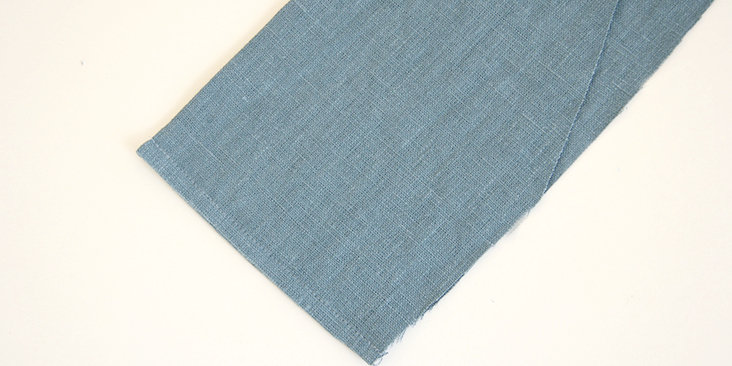
21. Lastly, finish the hem by folding the raw edge twice to the wrong side: first 3/8”, then another 1”. Press, pin and stitch.
22. Give your pants a good last press and you are all done!
We love seeing what you make! Don’t forget to share your pictures and tag your creations with #FabricsStoreSaraPattern hashtag.
Whether you are looking for natural or bright colors, heavier or lighter linen, we have something for everyone. Browse our selection of linen fabrics and find the color that inspires you for this project!
Leave a comment
Related posts

Blending Between Sizes on a Sewing Pattern – Part 2: How to Blend
If you’ve already read Part 1 of this tutorial, you will hopefully have a good understanding of when blending between sizes on a sewing pattern can come in handy. Let’s get into how to actually do it. In this Part 2, I will walk you through the basic process using a few different examples. I’ll…

Blending Between Sizes on a Sewing Pattern – Part 1: When to Blend
Let’s be honest—finding a sewing pattern that perfectly matches your measurements is pretty rare. And that makes sense! Every body is unique, fit preferences vary, and each pattern brand uses its own sizing system. If you find yourself falling between sizes, you’re not alone. But the beauty of sewing is that in these situations, you…

How Much Fabric Do You Need? A Simple Estimation Guide
Starting a new sewing project is always exciting. But there is nothing more frustrating than running out of fabric halfway through… or ending up with scraps that aren’t quite big enough for anything useful (trust me, I’ve been there! I have a whole drawer full of pieces like this). If you’re working with a commercial…
Understanding Seam Allowance: A Simple Guide
Every garment needs seam allowance—it’s a crucial part of garment construction. Sometimes it’s already included in the pattern; other times, it may need to be added, especially when working with a self-drafted pattern or after making adjustments. Seam allowance is the extra fabric added around the edges of a pattern piece. It creates space between…
Sewing Essentials: Dart Manipulation
Dart manipulation is a pattern making technique used to reposition a dart on a garment without altering or adjusting its overall fit. Essentially, it’s a way to move the shaping in your pattern to a new location. Dart manipulation lets you customise a sewing pattern to suit your design preferences. Whether you want to move…


SEW THIS LOOK


Latest Posts


43 Comments
Susan Shaw
Hello,
Can you recommend the best tutorial for lengthening the crotch depth/rise on the Sara pant? The model’s picture shows it rather short on back side. I would like to make these with a slightly dropped crotch. I think I am using the correct term for this alteration. I am confused by the different suggestions I find online. Any help would be greatly appreciated!
Thank you,
Susan
Pauline Kompier
Hello Susan,
For more good tutorials, have a look at the ones at In the Folds. They also have very good tutorials on pattern adjustments, pattern grading, etc. Here is the link: https://inthefolds.com/garment-fitting
Just scroll down to find the one named ‘Altering the croth lenght on pants’. If you sign up to their news letter, they have a social sewing community newsletter, to which you can email a sewing question, like yours, and they will answer with a tutorial in their next news letter.
Have a great day!
Pauline
Sarah Holmes
I just finished making these paants, and I want to compliment you on not only a pattern that was extremely well made, but the tutorials and pictures that accompanied it all were exactly what was needed. The result was a pair of pants that fit perfectly and that had all of the finished touches that are almost never seen in ready made clothing. I’ve been sewing for well over 60 years and I don’t believe I have ever used a pattern that was as straightforward, easy to use and adjust as yours. I’ll admit that I had to take out one seam when I sewed the pockets right sides together all the while wondering why the instructions said to do that, but of course when I checked after the fact, I realized that I had simply rushed through the reading and was the one who had erred. Take it from a person of experience,…don’t cut your fabric until your adjustments to the pattern have been made first. I’ll often use old sheets or fabric left from other projects to make a trial to see if the fit is right before making the first cut.
ell d
I loved the instructions that came with this pattern and will use the images as reference for other projects. But I didn’t end up making these pants. Don’t want to say bad things about this pattern because I know someone worked hard on it, and it’s definitely great for someone out there! But, do want to share with my petite and curvy siblings that this pattern seems to be cut for a tall and straight frame.
For reference, I’m 5’3” with a 11 in. difference between waist and hips, and “shelf hips”. After 2 hours of puzzling together the pattern pieces, going up a size from what was listed, moving the darts, and even trying top down center out on my toile, I could not get these to work for me. The pant fit more like a wide leg and there was just not enough room for my butt. I don’t feel like doing a bunch of pattern adjustments on paper to make this work, so I’ll be passing on this pattern. I don’t want to discourage people from using this who would be a good match for the pattern, but thought I’d save others like me some time. I’m sure fabric store has another pattern that would be better, but this is not the one for me.
Pauline Kompier
Hello lovely people at Fabric Store,
I am making the Sara Pants for my friend as a pair of trousers she can wear to work. As I needed to grade between sizes and add more fabric in the bum area, I made a test piece out of craft cotton. When I got to the stage I needed to attach the waist band, the waist band was too short. So I made another one, to then realise that I must have interpreted the pleats wrong, and had put the notches together to form the pleat, making the waist too big for my friend. Now I am working on the Real One, I have made the pleats by using the notches as turning point, yet it looks so different than in the photos., on mine the pleats nearly touch the pocket opening. I measured the ‘new’ pleats, which are about 1 1/4″ deep. Is this correct? Now the waist band is too long…… I appreciate this is a free pattern, however if I can help prevent someone from making the same mistake. Waist-wise, the trousers are the right size. Shall I just cut back the excess waist band? I just hope it will fit… (She loved the test fit, the one with the improvised waistband. The pair fitted like a glove, apart from the waist band being too long.) I think the key and confusion is in how the pleats are made.
Thank you for your time and help.
Lauren Linen
Please sent us an email with photos to Ask@fabrics-store.com and we will be happy to see whats going on here.
Anita D
Hi! I am planning on adding a lining to mine. Is there any guidance on the best way to do that, especially with the pockets?
Nathalie Laroche
Bonjour, je voudrais coudre le pantalon plissé Sara
Je taille 38/40 français, quelle taille me correspond pour ce patron
Cordialement
Nathalie
Virginie Brunel
BONJOUR , je ne trouve pas le point d apex pour la pince dos et ni de combien i faut la coudre je me retrouve bloque a cette etape merci
Holly Harken
I’m a Petite person who needs to make adjustments to patterns. I don’t see an adjustment line on this pattern.
Also, why, oh why don’t you make trim less patterns? Now I have to trim down the edges of every other page to be able to see the circles to match them up. Also an instruction booklet with the pattern would’ve been very helpful. Instead, I have to go online to get them, copy and paste each part into a document so that I can print them out.
I do realize that this is a free pattern, but I’ve gotten other free patterns that came with instructions, along with an adjustment line to make them shorter or longer. Now I have to “walk” the pattern to see what the length of the crotch will be and adjust the pattern. Most purchased pants fall down to my natural low waist line and then I have a huge hunk of fabric in my crotch! If I pull them up to fit the crotch, the waist of the pants are way too high and they’ll slip back down. Other than wearing suspenders under my shirt, which I’ve done in years past, I’d rather have a pattern that works for my body from the get go. I’ve learned a lot in the past few years about fitting clothing, but I’m still working on pattern fitting.
Lauren Linen
Hello Holly,
Thanks for your feedback about our free patterns. In order to offer so many patterns for free, we have kept them fairly simple and straight forward.
We have also made our patterns available to a wider audience of customers by allowing the pages to be printed on both A4 and US letter sized paper, so that is the reason for the borders on the pages. Plus, this allows people to assemble the pattern in their preferred method.
You can also download the tutorials for offline viewing into a .pdf document by clicking the “pdf” icon at the bottom of each tutorial.
For more in-depth patterns which come with 1:1 fitting and sewing advice, please consider one of our Premium Patterns.
Rebecca Reagan
How did I miss the PDF icon at the bottom! I can be a real dummy. Thanks for pointing out another way to view the best resources ever! These tutorials are great. I use them like a personal reference library for just in time information. Thanks again. Have a great day!
Rebecca
Viveka Jenks
Hello, I have finished sewing the front and am on to the back. Do you think its best if I skip the dart step until I have assembled the pants and before the waistband? In such case, I can try it on and create the dart based on my body shape. I’ve looked at other tutorials, and they say its best to do it this way so that the darts are the correct size? Please advise. Thank you.
Lauren Linen
Hello,
If you would prefer to do it this way, you can absolutely do it 🙂
Claudia Belic
Hi! Would this pattern work for shorts? Thanks!
Lauren Linen
Hi, yes, you can adjust this pattern for shorts 🙂
Natasha Pulfrey
Hello can you please tell me how I can download the pattern to take to a print shop to avoid printing it at home and having to assemble the pattern. Thank you!
Lauren Linen
Hello, Our patterns are only available in this format for printing at home. If you’re handy with Adobe illustrator or photoshop you may be able to piece them together digitally.
Natasha Pulfrey
Thank you for your reply!
Yolanda Wilkins
I just finished a pair and I love the way they came out. I made the 20/22 and graded up at the hip to the 24/26. I really enjoyed this pattern. Thanks!
Suzette Mason
how do you download the sara pleated pants pattern? i click on the picture but theres only the tutorial no pattern
Lauren Linen
Hello Suzette,
You can find the pattern download at this link:
https://fabrics-store.com/sewing-patterns/sara-sara-pleated-pants-pattern
Antoinette Beauzec
Hi Folks, sorry to be a nuisance. I don’t see the actual pattern to be downloadable. I only got the 6 page instruction manual. What am I doing wrong?
Antoinette
Lauren Linen
Hello Antoinette,
The pattern is an attachment to this 6 page download and accessible in Adobe Acrobat Reader. Here are is a link to tutorials to help out:
https://support.fabrics-store.com/hc/en-us/articles/360057105032-Downloading-and-Opening-Free-pdf-Patterns-on-a-Computer-PC-and-Mac-
Amanda Ortman
What is the inseam of the pattern as is?
Lauren Gates
Hello,
We don’t have that measurement available in the size guide. To figure out the inseam you can measure the pattern and take away seam and hem allowance.
Xara Xaritou
Hi, thank you very much for this pattern a sew the pants in two days. It is the first time ever, that a pattern fits me so perfect!
Greetings from Greece!
Lauren Linen
Our pleasure! We’re so glad you’ve found a winner in our Sara Pattern
Francesca Hall
Hi! I’m fairly certain there’s a mistake on steps 5 and 6. If you pin the wrong side of the pocket diagonal to the right side of the front pant, then when you turn the seam right side out, you will have the wrong side of the pocket bag no showing on the right side of the pant. With the linen you used in the example there is no clear right/wrong side of the fabric. Making these pants in a different fabric, however, shows that this is incorrect. You should be pinning the right side of the pocket bag diagonal to the right side of the front pant. Is this a mistake in the instructions? I have been working this out for a good 15 minutes and I followed every step but still end up with the wrong side facing out. Please let me know, thanks!
Lauren Gates
Hello Francesca, Our patterns are designed for our linen and may produce different results if you are using other fabrics.
For the pockets, you may like the RS of your fabric to be on the inside of the sewn pocket bag, so yes the Right Side of the fabric will be sewn to the RS of the pocket opening and then flipped over to reveal the RS of the pocket fabric.
Hunter Schallhorn
As someone who did not read the comments first and have a botched set of pants from this omission as well, maybe a note in the in steps about this would help?
Lauren Gates
We’ve now updated the instructions for the pockets 🙂
robin wischner
Hello there!
I have a problem with choosing the right size to sew. My waist measurement fits into a US size 8/10 whilst my hips need a 12/14 following the provided size chart.
Which one should I pick since I obviously don’t want ill-fitting pants?
Lauren Gates
Hello Robin, we recommend you also consider the finished garment measurements for these pants. They may give you a better idea of what the pants will measure when finished.
If you’re still stuck please send us an email and we would be happy to assist you. Email: Ask@fabrics-store.com
Julia V
Thank you so much for this tutorial, I followed it to make the Sara pants and everything went very well, I made the pants and it’s great, I love it!
Margaret Olson
I know you said the material amount was on page 4 of the PDF booklet,.. I am looking at page four of the pattern printout. Is the booklet a different thing because page 4 of the pattern printout does not have the material amount on my printout.
Help please.
Lauren Gates
Hello Margaret, this will be on page 4 of the information booklet you first downloaded. It will not be on the pattern attachment 🙂
Jaime Delano
Hi, I started this tutorial and began with the zipper instructions. The link says to sew the seam up to the notch, but the pattern download doesn’t have a notch on the front seam near the zipper. How far up should I see the front seam before adding the zipper?
Lauren Gates
Hi Jaime,
Thanks for picking this up for us. We are going to look into it, I’ll be sending you an email.
Lauren Gates
The pattern has now been updated to include the missing notch 🙂 Thanks once again for letting us know.
Sofia Jeppsson
Hi! Sorry if I’m just terribly distracted but I can’t find a size guide for these pants, neither here nor in the pdf pattern. Do you know where I can find one? Thank you!
Lauren Gates
Hello Sofia, they are on page 4 of the .pdf booklet.
Sofia Jeppsson
Thank you so much! Apparently I can’t handle these (otherwise very convenient) multi-layer patterns.