Sewing Glossary: How To Draft And Sew A Peter Pan Collar Tutorial
Peter Pan collar is a flat collar with rounded ends that meet at the front. Women have worn this classic design staple since the early 20th century and it has made a major comeback during these last years. It seems to be popping up a lot in stores and around necks, but why buy one if you can make one?
In this tutorial we are going to show you how to draft and attach a Peter Pan collar. It’s easy and quick, and you can add it to any dress or top you already own or are planning to make for a feminine and sophisticated touch.
Materials
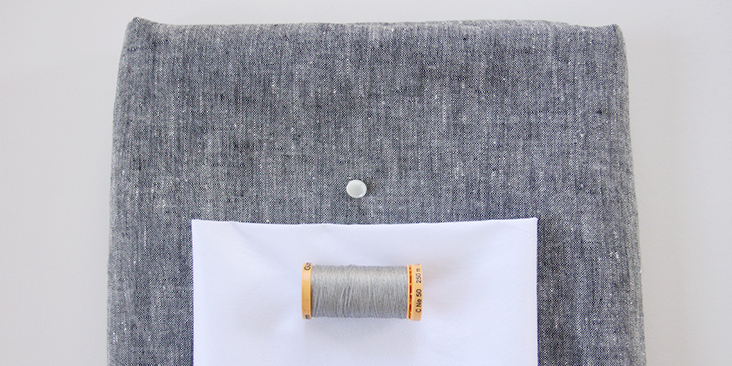
Fabric of your choice (we are using IL042 900 – FS Premier Finish – 100% Medium Weight Linen)
Matching sewing thread, fusible interfacing
Tools
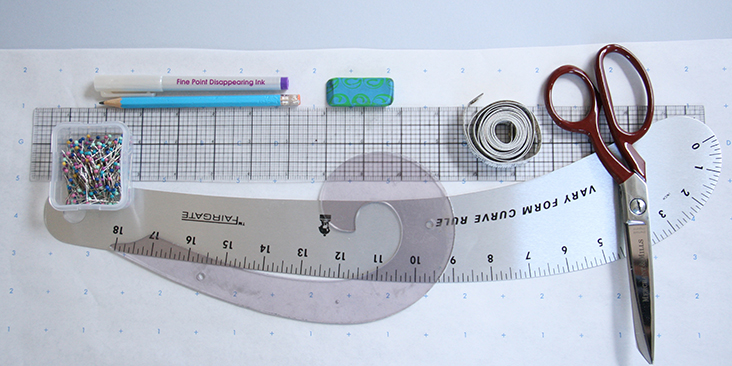
Pattern paper, pen, fabric marker, scissors, pins, seam ripper, chalk, ruler, French/hip curve, measuring tape, needle, sewing machine
Difficulty
Advanced Beginner
Time
1-2 hours
Drafting The Pattern
1. To draft your own Peter Pan collar, you simply need to cut out your front and back bodice pieces from whichever pattern you are using, lay them flat on the table and place front and back shoulders together with neck points touching and shoulder points overlapping by 3/4″ (2 cm). This overlap will help you get a shape that will fit flat to your shoulders.
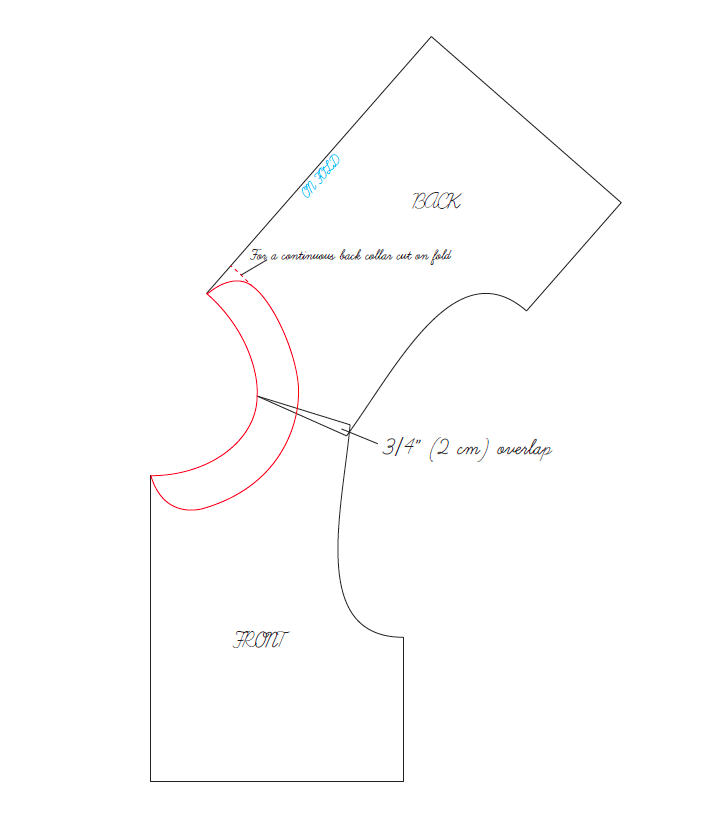
If you are working with a pattern where the seam allowances are already included, make sure to account for them when you place your pieces.
2. Draw in the curvy collar shape all the way around your half neckline. Use your ruler to make sure that your curve is parallel to the neckline and that you have a consistent depth all the way round. Draw the round end at the front (to create your front collar shape) and nothing in the back if your back doesn’t have any opening or, as in our case, another round shape if your project includes a back slit, a keyhole opening or button bands.
Please note that in the second case, your collar should end before your button bands or any finished slits or openings. Refer to the markings on your pattern pieces to understand from there to start drawing and where to stop.
As for the width of your collar, it can be as large or small as you’d like it to be. A basic Peter Pan collar is about 1.5″-2″ wide. Ours is 1.75″ wide.
3. Trace off your shape that will become your pattern piece.
As a general rule, the top part of the collar should be slightly bigger than the bottom part. This is to ensure that the seam line at the edge will lie slightly on the underside of the collar and will not show when made up. If you want to make your life simpler, you can totally cut your pieces exactly the same size and still get a nice looking collar. But if you want a perfect and neat collar, we strongly recommend adding 1/8″ (3 mm) all the way round the outer edge of your top collar piece(s). The under collar remains unaltered.
4. Add your usual seam allowance (we are using 3/8″ (1 cm)) around all edges and cut 1 top collar and one under collar on fold at the back (if your back is continuous and doesn’t have any openings etc); or two top collar mirror pieces and two under collar mirror pieces if your pattern has a back opening.
Take your under collar piece(s) and use it to cut fusible interfacing. Please note that no seam allowances should be added to the fusible interfacing piece(s) as it will only create additional bulk at the seam when the collar is assembled.
Attaching The Collar
We will show how to attach a Peter Pan collar to the top that has a keyhole opening at the back since the process is a little more complicated and requires additional explanations.
Please note that before attaching the collar, your back opening (slit, keyhole opening, button bands etc) should be already finished and the front and back bodices assembled together.
1. Apply fusible interfacing to the wrong side of your under collar pieces.
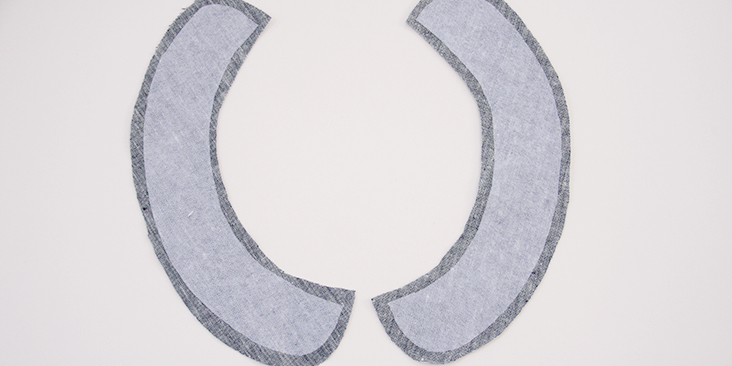
2. Now pin the top collar to the under collar right sides together evenly distributing fabric around all edges. Note how bumpy your assembled collar looks now due to the fact that the top collar is wider than the under collar.
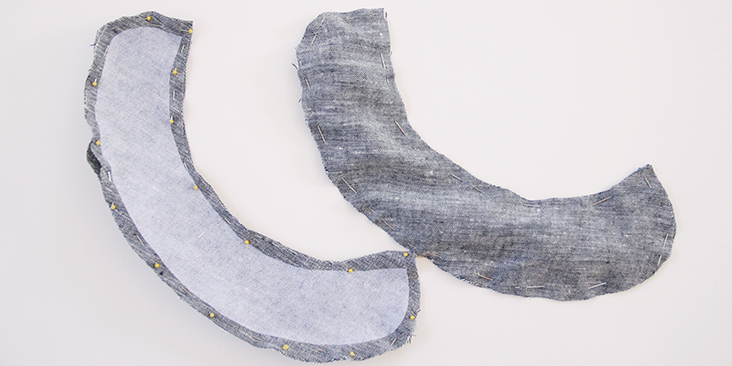
3. Sew the two pieces together using a 3/8″ (1 cm) seam allowance but leave the inner edge unstitched.
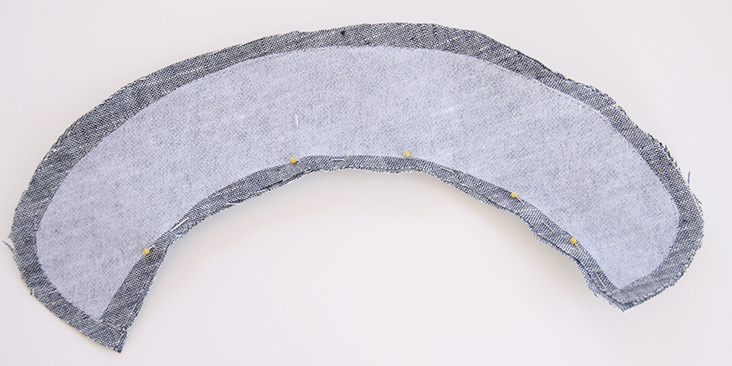
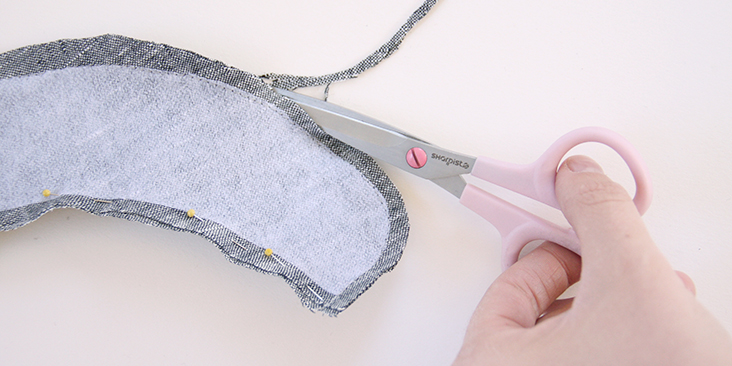
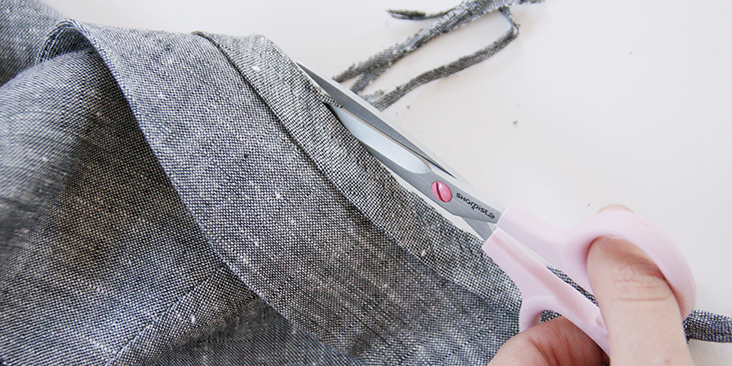
4. Trim the seam allowances down to ¼” and notch them at the curves so they will turn smoothly.
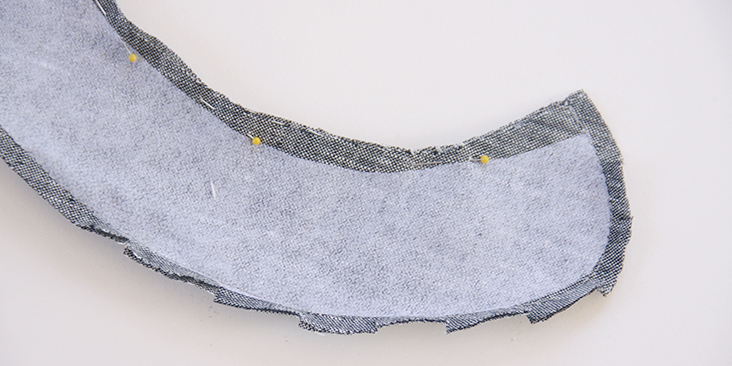
5. Finger press the seam allowances open.
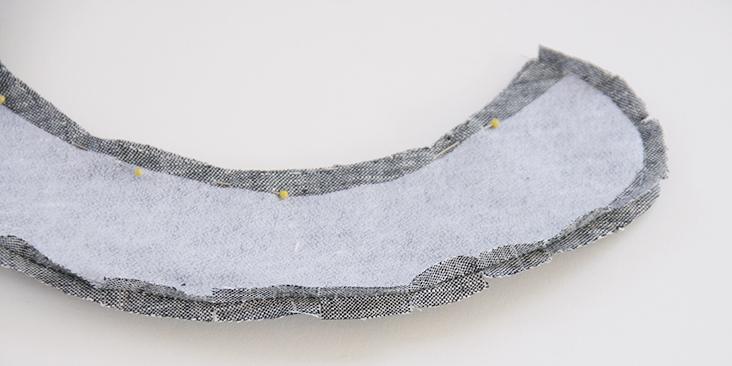
6. Turn your collar pieces right side out and press. Check out your nice and neat collar with no visible side seam on the edge.
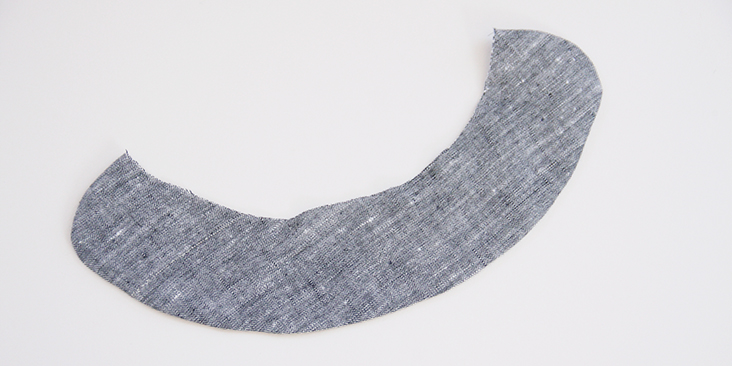
This side seam is hidden under your collar:
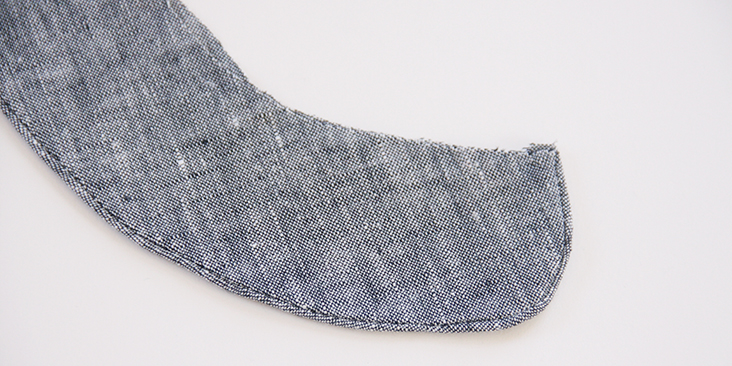
It’s time to attach the collar to the neckline.
7. But first, you need to cut a 1.5″ wide strip of fabric on the bias (at a 45 degree angle) to the entire measurement of your neckline plus a couple of inches for the tails. For more instructions on how to cut your fabric on the bias please follow this tutorial. Fold your strip in half lengthwise and wrong sides together and press.
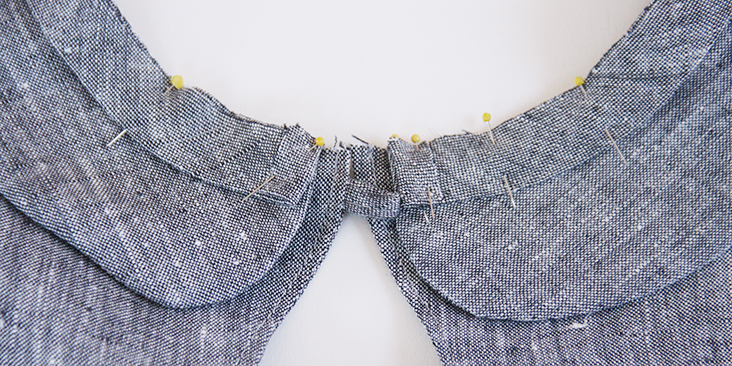
8. Pin your collar to the neckline with right sides together and your bias strip folded in half placed on top. Don’t forget that the side with interfacing will be the underside of the collar. Center your collar by marking the center front and the center back of your neckline.
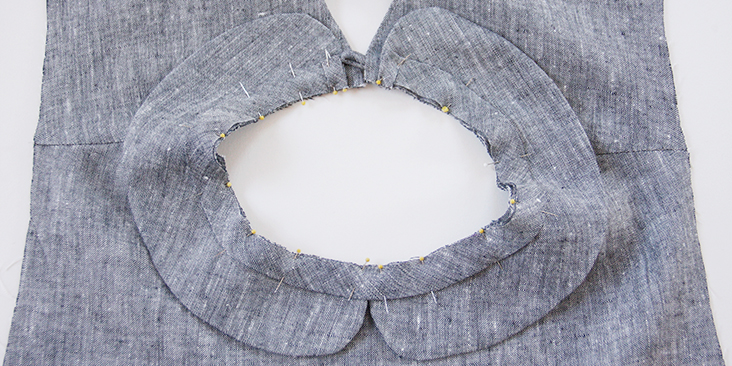
When you reach the back opening, fold the ends of your bias strip as shown in the picture:
9. Set your machine on a longer stitch (since you have a lot of layers to stitch through) and stitch the collar and the bias strip to the neckline at your usual seam allowance (we are using 3/8″ (1 cm)).
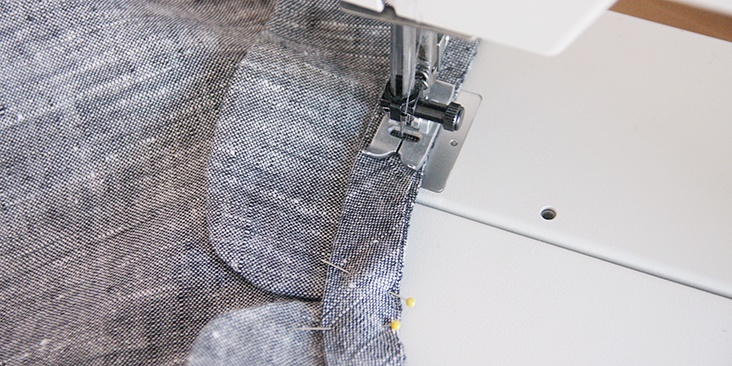
10. Trim the raw edge down to 1/4″.
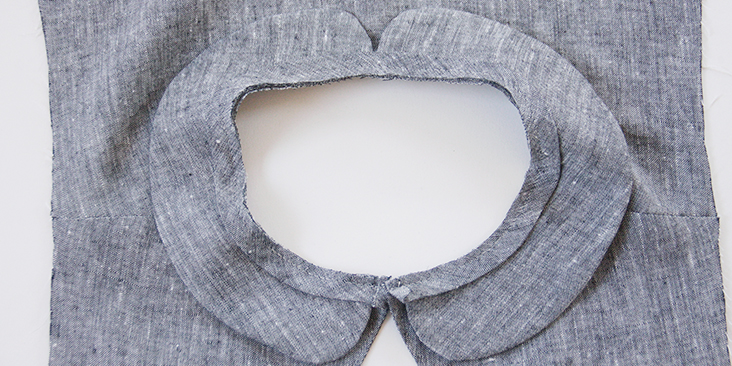
11. Now press the the bias band away from the collar, fold it towards the wrong side and pin around the neckline. Now you have a sandwich with the dress and the bias on the outside, and the raw edge of the seam allowance inside.
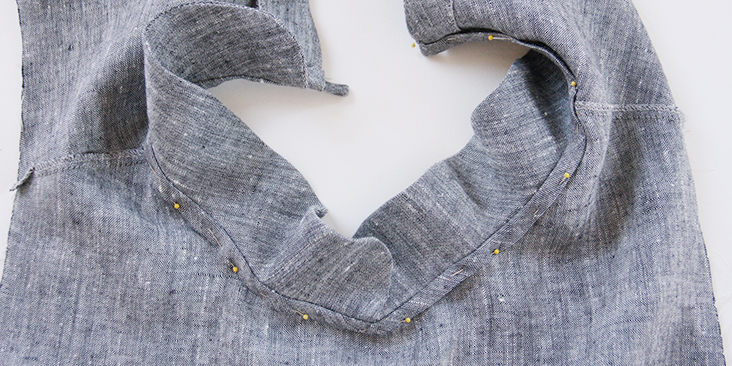
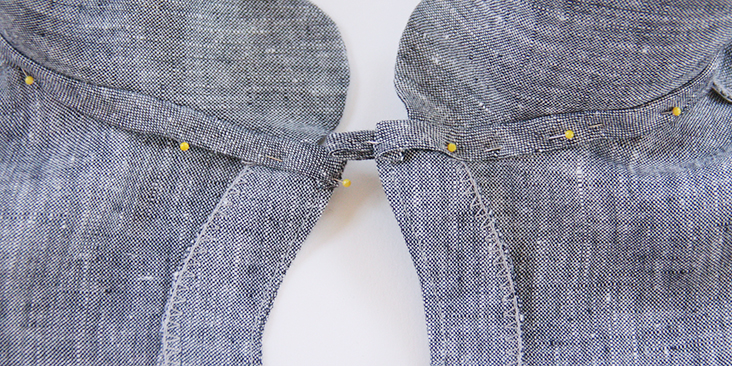
12. Moving the collar out of the way, and making sure that the bias strip ends are parallel to the finished edges of your back opening, edgestitch it in place. Remember to backstitch at the ends.
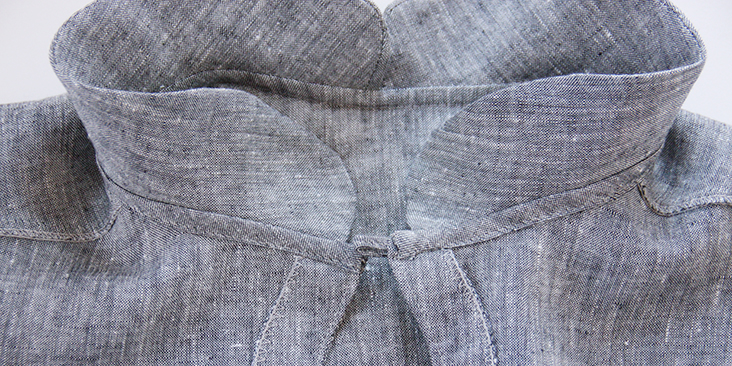
This stitch line will be hidden on the right side of the dress under the collar.
13. Give your collar a good press and you are all done! Admire your lovely flat collar and a neatly finished neckline.
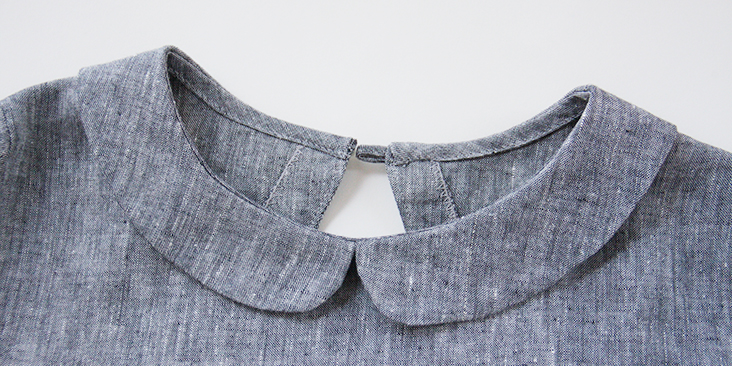
This cute little collar is so simple yet elegant and can be worn so many different ways: casually during the day or spruced up for a night out.














16 Comments
Karen Vernon
I would like to suggest an alternate method of clipping the seam allowances. I was taught this in dress design school many years ago. When clipping the seam allowances, don’t clip both at the same time. clip each one separately. clip the top one, then stagger the clip on the bottom one so they are between the top one. It makes for a rounder more even curve when turning and pressing. It prevents that “pointed edge” and also much easier to press the seam open when clipped this way. Wonderful tutorial.
Carol Moline
Brilliant!
Milou Hibou
Thank you kindly for making these tutorials. This one is precisely what I was looking for to update a blouse pattern with one of Fabric Store’s lovely bleached linens.
Katherine Yoder
Lovely directions. I was wondering when you said, “If you are working with a pattern where the seam allowances are already included, make sure to account for them when you place your pieces”
What do you mean by ‘account for them’? Do you mean to remove them before tracing your collar? I’m drafting my collar based on my pattern pieces that have the seam allowances included. In my mind it makes sense to draft the collar without the seam allowances since that would give me the finished neckline size that the collar will be fitted to. Let me know! 🙂
Thanks!
Cydni Hudson
I think that might be talking about the spot where the shoulder seams of the pattern are set up together. If the pattern pieces have seam allowance for the shoulder seams, and you trace the collar from the pattern and then sew the pattern up, the seam allowance is then taken and the collar won’t fit properly. So I think I would need to overlap the pattern pieces a little more so the collar fits correctly when the shoulder seams are all sewn up. At least, that’s how I interpret it.
Karen Close
Thank you! This is EXACTLY what I have been looking for! I am making a black short sleeve blouse (BURDA 6525) but want to add a cream colored peter pan collar. I have not been able to find a pattern that I like, so I plan to make my own collar.
Your directions are so clear, and the finished product is gorgeous.
Thanks!
Rima Khusainova
Thank you so much Karen! So happy to hear that you found this tutorial helpful 🙂
Cynthia
Thank you for the tutorial. It’s a refresher for me. I appreciate it very much. I wouldn’t take the negative comments to heart. Those of us who know about the art of sewing, know that there are many ways to sew and make adjustments. I learned to sew from my grandmother who was a professional seamstress, and took classes in school. I’m now 69 years old and finding sewing as a hobby again after many years of teaching school
Rima Khusainova
Dear Cynthia, thank you for your comment and nice words! I couldn’t agree more: there are so many ways to sew exactly the same thing and this is what makes sewing fun! And personally, I appreciate both positive and negative comments because this is how you learn and get better 🙂
Sally Di Marco
The finished collar looks homemade. If you are trying to sell this tutorial, the finished product should look professional.
Rima Khusainova
Thanks for your comment Sally. We are not selling the tutorial, just giving some tips and techniques to those who want to try and sew a collar like this. Linen is not the easiest fabric to get the perfect collar curves but the technique stays the same whatever’s the fabric…
Sharon
Your grain lines are off. Your clipping and pressing need improving.
Rima Khusainova
Thank you for your comment Sharon. I’ll work on that, thanks!
Margaret Wells
I saw a Peter Pan coller with the curve in the front and back it was cute
I was thinking of making one.
I Love this coller. Thank you for the timely post
Rima Khusainova
Thank you so much for your kind words, Margaret! Glad to hear this post came out on time 🙂
Cheryl Cholavchuk
Very nicely done instructions. However you might have mentioned that the amount of overlap is what makes the collar “stand”. If they want more stand they can add more overlap at the shoulder seams. Always nice to try it out in with a bit of spare fabric to see if you like it.