Sewing Glossary: How to Bind A Neckline Tutorial
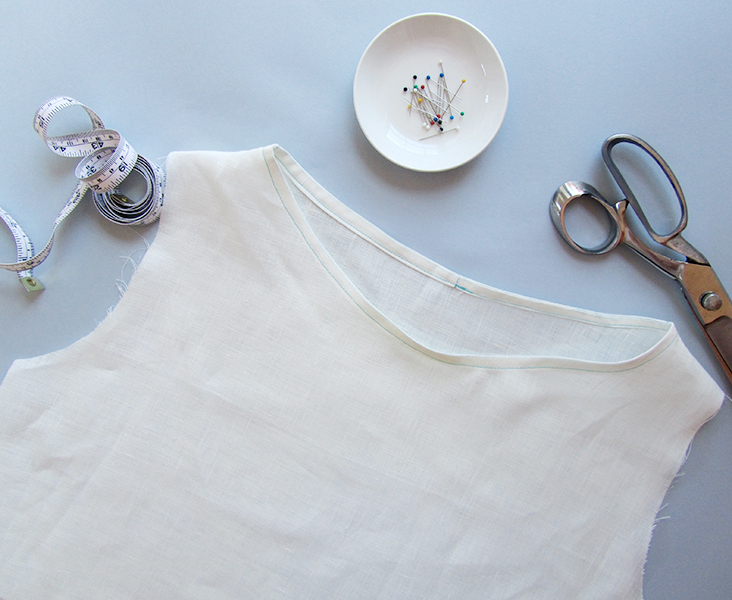
Necklines are often finished with a bias tape or a facing but I find that binding is the most professional and neatest way to finish your garment’s neckline and armholes. Basically, when you are applying a neck binding, your are finishing your neckline by turning a strip of bias fabric to the inside and stitching it from there, so all the seam allowances are tucked in and hidden. You’ll see that this method makes your finished edges look clean and lay flat. It can also be used for adding a little contrasting color on the edges.
This finish is recommended for light and medium weight linen fabrics and helps prevent them from fraying.
So here’s a quick tutorial on how to attach a binding to your neckline in just a few easy steps.
Tools:
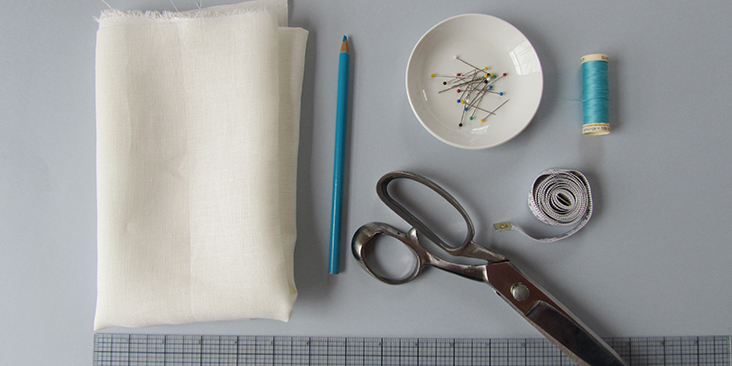
Fabric, matching thread (for the purpose of this tutorial we have used a contrasting colour thread)
Pins, scissors, measuring tape, ruler, fabric pencil/marker, sewing machine
Steps:
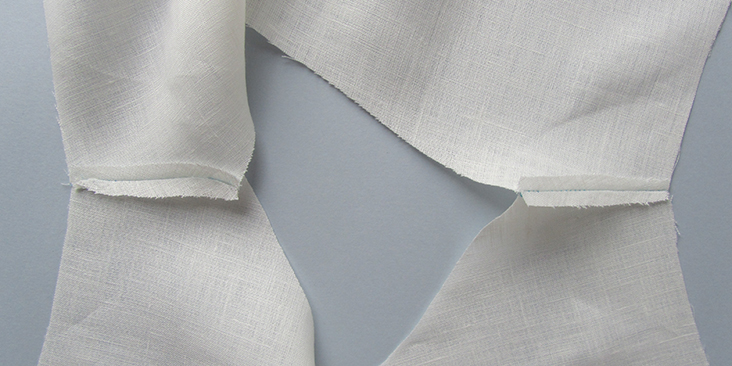
1. Prepare your garment by pinning and sewing your shoulder seams right sides together. Note that its best to leave the side seams open for now as it will be easier for you to attach the binding when you have an easy access to the neckline area.
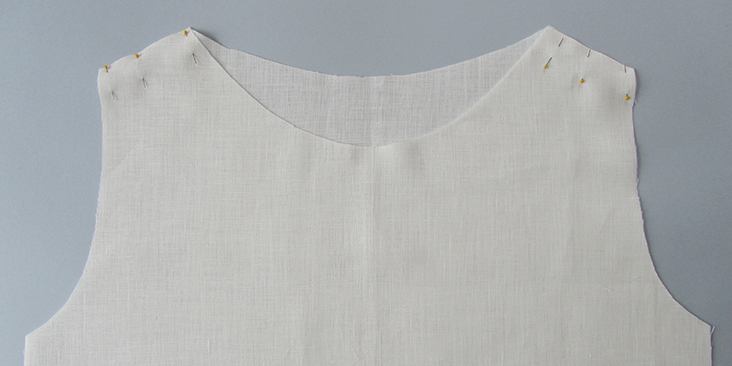
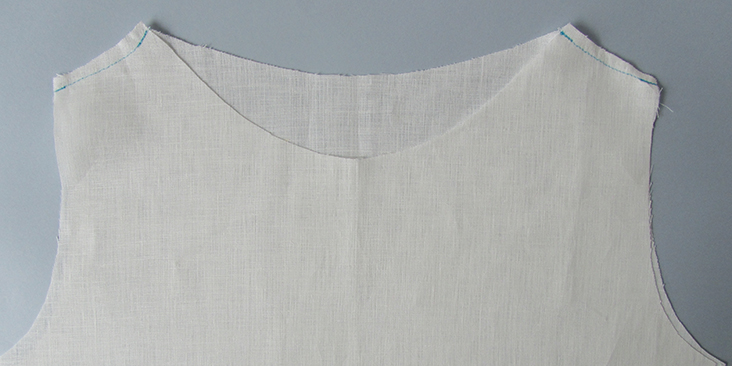 2. Press the seams open and turn your garment right side out.
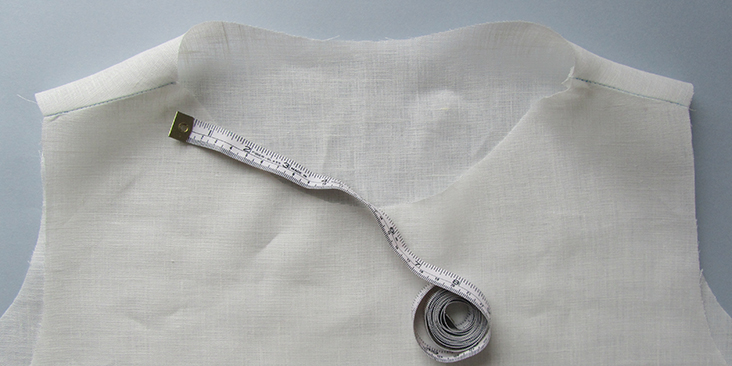
3. Now we need to make our bias band. First, using you measuring tape you need to measure the entire neck opening and add a couple of extra inches/cm to the amount for overlapping in the back.
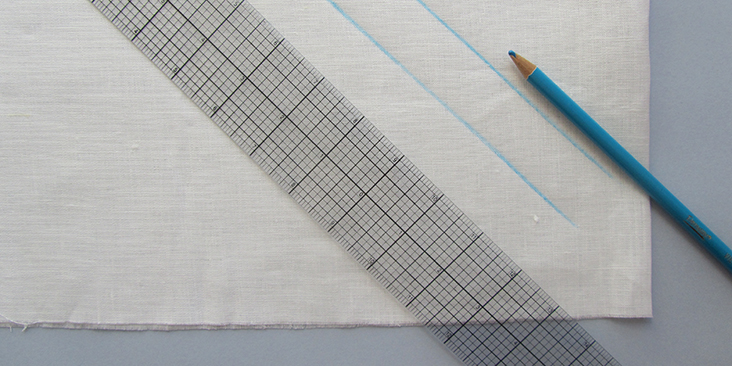
 4. Fold you fabric and diagonally draw your bias tape using a ruler and a pencil/fabric marker. Because the binding is cut diagonally (on the bias) the raw edges will not fray and will stretch nicely when applied to the neckline.
You can decide on the finished width for the band yourself. I usually go for a 1″ width but if you want a thinner band, choose 1/2″ or 5/8″.
 5. Cut out your bias band and pin it to the neckline (with right sides together) starting and ending in the center back. Make sure that the band is evenly distributed, if it’s too long or too short your neckline will not lay flat nicely.
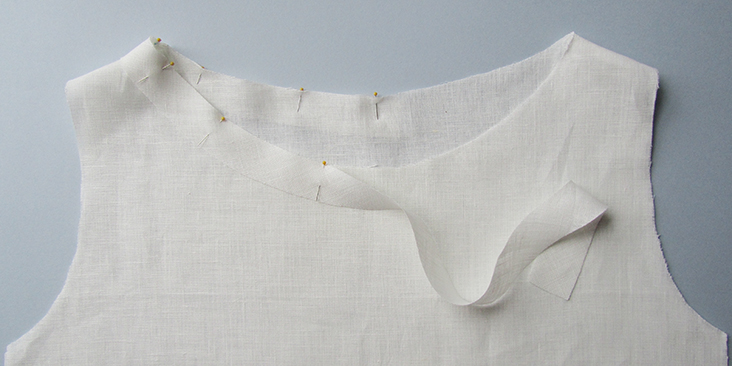 6. When you reach the center back, overlap the two ends of the band and pin them together to perfectly fit the opening. Sew along the pinned spot and press it open.
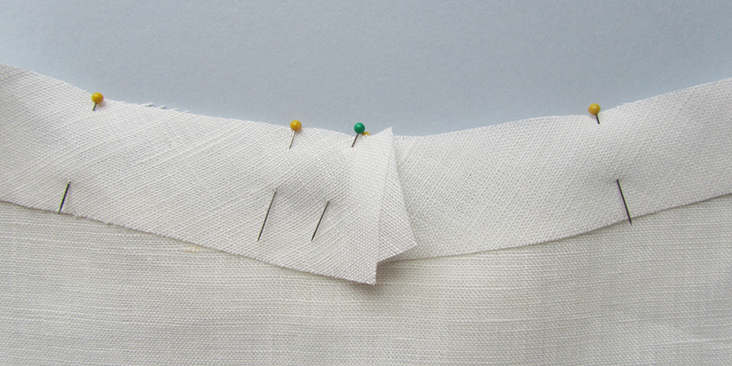
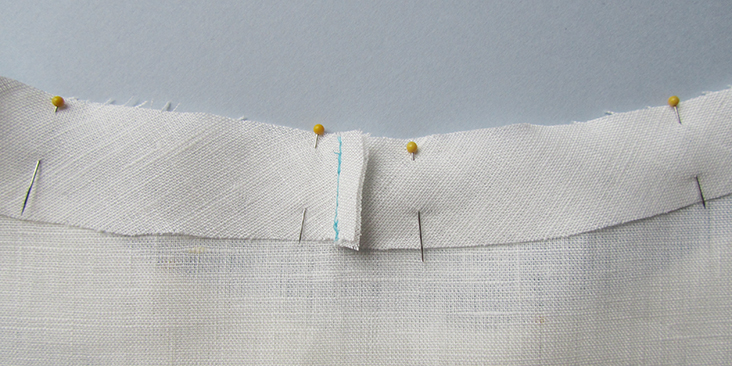
7. Now stitch the bias band to the neckline using a 1/4″ seam allowance.
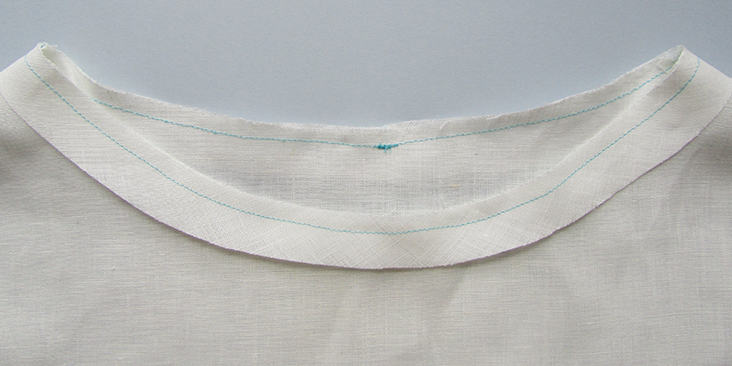
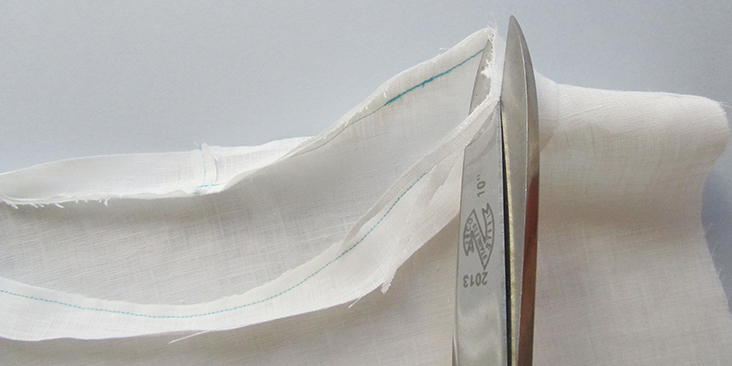
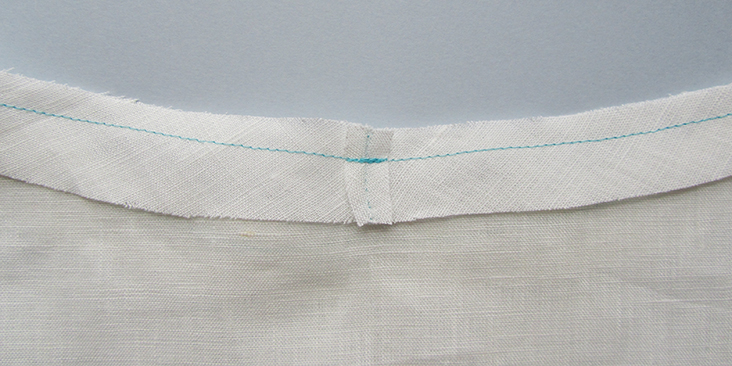 8. Trim the seam allowances to 1/8” using your scissors and press the remaining seam allowance open toward the bias band (from the inside of your garment).
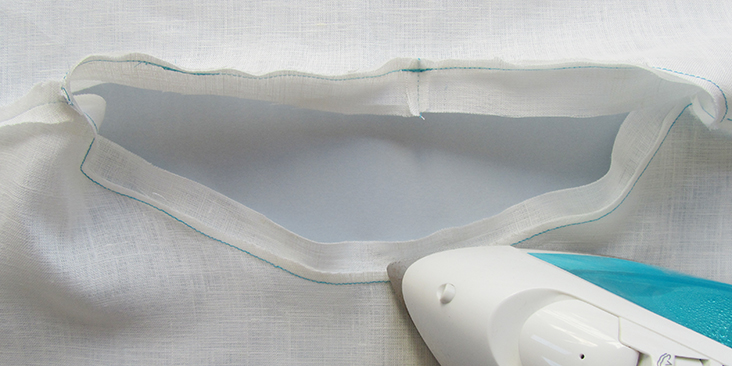 9. Now turn your garment right side out and press the seam flat.
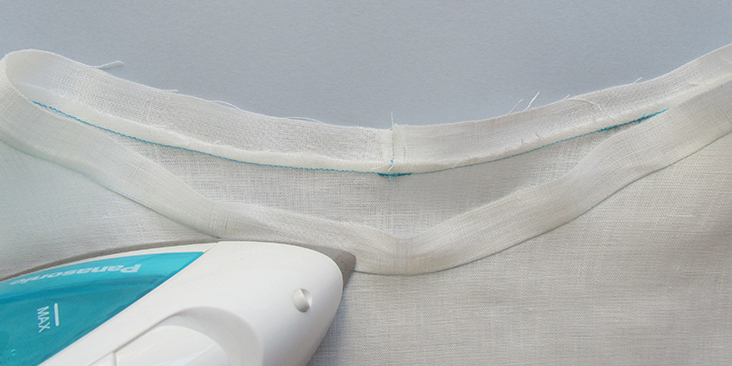 10. Fold the bias band in half, lining it up with the stitch line and press it all around the neckline. Fold again under raw edge of binding.
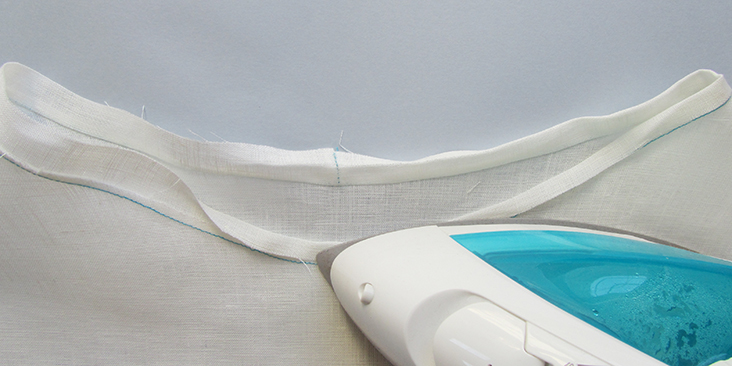
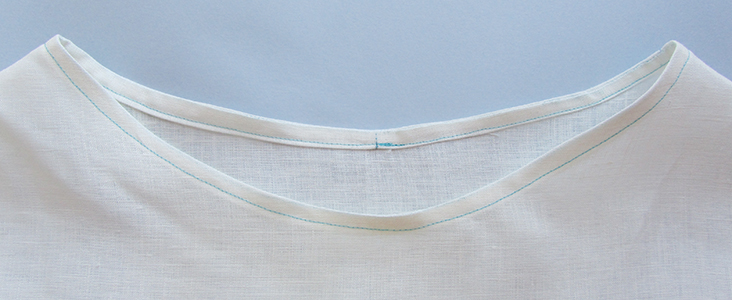
11. Now pin and stitch the band from the inside, sewing as close to the fold as possible. Remember to backstitch at the beginning and the end to secure the stitches.
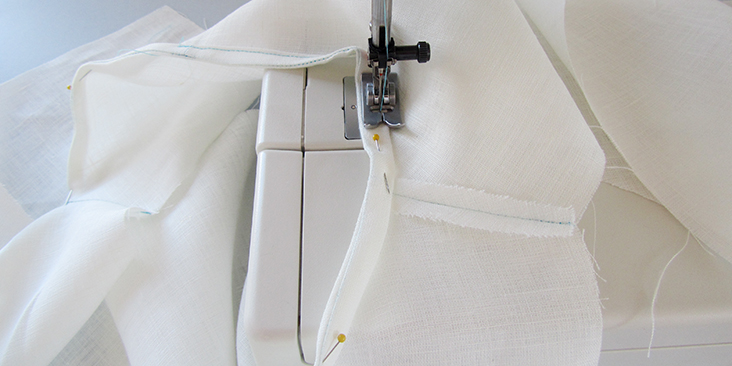 12. Give the entire neckline a good pressing to smooth it out and you are done!
Remember that you can use this method for finishing armholes too!












27 Comments
Rachel Clark
Thank you for the pattern! I just had a question – it looks like on step 5 the picture shows the wrong sides are together, but the instructions say to pin the the bias band with the right sides together. Am I looking at this incorrectly? Trying to learn how to create this beautiful pattern.
Thank you for your help!!!
Sandrine Lo
Hello,
I love your website and blog, it’s will help me to improve a lot.
Even i speak french, your explication is so clear and the image !!!
Thanks a lot,
Please continue
Carolyn
The whole tutorial was to be about applying bias binding. Up until photo 8 I see a bias strip. Starting at 8 you have a strip on the straight grain. That stretches the neckline instead of conforming to it. Staystitching is necessary to achieve the ‘unstretched’ and non home made result.
Trish Triplett
If you put the pins in the fabric the other direction you can slip them out easily as you sew.
Susan
I have sewn personally and professionally for more than 45 years, and I have to admit I couldn’t easily master the single bias strip finish. I use bound necklines on almost every collarless neckline, so I had to develop an easier way. I cut my bias double the finished width + seam allowances (2xW + 2×1/4″). Press under one short end 1/8″following the straight grain. Press in half the long way, then steam press into a slight curve with the raw edges to the inside of the curve. The bias will easily conform to the shape and eliminate unwanted stretching or compression. I then carefully staystitch the neckline slightly inside my seamline. With just a slight tension, start pinning the pressed end of the bias strip onto the neckline just behind the left shoulder seam, right shoulder, and CF, CB, all the way around. The raw end will overlap the finished end. Cut band end on straight grain, maintaining a 1/4″ overlap. This will cleanfinish the join and eliminate bulk when turned. It does not need to be sewn, unless it’s very loosely woven. Now I can turn the entire strip inside, trim seam allowances, press and either understitch or topstitch. Or, I could also create a clean band finish by turning only the seam allowance in, pressing it toward the garment body and topstitching it down from the outside. This will leave a raw edge that the topstitch will help from fraying, or it could be carefully serged before topstitching in place.
Enid
When putting binding on a curved neckline, the neckline itself will most often stretch because so much of it is on the bias and therefore very unstable. I always put fusible bias stay tape right at the edge of the neckline immediately after cutting out the pattern piece. Then apply binding as in the tutorial….this will keep your neckline very smooth, perfectly in shape and easier to bind. The stay tape will not show at all if you use light tape on light fabrics and black on dark fabrics.
Barbara Perreault
pictures look like band is cut on straight of fabric not on bias, I lie to join pieces where they meet on bias so not as much fabric to make bump at seam
Linda
Just a suggestion. The left front of the garment has a gap (right side when looking at the pictures). This is usually caused by stretching the bias tape on one side of the front or back at different tensions. Another option that is very tedious is to sew the binding from the centers, both front and back to the shoulder seams.That means you will have four stitching breaks that have to be matched up perfectly. It is worth the time and effort to eliminate the gap and have a garment that does not scream home made.
Izumi Arts Sewing School
I have been Sewing for 50+ years, and yes I agree. Sewing from the center points eliminates some of the possible rippling when you use bias. If you really dont want to sew 4 sections, at least do 2 sections starting at the center front, and end at the center back.
Personally, I prefer to finish a sleeveless bodice with an ‘All in One facing”, which provides a very nice & smooth finishing without having to topstitch.
Thank you for sharing!
marei
The instructions do not clearly state that there are two folds over to the inside, so that there is no raw edge when the fold is sewn down.
Leslie Aitken
I agree — especially when sewing with linen, or any other fabric that frays!! There needs to be a step 10.5 that states fold under raw edge of binding!
DIXIE SHOUP
Many thanks for such useful information!!
Rima Khusainova
You are welcome!
DIXIE SHOUP
Many Thanks!! Really helpful information!
Bonnie
Thanks for another great tute. I’m confused, however, about the second line of stitching (on the inside). I’ve read the directions twice and and it still appears to me that stitching on the inside would produce an uneven stitch line on the public side of the neckline – unless the second stichline was done by hand applying a hem stitch. What am I misunderstanding?
Rima Khusainova
Hi Bonnie, sorry to hear that you are having difficulties with the tutorial. I’ll try to explain but I’m not quite sure I understand what you mean…The only way to sew that second line is from the inside (as the bias band is folded twice to the inside). If you want to get it right, the first thing to do is to check that the tension on your sewing machine is adjusted correctly (the dials for the upper and the lower bobbins should have the same numbers). This is the most common reason for the stitch line to look a little off. Also, go slowly when you stitch and try to get as close to the fold as you feel comfortable. Hope this helps! Let me know if you need any further assistance.
Theresa
Bonnie, you will indeed end up with a stitch line on the public side unless you hand sew using a hem stitch. And some machines’ stitching don’t look as nice on the bobbin side as on the needle side no matter how much you tweak the tensions. This is why top stitching is usually done with the needle on the public side of the fabric. I think if you like the top stitch look but don’t like the results that you’re getting with your bobbin thread on the top side, you could baste the bias strip in place and then flip it over and top stitch the regular way.
Teresa
Extremely helpful! Thanks!
Rima Khusainova
Great to hear that! Thank you Teresa!
Margrete olsen
I do this all the time for neck and sleeve finishing. I strongly recommend using a bias tape maker. It is a metal thing tha you pull you fabric through and it folds the fabric which you press into bias fold tape. It is much easier than pressing it after you sew it to your garment and you get a much neater finish.
Lisa Arnett
What is that?
Yardwork
I usually start with a folded end, pinned to the neckline. Then when the other end reaches that – just cut it a little past the folded end. Then when turned to the other side, there are no raw edges. Trying to make a seam there takes too much fiddling I think.
Rima Khusainova
Thank you so much for the tip! I’ll be sure to try this next time.
melissa
Any comments on how to do a corner with this method? Love the tut. Thank you
Rima Khusainova
Hi Melissa! This method works great with curves but you can do corners with it too, it’s a little tricky though. When you approach the corner, you’ll need to fold your band diagonally and then stitch on top of this fold. The great thing is that it will only be visible from the inside of your garment.
Janet
nice, the only thing I would do different is to do the close the same way you would close quilt binding. Nice tut. Thanks, Janet
Rima Khusainova
Thank you so much for your feedback, Janet! It could be indeed a great option too.