Welt Pocket Tutorial
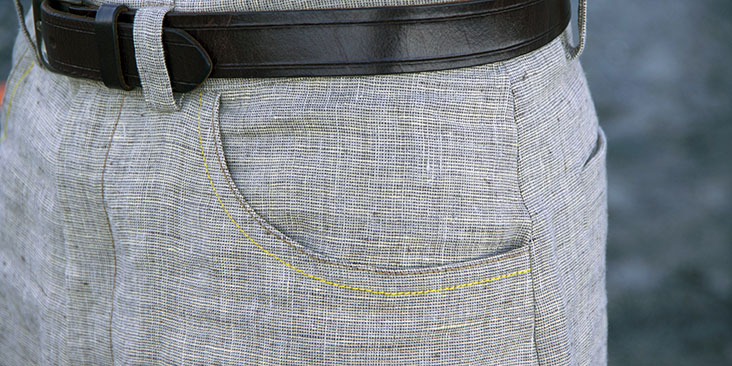
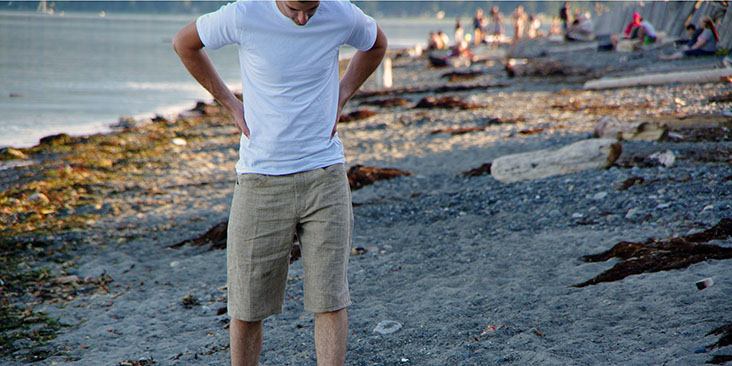
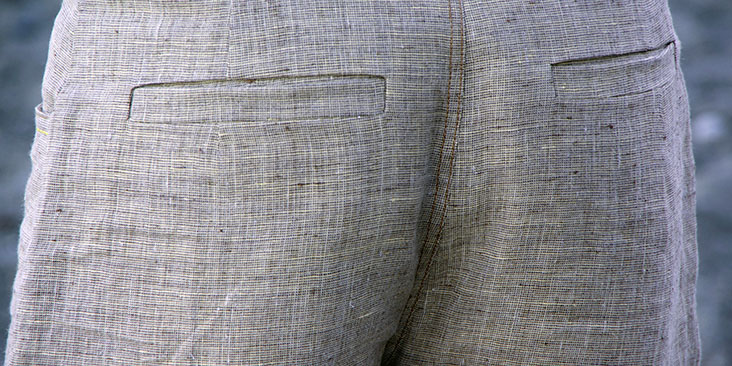
Linen is the perfect fabric to use for casual and comfortable summer menswear. I’ve been busy sewing Matt some linen shorts using this’ beautiful mid-weight yarn dyed linen. I love the depth that yarn dyed fabric has – especially when the two different colors are as subtle as they are in this color way. They are creamy yellow and light brown which I think pairs really nice with a basic white t-shirt but could also be treated as a neutral base for all sorts of colorful tops.
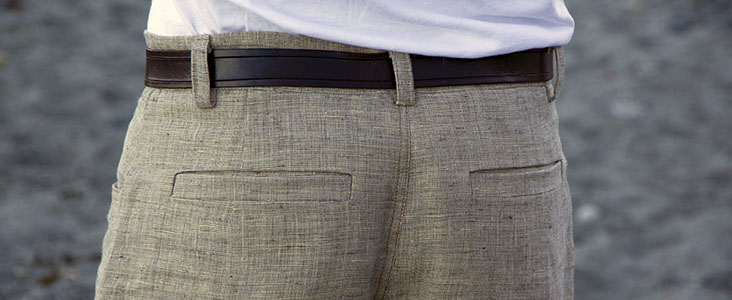
As a nice professional touch on these shorts I decided to add wide single welt pockets to the back. Welt pockets often have the bad reputation as being scary and difficult to sew. While it might take a little while to make perfectly square corners and until the origami folds become second nature, they really aren’t that difficult…it is just a matter of doing the right step at the right time. And here are all the right steps laid out in photos for you!
Difficulty: Intermediate
Materials: 2 yards of IL044 Yarn Dye
Shorts Pattern (get it here)
Notions: Scissors, pins
Sewing machine
Here I will demonstrate how to make the welt pockets, for a full tutorial on how to make shorts, please follow this link to purchase our pattern which has all the instructions.
For each pocket you will need:
-‘ Welt rectangle – one interfaced rectangle that is about four times the height of your welt and a couple inches wider.
-‘ Shallow pocket lining – one shallow pocket piece (either shaped like mine is or just a shallow rectangle that is the same width as the welt rectangle) made out of thin cotton or some other pocketing material.
-‘ Deep pocket lining – one long pocket piece that is shaped to match the width and bottom of your shallow pocket piece and is tall enough to extend past the top of the pants (mine was 12″ tall)
-‘ Pocket facing – a rectangle approximately the size of your welt piece that will be top-stitched to the deep pocket lining to act as a backdrop for the welt pocket (so that you don’t see the pocketing fabric behind the open welt).
-‘ Interfacing – A square of interfacing that is larger than your welt rectangle piece to apply to the trousers.
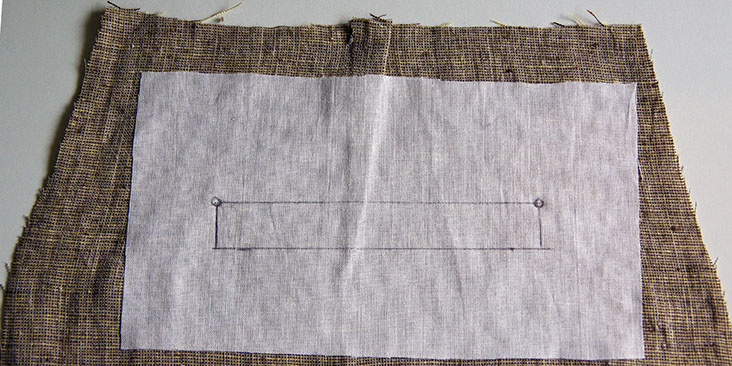
1. Okay, now that we have all of our pieces cut out and interfacing applied, we can begin to assemble the pockets! On the top third of the wrong side of the welt rectangle, mark the finished width and height of your welt (you can choose this based on your preference or use my measurements which were 5/8″ tall X 5 1/2″ wide). I’ve used pen for my markings so that you can see them clearly in the photos but it is probably more advisable to use chalk or a wash out fabric pen just in case your markings show through to the right side of your fabric!
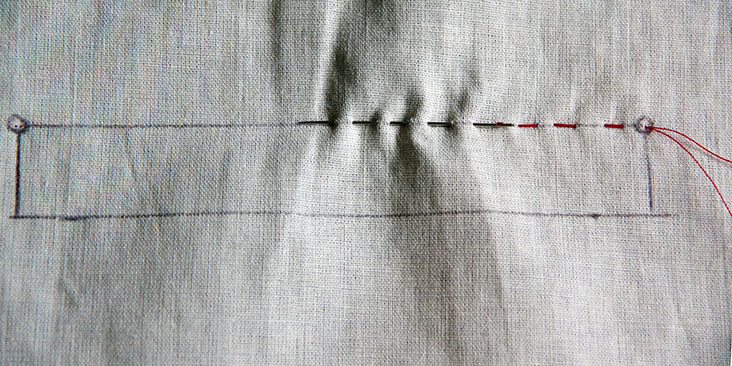
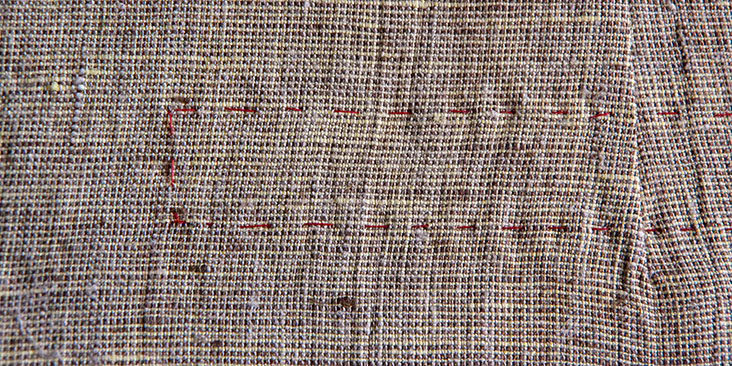
2. Draw markings on your interfaced trouser pieces as well. I’ve drawn them on the wrong side here because my pen won’t wash out and then I’ve traced these markings with thread (shown in the next couple photos) so that I can see them on the right side of the garment too because this will be necessary later on.
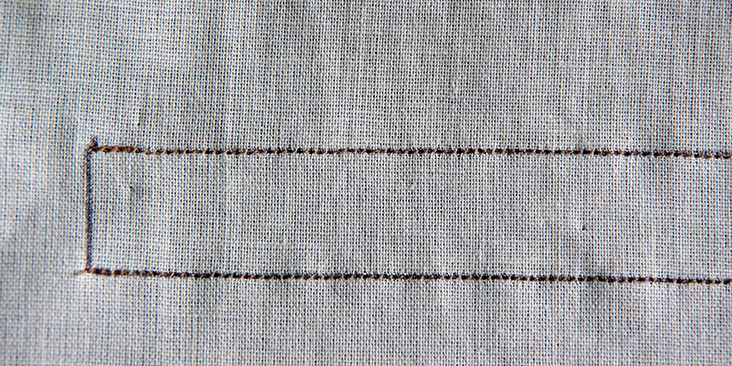
Here is my basting stitch:
And the view from the right side (make sure to stitch thoroughly at the corners so that they are very accurate):
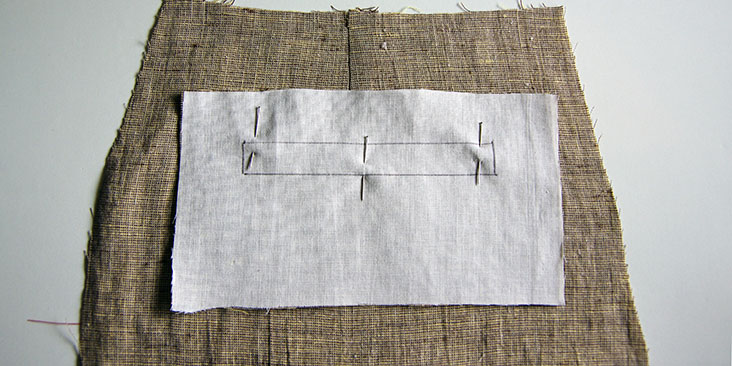
3. Line up your trousers with your welt piece, right sides together. Your markings will come in handy here to make sure everything is lined up precisely.
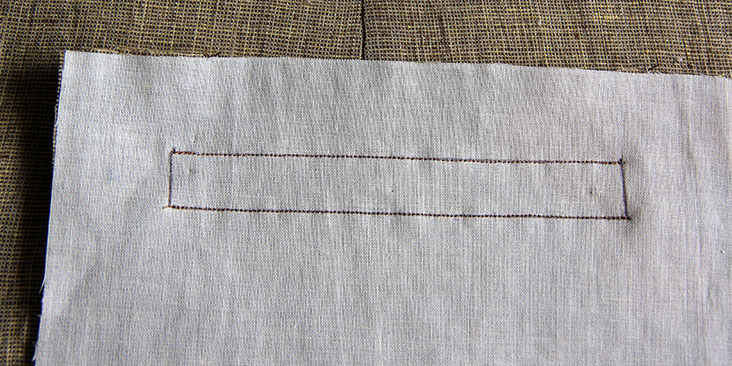
4. Using a very short stitch length for added strength and precision, stitch along the long edges of the welt rectangle. Stop and back stitch precisely at each corner.
Here is a close up to show you how carefully you should stitch over the marked lines:
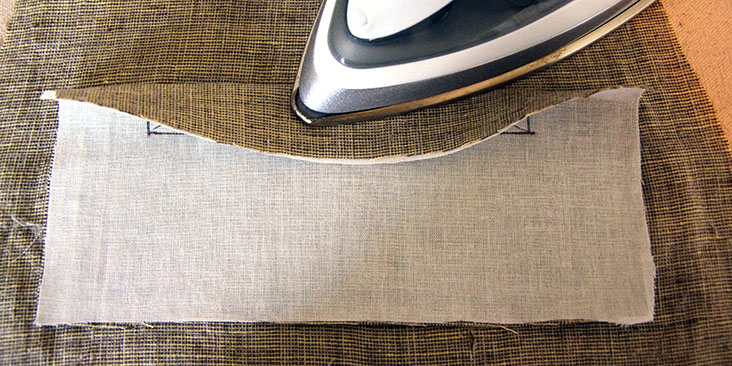
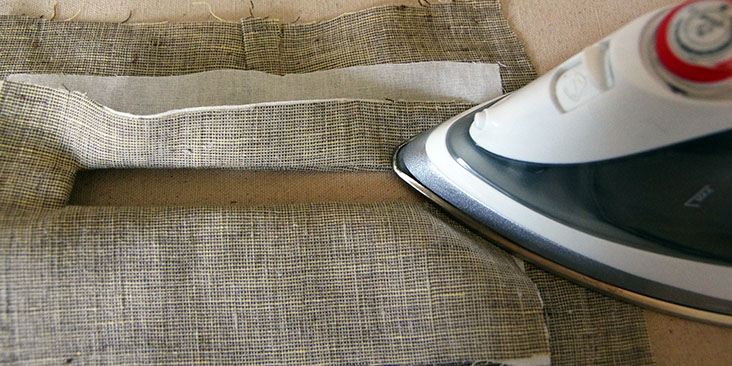
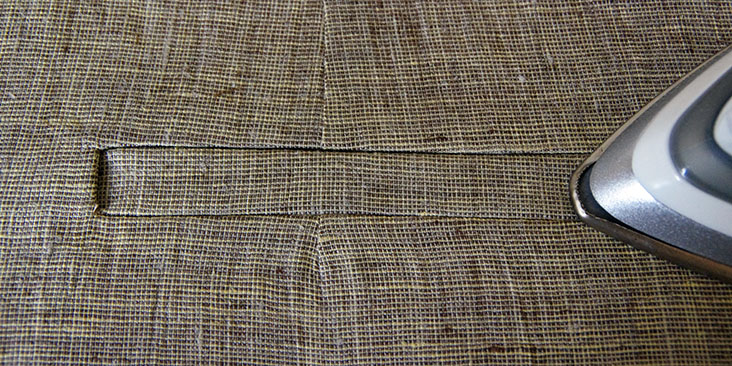
5. Now press the loose sections of the welt to help things fold crisply later on. Here I am pressing the top of the welt:
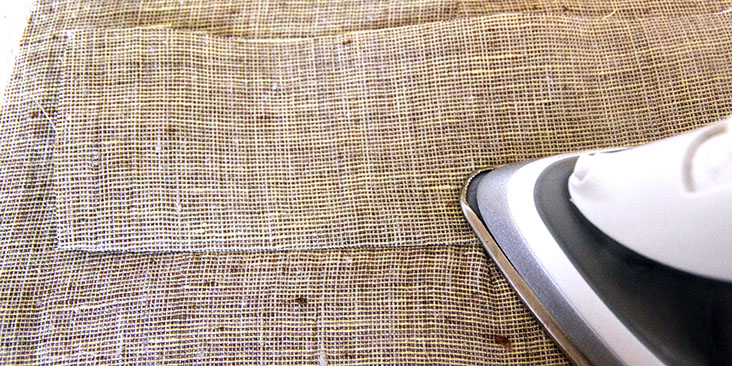
And pressing the bottom of the welt:
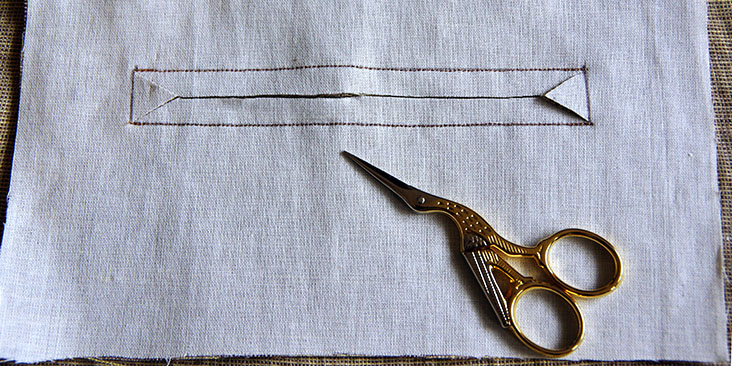
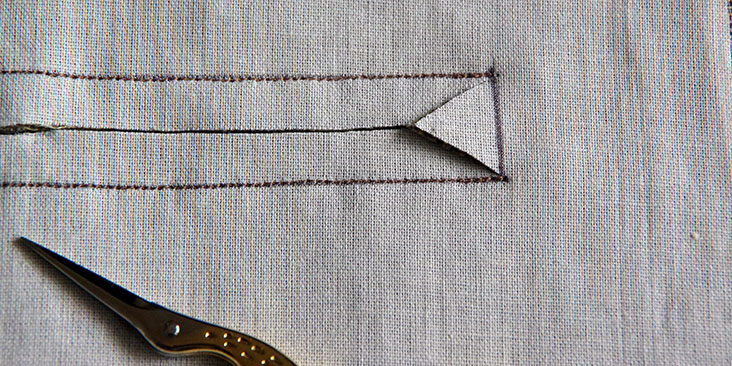
6. Using sharp little scissors, cut along the center of the welt and stop 1/2″ from either end. Cut on a diagonal towards each corner, clipping as close to the stitching as you dare! The closer you get, the crisper your welt corners will appear later on…but be warned – if you snip beyond your stitching your welt will have little holes in each corner!
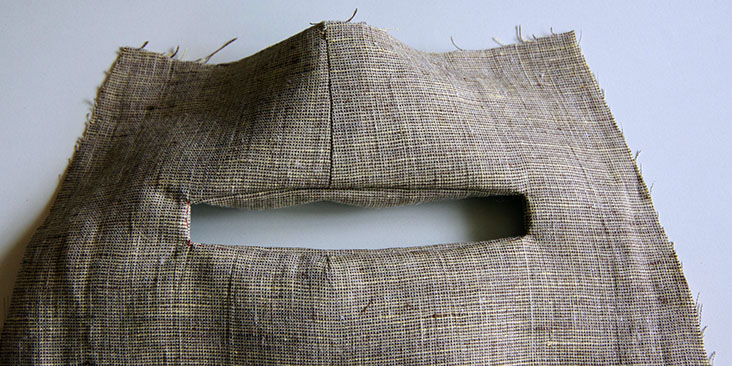
7. Turn the welt to the wrong side of the garment so that you are left with a rectangular window on the right side:
And the loose fabric on the wrong side:
8. Now is a great time to remove all the basting thread!
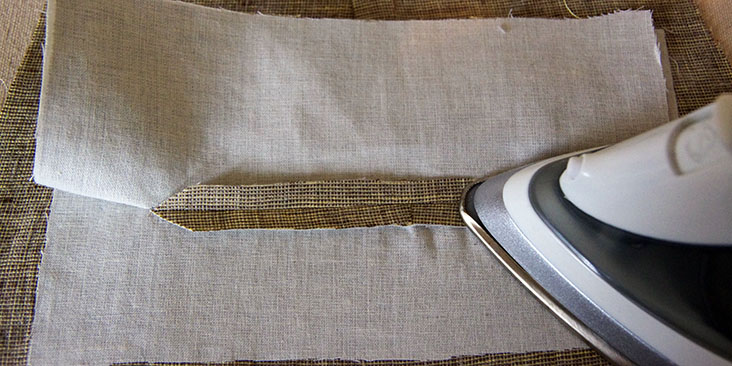
9. To reduce bulk later, flip up the bottom of the welt and press the seam allowances that are hidden underneath open.
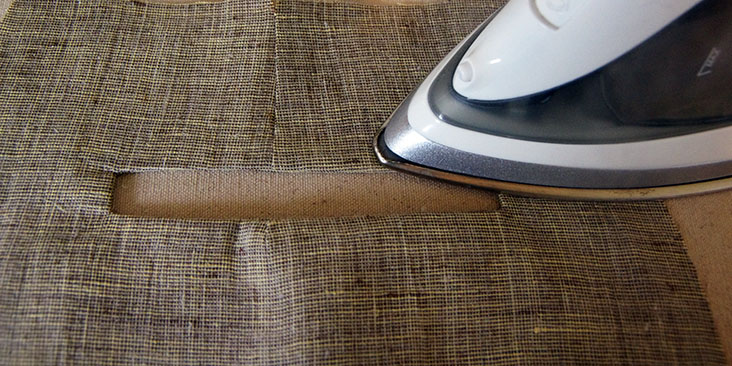
10. And now press the sides and the top of the welt crisply flat (isn’t linen lovely to press?). If you’d like, you can press the seam slightly towards the wrong side of the garment so that it isn’t visible from the right side.
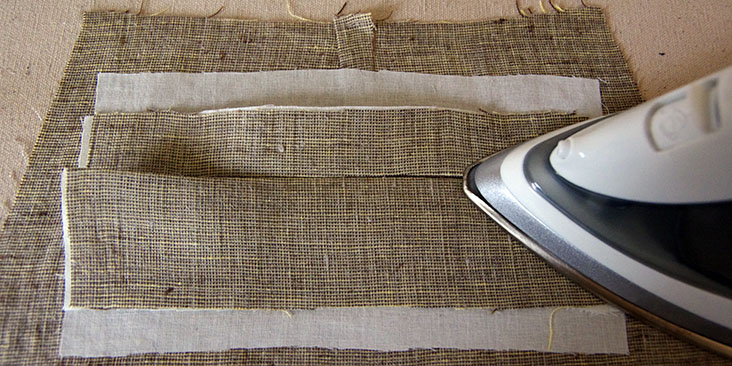
11. Turn the garment on the right side to press all four corners carefully – you can pinch and pull them a little to make them look perfectly right angled.
12. From the wrong side of the garment, create an accordion fold with the welt rectangle so that the folded edge meets the top of the welt window. Press the folded edge crisply.
From the right side of the garment, your welt will look almost finished!
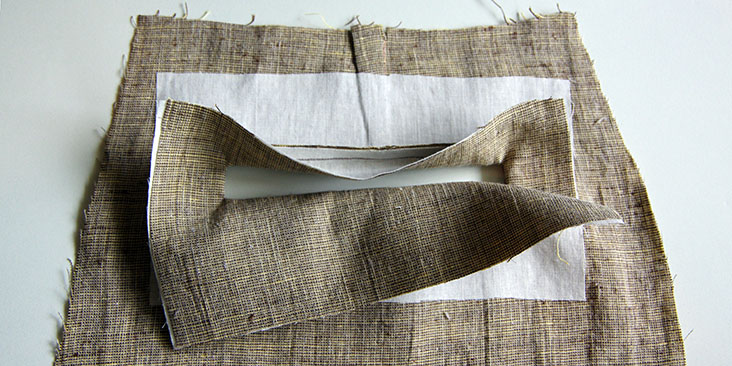
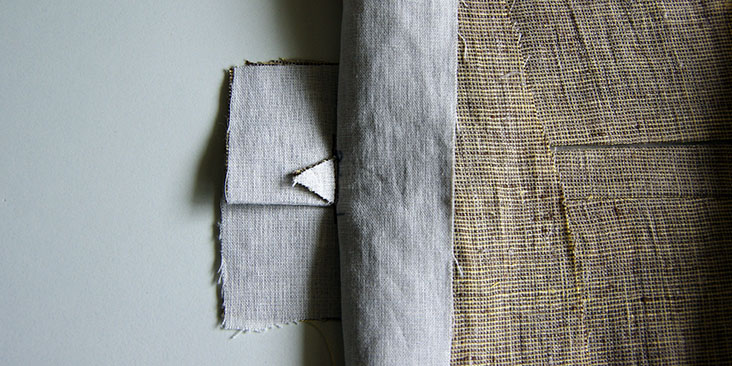
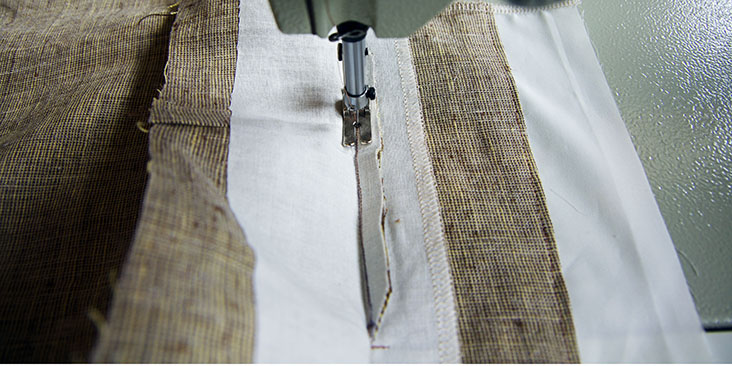
13. To keep the welt in place, uncover the sides of the welt by folding over the trousers. You will see a little triangle of fabric and your accordion fold. Stitch as close to the base of the triangle as possible through all layers except the trousers themselves.
Your welt is finished! Now it’s time to add the pocket bag so that it doesn’t open up to display underwear (unless you’ve made yourself some perfect Comox Trunks that you really want to show off.
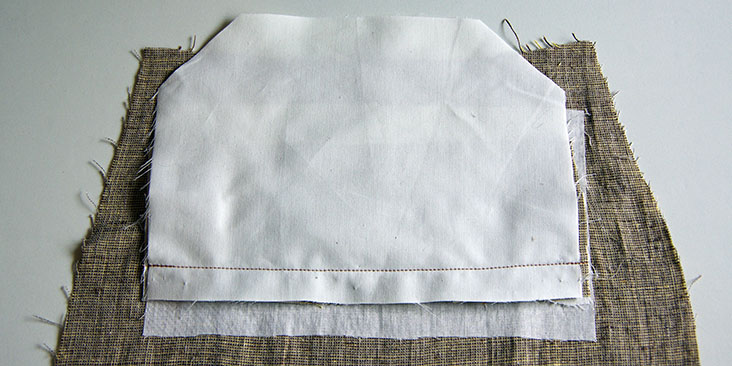
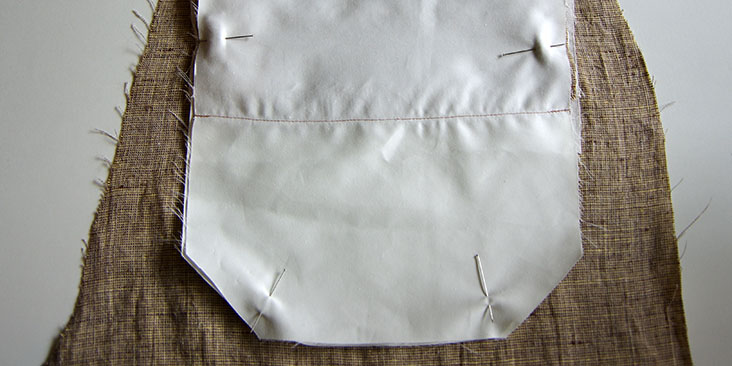
14. To add the pocket bag, first place the shallow pocket lining with right side down on top of the welt. Line up the top pocket edge with the bottom of the welt. Stitch using a 5/8″ seam allowance.
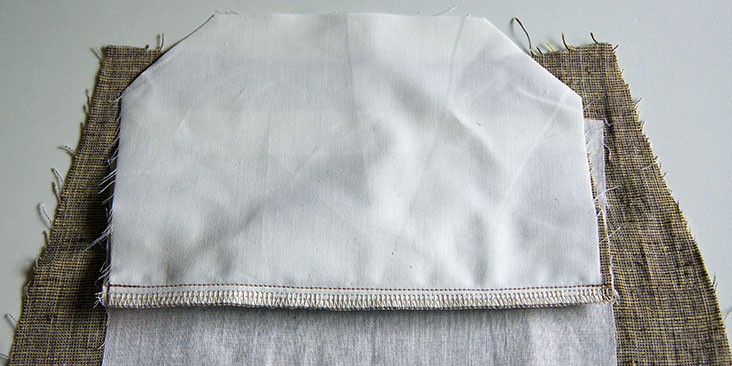
15. Finish with a serger or a zig zag stitch:
16. Press the pocket lining downwards:
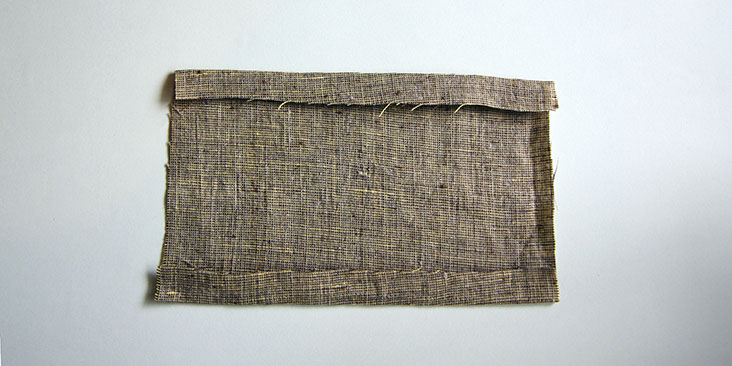
17. To prepare the deep pocket lining, first press under the long edges of the pocket facing 5/8″:
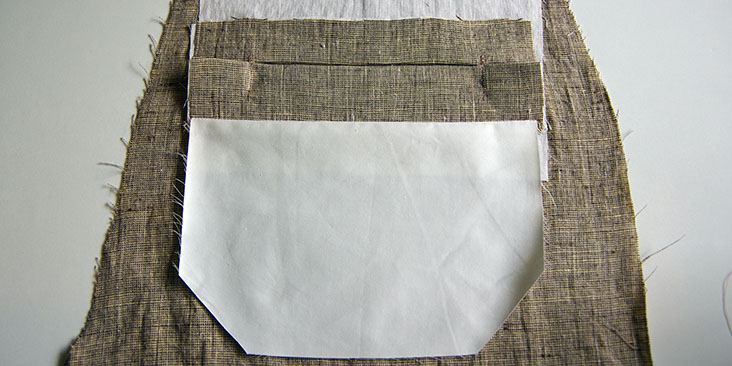
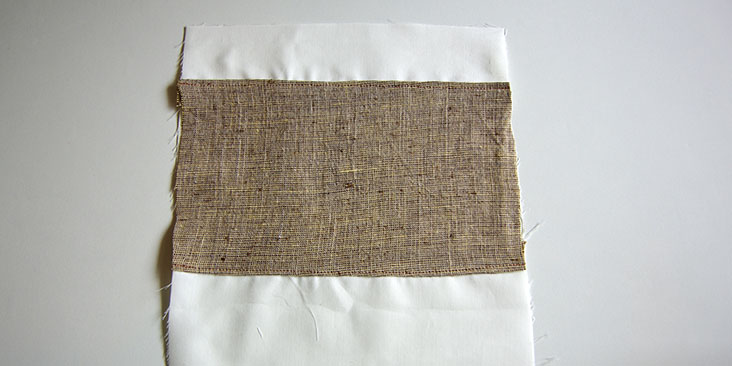
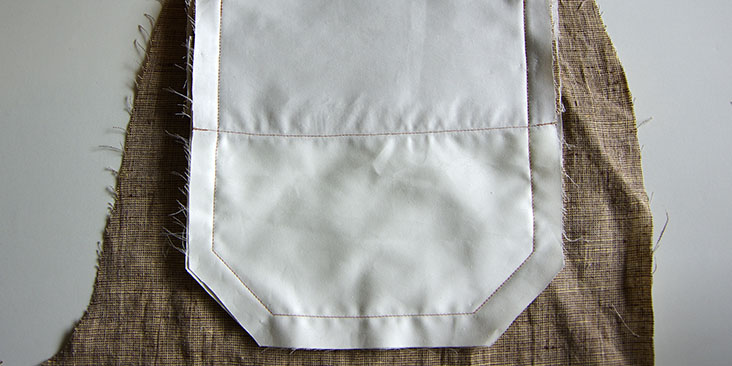
18. Top stitch the pocket facing to the deep pocket lining. You will want to place this facing so that it lies directly over the welt pocket when the bottom of the deep pocket lining is lined up with the bottom of the shallow pocket lining.
19. Line the pocket pieces up with right sides together and pin in place through all layers of the welt folds (but not through the trousers themselves).
20. Stitch around all pocket edges using a 5/8″ seam allowance. You won’t need to stitch up to the top of the deep pocket lining because no other layers extend this high.
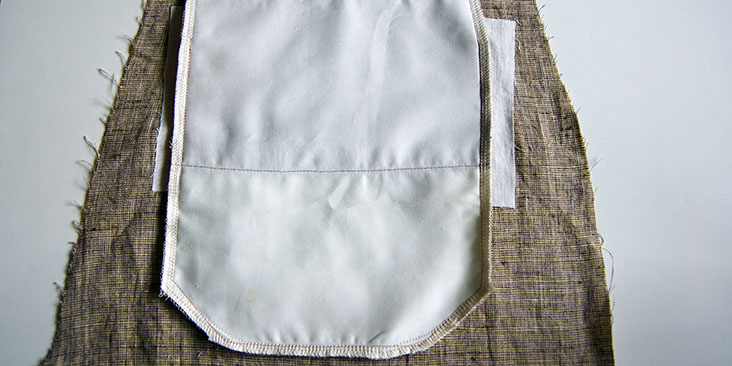
This is how your pocket will look at this point:
21. Finish the edges of the pocket with a serger or a zig zag stitch.
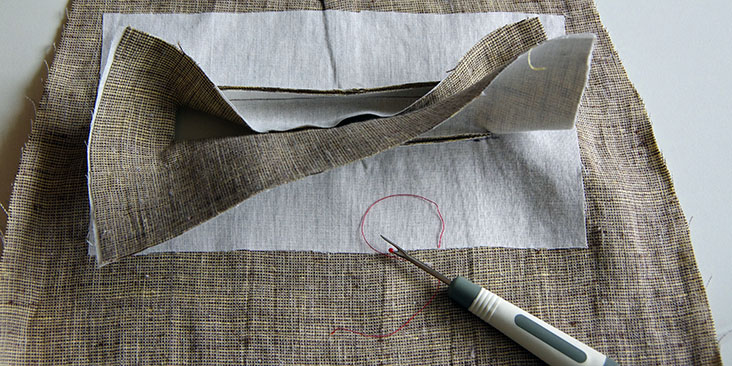
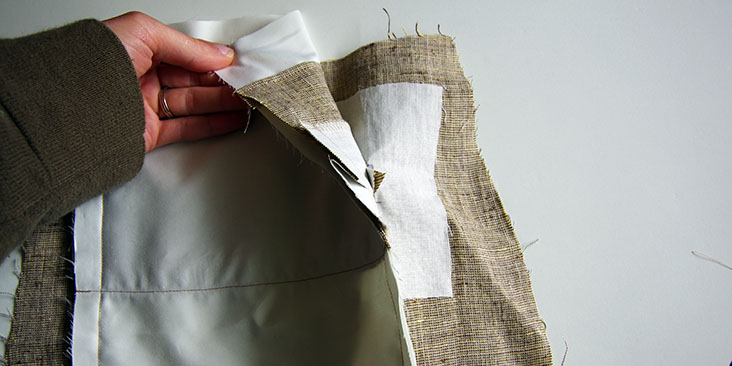
22. To help prevent your welts from sagging in the middle, fold down the top of the trousers to expose the little seam allowance between the trousers and the pocket pieces. Stitch through the seam allowance and all the pocket layers.
And that is it, you have constructed a gorgeous welt pocket! Doesn’t it look nice?
You can get Yarn Dye’ fabric to create this project with by clicking here!
Now you can add them to just about everything! The ‘trial’ pocket that I made before the final two on the shorts will make a great pillow cover for the sofa, complete with a built in pocket – perfect for hiding the remote control, I think :).
Thank you Fabrics-store for featuring my tutorial on The Thread and providing the beautiful linen!














7 Comments
Kathy
I watched A LOT of videos regarding welt pockets, but your written tutorial with excellent pictures was just the thing I needed. My pockets turned out great! Thank you so much for this post.
Donna
This is the BEST tutorial on welt pockets I’ve found yet. The instructions, whys and wherefores, and the pictures, are exceptionally clear and easy to follow. So inspired to try this now!
I am very happy to have found this great source for linen fabric, complete with amazing tutorials like this.
Thank you.
Donna in Canada 🙂
Morgan Meredith
Hi Donna,
Your comment made my day! I’m glad you like the tutorial! Good luck with your welt pockets and enjoy your new-found source for linen!
Have a great day,
Morgan (also from Canada!)
Pam Davis
No matter how easy the instructions look I always find welt pockets a challenge. Thank you for this wonderful tutorial. Using an extra sort stitch is going to make all the difference in the world!
Morgan Meredith
I hope the short stitch will be a nice addition to your welt pocket tool kit! Not only did it make my pocket very strong, it really helped me to slow down and stitch precisely.
ali
Thank you. I’m going to make a pair of trousers just to use these instructions.
Morgan Meredith
Great to hear! I hope your trousers and welt pockets turn out wonderfully! Please feel free to email me if you have any questions while sewing your welts (Morgan at info@threadtheory.ca).