A linen Apron tutorial by Stephanie Fail
This week we teamed up with the wonderful Stephanie Fail of imakeityoumakeit.com who was kind enough to walk us through on how to make her gorgeous apron for your kitchen.
This tutorial will show you how to make a reversible linen apron with a ruffled edge. ‘ The linen fabric makes a beautiful apron with great structure, and a luxurious feel to it. ‘ Linen works great for clean up too- after you’re finished in the kitchen, the apron can be machine washed and tumble dried. ‘ The tutorial below is perfect for beginners, and you can make the apron from start to finish within about 2-3 hours. ‘ The tutorial uses the gathering technique, basic machine straight stitching, and the hand slip stitch. ‘ This apron was made with the same color fabric, but you can easily use different fabrics on the front and back for a reversible apron.
Difficulty: Beginner
Time: 2/3 hours
Materials:
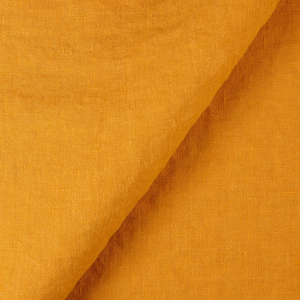
1 yd of IL019 Autumn Gold (57″ wide)
Pattern (draft your pieces or get them here)
Notions: scissors, pins, needle, turning point (or something pointy like a chopstick)
Sewing machine
Optional: pinking shears
Cut Your Fabric
Cut 2 pieces of the main apron body
Cut 2 apron tie pieces: 4″ width x 35″ length each
Cut 1 apron ruffle piece: 3 1/8″ wide and 57-76″ (the longer the piece, the fuller the ruffles)
Make the Ruffle
1. ‘ Hem one of the long edges of your ruffle piece. ‘ Do this by folding up the edge of the fabric 1/4″, and then another 1/4″. ‘ Press flat, then stitch. ‘ Alternatively, if you have a serger and want to add a decorative hem, use the rolled hem
2. Prepare to ruffle: On the other long edge of your ruffle piece, stitch along at 5/8″, leaving threads long. ‘ Then stitch again 1/4″ above that, again, leaving your threads long.
3. Gather your fabric: Gently pull just the 2 bobbin threads at one end of your fabric, gathering the fabric.
4.’ Continue to gather your fabric until it measures about 50.5″
Make the Apron Body
1. Stitch gathering lines across the top of the main apron body, just like you did for the ruffle piece. Now stitch them again for the other apron body piece.
2. Attach the ruffle to one of the main apron pieces, right sides together. Baste your ruffle onto your apron body.
3. Now lay your other apron body piece on top, with the right side of the fabric down.
4. Stitch around the edge of your apron body, stitching through 2 layers of the apron body, and the ruffle piece.
5. You can pink your seams with pinking shears, if you have them. The press your seams open.
6. Turn your apron right side down and press.
7. Gather the apron at the top, on both apron pieces, until your piece measures 10″ (or your desired width) not including the ruffled edging.
8. Pin the apron pieces together at the top, then stitch over them at 1/2″ seam allowance, securing your gathered edge down.
Make the Apron Tie
1. Stitch the 2 short ends of the apron tie together with 1/4″ seam allowance. Pink your edges and press your seams open.
2. Fold the apron tie in half length-wise, right sides together. Press. Then, pin your edges together along the raw edge.
3. Stitch along the edges using a 1/4″ seam allowance, making sure to leave a 10″ opening at the center.
4. Clip corners and press seams open. Turn right side out and press.
Attaching your tie to your Apron
1. Place the top of the apron inside of the tie opening and pin.
2. Hand slip stitch the apron tie to the apron body for the front of the apron. Repeat for the back side.
That’s it – you’re all done! ‘ If you liked this pattern, you can check out other’ sewing patterns‘ at’ imakeityoumakeit.com











3 Comments
Stephanie
Love the apron and the color really makes it pop. Where can I find the pattern for this?
Masha Karpushina
Dear Stephanie, here is the link. Its also at the top, by the material list. Really glad you like it.
http://imakeityoumakeit.com/2013/08/half-apron-sewing-pattern-diy/
Pingback:
Apron Tutorial featured at Fabrics-Store « I Make It You Make It