Tutorial: Valentine’s Day Treat Bags
Most people usually say their favorite holiday is Christmas. Occasionally, you’ll hear someone claim New Year’s Eve, some may say Thanksgiving… but mine is Valentine’s Day, without a doubt. All the pinks and reds, laces and ruffles, themed treats and gifts; it’s so much fun!
As a maker, I find myself always looking for opportunities to hand make gifts for my loved ones. This year I took up sourdough baking (who didn’t?), and have mostly replaced all the baked goods in our house with it. I usually bake in surplus, so it’s become an intentional habit to bake an extra loaf each week to gift to a friend or family member. I’m not big on single use plastics, so I took to just making little drawstring bags for my loaves just out of my scrap pile, and it’s the perfect thoughtful but low effort project for Valentine’s Day gifts.
Materials
Half a yard of linen
Scissors or pinking shears
Matching thread
An iron
A safety pin
Scraps/rick rack/ribbons for added fun
Steps
1. First, let’s cut out our pieces. Cut a rectangle 16 inches by 28 inches (the bag portion), and 1.5 inches by 30 inches (the drawstring). If you’re running low on fabric or are feeling creative, opt for a fun ribbon or yarn for the drawstring. Half a yard will yield two of this size bags, which are the size I make for my sourdough loaves. You can easily make these bags smaller or larger to your liking – I’ve made little cookie bags to fit two cookies as well as little treasure bags for my daughters to stuff their rocks and flowers in during outdoor activities.
2. Next, this step will be for those who prefer to finish their edges instead of using pinking shears. Serge the short sides and long bottom edge of your large rectangle. This concludes all of the prep work, so now it’s time to do the fun stuff: appliqué and rick racking!
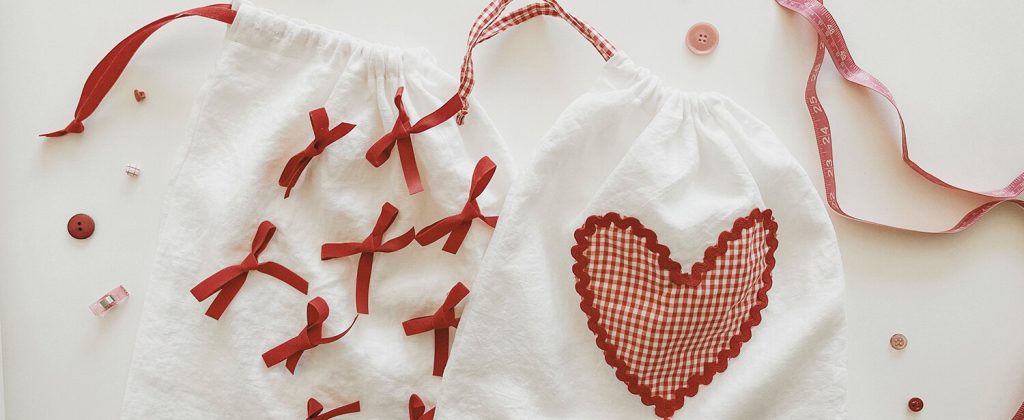
3. Once you’ve decided on your designs, it’s time to choose your placement and sew them down. I chose to take my red gingham scraps from my Valentine’s Day dress and cut out a heart I lined with rick rack. Pro tip: grab one of those glue sticks from grade school to secure your placement before sewing down instead of spending time pinning. The large rectangle will be folded short ways then sewn down the side and bottom, so keep that in mind if you’ve got something you intend to be in the middle of the bag.
4. Once you’ve secured your designs, it’s time to sew the bag. We’re going to start by folding the rectangle with right sides together (your designs should be facing inward). Measure about 2.5 inches down from the top of the bag.
5. Sew a line at a 5/8 inch seam allowance starting from right underneath your marking, pivoting when you reach the corner where the side meets the bottom.
6. Press open the top of your side seam. Sew a “U” shape from the top of the opening down, over, and up. This will secure the opening to the channel of the drawstring.
7. Now it’s time to create the channel. Fold the top edge down 1/4 inch and press, then fold that down 1 inch and press again. I find that flipping the bag right side out is the easiest way to sew this portion. Sew a line to close the channel. When you’re done, you should see that the ends at the side seam should be open.
8. If you’re opting for a fabric drawstring, you can grab that now. If not, you can skip this step. Fold your fabric strip long ways in half and iron. Next, open up the strip and fold the edges inward to press again. Sew along the edge to enclose.
9. Grab your safety pin and attach it to either end of your drawstring. Insert it into the channel at the top of the bag and shimmy through. Once it’s been pulled all the way through, tie the two ends together.
Your bag is ready to be stuffed with goodies!







Leave a comment