Tutorial: How to Self-Draft a Backless Summer Dress
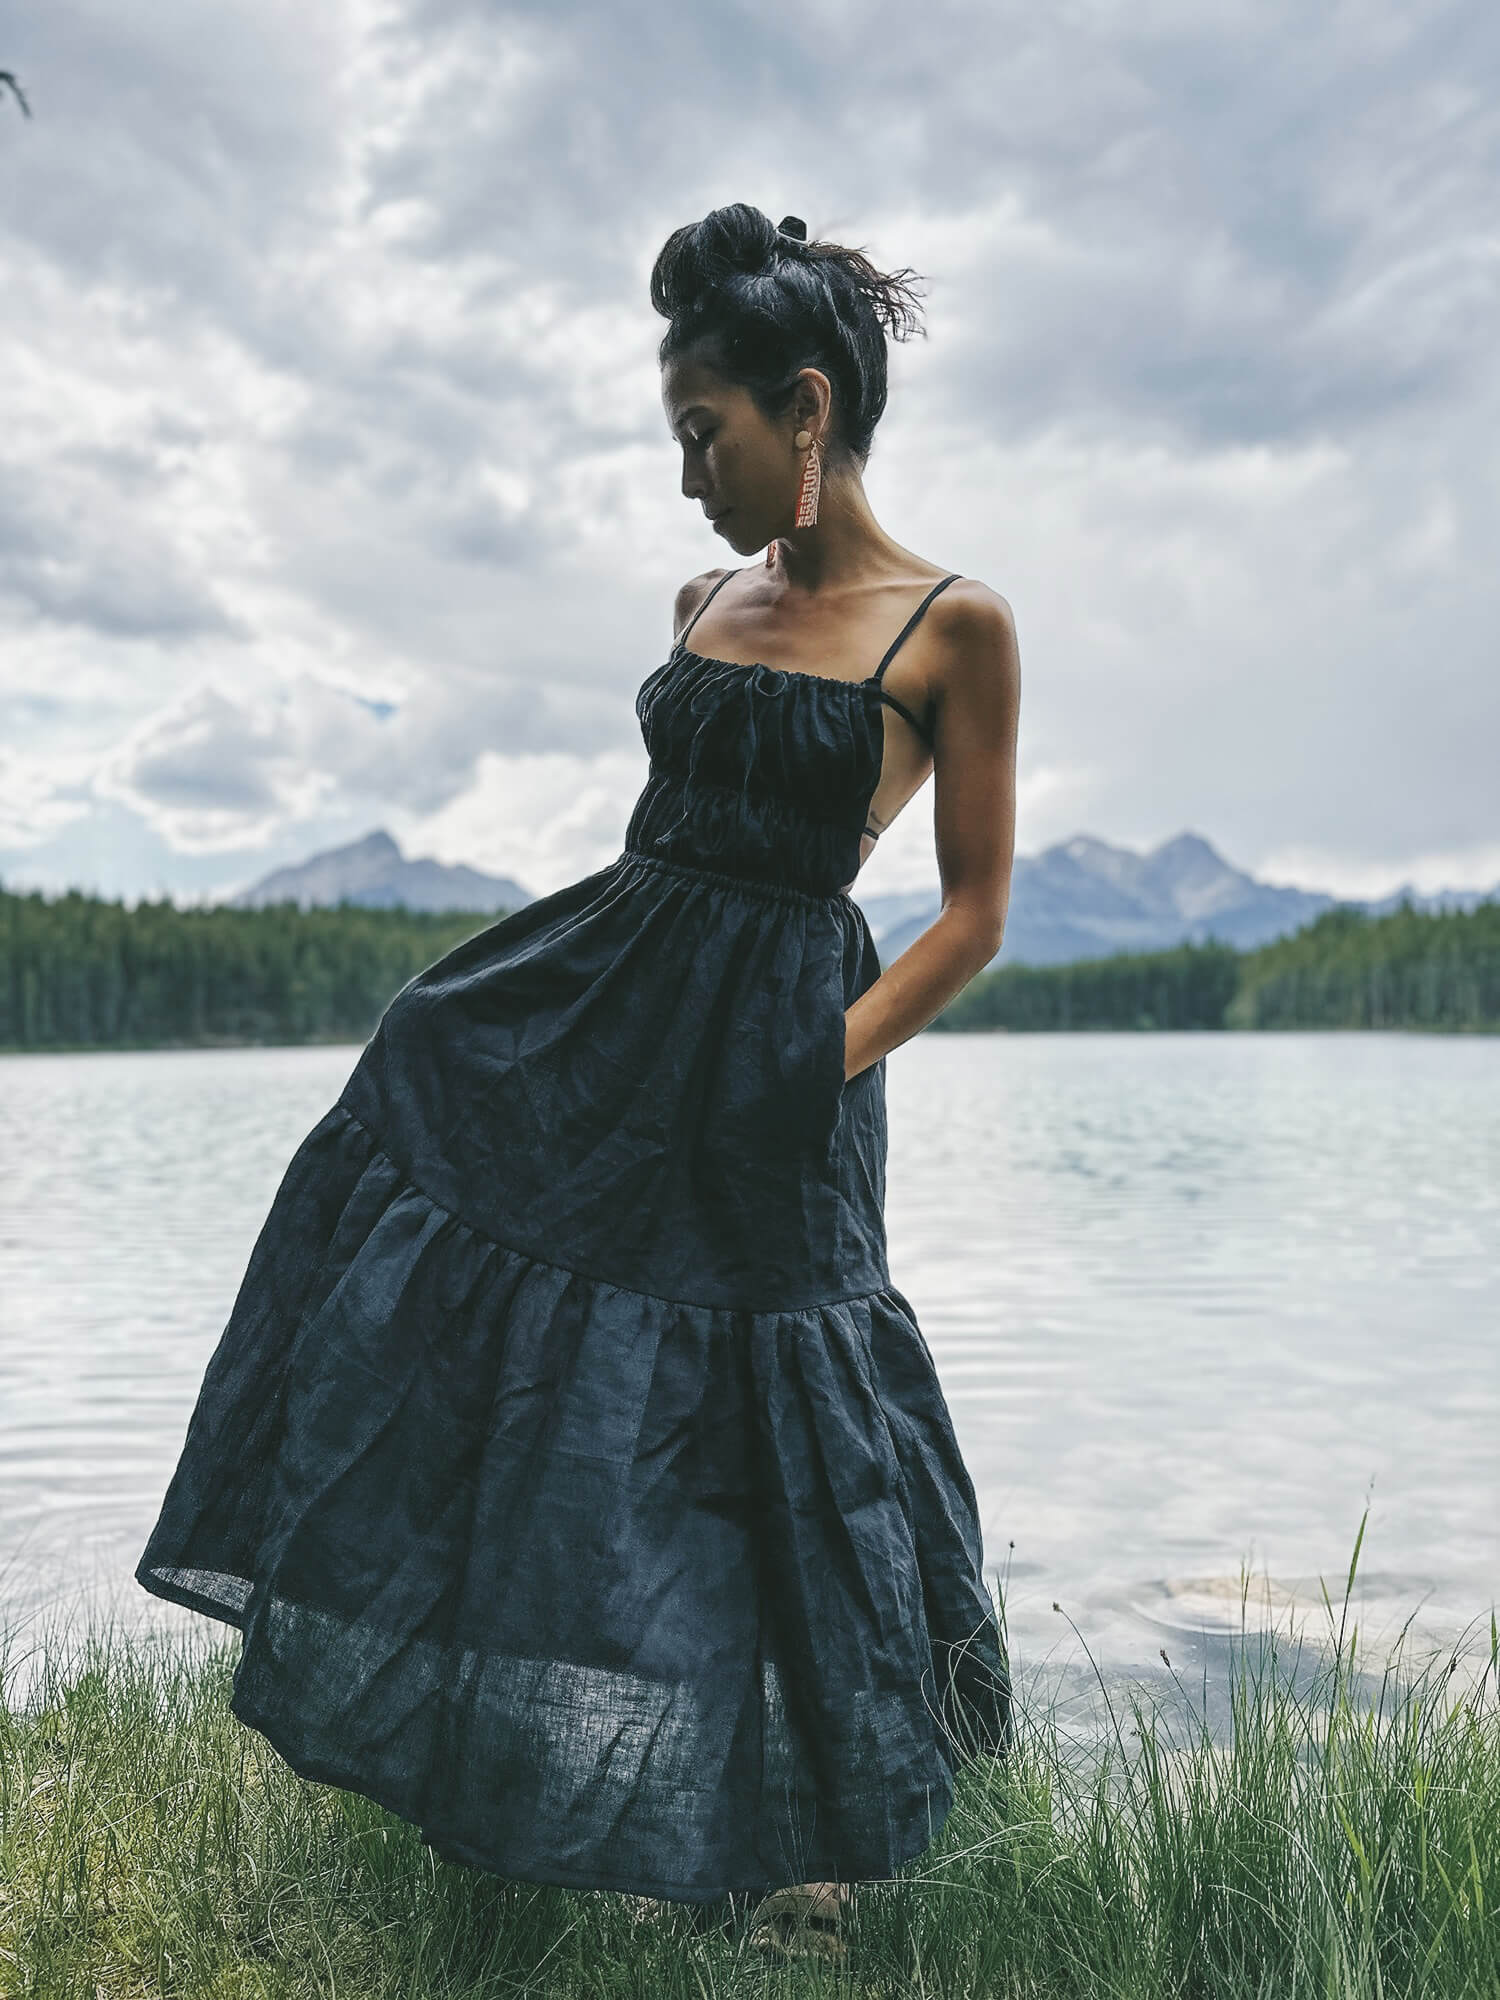
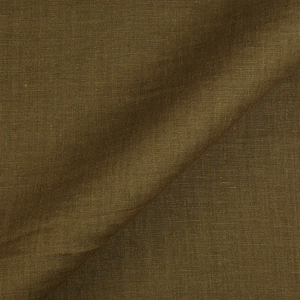
Summer is in full swing and if you’re like me, sometimes you just want to change it up and even out your strappy tank top tan lines (or you just want to feel a breeze on your back on a hot sunny day). I came across a ready-to-wear dress with a similar strappy backless feature and knew I wanted to try and make my own simplified version in lightweight linen (IL020).
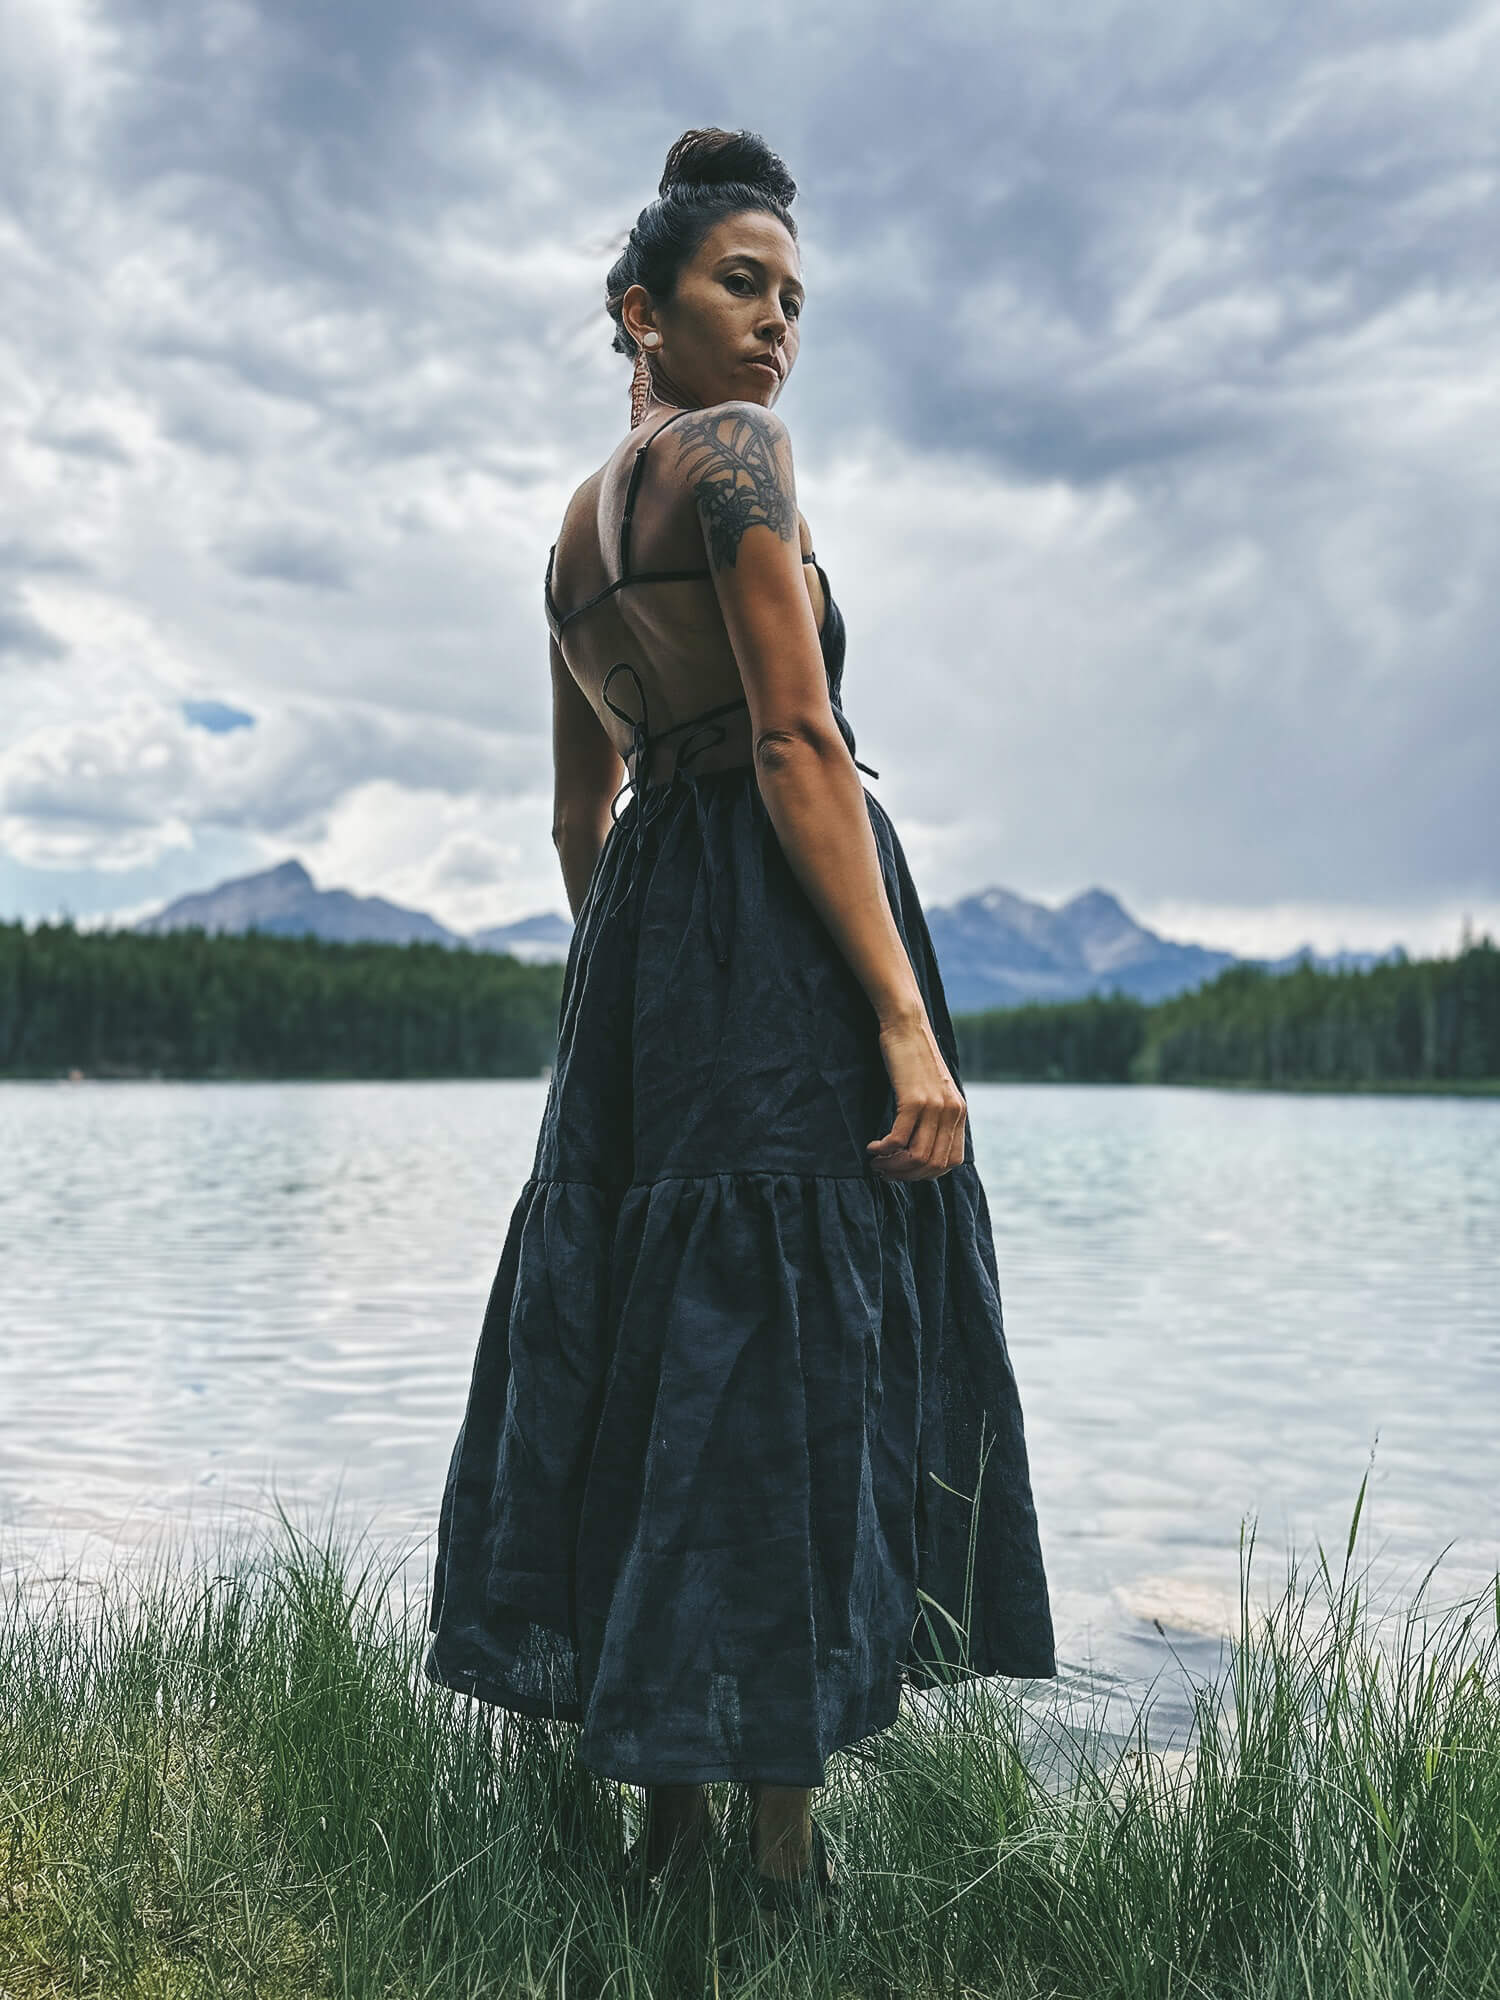
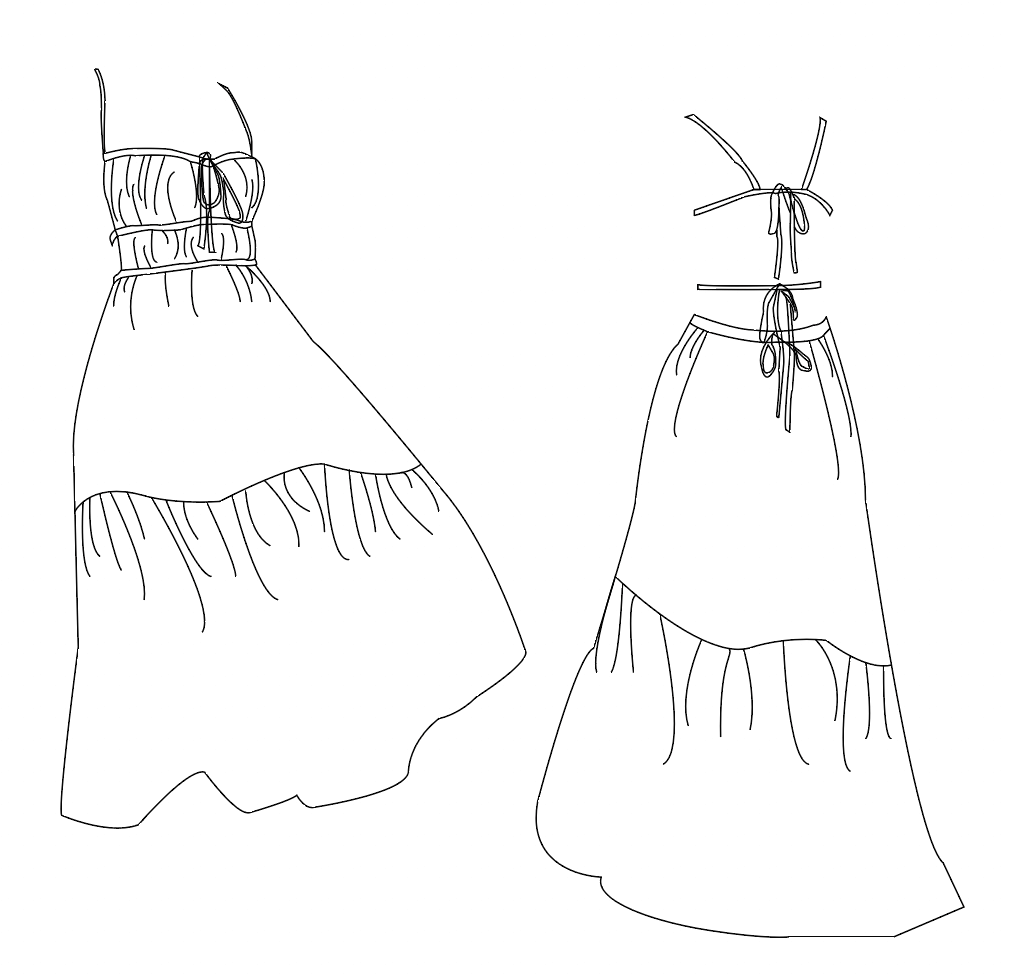
This dress is really just a collection of rectangles, featuring a strappy back tie situation with reinforcing cinch ties at the upper bust in front, and the under bust and waist line in the back. The skirt is two-tiered, but can be modified to be single tier or even up to a four-tiered bottom, if wanted.
Materials
4-5 yards IL020 linen (or other lightweight fabric that will accommodate gathering)
Matching thread
Safety pin (for pulling drawstrings through channels)
Soft tape measure
Iron
Optional: 12mm bias tape maker, ¼” or 3/8” elastic
Prep
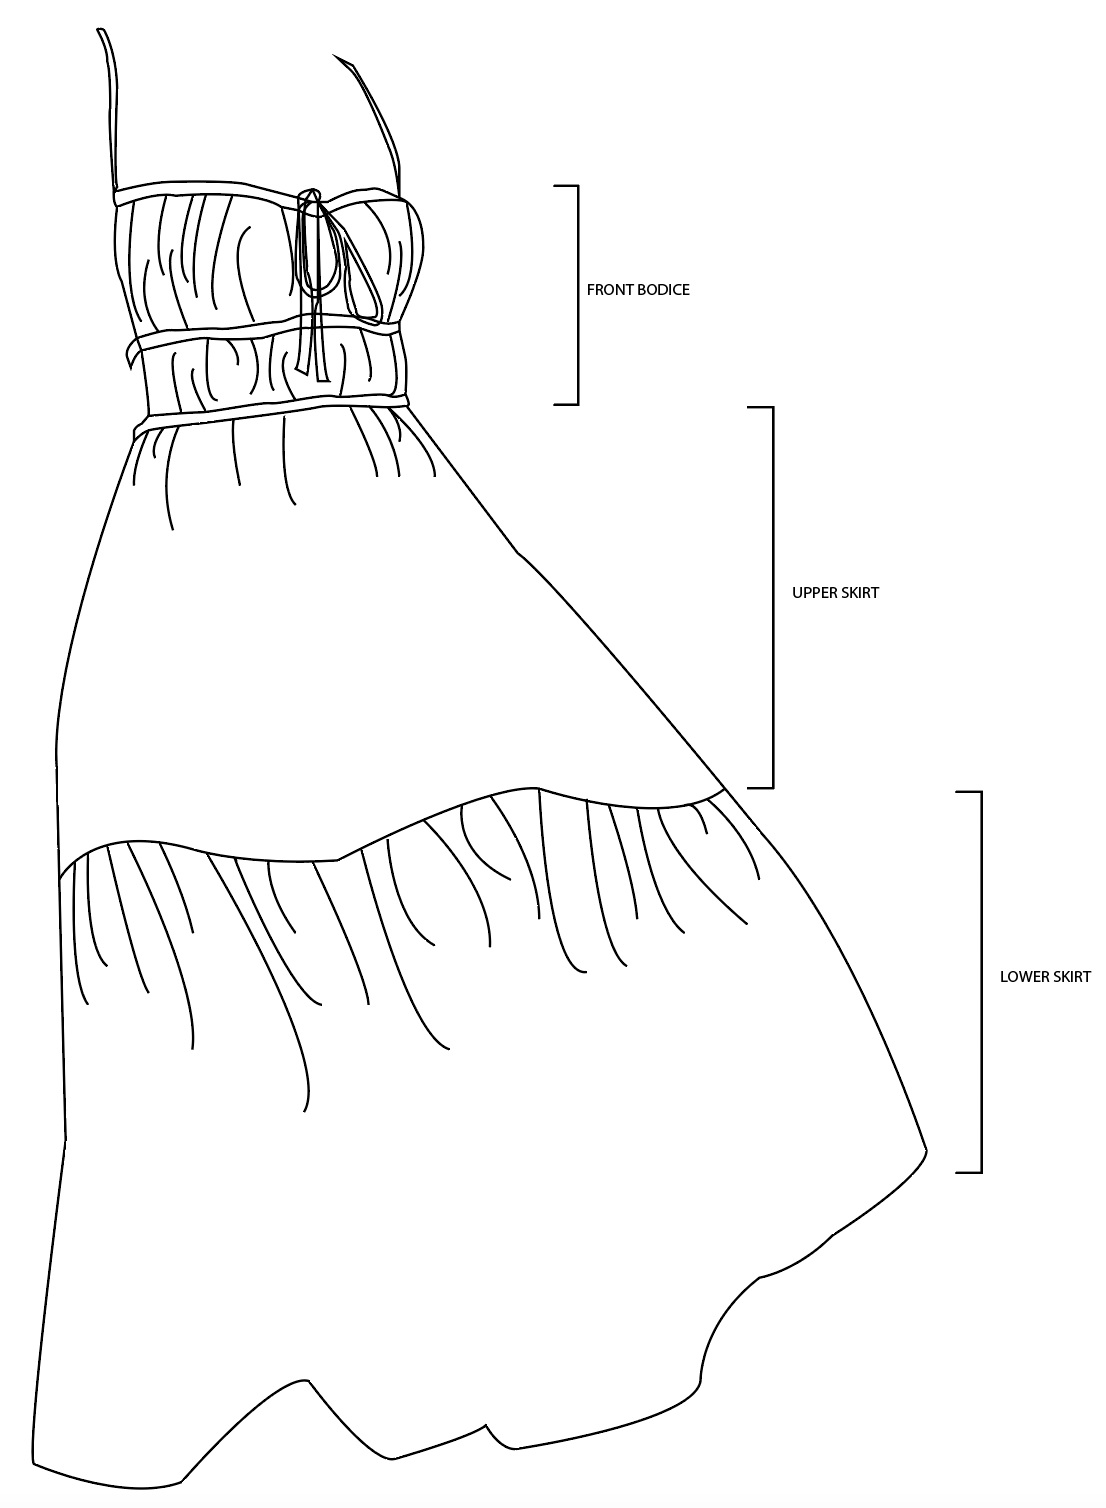
First, you’re going to figure out your rectangle dimensions. I’ve divided the dress pieces into 3 sections: front bodice, top skirt, and bottom skirt. Note that I am using a 3/8” (1cm) seam allowance for construction, unless otherwise stated. Refer to the dimensions chart diagram here for a visual representation of calculating your own dimensions and feel free to use the blank dimensions file to fill in your own measurements and dimensions!
FRONT BODICE
1. Take your upper bust measurement (or where you want the upper hem of the front bodice to start) and divide this by 2 (since we are making this bodice backless, we only need the front measurement)
2. Subtract 1.5” from both sides, i.e. subtract 3” from this measurement – this will be your final measurement for the front bodice width
3. Decide how much gathering you want to incorporate into the bodice – I would choose between 2.5-3x gathering and opted for 2.5x, so I multiplied my bodice width by 2.5x and calculated 32.5” as my final bodice piece width
4. Determine the length of your bodice piece by measuring from your upper bust to your waist – my desired length ended up being 9”
SHOULDER STRAPS
1. I chose to make a ¼” finished strap so made the strap pieces 1” wide by 25” long – this length is much longer than I needed, so you will shorten this strap to your preference during construction/fitting
2. If you would like to have wider straps, for example a ½” finished strap, then use a 2” width so that when they are double folded you will get your desired finished width of ½”
BODY STRAPS
1. These straps will be fed through the upper bust hem, underbust casing channel, and waistline hem, so I chose a length that would accommodate all of these areas and arbitrarily assigned 50” as the length (again this can be shortened/lengthened to preference)
2. To be consistent, I chose a 1” width for the body strap pieces
WAIST CASING
1. You only need one casing channel for the underbust body strap, as the other 2 body straps are fed through the hems (upper bust & waist)
2. To determine your casing dimensions, take your final front bodice width (mine is 34”) and subtract ¾” (2cm) = 32.5” long
3. To ensure this channel will accommodate a ¼-½” finished strap – make this casing piece 1.5” wide
UPPER SKIRT
1. If your front bodice piece final width is >/= your waist (for me, 32.5” > 25”) then you can use the same width as your front bodice piece for convenience
2. Otherwise, take your waist measurement and divide it by 2 (to create a front & back skirt panel)
3. Decide how much gathering you want to incorporate into the upper skirt, I would choose between 2-2.5x gathering and I opted for 2x, so I multiplied my upper skirt width dimension by 2x and calculated 25”
4. Determine the length of your upper skirt piece by measuring from your waist to your desired upper skirt tier hem – my desired length was determined to be 16”
LOWER SKIRT
1. Decide how much gathering you would like to incorporate into the lower skirt, I would choose the same gathering you chose for the upper skirt so I opted for 2x and multiplied my upper skirt tier width by 2x and calculated 50”
2. Determine the length of your lower skirt piece by measuring from your upper skirt tier hem to your desired lower skirt tier hem – my desired length was determined to be 18”
OPTIONAL POCKETS
1. This tutorial is getting heavy, so I opted to not discuss inseam pocket construction. If you’d like to add pockets, you can find a concise tutorial here and cut 4 pieces out
2. NOTE: these dimensions do NOT include seam allowances yet, so refer to the dimensions chart diagram below to add the appropriate seam allowances to your pieces
3. NOTE: on my dimensions chart, I include a range of widths on some of my pieces. Because this dress is all about gathering, it offers a wide margin of error 🙂 so I opted to cut my panels out to my WOF (58”) for convenience
Steps
1. Start with the front bodice. Fold the sides in 3/8” (1cm) two times to enclose the raw edges, press & edgestitch in place
2. Fold the top edge in 3/8” then ¾” to make a strap channel and press ONLY
3. Sew 2 buttonholes at the center front of this hem to accommodate your straps, placing them ~1” apart & (3/8”)*3 down from the raw edge
(You may want to add interfacing to this area if your fabric is very thin for extra support)
4. Don’t forget to cut open your buttonholes
5. Now edgestitch this pre-pressed hem in place
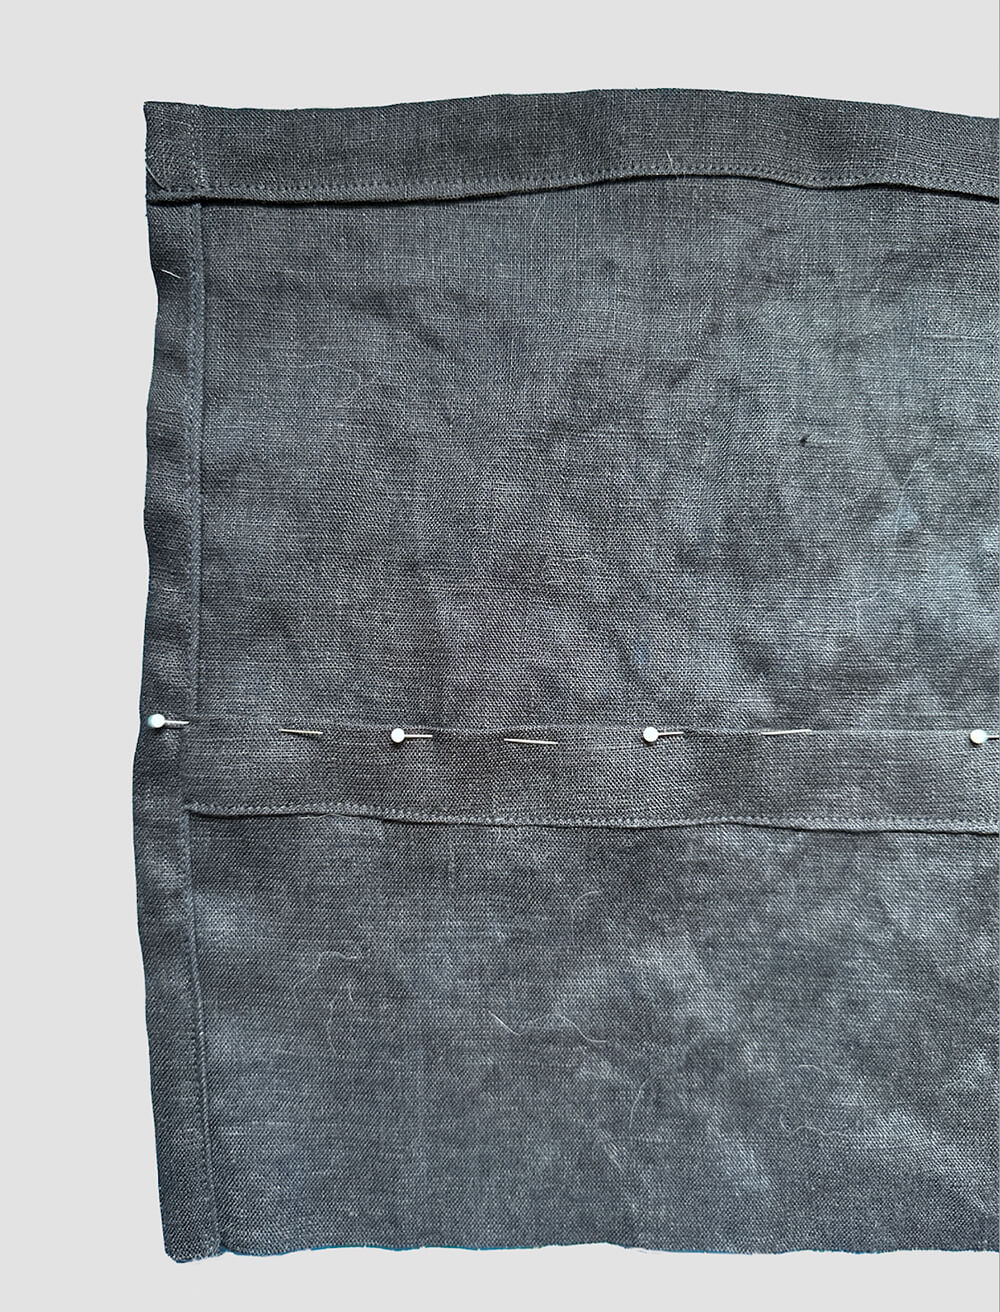
6. Press the casing long edges inward ¼” and pin to the WRONG side of your front bodice piece, folding in the short ends of the casing to fit just inside the side hems of the bodice (see image)
7. Edgestitch along the long edges of the casing to create a channel on the wrong side of the front bodice
(*OPTIONAL* for an extra ~hug~ try curving the casing channel ends upward at the sides of the bodice)
NOTE: Placement of this channel is based on preference – aim for the underbust area (for me, this was ~5” down from the finished top hem of the bodice)
8. Now let’s make the straps. Use a bias tape maker if you have one to turn the long edges inward ~¼” then fold this in half lengthwise to enclose the raw edges & edgestitch (I used a 12mm maker for my ¼” straps)
OR simply press the long edges WRONG sides together, then open and press raw edges toward this pressed center line, then join the folded edges together to fully enclose the raw edges & edgestitch to create a strap
9. Make your body straps in the same fashion as described above. Insert body straps into the top hem channel and underbust casing channel
10. Attach the shoulder straps: sew shoulder straps to front bodice at corners
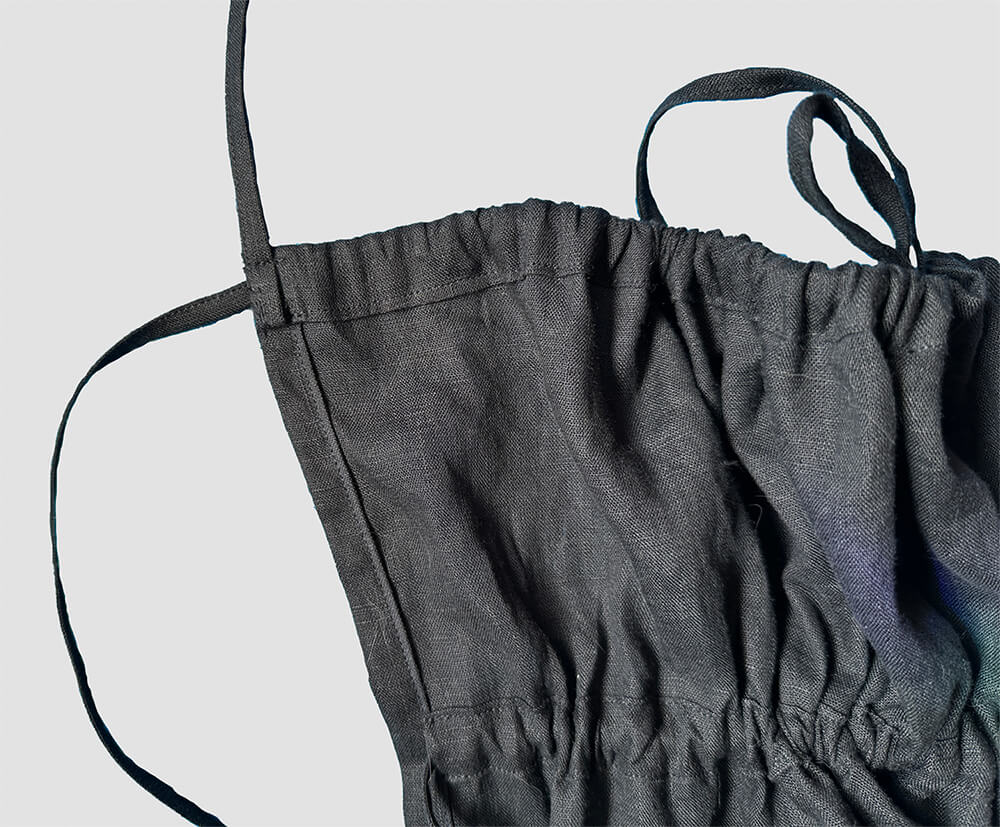
NOTE: I like to sew the strap to the lower stitchline of the bodice hem (mind the body strap! Or just remove it to keep it out of the way) WRONG sides together with the strap oriented downward, then flip the strap upward to enclose the raw edge of the strap & sew down on the upper stitchline of the bodice hem (again, mind the body strap here) (see image)
11. Try on your top and decide where you want the shoulder straps to attach at the back – I chose to place mine 2.5” from the center back (spaced 5” apart) **be sure your upper bust body strap is evenly pulled through your front bodice so you are using your true center back as a landmark to space your straps evenly apart
12. To attach neatly, seam rip your upper bust body strap at the attachment points you just chose and insert your shoulder strap ends into them, then edgestitch (and backstitch!) in place for reinforcement
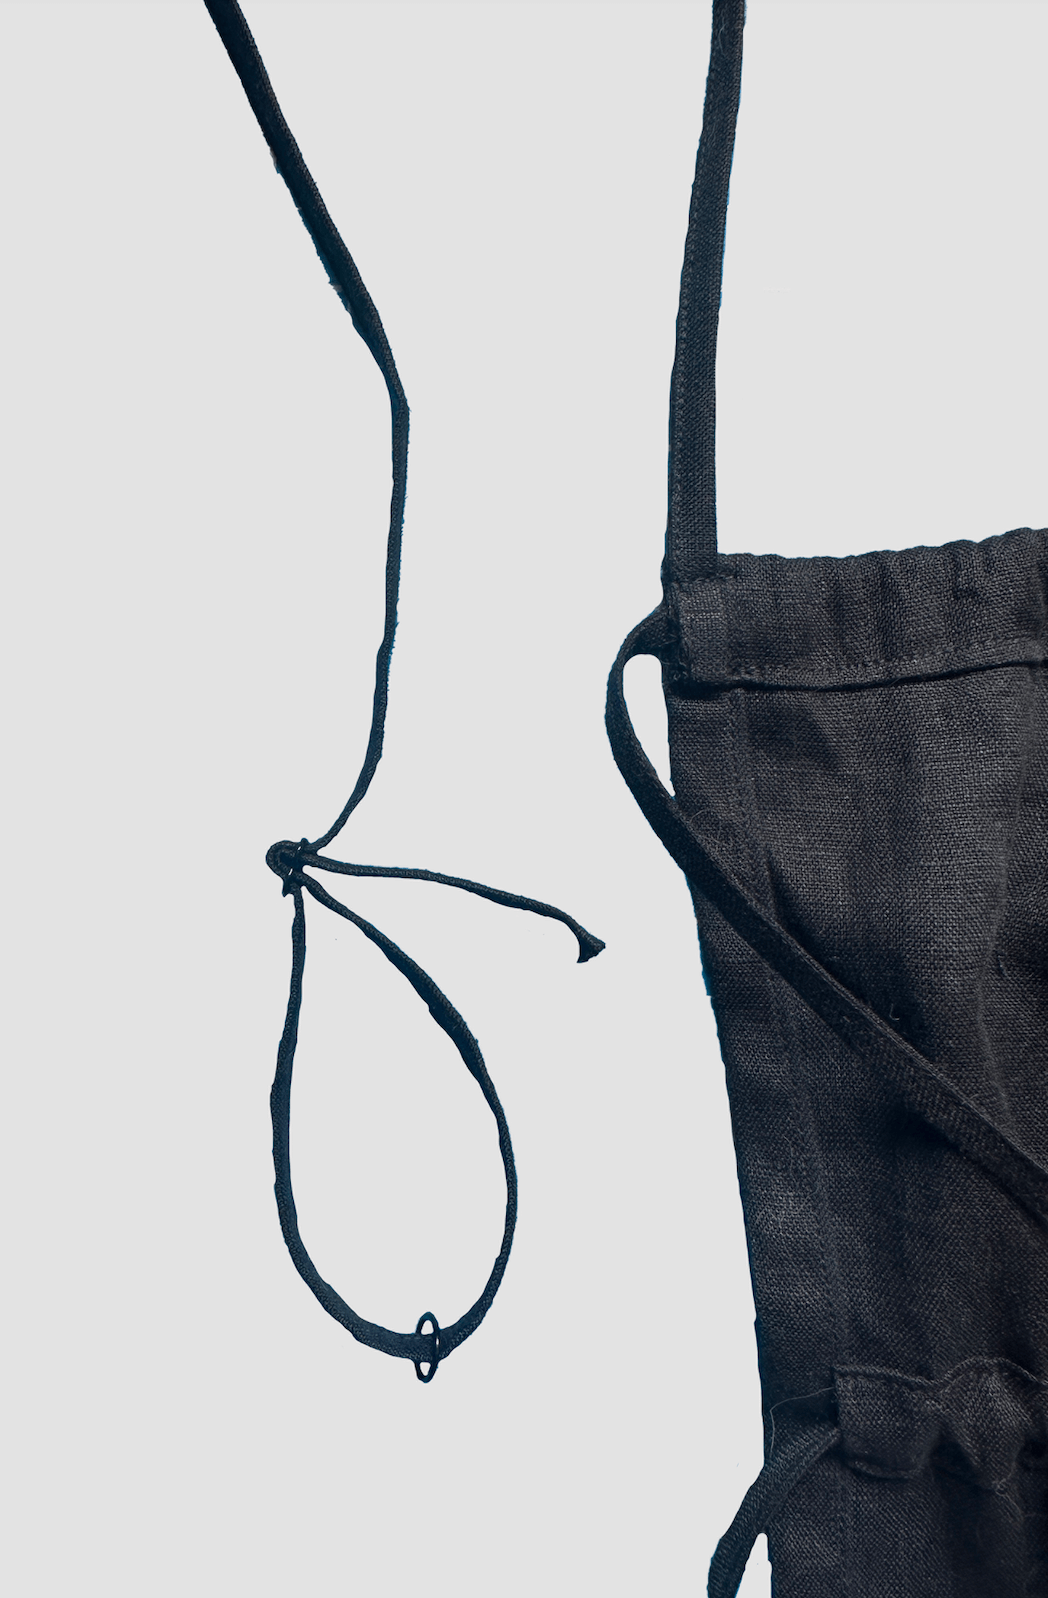
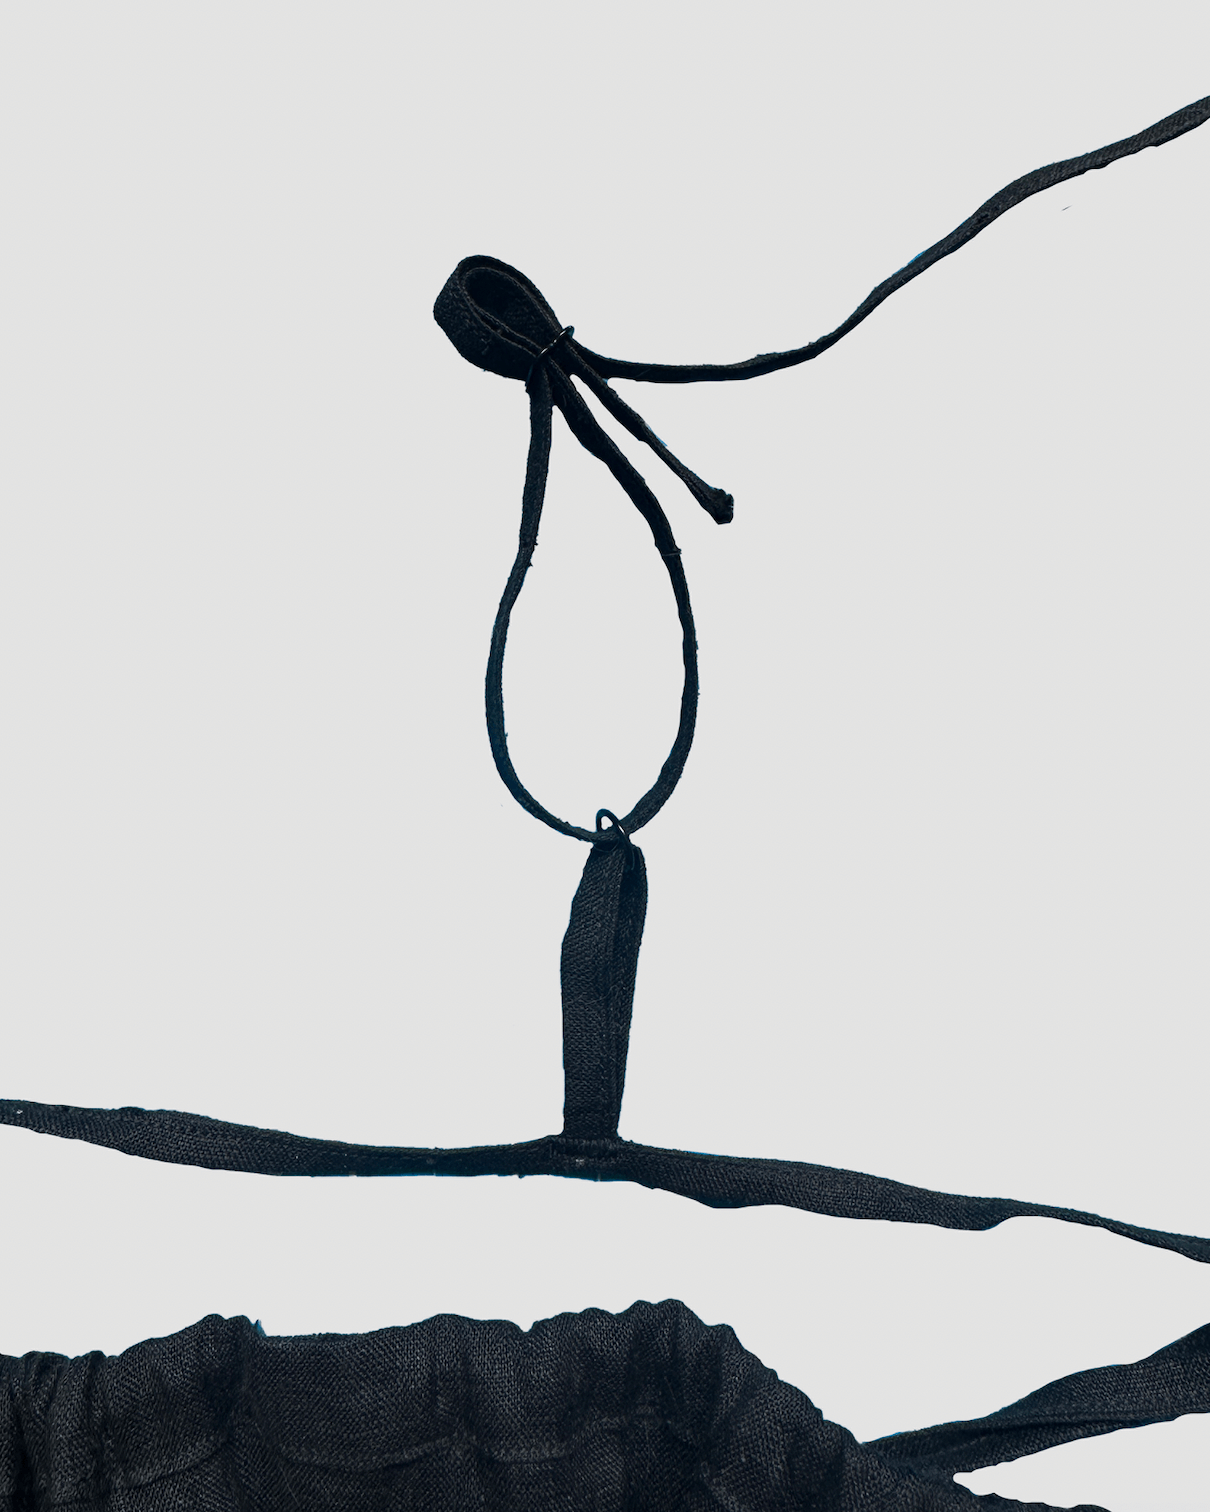
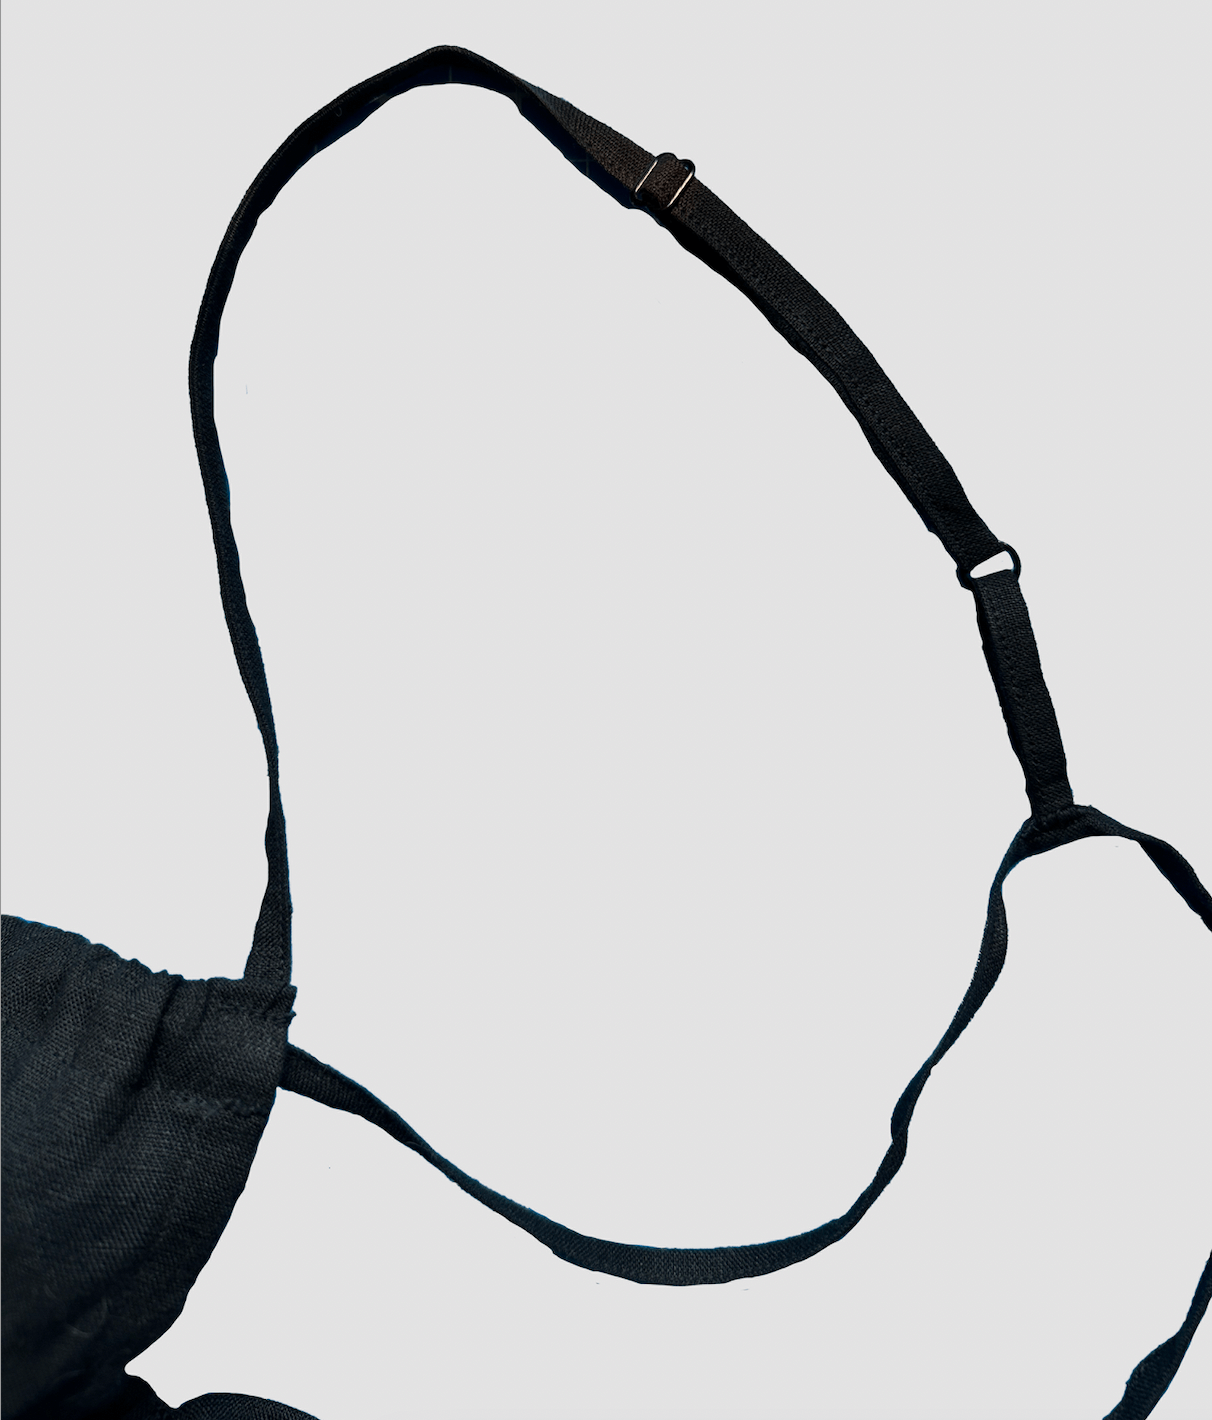
OPTIONAL You can make these straps adjustable if you’d like by incorporating rings & sliders (see images)
a) Cut two 4” pieces from your shoulder straps to make back loops for the rings & attach to upper bust body strap as described above
b) Feed your remaining shoulder straps through the slider and ring & sew to itself on the lower loop formed between the slider and ring (see image)
13. Move on to the upper skirt. Sew 2 buttonholes (long enough to accommodate the body strap) along the waist channel, placing them ~1” apart and (3/8″)”*3 down from the raw edge at the center back of the skirt panel
NOTE: Again, consider adding interfacing to this area if your fabric is very thin for extra support
OPTIONAL Insert inseam pockets here – I chose to place mine 2” down from the raw edge
Here is a tutorial on how to sew inseam pockets.
a) Sew side seams together with a 3/8” SA & finish edges
b) Press the top edge of the upper skirt down 3/8” then ¾” and edgestitch in place
OPTIONAL You can add elastic to this waist channel along with the body strap for some extra support (I did and recommend it)
a) If you want to insert elastic, be sure to leave a 2” opening near the back of the upper skirt hem channel to do this
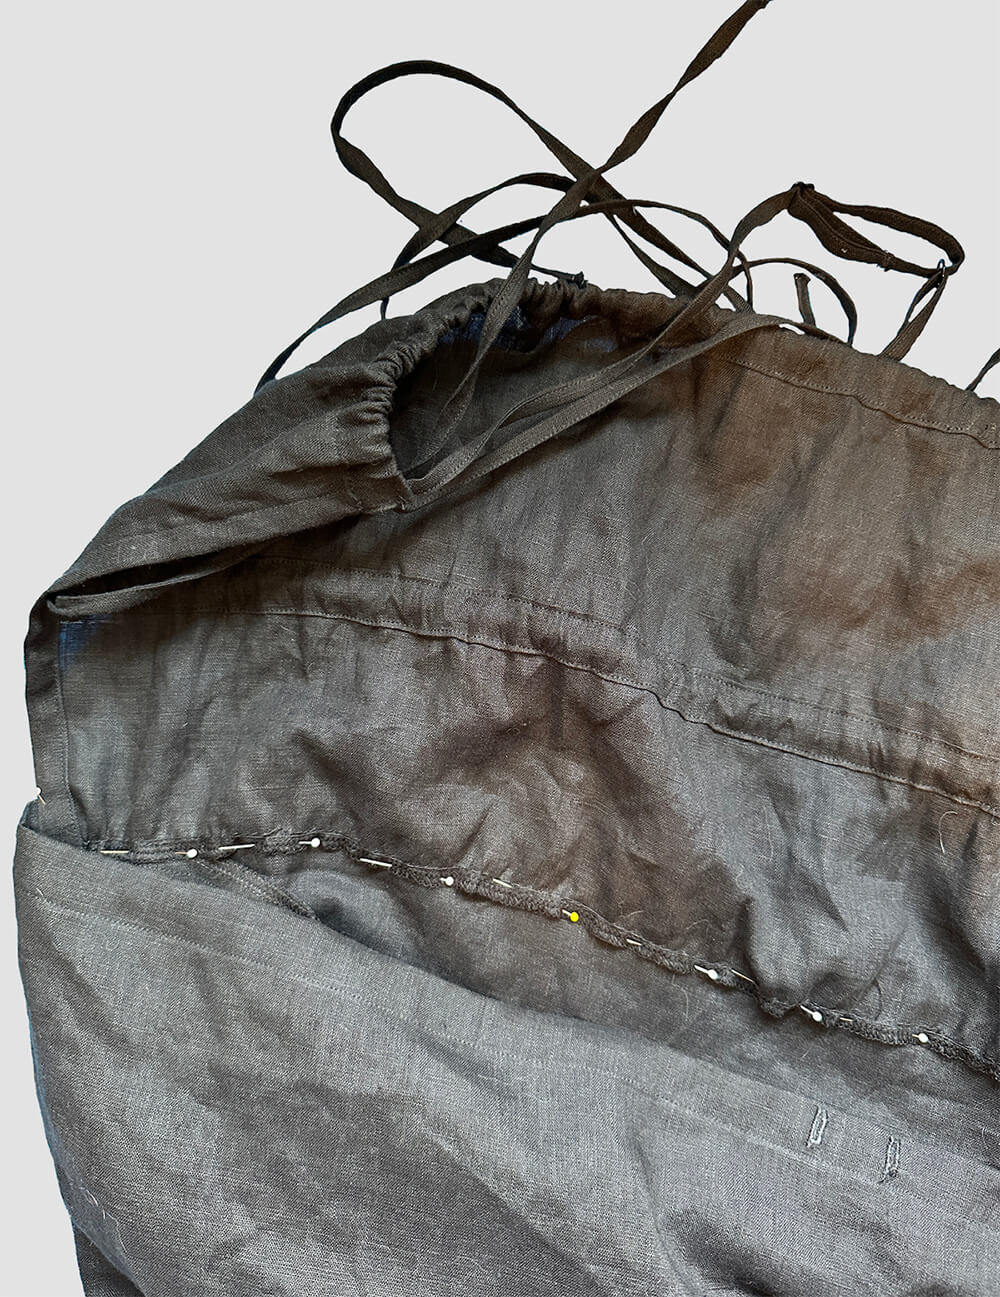
14. Finish the bottom raw edge of the bodice & sew to your upper skirt. Place the RIGHT side of bodice onto the WRONG side of upper skirt – place skirt on table wrong side up then place your bodice right side down oriented upward (see image)
15. Place bodice 1/8” past the hem stitch line of the skirt
16. Sew along upper skirt hem stitch line as well as an additional stitch line along the upper edge of skirt hem
NOTE: You may have to gather your bodice to your skirt to fit – if this is the case, then baste a long stitch line (5mm) on a low tension setting to gather and sew together with a 3/8” SA
17. If doing so, insert elastic through waist channel and sew elastic ends together after trying dress on to determine desired elastic length, then edgestitch gap closed along upper skirt hem
18. Insert the body strap through the skirt center back buttonholes
19. Finish the raw edge of upper skirt panel (this will be the bottom edge that attaches to the lower skirt piece)
20. Moving on to the lower skirt. Sew side seams together with a 3/8” SA and finish
21. Gather top edge of skirt panel and sew to upper skirt panel with a 3/8” SA
22. Fold over the bottom hem of lower skirt 3/8” two times to enclose the raw edge and edgestitch in place
(Don’t forget to secure your tie ends – either tie them into a knot or fold them over twice and sew in place)
23. Optional finishing touches: Try on your dress and decide where you want the bodice side edges to be – if you’d like to keep this gathering static you can stitch down the channel ends that hold the body straps in place at the upper and under bust – I did NOT do this and feel secure wearing the dress without this additional feature
I hope you love your new backless summer dress & let that back BREATHE 🙂





















2 Comments
Kerry Pitt-hart
So beautiful Leila! ?
A. She
Breathtaking work! Beautiful. Can’t wait to make this. Thank you