Tutorial: How to Trace Off a RTW Garment
You know that one well-worn, probably damaged-beyond-repair item in your closet you bought off the rack ages ago that you still hold on to because you just love the way it looks and fits? Or maybe it’s a garment you think would look amazing in another fabric that the original wasn’t offered in? Well, have you thought of tracing it off into a pattern so that you can make another one yourself? You should, because you definitely can.
In this tutorial, I’ll show you how to trace off an existing ready to wear garment and turn it into a pattern. There are many different methods on how to trace off a garment, but this is the process that I like. It’s actually a quite useful skill and is a great DIY intro to patternmaking! If you’re new to tracing off or an absolute beginner, it’s best to try this method with a simple piece of clothing with symmetrical lines, like a T-shirt or A-line skirt. I’m using a boxy jacket with mostly straight lines so that it will be easy to trace and follow along with. So let’s begin!
Tools
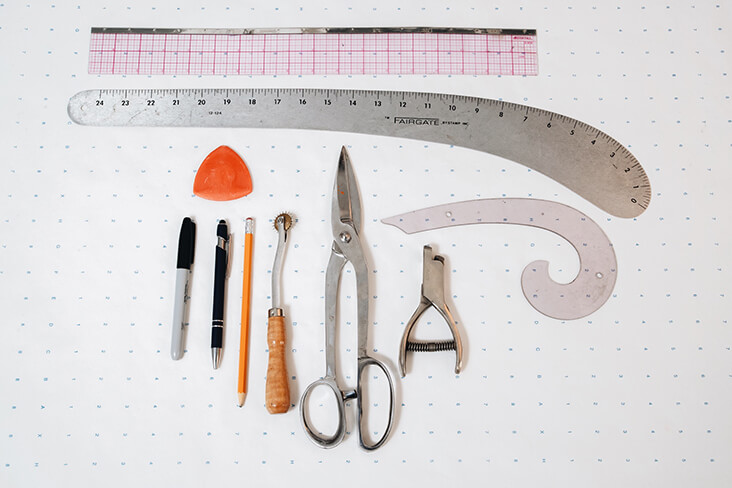
Straight ruler
Pen, pencil or chalk
Dotted pattern paper or tracing paper
Optional: Hip curve ruler, neck curve ruler, tracing wheel, notcher
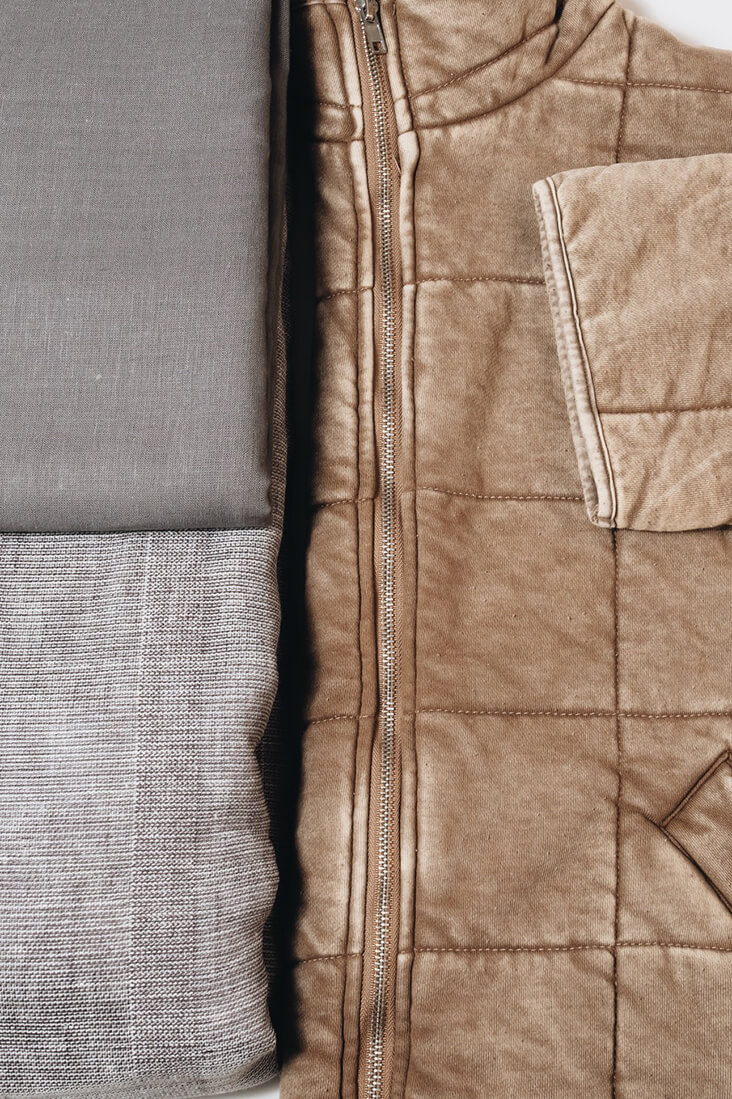
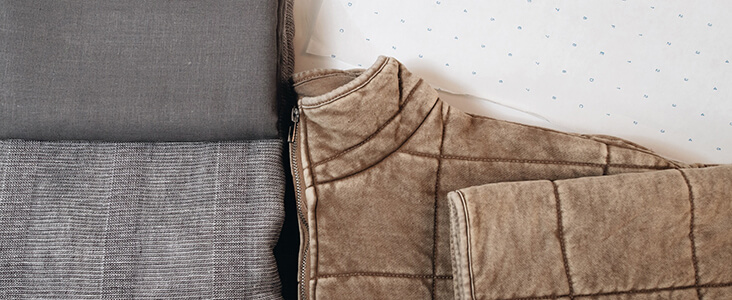
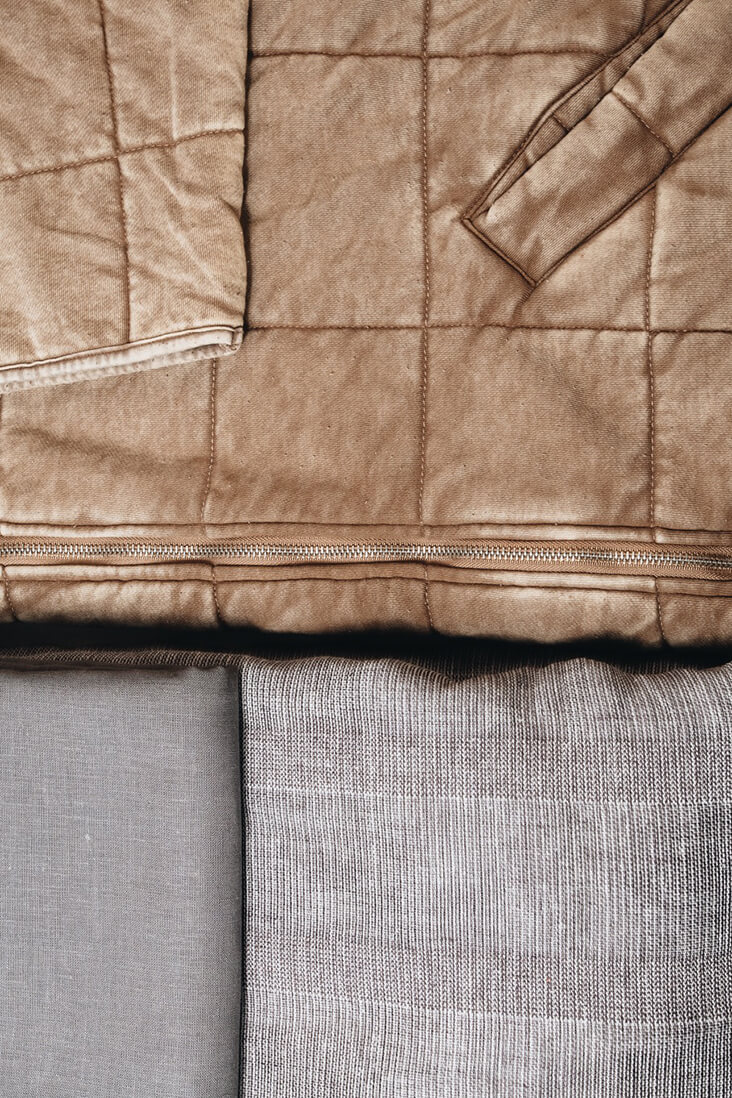
For my project, I used 1C64 midweight linen in Asphalt for the lining and IS046 jacquard heavyweight linen & cotton blend in Graphite for the outershell.
Tools
Advanced Beginner
Steps
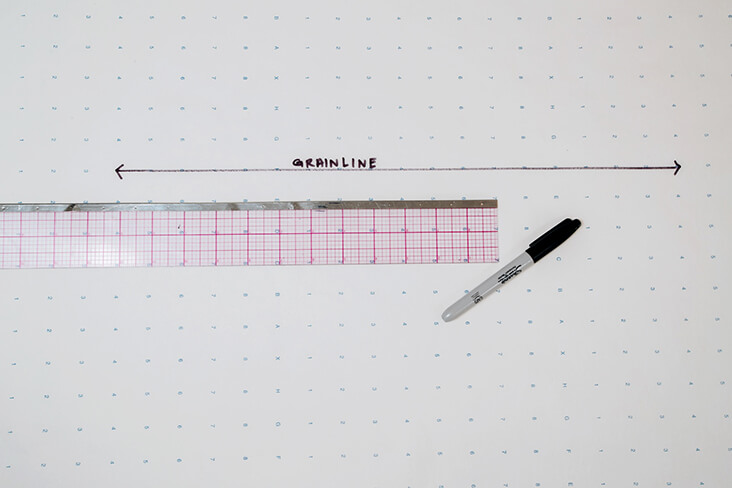
1. Roll out a large enough piece of tracing paper and begin by drawing a straight line to establish your grainline. This will help ensure your pattern is traced accurately from the start.
2. Take your garment of choice and fold in half along the length from neckline to hem. Lay it as flat as possible on top of your paper and align the fold parallel to your grainline.
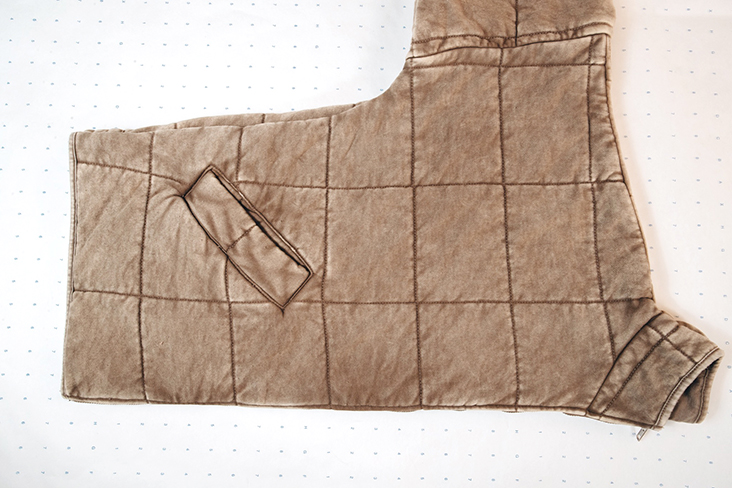
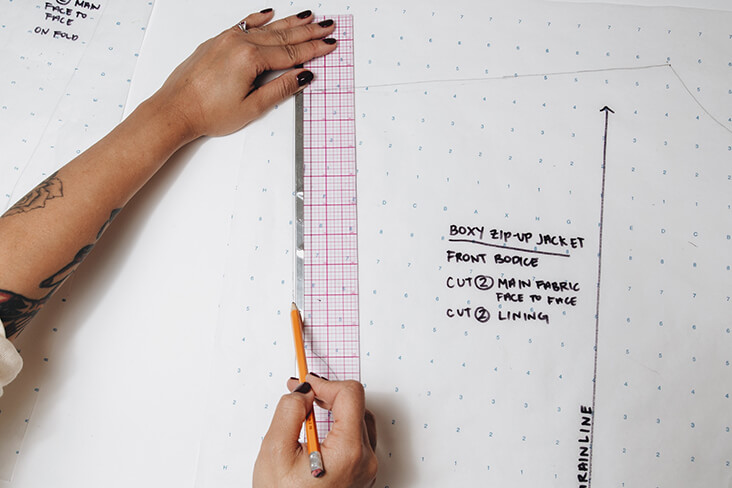
3. Begin tracing the bodice first, starting with the folded straight edge of your garment. You can use your straight ruler here for help with a nice clean line. Hold down your garment or use weights to ensure it doesn’t move and continue tracing along the bodice: hem, side seam, and shoulders.
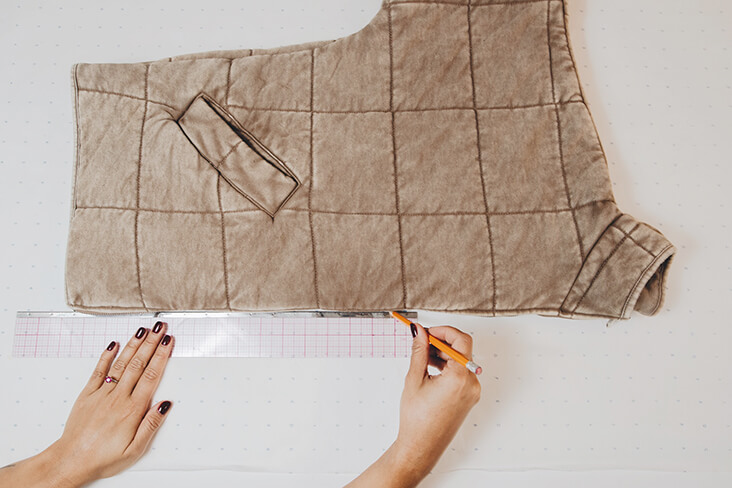
4. If your garment has sleeves and/or a collar or neckband, here are two ways you can accurately copy adjoining seamlines.
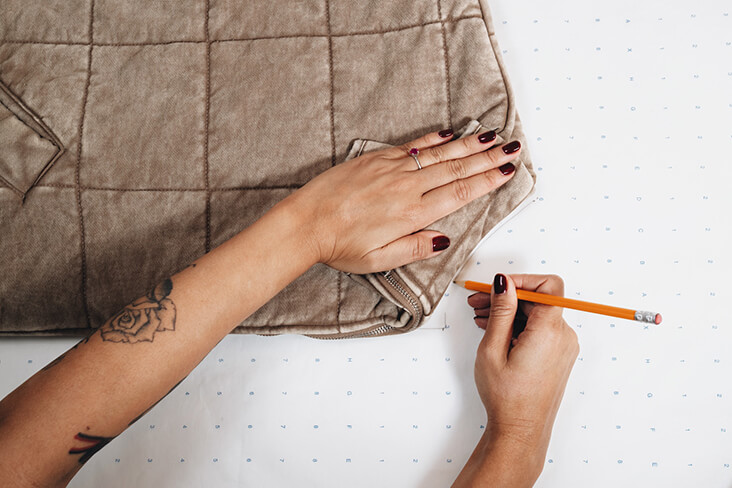
The first method is to carefully pull back the area attached to the seamline and trace as close as possible to the seam. In the picture below, I am pulling back the collar to expose the neckline seam and tracing along that curve. Tip: the corner where the neck and the top of the bodice meet should always be square at a 90 degree angle; as you can see in the image below I’ve drawn a 1/2 inch straight line perpendicular to the front bodice edge line so the rest of my curved neckline to connect to it.
The second method, which is even more accurate and easier in my opinion, is to use a tracing wheel right on top of that seamline. To this, make sure you’ve drawn the grainline first and the garment is laying flat and in half if necessary. Then, take your tracing wheel and simply roll it right into the seamline with enough pressure to mark through to the paper. If you don’t have a tracing wheel, you can also using a pin to dot along the seamline for a similar result.
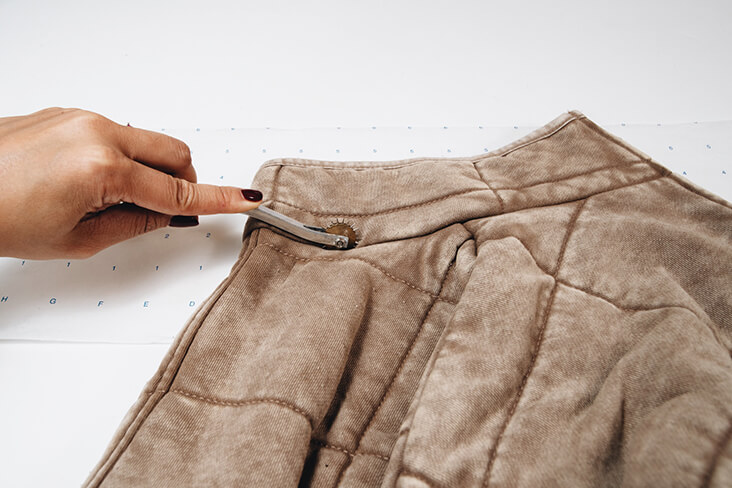
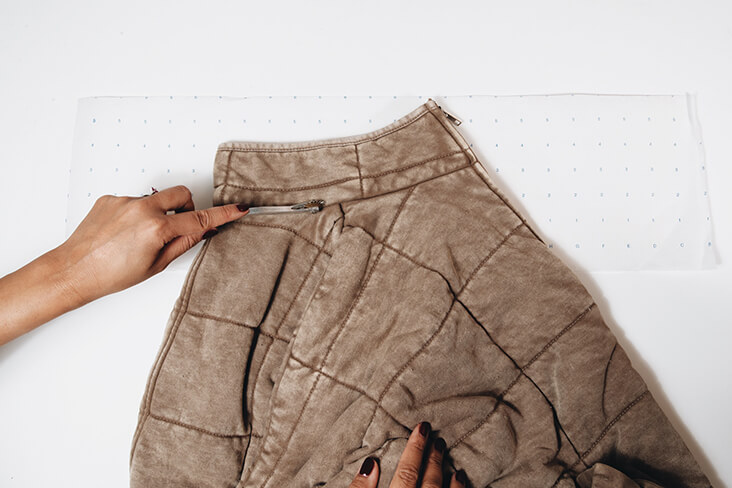
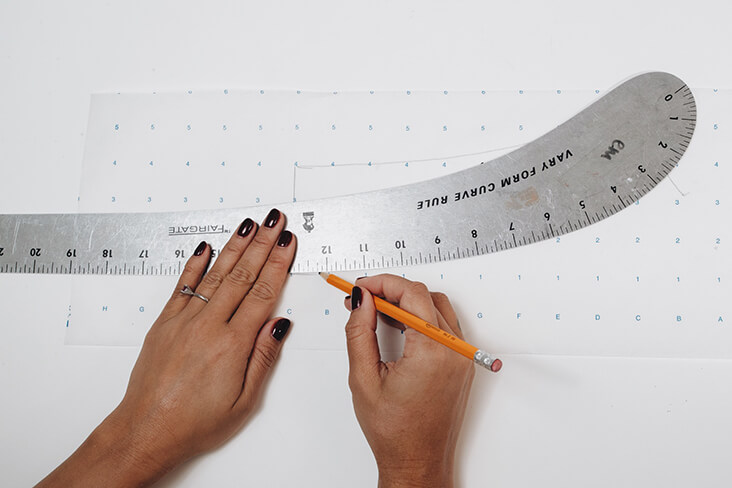
Then, go over your tracing wheel marks with a pencil. Feel free to use the help of a curved ruler for nice clean lines.
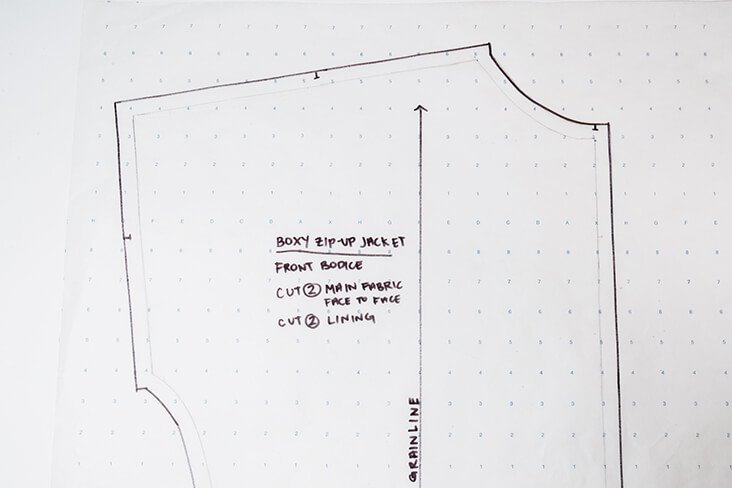
5. Label each pattern piece after you trace each one so you remember what they are. I like to use the following format (a loose iteration of what design school taught me)
Name of Garment
Pattern Piece type
Cut #, type of fabric, orientation if applicable
Size (optional)
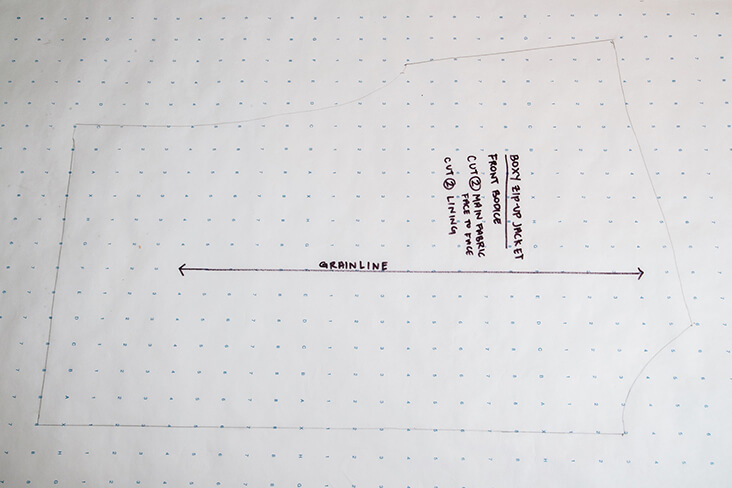
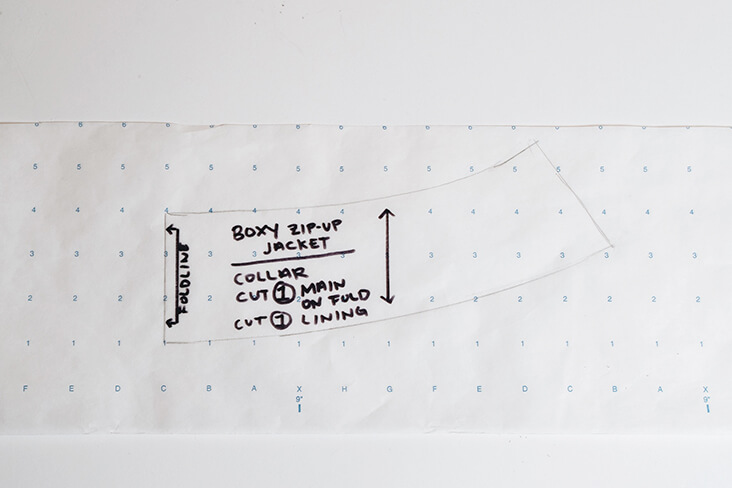
6. Finished tracing off and labeling your pattern pieces? Great! But you’re not done just yet! You will now have to walk and true your seams that adjoin together to ensure that everything lines up and, therefore, will sew up correctly.
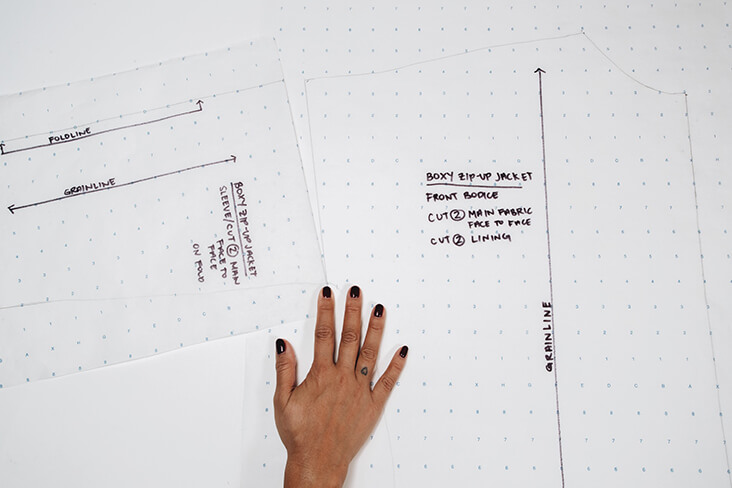
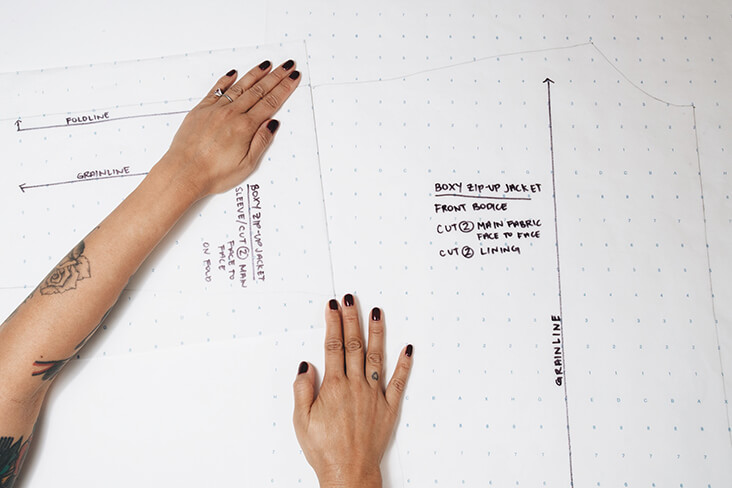
In this example, I will show you how I walk my sleeve armscye to my bodice armscye. Since my jacket is boxy, it has mostly straight lines, so walking this seam is straight forward. I take the sleeve pattern and turn it over so that it is essentially “face to face” with my bodice pattern. Then I align the underarm points of both the sleeve and the bodice pattern on top of each other.
The below images show the sleeve pattern folded back to face at the seam for a clearer visual of what walking this seam looks like. I pivot 1 inch at a time going up until I reach the shoulder point.
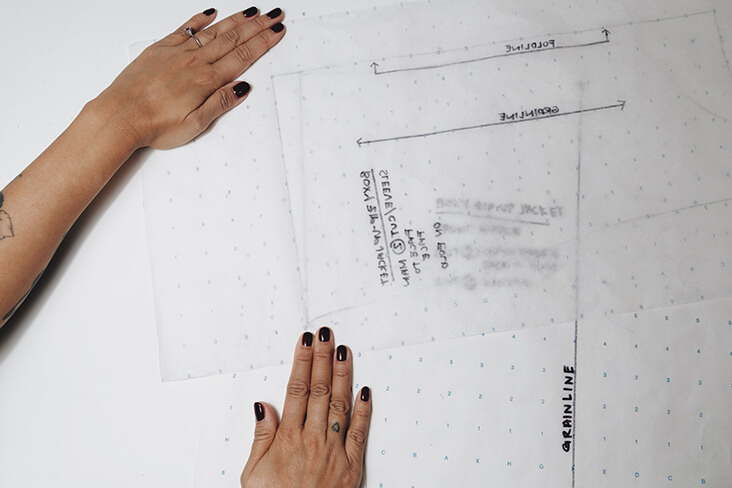
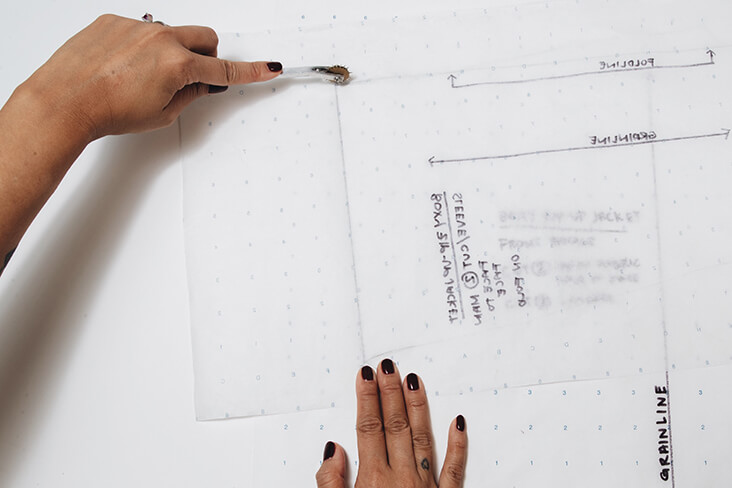
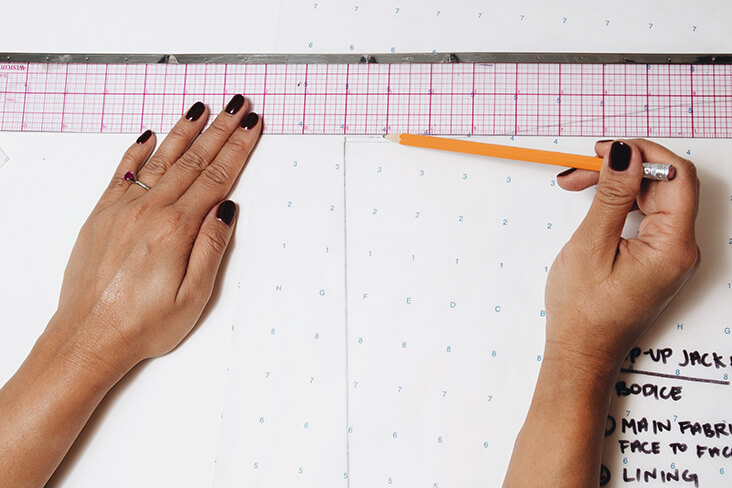
6. If you notice that your seams don’t match up, you’ll have to true the seams by lengthening or shortening the lines as needed. In my case, there was about 1/8 inch difference between the bodice and sleeve armsyces, so I used my tracing wheel to copy the area of the sleeve onto the bodice to get the exact amount needed to lengthen. Then, I drew over the wheel tracing and blended the shoulder seam into it for a smooth line.
7. Now that you’ve trued all your seams, it’s time to add seam allowances, notches, and any other important pattern markings or notes to your patterns (such as foldlines, buttons & button hole placements, zipper placements, etc.) For my pattern, I’m using 1/2 inch seam allowance everywhere, but feel free to use anywhere between 3/8 inch to 5/8 inch.
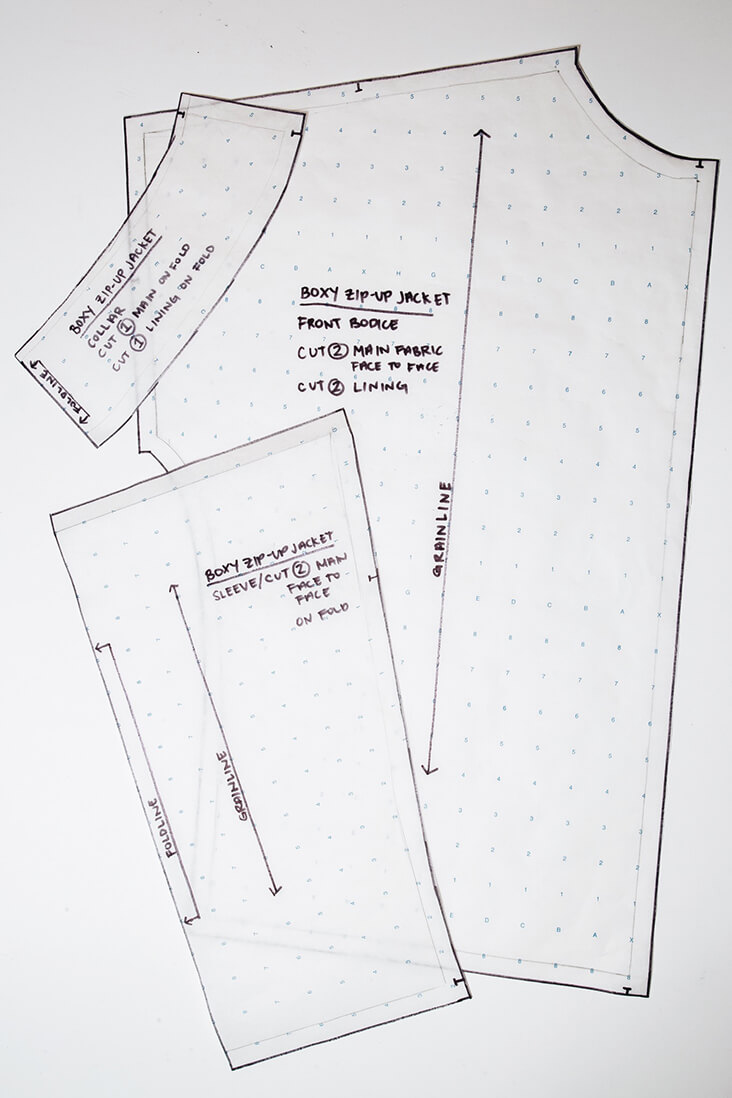
8. Et Voila! You have created your own pattern pieces, ready to be sewn up into a new, beautiful garment!
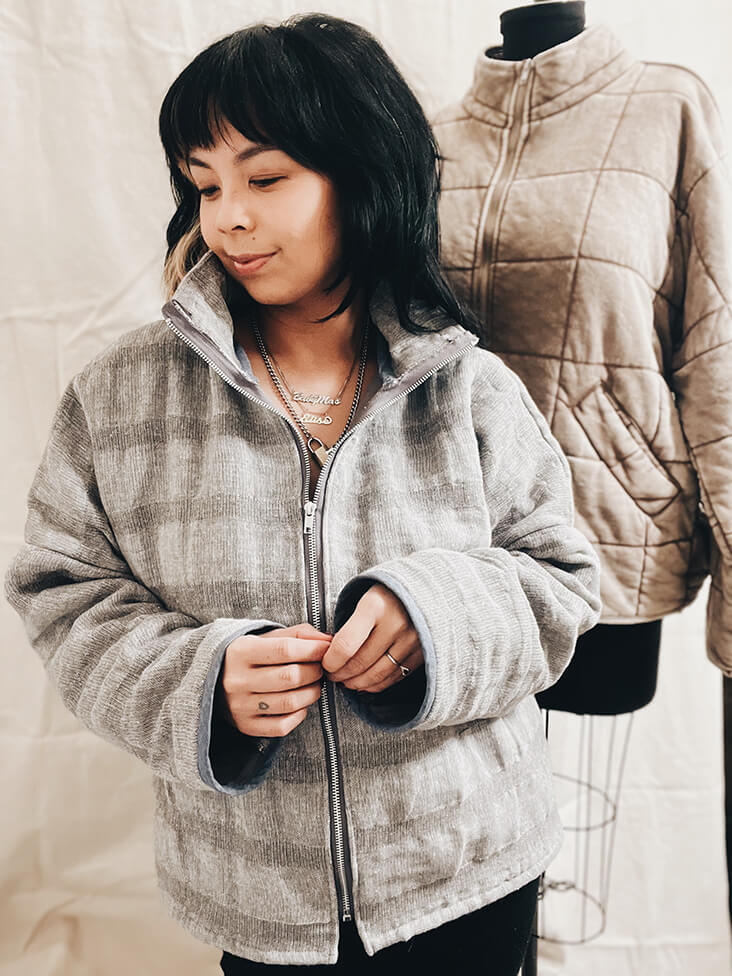
Here is finished jacket that I sewed up using the pattern made off the ready wear jacket and I’m so pleased with how it turned out. Happy sewing!









21 Comments
Irene Erickson
Nice tutorial. I basically use this method. What I usually struggle with is the account for “fold of the cloth”. Also, it seems that if I used a tracing wheel hard enough to go through several layers it would damage the seam of the item I am tracing. No problem if the garment is no longer wearable but if I only want to duplicate and the original is wearable, wouldn’t that leave marks or damage the clothing seam?
Pat Gaumer
I am not seeing the back pattern piece. I realize this is an older post.
Alice Byrne
You would trace the back just like that authored showed how to trace the front. Good luck!
Kari Carlson
This is a great tutorial, but how to do you the same thing with a garment that doesn’t lay flat? Or, say, a dress that is shaped (curved seams) and/or has more than 4 panels so you can’t just fold the garment in half and trace that?
Miriam Stanford
Great explanation – thank you for this! I’m wondering about how you would use this process for a garment with shaping, like darts for example, that make it impossible to lay the garment completely flat. How would one adapt this process? And how might I capture the correct size of the dart?
Rachael sparks
Great tutorial, thanks! This might be a dumb question but when it’s time to add seam allowance to your pattern pieces that adjoin, do you have to first copy all but one to a new piece of pattern paper? For example, the collar?
Elise Montecastro
Hi Rachel! Thank you!
And not a dumb question at all. If I understand your question correctly, you should first definitely trace off each piece on to a new piece of paper, so yes collar should be traced on a new piece of paper; bodice, sleeves, collars, cuffs, pockets – those all are their own pattern pieces.
When it comes to adding seam allowance, each side of a pattern should have seam allowance, including areas that adjoin to each other. So for example, the neckline of the bodice and the neckline of the collar that adjoins to each other should each have their own seam allowance.
Let me know if I answered your questions correctly or if you need anything else! Happy to answer 🙂
Annie Fetzer
Hello Elise! Great inspiring and exciting project! My mind is reeling! By the way do you know where I might get a good dress maker’s mannequin? Do you have any projects to work with that?
Elise Montecastro
Hi Annie, thank you!
I actually found my dress form on OfferUp from a designer that was destashing. If you don’t mind getting a used one, try OfferUp, Fbook Marketplace, or even Craigslist. I’ve also heard of people getting dress forms from designs schools that were getting rid of them. I know that Dritz brand also sells those adjustable forms that can easily be found online. But if you’d like a brand new professional dress form, there’s theshopcompany.com – their prices are the most reasonable out of majority of the professional dress forms on the market that I’ve seen! Happy hunting!
Elise Montecastro
Oh also, to your question about projects that work with a mannequin – draping is the most ideal technique to use on a mannequin! But let me know if you have anything specific that you’d like to see working with a mannequin and I’ll do my best to create a tutorial for it!
Thank you!
Margot Nowicke
I was always taught (sewing for 55-ish years and a textiles major – so have had a couple pattern making classes) that garment sewing uses 5/8” seams to allow for adjustments/alterations – something a garment made from a traced garment would probably need. I would probably use a 5/8” to 1” seam allowance at least for the first garment sewn from a traced pattern. Personal preference.
Margot Nowicke
BTW – you did a great job explaining the process.
Elise Montecastro
Hi Margot! Thank you for your comments!
Yes, you’re right, in commercial home sewing patterns, 5/8” SA is generally what’s used to allow for fitting adjustments. In fashion design school, we were taught industry standards for cost-effective production, so 1/2” is the standard SA for all seams, except for necklines, which is only 1/4”. Since my jacket has an oversized silhouette, I stuck with the 1/2” SA, but if I’m creating a pattern from scratch just for myself, I’ll usually use a 5/8” SA to allow for fitting adjustments as well 🙂
Renee Middlebrooks
Hello!
The jacket you made is darling and I love how it looks in the fabric you chose, but what happens when you wash the jacket? Won’t this fabric get all crinkly and shrunken? or is there a way to prevent that? I haven’t bought any of this fabric because I prefer how it looks before washing, but I’d want to be able to wash it. Thank you for this very well explained tutorial!
Renee
Elise Montecastro
Hi Renee! Thank you for your comment!
So I was actually going for that crinkly, seersucker look that the fabric has after the first wash and dry! I did have to do a light steam over the fabric to flatten it a bit for easier cutting, but I noticed the more I handled the fabric while sewing, the more relaxed it got, so I think this is why it looks more flat in the picture where I’m wearing it. I did cut my fabric a bit bigger than the actual pattern to account for the crinkling up for the next round in the wash it goes.
Barbara McNeely
Thank you so much for this. I have a blouse that is probably 30 years old. I’ve not worn it in many years because it is worn and faded. But I’ve been saving it to do exactly this. Now I know how!
Elise Montecastro
Hi Barbara! Thanks for your lovely comment! I’m glad this tutorial resonated with you, excited for you to bring that old blouse back and make a new one!
Terry Kessinger
This is a great post, thank you. Do you have any suggestions for online dressmaker tool shops? I have a couple of the tools you listed, but I live in an area devoid of quality shopping. Thank you!
Elise Montecastro
Hello Terry! Thank you for your comment!
Yes I would definitely suggest either Wawak.com or Goldstartool.com for patternmaking tools.
Anita Busch
Very nice job! Your instructions are very clear and easy to follow, and the photos are outstanding. I like the tip about using the tracing wheel on the garment seams. I have traced a lot of patterns but never such a bulky garment as this – your tutorial gives me confidence to be more adventurous!
Elise Montecastro
Hello Anita! Thank you for your lovely comment!
I’ve definitely boosted my own confidence in sewing and pattern making through tracing off garments, it gets easier the more you do! There are a lot more great tutorials online for tracing more complicated garments, such as pants with darts or bodices with princess seams. Enjoy!