Sashiko Embroidery Technique Tutorial
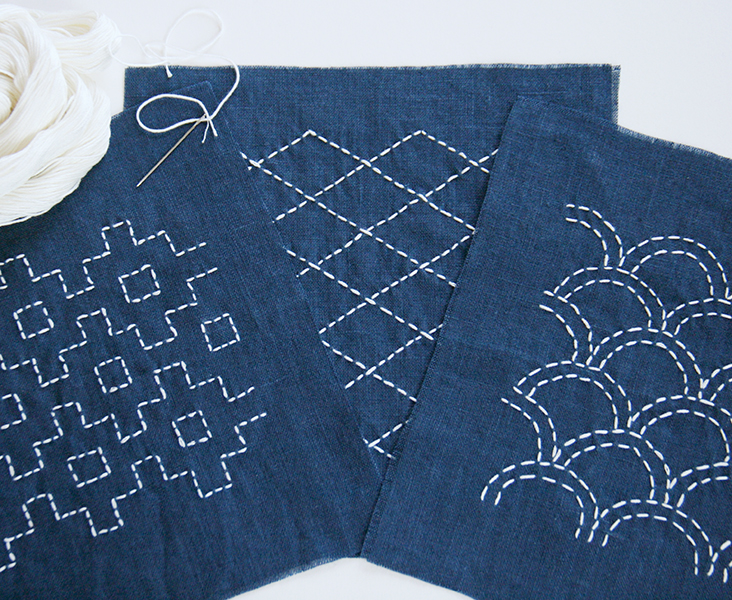
Sashiko is a form of Japanese folk embroidery using simple running stitches to create repeating geometric shapes and intricate patterns. Literally meaning “little stabs”, sashiko was originally used for repairs and reinforcements. Today, the traditional patterns have evolved into a more decorative form and are often used to create beautiful handmade designs on table linens, clutches, tote bags and clothing such as dresses, jackets etc.
In this tutorial we will show some basic techniques used in sashiko embroidery and share some useful tips for creating simple and stylish designs. While it may look complicated, sashiko is pretty easy to learn and fun to master.’ Since it is merely a collection of simple running stitches, this technique is somewhat similar to quilting by hand. So we hope that this tutorial will help you to get a feel of how to deal with different kinds of patterns and introduce you to the wonderful world of sashiko!
Materials
Choosing the right fabric for hand embroidery is a vital part of ensuring your finished piece turns out. Luckily for us, pure linen is the ultimate fabric to use for sashiko embroidery. It is one of the most durable and hard wearing fabrics available due to its flax fibers nature that is strong and pliable enough so that the needle glides through it easily and without leaving holes or twisting the fibers. So linen perfectly supports the weight and the style of sashiko stitches. Pure linen can also be washed and ironed with a hot steam without suffering the process. And lastly, it is just beautiful to work on and as a result you get a beautiful, textured feel that works so well with hand embroidery.
Traditionally, sashiko uses white thread on indigo fabric, though modern patterns are stitched in any color thread or fabric.
For the purpose of authenticity, we chose to work on our beautiful IL019 COBALT Signarure Finish 100% Middle Weight Linen that is the closest shade to the indigo color. You can, however, create your own dashing color combination from our plethora of medium weight linens.
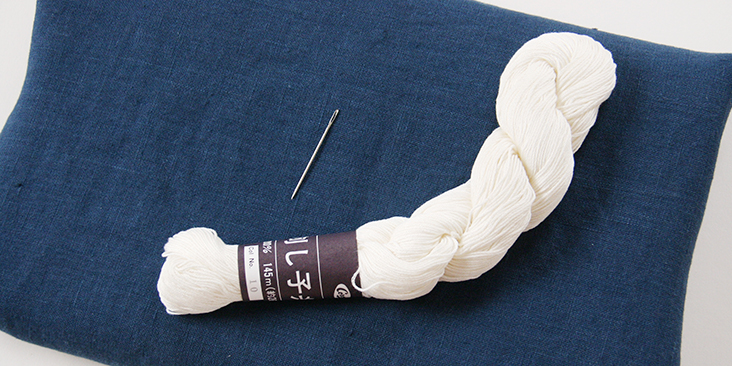
As for the embroidery thread, we opted for a specialty sashiko white thread which is similar to perle cotton or embroidery floss. It is a single strand that is thinner and more tightly twisted (so it won’t separate into strands) than the other two threads and is made of pure cotton and has no sheen. Either thread could be used as a substitute to the sashiko thread, though the finished look will be slightly different.
Here are some examples of embroidery threads used for sashiko:
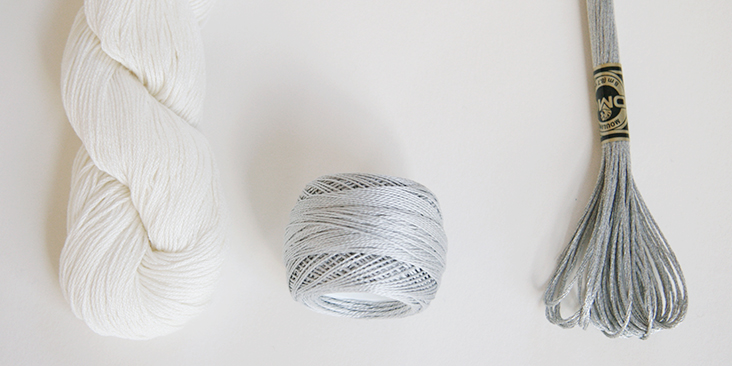
Left: Sashiko thread
Middle: Perle cotton embroidery thread (#8, preferably)
Right: Embroidery floss (use 6 strands of floss)
These thread examples are for use on medium weight linen. So if you work with lighter or heavier fabrics, consider using thinner or heavier threads.
Tools
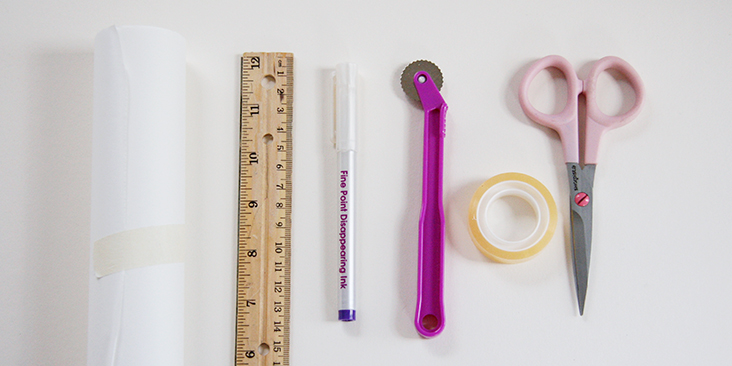
Embroidery/sashiko needle, wax free chalk tracing paper or disappearing ink fabric marker, tracing tool, tape, ruler, scissors. No embroidery hoop is necessary.
It’s recommended to use a traditional sashiko needle which is longer than a regular embroidery needle and works best for carrying multiple stitches. Though a sashiko needle is certainly a nice tool to have, you can still achieve beautiful results with regular embroidery needles.
Patterns
Sashiko designs range from simple directional lines and checks to more complicated interlocking mosaics.
This tutorial features three downloadable sashiko patterns for you to try (click on the name to download the pattern):
You will find the full-size printable diagrams for each style where the different colors will show you how to work the sashiko stitch and the directions to follow.
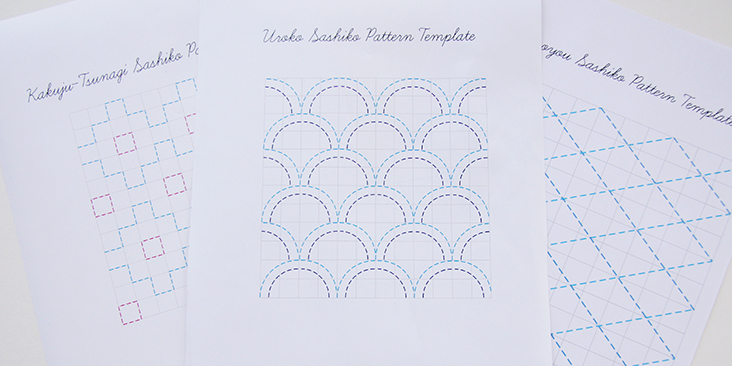
If you are looking for a different design, there is a large variety of other sashiko pattern templates available online. Or you can use graph paper to make your own patterns. There are several simple geometric ideas that you can easily draw and use for any project. Pre-made sashiko templates and patterns, which allow you to transfer designs directly to the fabric, are also available from craft and online stores.
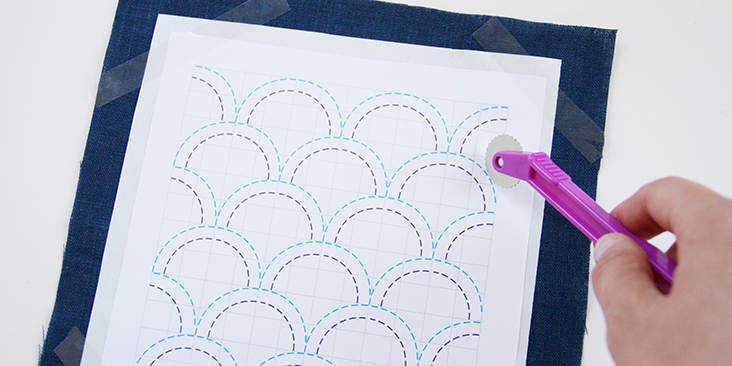
Once you’ve chosen an ideal design for your project, you’ll need to transfer it to your fabric to ensure neat and regular stitching. For transferring patterns we recommend using chalk paper and a tracing tool, but you may also use a water-soluble marking pen or a pencil that will disappear after the first wash.
Trace over all of the pattern lines and even though the diagrams show dashed lines, we strongly recommend marking solid lines and then dividing each line segment into an even number of stitches indicated in the diagram. Draw lightly as you want your markings to wash out later, but not too light as you don’t want them to wear off too soon.
If you are using chalk tracing paper, use some clear tape or weights to secure your fabric to the tabletop and to prevent it from shifting while you trace.
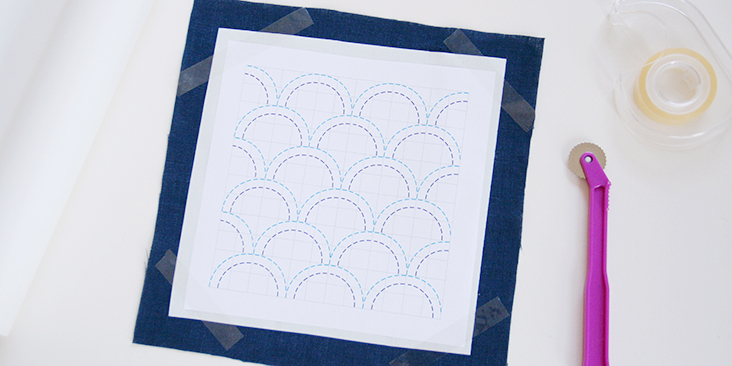
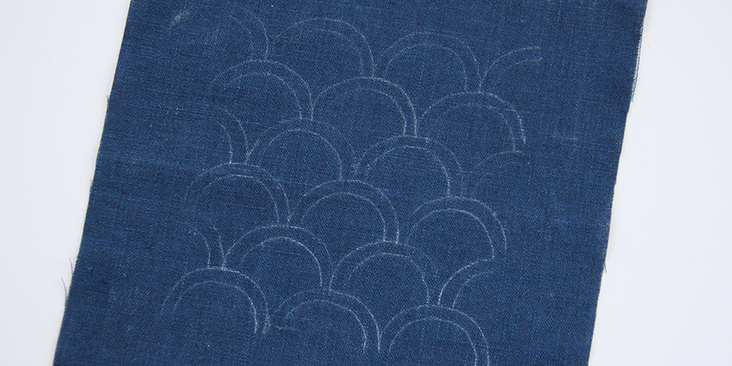
If you need to extend your pattern, make additional copies and tape them together. When all of the pattern lines have been transferred, you are ready to stitch.
The Technique
The sashiko stitch is worked in the same way as a basic running stitch, the technique that we have already covered in one of our tutorials on hand embroidery. The only difference is that the gap between each stitch must be half the length of a full stitch with the longer stitch on the right side of the fabric. So, the main stitches are longer and the gaps are half of this length.
Sashiko patterns are worked in continuous lines and knots are traditionally not used to start or end a stitch as they might create additional bulk or leave marks.
But, for the ease of it, you can totally use knots when working on two layers of fabric and where the reverse of the fabric will not be shown. In which case, all the tails and knots will be hidden between the layers. For designs where the reverse of the fabric will be shown, there’s a basic temporary knot often used in embroidery that will work great with sashiko – the away knot. As its name suggests, an away knot is tied a few inches away from the area where the embroidery begins. The knot is clipped after working the embroidery, and the tail is then threaded through the stitches on the back side of the fabric. Additionally, to secure the thread you can overlap a few stitches.
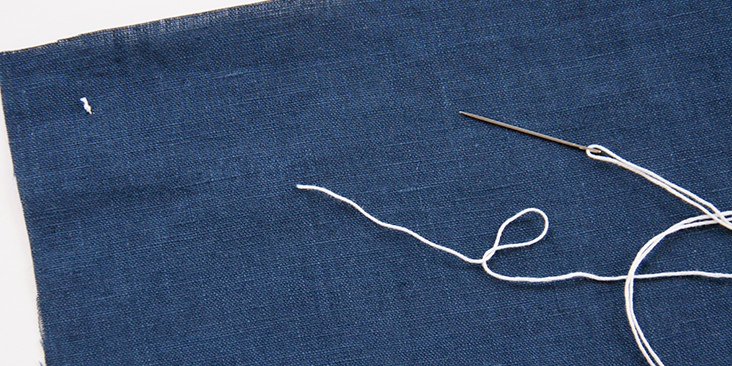
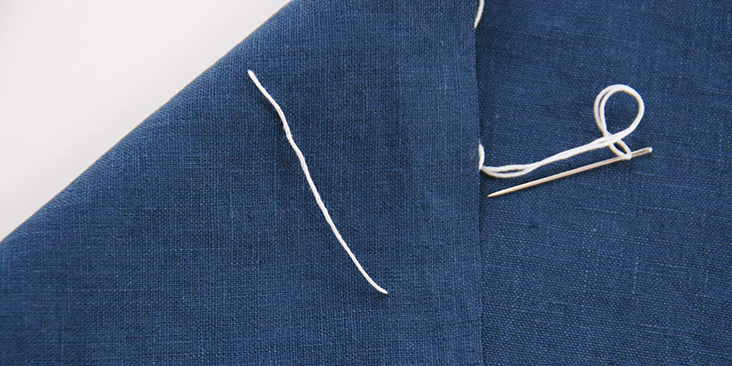
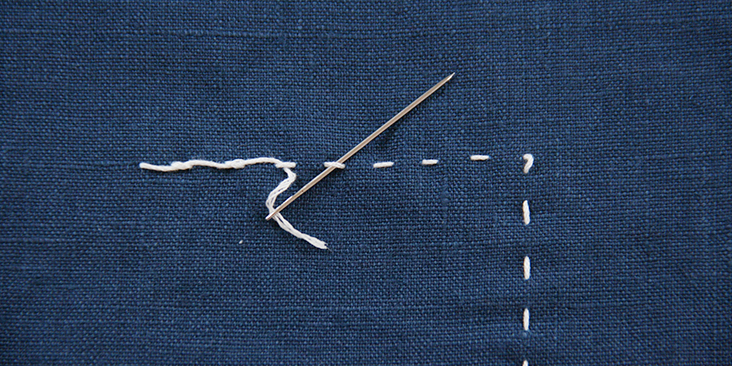
To begin your project, cut a piece of thread that is long enough to go from one end of the row of your stitches to the other. Create an away knot a few inches away (3 to 5) from the desired starting point, then insert the needle into the fabric and cast on multiple stitches on the needle without pulling the thread through. The reason you do not do one stitch at a time is because the thread will tend to twist. Keep your spacing at a 1:2 ratio and as even as possible.
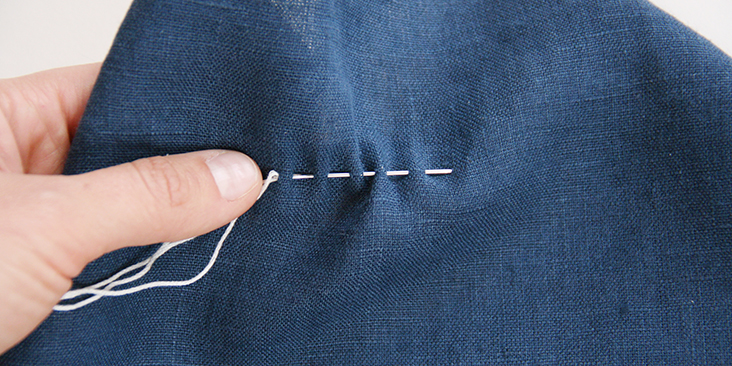
After you have several stitches on the needle, whatever number you are comfortable with, push the needle through the fabric and pull the thread all the way through. Be careful that you don’t pull the thread too tight, which will cause the fabric to pucker.
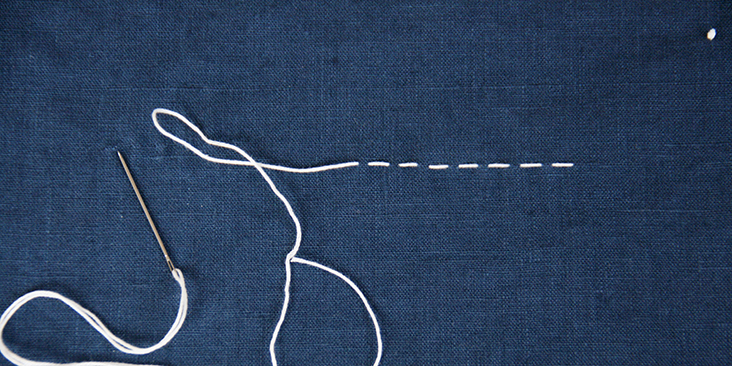
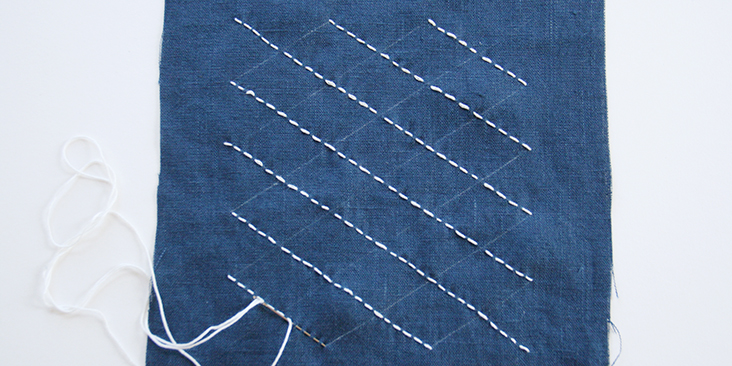
Work all parallel lines first, then change direction and work another set of parallel lines. A stitch is to be kept continuous as far as possible.
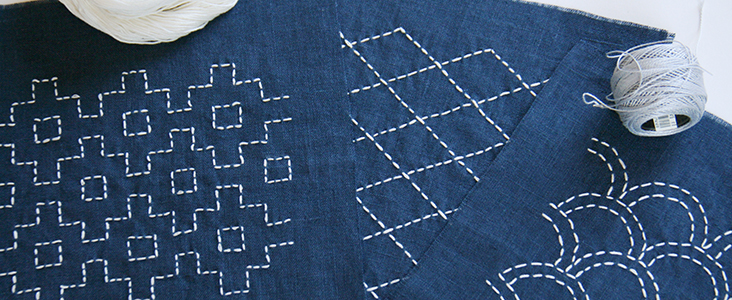
1. Kakuju-Tsunagi
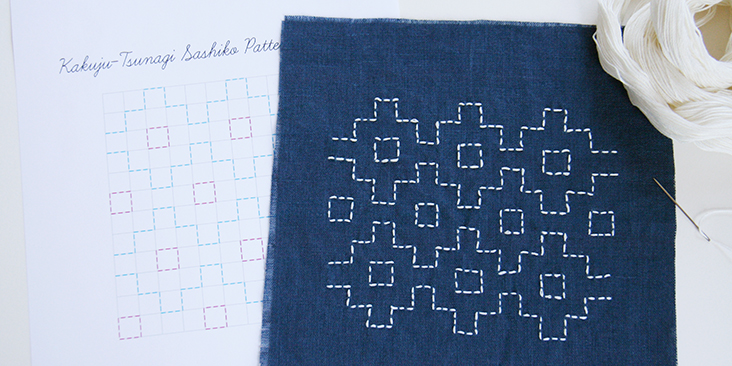
This is a square based pattern that is very easy to make and stitch. Stitch each set of steps at a time. Then, stitch each square at a time.
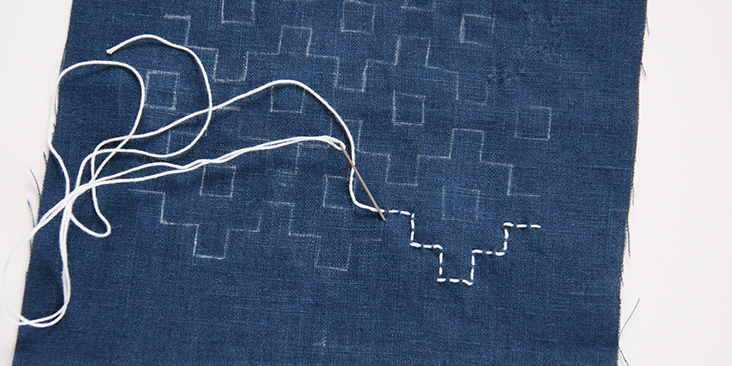
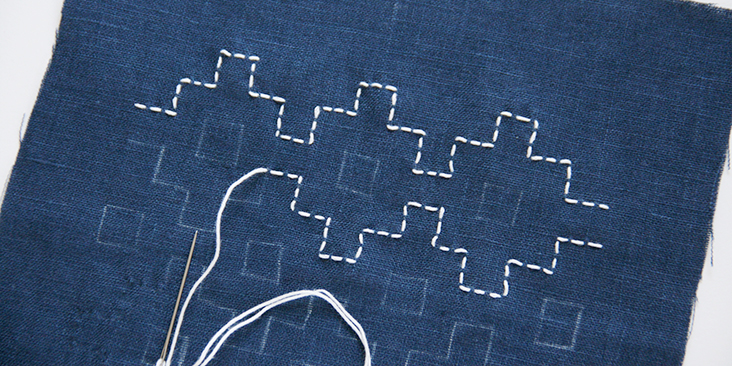
2. Hishimoyou
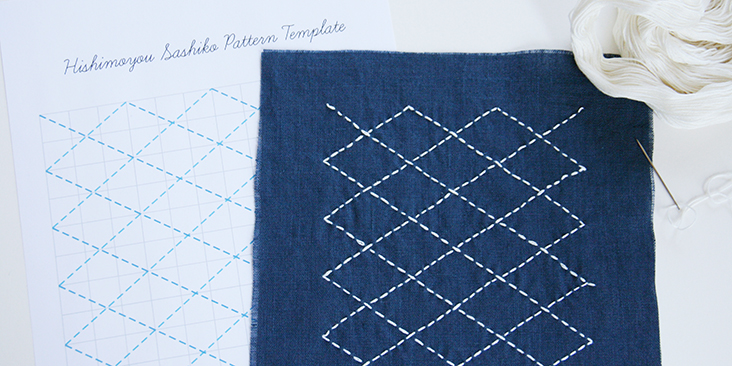
Hishimoyou is a diamond-based pattern. To complete this pattern, work on one set of parallel diagonal lines first and then on the other.
3. Uroko
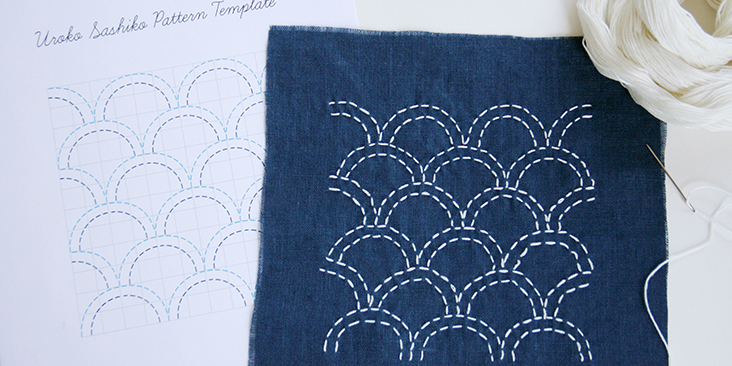
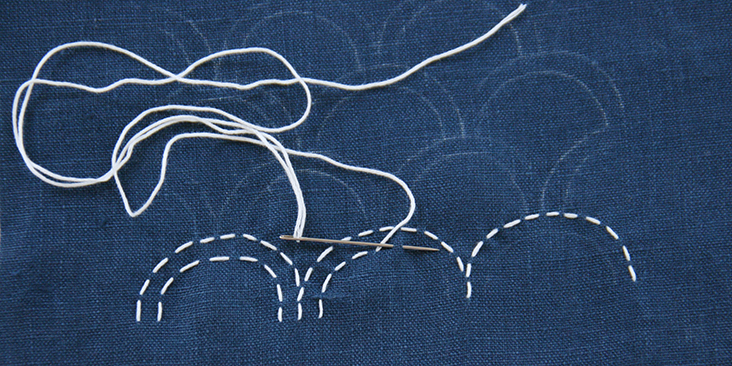
Uroko (Fish scales) is a circle based pattern. It is pretty easy to make but can take a little practice before the curves can be learned to be stitched neatly and with precision.
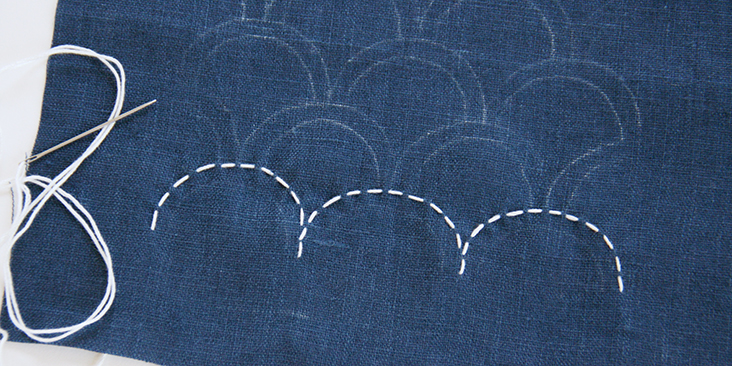
Stitch each horizontal row of semi circles from one end to the other. The stitches should look like mirror images where the curves meet.
Useful Tips
Here are some useful tips to follow to achieve clean and elegant end results:
1. Always prewash and dry your fabric before starting a project.
2. Keep your stitching as even as possible and respect the space ratio.
3. Don’t pull the thread too tight as it might cause the fabric to pucker.
4. When working on a pattern where the lines meet, space the stitches evenly so that they don’t touch or cross each other. There should be a small open space at the point where the lines would usually meet. This will make the pattern look more elegant.
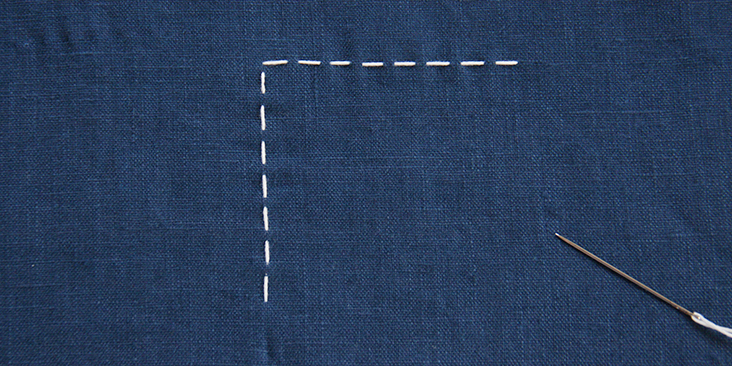
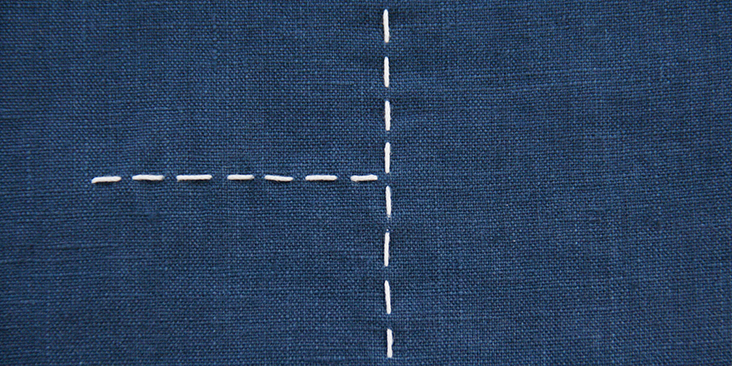
5. For a nicely defined 45-degree angle, both stitches must end right at the turn of a corner.
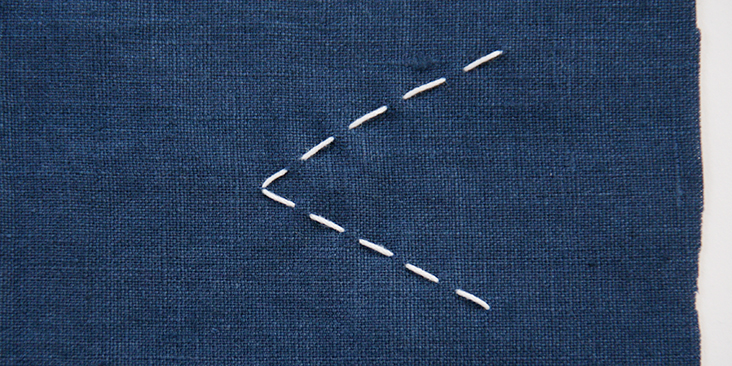
6. When turning a corner, leave a small yarn loop on the wrong side of the fabric to help prevent it from puckering.
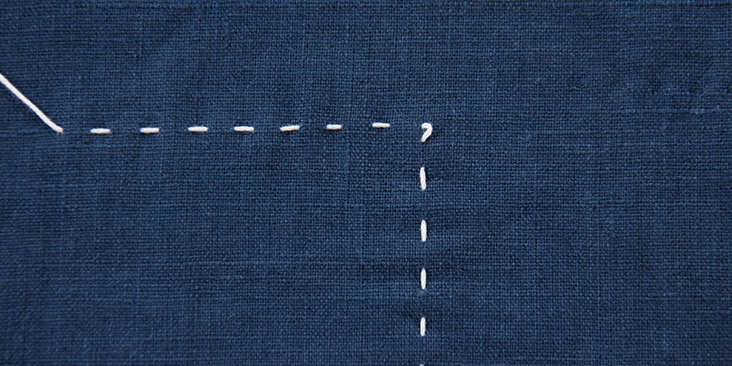
7. To move from one section to another, you can carry the thread across the back of your work if the distance is about an inch or less. But make sure that it stays slightly loose so the fabric doesn’t pucker.
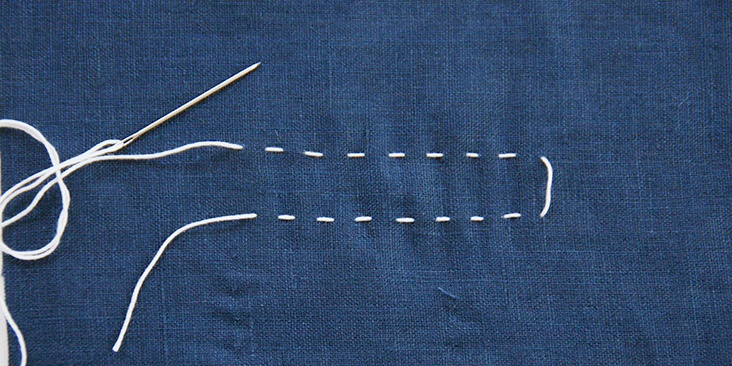
8. And lastly, try to be mindful of where the pattern lines meet and do a little preplanning when you are coming to a junction, turning a corner or changing a direction.
Now that you know all the basic sashiko tips and techniques, we invite you to delve into the wonderful world of sashiko and create some totally unique and elegant projects. To give you some ideas on how to use sashiko in garment making, we are preparing a little tutorial for an embroidered dress that we will share with you in our next post. In the meantime, you can practice your sashiko skills by creating the smallest of quilt projects – quick and easy pot holders!














14 Comments
Karen Cayce
Sashiko traditionally was not a perfect pattern, but used to join scraps of fabric together (boro) and then in the most asthetically style (sashiko). I have recently started using sashiko and have done a lot of it free hand, on denim and kasuri, and then also used a ruler and a bracelet as a guide. It is beautiful….no matter what. You can see if on my IG page (if this is allowed) https://www.instagram.com/p/C6rvClbOsio/?img_index=1
I especially love the fat cat, which I “copied” free hand while driving back and forth across the country. I plan to do much more. So easy to do in the car…on the plane….watching TV.
Kate Renwick
This looks so painstaking! Could you do lightweight quilting using this method?
Karen Cayce
I would say this technique is more for patching or decor….but it is a straight stitch and you can stitch as deep as you want! Make your own art!
stitchmax embroidery
embroidery thread
such a nice blog , I am really impress your writing skills , we are also work in StitchMax software , it can use to embroidery design and punching use, The Stitchmax Provide best embroidery digitizing service, Stitchmax is a great way to start creating and editing professional embroidery designs on a VERY low budget. Every device support of Windows OS with all versions that is work fast speed and smooth work, website: stitchmax [dot] in
Athena
Can’t wait to see the tutorials!
Will it come to my email?
Patricia Welsh
A beautiful way to and beauty to a garment. I had never heard of this but had seen it. Can’t wait to try it. My great grandmother use to do this. Always pretty. I am going to try it on a piece of light weight blue jean jumper I have .
AmyCat =^.^=
Your photo and caption of suggested embroidery threads has mixed up Perle cotton #8 and DMC 6-strand embroidery floss… Otherwise, great article!
The results remind me of a traditional Japanese embroidery/dyeing technique in which you stitch patterns similar to some of these Shashiko ones, then pull the thread tight to gather the fabric along the pattern lines before indigo-dyeing. Once the fabric’s dyed, the stitches are removed. You end up with the stitched areas being white on indigo fabric… More detailed and precise than western Tie-dye.
Rima Khusainova
Dear AmyCat, thanks so much for pointing this out! I’ve already updated the info in the post.
AmyCat =^.^=
No, it’s still showing that the middle thread is “œembroidery floss” instead of Pearl Cotton… NOT fixed!
Nia
Pretty cool.
Norma
In the photo of the threads that can be used, the perle cotton is in the center, the 6-strand embroidery floss on the right.
Rima Khusainova
Sorry for this little misunderstanding, Norma. It’s all fixed now.
AmyCat =^.^=
NO, it’s NOT. Here’s what your article STILL says:
“œLeft: Sashiko thread
Middle: Embroidery floss (use 6 strands of floss)
Right: Perle cotton embroidery thread (#8, preferably)”
Rima Khusainova
Dear Amy, very strange why the edit I made back in August was not saved… Well, I apologize once again and this time I hope it is fixed 🙂