


Sewing Essentials: A Simple Guide to Notches
I love a notch, so much so that I’ve decided to dedicate this article to these small but important markings. Here, I’ll explain why they’re so helpful, when to use them, and how to add them to your own patterns or adapt them for existing ones.
What exactly are notches?
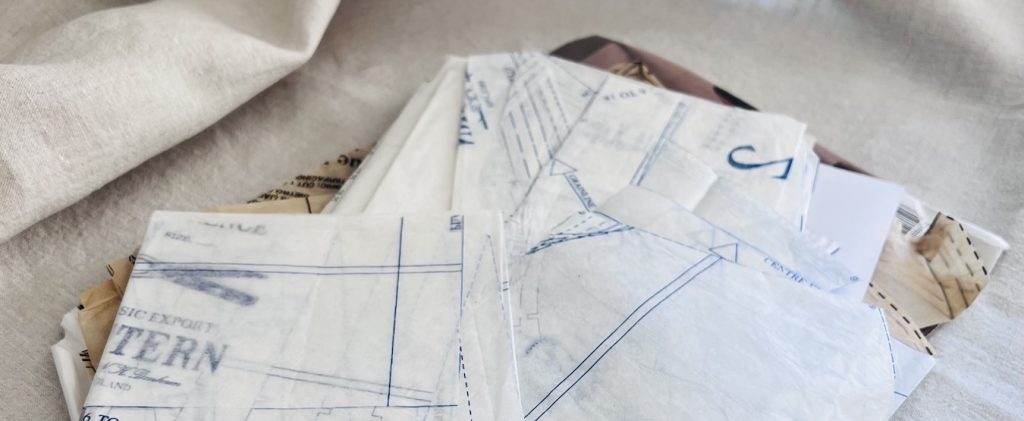
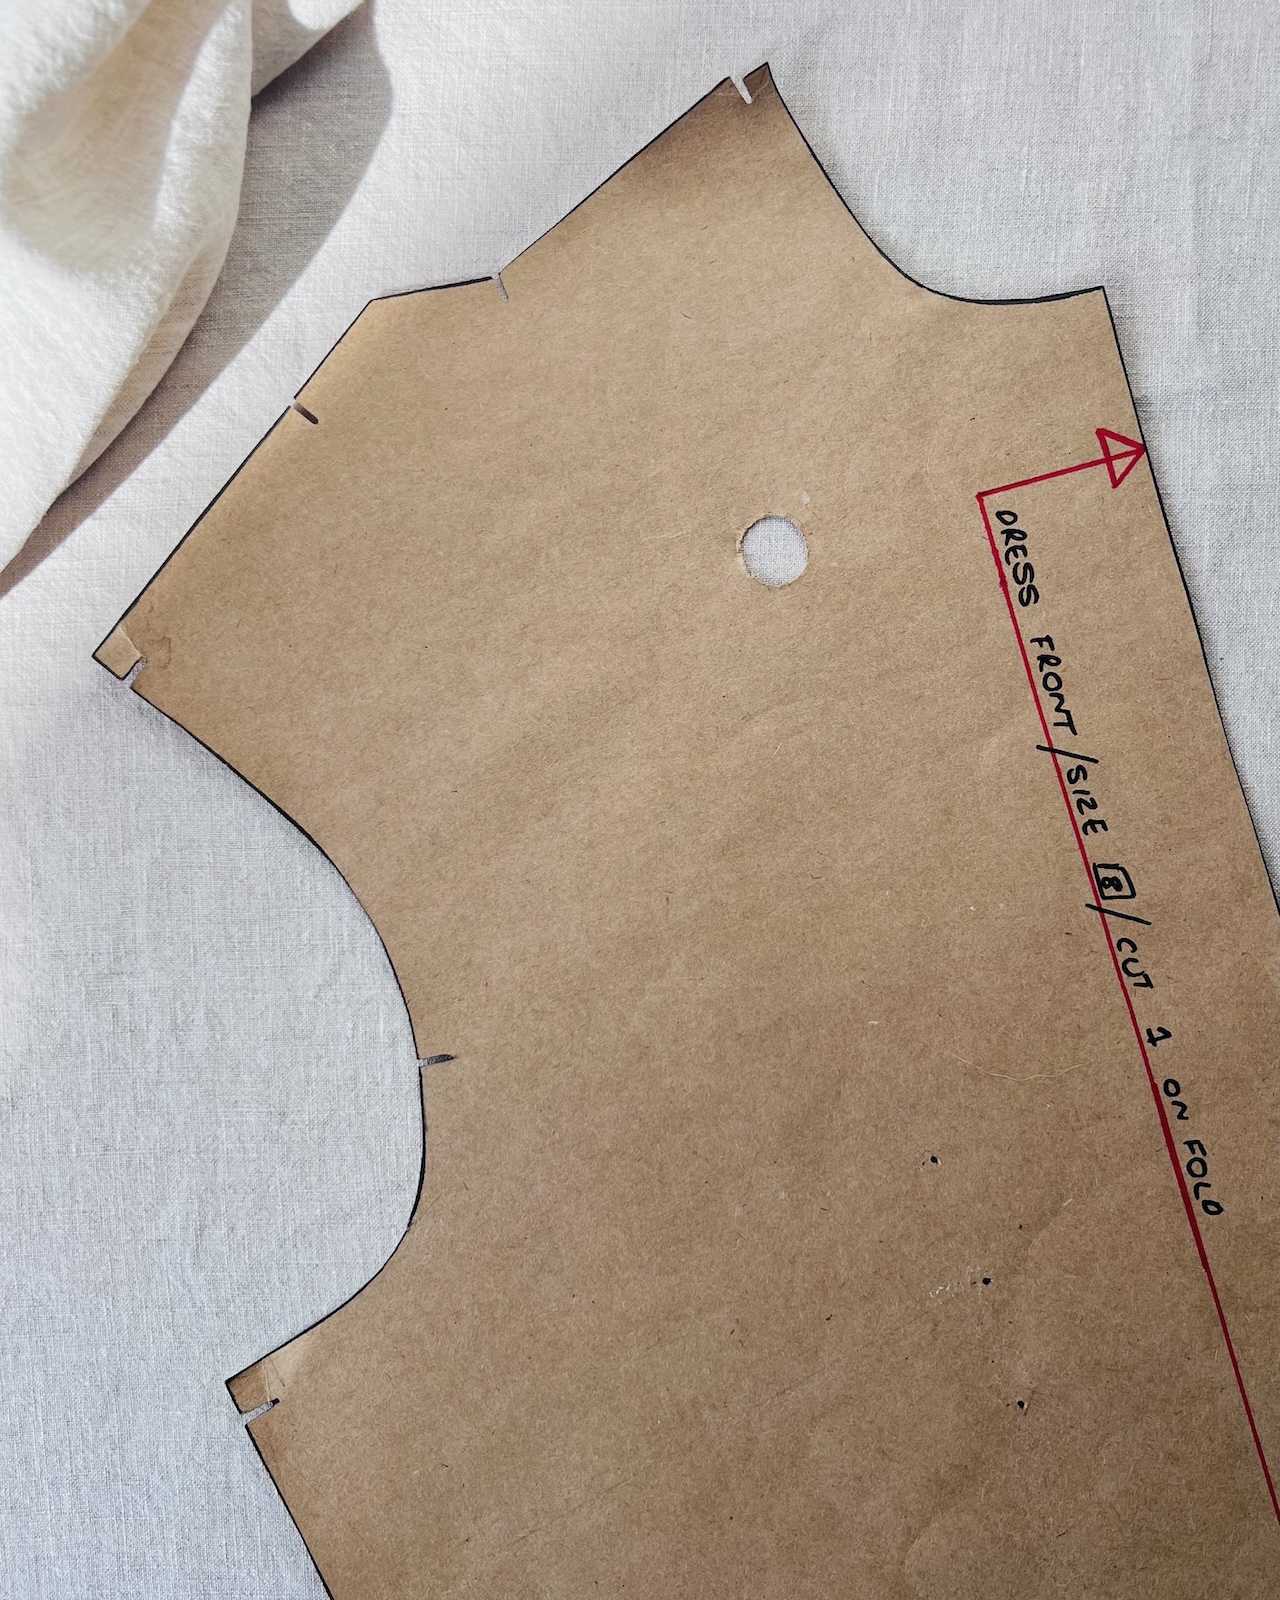
Notches are small markings found around the perimeter of pattern pieces. They sit perpendicular to the cutting line and point inward toward the stitching line. They are like puzzle tabs in that they help ensure each piece goes together correctly and accurately.
Notches can appear in several forms:
- Single notches: The most common type, used for everything from side seams and hems, to darts and tucks.
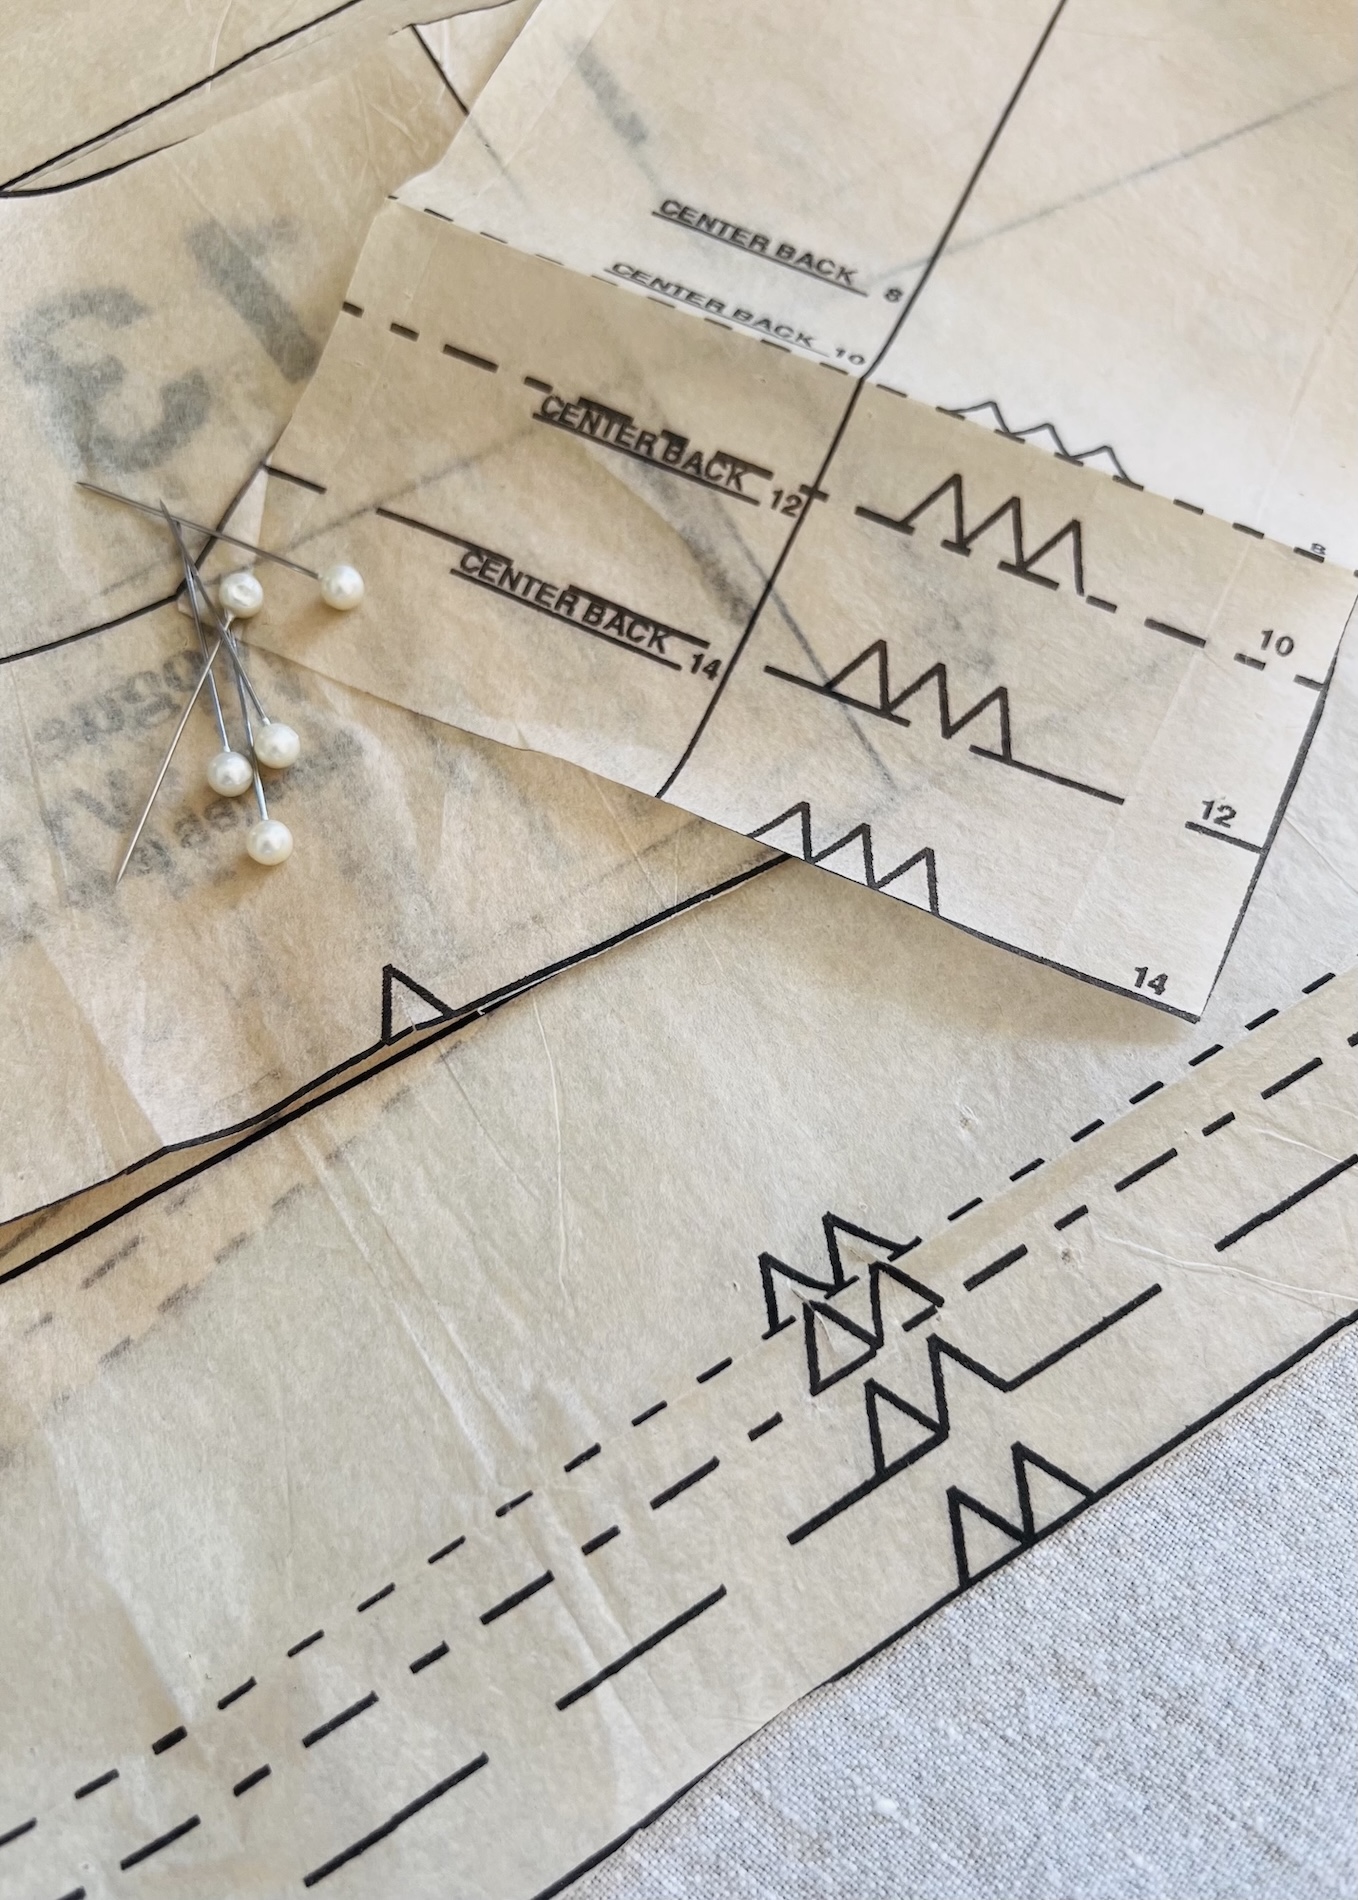
- Double notches: Often used to indicate the back of a pattern piece, such as the centre back seam or the back of a sleeve head or armscye.
- Triple notches: These are less common, typically reserved for complex designs, industry sewing, or distinctive points like zipper ends.
- Half notches: These seem to be appearing more frequently, and are used on folded pattern pieces to indicate the midpoint.
How are notches indicated on paper patterns?
Different pattern brands and individual designers use a number of different symbols to mark notches. These may appear as lines, rectangles, triangles, or diamonds (see examples below).
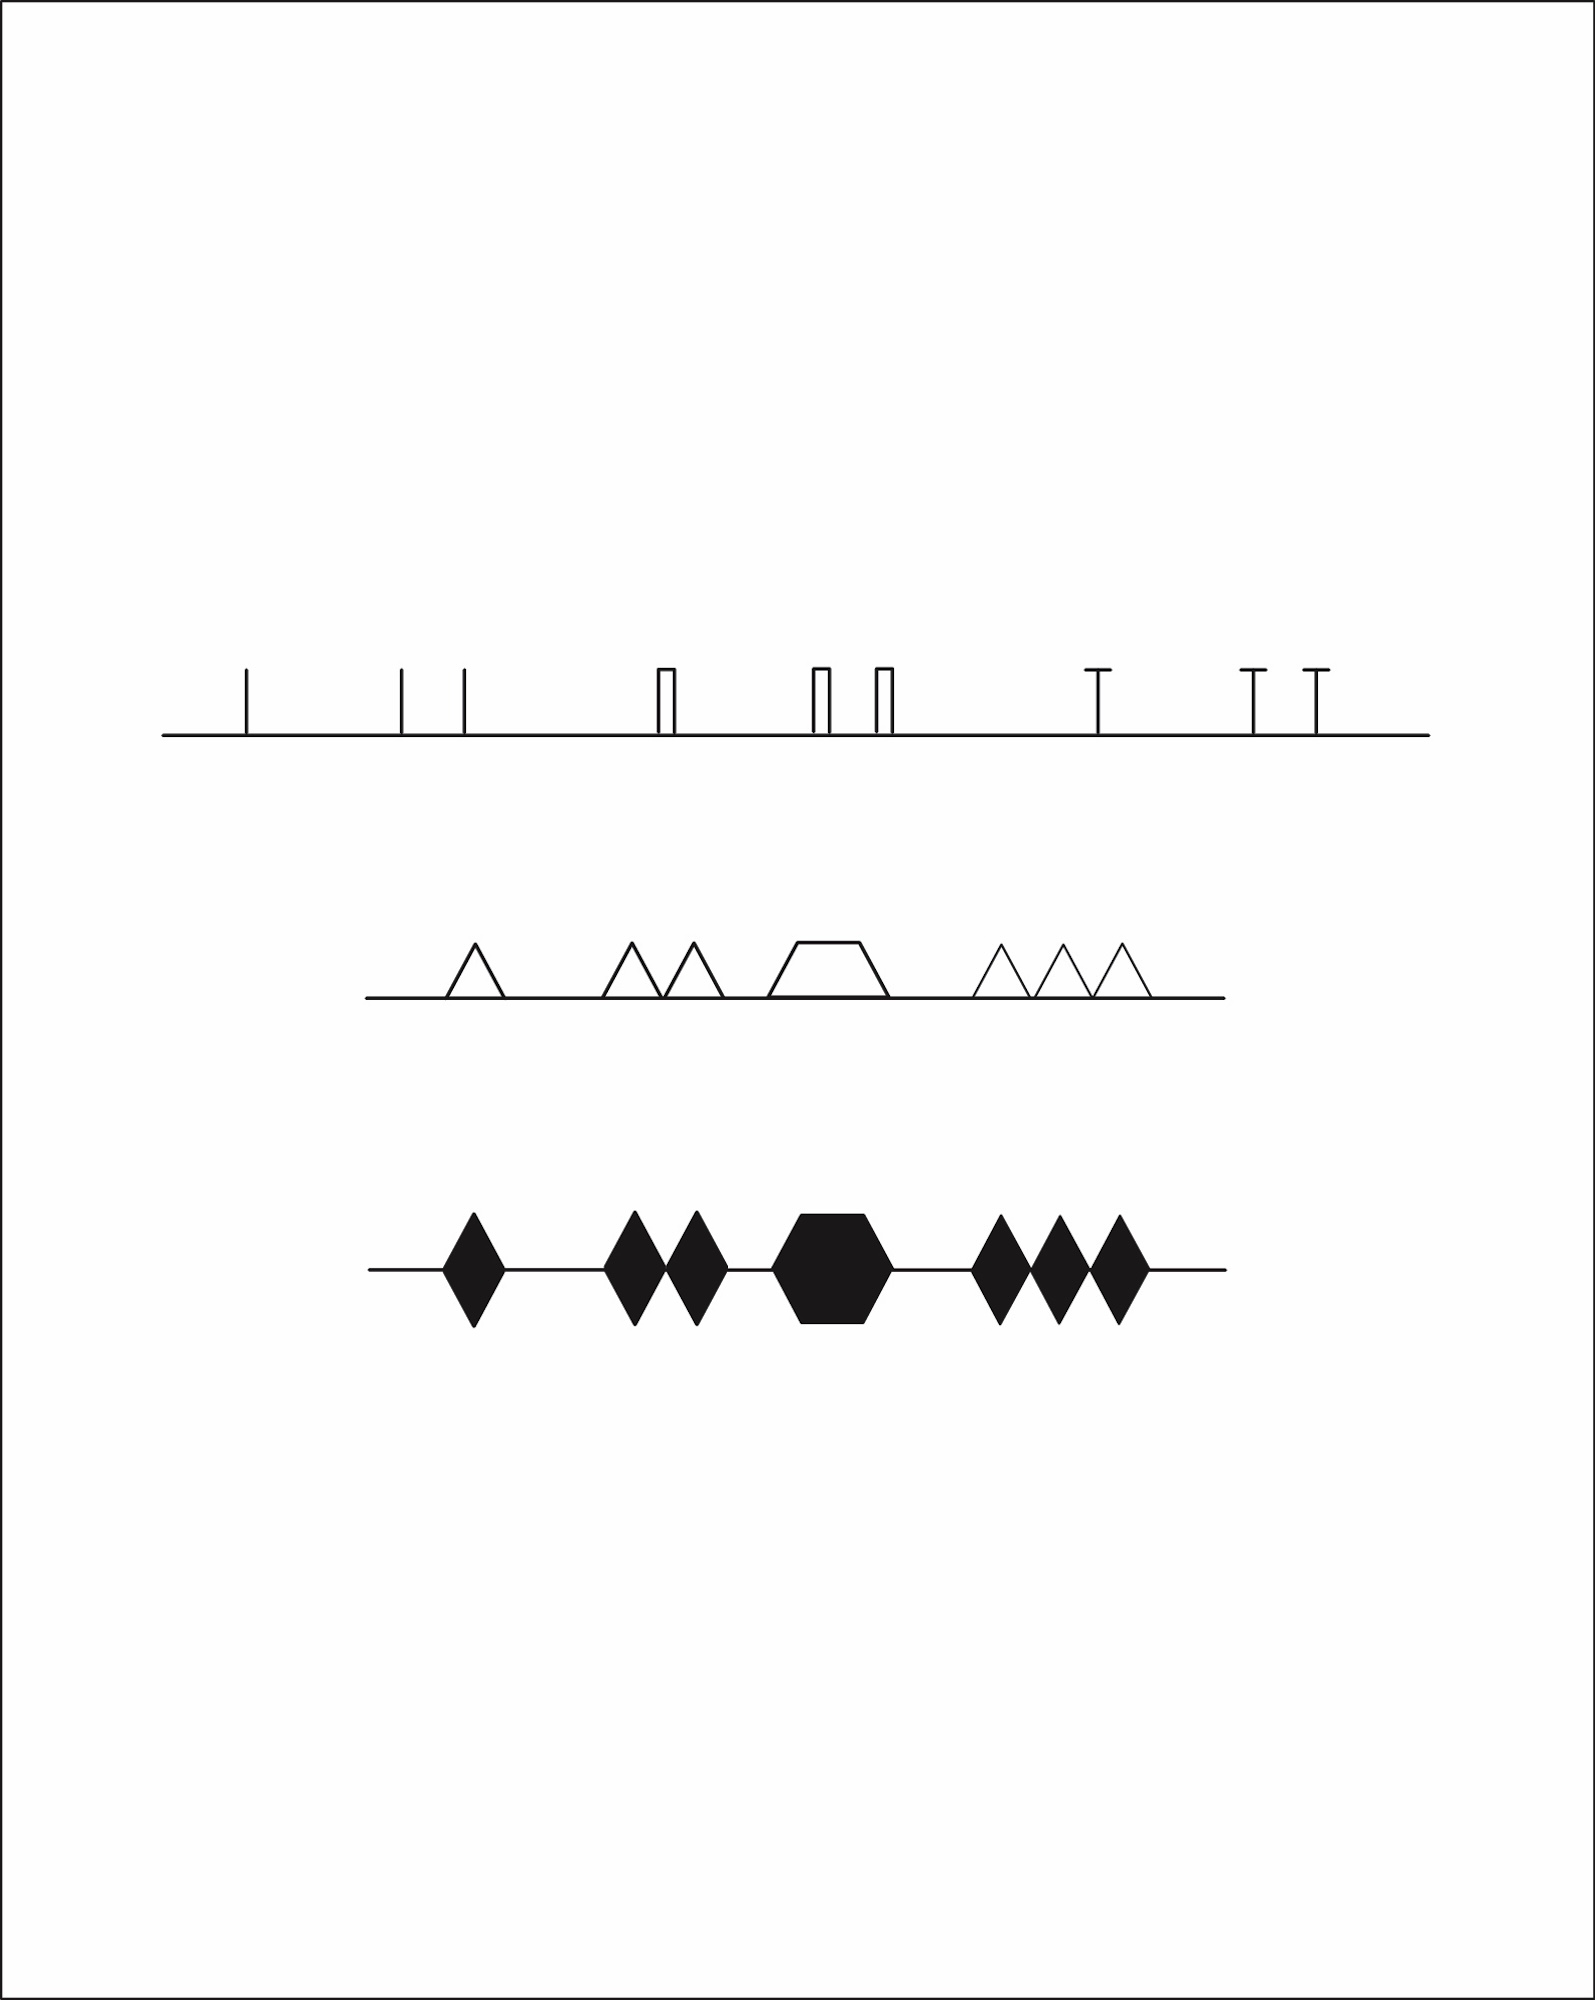
There is no single “right” way to indicate a notch. The style usually comes down to personal preference, training, or brand standards. However, what I have noticed is that indie sewing pattern brands tend to favour the more simple line or T-shaped notch, while triangular and diamond-shaped notches are more commonly seen on patterns from the “Big 4” (i.e. Simplicity, McCall’s, Butterick, and Vogue).
 Different ways to mark notches
Notches are transferred at two key stages:
- Initial pattern making (from block to paper).
- Cutting stage (from pattern to fabric(s))
For manual pattern making:
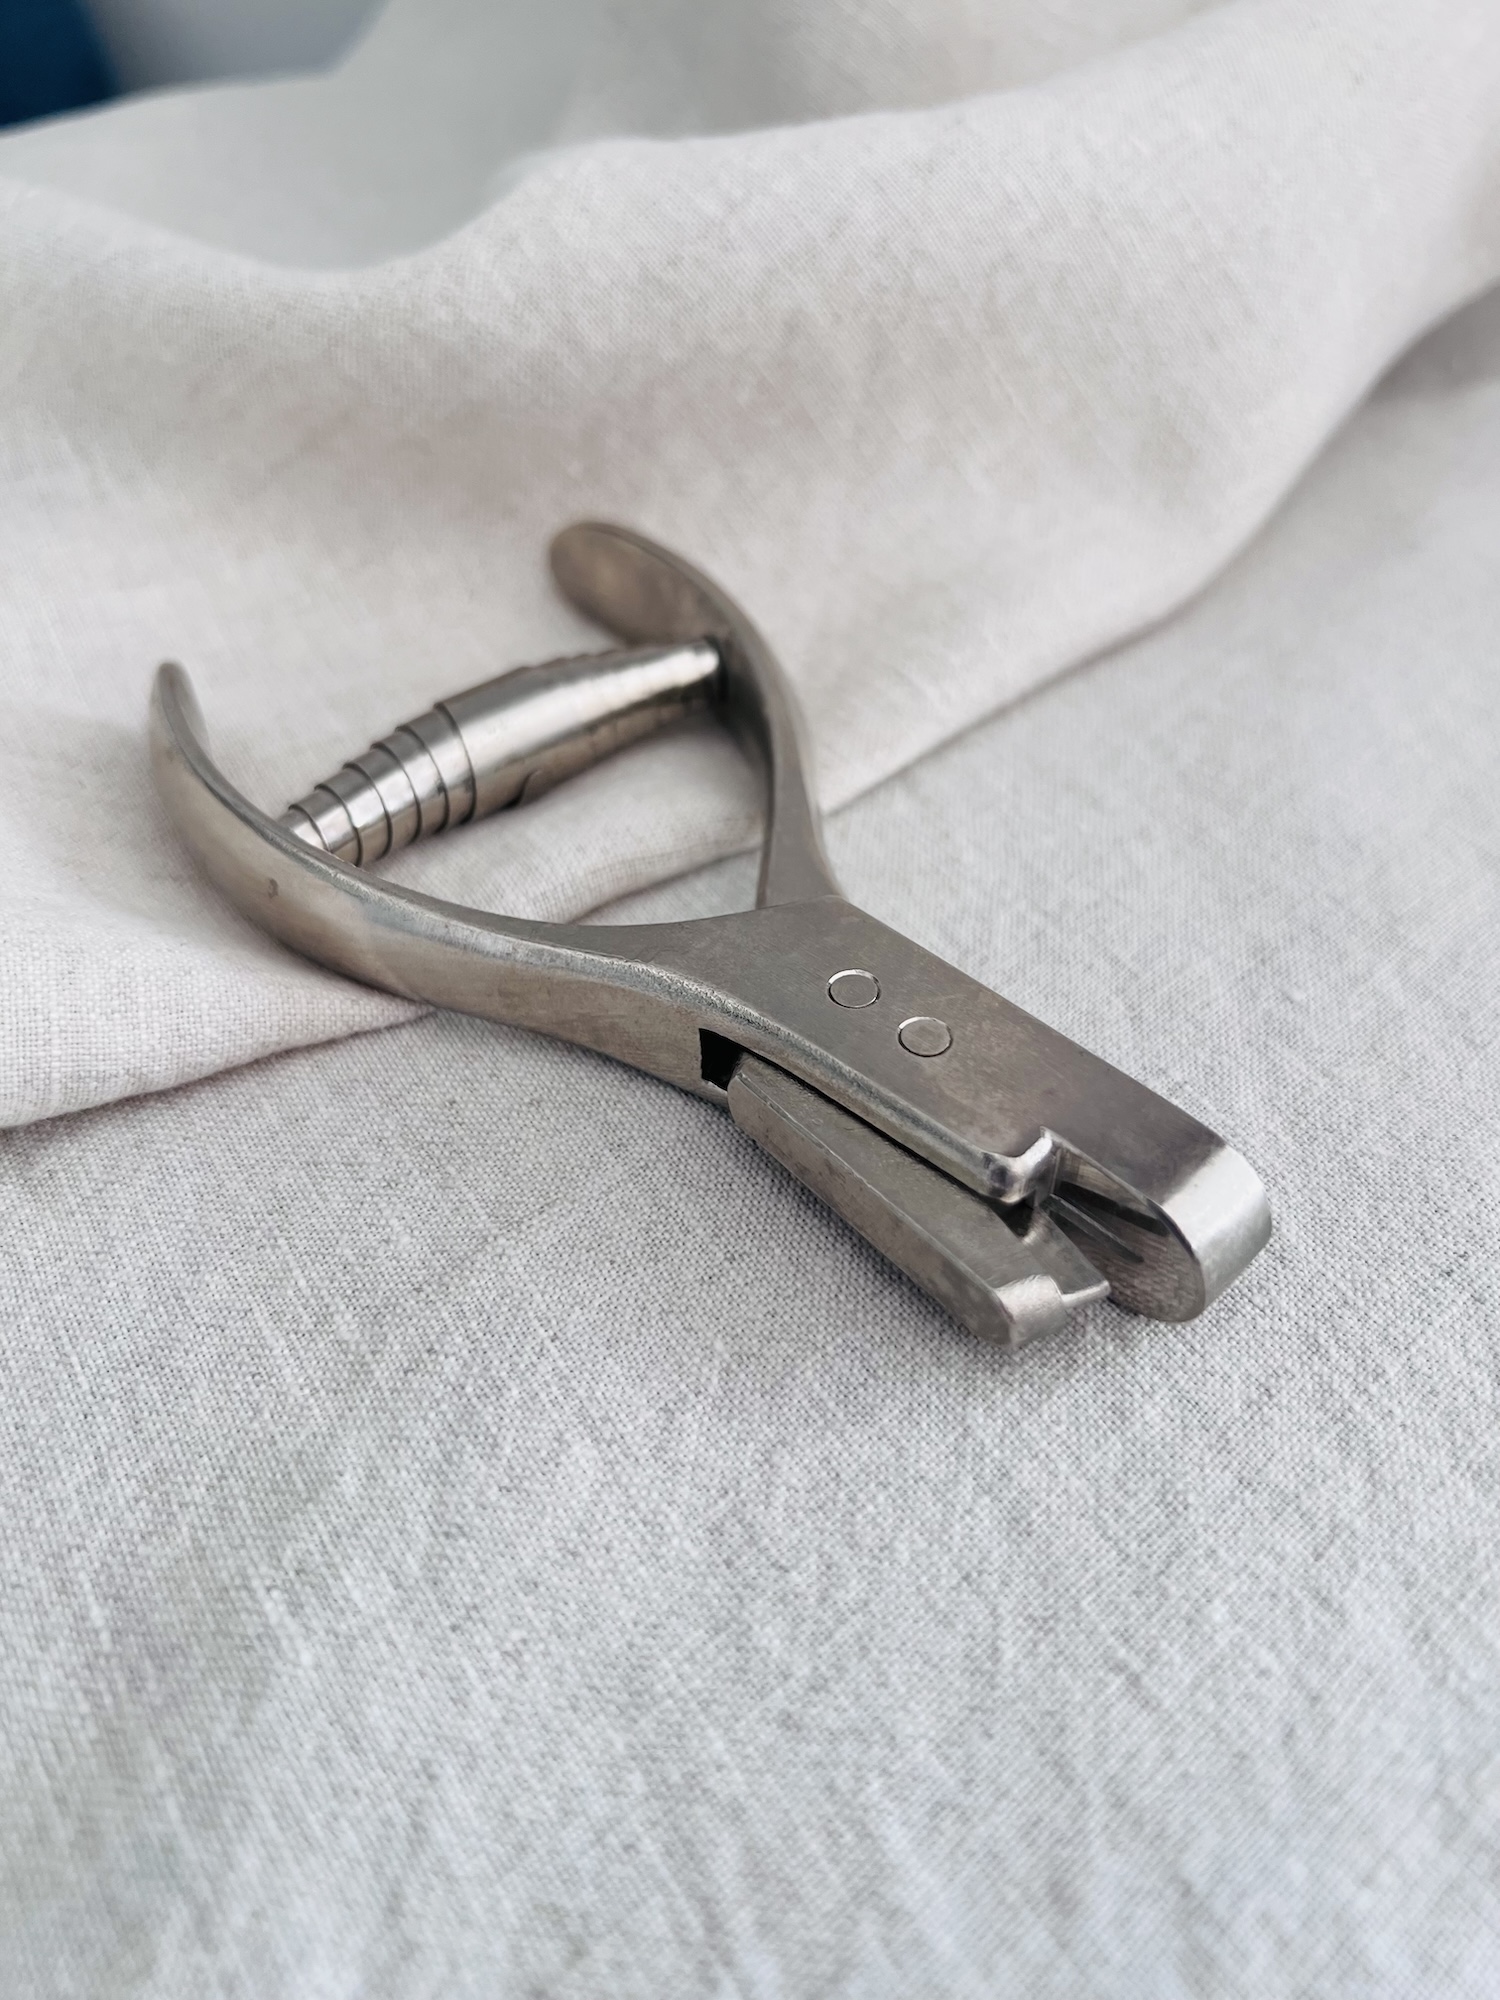
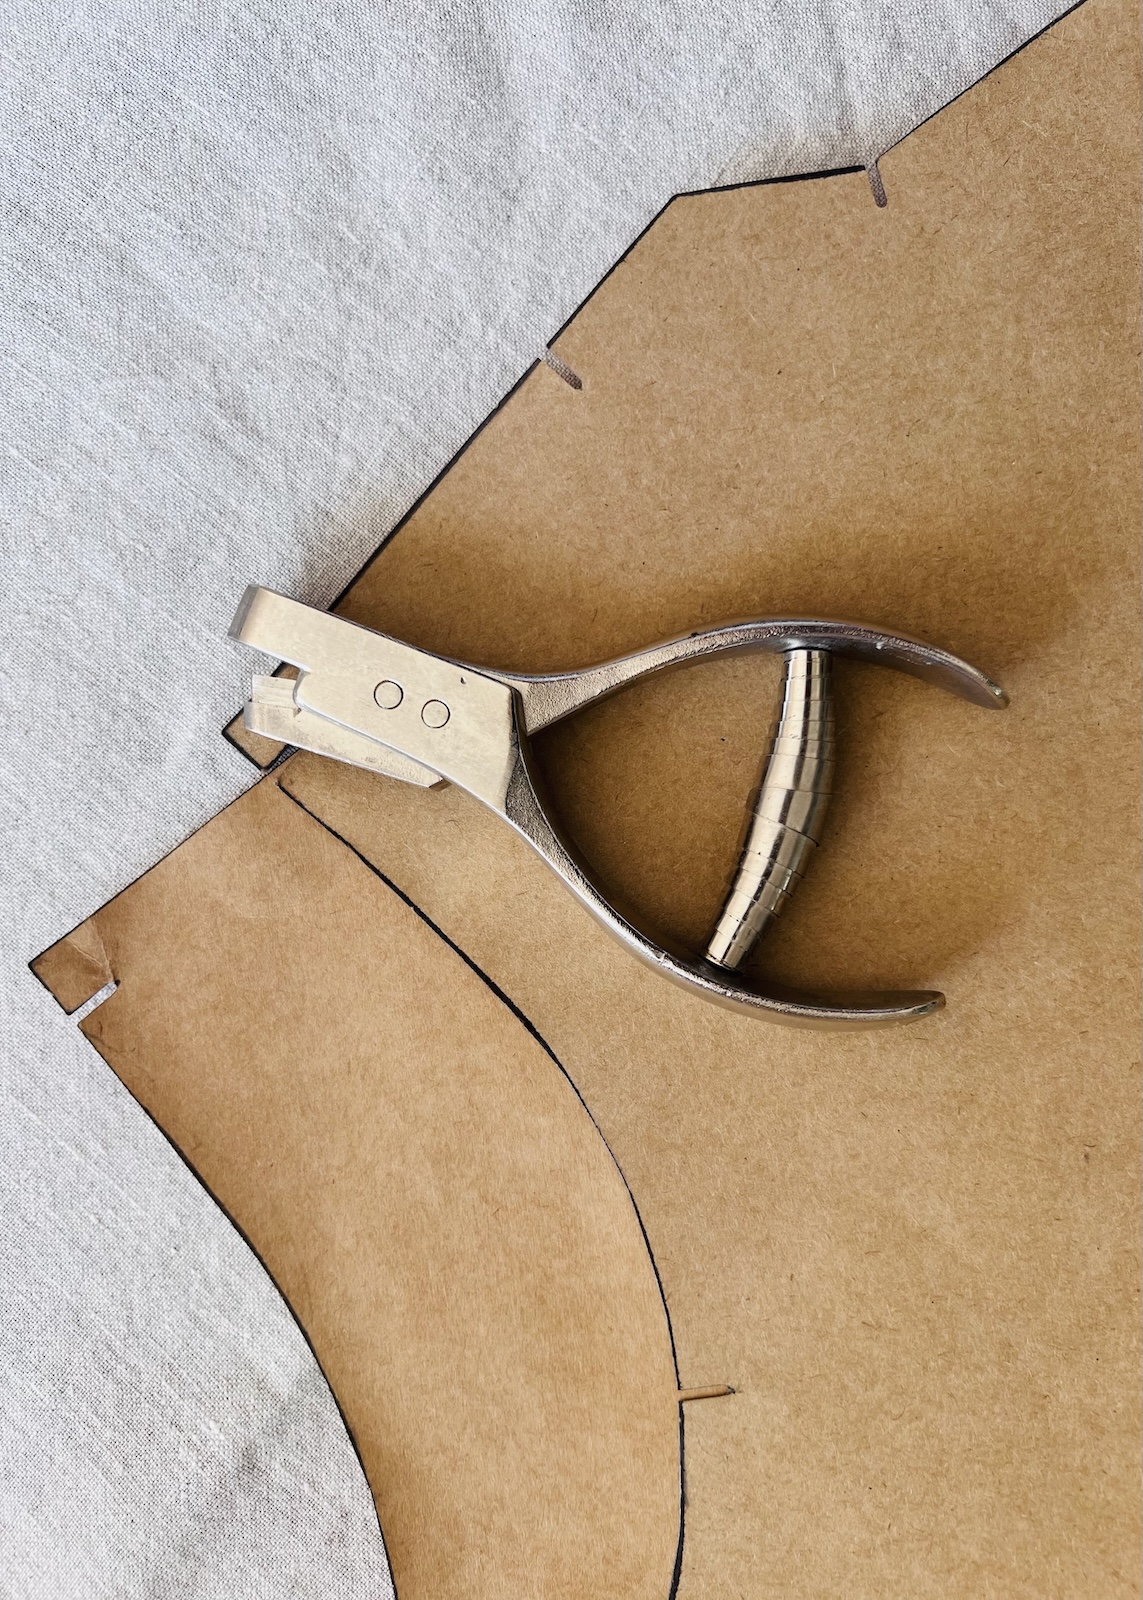
Whether you are transferring a block to pattern paper, or duplicating an existing pattern, a notcher tool is super handy.
This small, handheld tool punches slits (approximately 6mm) along the edges of cardboard blocks or paper patterns (not fabric!). Think of it like a mini hole punch. They are efficient, accurate, and honestly kind of fun to use even if they leave little bits of paper everywhere.
What are the benefits of a notcher tool?
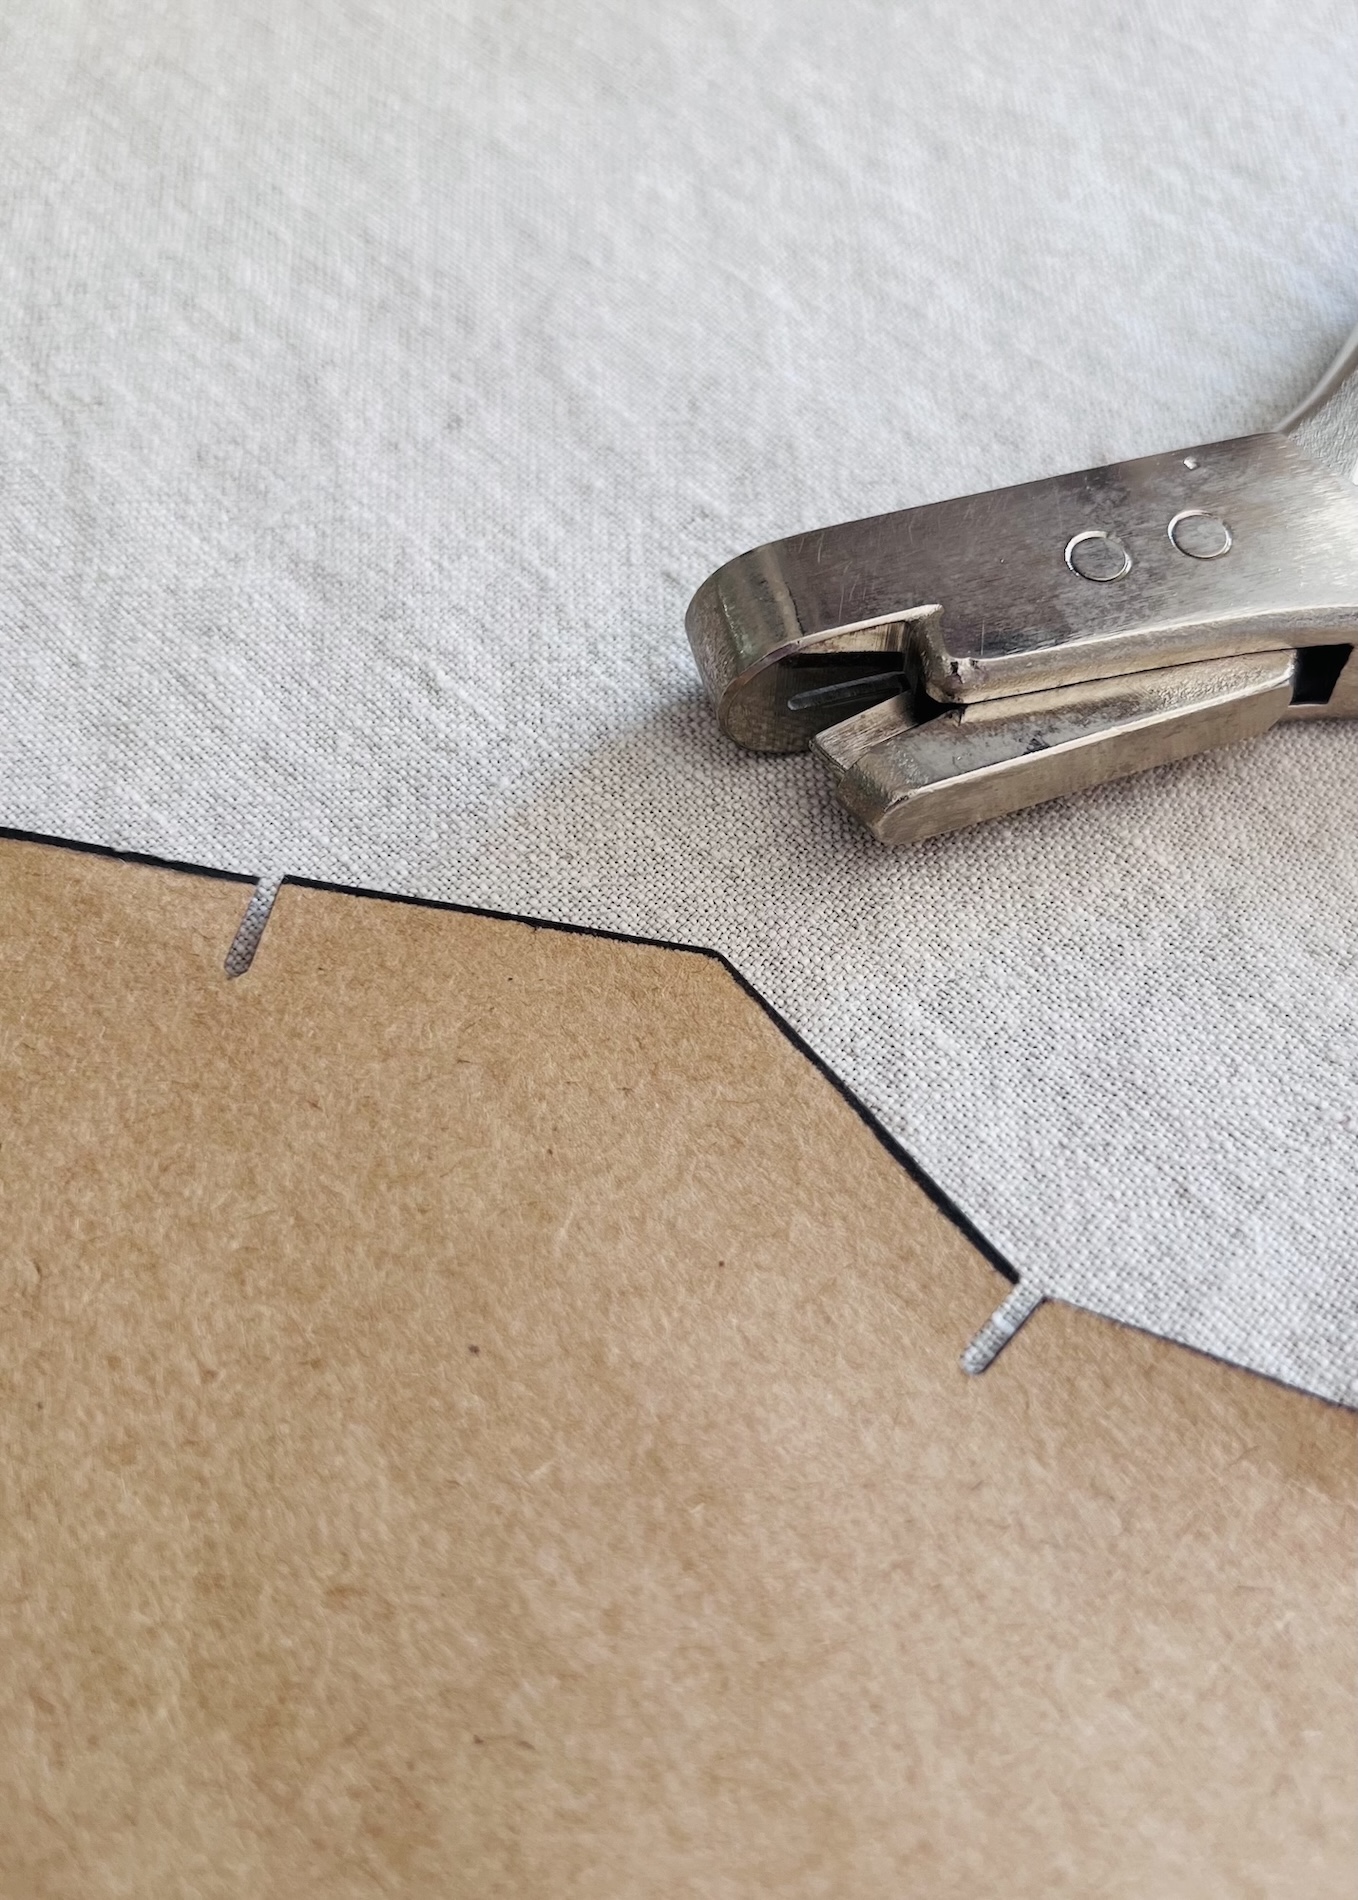
- The punched slits make it easy to trace notches accurately, especially from card. You simply follow the cutouts with your pen or pencil. They are hard to miss when tracing.
- You can notch several paper pieces at once, improving consistency and saving time.
- After printing a pattern, the slits provide perfect guides for snipping into your fabric, helping prevent cutting too far into the fabric (something I am sure we have all done).
Investing in a quality notcher is worthwhile. I got mine at university, and it is still going strong even after 18 years. If you do a bit of patternmaking and sewing, I highly recommend adding this handy tool to your toolkit!
For fabric cutting
When transferring notches from paper pattern to fabric, there are a few different options:
1. Snipping into the fabric: Cut a small snip (just a few millimetres) into the seam allowance. One snip indicates a single notch, two snips a double, and so on.
2. Cutting outward shapes: Cut small triangles outward from the fabric edge, again cutting one triangle for a single notch, two triangles (or a trapeze) for a double, etc. This method avoids cutting into the seam allowance, which can be helpful if adjustments may likely be needed later on.
3. Use a marking tool: Mark notches with tailor’s chalk, a washable fabric pen, tape, or a small hand-sewn stitch in contrasting thread. This is especially useful for delicate fabrics, or fabrics prone to fraying.
Again, there is really is no right or wrong method. The choice really comes down to the fabric, the seam allowance width, or simply personal preference. Personally, I prefer a simple snip into the seam allowance as I find outward-cut notches easier to forget, and they disappear once the edges are finished anyway.
Where are notches commonly positioned?
Notches play an important role in patternmaking and shouldn’t be underestimated. Small as they are, they really can improve accuracy, alignment, and overall sewing efficiency. I often find myself adding extra notches to patterns.
Here is a list of where notches are typically found and why:
1. Seam allowance:
At university, I was taught to indicate all seam allowances using notches, whether that be a side seam, hem, or neckline. The rationale behind this was so that anyone with some basic sewing knowledge could pick up the pattern and construct it without instructions. In fact, we even had to send our patterns to someone within the industry to test this.
In reality, I don’t see this method used consistently in commercial or indie patterns.
In my own sewing practice, I am a bit hit and miss as to whether I do this. If a pattern has many different seam allowance widths, marking them with notches can be a helpful reminder. Conversely, if all the seam allowances are the same, it may not be necessary.
If you do choose to indicate seam allowances with notches, try keeping these points in mind:
- Consider the order of construction (i.e. the order in which the seams will be sewn).
- Notch only one end of the seam.
- Don’t notch into the same corner twice, as this can weaken the fabric.
- Start with the front pattern piece and transfer to the back, ensuring the pieces fit back together like puzzle pieces.
For example, on a basic bodice block, I would generally sew the centre back seam first (top to bottom), shoulder seams (shoulder to neck), the side seams (top to bottom), and finally the hem and neckline. With this construction order in mind, I would position the seam allowance notches to support this, guiding the sewing process (see diagram below).
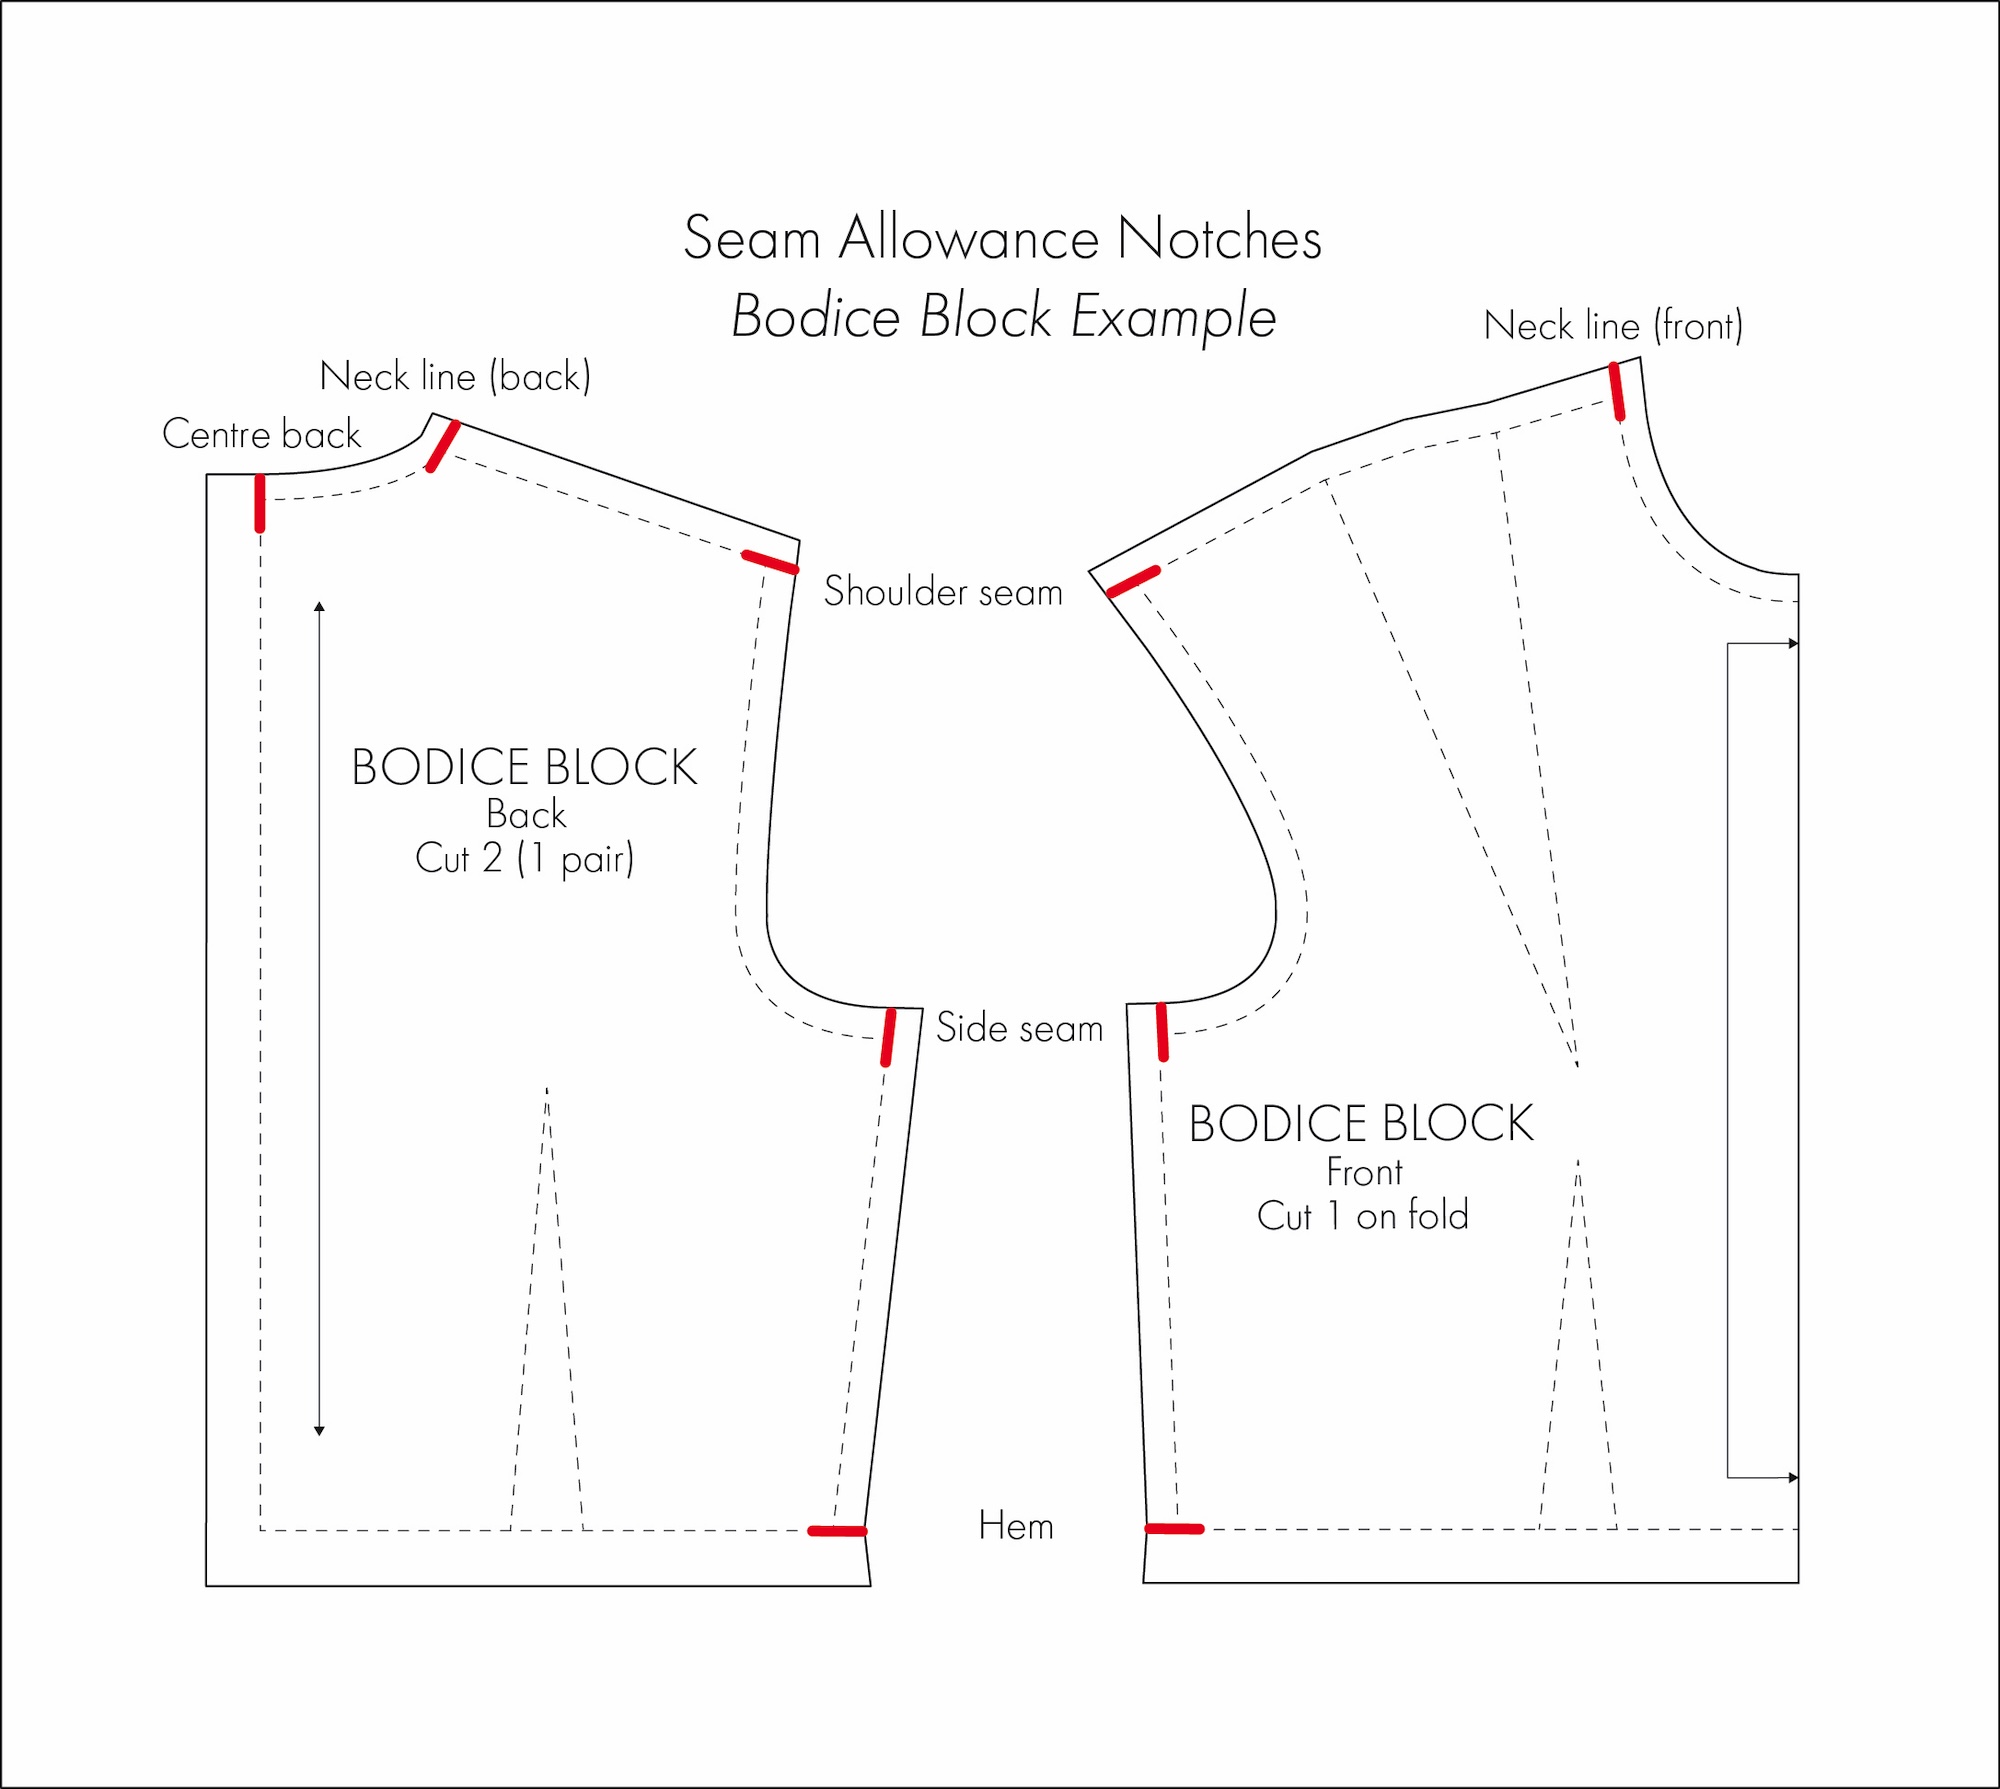
Note: These diagrams are not to scale and I have deliberately exaggerated the notches.
2. Balance points:
Let me start by explaining what I mean by a balance point. When you think about the body, there are certain areas that naturally align along balanced vertical and horizontal lines. For example:
- Horizontal: The bust, waist and hips.
- Vertical: The centre front and back, side seams.
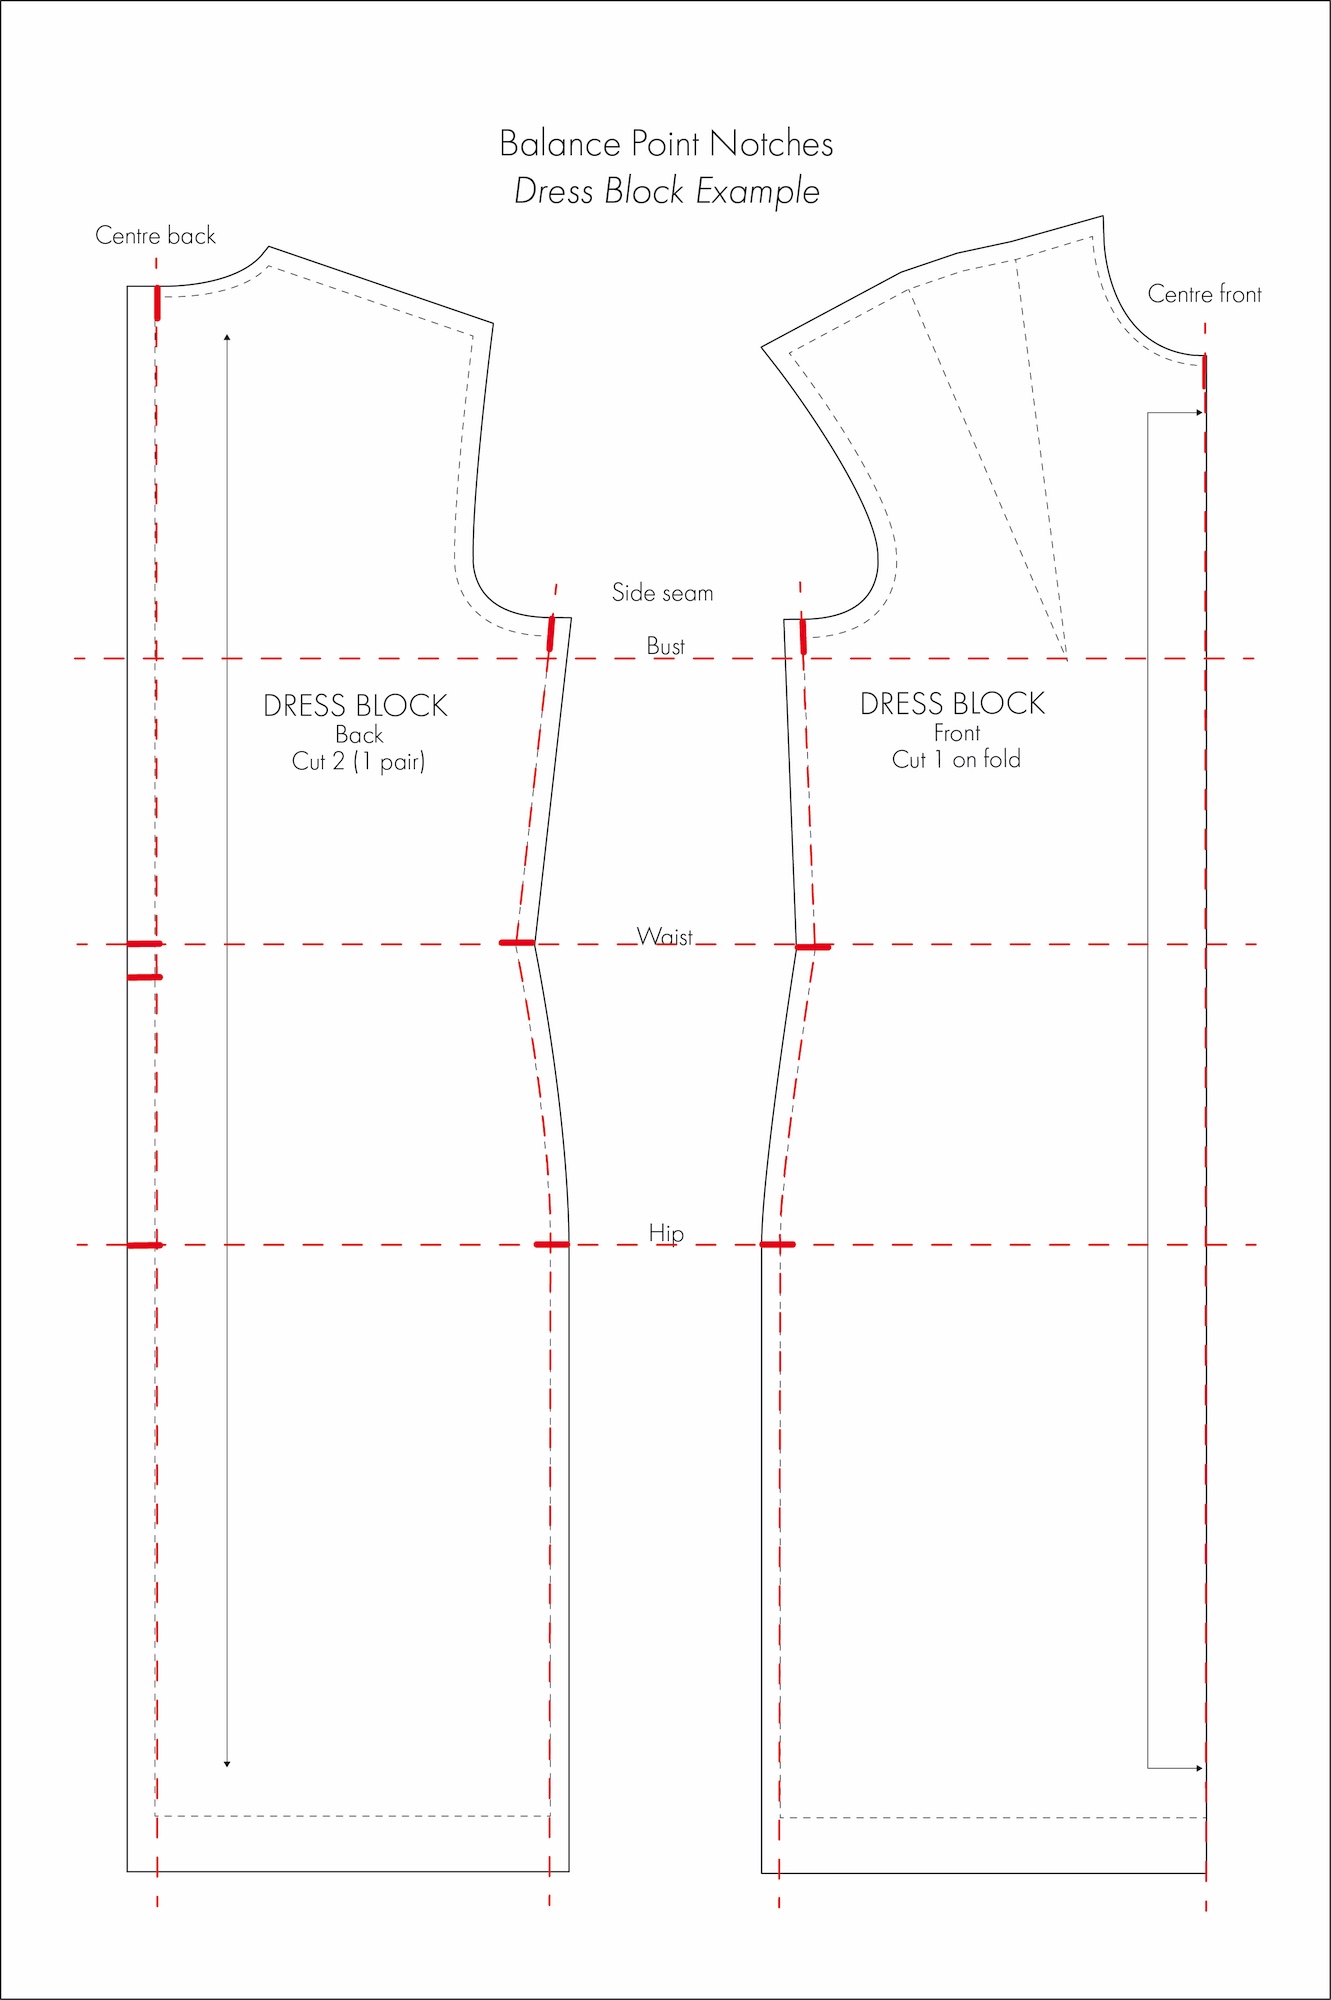
These balance points help a garment fit, hang and drape the way it is intended on the body. I like to keep these balanced lines in mind when choosing where to place a notch.
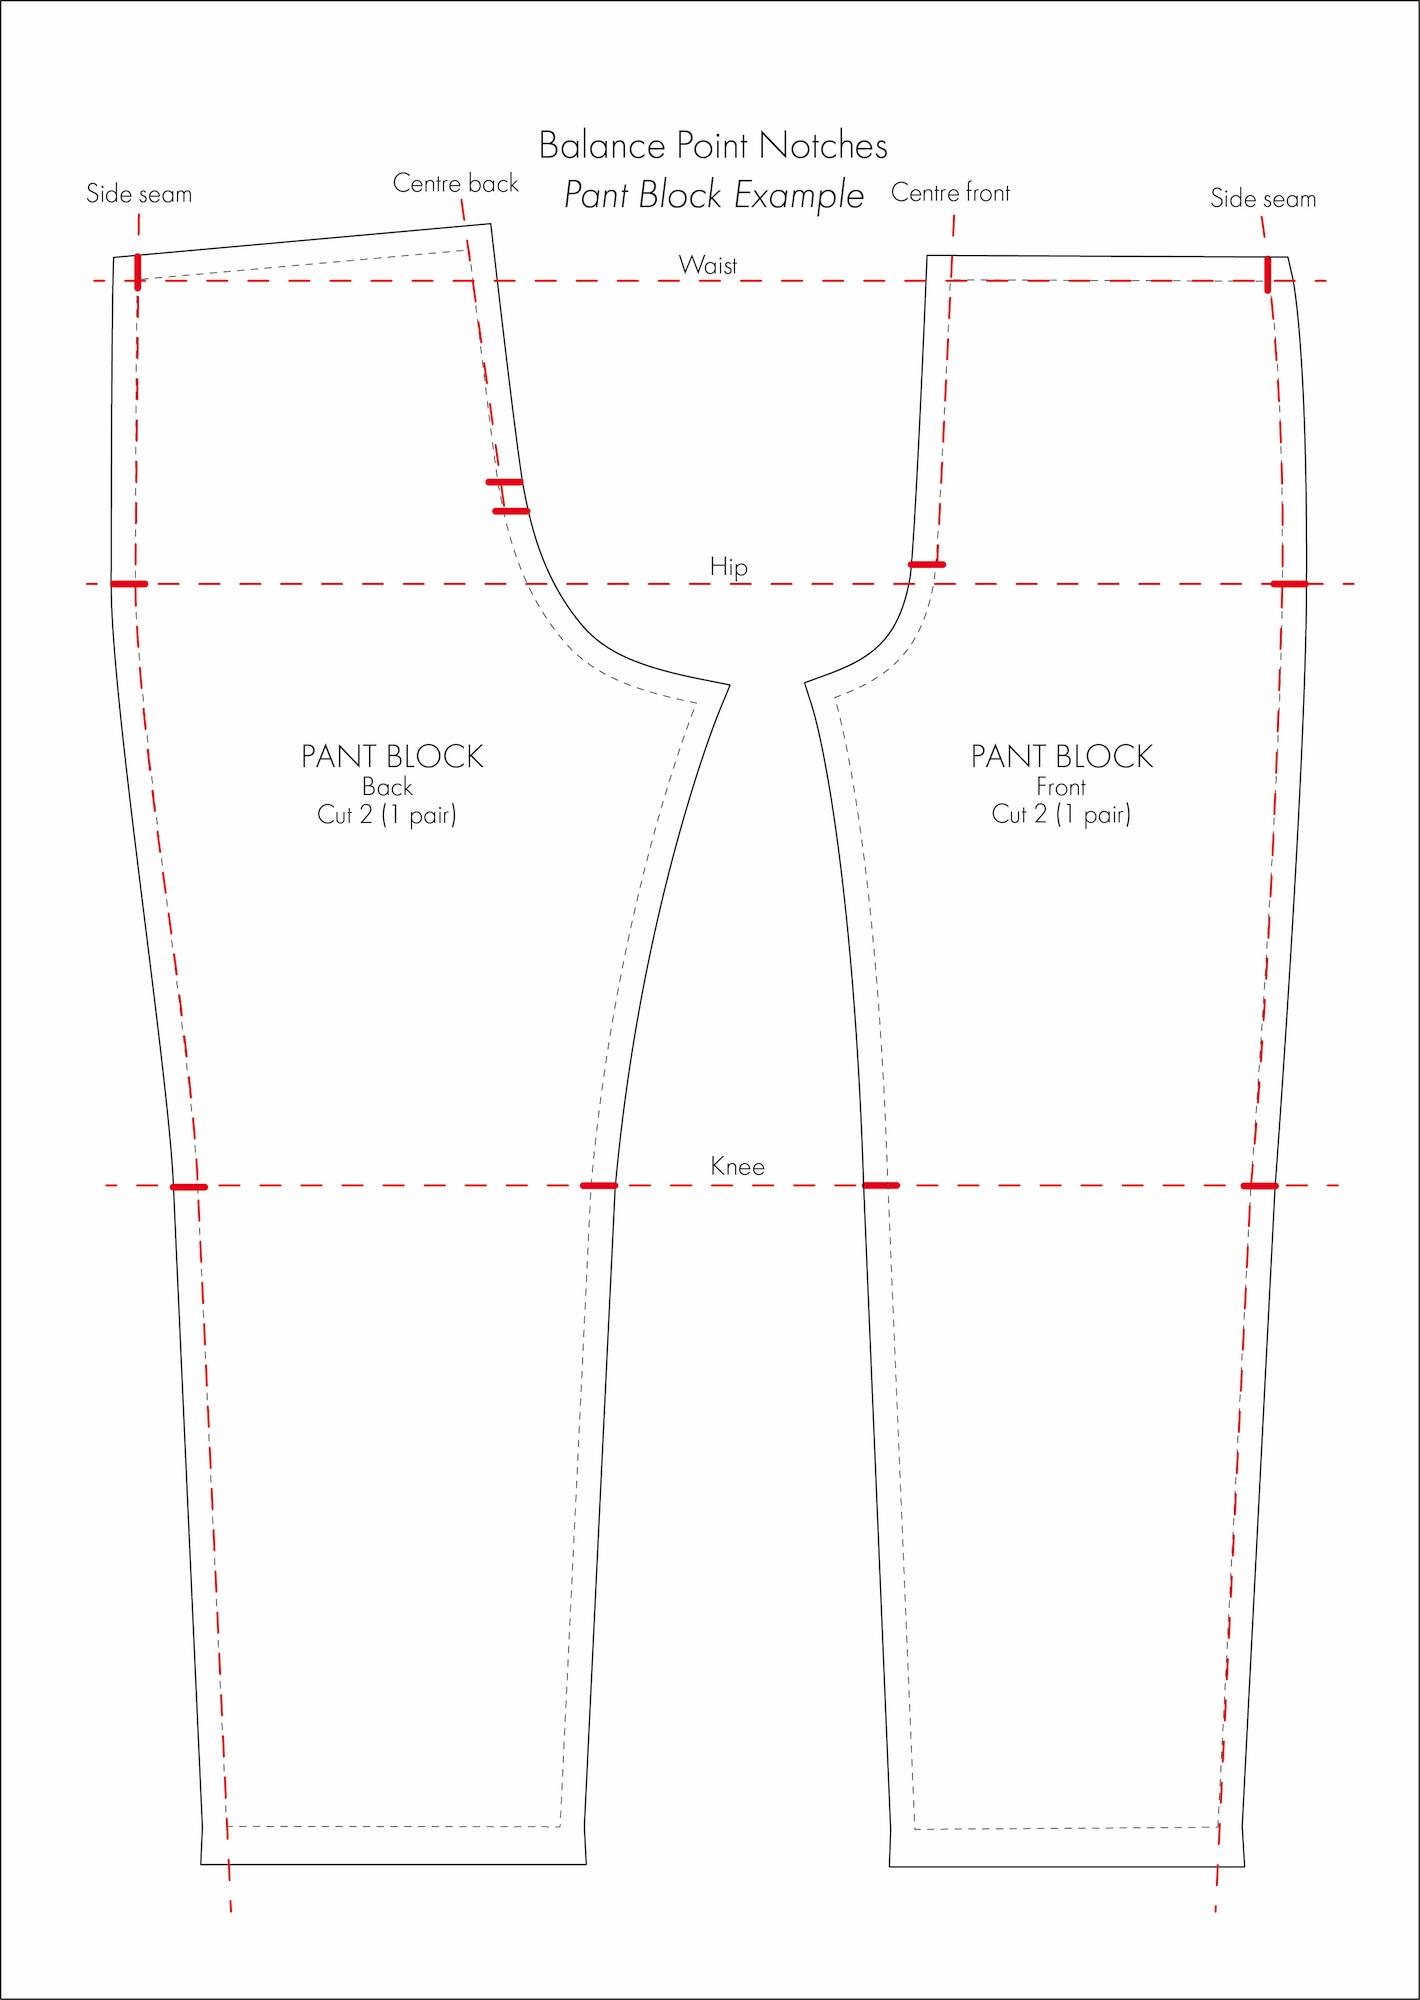
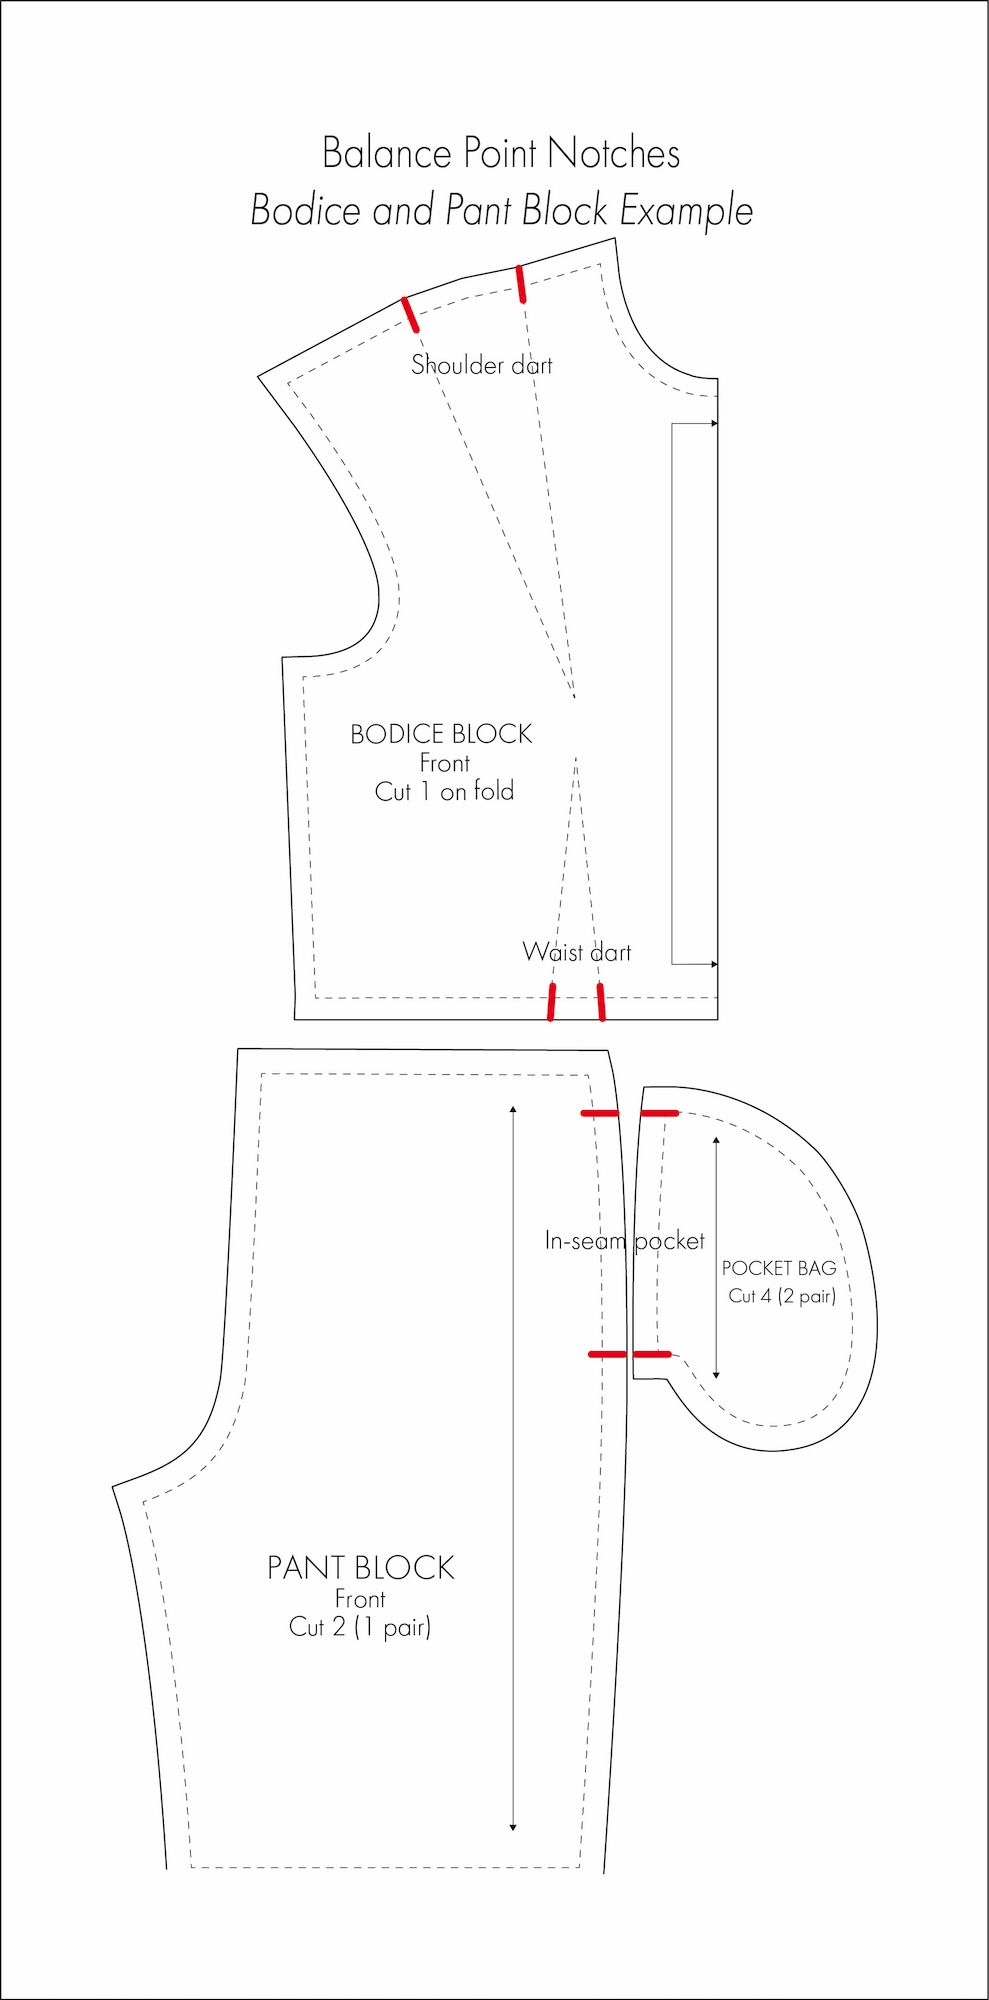
For example, the side seams on a dress or a pair of pants can be quite long. Have you ever sewn the side seam and found you had extra fabric at the end? Adding notches at these key balance points, such as the waist, hip and/or knee, helps ensure that fabric is appropriately spread along the seam, preventing twisting and distorting. It also helps distribute ease correctly.
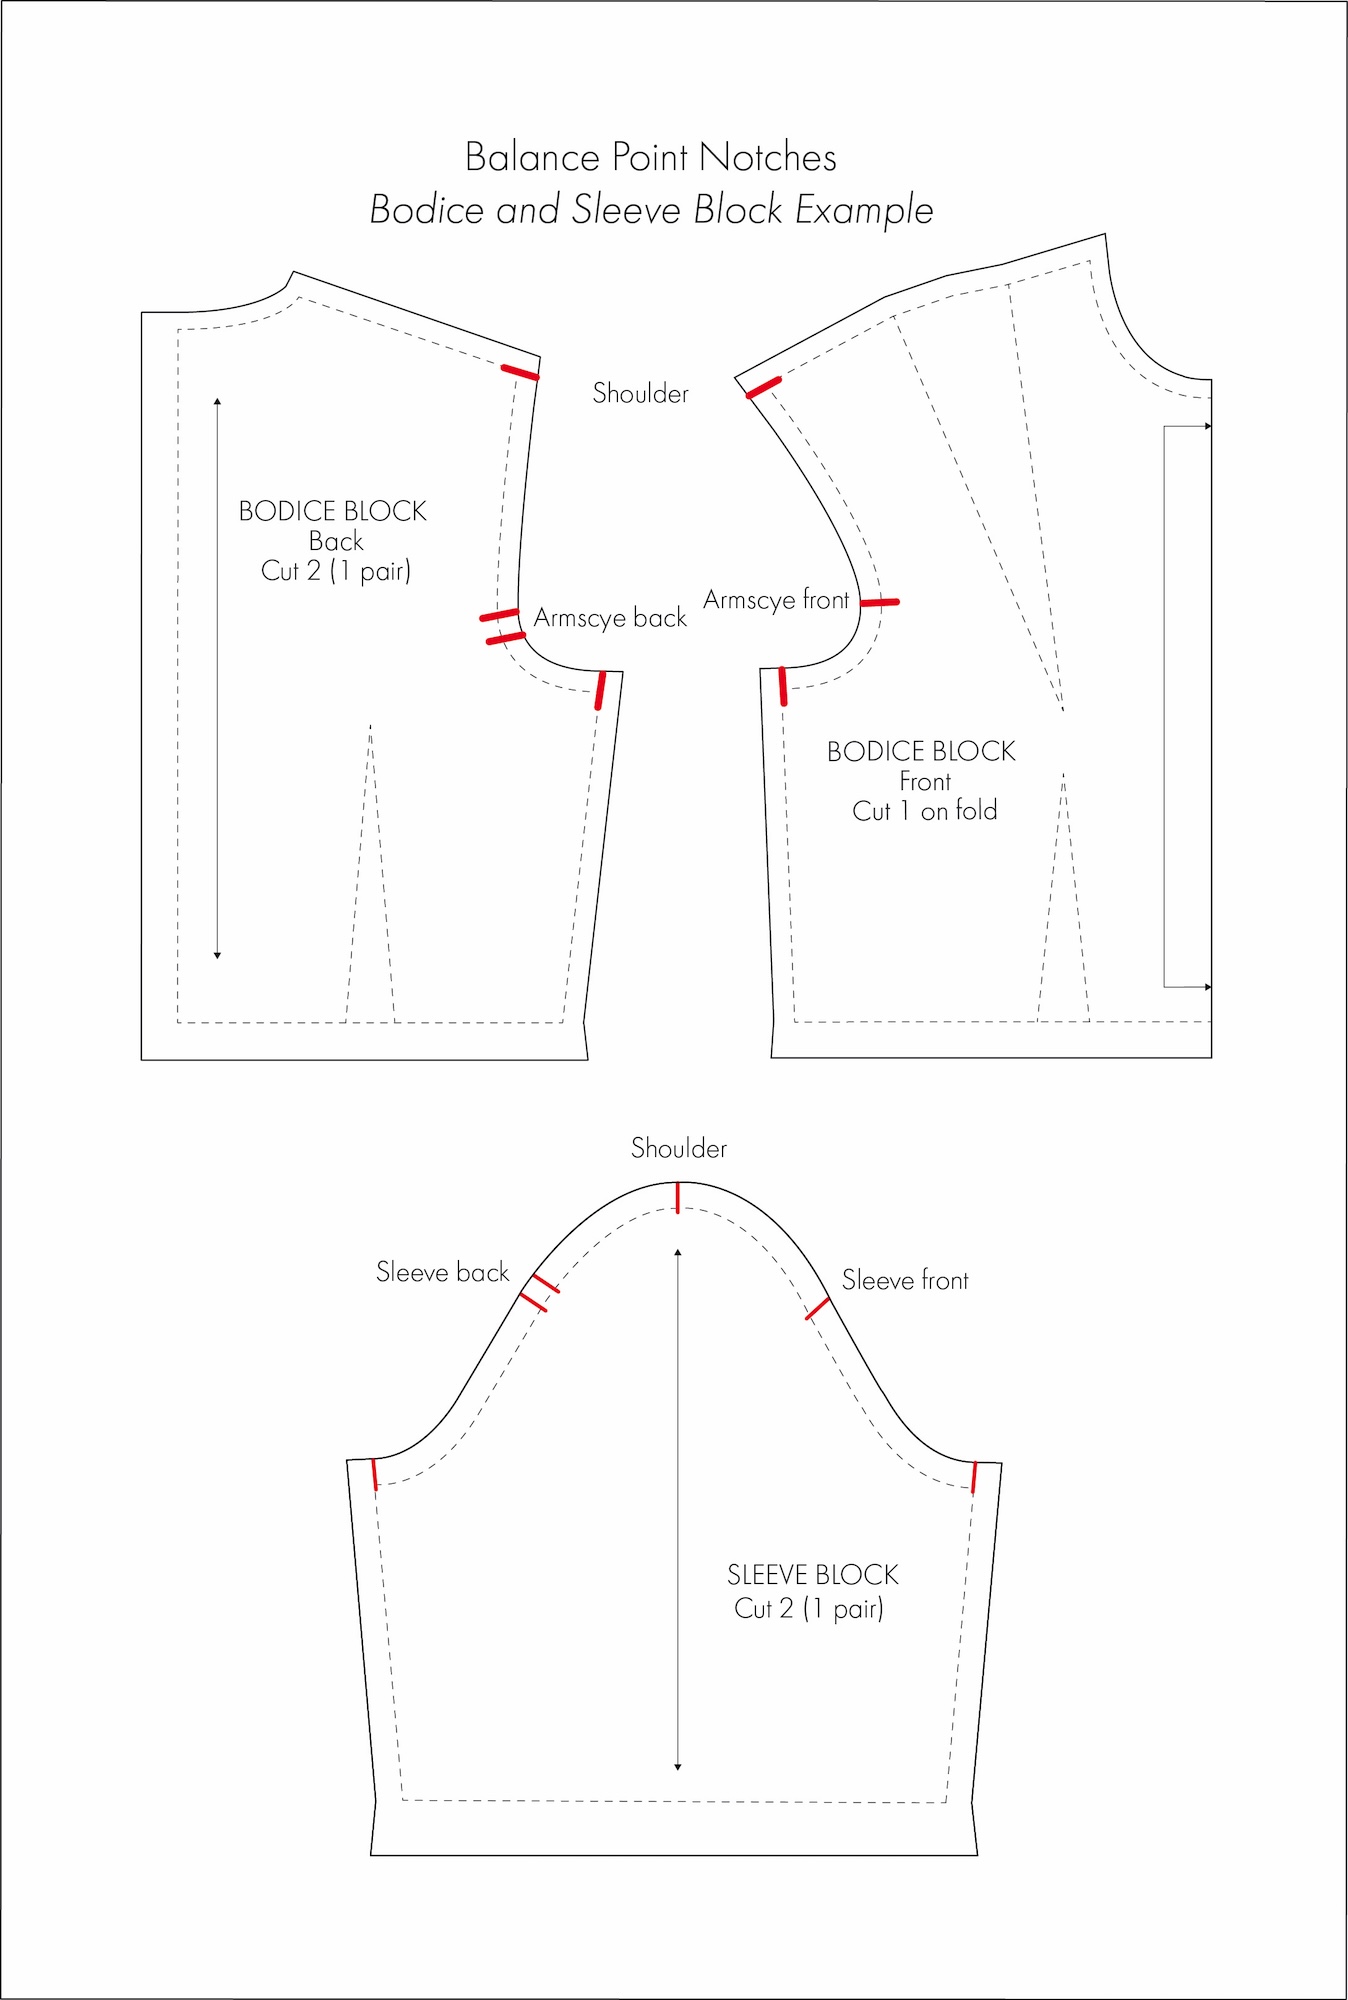
Sleeve heads are a good example. A sleeve head is typically slightly larger than the armscye to allow for ease. However, that ease isn’t distributed evenly around the entire curve (unless it’s say a fully gathered sleeve). Therefore, positioning balance point notches at the front, back, and shoulder of both the sleeve head and the armscye helps control where the ease is placed. This ensures the fullness is where it should be, keeping it balanced.
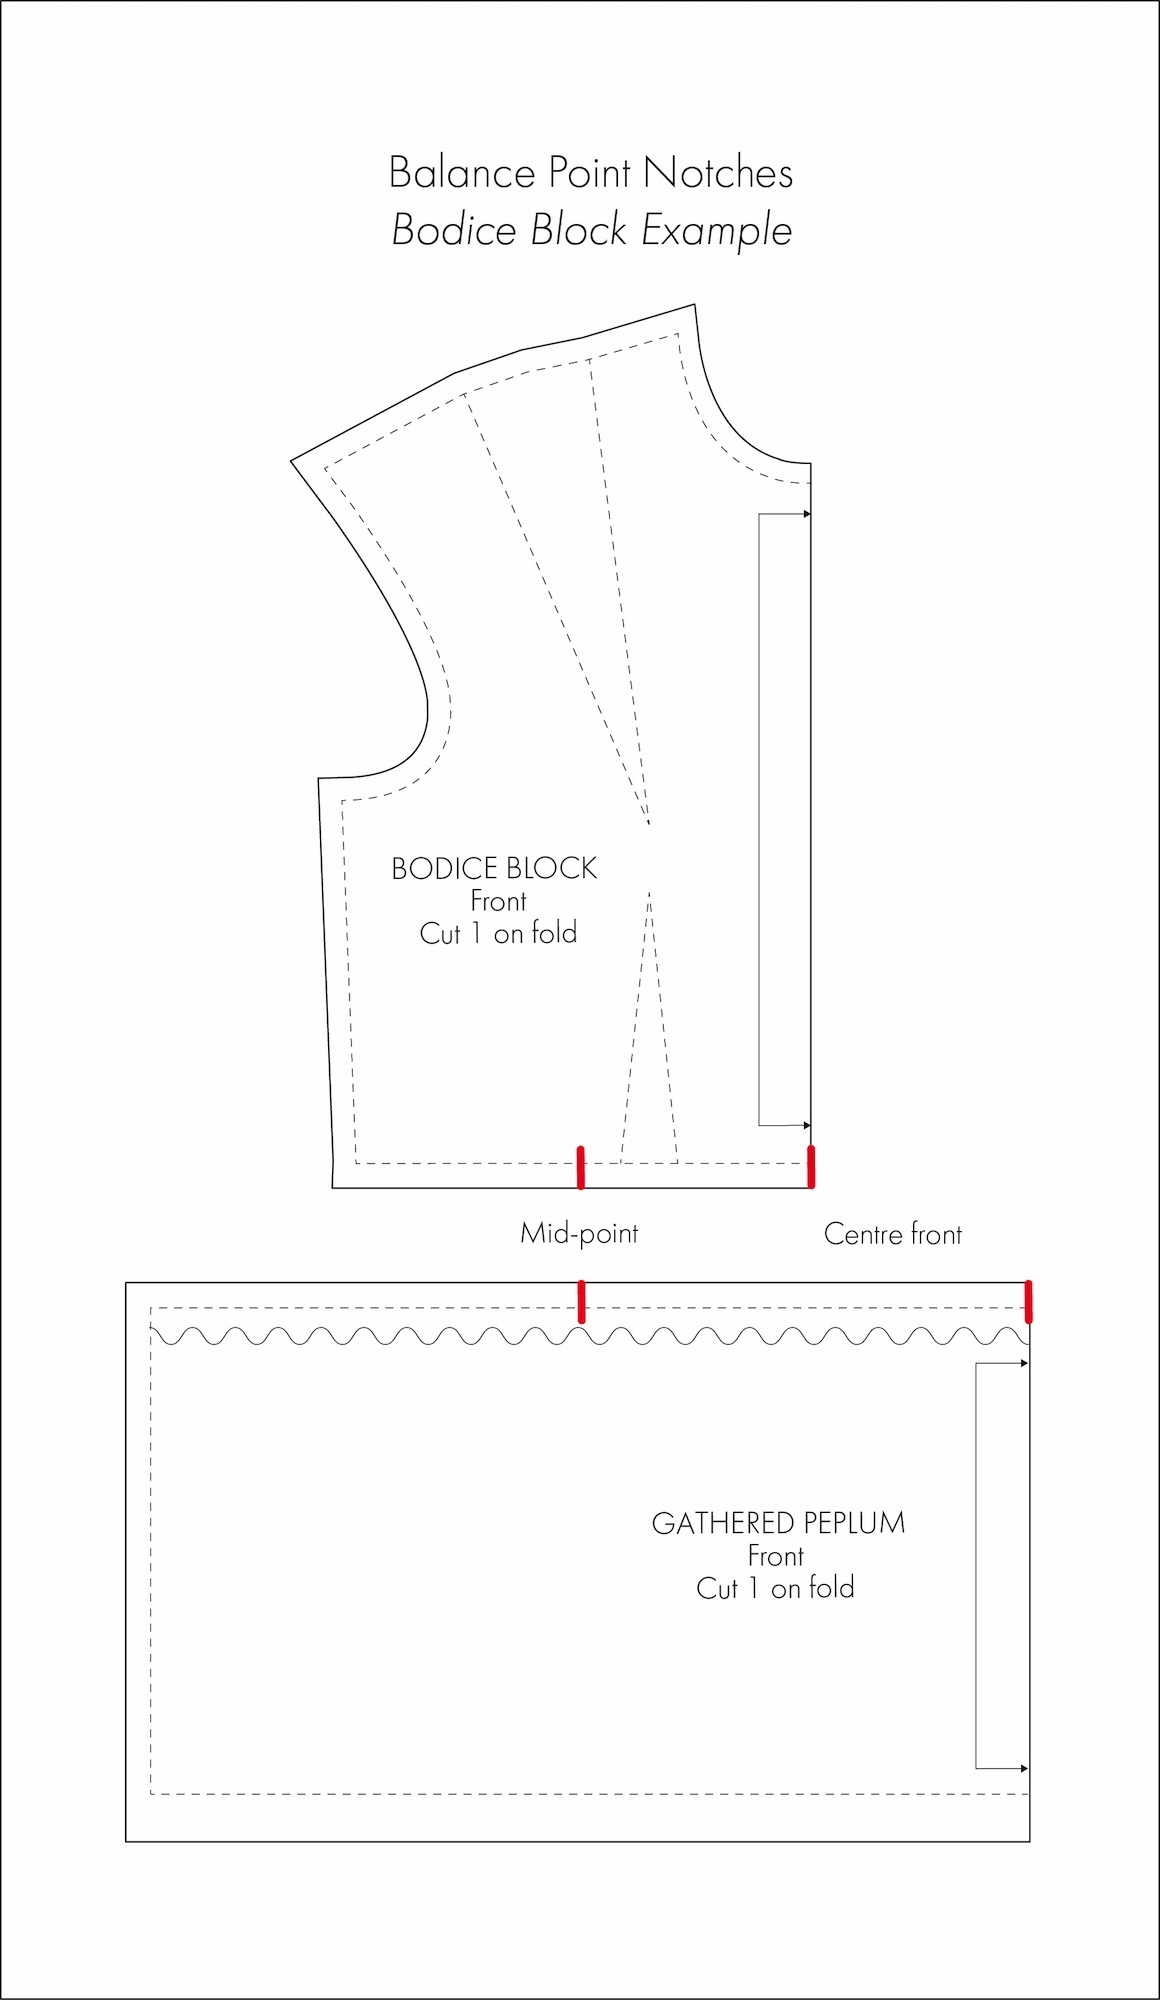
Gathered sections are another good example, and are an area where I often find patterns lack enough notches. Take a peplum attached to the hem of a bodice for example (one of my favourite silhouettes). You want to know where to disperse the gathering to ensure it’s even, and to avoid having too much in some places and not enough in others. By adding notches at the centre front, centre back, and quarter points on both pieces, you create clear distribution markers, ensuring the fullness is applied evenly.
3. Alignment notches
Alignment notches are used for just that, to align two corresponding pattern pieces, ensuring they are sewn together at the correct points. They help seams, design lines, and openings line up, make the sewing process clearer and more intuitive.
The most obvious example I can think of to demonstrate this is the front and back of a garment. A double notch on the back piece and a single notch on the front. This is especially helpful when sewing similar-looking pieces, such as a dress front and back.
Alignment notches are also commonly used to indicate where pieces or details such as pockets, zippers, or keyholes should be placed.
Note: I know that the difference between balance and alignment notches is sometimes unclear, so I like to think of it like this:
- Balance point notches control fit, hang, and ease distribution.
- Alignment notches ensure two specific construction points or pieces meet correctly and accurately.
Tips for when using and adding notches:
- True your pattern first, then position notches. Notches can shift slightly (up, down, sideways) when the pattern is trued. Adjust them as needed, prioritising alignment of seam lines.
- Add notches before grading. You want those little guys to be graded along with the rest of your pattern.
- Transfer notches to all layers. Mark notches on the fabric, interfacing, lining, or any additional layers while the pattern is secured.
- Keep snips small! This is an important one. 2–3mm is sufficient. You don’t want to cut too far into the seam allowance and create weak spots. It’s easy to get carried away or not pay attention and cut too far in. There is not going back after that!
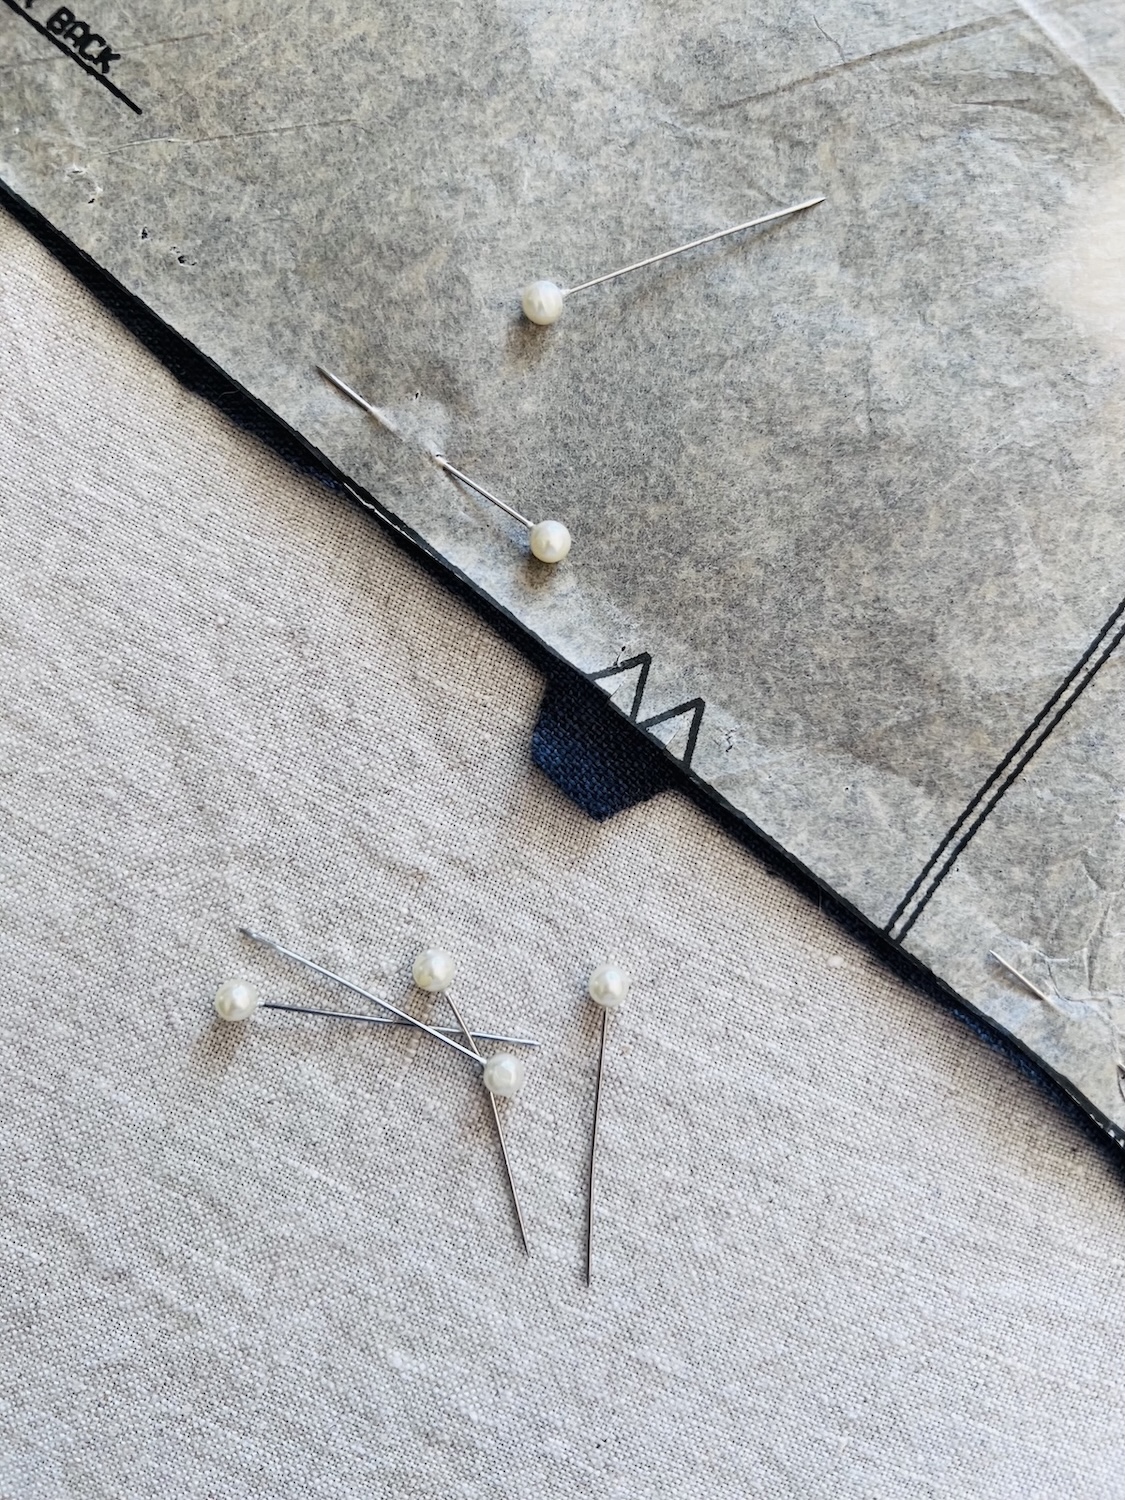
- Account for finishing methods. If overlocking or serging seams before sewing, notches will likely be trimmed away. Therefore, consider:
- Using a marker or stitch to indicate the notch.
- Inserting a pin perpendicular to the seam at the notch location (just keep it clear of the overlocker’s cutter blade).
- Avoid over-notching. Use your judgment and consider the sewing sequence, marking only what’s necessary for assembly.
- Don’t be afraid to add your own. If working with a commercial pattern, look at it and consider the order of construction. Are there enough for your liking to join the pattern pieces together with ease and accurately? An area that I am always finding myself adding notches to is side seams. These are often long and can benefit from an additional notch or two to help with alignment.
Notches play a key role in both pattern making and sewing. Think of them like tabs on a puzzle piece, helping you identify which piece goes with which. They ensure seams are matched accurately. They help control fit and ease, distribute fullness evenly, and make sure the garment hangs as intended. And if you find there aren’t enough, don’t be afraid to add a few extra!
About Author
Emma Cartmel
Heya! I’m Emma, and I'm an Aussie living in beautiful Munich with my husband Ben, and our pug Harley. I am a designer, pattern maker, and sewist, and I share my expertise and experience through my ‘cartem.sewing’ page. You can follow me on Instagram @cartem.sewingLeave a Reply to Emma Cartmel Cancel reply
Related posts

Sewing Essentials: Stitch Width, Stitch Length & Needle Position
Thinking back to my high school textiles days, I remember having to test stitch settings on every fabric we planned to use for our projects. We would cut out little squares of fabric and experiment with different stitch lengths and widths, and edge-finishing techniques. At the time, it felt unnecessary, not to mention tedious….

How to Select and Use Interfacing: A Simple Guide
Iron-on or sew-in, woven or non-woven, lightweight or heavyweight. With so many different types, weaves, and weights to choose from, how do you know which interfacing is best for your project? In this article, I will explain the two main types of interfacing before diving into the differences in weave and weight. Hopefully by the…

Sewing Essentials: A Simple Method for Reversible Seams
There are so many ways to finish a seam, from good old overlocking to French seams and binding. I recently stumbled across another method that’s pretty nifty, and honestly, I kind of wish I had known about it sooner. It is a bit like binding, but topstitched in place so it doesn’t move or flap…

Sewing Essentials: Understanding Different Types of Sewing Elastic
Elastic is a really common notion used in sewing. You’ll find it on everything from waistbands to cuffs and necklines. It plays a crucial role in giving garments both support and shape. Have you ever had the waistband of your pants twist and never sit quite right? Or maybe you’ve noticed the leg opening of…
Sewing Essentials: A Simple Guide to Common Presser Feet
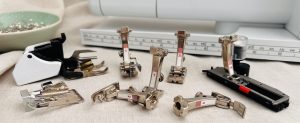
There are so many different presser feet available for sewing machines, each designed with a specific purpose, whether that be creating particular stitches or working with certain fabrics. Even after almost 20 years of sewing, I still haven’t used them all. In this article, my goal is to give you a helpful introduction to what…


SEW THIS LOOK


Latest Posts


9 Comments
Peta Giddey
Christine, Thank you for taking the time to write this article. It now makes me so much more aware of the importance of these small but very useful little marks on my patterns. I have always found it difficullt to cut out the notches and as a result they are not accurate. I will now use the “snip” into the seam allowance to indicate single or double notches. I am sure it will make the construction of my garment much more accurate. Also understanding that balance points are only one notch will make it much easier to align the seams.
Emma Cartmel
Hi Peta ,
Thank you so much for your lovely comment.
I’m so glad you found it helpful, and I hope you find the snip method easy and helpful.
Happy sewing!
Victoria Walker
Excellent reference. I always have issues with notches. Now I MUST find a notch punch!
Emma Cartmel
Hi Victoria,
Thank you! I’m so glad you found this a useful reference.
I hope you find a notcher, as once you use one, you’ll never go back.
Happy pattern making!
Tammy Parkinson
Thank you for this article. You explained this so well. I never knew what the notches were for.
Emma Cartmel
Hi Tammy,
Thank you! I’m so glad you found the article helpful.
Christine Conner
Thank you for this. I do have a question. What is the correct way to match a single notch to a double notch? Do you put the single notch between the two points on the double notch?
Emma Cartmel
Hi Christine,
This is such a great question. Thank you for asking!
I had a quick look back through my patterns and diagrams and couldn’t find any examples of when you might need to do that. Was there a particular scenario you were thinking of?
My understanding is that you wouldn’t normally match a single notch with a double notch.
Using my diagrams from this article as examples:
– The double notch on the sleeve head matches with the double notch on the back armscye.
– The double notches on the back crotch seam are aligned and sewn together.
– The double notch on the centre back seam of the dress would also be sewn together. n this case, the double notch may simply act as an identification mark for the back, a balance notch for the centre back seam, or even indicate where a zipper is intended to end.
I hope that helps clarify things, and please feel free to share more details if you’d like me to look at a specific example.
Christine Conner
Thank you. I hadn’t thought about it quite like that, but it makes sense.