Hitomezashi Sashiko on The Ashton Top: Part ONE
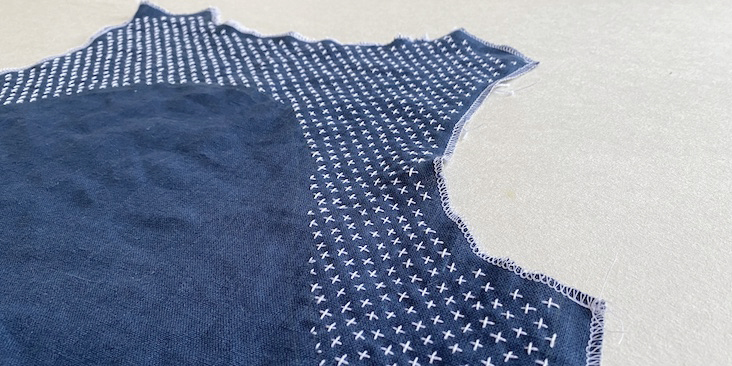
This is a tutorial where I will be sharing how I embellish the Ashton Top (designed by Helen’s Closet Patterns) with Hitomezashi Sashiko. The tutorial is divided into two parts, and in the first instalment, we will be focusing on preparing the grid for Sashiko-stitching on the Ashton Top. After drawing the grid on the fabric pieces, we will explore several Hitomezashi Sashiko stitches in the second instalment.
Sashiko is a mending technique traditionally applied to sewn garments that need repair. It has since evolved into a highly decorative craft. When used mainly for the latter purpose, I find it easier to stitch the embroidery before sewing up the garment, especially when there is a clear idea for embroidery placement and design. It is more straightforward to draw the stitching grid, and sew on a flat piece of fabric rather than to do the same tasks on a garment after it has taken its 3-dimensional form. This tutorial will walk you through some basic principles of applying Sashiko embellishment to fabric before the garment is sewn.
The fabric that we will be using is FS INSIGNIA BLUE Heavyweight Linen, which is perfect for Sashiko stitching. The colour of this shade of blue is reminiscent of the traditional indigo that provides the backdrop for white-coloured stitching. There are many methods for transferring the embroidery grid onto dark-coloured fabric, and I will impart the preferred method that I use with the help of graph paper. This technique can be adapted for any garment that you wish to stitch with Sashiko. It will also enable you to create your own Sashiko templates. But before we dive into the tutorial for gird-transfer, the following are a few words about Hitomezashi Sashiko.
What is Hitomezashi Sashiko?
Sashiko is Japanese folk art embroidery that features intricate designs created by the most basic embroidery stitch – the running stitch. There are 2 broad categories for the geometric embroidery patterns that have been passed down through the generations – Moyozashi and Hitomezashi.
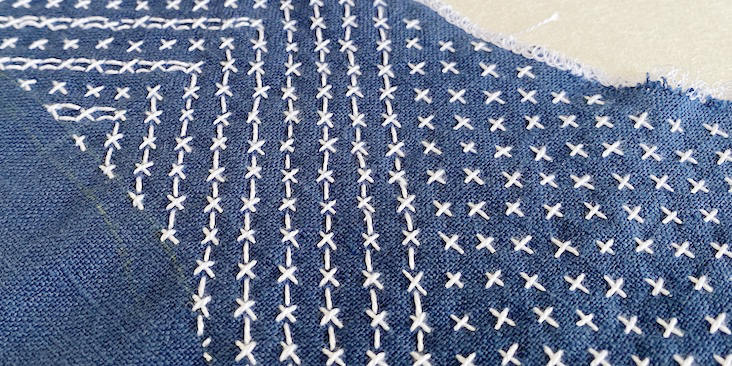
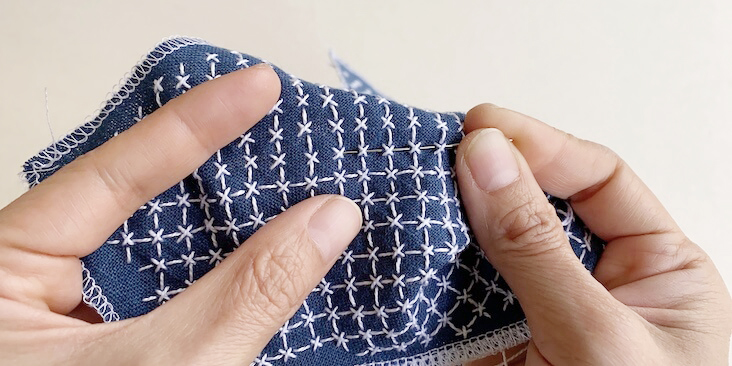
Moyozashi patterns feature curved or straight lines of stitching, and the stitches never meet or cross. On the contrary, Hitomezashi patterns feature predominantly straight lines embroidered mainly on the horizontal, vertical or diagonal planes. The stitches meet and cross, and thread-looping is incorporated in some patterns. Many of these stitching patterns overlap with patterns found in Blackwork embroidery or Indian Kantha embroidery.
Hitomezashi stitching tends to be denser compared to Moyozashi patterns, and for this reason, I find that it’s best that the embroidery is protected with a lining, facing or interfacing. This is why I’ve chosen to work on the Ashton Top for this tutorial because the pattern consists of an all-in-one facing for the neckline and armhole. These are areas in the front and back bodices where I will demonstrate Sashiko on.
For great introductory information about Sashiko, and the Moyozashi stitching technique, you can refer to Rima Khusainova’s article. For more in depth study of Sashiko, I highly recommend The Ultimate Sashiko Sourcebook by Susan Briscoe, which has become my Sashiko “bible”.
The Grid
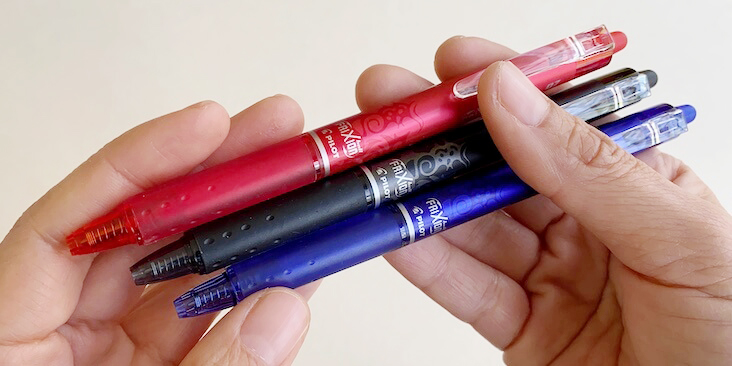
Before we put needle and thread to fabric and start stitching, the preparation of transferring or drawing a grid onto the fabric is an all-important step in Sashiko. There are many ways to do this task, and I will be showing you the preferred method I use for transferring the grid onto dark coloured fabrics. The dimensions of the grid are 0.5cm x 0.5cm. The challenge of drawing these relatively small squares on fabric is to produce fine clear lines with the right tools. On light-coloured fabrics, this can be easily achieved by using Pilot Frixion erasable pens to draw the grid directly on the fabric with the help of a clear plastic ruler.
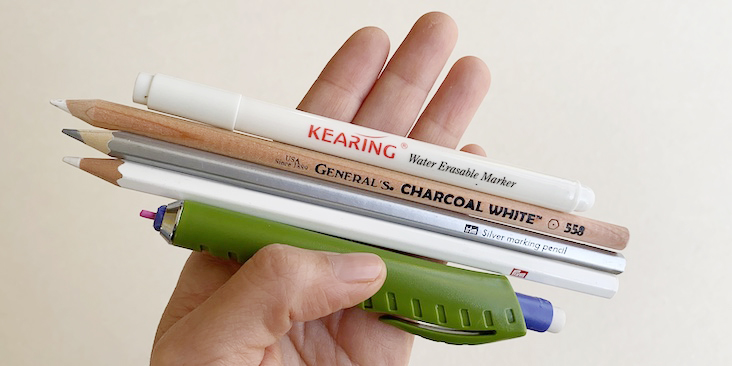
However, this option is not possible for dark coloured fabrics like the traditional indigo because the pen marks will not be visible. An option will be to use chalk markers or white ink makers that can be visible on dark fabric.
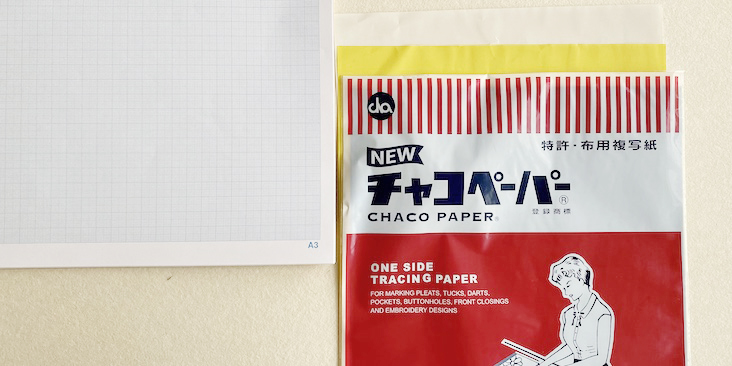
These markers are all good and quick options to draw directly on dark coloured fabric, especially when the stitching area is small. However, I find that when I want to stitch a larger surface, then I like to draw the lines with the help of graph paper and chalk transfer paper for better accuracy and clearer lines. This is especially true when the grid I am using has smaller-sized squares.
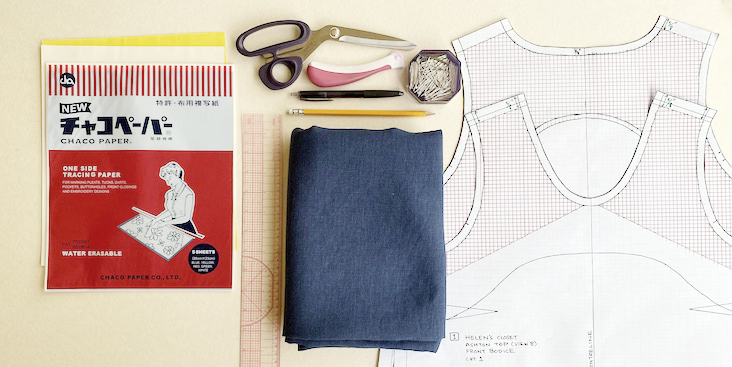
I use Chaco Chalk Paper but any good quality chalk transfer paper is fine to use. Make sure that the marks made from the transfer paper are water-erasable. White and yellow chalk paper show up well on dark coloured fabric, and I keep the white ink marker or chalk pencils on hand to fill in the lines that need more definition. The task of grid-drawing or grid-transferring may feel tedious, but it is necessary preparation for more accurate stitching. The investment of time put into this task will make the stitching more smooth-going as well. I suggest putting on some music or a podcast, take a deep breath and enjoy this process as much as you can. Your patience will be rewarded.
Transferring a grid onto dark-coloured fabric is a 2-step process:
1) tracing out the sewing paper pattern onto graph paper, and
2) transferring the grid on the graph paper pattern onto the fabric.
Step One: Tracing The Paper Pattern of the Ashtop Top onto Graph Paper
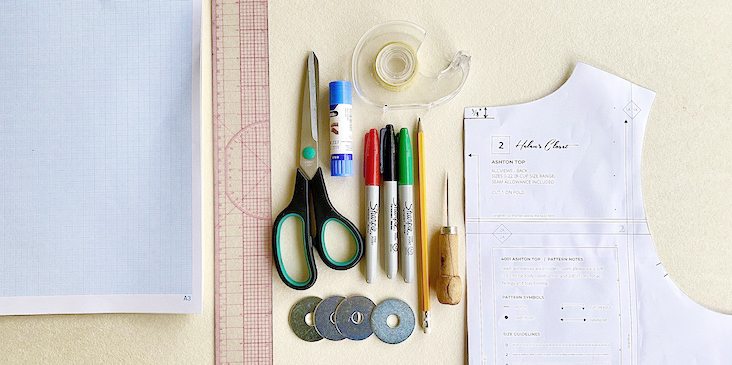
Materials
A3 sized graph paper on a millimetre grid. If you can get your hands on an even larger sized graph paper, the better. But what was available to me at this time is A3-sized.
Clear Plastic Ruler
Paper Scissors
Adhesive Tape or Glue
Sharpie Markers (optional)
Pencil
Awl
Pattern/Paper weights
Ashton Top paper pattern pieces. The front and back bodice pieces are required because they are where the Sashiko will be embroidered. In addition, the front and back all-in-one facing pieces are needed to demarcate the embroidery areas. If adjustments need to be made to the paper patterns for a better fit, make sure that these adjustments are made and transferred to the paper patterns first before executing this first tracing step.
We are essentially making new paper patterns of the Ashton Top using graph paper. The graph paper will then provide a ready grid that can then be transferred onto the fabric.
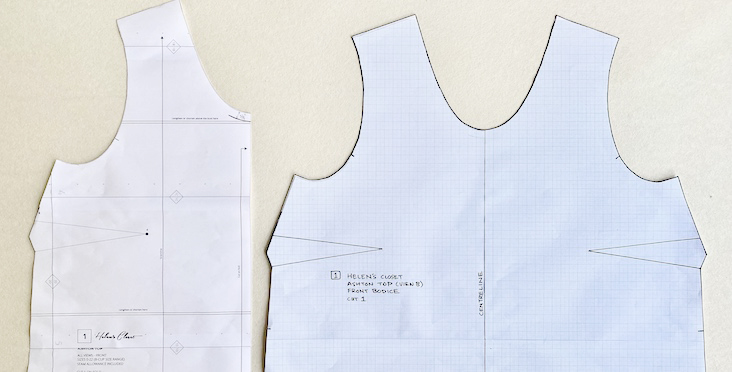
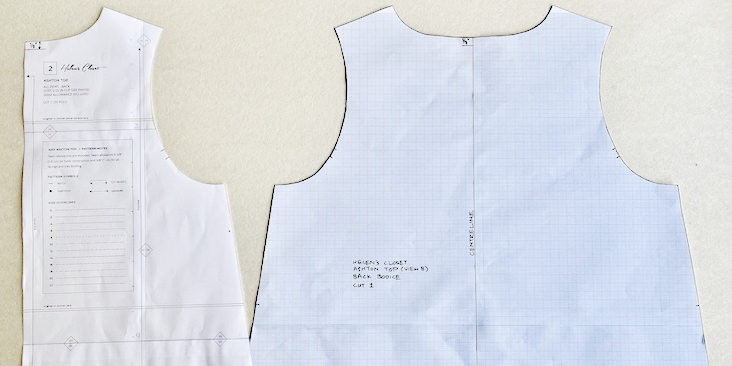
We are making the graph paper pattern pieces in order for the fabric to be cut on a single layer, not on the fold. The 2 following pictures show the original front and back pattern pieces on the left, and the graph paper versions on the right.
How To Guide
- To make these graph paper patterns, first attach pages of the A3-sized graph papers together carefully with tape of glue (I prefer glue), making sure the graph lines are matched up between pages. If you are working with graph paper that is large enough to accommodate the entire pattern piece, then you may skip this step.
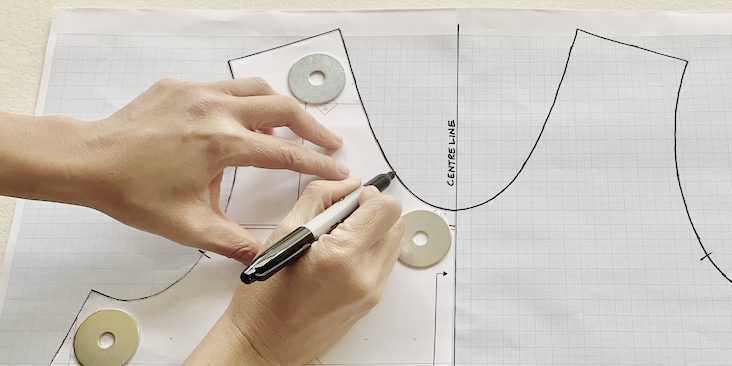
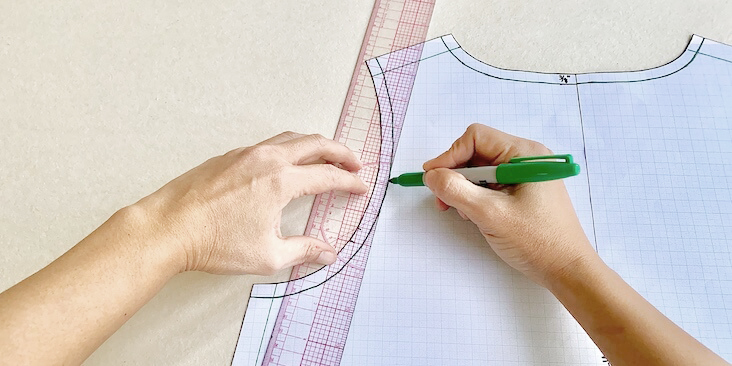
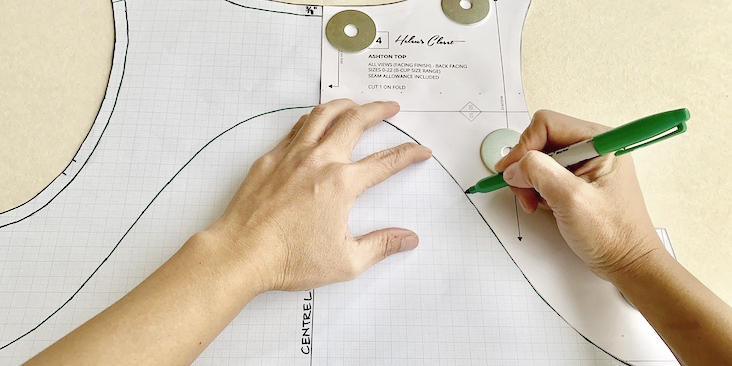
- Centre the fold line of the pattern piece on a vertical line on the graph paper and then trace the out lines of the front and back bodice patterns onto the graph paper. This line is the centre line of the pattern. While tracing, use pattern/paperweights to prevent the papers from shifting. You may use a pencil to trace all the lines and markings, but I am using Sharpie pens so that they show up clearer in the pictures.
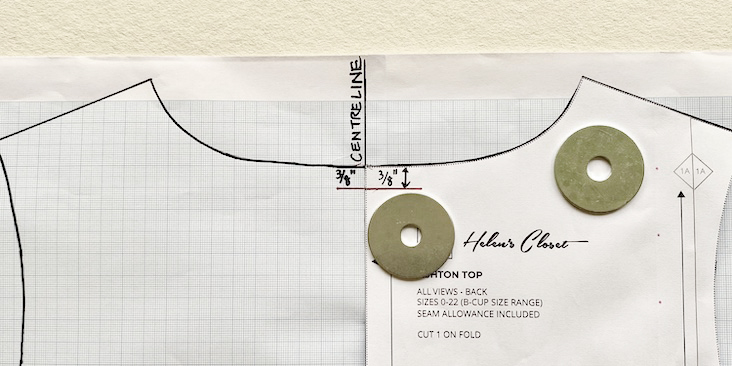
- Tip: Align the neckline’s seam line at centre front/back with a dominant horizontal line on the graph paper. Please see picture below where the horizontal red line indicates how the seam line (3/8” seam allowance) meets a dominant line on the graph paper. Do this for both front and back bodices as this will make it easier to position the Sashiko stitches later.
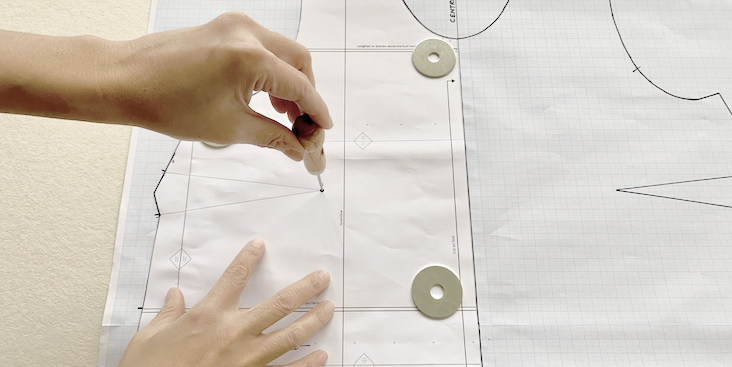
- Transfer all notches and the dart lines. Use an awl to puncture a small hole through the paper layers to get an accurate placement of the dart apex to help draw in the dart lines.
- With a ruler, draw in the seam allowances. Careful reading of the instruction manual of the Ashton Top will reveal that the seam allowance for body construction is 5/8 inch, the facing seam allowances are 3/8 inch, and the bottom edge of the facings are 1/4 inch for the serged edge or a narrow fold-under seam. I’ve highlighted these lines with a green Sharpie so that they show up clearer in the pictures.
- Line up the all-in-one front bodice facing on top of the traced out front bodice on the graph paper and trace out the bottom edge of the facing. This demarcates the embroidery areas. Do the same for the back bodice.
- For the front bodice piece, I draw in a sloping line (starting approximately 1.5cm from the centre front line) extending from the neckline to the side seam.

For the front bodice, draw in a sloping line which will become the bottom boundary for Sashiko embroidery
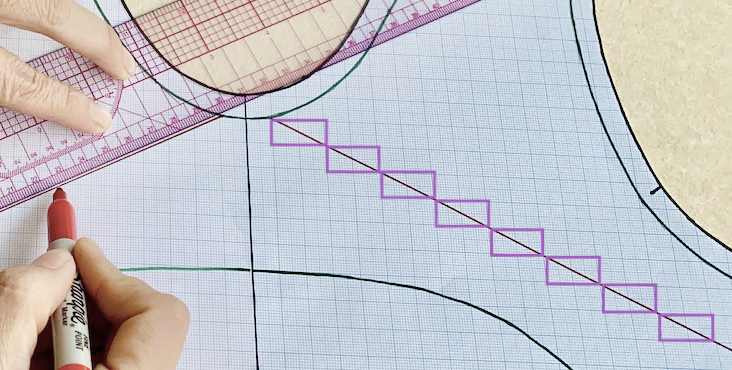
The section above this line is where the Sashiko will be embroidered. I make sure that the line is within the facing lines and above the dart lines of the front bodice. Tip: When I draw diagonal lines to demarcate areas for Sashiko stitching, I do my best to draw a line that will facilitate the stitching later on. For example, instead of drawing a haphazard diagonal line, the red diagonal line that you see in the picture below cuts across a grid of 1cmX2cm as shown by the purple rectangles. This really helps with regulating the pattern of stitch placement at the diagonal line. The stitches will look more ordered with a repeated pattern.
- For the back bodice, I am simply following the lines of the facing. Then I draw in the 1/4” seam allowance at the bottom of the facing line.
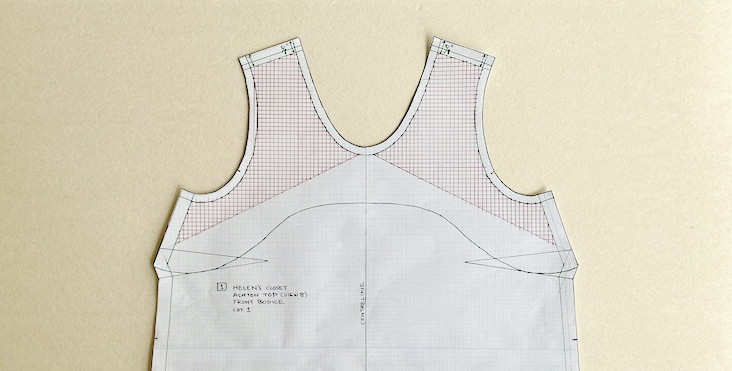
Congratulations! You have now made new graph paper pattern pieces of the front and back bodices of Ashton top with a basic Sashiko grid on it. In the pictures below, I highlighted the grid lines with a red Sharpie so that you can see clearly where the embroidery areas are:
Let’s move on to Step Two.
Step Two: Transferring Grid Lines Onto The Fabric
Materials
1-2 yards of FS INSIGNIA BLUE Heavyweight Softened 100% Linen
The newly made graph paper pattern pieces of the front and back bodices.
Pins
Fabric Scissors
Pencil or Pen
Tracing Wheel
Clear Plastic Ruler
Dressmaker’s chalk transfer paper – white works best for dark-coloured fabrics. Not all transfer papers are made equal. I suggest testing transfer markings onto the fabric to make sure that the colour and the quality of the markings work for an extended period of stitching.
Masking Tape
How To Guide
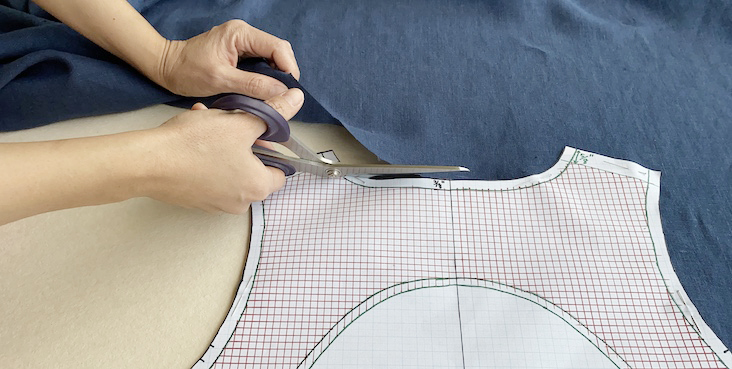
- Pin the graph paper pattern pieces of the front and back bodices onto the the linen and cut out the fabric pieces.
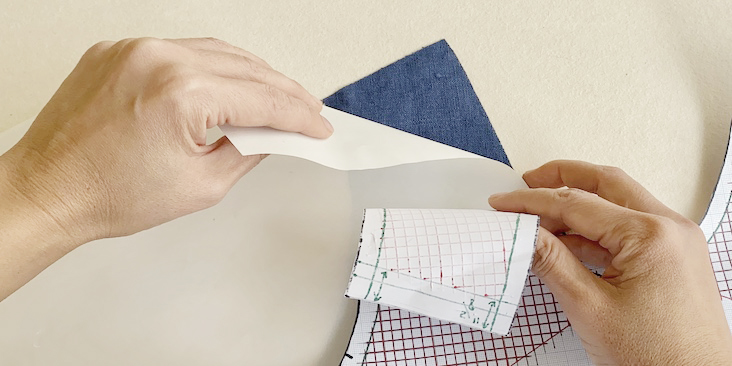
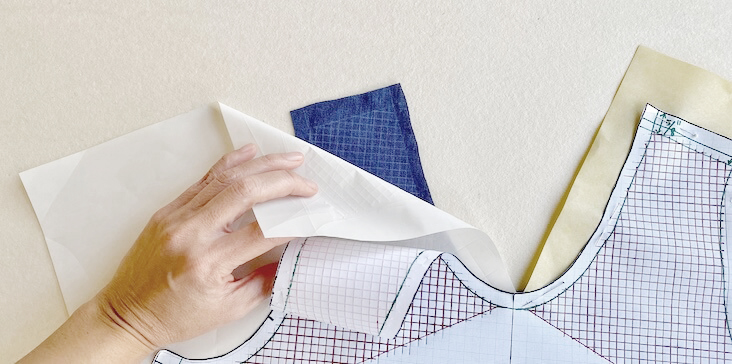
- First transfer the lines for the seam allowances and dart lines onto the right and wrong sides of the bodices. This demarcation on both sides of the fabric helps with stitching and sewing the bodice later on. To do this, position 2 layers of the chalk transfer paper in contact with the right and wrong sides of the fabric. One layer will be between the graph paper and fabric; the other will be on the other side of the fabric. Using a tracing wheel, go over all the lines for seam allowances and darts.
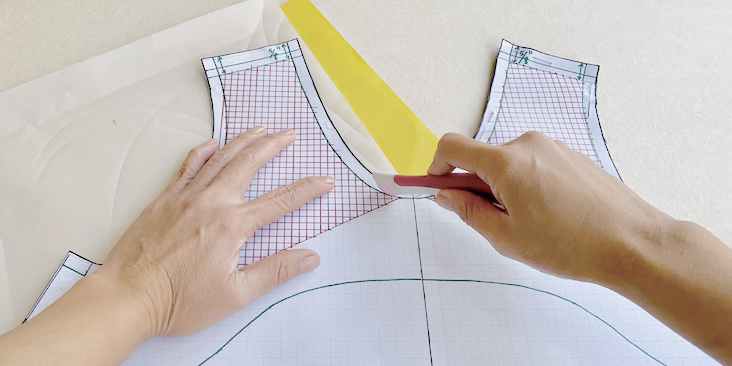
Tracing out the lines of the seam allowances on the right and wrong sides of the fabric with chalk transfer paper
After this step, remove transfer paper that is in contact with the wrong side of the fabric.
- To transfer the grid lines, position a piece of transfer paper large enough, or use multiple transfer sheets to cover the whole area you are working on.
- Position this transfer paper, chalk side facing the right side of the fabric.
Once you start tracing the grid, you want to make sure that there is as little shifting of the fabric as possible as this may distort the grid. I pin all three layers together – fabric, transfer paper and graph paper.
-
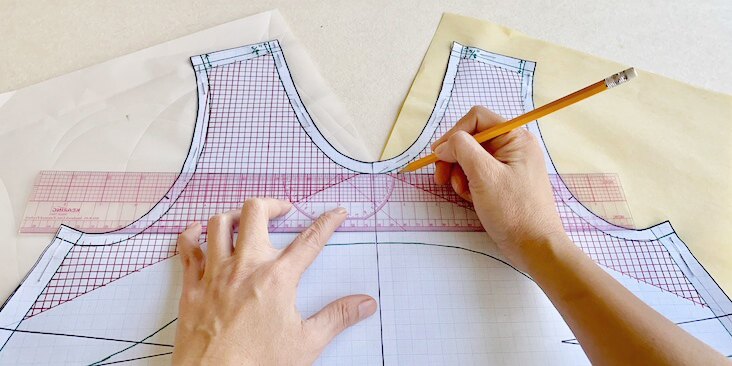
Pin all layers together to prevent shifting when transferring the chalk lines onto the fabric. Use firm pressure to go over the grid lines with a pencil or ball-point pen.
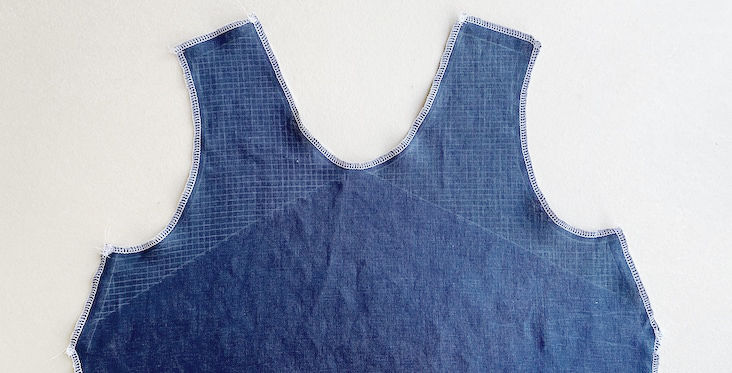
With a pencil, go over the grid lines to create a 0.5cm square grid. Use firm pressure to transfer the grid onto the fabric. A clear plastic ruler comes in handy to keep the lines straight. Take your time with this.
- Very carefully, remove the the graph paper from the fabric and prepare the fabric pieces for stitching.
- If you have a serger, serge all the edges to prevent fraying. I find that the serging also doubles up as stay-stitching to prevent stretching around the curved edges. If you don’t have a serger, you can sew in a stay-stitching line within the seam allowances, then add a zig-zag stitch all around the raw edges.
Take note that the markings from the chalk can be removed with too much handling. I suggest being very careful with the fabric pieces once the grid has been transferred. Work on a clean dry surface with clean, dry hands. Once the grid has been transferred onto the fabric, avoid touching the chalked grid as little as possible to prevent the grid marks from being rubbed off with over-handling. Do not iron the fabric pieces at this point in time. In addition, I start stitching soon after the grid has been transferred onto the fabric as the the chalk markings may disappear over time as well. Once the first set of running stitches are stitched in, it becomes the guide for other layers of stitching. Then it becomes less crucial to preserve the chalk grid markings.
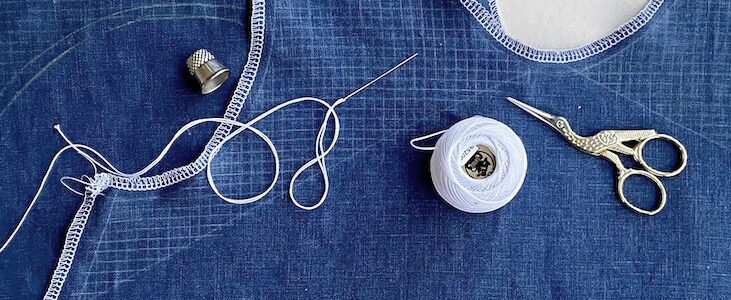
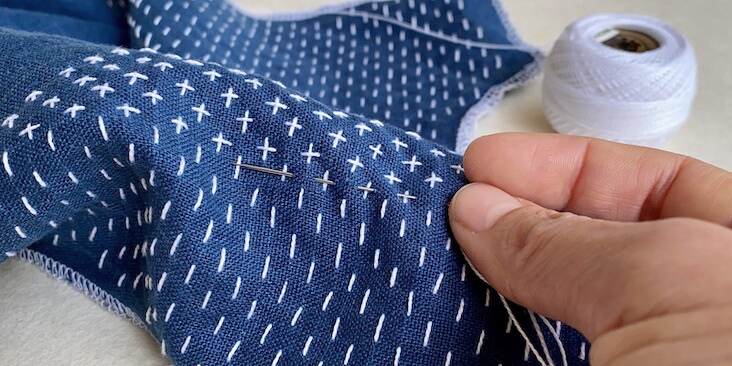
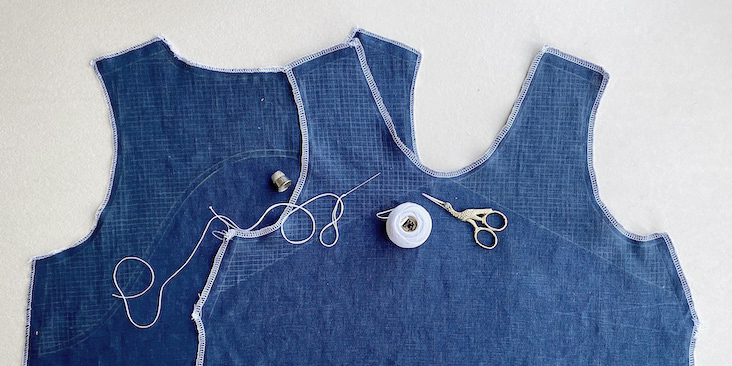
Now that the grid has been transferred on the fabric pieces, we are now ready to stitch Sashiko on them. Next week we will show you the 2nd instalment of this tutorial. You must be itching to stitch by now. So let’s get started!







5 Comments
Janette Haruguchi
Wow! What a beautiful tutorial! Easy to follow and understand.
Diane Stanley
Fabulous tutorial! I have been fascinated by these techniques for quite some time but lack the confidence to move away from the kits. After reading your account of fearing failure, there is nothing lost in just Giving it a go. Thank you
Geri In Stitches
Hi Diane, Thank you so so much for reaching out to me with your lovely message. I’m so happy to hear that the tutorial is helping you take the leap to apply Sashiko onto garments, and move beyond the kits. Thanks for reading the tutorial and for visiting Geri In Stitches! You’ve made my day. Failure can be a great teacher, and Sashiko rocks!!! Happy stitching!
Jill Ben-Dor
What a great, detailed tutorial! Geri’s work is really inspiring me to give it a try….thanks!
Geri In Stitches
Thank you so much for your kind words, Jill. I am happy to hear that you’ll be giving it a try!