Tailored Reversible Face Mask Pattern and Tutorial
I know what you are thinking…do we really need another mask tutorial? The short answer is no. But for those facing similar struggles as I have with the fit of most masks, I am here to share a possible solution. At the start of this pandemic, I found the available mask patterns out there leaving me with foggy glasses, painful ears and gaping around the chin. This led to a lack of confidence for my health each time I left my home, so I created this pattern to help solve these issues.
While the number of cases have dropped since the start of the pandemic the CDC still recommends everyone wear a mask in public. In the absence of a medical grade mask, a cloth face covering can help slow and prevent the spread of Covid-19. As many restaurants and business begin to reopen, it is imperative we all continue to be safe and wear a mask.
To be forewarned, this is not the simplest of mask patterns, but rest assured it is worth the extra bit of time and care. I love when even the simplest designs have nice details, so I’ve included a few in this mask. As this pattern is more fitted, it lends itself a more tailored aesthetic; think a crisp dress shirt, but for your face! It uses no elastic making it is safe to throw in the wash at high heat. Because of the nature of linen, the mask is quite breathable and the fabric softens with each wash, becoming even more comfortable over time.
If you are a more intermediate sewer and looking for a small challenge to improve your sewing skills, please follow along with the tutorial below. For those looking for a simpler mask pattern to wear over a N95 mask see this post for your reference.
Materials
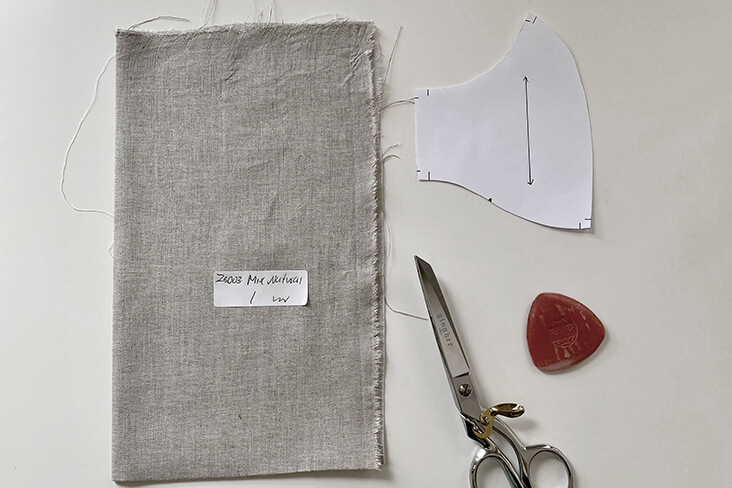
Tightly woven 100% cotton or linen fabric (I used IL020 NATURAL 100% Linen)
Thread
Sewing Machine (with button foot)
Scissors
Iron
Chalk
Pins
Wire (I used thin florist wire I had on hand, but any malleable wire should work)
Wire Cutters
Bobby pin
¼” bias binding
Pattern
Download the multisized PDF Pattern HERE.
Tips + Tricks
Printing: As with all digital patterns, make sure to unclick “fit to page” box when printing. After printing, be sure to measure your pattern piece to ensure it matches the dimensions shown.
Preparation: Prewash your fabric and tumble dry until it is still slightly moist
Pinning: Pin horizontally against the fabric to make removing quick and easy while sewing.
Sewing: After pressing, sew in the direction you want seams to lay in order to reduce bulk.
Pressing: I prefer to press each seam as I sew, which helps to create a nice clean finished quality to your mask.
Steps
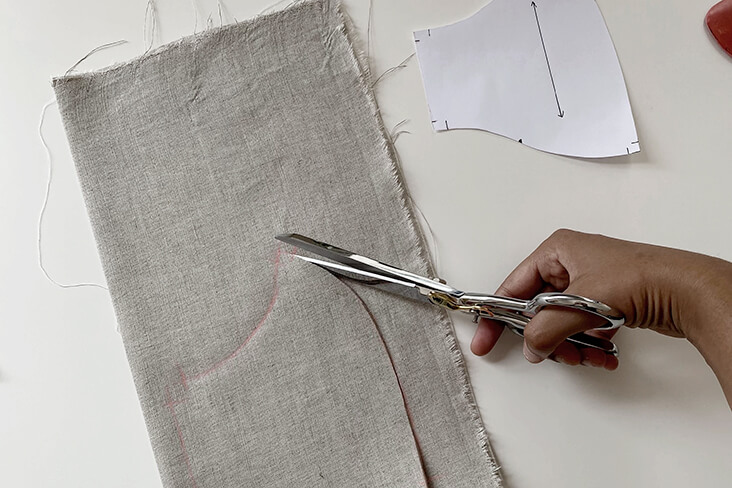
1. Start by tracing the pattern following the direction of the grainline indicated on the pattern & cutting out.
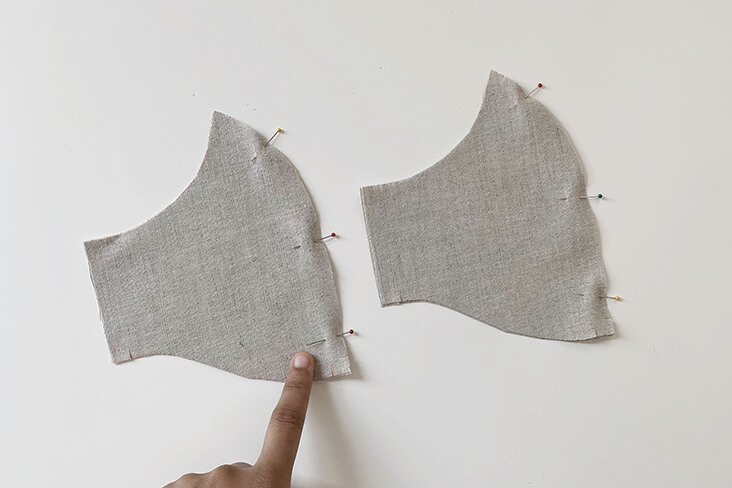
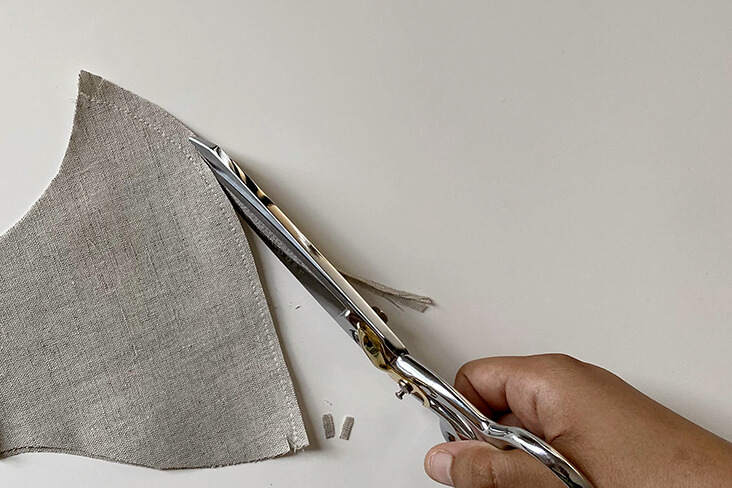
2. Pin right sides together along the nose line and stitch at 1/4″ seam allowance. Afterwards trim down seam allowance.
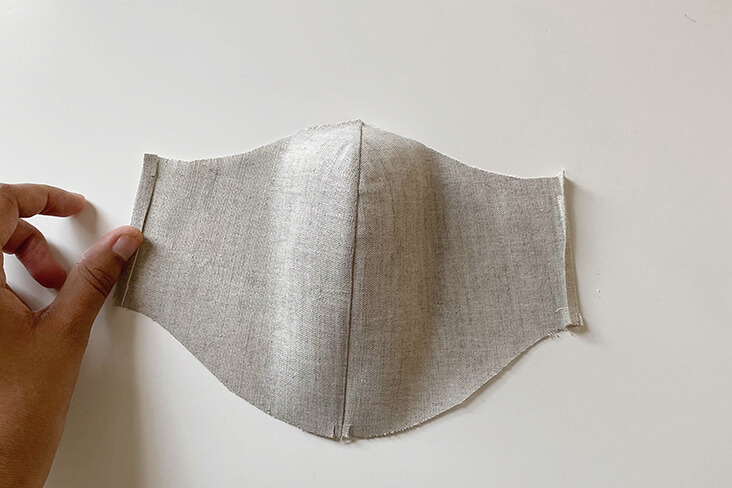
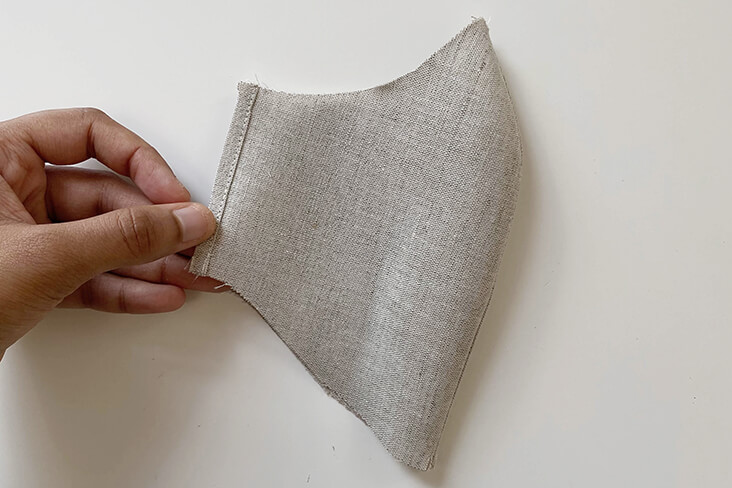
3. Press side seams (towards the outside of the fabric) in 1/4″, then foldover another 1/4″ and stitch down by topstitching along edge.
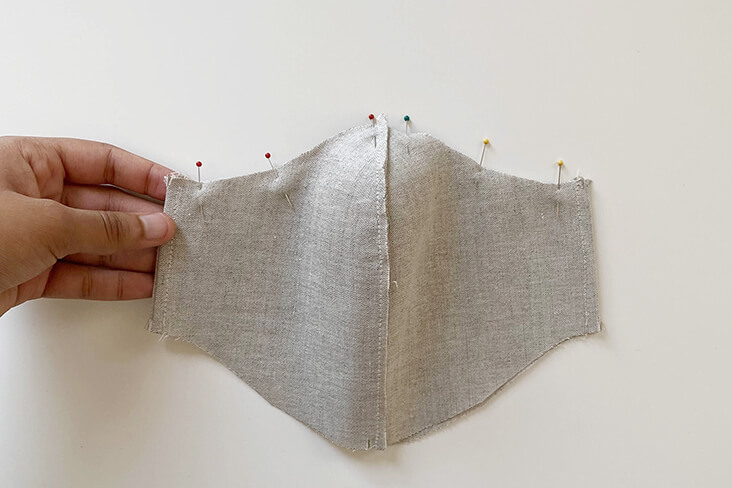
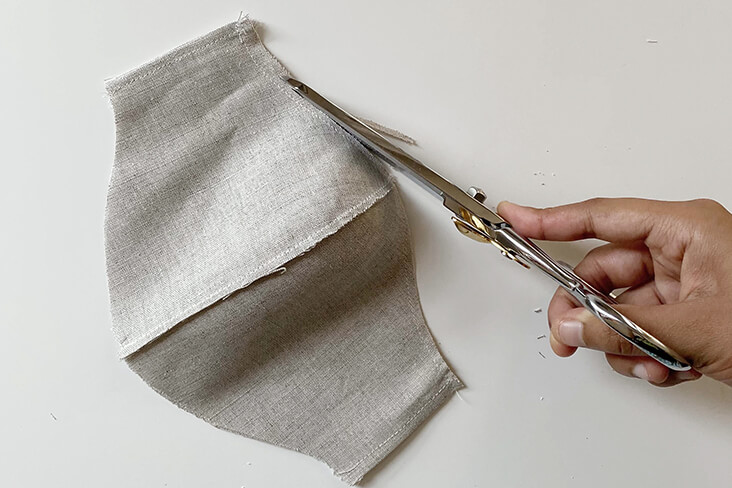
4. Take both mask pieces and pin with right sides together along the top edge. Sew 1/4″ seam allowance, then trim down.
5. Pin along bottom edge and sew 1/4″ seam allowance, then trim down.
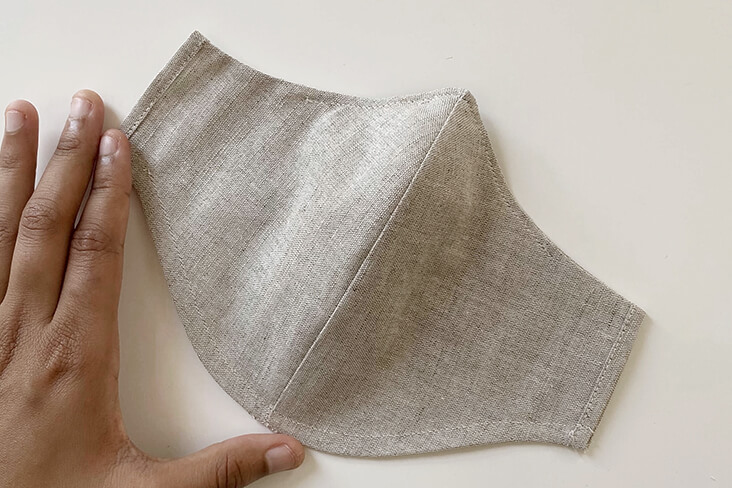
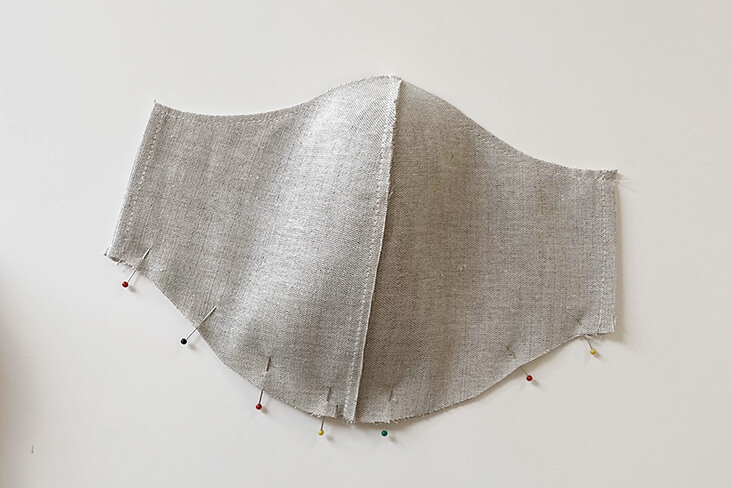 6. Turn mask inside out. Press all seams flat, then stitch along bottom edge 1/4″ in from the seam edge.
7. Using pins mark the start/end point for the nose wire placement. Then stitch 1/8″ from seam edge along upper edge.
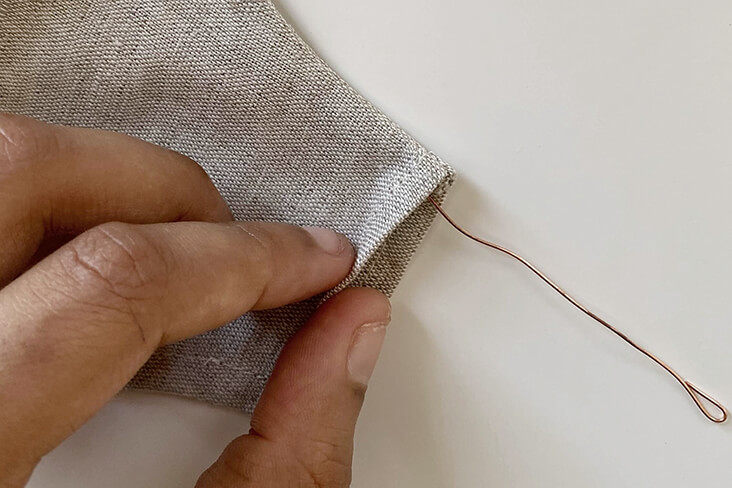
8. Cut a small piece of wire slighter longer than the wire channel and fold ends over.
9. Insert wire into wire channel by going in through the side seam opening. To avoid wire catching on seam allowance, make sure to insert wire in direction in which the seam allowance is pressed.
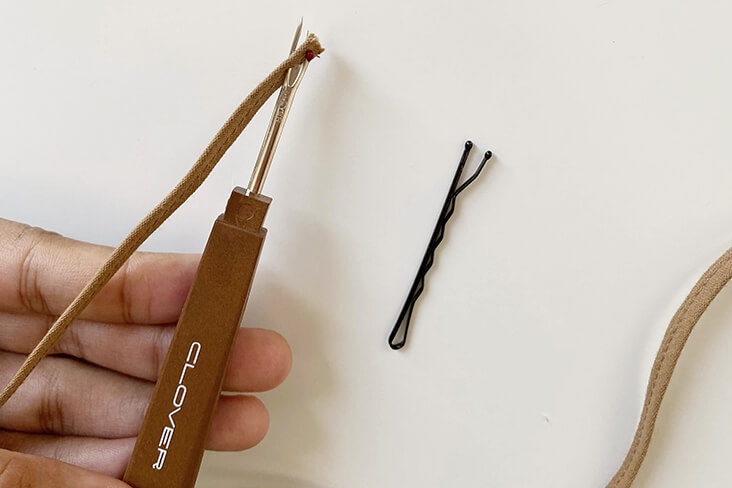
10. Take 1/4″wide bias tape binding and using a seam ripper cut a small hole at one end to thread a bobby pin through.
Follow this tutorial on how to create your own bias binding.
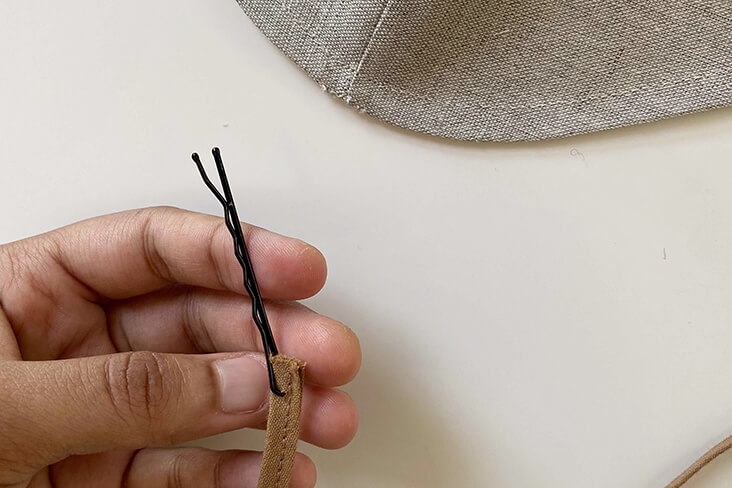
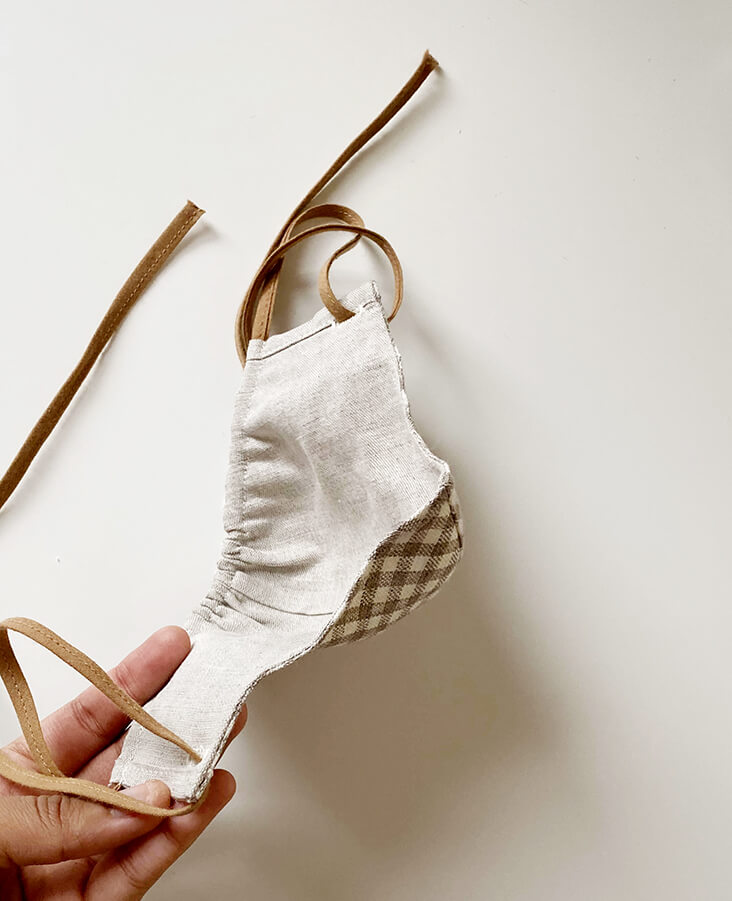
11. Thread bobby pin with bias tape through channel along bottom edge.
12. Mark a half inch line on either side of the mask for you button hole, then stitch (I used a 1/2″ button hole setting on my machine).
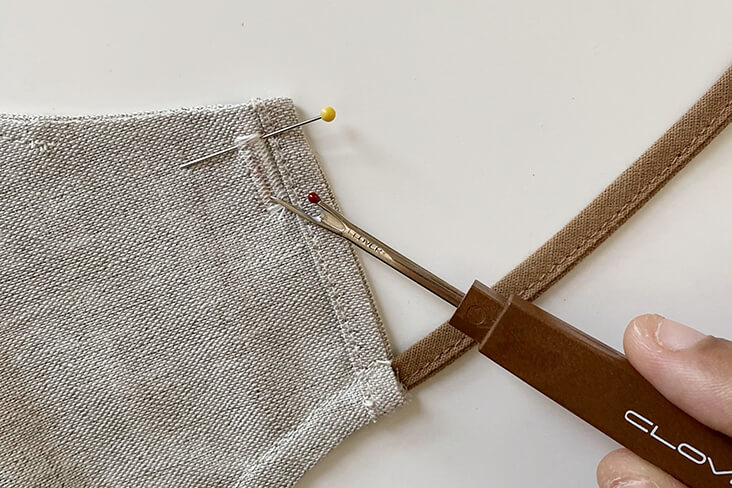
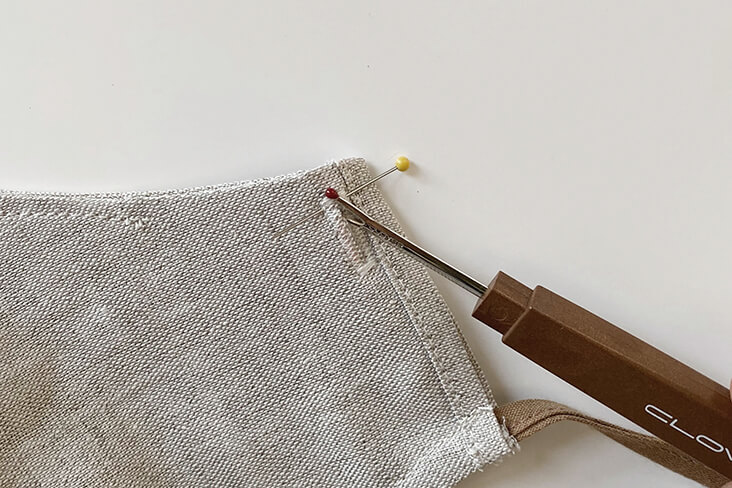
13. Place a pin at one end of each button hole (this prevents seam ripper from cutting button hole too wide) then cut open with a seam ripper.
14. Then take both ends of bias tape and thread through the button holes.
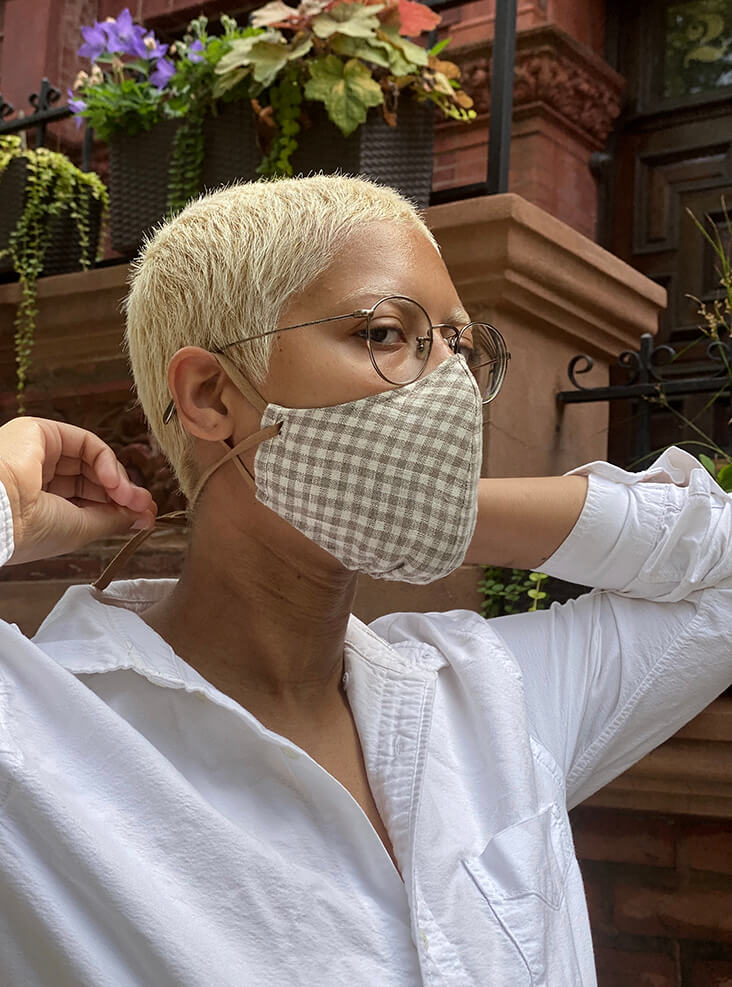
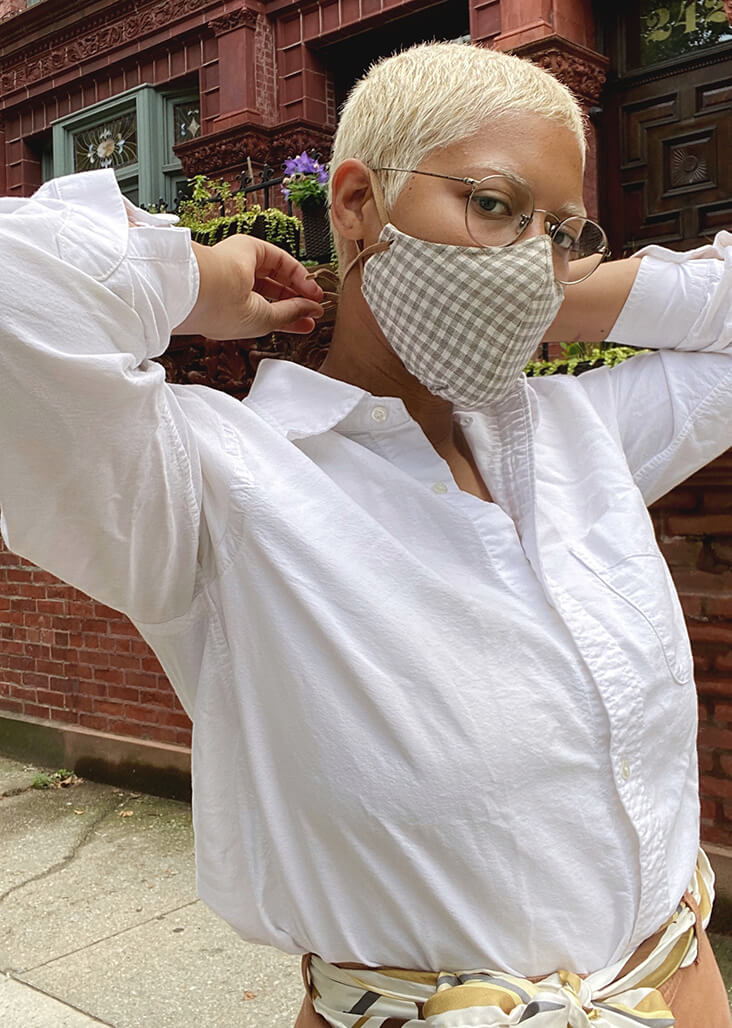
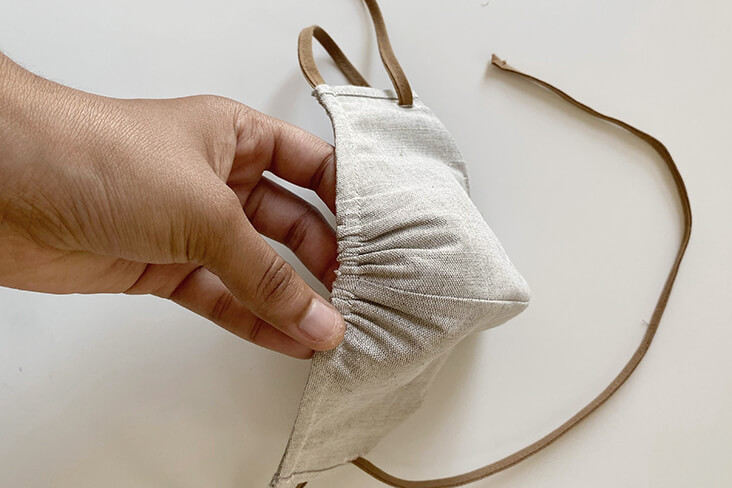
15. To wear, ruche mask along jawline to fit the shape of your chin. Place loops around ears and tie off ends either at the back of the head or base of the neck, whichever feels most comfortable!
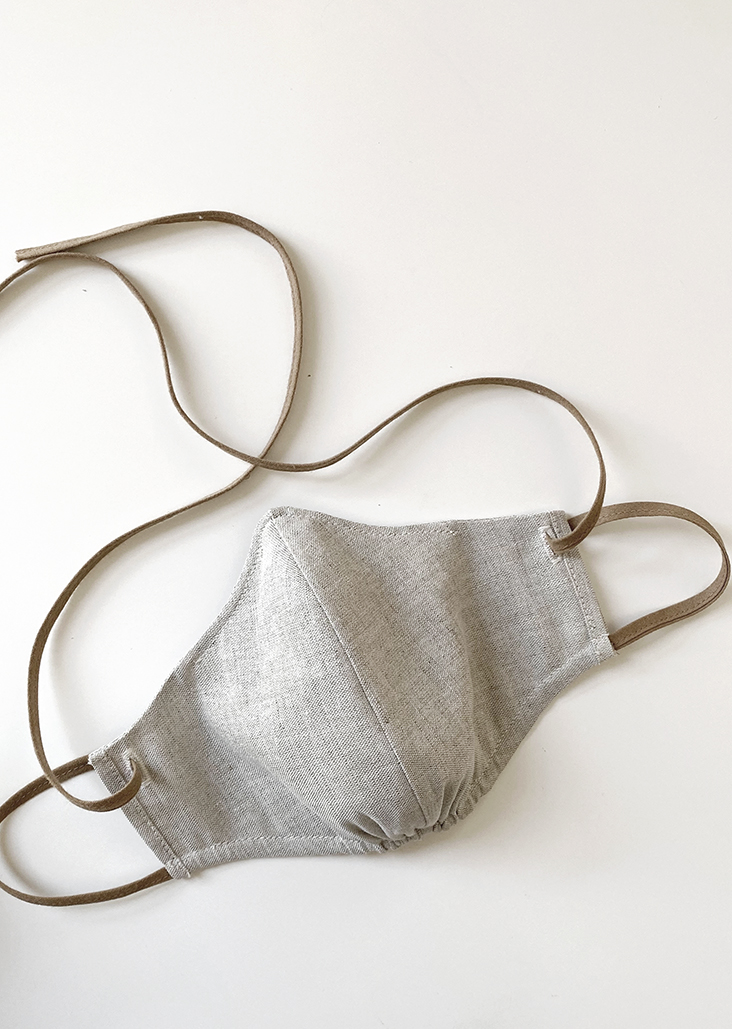
I can not be more pleased with how well the finished mask fits! The deeper scoop beneath the eyes leaves plenty of room for my glasses and the wire at the nose means no more foggy lenses. The drawstring along the chin makes for a perfect fit every time and is easy to adjust to better accommodate a more narrow or wider jawline. My favorite detail is the small button hole which adds a unique, yet functional touch and makes it easy to tighten or loosen the mask.
With all that is happening during this time, it has brought me much comfort to create not only for myself, but for others. I encourage everyone to do your own part in helping to improve upon the world we all live in. Whether it is by making masks for friends and family, donating towards a just cause or simply taking a moment to reflect on the privileges one may or may not have in this lifetime. I hope you find peace and solace in sewing as I have.
With love and nimble fingers,
Nayila










25 Comments
Rebecca Bowers
About how long is the bias tape/tie?
Julia Podesta
I used a 43″ length of twill tape I had for a medium mask and had room to tie a bow. You may want to adjust the amount according to your fit and how you want to tie it.
Nancy Mandoky
I love the tailored fit of this mask! I understand the concern that some might have that the linen is too breathable. The National Institutes of Health did a study of common materials used in cloth masks and recommends a layer of chiffon as a “filter” because of its electrostatic properties. The nice thing about chiffon is it doesn’t add any bulk and you can easily bond it and treat it as one layer of the linen with a glue stick (washable) which will wash out in the laundry. BONUS — the filter is permanent!
Kimberly Nealy
Nayila, thank you so much for sharing your talent, creativity, and mask! I took the leap and did it. Made one for a birthday gift! For a newbie “seamstress”, it turned out decent. The first time using the buttonhole feature on my sewing machine that I have had for years! I will practice more so I can get the pattern and techniques down. I wanted to share my pic but was not sure how to upload it. Love your creativity! Thank you again!
Susan Coleman
This looks wonderful. What length of bias tape did you use? I’m sure everyone needs something a little different, but just a ballpark would be helpful. Thanks!
Briana Deserio
Absolutely love this !!! Just made it. Took a while but I took the time to process how it was made. So in love with it. Used my grandfathers old flannel shirt and some charcoal linen. Just to clarify , the sides are not sewn shut ? I will slip in a filter and keep it open. Thank you so much for taking the time on the tutorial …. this mask is worth it.
Chrystal Kwiatkowski
I downloaded another mask pattern and added 1 inch to the top and bottom. Sewed a box pleat instead of the knife pleat on the nose end and soft elastic. it fits under my chin, doesn’t fog my glasses and is breathable. I used hankerchief linen from Fabrics-store.com and love love love it! I will make this one and see which one I like better. I don’t like the wire at the nose so I will not put that in but everything else I will follow the instructions. Happy sewing!
Nayila Wright
Hi Chrystal,
Love the handkerchief weight linen, so breathable! If you prefer the ease of elastic, one modification you do potentially do with this pattern is omit the drawstring and simply sew in a piece of elastic along the dip of the chin. Either way, hope you enjoy this pattern!
Pat Jacobs
Stylish indeed! Beautiful in linen. I’ve been trying different patterns and none stay down under my chin. I’ll be giving yours a try tomorrow
Thanks for sharing!
Kate Pavelle
Hi Nayila,
thank you for sharing the mask pattern! I’m working with another one which allows for a filter pocket, but I’ll switch to yours because it’s adjustable under the chin, and because it allows for adjustable ear loops. That’s brilliant.
Something that might help:
– I use a cotton twine instead of bias tape, and may have to switch to bias tape to feed it through the bottom channel. However, perhaps a thin crochet hook might be able to pull it through? That’s what I do for my current masks, where I have a loop around the back of the head, the twine feeds through the sides of the mask, then it fastens at the nape. (Also no elastic.)
– I feed the twine through a wooden craft bead I bought in bulk at JoAnne’s, then I tie it off to prevent bead loss. It took me a while to figure out I have to tape the twine together to coax it through, but the friction is just right to keep the mask in place.
CAVEAT: The excess twine tends to travel to my right side (I’m right-handed), so I just stick it under my bra strap 😉
I’m looking forward to trying your version!
Thanks again, and be well,
Kate Pavelle
Pittsburgh, PA
Nayila Wright
Hi Kate,
That’s an excellent idea to using twine in place of bias tape as option if one does not have bias tape on hand or do not feel up to the additional step of making some. You could also use ribbon, thin rope, even a shoe lace! To feed through the channel, I would simply loop the twine at the base of the bobby pin and use a small piece of tape to secure the loop to the twine itself. The tape should prevent it from pulling off of the bobbypin while feeding through the gathering channel.
Some great ideas for adding a pocket filter have been made in the comments below. Check out Tamara’s response and maybe give her suggestion for a ‘floating filter’ a try! I hope this pattern works out well for you and thank you for the kind words!
ANN SACKS
Very nice design! i like the gathers under the chin. I make a similar style and I use “garden training wire” in the nose piece. It is coated with plastic and comes in a 50 ft roll. After I cut it (with wire cutters), I seal both ends with nail polish. It prevents it from poking through and has lasted many months of wear.
Nayila Wright
That is such a clever idea to seal the ends of the wire with nail polish! I will definitely be trying that, thank you Ann!
Kathleen Smith
Great mask. A very good assimilation of techniques and ideas of ALL the mask ideas with less sewing but resulting in a functional and beautifully crafted mask.
I’ve been sewing the CraftPassion mask and it is very nice but does require extensive sewing and top stitching.
Thank you.
Nayila Wright
Thank you for your kind words Kathleen! An assimilation of ALL the mask ideas is a perfect way to describe it.
Tamara Burke
I’ve been making linen masks for months now, and started out like this one, with two layers of fabric. The linen weave is more open than is recommended for civilian masks, and I modified the pattern by adding a “floating” third layer by cutting a third mask to layer between the front and back.. Sew the third layer by adding it to the wrong side of the front mask ))(( so when you sew the nose sides together you are sewing 4 layers of fabric. When you stitch the front and back together, wrong sides together, and turn, you will have a third layer between the top and back. It adds a lovely body to the mask and is every bit as easy to breathe through. You can also now buy medical grade filtering material by the yard to use as your third layer if you want to step up the protection to yet another level. The tie system in this mask, however, is superior to anything else out there, it truly does create a custom fit and a very nice seal around the face to protect you and others when you must be out and about. Want to really kick some butt? My favorite outfit right now is my Phoebe tank and matching mask from Crimson linen! #CovidCouture !
Liisa May
Have you ever tried the material In hepa filters? I love the design and your suggestion of a floating lining made me wonder.
Kymeth-Eren Doyle
Some Hepa filters contain asbestos. Just a heads up.
Nayila Wright
Excellent idea in adding a third ‘floating’ layer Tamara! I think it would be possible to lengthen the side seams of this mask making it wide enough to tuck in a filter and have it sandwiched between the two layers of the mask. If you happen to try this, let us know how it goes! And thank you for the kind words!
Suzette Mariotti
This has taken all the best features of the many styles of masks and rolled them into one. I’m sewing today!
Nayila Wright
Ahh thank you so much and happy sewing!
Maureen Robinson
I love this. I have made many masks for friends and family but I end up with foggy glasses! I will be making one of this right away! Hopefully no more foggy glasses.
Thank you!
Maureen
Nayila Wright
Thank you Maureen! I hope this pattern helps solve the foggy lenses issue for you too!
Mary Stoughton
Nayila, you did it! I have been sewing masks in this fashion. I was using ties, that just weren’t working. My pattern is more rounded in front that causes it to collapse around the nose. You are amazing! This tie system around the ears and adjusting the fit by tying it in back is genius! Be safe and thanks. Mae
Nayila Wright
Thank you Mae! I had similar issues with the mouth area of other mask patterns ‘collapsing’ once worn, so there is much less of a curve in this one. However, I do understand that some prefer to have more space between one’s mouth and the mask, so in that case more curvature could always be added to this pattern. I hope this one works out and you love it as much as I do!