Chelsea Linen Raglan Tee Tutorial and Pattern
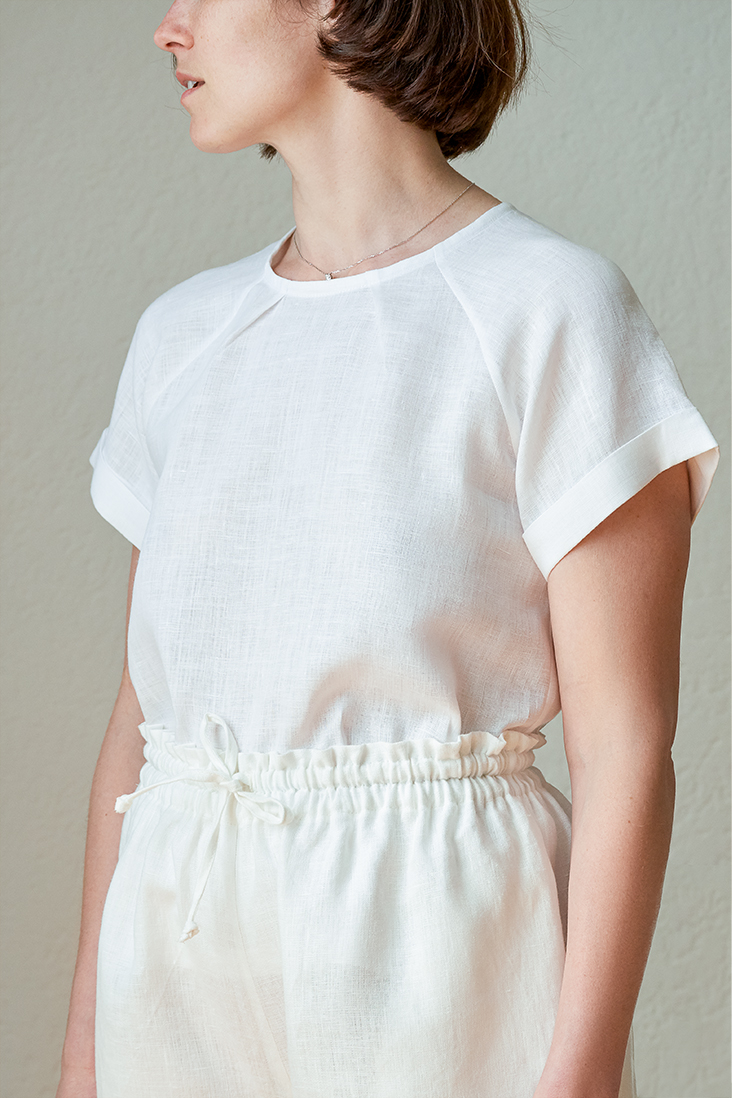
If you are a practical woman of any age, you no doubt own countless versions of a plain white T-shirt. Here, we’d like to present you our alternative to your favorite white basic – Chelsea Raglan Tshirt! Simple design, raglan sleeves, delicate pleating at the neck, and our gorgeous lightweight linen that gets softer with every wash. You’ll love it so much you’ll want one in every color!
Materials
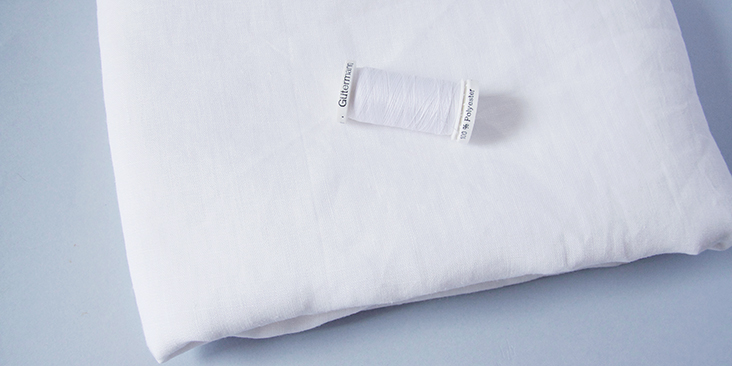
1.5 yards of IL020 OPTIC WHITE Softened Lightweight Linen
Matching sewing thread
Tools
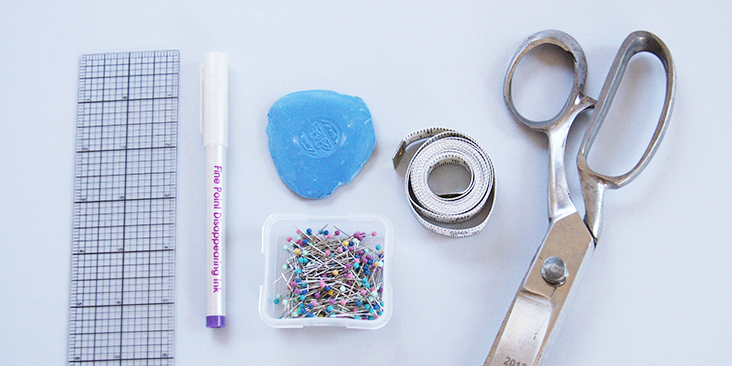
Scissors, pins, ruler, fabric marker, measuring tape, chalk, sewing machine
Difficulty
Beginner
Time
2-3 hours
Pattern
You can access the multi sized printable PDF pattern by following this link HERE. The model is wearing size S. All seam allowances are included in the pattern.
Please note that you’ll also need to cut one continuous strip of fabric on the bias (1.5″ wide and 26″ long) for the neckline binding. For more instructions on how to cut your fabric on the bias please follow this tutorial.
If you need help adjusting the pattern for a fuller bust, we have a great Full Bust Adjustment tutorial HERE.
Steps
Note: Prewash your fabric and tumble dry it until it is still slightly moist, dry in room temperature. Iron the fabric so it is easier to work with.
1. Pin the sleeves to the armholes right sides together matching the front and the back edges.
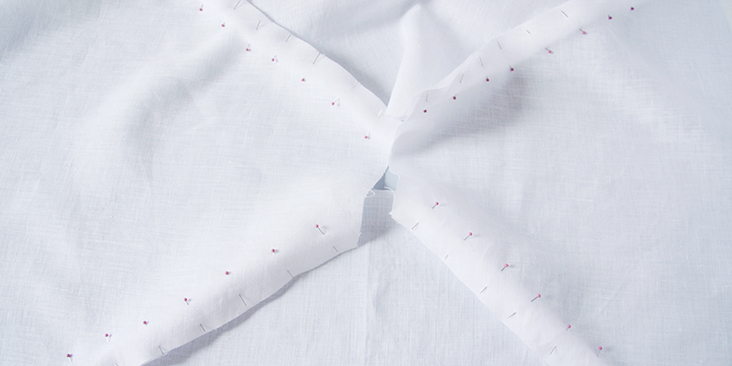
2. Stitch the pinned edges together 3/8″ (1 cm), then trim the seam allowances down to 1/4″ (6 mm) and serge/zigzag the raw edges together to prevent the fabric from fraying.
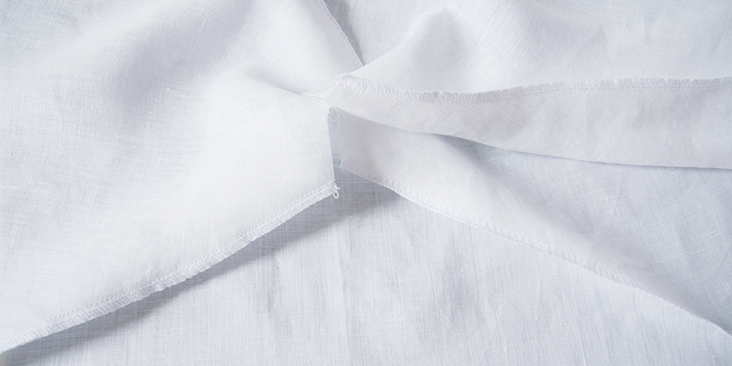
3. Press the seam allowance to one side (preferably, towards the sleeves).
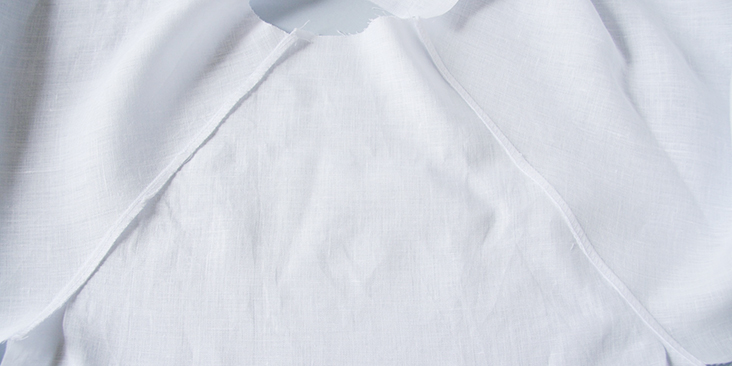
4. Create two small knife pleats on the front and on the back of your tank as shown below:
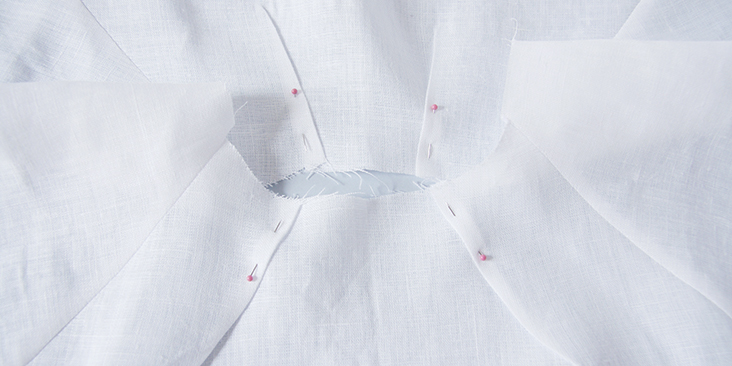
Place your pleats on either side of the center back and the center front. Each pleat should be no more than 3/8” (1 cm) wide when folded. Make sure your pleats are symmetrical.
5. Baste your pleats (1/4” from the raw edge) to keep them in place.
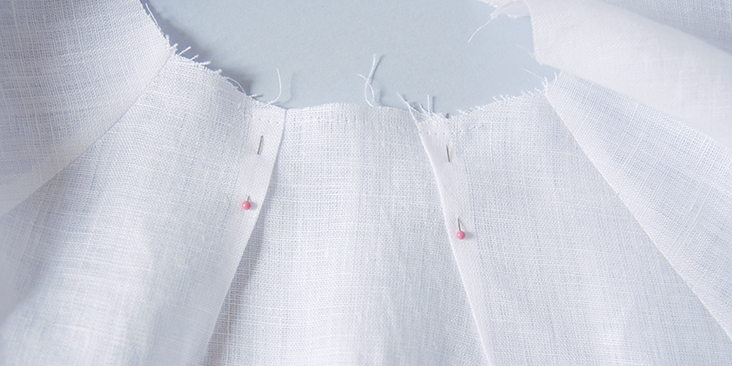
6. Bind the neckline following this step-by-step tutorial HERE.
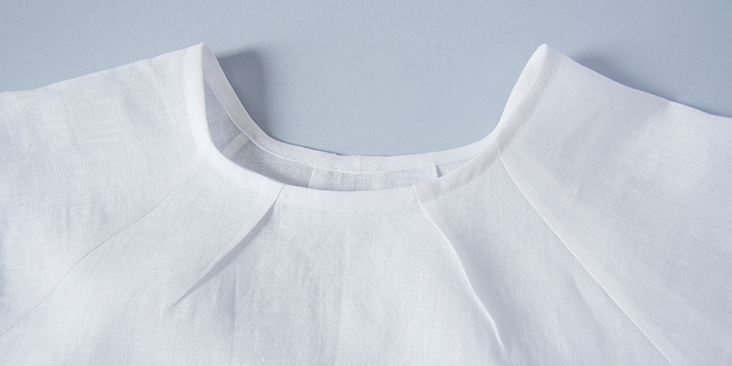
7. Pin the sleeve at the underarm and the side seams right sides together.
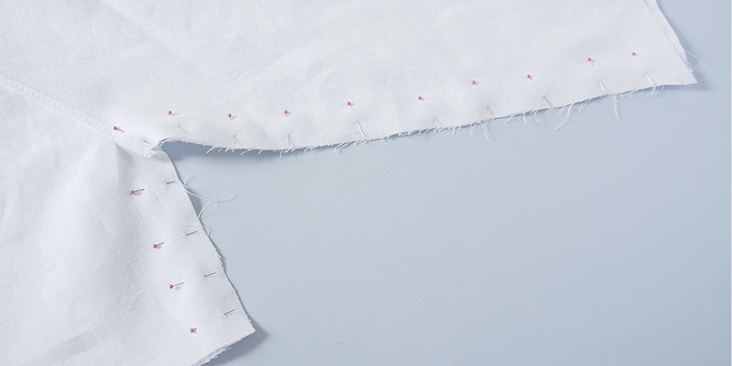
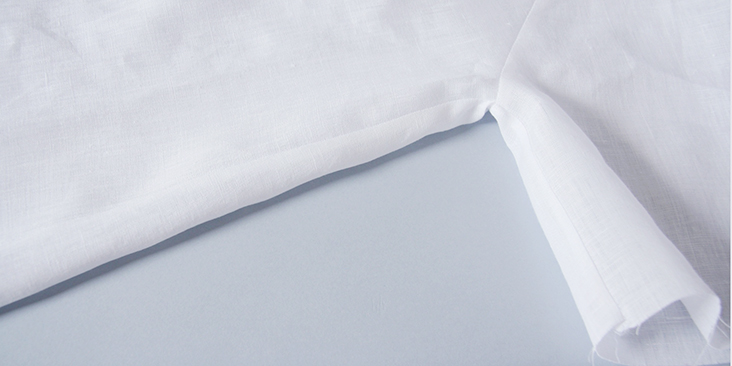
8. Sew the sleeves and the sides all in one seam at a 3/8″ (1 cm) seam allowance. Trim the seam allowance down to 1/4″ (6 mm) and serge or zigzag the raw edges together. Press the seams flat folding the serged/zigzagged edges to one side.
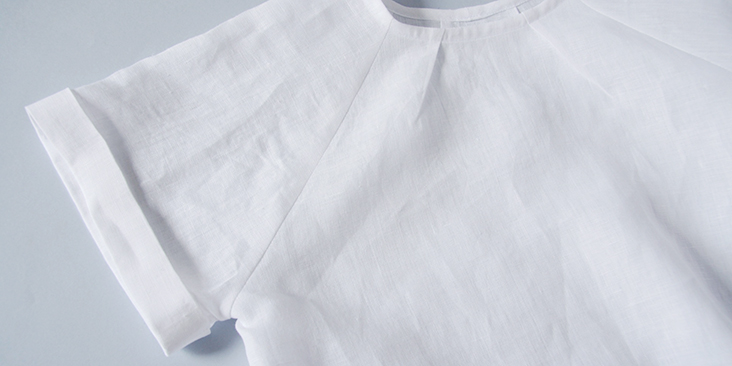
9. Create 1”-wide cuffs following this detailed tutorial.
10. Lastly, finish the hem by folding the fabric twice to the wrong side: first 3/8″ (1 cm), then another 1″ (2.5 cm). Press and pin.
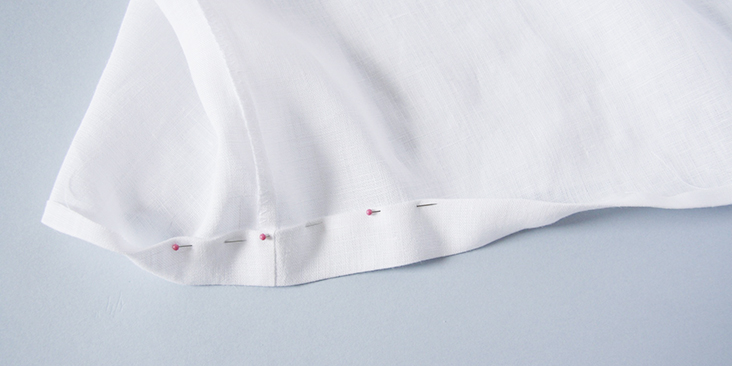
11. Working from the wrong side, topstitch the hem as close to the folded edge as possible. Press.
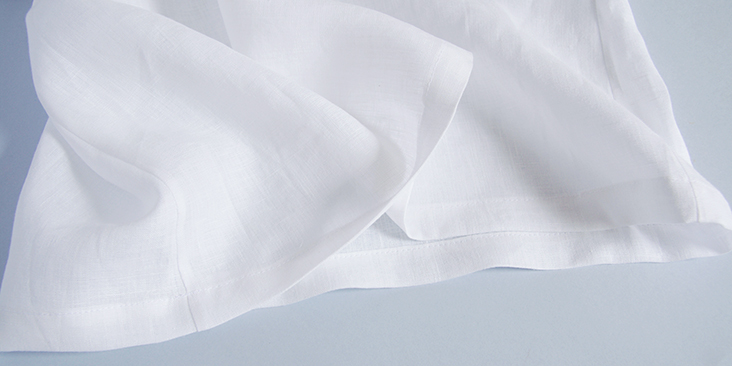
Give your tee one last good press and you are all done!
Perfectly simple, but stylish and versatile, this tee can be made in a variety of linen fabrics. Have a browse through our plethora of colors and find the one that inspires you for this cute little project!









131 Comments
Pingback:
25 Free T-Shirt Patterns You Can Print And Sew - Diy FollyPingback:
30 Free T-Shirt Sewing Patterns To Add To Your WardrobeSophie Castaillac
hi,
Would I be allowed to sell a finished product of this shirt on my Etsy, not the pattern just the physical shirt that I embroider?
Thanks,
Sophie
Kelly Potocki
Hi,
In step 1 when attaching the sleeves to the front and back bodice, how do I know which seam in the sleeve attach to the front bodice and which to attach to the back bodice. In other words, there are no notches in the sleeve pattern showing which is front and which is back. Please help.
Shari Darke
The link for the full bust adjustment is broken
Lauren Linen
Thank you, this has been repaired 🙂
Maxine Cox
I made this garment size 4/6 based on my physical measurements and finished garment measurements. I chose a patterned linen. I followed the instructions exactly, including easing in the curve of the raglan sleeve. Everything lined up superbly. The cuffed sleeves turned out beautifully. All in all, a fantastic, easy sew, well described and detailed instructions. Many thanks for providing such wonderful patterns and tutorials all for free. Absolutely no room for complaints. Five stars!
Anja Seegebrecht
Hei,
thanks a lot for the nice pattern. I tried it out and worked well as soon I had sorted out how to attach the sleeves. But unfortunately it does not fit that well. I used the given bust, waist and hip measures for orientation. But it seems my shoulders are too wide to allow a good fit. Maybe that could be added to the sizing table. Is there a neat way to adjust my result to this? (My first idea would be to change the neckline but I dont have much experience with fittting yet.) I would highly appreciate a hint.
Christine Conner
I would suggest doing a toile trial, but leave out the pleats on the neckline. That may give just enough ease in the shoulder area. Another thought would be to do a size bigger and grade down to a smaller size at the waist area.
Mary Lee
Please send me the sleeve tutorial, Thanks.
Lauren Linen
You can now find the tutorial in our Help Center here:
https://support.fabrics-store.com/hc/en-us/articles/15503796041613-Sewing-the-Sleeves-on-the-Chelsea-Linen-Raglan-Tee
Jennifer Champion
I just sewed this and it’s the first top I’ve ever made from scratch. I also had the same problem with the sleeves but honestly I just sewed a straight line connecting the curves and it was fine. Thank you for this pattern. I’m wearing it now in emerald green broadcloth and will definitely consider doing it again in linen.
Eva Weiand
I was sceptical at first because I had to do quite a big FBA on the pattern and then created some darts as well to get rid of the extra fabric. When I was done with the adjustments the pattern looked huge, but it sewed up like a dream!
This will definitely become one of my go-to patterns for summer, love the fit of it and it’s a fun and quick sew.
Michelle Ng
Love this pattern, it is such a lovely and timeless design. The fit is also great, I’m so glad to add it along with the Agustina top as one of my favourite top patterns!
I also had problems with folding up the cuff though, I could only fold it over 2″ to sew, but that wasn’t a big problem. Thanks so much for the free pattern!!
Heidi Dewalt
Hi. I am making this tee. At first I was baffled by the sleeve not matching the front and back pieces. As I pinned them together I was able to ease the sleeve into the body. I am still not certain why the curve at the bottom of the sleeve front and back does not match the curve at the bottom of the front and back pieces. I will correct this on my copy for future use. Also, the front piece turned out to be 1″ longer than the back. At first I thought this was my error when assembling the pages but after looking carefully I found it wasn’t. I am not sure why there is such a difference. I have been sewing for 60 years and know a lot about pattern drafting so it was not a big deal to me. I just feel that this is suppose to be an “easy” pattern but think that it is not a good choice for a beginner who may find these inconsistencies overwhelming. I get that it is a free pattern but I would highly recommend that a newbie sewist make a muslin first from an old sheet or something to figure out these problems before cutting into an expensive piece of linen. I do think it is going to be a very nice top but I was just a bit surprised at the drafting of this pattern.
Lauren Linen
Hello Heidi,
We’re sorry you had some trouble with this pattern. We have a tutorial for the sleeves which shows you how to pin it so that the curves match up.
Please feel free to reach out to us directly on our contact form on the website if you’re ever having troubles with a pattern.
Nikola Janevski
I noticed the same problem in the pattern. The front is about 1″-1.25″ longer than the back. I measured the length of the side seams on size 16 and size 2 and both had the same problem. This is easy to fix but I don’t understand why they have not fixed it on the pattern piece already.
Meghan MacDonlad
Hello – can I please have the email sent with the sleeve tutorial? Thank you
Gillian Sulzer
Hello! I am also having trouble lining up the sleeves to the front and back pieces, I can’t seem to figure it out as the lengths differ (and there no note of which part of the sleeve is front be back)… I’ve just sent an email requesting instructions
Thank you! ?
Lauren Linen
Thanks Gillian, I’ve just sent you the instructions 🙂
Aisya N
Hi. Thanks for the pdf. But how do i make it baggy? I mean, the underarm sleeves to be more baggy?
Lisa Carter
I’m new and not understanding the sleeves – can I get more detailed instructions emailed to me? lmimicarter@gmail.com
Ashleigh Mayhew
Hi! I sent an email yesterday asking about the sleeve tutorial. Hoping to make the tee soon, but I don’t quite know how to move past the sleeves when they don’t line up in length with the front and back of the tee. Would love the tutorial via email…or you guys could just update this blog post with the extra instructions! 🙂 That would be super helpful. Thanks!
Shif Shakeel
Can anyone tell me how long is the finished top’s length?
Thank you
Talia Gertman
Such a great pattern and tutorial, and it’s still free! Follow the links on the instruction page and see how to sew the bias binding in the neckline and the beautiful sleeves. I guess that after sewing I can now call myself “a confident beginner” ? I used soft, white linen that came out exactly as in the pictures. Thank you so much for the beautiful pattern.
Leo Haapaoja
Hello! I just starting sewing this and it’s my first project so I’m a bit lost. Could I also get additional instructions for the sleeves?
Lauren Linen
Hello Leo, please contact customer service or Ask@fabrics-store.com to request your copy.
Trudy Quaif
Can you send me the additional instructions for sewing the sleeves? Thank you.
Lauren Linen
Hello Leo, please contact customer service or Ask@fabrics-store.com to request your copy.
Olivia Hart
Can you confirm that this pattern is for wovens? It appears to be but can’t see it written anywhere.
Lauren Linen
Yes, this pattern is designed for our woven linen fabrics 🙂
Jennifer McConville
Can you just post the sleeve tutorial on here since it is everyone’s question? I too am stumped. Thank you!
Lauren Linen
We are working on it right now Jennifer 🙂
Deidre Mclean
Hi, I’m struggling with the sleeves too. Could I have the extra tutorial please.
Deidre Mclean
Not to worry, it suddenly clicked
Samantha Whitehead
Hi Lauren and Rima! Getting started on this and having the same confusion as others re: length of pieces not seeming to line up. Can you email me the tutorial, or point me to where it is posted? Thanks!
Danielle Henderson
Similar to others, I encountered the issue with the sleeves not aligning with the front and back. Could you send me that email with the tutorial? Thank you!
Lauren Linen
Sent 🙂
Laura Watt
I’ve finally been able to download this pattern and am in the process of figuring it out. Could I possibly get the sleeve tutorial emailed to me? Thank you very much. I can’t wait to sew this top.
Lauren Linen
Sure thing Laura 🙂
Dee Jane
Five stars for a super pattern and excellent customer service! At first, I had trouble accessing the layers on the pattern file. Patricia at Fabrics Store replied to my email very quickly. After I saved the file to my computer, I was able to open it in Adobe Acrobat with no further issues. I’m looking forward to making this cute top!
Rebecca Lupton
Could I possible get that sleeve tutorial too. I seem to be struggling with it as well. Thank you! Excited to make this in insignia blue!
Lauren Linen
Sent you an email Rebecca 🙂
Kristel Catterton
Hey there–I’m looking at the cuff tutorial for this shirt and the pictures for the cuff show as a straight line. However, these sleeves are cut at an angle and there’s no room to make the cuff as specified without having a bunch of fabric bunching up across the bicep. What am I missing? Thanks!
Lauren Linen
Hello Kristel,
The cuffs are drafted to fold over themselves, not the sleeve, so you shouldn’t have any bunching 🙂
Anna Maasikas
Hi,
would it be possible to also get the email with additional instructions on sewing the sleeves?
Thank you!
Lauren Linen
Sent a copy to you Anna 🙂
Hazel Baker
Could I have one too? I can’t work out which is the front/back of the sleeves, there is no mark on the pattern
Lauren Linen
Sure thing Hazel 🙂 Please look out for my email. As for the front and back of the sleeves, The back is the side which is longer and sits higher. There will be a labelled photo in my email to you.
jessica be
Hello FS I have been trying to find the size chart but I can’t for the life of me find it on the pattern, the instructions or even from the download page. Maybe I am just not seeing it? I seen in a comment either on this post or the download page that there is a pdf booklet, can you point me in the direction to where that is
Thanks!
Jessica
Lauren Linen
Hi Jessica, the size chart is on page 4 of the main .pdf download. Please email FS if you can’t find it an we can send you a screenshot.
jessica be
Thank you! I just re downloaded it and I was missing that page with the size guide.
Daniele Todaro
I am really stumped.
To repeat another post. The seam length between the sleeve and the body (back more than front) are not the same. Was an ease-in intended? The sleeve armhole curve at the armpit does not match the body armhole curve. There seems to be an email you can send for clarification. Could you please send me that email?
Lauren Linen
Sure thing Daniele, I will send you an email with instructions for sewing the sleeves to the Chelsea Bodice pieces. Please look out for it.
Rosemary Ford
Please email the instructions to me as well. I haven’t started to sew this yet but the blog notes make me think I will need help. Rosemary Ford
Lauren Linen
Sure thing Rosemary, Please look out for them in your inbox 🙂
Connie Daniel
Hello! I just downloaded the pattern. Could I get those instructions sent to my email as well? Thanks!
dconnie206@gmail.com
Lauren Linen
Email sent Connie 🙂
Barbara Neary
Hello, can you share the details for the sleeves to me, too please? Or tell me where to find them? Confused.
Barbara
Grace P
Hi – I’m facing the same issue. Can you email me too please ? Thanks
Lauren Linen
Sure thing Grace 🙂
Birte Petersen
I seem to have the same problem. Sleeves and front/back just don’t fit together, the seam length isnt the same. What’s the trick here?
Lauren Linen
Hello, we have a tutorial which may help here. I’m going to email it to you 🙂
Trudi Roberts
Hello,
I am just starting this project and it sounds like I might need the tutorial as well. Could you email it to me please?
Lauren Linen
Sent a copy to you Trudi 🙂
Kristyl Agugua
May I also have the email with the sleeve instructions
Lauren Linen
Sent you an email 🙂
kim oh
Me too please? Thank you.
Eve Shaw
Is there perhaps a YouTube tutorial?
Lauren Linen
Hello Eve, we don’t have YouTube tutorials, but if you need any extra assistance please email us. I’m the sewing and pattern consultant and I can help out 🙂
Aisling Cooke
I’m very much a beginner so I’m not really sure what I’m doing. Which side of the sleeve piece attaches to the front and which to the back?
Lauren Linen
Hello Aisling. You will notice, one side of your sleeve piece is longer and higher than the other at the shoulder. This section is the back sleeve, and the small/shorter edge is the front.
Martha Daly
The seam length between the sleeve and the body (back more than front) are not the same. Was an ease-in intended? The sleeve armhole curve at the armpit does not match the body armhole curve. Was this intentional? Any specific tips here?
Lauren Gates
Hello Martha, The side seams for the back and front should match up on this pattern. The curve on the sleeve is intentional too, be sure to straighten out your sleeve fabric when pinning to the front and back. If you’d like extra assistance here, please reach out to us via email and we would be more than happy to help.
Rosario Becerril
I have exactly the same problem. None of the cuerves match.
Lauren Gates
Hello Rosario,
I have sent you an email to help out. Please look out for it 🙂
Dawn Nolt
I have exactly the same issue of the arm curves not matching up. Would appreciate help.
Lauren Linen
Hello Dawn, I will send you an email with a tutorial 🙂 please look out for it.
April Gobert
Hi
I agree the curves in the sleeves and front/back bodice do not match.
Please provide me with instructions to deal with this.
The pattern pieces should be better labelled.
Lauren Gates
Hello April, I have sent you an email, please look out for it.
Silvia Amtmann
I’m also struggling to line up the arm hole curves. Any guidance would be appreciated! And thank you for the awesome free pattern.
Lauren Linen
Sending you an email Silvia 🙂
Patty Gale
Love this pattern! Super simple. Made up a couple! But DO make a muslin/practice piece first to identify any tweaks you need to make to fit your body. After making a muslin, I decided to: 1. Omit the pleats on the back so the neck is less snug, 2. Change sleeves to be a bit longer (to elbow) without cuffs, and 3. Increase bust by 1/2” on each side (total of 2”) and hip 1” on each side (total of 4”), drawing a slanted line between the two points. Worked out perfectly for me!
Anja Waleson
I wholeheartedly agree. It would be so helpful if you could include those kind of notches and markings on all your lovely patterns!
Anja Waleson
This looks like a brilliant pattern. I can’t wait to get started on it. Any possibilities of offering extended sizing up until 28/30? Or at least an extensive tutorial on how to extend the patterns to our own sizes? Thanks so much!!
Lauren Gates
Hello Anja, We have a tutorial that shows you how to grade your pattern sizes up at this link here:
https://blog.fabrics-store.com/2015/06/01/how-to-grade-a-pattern-tutorial/
Anja Waleson
Thanks, Lauren!
Johanna Stolz
I really love the outcome of this pattern, super easy to sew and thanks a lot for the tutorials on how to sew the hems etc – I tried it really often now and this is the first time it comes out as I wanted it to 🙂
Sadly I could not purchase your fabric in Germany but I could find something similar and already gave a hint to your shop to my friends in the US.
Jennifer Dill-Kamal
Can you please share the pattern for this lovely blouse? The link did not provide a pattern. Thank you!
Lauren Gates
Hello Jennifer, The link will take you to the pattern page on our website. Simply log in, and hit the ”download button to get the pattern.
Here is the link:
https://fabrics-store.com/sewing-patterns/chelsea-linen-raglan-tee-pattern
Deniz Kaplan
is it possible to make it without darts for a men’s t-shirt?
Barbora Niklova
Hello, may I aks you for sharing the pattern? Link doesnt work. Thank you very much
Eveline Lee
Thank you so much for a free pattern and the clear instructions. I now have two breezy tops to help cope in this unseasonal heat.
Frederique Le Pan
Can it be done without the pleats (without adjustment)?
Thanks!
Suzanne Hutegger
Yes, this top can be made without pleats. I left the pleats in the back and left the front plain. It is truly a lovely top. I also did not want cuffs so I folded under twice and did a Topstitch.
Karen Goldin
I’m puzzled as to why you didn’t provide the standard markings on the sleeve and front/back pattern pieces to indicate which edge went with which? (i.e. single and double notches or hash marks of some kind). Pretty standard stuff for patterns with inset sleeves. With all due respect, makers shouldn’t have to scroll through all of the comments to find your remark that “the side of the sleeve with the lower neckline is the front side”.
Ellen Kemper
The PDF was only 5 pages, none of the pattern pieces were included. Did anyone else have this problem? I downloaded another pattern tonight and received 22 pages with the pattern.
Jehanne Hansen
This is a lovely garment, if you have absolutely no bust, at all. The cut and fit does allow for any room.
Sure it will be fine for a slim and sleight figure.
Xarophti
I don’t see any instructions anywhere for laying out the pattern on the fabric with the exception of grainline arrows. If it needs to be laid out lengthwise on fold, 1.5 yards does not seem to be enough. Are the front & back pieces supposed to be laid out horizontally?
Rima Khusainova
Hello and thank you for your comment! What is the width of the fabric that you are using? Is it one of our linens? Our patterns are designed for 56″-58″ wide fabric and 1.5 yard of fabric in this width should be more than enough to make this tee.
Xarophti
I am using a 58″ wide fabric. I fortunately cut & washed extra, and when I laid it out on the fold (lengthwise) the layout with the sleeve piece took 69″. I thought I was going to be short of fabric, but it definitely takes more than 1.5 yards IF the body pieces layout lengthwise (I’m not sure since it’s not specified. Grainline can be either direction in a straight weave, right?). I am making the size 22.
Doris Johnson
This doesn’t actually answer the question. HOW can one fit the pieces into 1.5 yards of fabric?
Lauren Gates
Hello Doris,
Using our linen folded in half with selvages together, Lay your front and back pieces on the folded edge first, then fit your sleeve piece around these on the remaining fabric.
Catina
Oh my.. if you are not seeing the layering feature and the 2″ square isn’t printing accurately, your PDF file might not be opening in Adobe Reader. Is it possible that your PDF is being opened in a browser/preview window or other third-party application?
Giovanna
Pattern includes seam allowance?
Rima Khusainova
Dear Giovanna, yes it does!
Desirejadeh
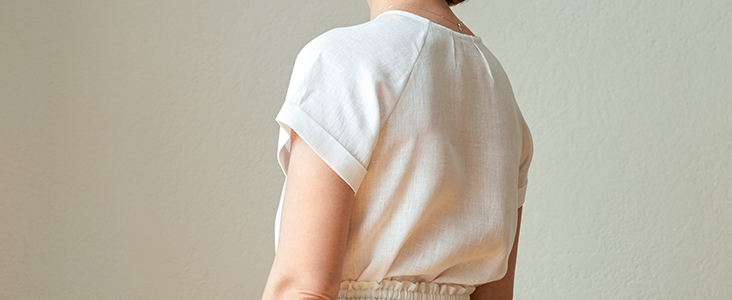
This is lovely. Thank you. Do you happen to had any pictures of the top alone though? The fashion shots are great but it’s hard to know if to make something without fully seeing the finished item. How is the hem? Is it lower at the back? Is there a side slit? Where does the actual top end, at hips?
I love y’all’s patterns though. I made the patchwork kimono as instructed everything came out great and fit together as told it would. It ended up way too big for me, swallowed me whole. I’ll have to give it as a gift. But that’s just the one size curse. I want to try something else. I’m a bit wary about if to use size 4 as I generally am or size 2 because I know you guys run large. I hate doing mock ups. By the time I do that I’ve no energy to make the actual item 🙂
Xarophti
This is the shirt I was looking for. I thought it had been published once before, but I couldn’t find it. I’m hoping I’ll be able to tackle this as my first “blog project,” but I haven’t worked with your online patterns before (especially expanding them up to my size!) I think this shirt should work with some of my stockpile of the slightly heavier IL019 as well.
Rima Khusainova
Hello and thank you for your comment. This particular tee is available in sizes 4-22 as a printable pdf file. So no need to expend anything, it is already graded for you 🙂
Xarophti
Oh, great, thanks! Guess I’m remembering back when you used to give instructions for increasing the sizes. I’ve been too busy making reenacting clothes to notice the change! Now I want to make nice stuff for ME.
Roxanna Adams
How di I print the pattern? Do I need an oversized printer? Please help
Rima Khusainova
Dear Roxanna, you’ll need a normal printer as the file is formatted for paper sizes A4 and Letter. Print only the first page to check the scale and if it is good – you can print the rest. Once you have opened the PDF pattern, the sizes are listed in the “Layers” panel in Adobe Reader. Should you need more help – please contact our customer service directly at ask@fabrics-store.com
Xarophti
Do the .pdf layers not show with free Adobe Reader? I can find no layers icon, only view attachments. Of course, I can always treat this like any other multi-size pattern. But my “2 inch accuracy square” is coming up almost 1/8″ too small, I can’t figure out any remedy (except maybe re-copying every page with 1% enlargement or something) or just cut it a little bigger by eye.
xarophti
Ok, I did find I could “Print to custom scale” in Adobe, and printing at 101% fixed my slight size accuracy problem. No layers, but other than that, I’m good to go.
Catina
Oh my.. if you are not seeing the layering feature and the 2″ square isn’t printing accurately, your PDF file might not be opening in Adobe Reader. Is it possible that your PDF is being opened in a browser/preview window or other third-party application?
Alexandra
Hello! Can you post the final bust sizes of the blouse so that we can choose the correct pattern size?
Betsy
Is there any sizing information?
Chris Hanner
For anyone doing a FBA (full bust adjustment) don’t forget to temporarily tape the sleeve pattern (with center marked) along the front pattern piece at the raglan line to enable you to correctly measure from that center marked shoulder “line” down to your apex.
Rima Khusainova
Thanks for this useful advice Chris!
Hutch
Which is the front side of the sleeve? No markings–
Rima Khusainova
The side of the sleeve with lower neckline is the front side.
Sali Olson
Has anyone out there tried lengthening the sleeves, work prefers 3/4 length (and so do I for that matter!)
Lynette
Hello, do you have the bust sizes for the different pattern sizes? I want to make this blouse now!!!!:grin::grin: It is quite lovely.
Lynette
Rima Khusainova
Dear Lynette, there’s no such info in the pattern but you should know that this tee is pretty loose and has an a-line silhouette. So as long as you go with your normal size, you should be good.
Lynette
Hello, do you have the bust sizes for the different pattern sizes? I want to make this blouse now!!!!:grin::grin: It is quite lovely.
Sara Schrader
How do I get the pattern?
Rima Khusainova
Dear Sara, click on the link in the pattern section, it will take you to the page where you can download a multi-sized pdf. When you open it, you’ll see the instructions to follow in order to locate the attachments to all the sizes. Basically, this pdf consists of several files: instructions/main page + attachments for each size. Hope this helps!
Lee
Cute! Love the pants! Is there a tutorial coming for those too??
Rima Khusainova
Hi Lee! This is actually a pair of drawstring shorts and yes, it’ll be on the blog soon!
Evelyn
I must have missed something. I cannot seem to find the measurement for your seam allowance. You say cut it down to 1/4 inch but what size was it to begin with?
Rima Khusainova
Dear Evelyn, our usual seam allowance is 3/8″ for all seams except for the hem. The gets 1″.