Sewing Glossary: How To Draft And Sew A Partial Button Placket The Easy Way
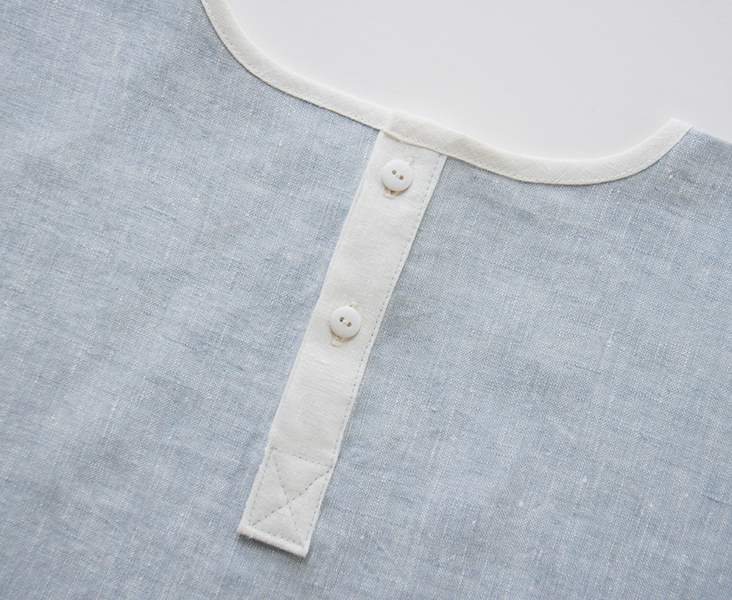
The partial placket, also known as a button placket, is basically an opening in clothes that allows you to easily put and remove your clothes and is a great design feature. As its name suggests, the partial placket will only go down a short distance instead of the full length of the garment.
Sewing a button placket might seem a bit complex and challenging at first, but do not worry! Today we are going to show you how to sew a partial placket the easy way. This method is slightly different from the standard method that we have previously shown to you in one of our tutorials. You won’t be attaching two separate pieces of fabric but just one, and you’ll see that you’ll get exactly the same results but in twice less time!
Materials
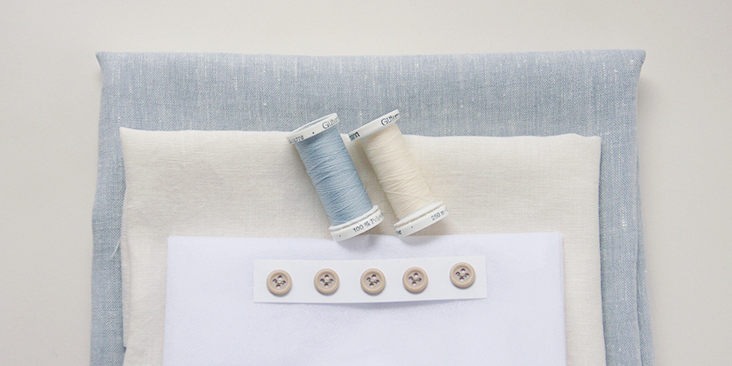
Fabric of your choice (for the purpose of this tutorial we are using two contrasting medium weight linens : IL042 903 FS Premier Finish 100% Medium Weight Linen and IL019 BLEACHED FS Signature Finish Medium Weight Linen)
Matching sewing thread, buttons, fusible interfacing
Tools
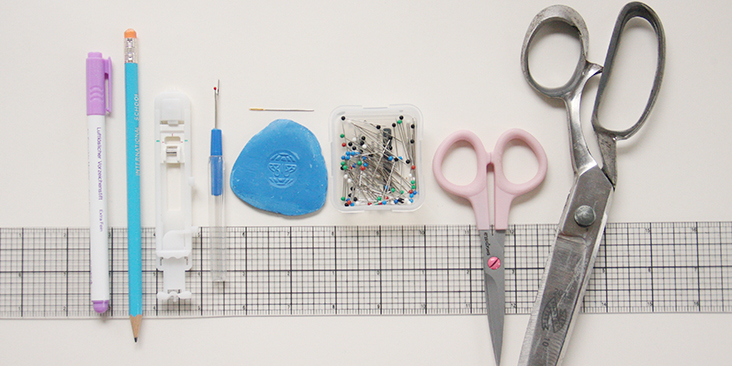
Pattern paper, scissors, ruler, pins, chalk, fabric marker, pen, buttonhole foot, needle, seam ripper, sewing machine
Difficulty
Beginner
Time
2 hours
Drafting the Pattern
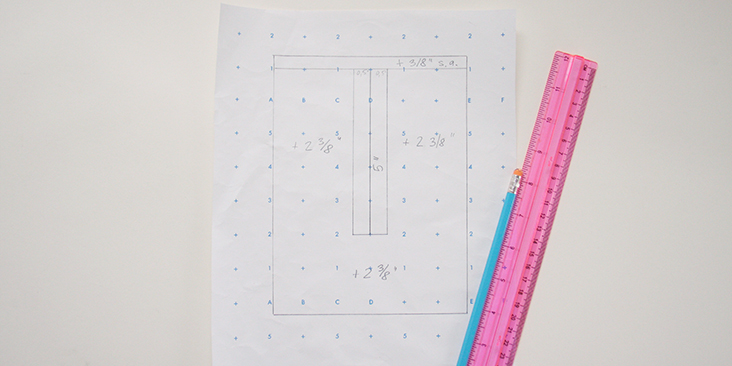
Normally, your pattern would tell you the measurements of the placket piece and how to cut it, but even if you are working with a pattern that doesn’t call for a placket or not following any pattern at all, you can always draw your own partial placket and add to any neckline.
What you need to do is to decide the length and width of your finished placket.
For our version, we went for a 5″ long x 1 inch wide placket.
First, draw your 5″ center line on a piece of pattern paper. From there, mark a line 1/2″ away from the center line on either side. Connect the two lines at the bottom. This will be the stitch line. Add 2 3/8″ (twice the width of the placket plus the 3/8″ seam allowance) outside all three sides of the stitch line. This makes the pattern piece.
See the diagram below:
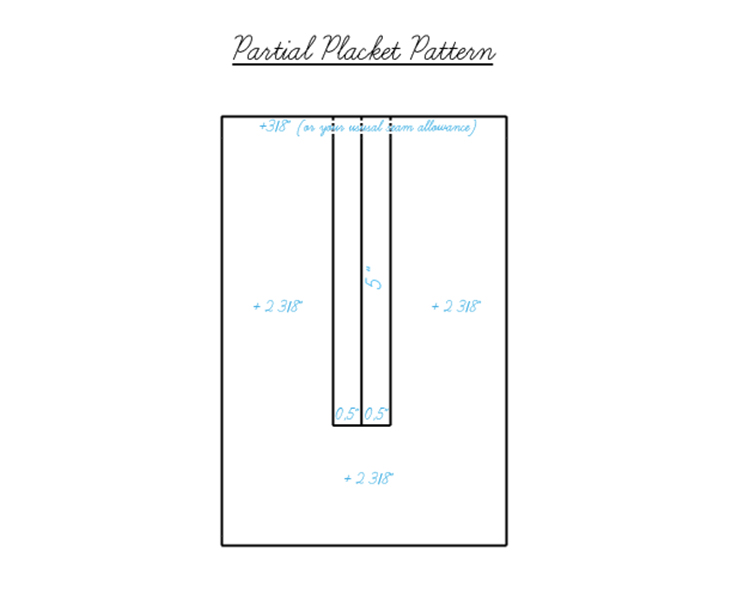 Use this pattern to cut one piece of fabric and one piece of interfacing.
Steps
Note: Prewash your fabric and tumble dry it until it is still slightly moist, dry in room temperature. Iron the fabric so it is easier to work with.
1. Apply the fusible interfacing to the wrong side of your placket piece.
2. Fold the front bodice piece and the placket piece in half to mark the center line.
3. Lay the placket rectangle right side down on the wrong side of the bodice, align the centers and pin.
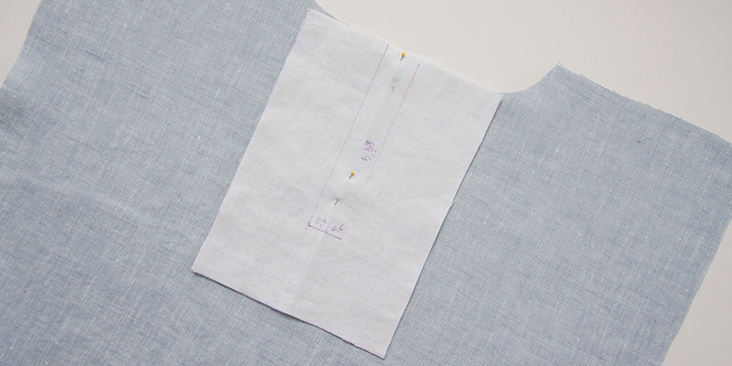
4. Draw your stitching lines with a fabric marker and stitch along the lines.
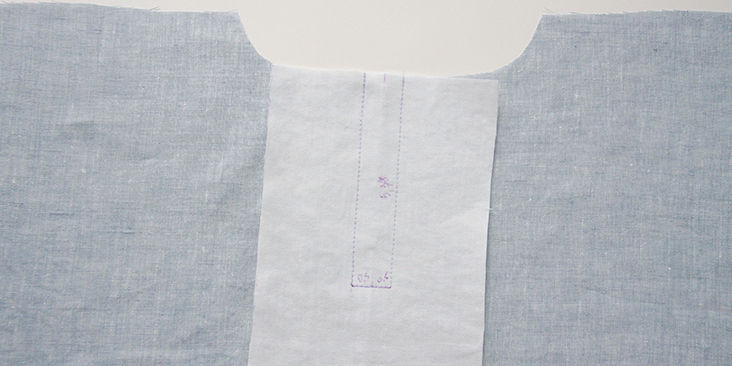
5. Cut in the middle but stop 0,5” from the end and clip diagonally to create a triangle.
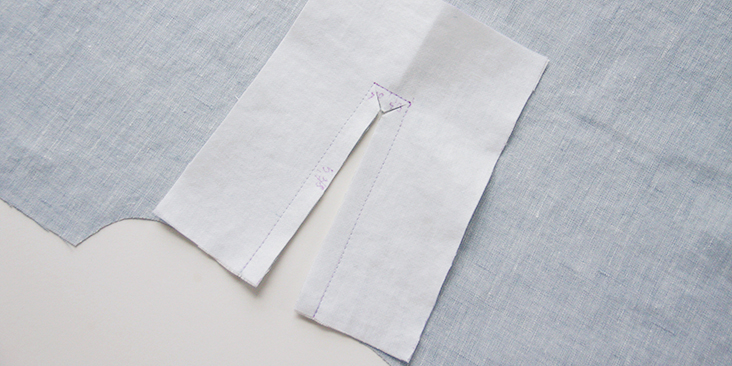
6. Trim the seam allowance to 1/4″.
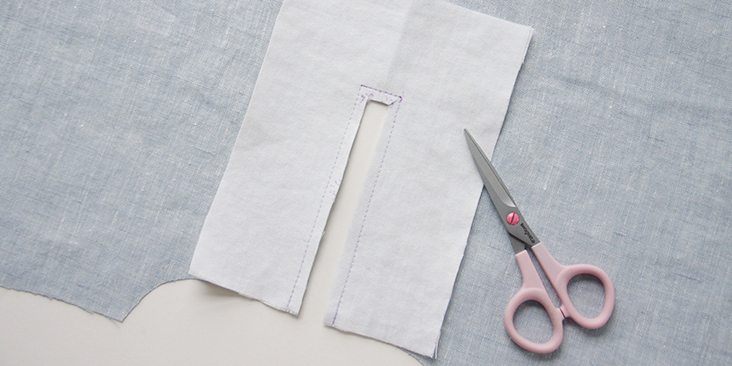
7. Press up the raw edge 3/8” (1 cm) seam allowance towards the wrong side of your placket piece.
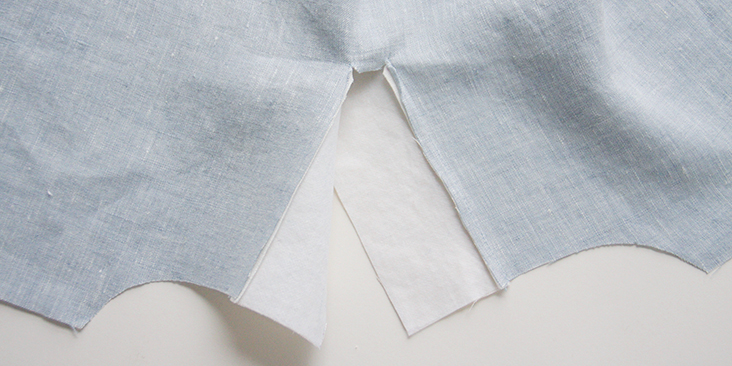
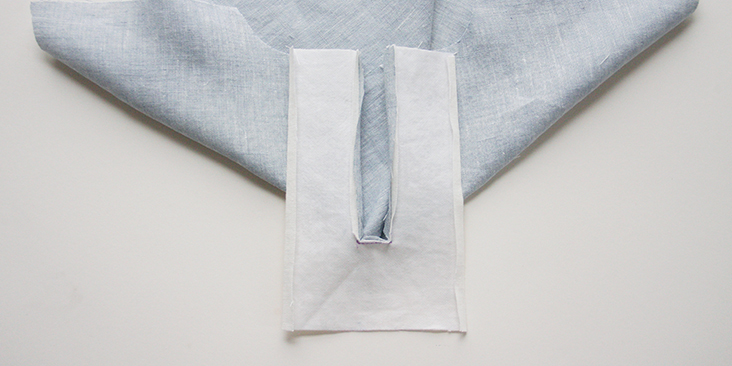
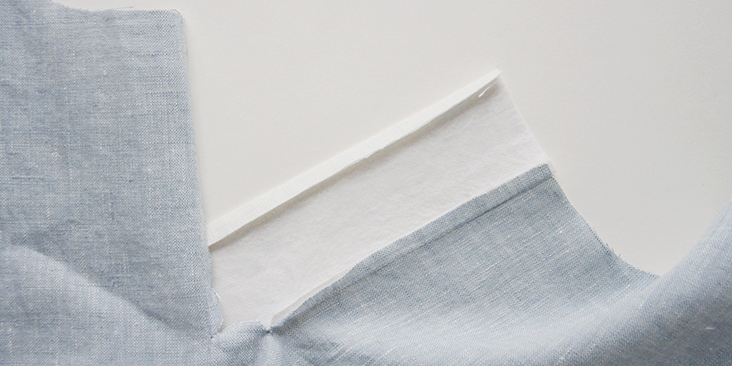
8. Fold left side of the placket over the right side of your garment just to cover the stitch line with the folded hem. This way you’ll get a nice overlap at the end.
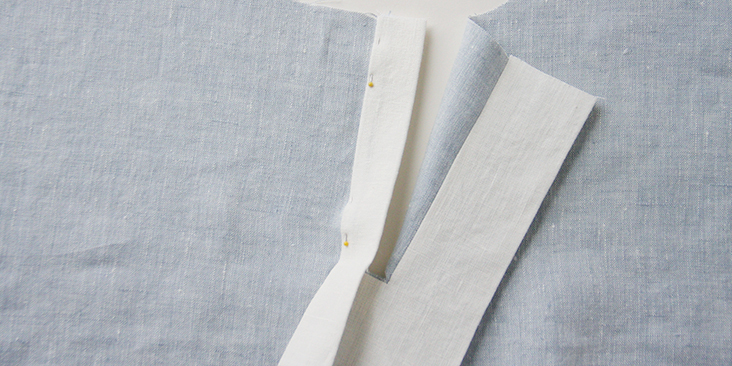
9. Topstitch as close to the edge as you feel comfortable with to enclose the seam. Stop stitching when the placket opening ends. Reorganize your fabric near the bottom so that it doesn’t get in your way.
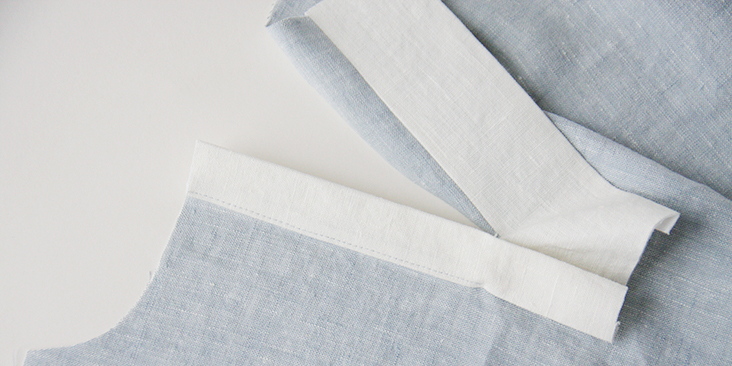
10. Fold the other side of the placket over the right side of your garment just to cover the stitch line with the folded hem. Here’s your overlap!
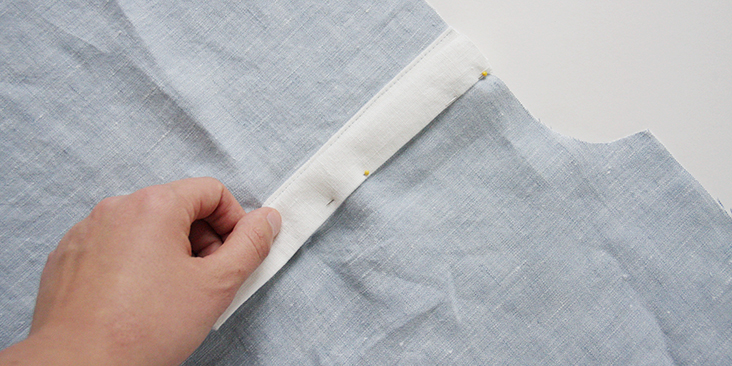
11. You now have several layers of fabric at the end of your placket and you’ll need to trim the right/bottom placket side down to 1/2″ to eliminate the bulk.
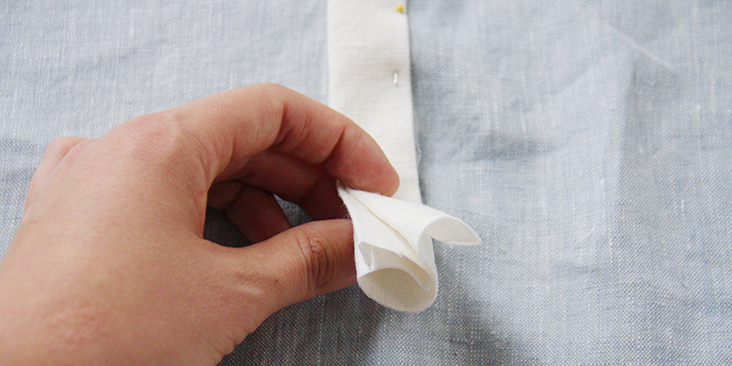
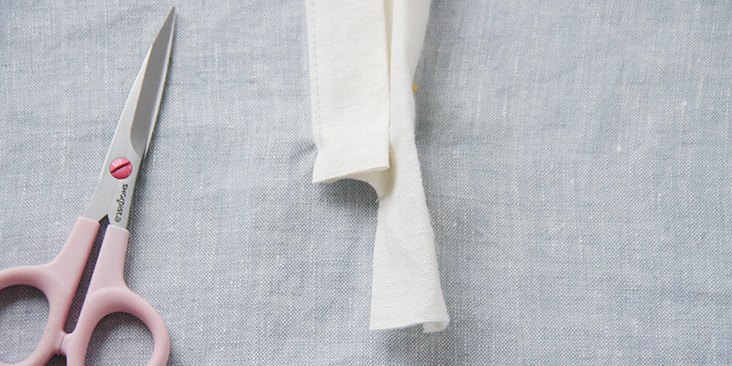
12. Fold the remaining layers so that the bottom of the placket comes to a nice, square shape with no exposed raw edges. Pin in place.
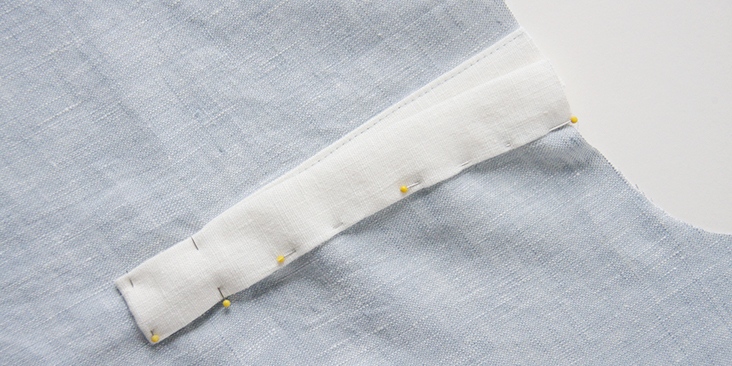
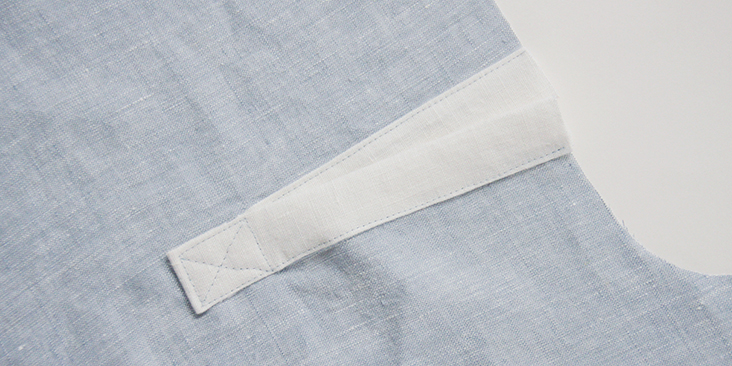
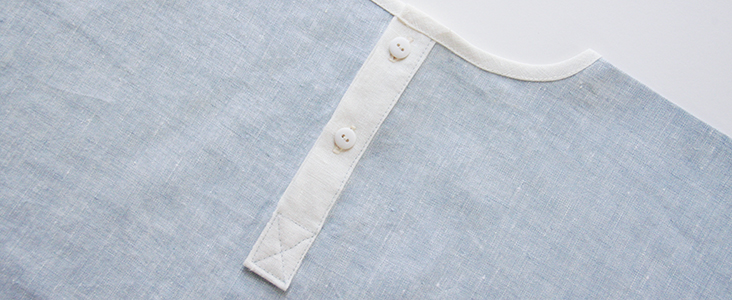
13. Topstitch along the edge of the placket and create a decorative X at the bottom to stabilize and close the seams.
14. Sew the buttonholes and attach the buttons following these easy tutorials HERE and HERE and you are all done!
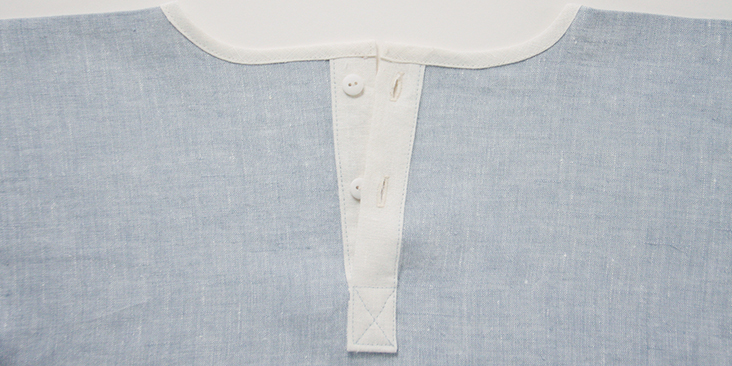
Follow the rest of your pattern instructions to complete your project.




5 Comments
Roshanda Chark
Thanks for this tutorial. I find it very helpful and easy to follow. My only watch out for other beginner placket makers is that if you plan on making a wider placket, then you will need to adjust the margin around the center line so the placket can lay flat when folded. I am fairly new to making plackets, so this was a learning for me. I had to unpick and trim which is a challenge when sewing with linen thread on linen fabric. Otherwise, great tutorial and this will be my go-to placket pattern.
Pingback:
Sy en partiell knappslå – Sy dina egna kläderacacarole
This is the way I was taught by my Mum to sew plackets….never knew there was any other method! She was a very talented seamstress and I was so lucky to be taught to sew by the best! ☺
Laurie B Healy
Rema, my dear, you are a genius!! Never seen this before, but it’s brilliant. I am going to try this today.
Rima Khusainova
Thank you so much Laurie! Somebody showed me this little technique some time ago and I thought it was genius too! Happy sewing!