Sewing Glossary: How To Add Inseam Pockets To A Flat-felled Seam
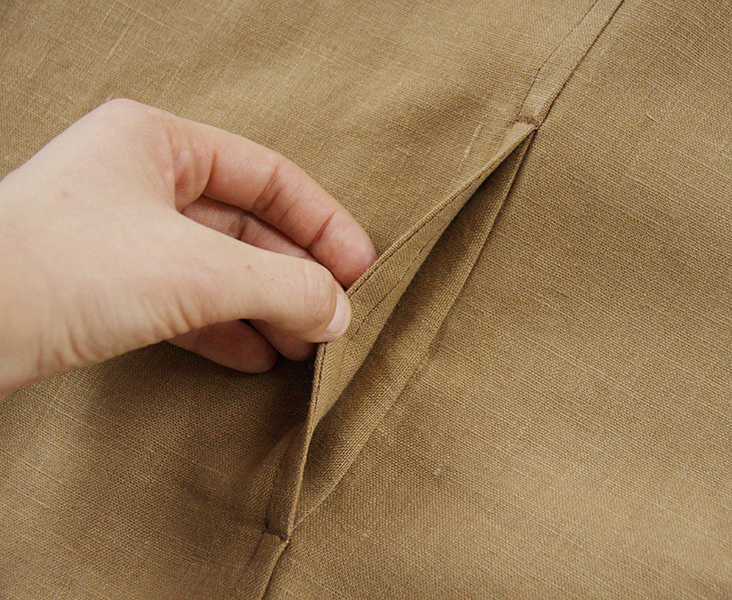
In our previous tutorials we showed you how to sew inseam pockets and flat-felled seams. These two skills are very useful to know and are often used in garment making. So today we decided to take you one step further and combine the two by showing you how to add an inseam pocket to a flat-felled seam.
Surprisingly, there are very few instructions about this technique on the Internet and since it is a great sewing skill to know if you want to make a pair of pants or a skirt with reinforced seams, we thought it deserves a proper tutorial!
Materials & Tools
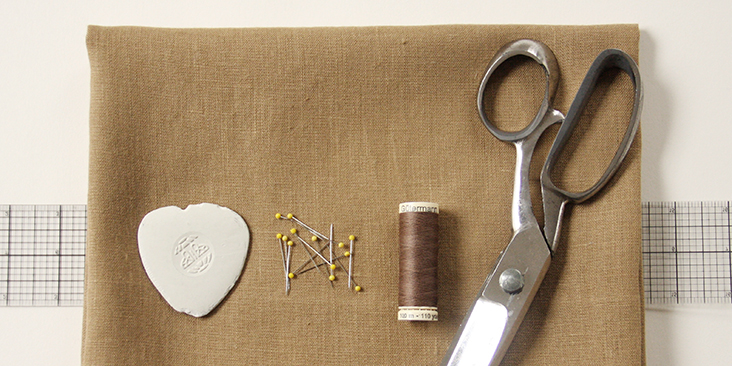
Fabric of your choice (we are using IL019 GINGER Softened medium weight linen)
Matching sewing thread (for the purpose of this tutorial we have used a darker color thread), scissors, ruler/measuring tape, pins, fabric marker/chalk, sewing machine
Difficulty
Intermediate
Time
1 hour
Pattern
Note: When sewing flat-felled seams, remember to increase the seam allowance of your pattern to 5/8″.
You can either draw your own pocket or use our printable template. With this template, your finished pocket will approximately measure 10″x 6″ (25,5 x 15 cm).
Make sure that you have two mirrored pieces for each pocket. The best way to get your pockets right is to fold your fabric in half and then pin the template an inch away from the fold. Cut through both layers of fabric at the same time and don’t add the seam allowances as they are already included in the template.
Steps
Note: Prewash your fabric and tumble dry it until it is still slightly moist, dry in room temperature. Iron the fabric so it is easier to work with.
1. Before you can start sewing, you need to finish the rounded edges of your pocket pieces with a serger or a zigzag stitch in order to prevent the fabric from fraying in the future. Leave the 5/8″ seam allowances raw at both ends of the opening.
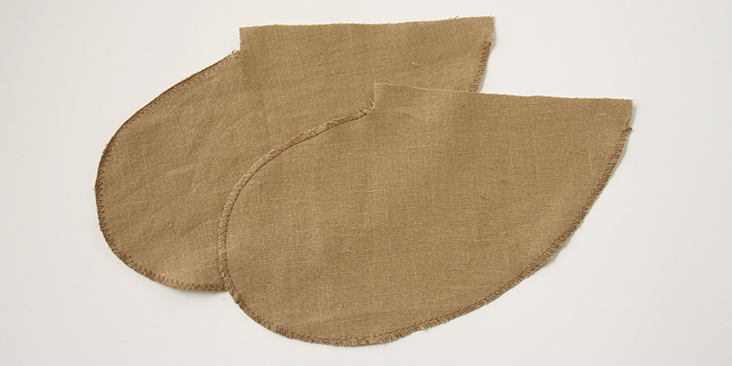
Usually, your pattern will give you indications where to place the pockets but if your pattern doesn’t call for inseam pockets or you want to add them to one of your own creations, then it’s up to you to decide where to place them. Try on your unfinished garment and determine the best spot.
2. Pin your front pocket piece to the front pattern piece right sides together.
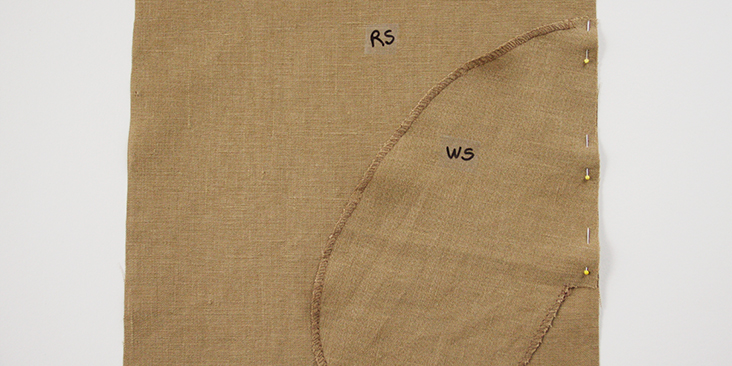
3. To attach your pocket panel to the fabric, start stitching in from the side of the opening an amount equal to the seam allowance required for the flat felled seam (5/8 of an inch). Note that you stitch a perpendicular line that is 5/8” long but at a ¼” seam allowance. Refer to the images below if this is not clear. Then stitch down to the end of the opening and back out to the side to create a rectangular shape. Remember to backstitch.
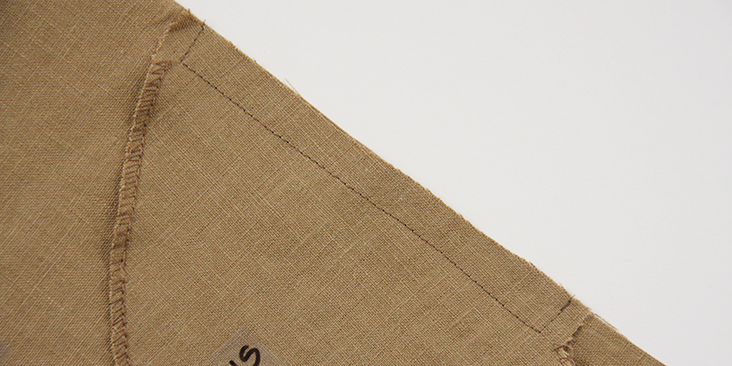
4. Trim the raw edges inside the rectangle down to 1/8″ and clip to the corners.
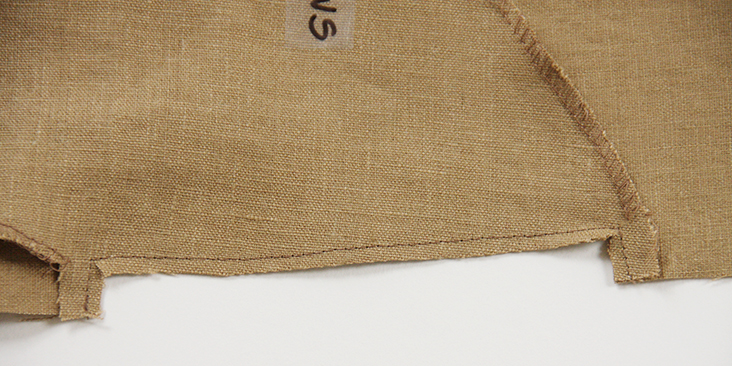
5. Fold your pocket panel to the other side and carefully press the seam flat and the trimmed seam allowances on the side.
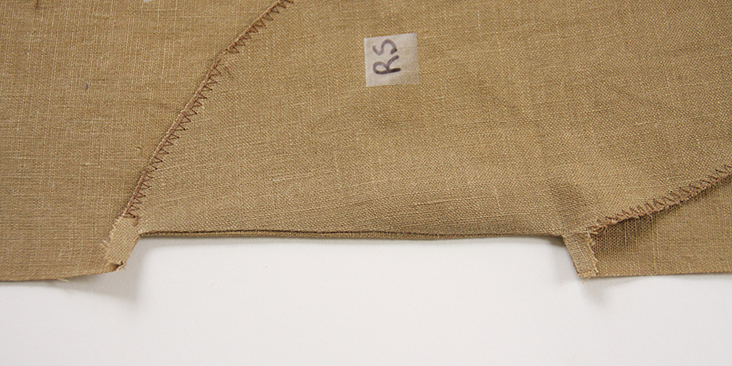
6. Working from the right side, topstitch your pocket panel (only the pocket length) in place 1/4″ from the edge. This stitch line will later blend in with your flat felled seam stitch line.
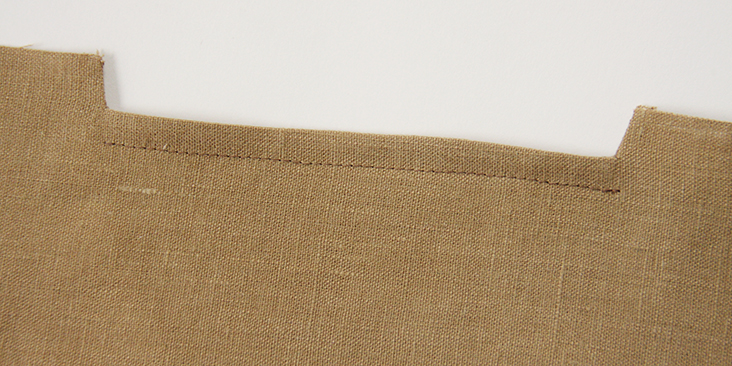
7. Place the second pocket piece on top of the first one right sides together and stitch along the curve from the spot where the first pocket panel is attached to the main fabric and up to the spot where it ends.
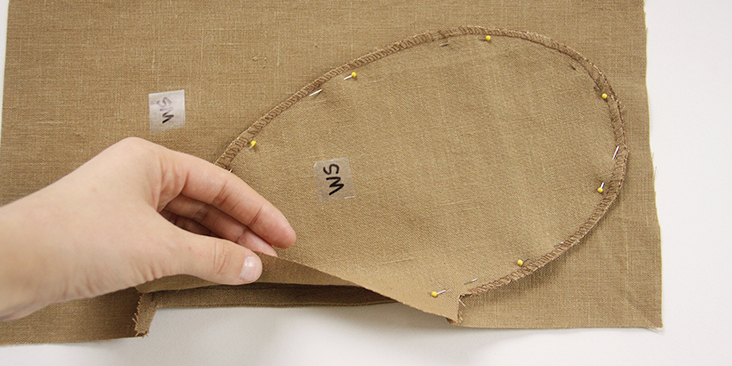
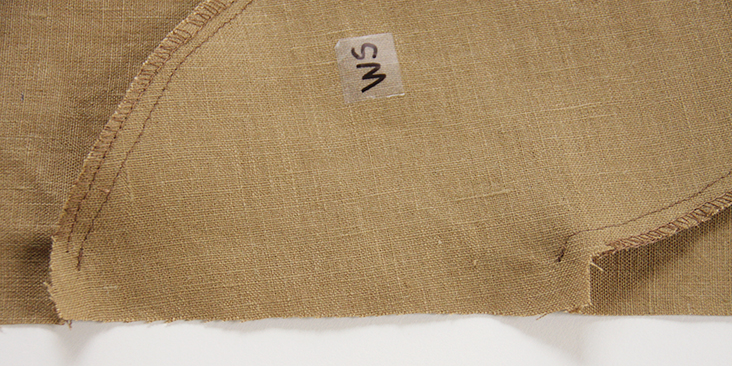
You now have a completed pocket attached to the front of your project.
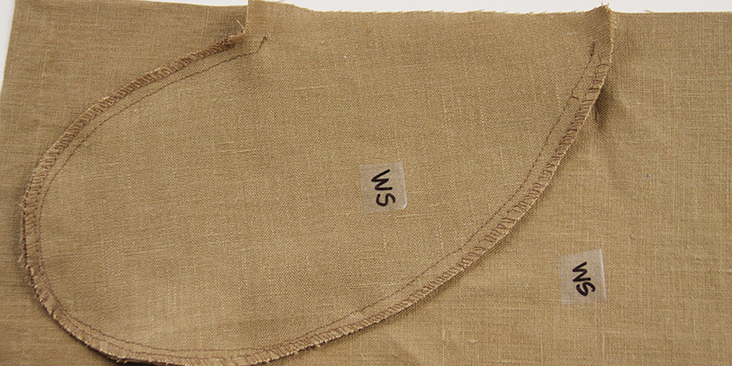
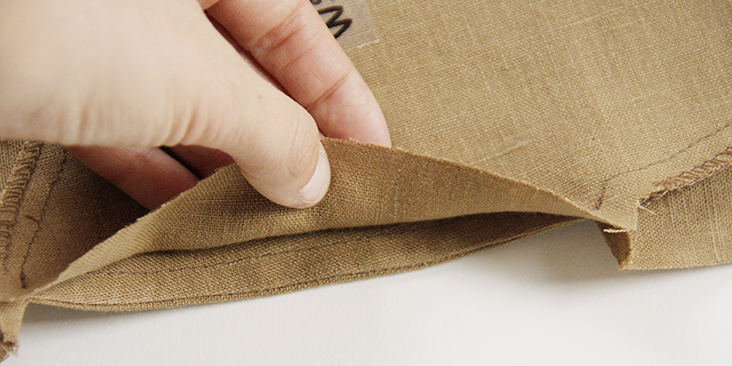
8. Now place the back pattern piece under the front piece right sides touching and pin aligning the raw edges. Note how the edge that you trimmed is shorter – don’t worry, it will later be hidden under the flat-felled seam.
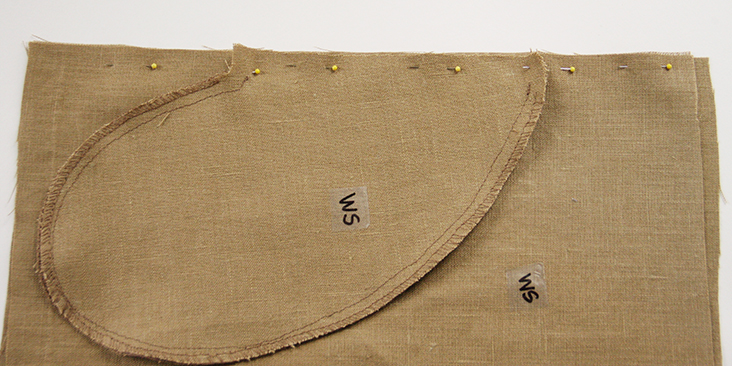
9. Stitch at a 5/8″ seam allowance and be careful not to catch the under pocket edge when you sew.
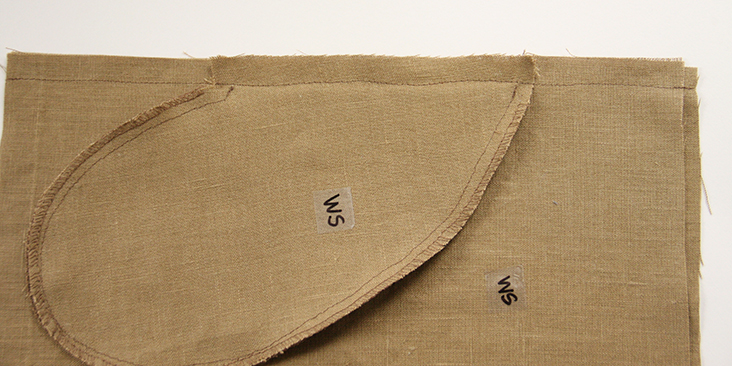
Here’s a look from the right side:
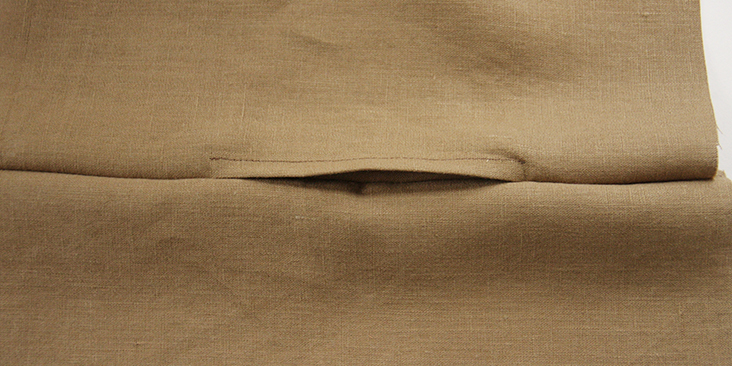
10. Trim the edge that has several levels down to 1/4″.
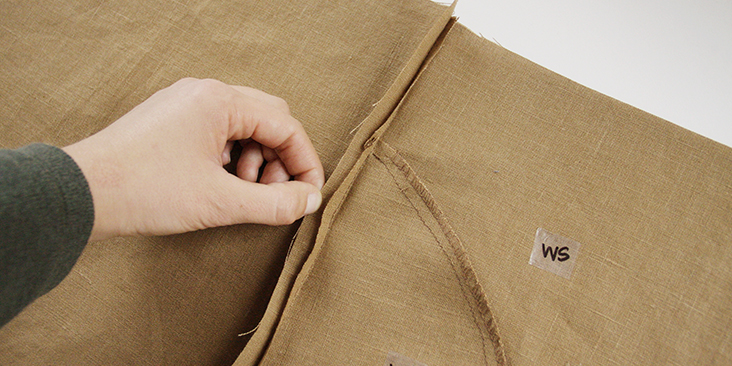
11. Fold the wider seam allowance over the trimmed one all the way to the stitching line and press. Fold it again and press flat to enclose all the raw edges within. Pin.
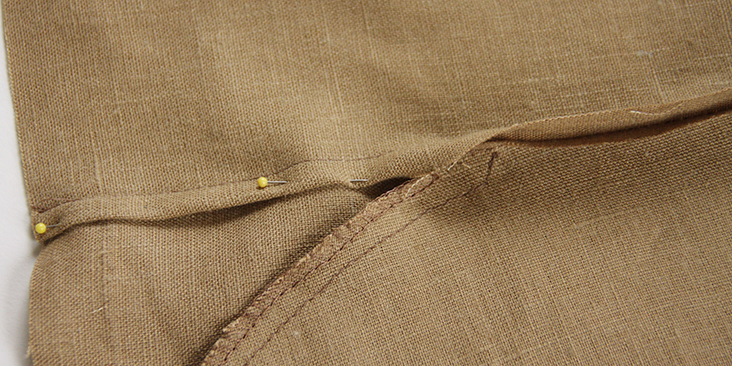
12. Before completing your side flat-felled seam, edgestitch the folded seam allowance parallel to the pocket opening.
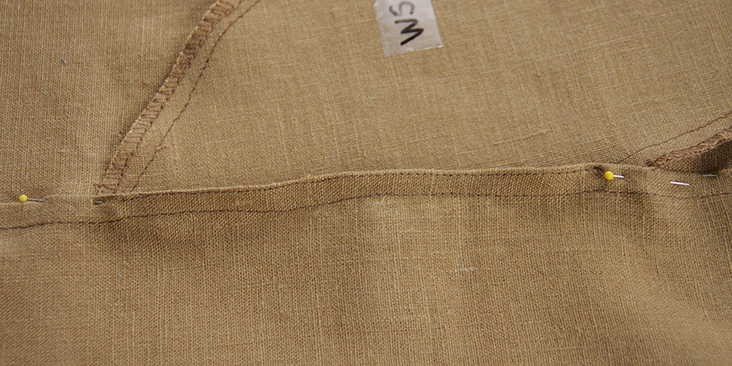
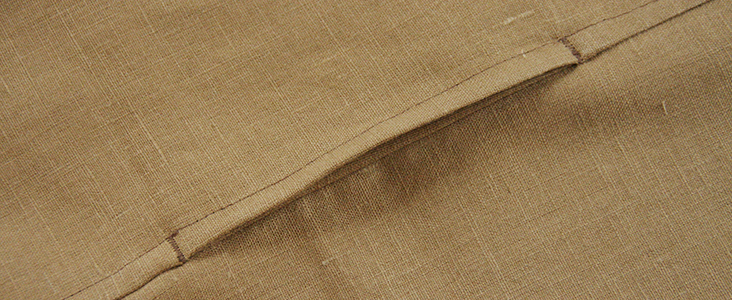
13. Now edgestitch the folded seam allowances to and from the pocket opening to create a flat-felled seam. Align your stitching with the stitch line that you’ve just made and when you reach the opening, reinforce it with a bar tack. With your needle still in the fabric, set your machine to a buttonhole stitch and sew a small tack perpendicular to the side seam.
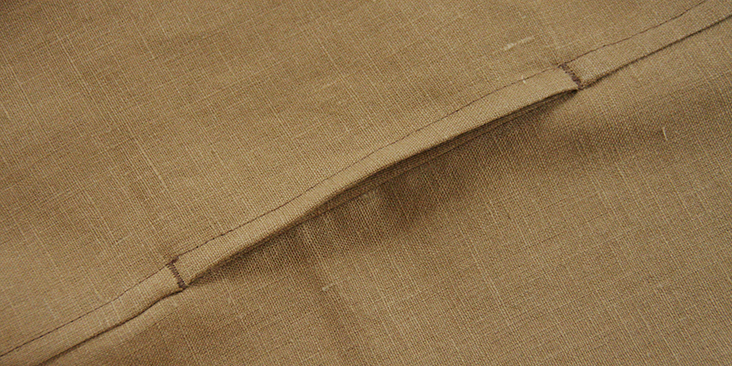
We hope you’ll find this technique useful for your future projects!








23 Comments
Patricia Lynch
Thank you, Rima. This is a great tutorial. VERY helpful to label the WS and RS with tape, also. You make it all so much easier. I really appreciate the archive of tutorials on your site.
Candace Strong
Do Fabrics-store’s fabrics actually have a right and wrong side? Since it is dyed not printed I have never worried about a right side versus a wrong side. Please correct me if I’m wrong about this.
Lauren Linen
Hello Candace, no there really isn’t an obvious right and wrong side. I like to be consistent when cutting out my fabrics so I try to make sure I’m always cutting my pattern pieces with a consistent side of the fabric as my right side.
Jill
Thanks for all the great tutorials! I have read through the French seams and Flat Felled seams and now the pocket tutorial. They are detailed enough to give me the confidence to try it. So, thanks again. Given me that “sewin” feeling!
Rima Khusainova
Oh thank you so much Jill! Anything is possible when you have the right steps 🙂
Linda
You are a life saver! I’m making cotton twill shorts for my husband and couldn’t picture how to do the pockets. Thank you!
Rima Khusainova
Thank you Linda! So happy to hear that you’ve found this little trick useful 🙂
Jane Bordzol
Can’t wait to try this. I’ve already don a tutorial to add pockets and I loved it!
Susan
Great instructions!
Sidney Ann Spencer
Your tutorials are wonderful.. My great Aunt Mamie taught me how to sew at 12 years of age. We started out with doll clothes. I am now 74 and I still love to sew my own clothes. Now I use Barbie doll patterns to teach my great granddaughter to sew. There is still so much more to learn about sewing though. I’m excited to learn something new. LOL
Sidney Ann
Muriel
These instructions are so clear. Thank you! I have several pairs of capris without pockets and i have wanted to try putting in pockets. Now I know i will tackle putting in pockets. thank you!
Rima Khusainova
Thank you Muriel! Glad you’ve found this technique useful!
MaryAlice
Thanks very much. I’ve always just ignored that pocket finishing and hoped not one would notice.
Rima Khusainova
I know what you mean! 🙂
Patricia Hersl
How I adore your patterns but can’t conquer a computer enough to be able to store. If I had my best life, everything would have a little pdf button to push so that I could store it the only way I know.
What a super technique.
Lynda
Patricia,
If you have copy and paste you can drop in your memo file
Rima Khusainova
Hi Patricia! You can save the page as a PDF by going to File–> Print –> then in the printer dialogue window you choose “Open PDF in Preview” —> And then “File” again –> Save. The order might be a little bit different depending on your computer but the idea is to be able to save the web page as a PDF. If not, you can follow Lynda’s advice and use copy/paste. Works every time 🙂
Susan Seifert
I just cut out some linen culottes with pockets, going to try this, instructions couldn’t be simpler, thanks !
Rima Khusainova
Good luck Susan! Let us know how it turns out 🙂
Diane
Beautifully explained with excellent photos! Thank you. After 40-plus years of sewing, this is the first time I’ve seen this technique!
Rima Khusainova
Thank you so much for your kind words Diane!
Dana
Thanks for the great tutorial!
Rima Khusainova
Thanks Dana! Glad you liked it 🙂