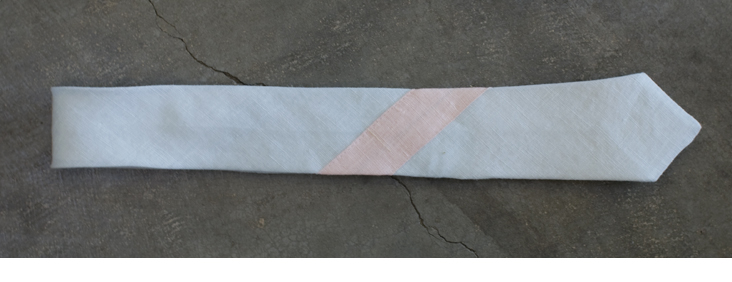
LINEN NECK TIE TUTORIAL
Difficulty: Beginner to Advanced
Time: Approx. 2 hours
Materials:
Approx. 1 yard of IL020 Light Blue (with IL020 Light Pink stripe)
Pattern
Interfacing
Hand Sewing Needle
Print out your pattern pieces. Cut out the individual pieces and tape them together at the matching edges (for example, match both edges together that are labelled “A”). This pattern includes a 1/4″ or 1/2″ seam allowance, whichever you prefer to work with.
Pin onto your fabric with the bias line on the pattern pieces matching the bias of your fabric. If the fabric is not cut on the bias, the fabric will fold and generally be wrinkled in appearance when tied.
First match the front tie piece (Piece A) together with the middle tie piece (Piece B), matching the edges at a 90 degree angle, as shown here:
Make sure to have the pointed ends overlapping by the amount of your seam allowance. You have to sew directly through the cross-point of the two fabrics, otherwise your seam will be off. Sew and iron the seam open. Match the opposite edge of Piece B to the not-triangular side of the end tie piece (Piece C), again at a 90 degree angle, keeping right sides together. Sew and iron the seam open.
Take the lining pieces and match with right sides together onto the ends of the necktie. Sew onto the necktie, leaving one side edge unsewn – make sure you leave the same side unsewn on both ends of the necktie.
Turn the ends right-side out and iron. On the side that was sewn under the lining, fold and iron across that edge of the necktie (along the entire length of the necktie) by the seam allowance.
Cut out your interfacing, and match the edges together like you did on the necktie pieces, using the same seam allowance as the necktie.
Iron the seam open so that it’s nice and smooth.
Once your interfacing pieces are sewn together, slide the ends in between the lining and outer fabric of the tie. Iron into place if you’re using a fusible interfacing, and pin into place if you’re using non-fusible interfacing. I decided just to use 4C22 in Bleached as my interfacing (it’s not quite heavy enough, but does a good job of providing more body to the tie!).
Now here comes the time consuming parts of creating a tie! Start by folding the unfolded edge of the tie over your interfacing, making sure that the edge overlaps the center of the tie by your seam allowance (for example, I used a 1/4″ seam allowance and had the raw/unsewn edge lay over past the middle mark by 1/4″). Iron the fabric, and then fold the folded side over, lining the fold up with the middle of the tie. Continue like this across the entire tie, pinning as you go.
If you would like to include a holder for the smaller part of the tie, cut out a 2″ x 4″ piece of fabric. I cut mine from the pink lining fabric. Fold in half with the long edges together, and sew using a 1/4″ or 1/2″ seam allowance. Turn right-side out, and iron it flat. Fold in half and sew the raw edges together to get this:
Pin the sewn edge into place on the back side of the front piece. You can either slip stitch this into place now (sewing it into the seam, then ironing it open and sewing it onto the tie), or secure it as you sew up the rest of the tie. Here’s what the holder will look like once it’s sewn into place:
When you make your tie, give us a comment and let us see your awesome creation!


5 Comments
Caitlyn
Hello! Love your tutorials SO much! Excited to make this tie for my husband, but when I click on the pattern, I get a message that the file/link for the pattern has been deleted or damaged.
Cheryl Wical
Oh no. The pattern doesn’t exist at the location the link points to. Is it somewhere else on the site?
Many Thanks,
Cheryl
Megan
What interfacing is recommended for use with the linen? Cotton, wool?
Molly
I am going to attempt to make this tie for my son. Is the size designed for a child or a man?
IBE
THIS WAS A FUN & WELL ILLUSTRATED TUTORIAL….I HAVE BASIC SEWING SKILLS & USUALLY REFRAIN FROM SEWING ANYTHING ON THE BIAS, BUT THIS STEP-BY-STEP TUTORIAL ENCOURAGES ME TO MAKE AN ATTEMPT. THANKS!!