


LINEN BLANKET TUTORIAL
Difficulty: Beginner
Materials:
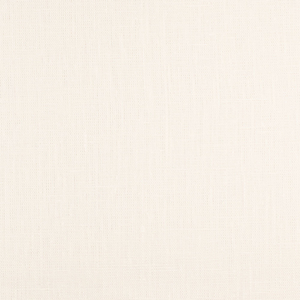
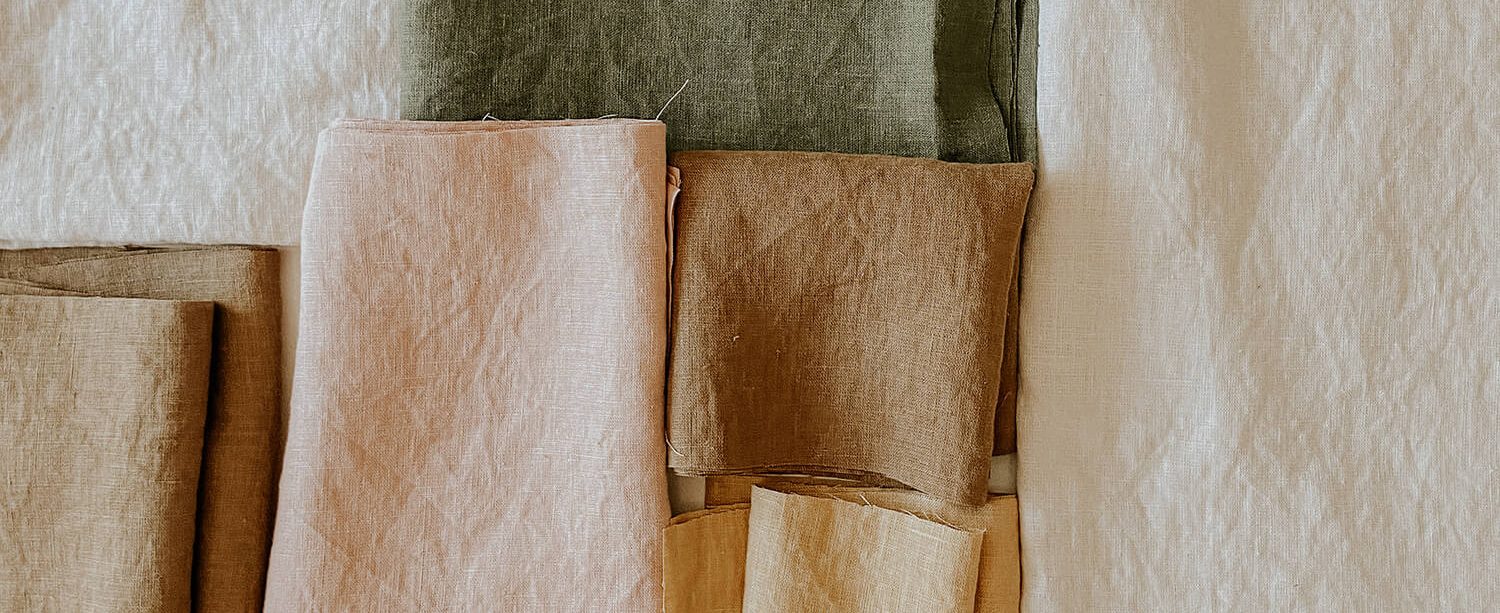
2 yards of IL019 or 4C22 Mix Natural (click on links)
A sewing machine
Lots of patience
Time: 3 – 5 hours
1. Decide how large you want your blanket to be. A standard throw blanket is approx. 50″ x 60″. Add in 3.5″ to each side for the fringe. This will make the total size you need to cut for the blanket 57″ x 67″. You could even just use the full 2 yard length for an extra-long blanket.
2. Cut off the sewn selvage edges.
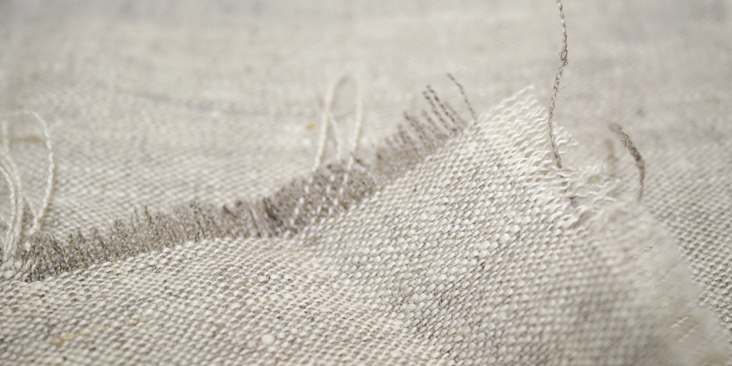
 3. Sew a seam 3.5″ in from each edge. You can use a straight seam or a zigzag seam. We just want to keep the fringe from fraying too far in on the blanket, and make a marker so we know when to stop removing threads.
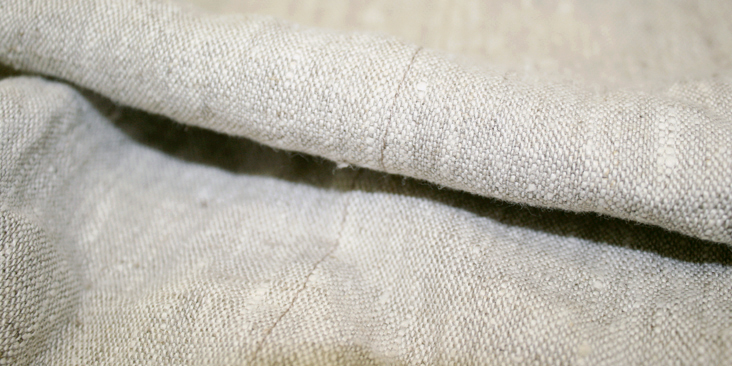 4. Take a needle and start pulling away the threads in the blanket on the edges. You’ll start seeing your fringe develop.
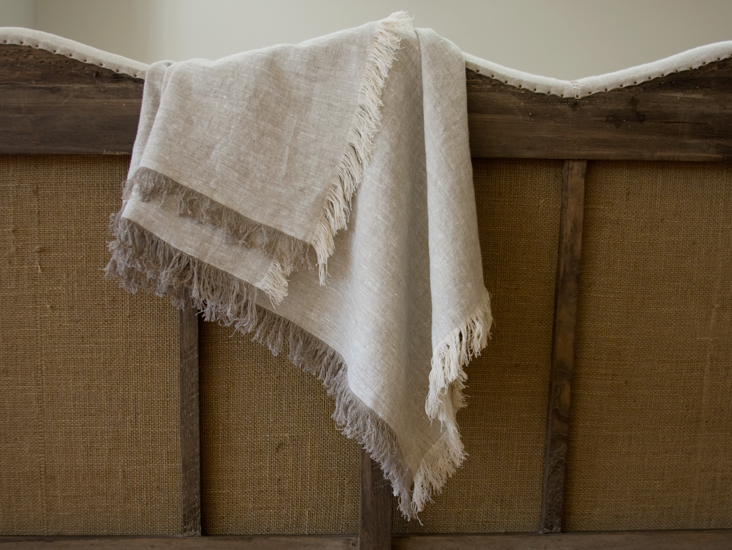
 Once you’ve created your fringe, you’re done! You can do a couple tack stitches at the corners to secure the threading on the blanket if you’d like.
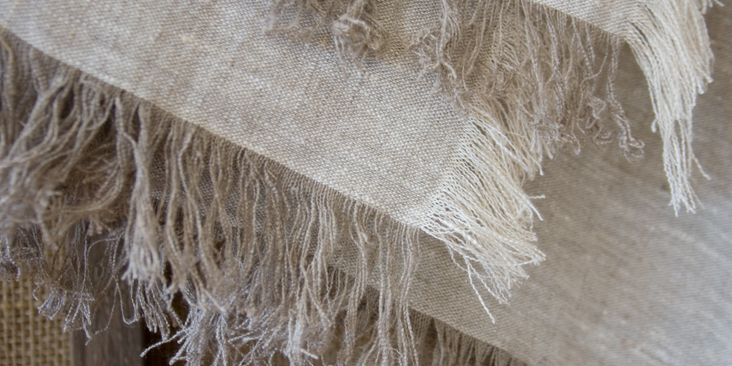
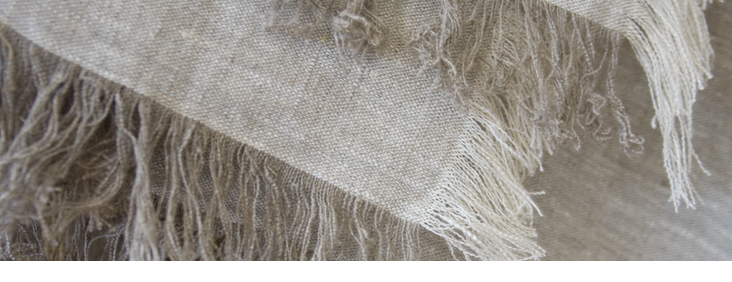
To get this dual-toned fringe, use our Mix Natural color! The threads are woven with a different color on each side, giving it a dual tone. We have a few other dual toned fabrics in the Yarn Dye section.
Leave a comment
Related posts

Blending Between Sizes on a Sewing Pattern – Part 2: How to Blend
If you’ve already read Part 1 of this tutorial, you will hopefully have a good understanding of when blending between sizes on a sewing pattern can come in handy. Let’s get into how to actually do it. In this Part 2, I will walk you through the basic process using a few different examples. I’ll…

Blending Between Sizes on a Sewing Pattern – Part 1: When to Blend
Let’s be honest—finding a sewing pattern that perfectly matches your measurements is pretty rare. And that makes sense! Every body is unique, fit preferences vary, and each pattern brand uses its own sizing system. If you find yourself falling between sizes, you’re not alone. But the beauty of sewing is that in these situations, you…

How Much Fabric Do You Need? A Simple Estimation Guide
Starting a new sewing project is always exciting. But there is nothing more frustrating than running out of fabric halfway through… or ending up with scraps that aren’t quite big enough for anything useful (trust me, I’ve been there! I have a whole drawer full of pieces like this). If you’re working with a commercial…
Understanding Seam Allowance: A Simple Guide
Every garment needs seam allowance—it’s a crucial part of garment construction. Sometimes it’s already included in the pattern; other times, it may need to be added, especially when working with a self-drafted pattern or after making adjustments. Seam allowance is the extra fabric added around the edges of a pattern piece. It creates space between…

Sewing Essentials: Dart Manipulation
Dart manipulation is a pattern making technique used to reposition a dart on a garment without altering or adjusting its overall fit. Essentially, it’s a way to move the shaping in your pattern to a new location. Dart manipulation lets you customise a sewing pattern to suit your design preferences. Whether you want to move…


SEW THIS LOOK


Latest Posts


17 Comments
Ann
Here’s a thought: Perhaps the kind of washing machine you use makes a difference in the “tangle” dilemma. Three of us made the fringed linen scarves. https://blog.fabrics-store.com/?s=fringed+linen+scarf The two of us with front-loading washing machines had no issues; the one with a top-loading machine experienced a tangle nightmare.
Ivy
I’ve made two nice throws with the heavy-weight blue and green plaids that seems to be no longer in stock. I seamed the edges and made a short fringe at the ends. A short fringe is not prone to the problems people are describing.
Jill Cattron Mihocko
I got a sewing machine for Christmas. I haven’t sewn since high school (40 yrs. ago)! This looks like a fun and easy project for a beginner, again.
Nancy Seyfried
I am just starting to work with linen. Love the idea of the throw, but would be concerned
With the fringe wear. Keep these ideas coming!
Linda
I turned some IL090 into bath sheets/towels, and they are wonderful! Now I see that I need to turn some into throws, too. Thanks!
Rakhel
Beautiful! So lovely! I have found it hard to pull the fringe, especially the longer it gets. Any tips?
Hilary Catron
I do not recommend any of the fringed linen projects, they do not last, they lose the fresh look pretty quickly. Linen should not have to be a delicate flower, it lasts forever, don’t make something from it with a Best By date.
I have done this type of project, and do not recommend it for several reasons. It looks great before it is laundered, but never again. The more you wash linen, and I wash throws several times each season, the limper and softer it gets. Which is great but…
The 3.5″ fringe not only gets wrapped up in itself, meaning you have to carefully pick it out like tangled curls in hair, for endless inches each time, but it also becomes tangled with pet and human hair, thread and lint from the washer load, all of which are part of everyday life. Boring.
I have also done maybe a 3/4″ fringe on heavy and medium weight linen napkins, exactly as described above, same problem after a time. The threads in the fringe fray and get thinner, sort of like hair that gets split ends. Not pretty.
In the end, on the long fringed item, I went back, cut all the fringe threads off and did a double rolled hem, mitered corners. SO much less time than the fringe. Also, after thirty years, it still looks fabulous. The napkins were eventually made into rags, because the fringe looked so awful. I used cloth napkins every day for the whole family for many years, and washed them in with the towels. The boring machine stitched ones of cotton or linen have lasted for decades.
I would do a mitered double-turned sewn hem, inches deep or just 1/4″. The larger the item, the deeper a hem it can handle and not look off balance. Audition the length you think you want before you make it permanent. Pin it and step back. You can hand stitch if you like that task while you watch a movie, or just machine stitch, with a straight stitch or one of the fancier stitches, matching or contrasting thread. These are your design choices, they make the end product uniquely yours.
Nitza Moshe
Hilary – what if one fringes enough to tie off? and wash by hand? We have had success with such but LOVE your comments and agree — haven’t had enough years the tied off ones washed by hand.
Nitza Moshe
http://www.LivingStonesTabernacle.org
lina
This was so helpful! It answered all my questions and concerns about how these beautiful fringes would wear over time. Thank you!
Diane Durand
I agree! I have bought frayed edged linen napkins… and those did the same thing. The worst is when they get the stray hairs and lint from the washer or dryer tangled in! The frayed edge is beautiful, but save it for say a dresser scarf, or a dining room table runner, that you take off when eating… so it does not get soiled… some decorative item that you are not going to wash but maybe once a year? or just hang out to air, and never wash.
Susan Freeman
I completely agree with your comments about fringe on linen items. Even short fringe on linen cloth napkins, placemats, and dish towels ends up getting matted quickly. I just finished a fringed throw for my living room using IL097 in Breeze Sand/White. Since it’s a more formal area of the house, I didn’t want messy fringe. An online search led me to an article on “Fringe Finishing Techniques “ at Gist Yarn. I laundered a 2 yard piece of the fabric using cold/gentle and dried on cold gentle. LOTS of lint. In retrospect, I recommend laundering twice. I first pulled threads on each end to establish the straight edge, removing the excess. I then removed the selvedge edge using my serger. Next I sewed a straight stitch across each end four inches from the cut edge to mark where the fringe would begin. Next I folded over 1/4 inch, then another inch on the selvedge edge which I hemmed starting 4 inches from the top and ending 4 inches from the bottom of each side. Starting and ending four inches in made it easier to remove the threads to create the fringe. I then removed the cross threads one by one until I had 4 inches of fringe on each side. Using the instructions in the article I mentioned above, I twisted and reverse twisted, then over hand knotted each fringe unit. When all the fringe was done, I trimmed excess fringe hanging past each knot. I also read online that fringed garments or throws should always be washed and dried alone, in a mesh bag like we use for lingerie or knits. I washed my completed throw as described and, even with all that abundance of caution, 4 of my twisted fringe unit knots came undone. I was easily able to redo those knots. I chose to hang the throw to dry and pressed it afterwards. I posted a photo of this throw in a review of the fabric. Yes, it was tedious, but the throw turned out great and I’m pretty sure I’ll be using it for a very long time.
Tanya
cut perpendicular to the stitching every 8-12″, cutting between the threads which will make the fringe threads. doing so shortens the length of the thread to be pulled. i tend to agree with hilary catron in reference to fringe on linen, though.
Karel A.
I LOVE this!! I think the IL019 would be the perfect weight, especially for summer. Such an easy and quick project with fabulous results.
Beverly
My attention span is somewhat limited. I’m thinking to try this with much smaller pieces to make placemats!
Roxane W.
Love, love, love this idea! Need to start now (maybe throw in a couple of matching pillows) for Christmas gifts next year!!!!! Thank you!
Laura
This is the beginning of a good idea, but it would not be “cozy” until it has been washed and machine dried a few times, which will soften the weave and fluff it. Ironing it will flatten the fluffiness. I would think that the heavier weight linens you offer would work better, be sure to use the softened variety.
Masha Karpushina
Hi Laura, It will look great both ways, depending on what look you are going for. As to ‘cosy’ this is the British spelling of the word, but thank you for reminding me that the Americans spell it with a ‘z’. 🙂