


How to Thread a Sewing Machine: A Beginners Guide – Part 2
Now that we’ve covered the basics of threading a sewing machine in Part 1, let’s move on to some additional functions.
In Part 2, I’ll show you how to change both the needle and the presser foot. I’ll also introduce the twin needle, and share some helpful troubleshooting tips for common issues that can happen when your machine isn’t threaded correctly.
I’ll be demonstrating on my Bernina B530 again. If your machine looks a little different, don’t worry—many of the steps are quite similar across models. You might just need to adjust a step or two depending on what you’re working with.
Changing the Sewing Needle
Different types of needles are designed for various fabrics and sewing tasks, so changing and replacing them will be a regular part of your sewing process.
Note: For more on sewing needles and choosing the right one, check out the article ‘Understanding Sewing Machine Needles’.
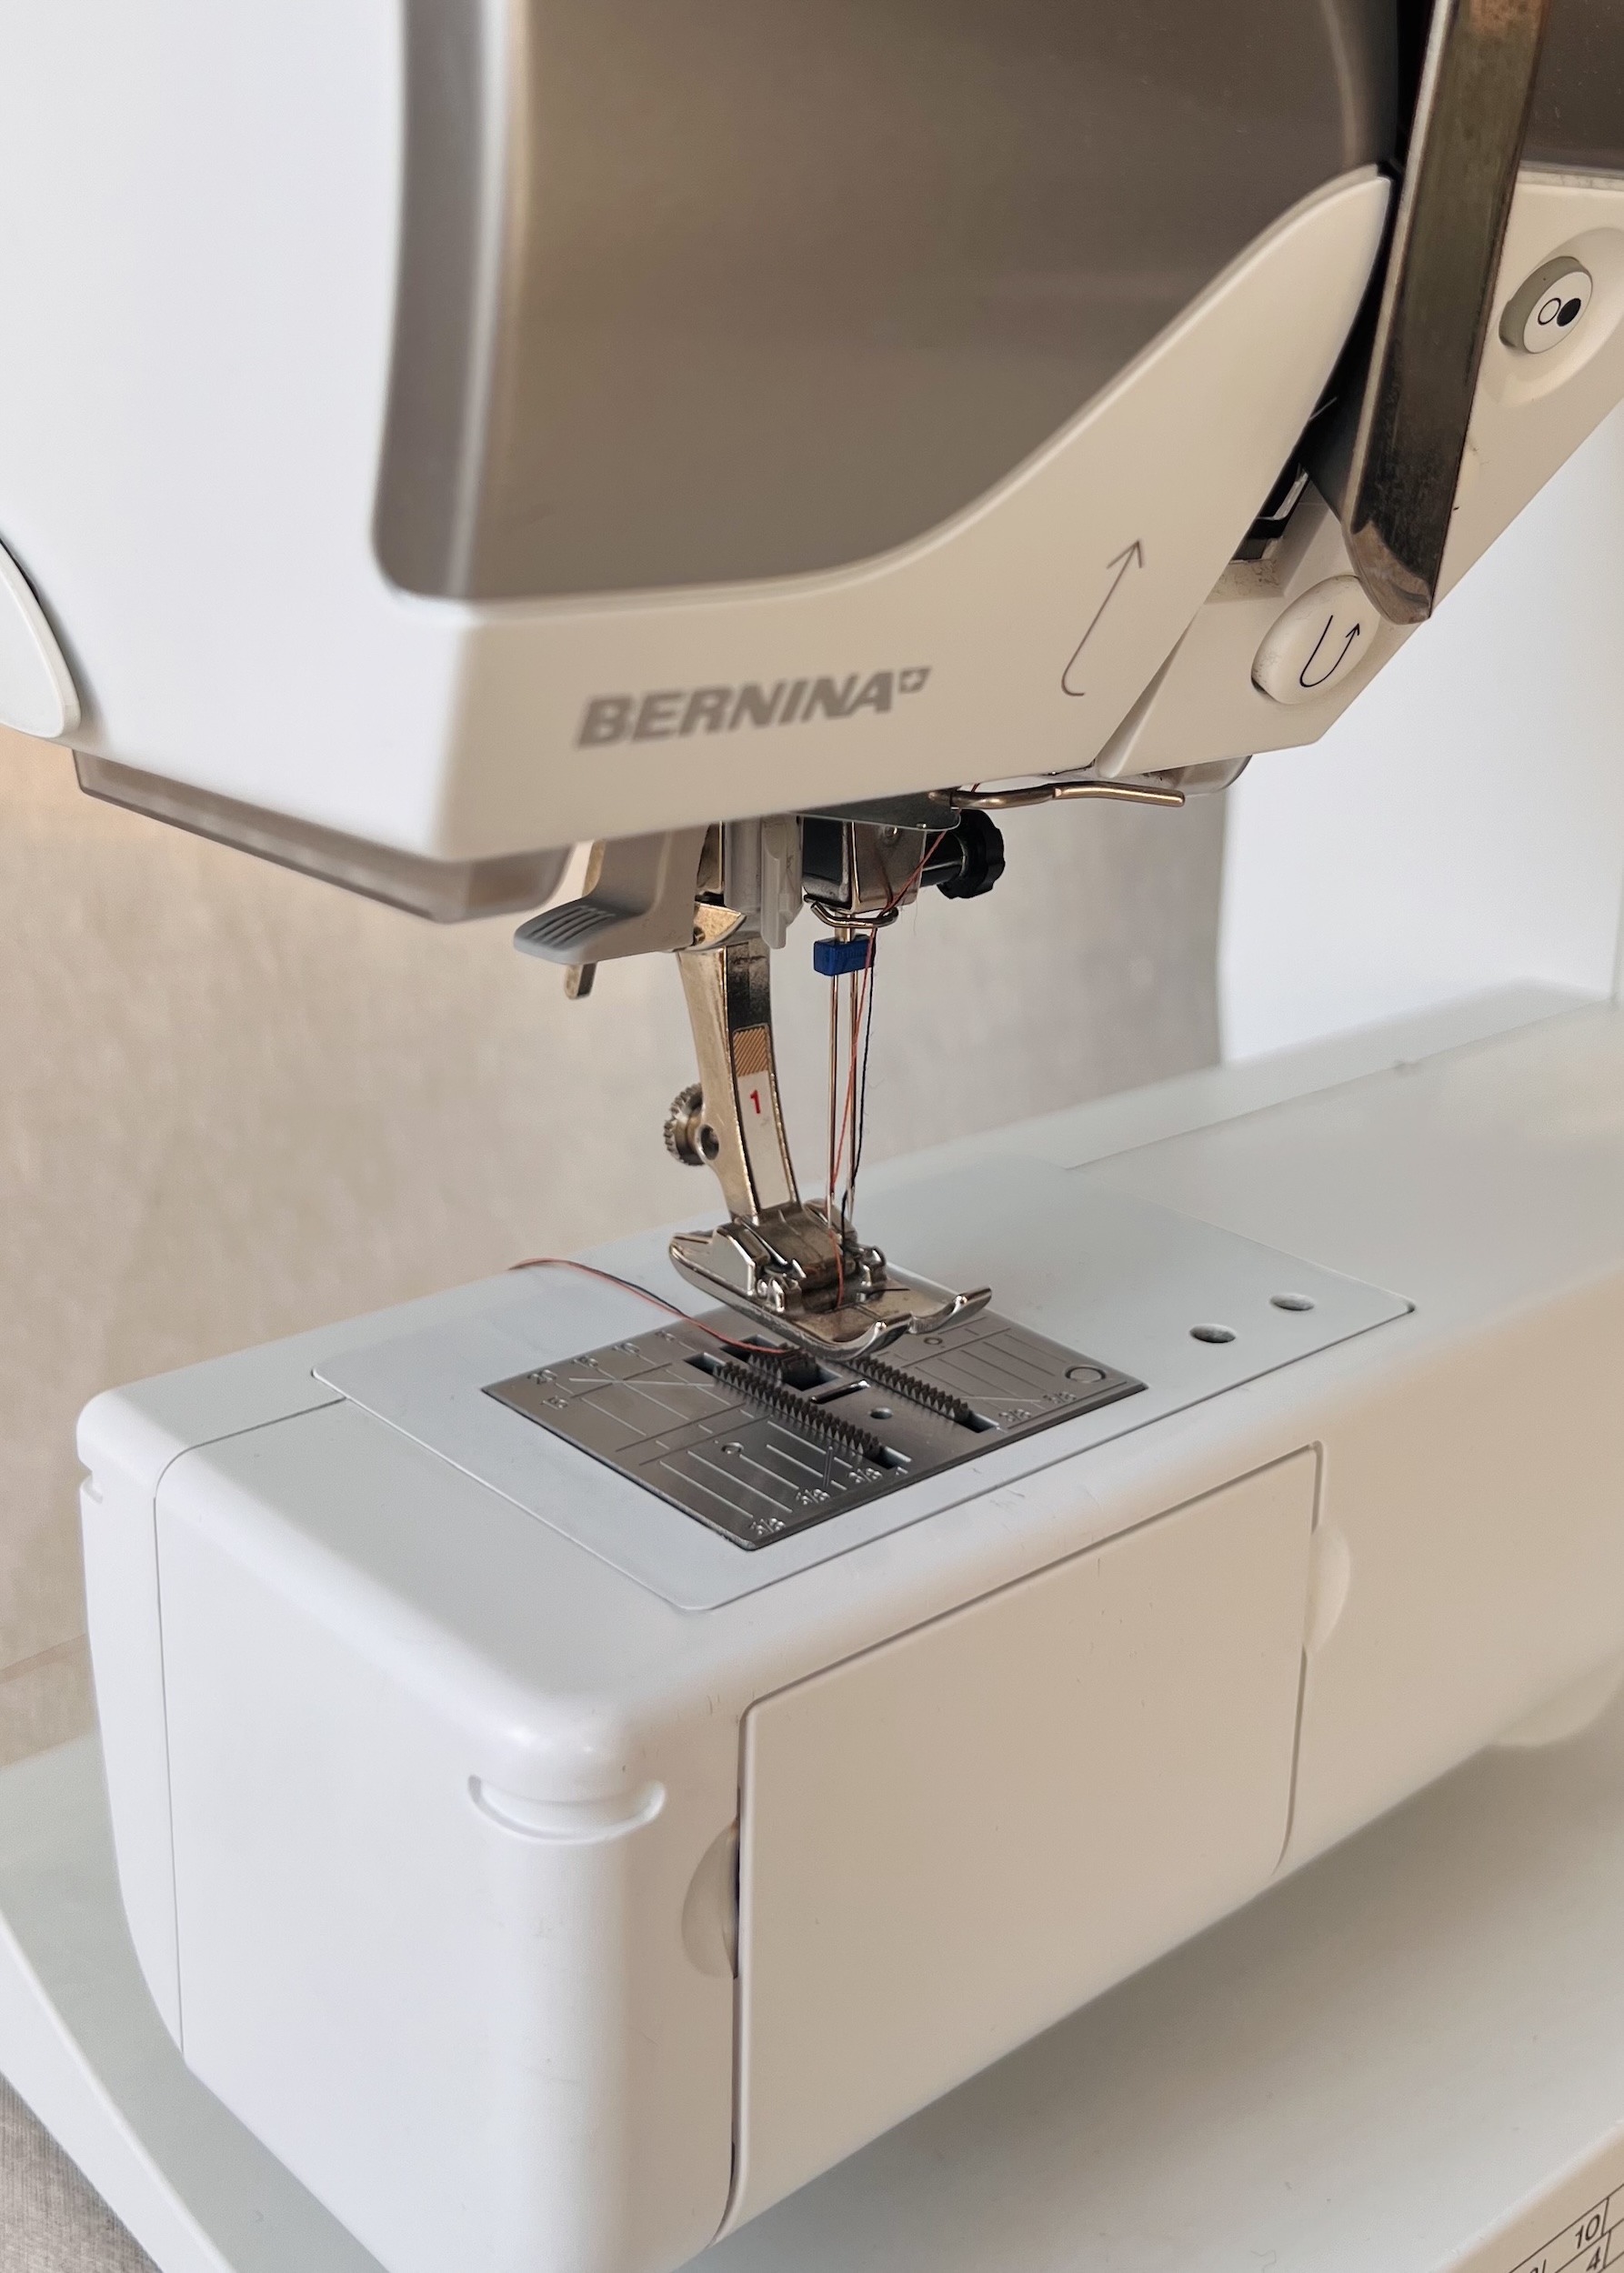
Here’s how to simply remove and insert a new needle.
Removing the needle:
1.Loosen the needle clamp screw by hand, or use a small screwdriver if your machine requires it and the screw is too tight.
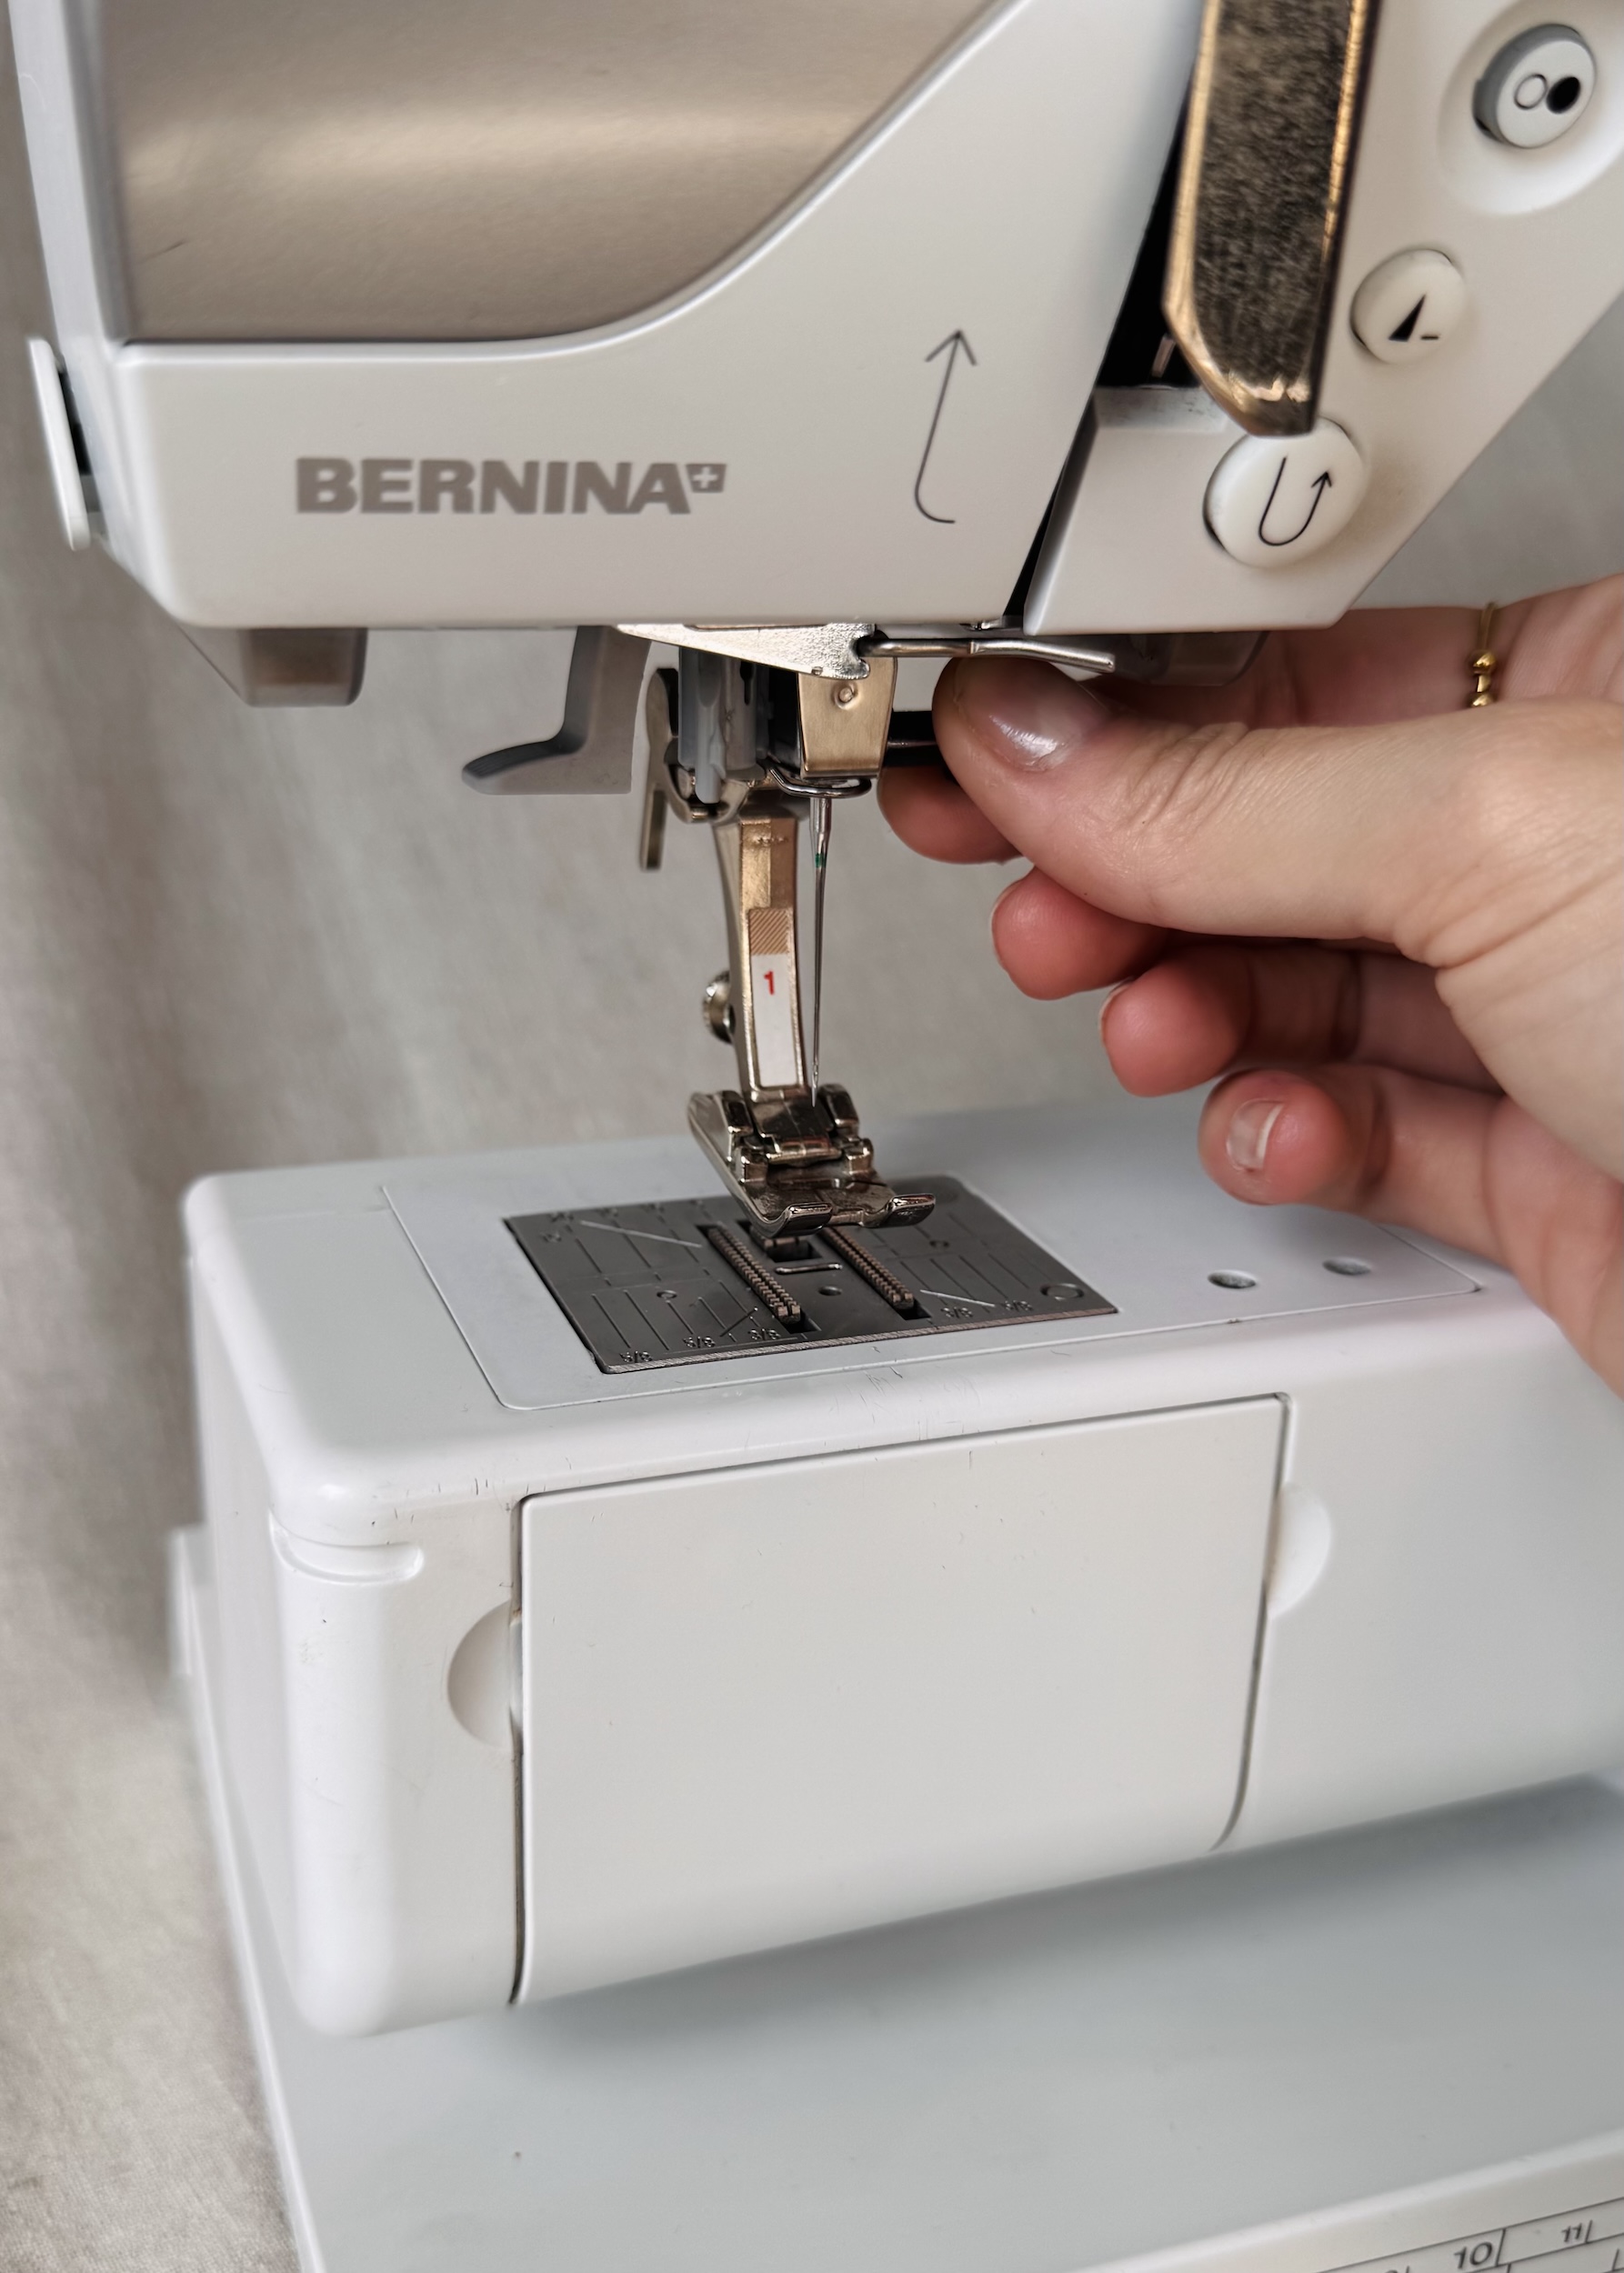
2. Gently pull the needle downward and out of the clamp, and then bring it toward you.
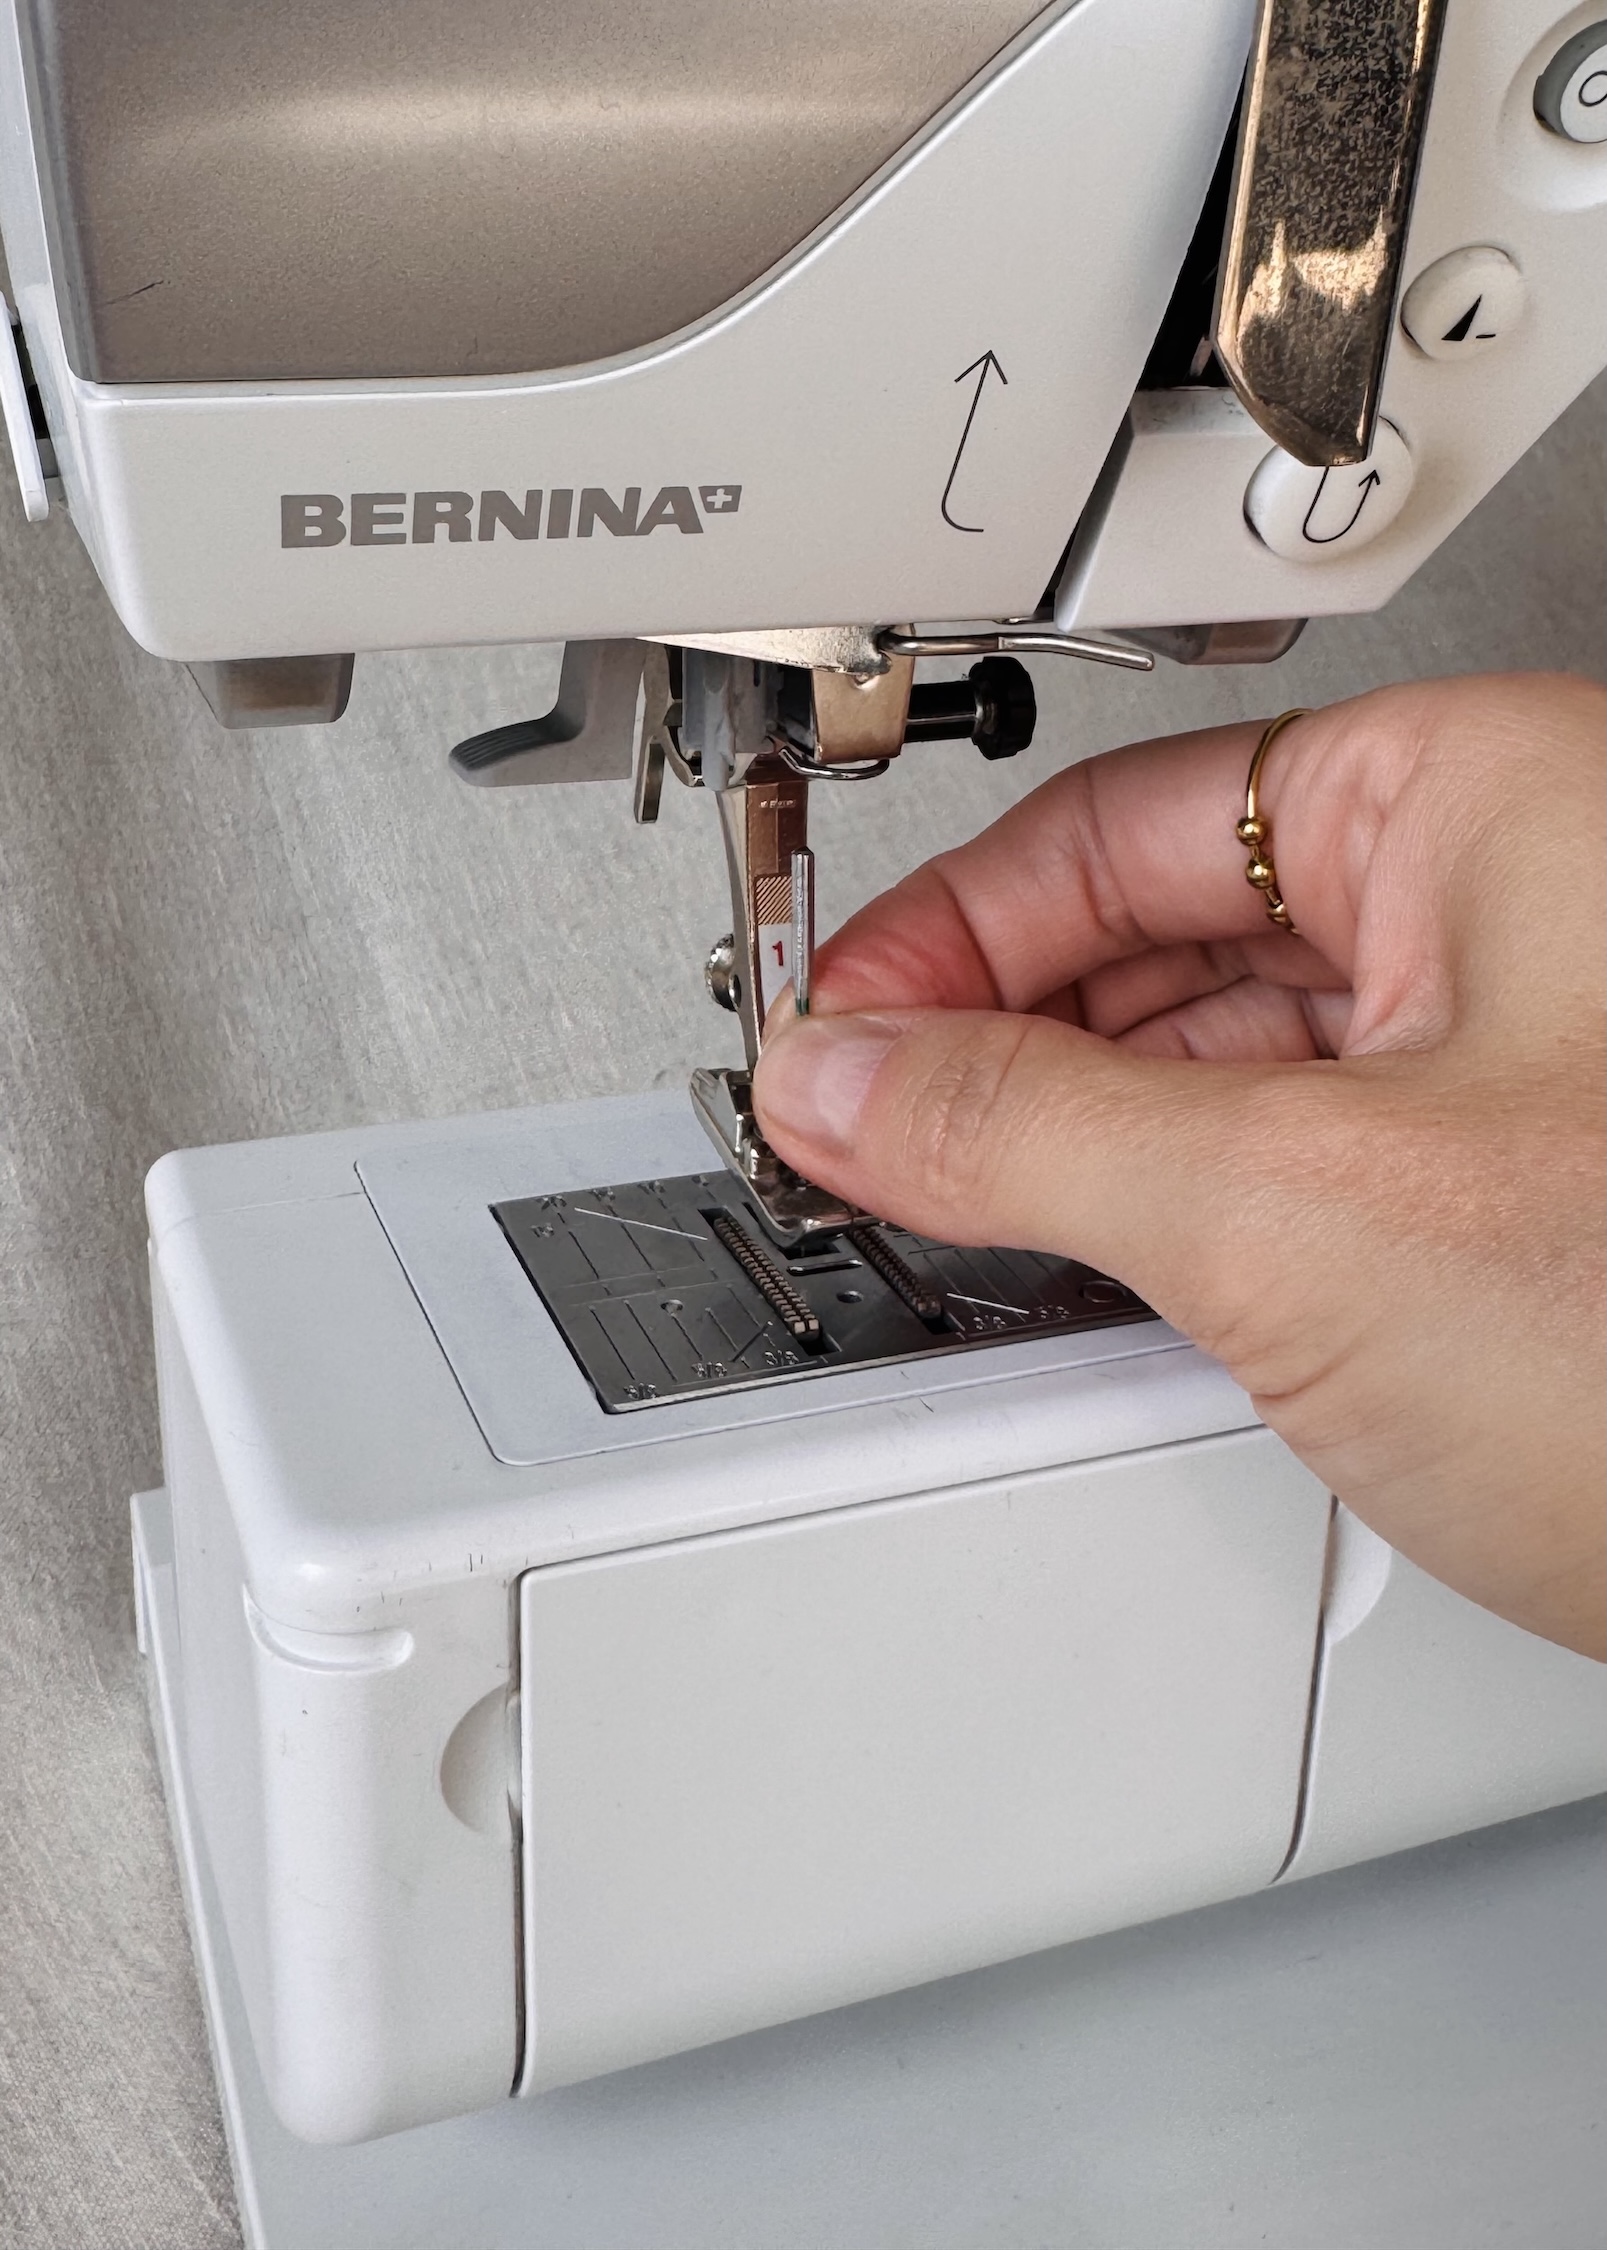
Inserting the needle:
1. Align the new needle vertically underneath the clamp. Make sure the flat side of the needle is facing the back of the machine.
2. Guide the needle upward into the clamp as far as it will go. You’ll feel a slight resistance once it’s fully inserted.
3. Hold the needle in place and tighten the clamp screw securely.
Tip: A good habit to get into is to switch to a new needle at the start of every project or after approximately 10 hours of sewing.
Twin Needling
A twin needle (also called a double needle) is just as it sounds. It has two needle shafts attached to a single shank. When used in your sewing machine, it creates two parallel rows of straight stitching on the top side of the fabric, and a zigzag-style stitch on the underside that connects the two rows. You’ll often see this type of stitching on knit garment hems, such as t-shirts. It can also be used as a decorative stitch on woven fabrics.
Note: You’ll need an extra spool of thread to sew with a twin needle. If you don’t have a second spool, winding some thread onto a spare bobbin works just as well.
Threading a double needle:
1. Follow steps 1–3 above to insert the twin needle, again ensuring that the flat side of the needle is facing the back of the machine.
2. Raise the needle to its highest point by turning the hand wheel. This gives you more room and visibility for threading the eyes of the needles.
Thread 1: The right needle
3. Place a foam pad onto the horizontal spool pin, followed by the spool of thread. Attach a spool disc to prevent the spool of thread from coming off the end of the pin. Ensure that the thread unwinds in a clockwise direction.
4. Feed the thread through the rear thread guide then bring it to the front of the machine.
5. Feed the thread down the right side of the take-up cover, then up the left side, following the standard threading path.
6. Pass the thread through the take-up lever, then continue down through the remaining thread guides.
7. Thread the right needle, then pull the thread down through the groove in the presser foot, and bring it toward the back of the machine.
Thread 2: The left needle
8. Place a foam pad onto the vertical spool pin, followed by the second spool of thread (or bobbin). Again, ensure that the thread unwinds in a clockwise direction.
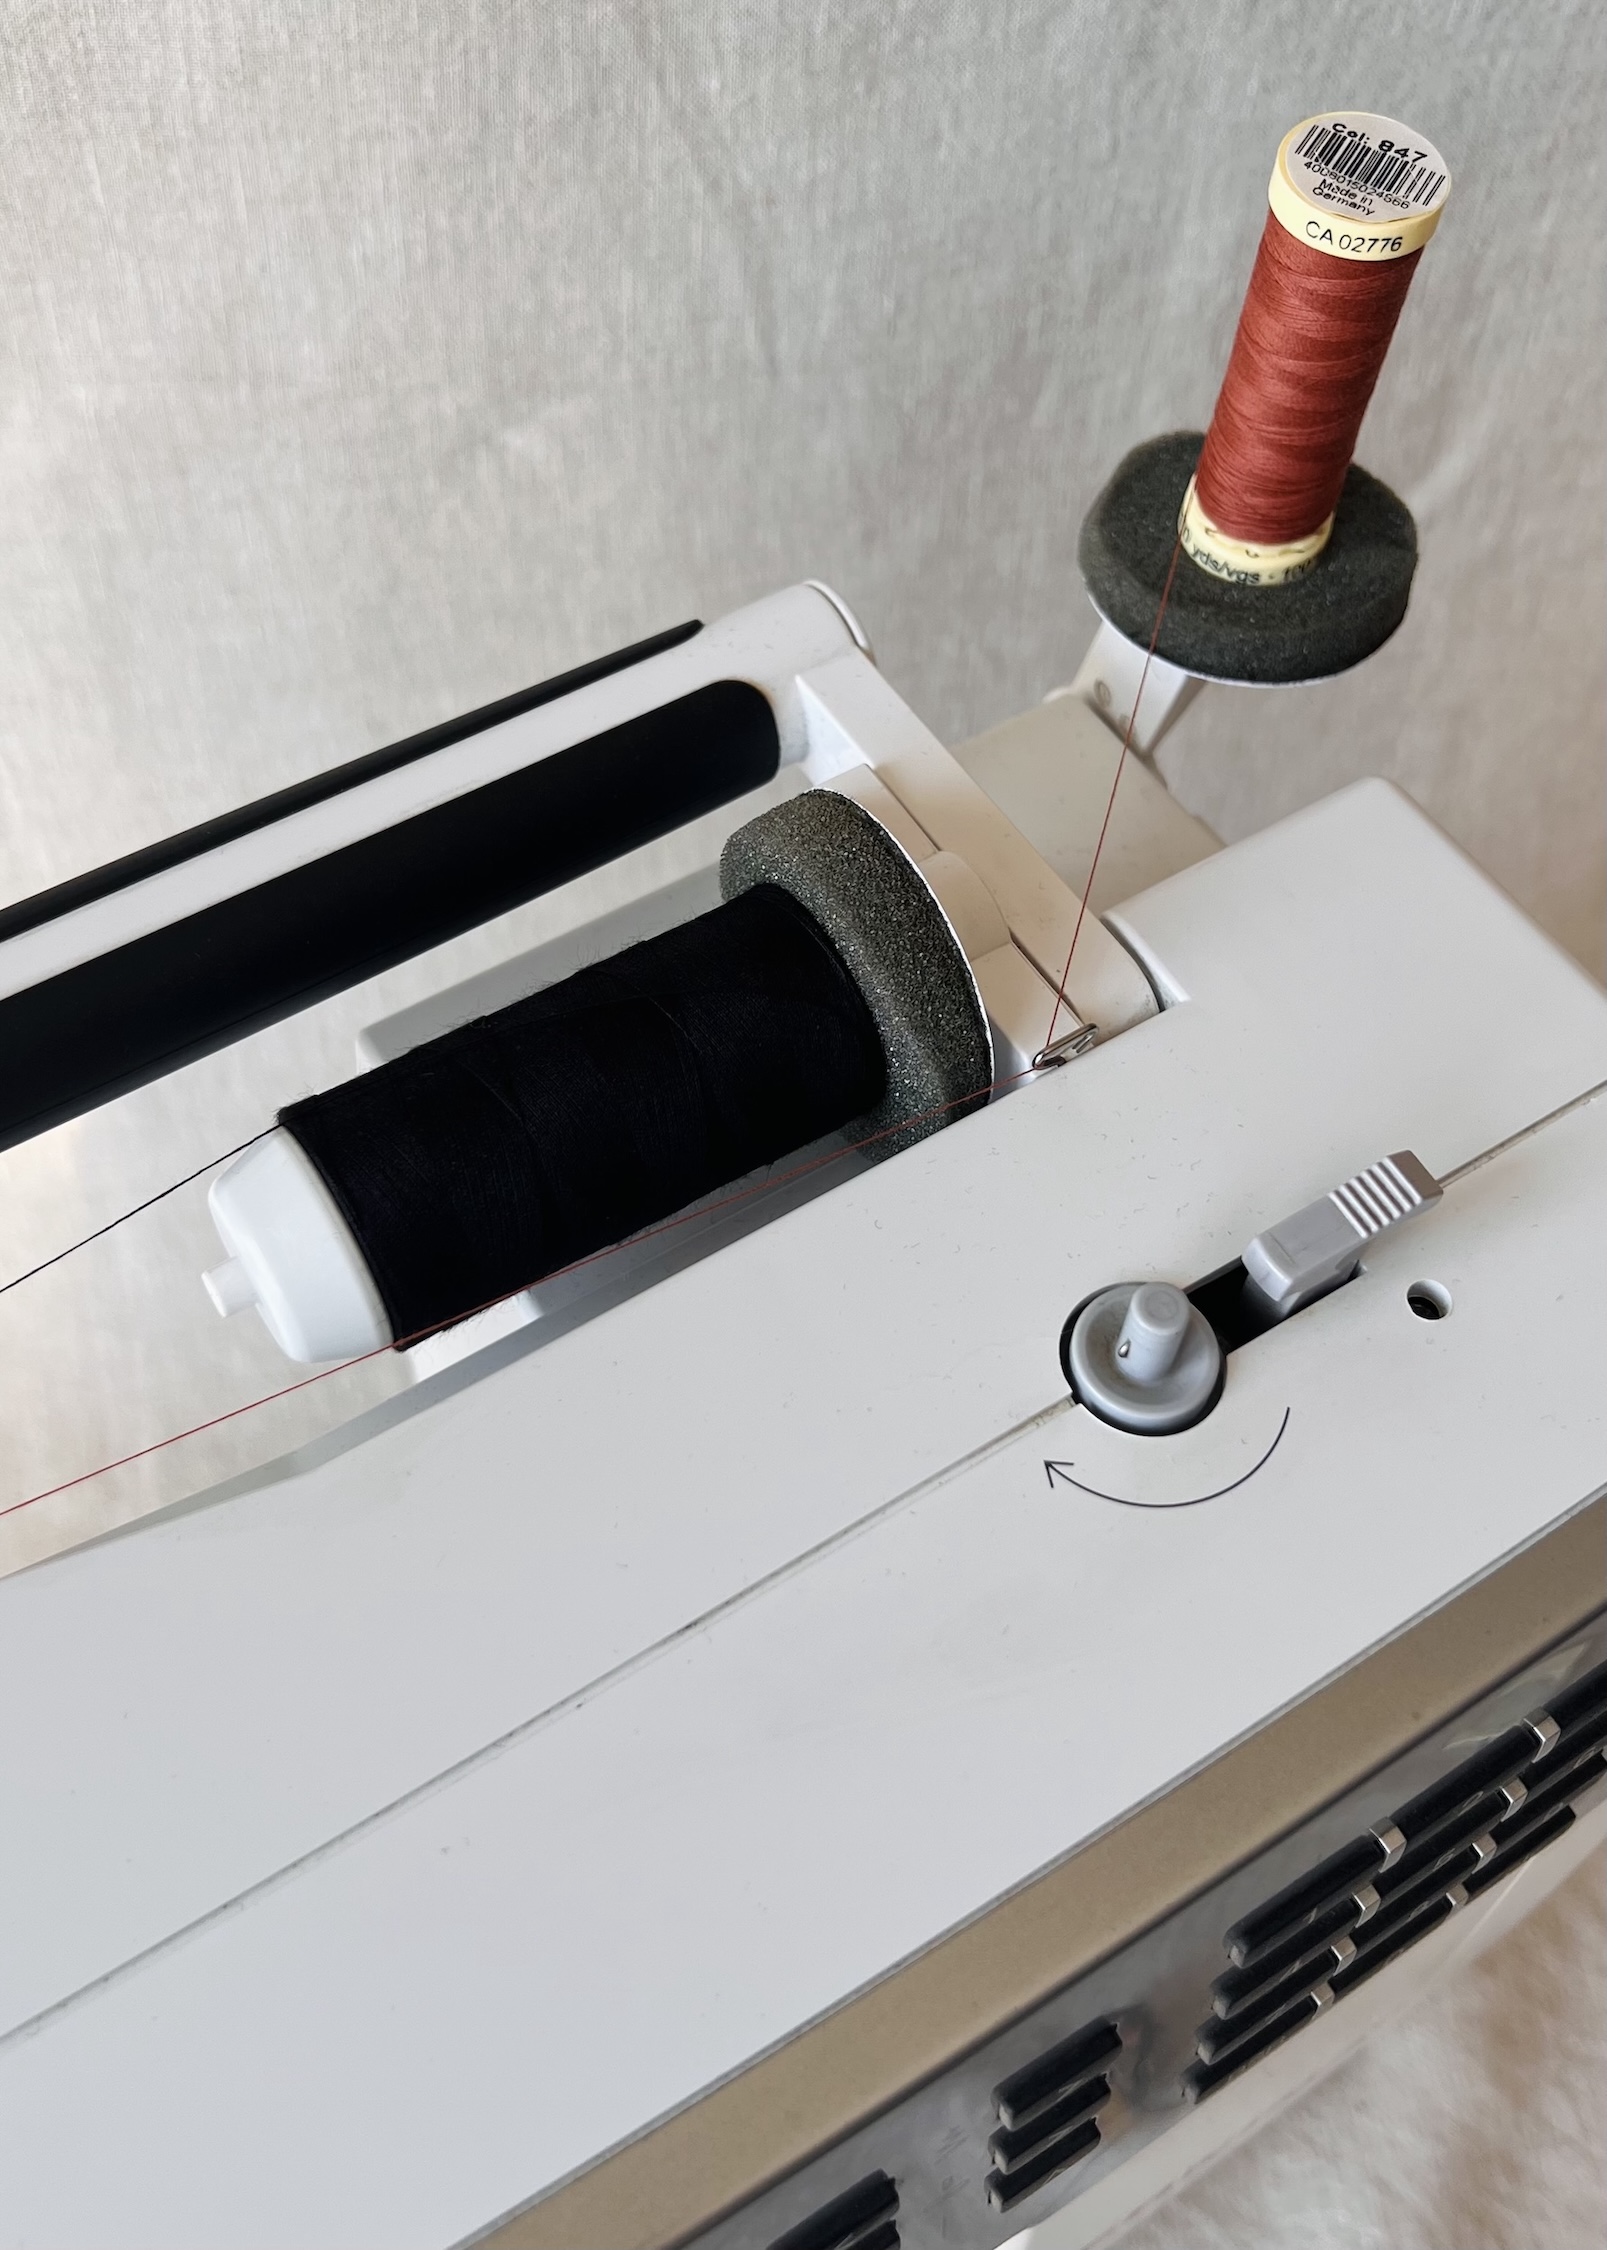
9. Follow the same threading path as the first thread (steps 4–6). Be careful to keep the threads separated and untangled as you go.
10. Thread the left needle, then pull the thread through the presser foot groove and toward the back of the machine.
11. Bring up the bobbin thread as per normal, following the instructions in Part 1.
Note: Be sure the needles are positioned in the centre to avoid hitting the stitch plate and breaking the needle. I also recommend using a longer stitch length with a twin needle for neater results.
Changing the Presser Foot
While presser feet don’t play a direct role in threading your sewing machine, it’s still worth understanding their function and how to change them.
Presser feet help keep the fabric stable while sewing and ensure even, consistent stitches. They can also be specialised for specific tasks such as inserting zippers, sewing buttonholes, or quilting. I plan to go deeper into the different types of presser feet and their uses in an upcoming article.
There are two main types of presser feet, distinguished by how they attach to the sewing machine:
- One-piece presser feet (like the one on my machine), where the peg (or shank) and sole are combined into a single unit.
- Two-piece or snap-on presser feet, where the sole snaps or slides onto the peg.
Here’s how to simply remove and attach a new presser foot.
Removing the presser foot:
1. Raise the needle all the way up by turning the hand wheel.
2. Raise the presser foot by lifting the presser foot lifter at the back of the machine.
3. Lift the presser foot clamping lever (also at the back of the machine) to release the presser foot.
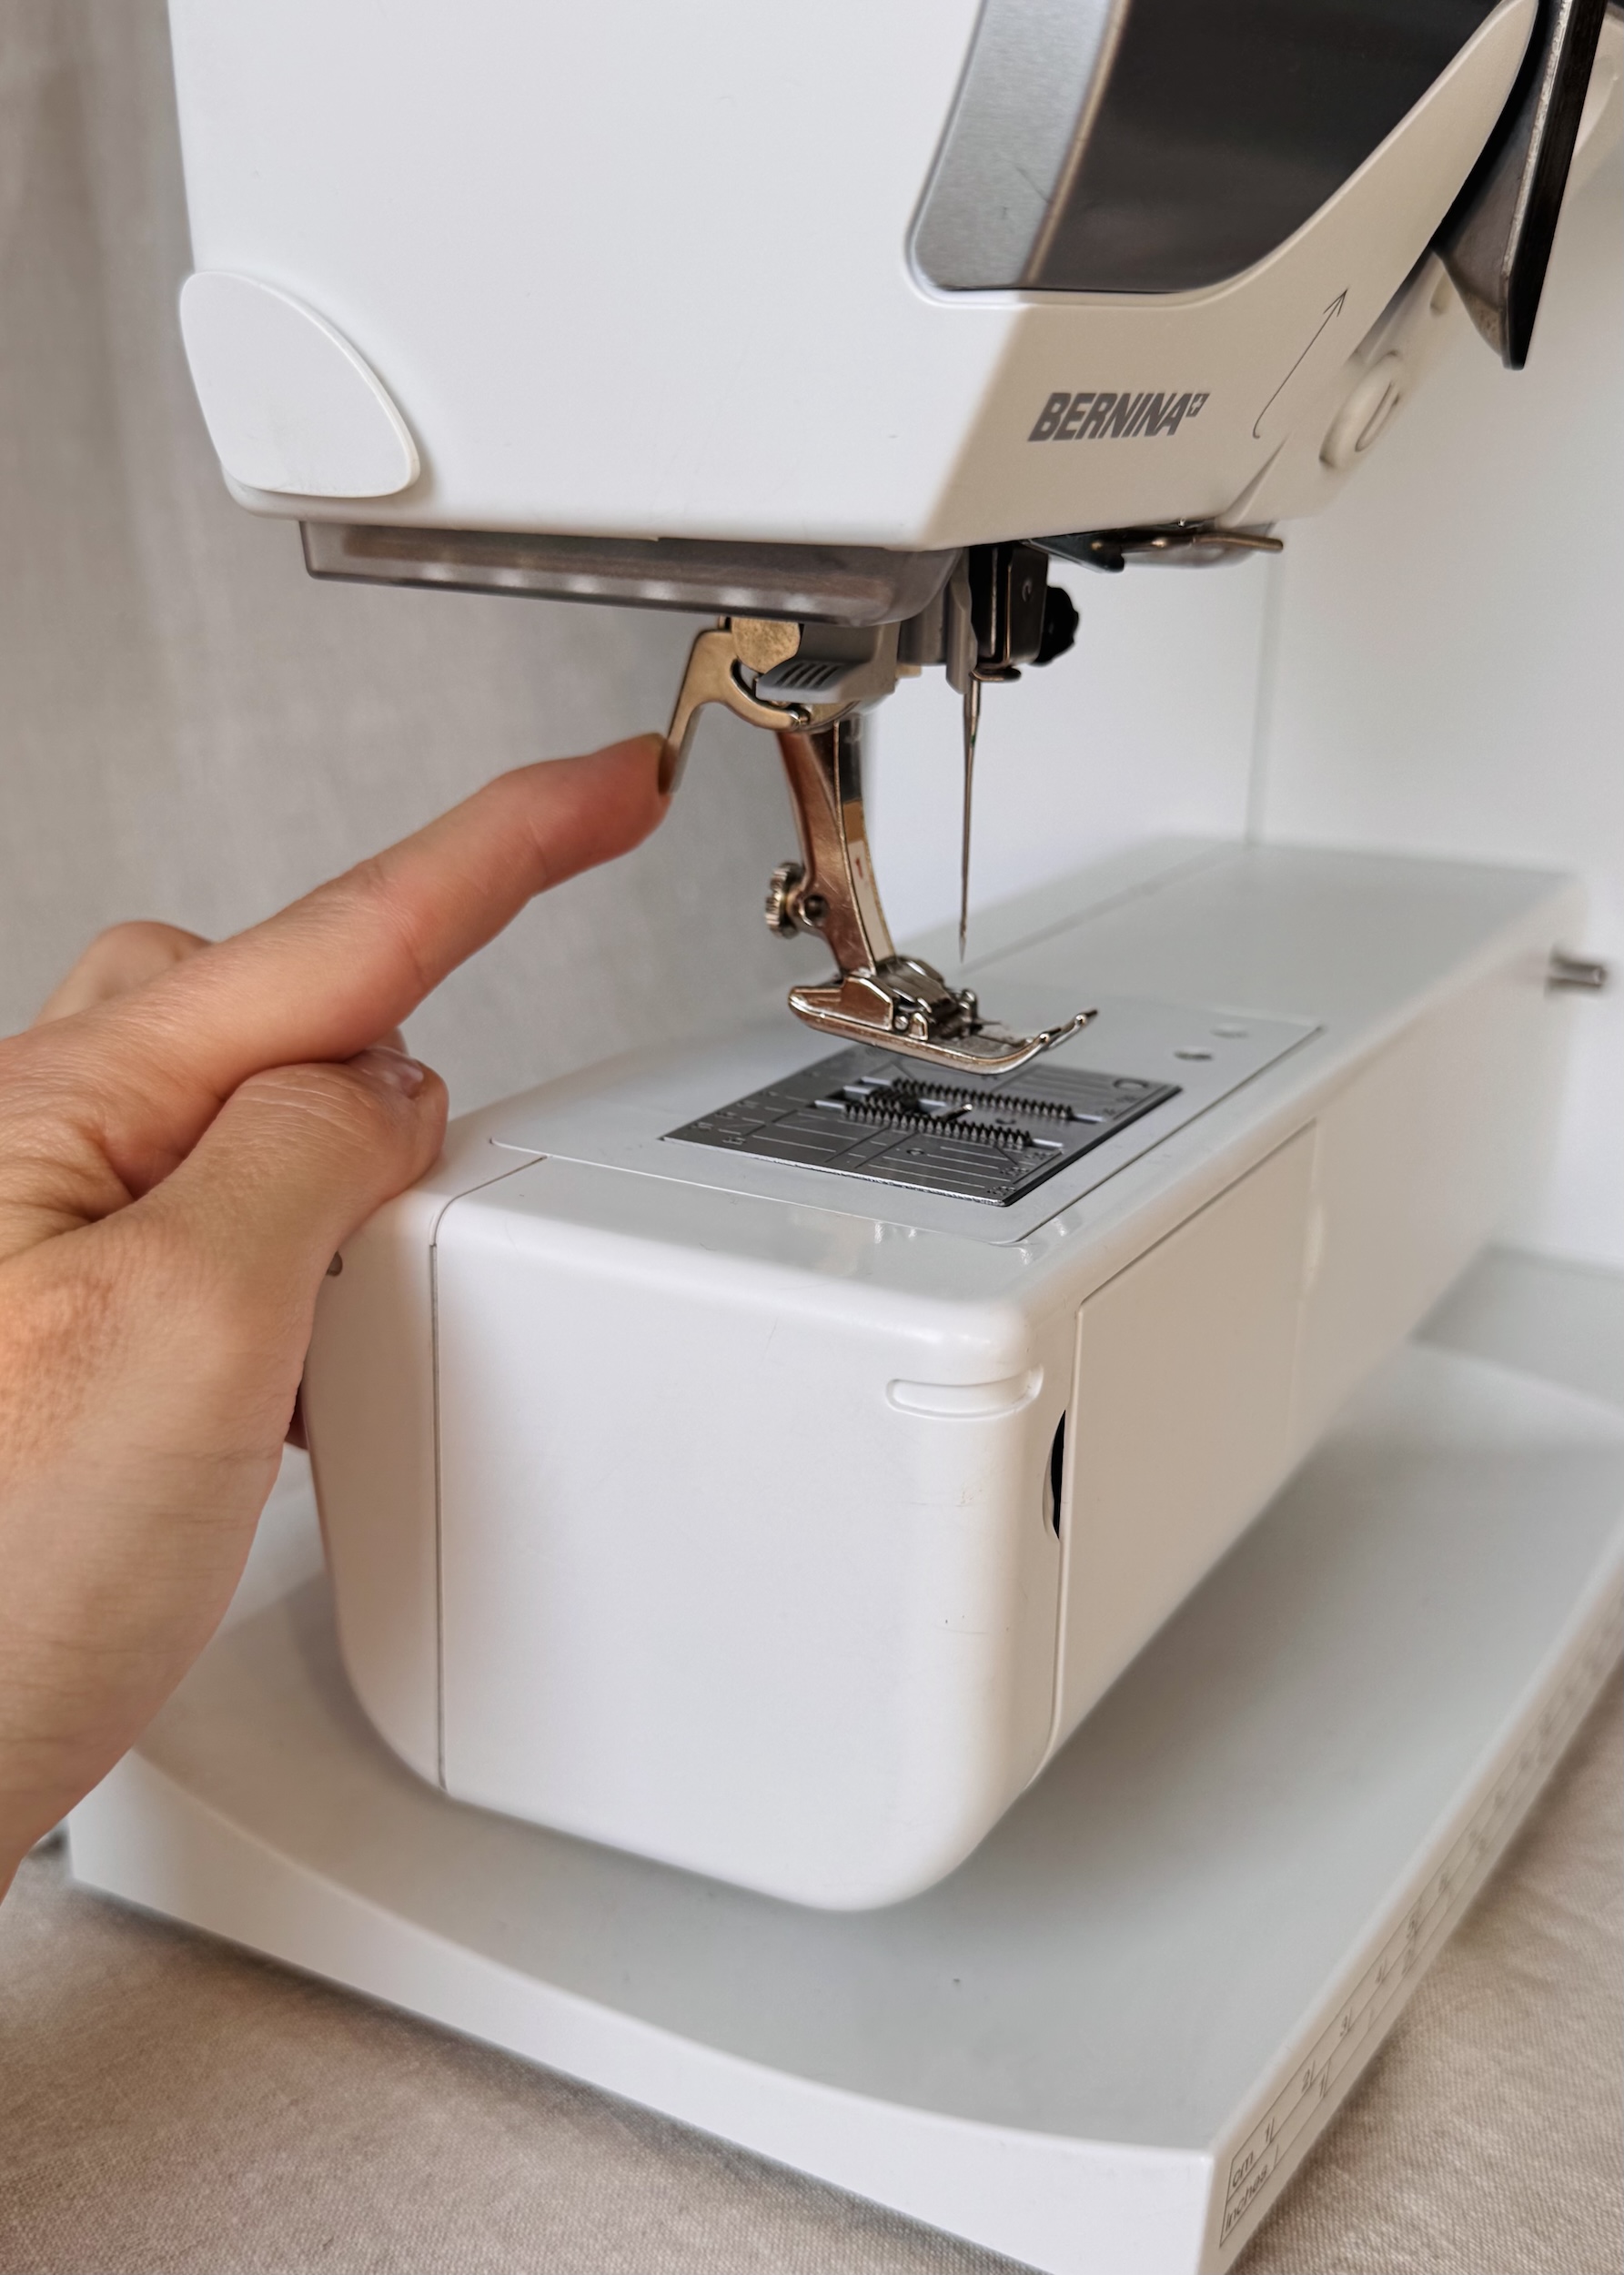
4. Gently lower the presser foot and guide it toward you to remove it from the cone.
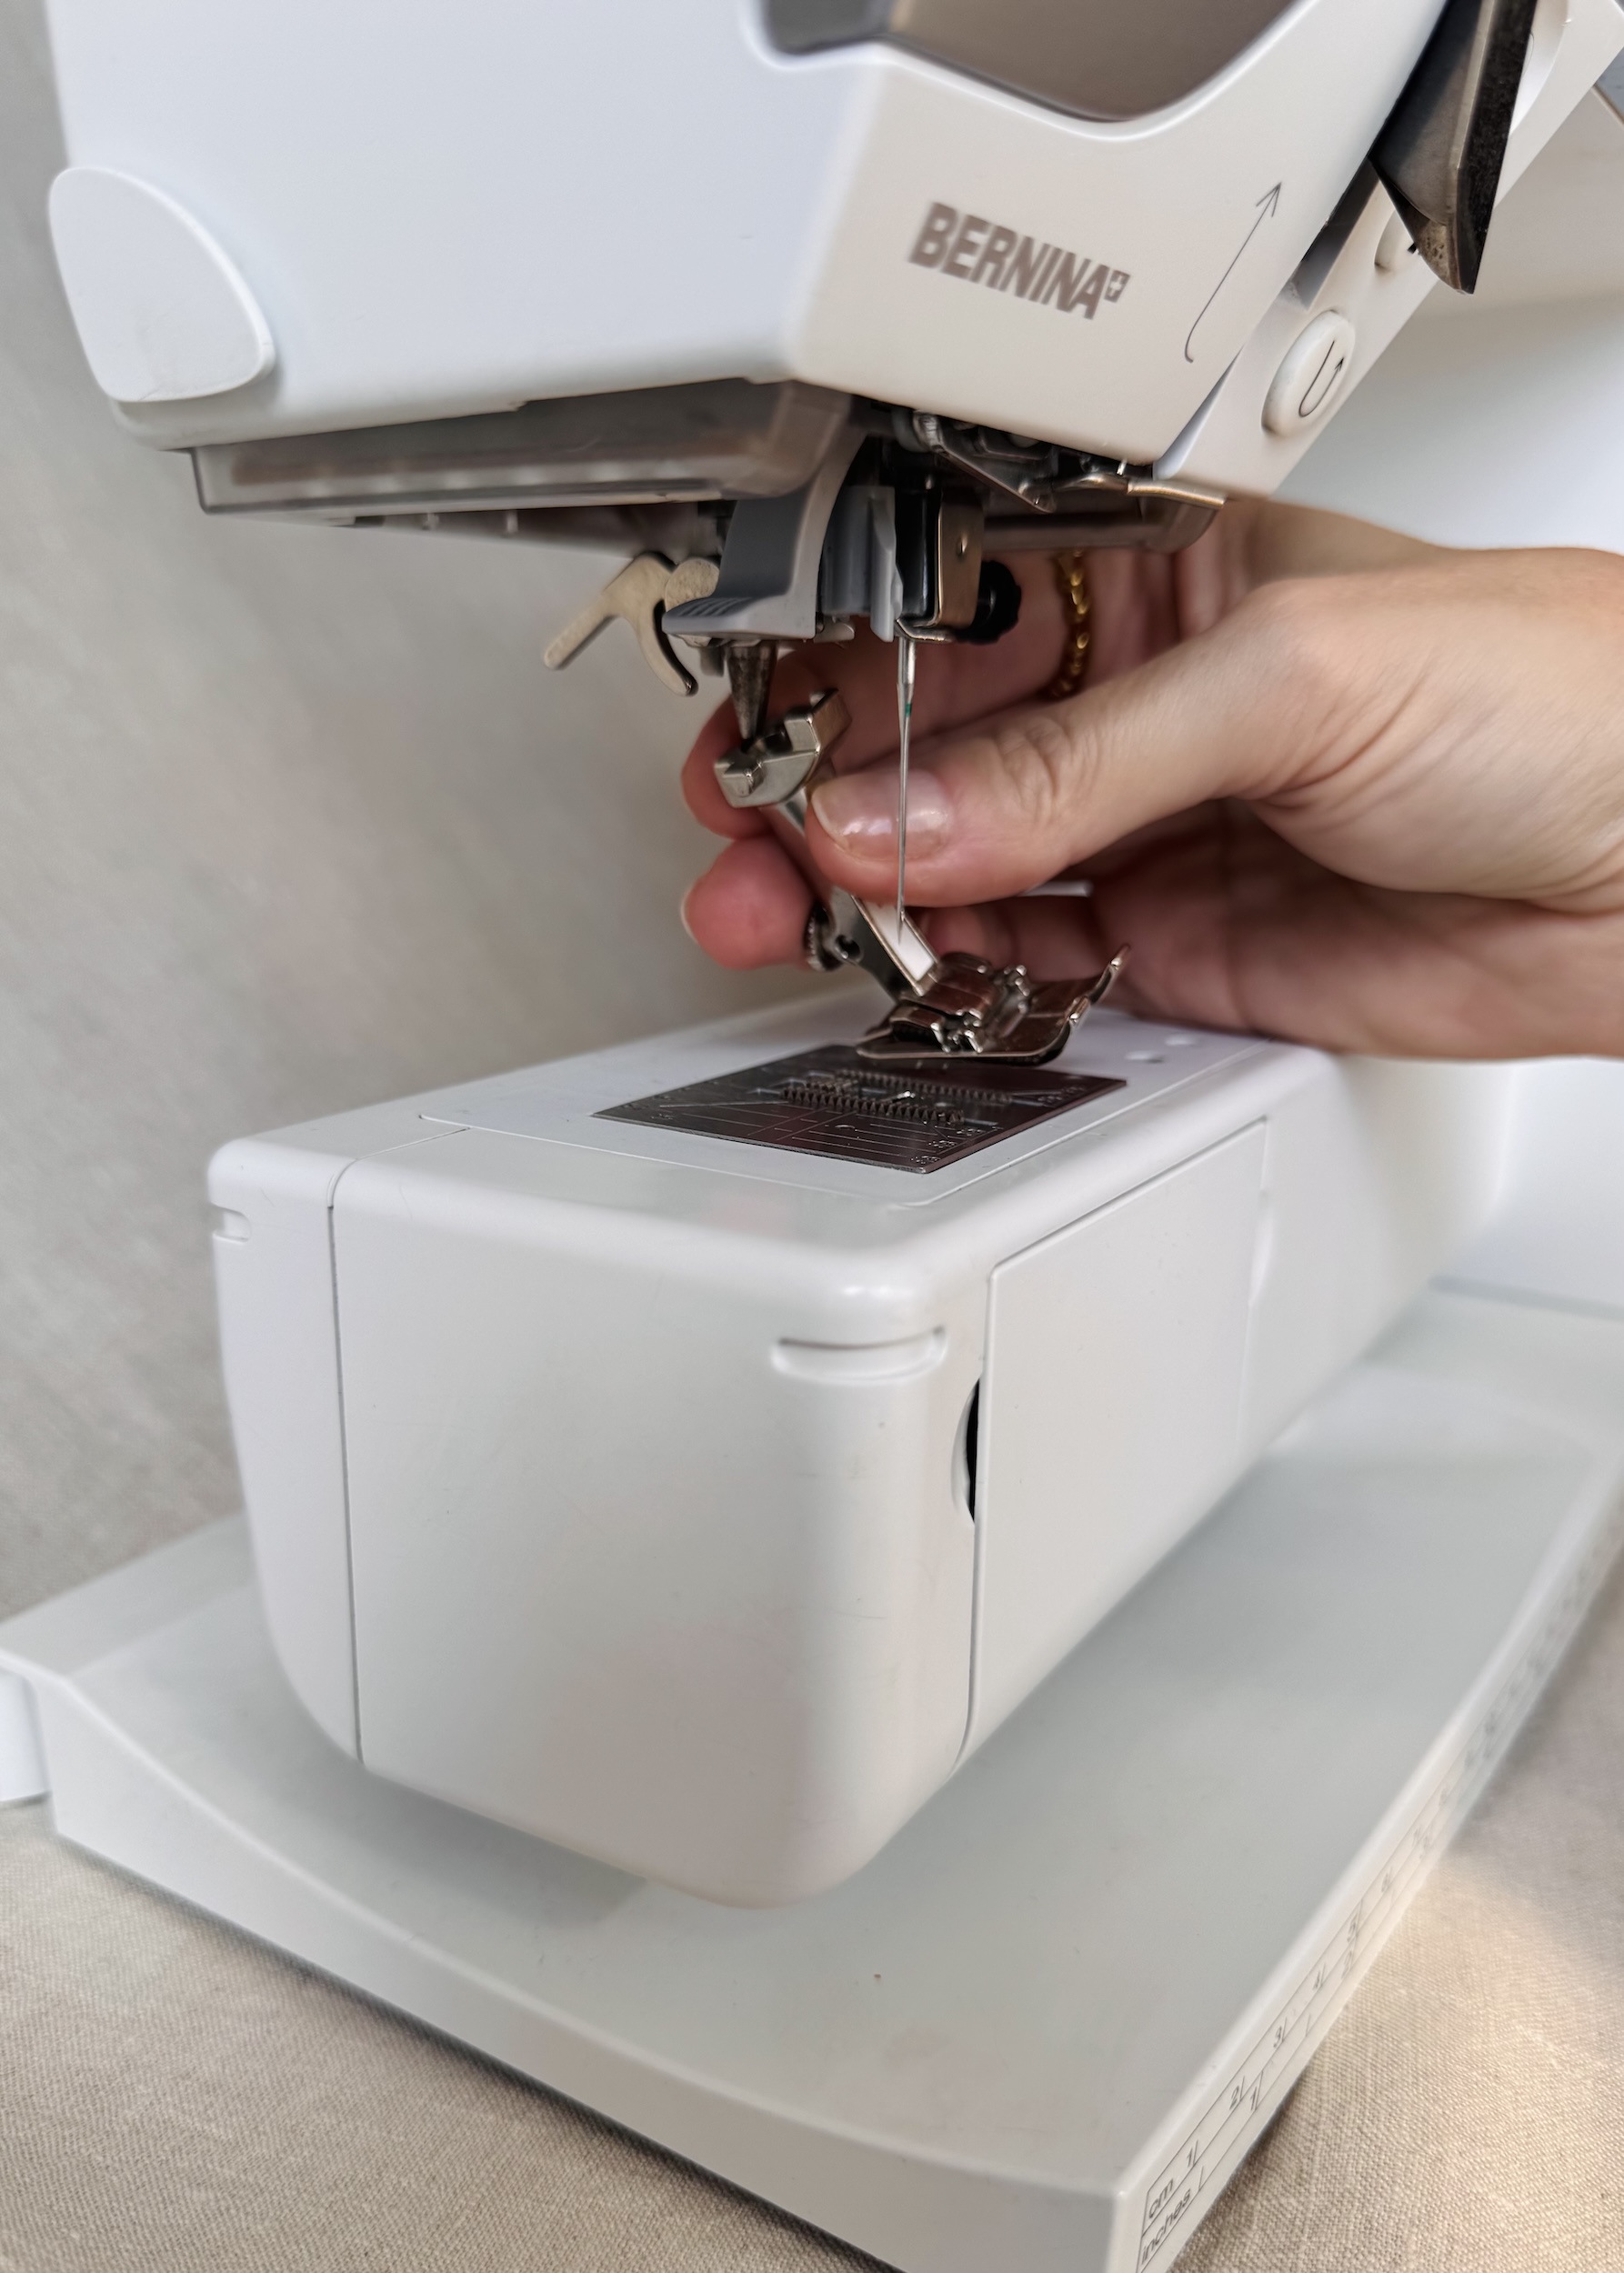
Attaching the presser foot:
1. Ensure the needle is raised all the way up by turning the hand wheel. Alternatively, you can remove the needle entirely (see instructions above) — this may give you more space to work.
2. Align the presser foot underneath the cone and gently guide it upward. You’ll know it’s correctly positioned when you feel slight resistance at the top of the cone.
3. Hold the presser foot in place and lower the presser foot clamping lever to secure it.
Additional Adjustments
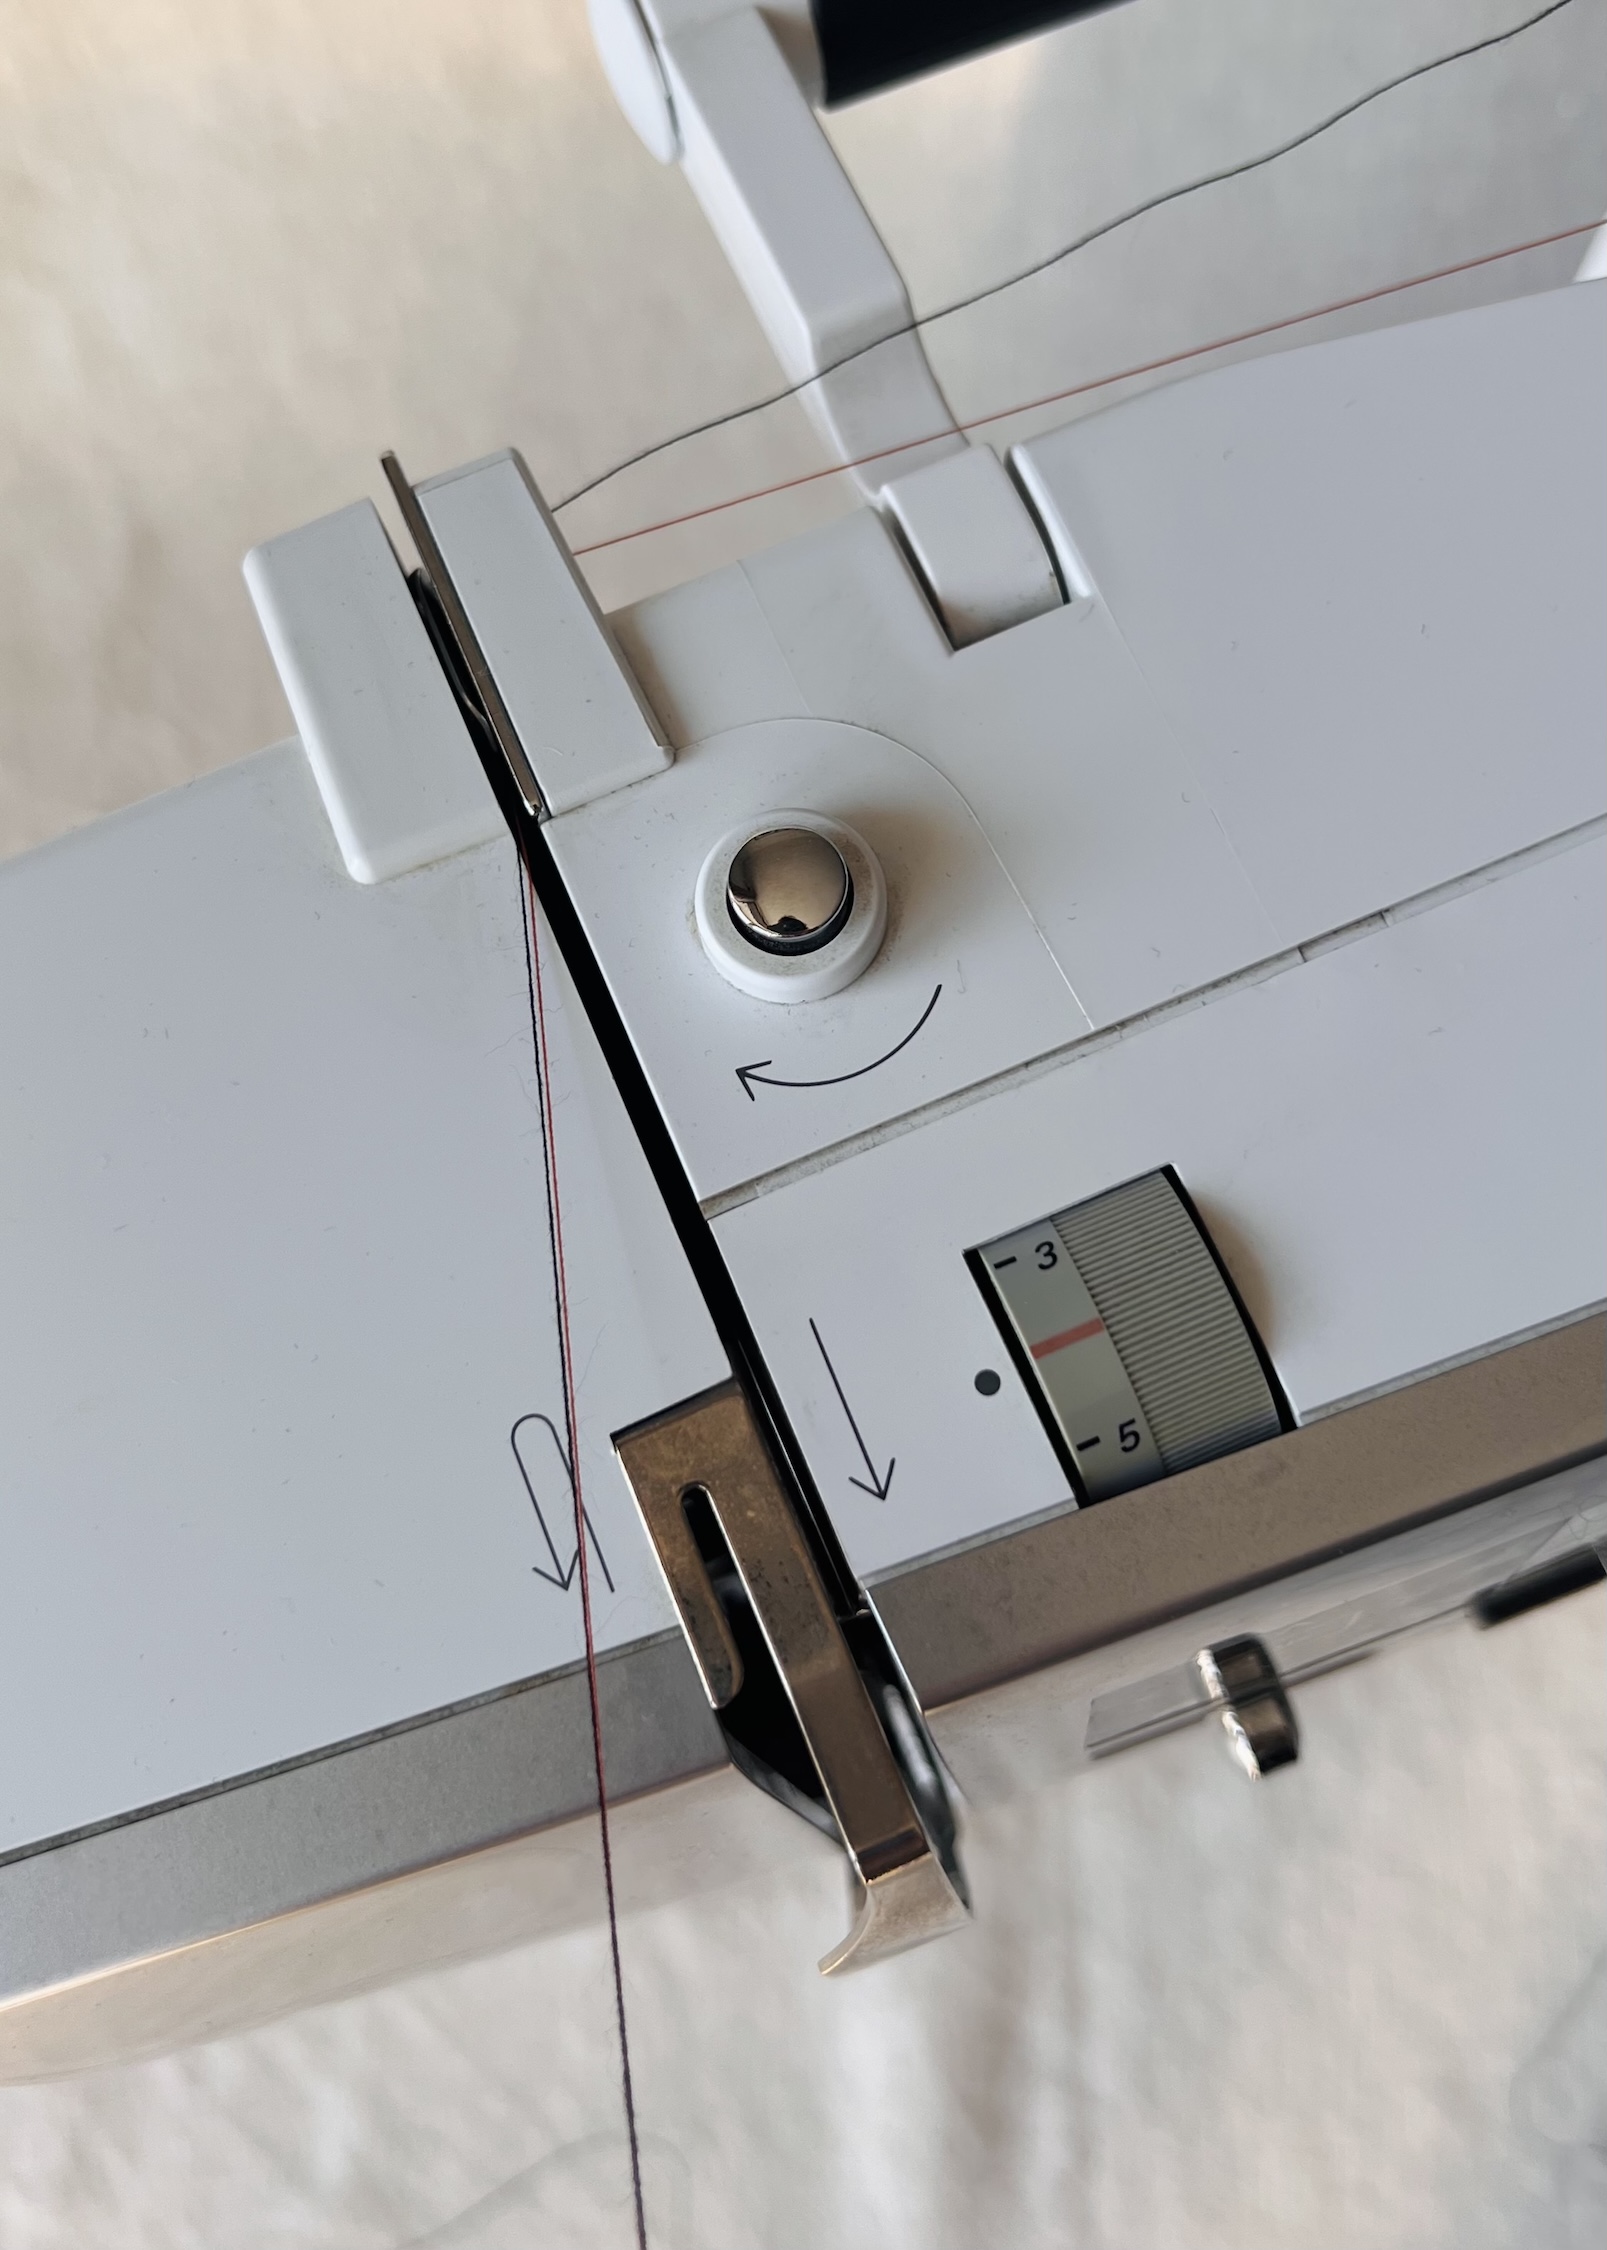
Presser foot pressure:
Presser foot pressure controls how firmly the foot presses down on the fabric as it feeds through the machine. On my machine, the presser foot pressure adjustments are made using the dial on the left side of the machine.
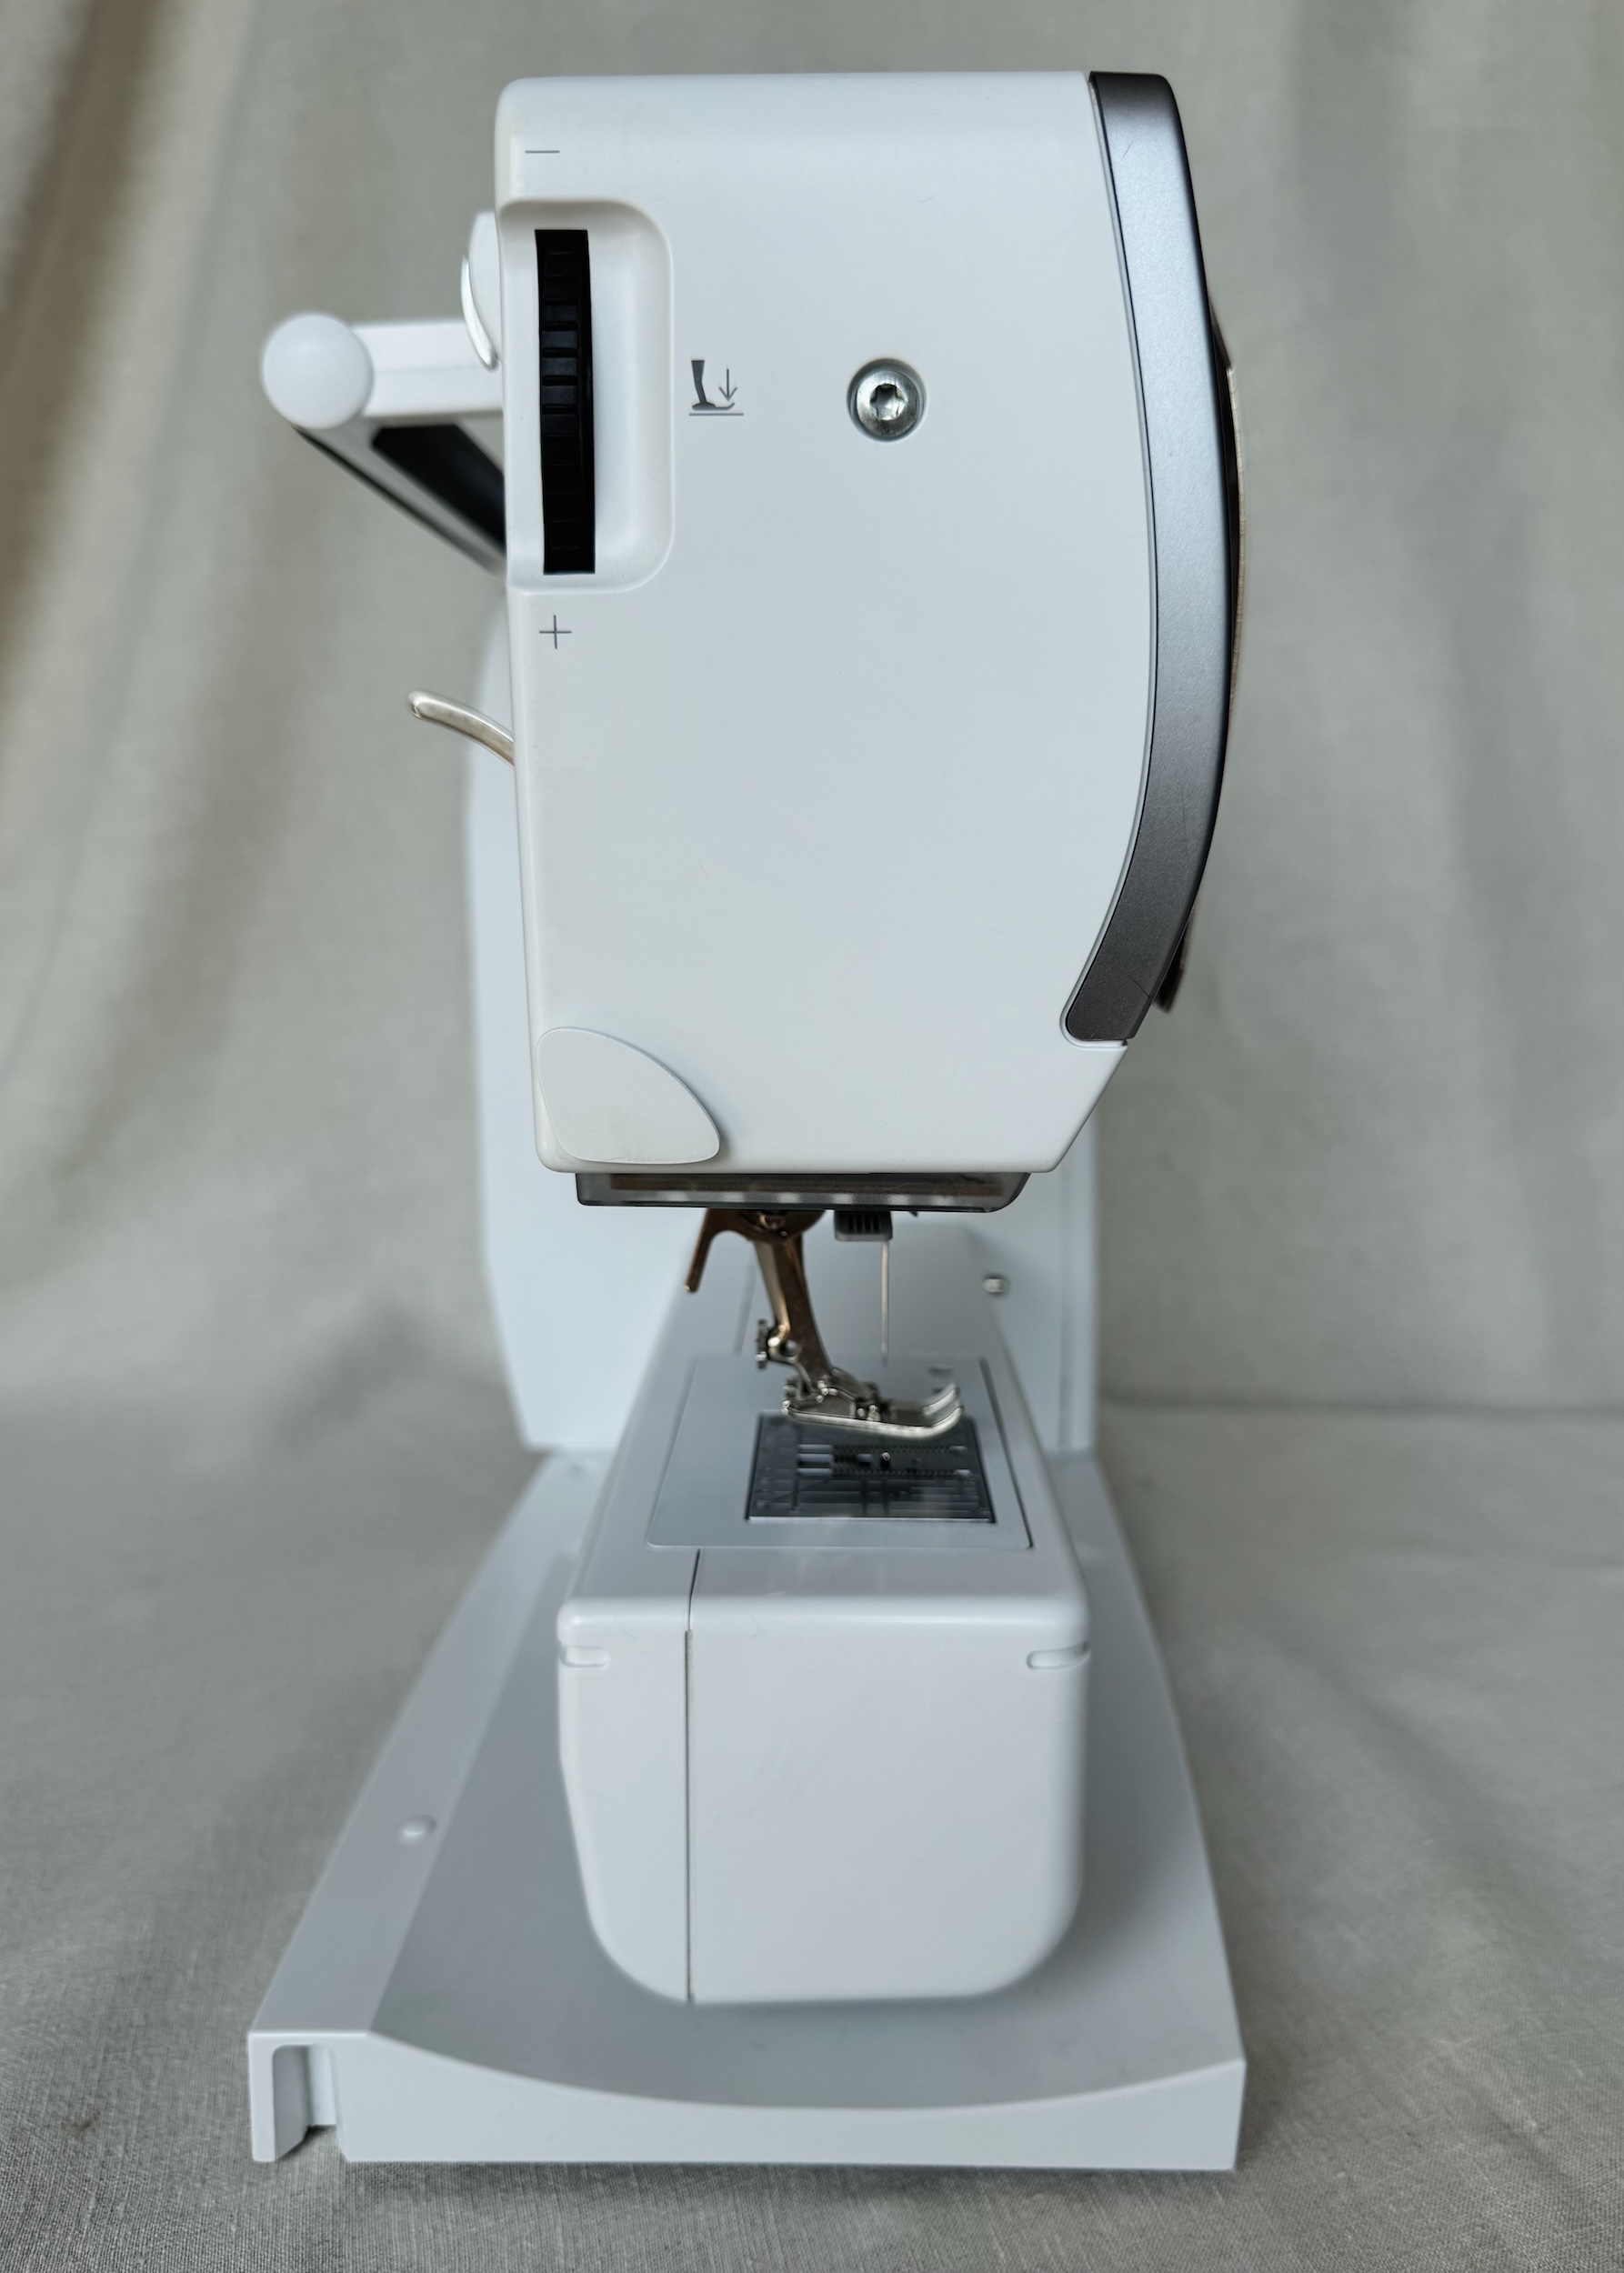
The default pressure setting on my machine is 46, which works well for most general-purpose sewing. However, adjusting this setting can make a difference, particularly when working with specialty fabrics.
- For sturdier fabrics like denim, canvas, or upholstery, increasing the presser foot pressure may help the fabric feed more smoothly. A higher pressure improves contact between the fabric and the feed dogs, giving the machine better control over denser fabrics.
- For stretchy or delicate fabrics (like jersey, knits, or lightweight woven’s), decreasing the pressure can help prevent the fabric from stretching or puckering.
As with many settings on your machine, you may need to just experiment and test on a scrap piece of the fabric you’re using before starting the actual project. That way, you can fine-tune the pressure and make sure the feed is smooth and even.
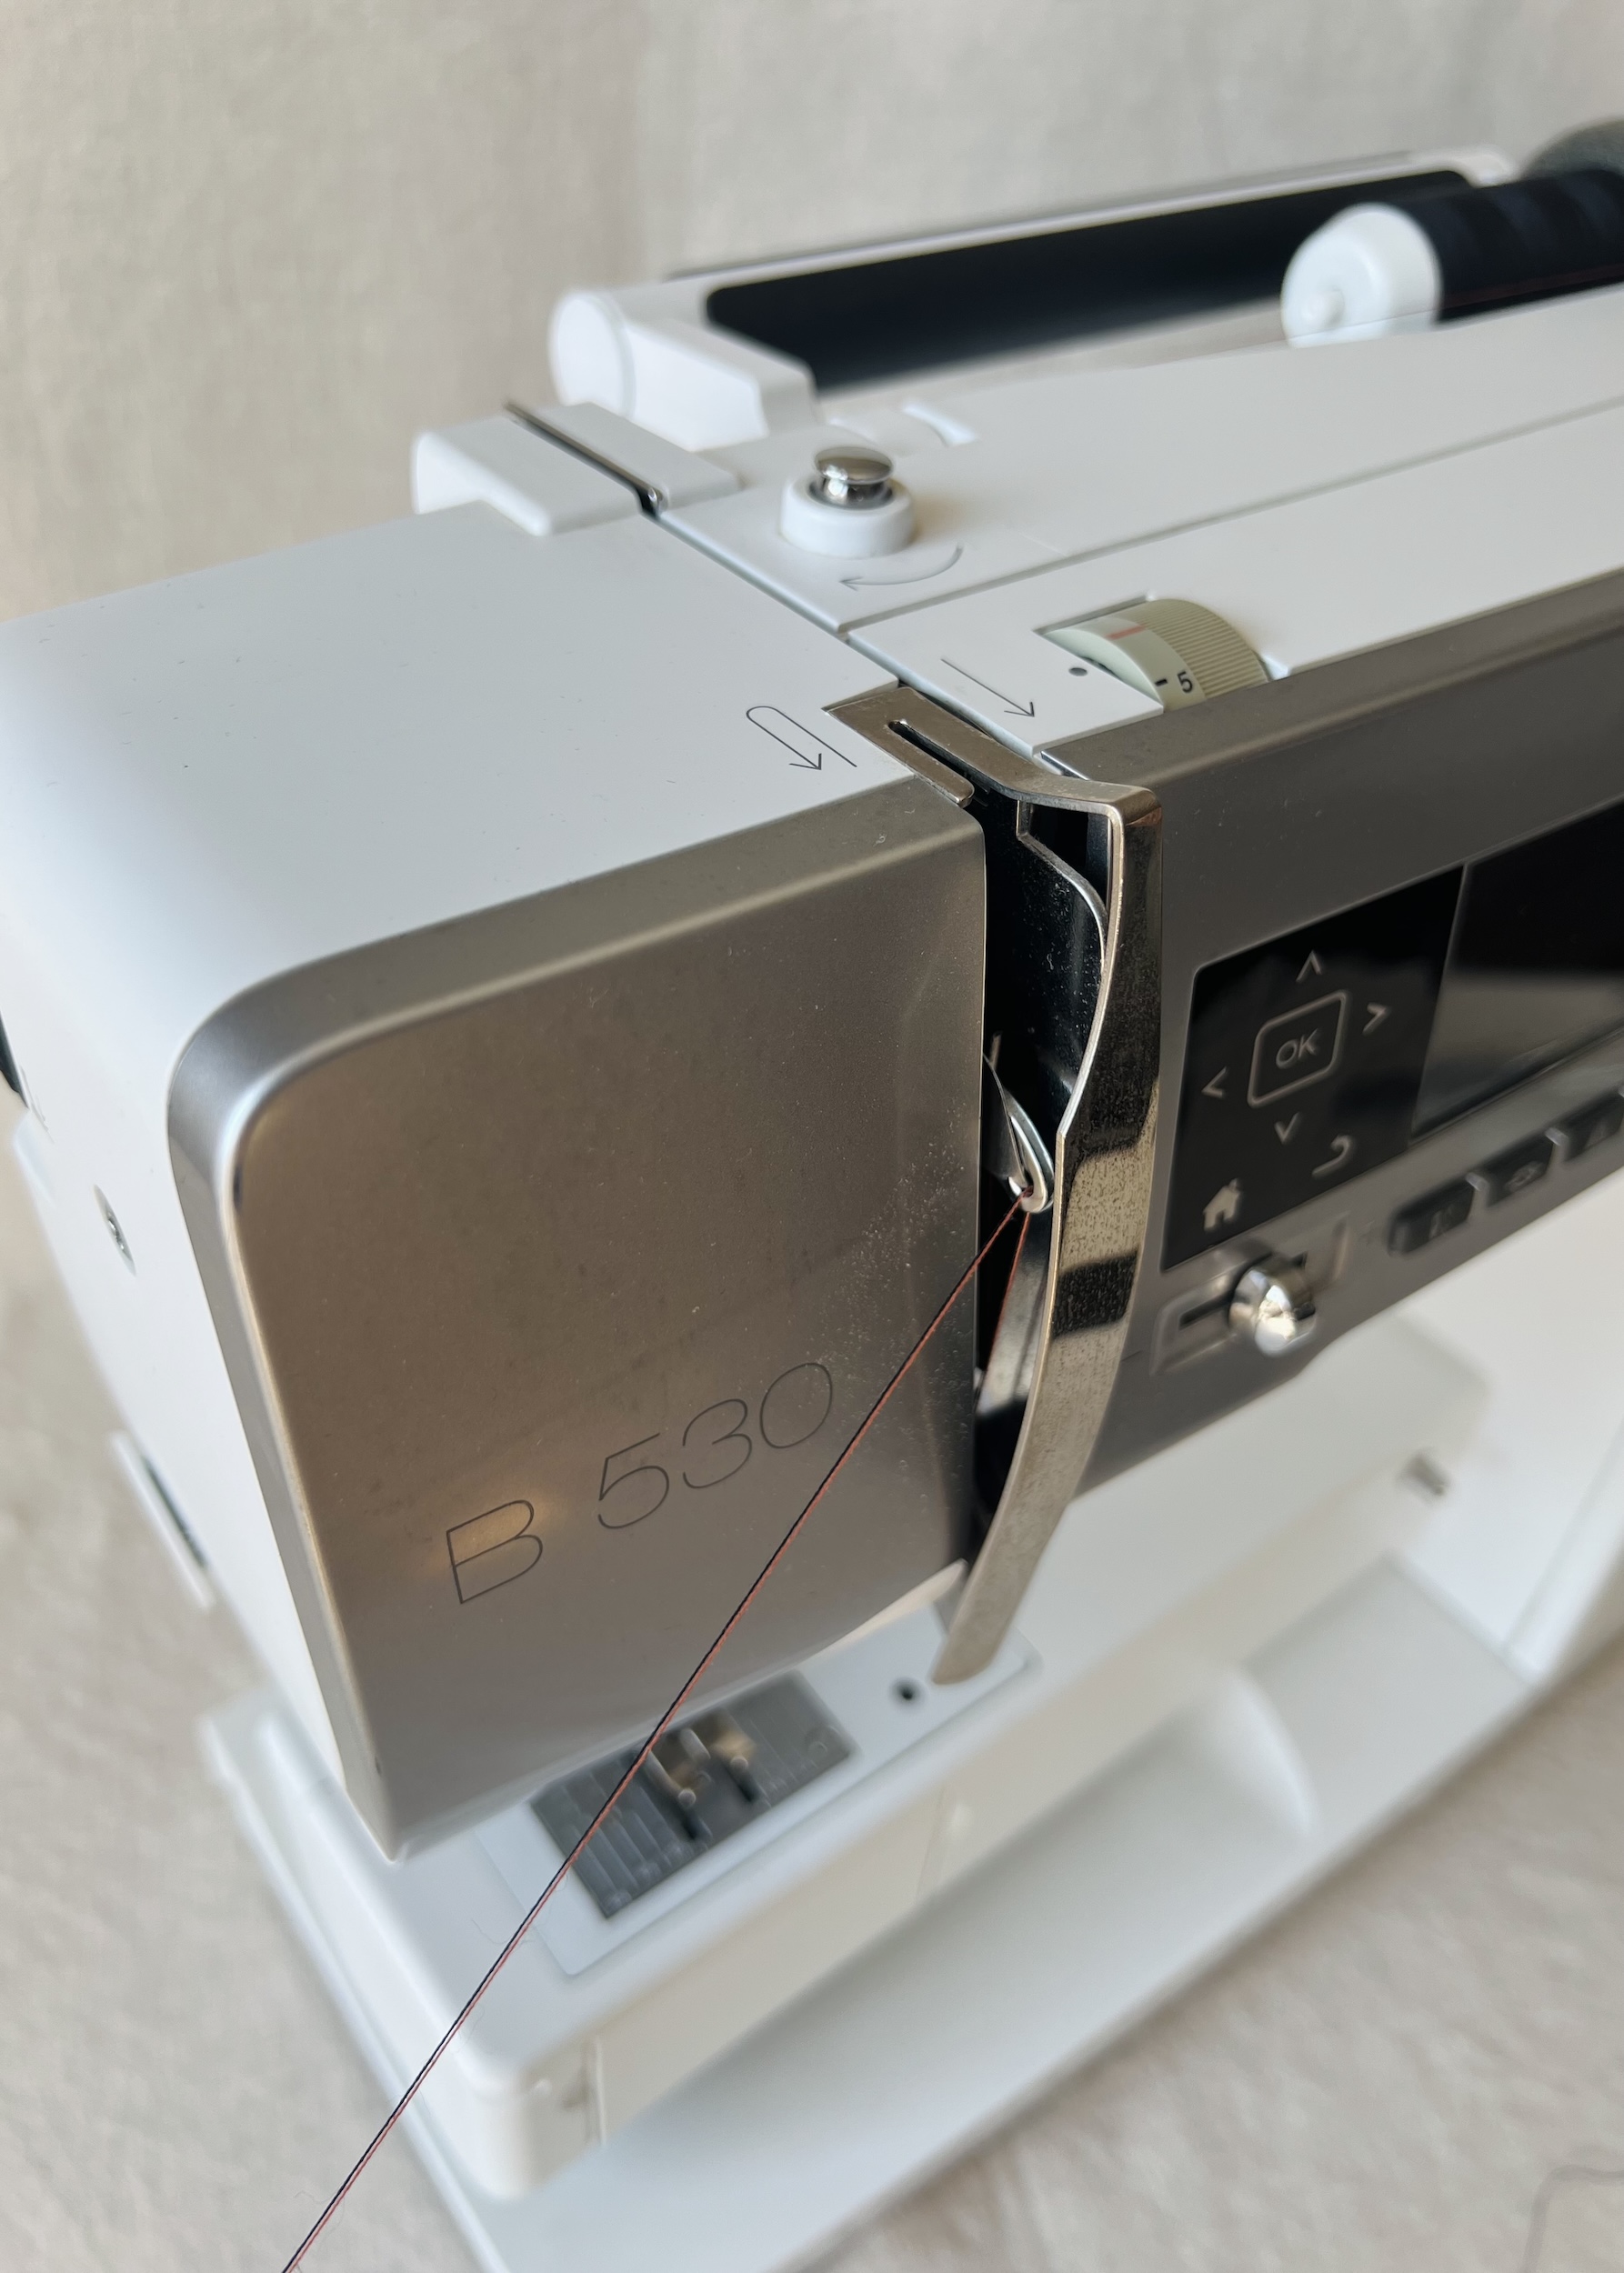
Thread tension:
Thread tension controls on a machine typically dictate how tightly the upper and lower threads pull against each other as stitches are formed.
The tension dial on my machine is located on the top near the thread uptake lever. Their will usually be some sort of mark to indicate the default or optimal setting. On my machine this is indicated by a red line.
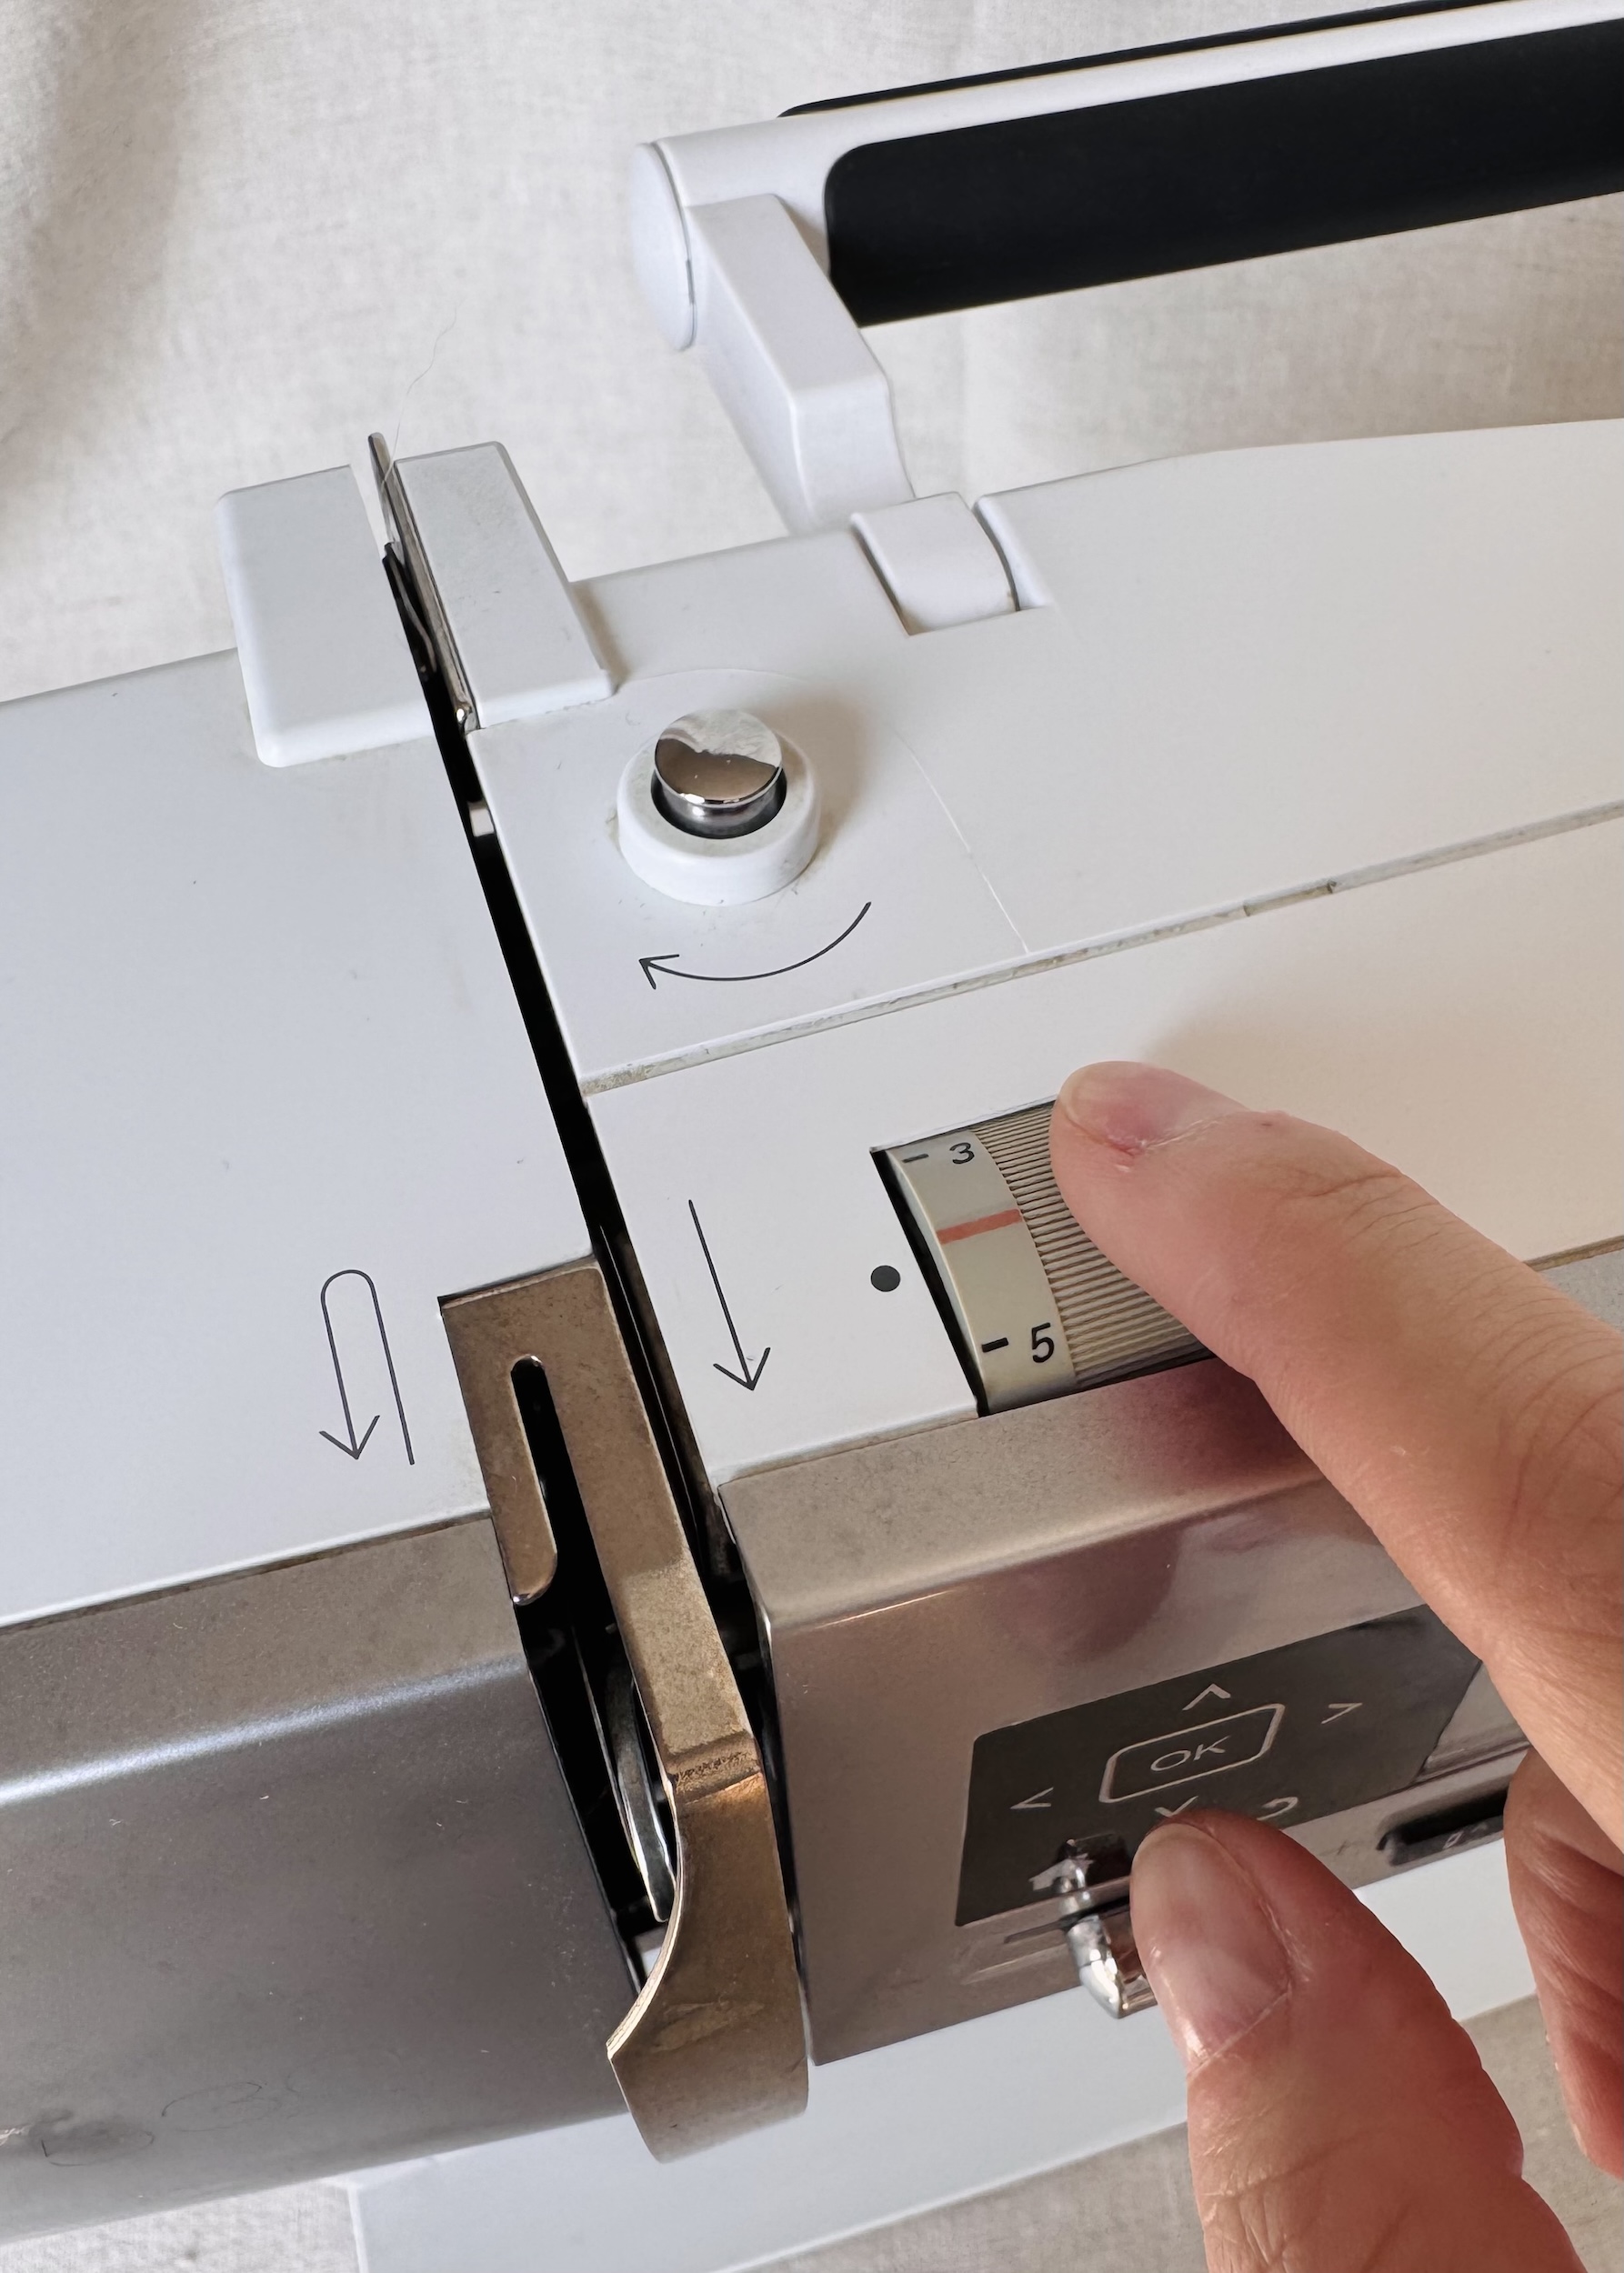
To be honest, I rarely adjust the tension on mine. However, for specialty fabrics, such as very light, stretchy, or heavy materials, adjustments to the tension may be necessary.
Here are some things to look out for:
- If the upper thread tension is too tight, the bobbin thread will be pulled up to the right (top) side of the fabric. In order to correct this, try turning the tension dial lower, toward 3–1.
- If the upper thread tension is too loose, the top thread will be pulled down to the wrong (underside) side of the fabric. Try turning the tension dial higher, toward 5–10.
- Optimal tension will result in the stitches appearing even and balanced. The point where the upper and lower threads interlock should be hidden within the fabric, being invisible on either side of the fabric.
Tip: If you are unsure, you could always test with two different colour threads. This will help highlight if the thread is being pulled to one side of the fabric or not.
Feed dogs:
The feed dogs are the metal teeth underneath your presser foot. They move the fabric forward (or backward, depending on your settings) by taking small steps with each stitch.
The stitch length setting controls how far the feed dogs move the fabric:
- Short stitches = smaller steps, slower fabric movement.
- Long stitches = longer steps, faster fabric movement.
Feed dogs work best when the presser foot is level. If you’re sewing over a thick seam or multiple layers, the presser foot may sit on an angle. When this happens, the feed dogs can lose contact with the fabric, and the fabric might not feed evenly.
To fix this you can try placing a small folded piece of fabric or levelling tool (speciality plates) behind the presser foot to help it stay level. This improves contact and feeding.
Don’t pull or push the fabric while sewing. Let the machine do the work. If you need to guide the fabric, do it gently as resisting the feed dogs can cause skipped and uneven stitches.
Most machines also allow you to raise or lower the feed dogs, depending on what kind of sewing you’re doing. To do this on my machine, there is a button to the front right.
- Feed dogs up (flush with needle plate): Default position for regular sewing with the fabric feeding automatically with each stitch.
- Feed dogs down: Used for free-motion sewing or darning.
Getting to know your sewing machine involves just giving things a go. Whether you’re trying out a twin needle for the first time or fiddling with the tension on a tricky fabric, take your time and experiment. It’s completely normal to re-thread or start over a few times. Like anything, that’s how we learn!
You May Also Like
About Author
Emma Cartmel
Heya! I’m Emma, and I'm an Aussie living in beautiful Munich with my husband Ben, and our pug Harley. I am a designer, pattern maker, and sewist, and I share my expertise and experience through my ‘cartem.sewing’ page. You can follow me on Instagram @cartem.sewingRelated posts
Sewing Essentials: A Guide to Sewing Threads
You might be thinking “Thread is thread… right?” Well, not always. Sewing thread is a key part of any sewing project. But just like fabric, the thread you choose matters, affecting things like the strength, appearance, and durability of your stitching. But if you have ever shopped for sewing thread, you probably know that it…

Sewing Essentials: Stitch Width, Stitch Length & Needle Position
Thinking back to my high school textiles days, I remember having to test stitch settings on every fabric we planned to use for our projects. We would cut out little squares of fabric and experiment with different stitch lengths and widths, and edge-finishing techniques. At the time, it felt unnecessary, not to mention tedious….

Sewing Essentials: A Simple Guide to Notches
I love a notch, so much so that I’ve decided to dedicate this article to these small but important markings. Here, I’ll explain why they’re so helpful, when to use them, and how to add them to your own patterns or adapt them for existing ones. What exactly are notches? Notches are small markings found…

How to Select and Use Interfacing: A Simple Guide
Iron-on or sew-in, woven or non-woven, lightweight or heavyweight. With so many different types, weaves, and weights to choose from, how do you know which interfacing is best for your project? In this article, I will explain the two main types of interfacing before diving into the differences in weave and weight. Hopefully by the…

Sewing Essentials: A Simple Method for Reversible Seams
There are so many ways to finish a seam, from good old overlocking to French seams and binding. I recently stumbled across another method that’s pretty nifty, and honestly, I kind of wish I had known about it sooner. It is a bit like binding, but topstitched in place so it doesn’t move or flap…


SEW THIS LOOK


Latest Posts

Leave a comment