Embroidery and Textile Paint DIY Tutorial
Materials:
A pillow 18″ by 18″ (make your own following this tutorial)
A needle
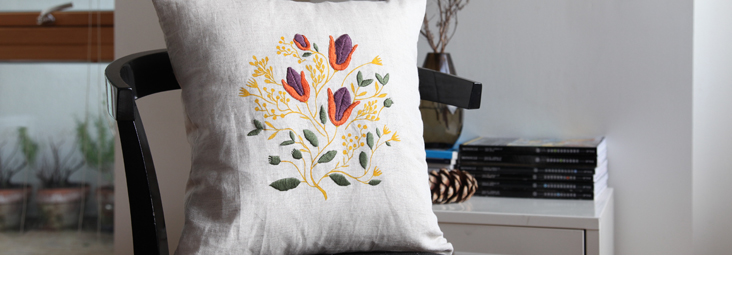
Embroidery Thread of your choice ( I used three different colours by Anchor)
Embroidery ring
Textile paint ( I used Marabu)
A thin paintbrush
Time: about 2 days (embroidery takes time, so this is a good one to make in the evenings instead)
1. Print out your stencil (at the bottom of this page)
2. Pre cut your fabric and decide where you want your image to be. I was making an envelope pillow so I had alot of fabric to work with. If you are making a pillow just like in the tutorial, you will be drawing on one of your 19″ squares. You can either use a lightbox, or make use of the sun. Stick your stencil onto your window, faceside looking at you. Place your fabric over the stencil making sure it is right in the middle and secure with some cellotape. Draw over all the lines with pencil carefully.
3. Now that you have a rough idea where your lines are, you can start painting the stems and smaller details of your design. Feel free to fill as much with paint as you want, you could go for more than one colour. Once the paint is dry, follow instructions on the manufacturers label. With Marabu you secure the paint with a 3 minute ironing job.
4. You are left with the rest of your design which you can start to embroider. I used the satin stitch to fill in my flowers and leaves. You could use a fishbone stitch on the flowers instead. I outlined the flowers with a split stitch to give them a more defined form. Go over all the elements you have left, it might take some time, but the result will be brilliant.
5. Now sew your pillow and enjoy the view.













Leave a comment