Sewing Glossary: How To Sew Knife Pleats Tutorial
Pleats are folds of fabric that are made to add volume, take in fullness and add interest to the silhouette of a garment. They can be used as decorative features on sleeves and blouses as well as in home decor. However, pleats are most commonly seen on skirts and dresses to take in a full skirt to fit at the waist.
There are different types of pleats, including box pleats, knife pleats, inverted pleats, accordion pleats and kick pleats, which are formed using different methods but sewn in the same manner. Today we are going to show you how to form and sew knife pleats, the most basic and common pleat used in sewing.
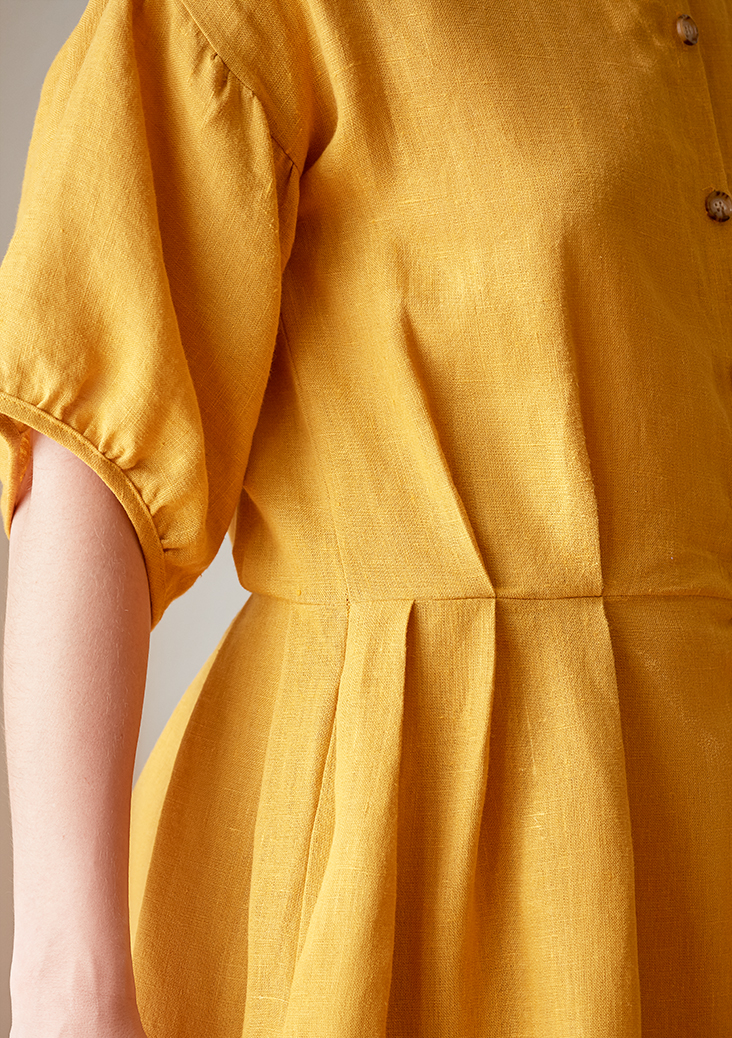
Knife pleats are folds of fabric that are pressed in one direction on the right side of the fabric. They may be used in small numbers as a style effect or for an entire part of a garment. They may be soft or pressed crisp, depending on the style required, and may be stitched down or hang free. They can also be spaced further apart or go in two directions.
Whichever style you choose, each pleat has to be accurately measured in order to look prefessional.
Materials & Tools
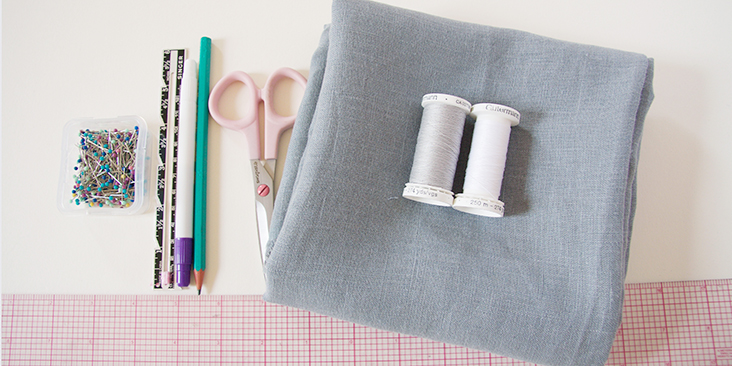
Fabric of your choice (we are using our IL019 MONUMENT Softened medium weight linen). Pleats work best with fabrics that will hold the crease or have enough body to keep the shape of the pleat. Natural fiber fabrics like linen lend themselves better to pleats than their synthetic counterparts.
Matching sewing thread (for the purpose of this tutorial, we are using a lighter thread so you can clearly see how to do the technique)
Pattern paper, pen, ruler, pins, scissors, fabric marker or chalk, sewing machine
Difficulty
Beginner
Time
1 hour
Drafting the template
The key to pleating is all in the math. You need to calculate the length of fabric you’ll need so that, once pleated, it equals your waistline measurement (or any other measurement you want to bring it to), plus seam allowances on each side.
Generally, each pleat takes three times its width in fabric: the pleat (as it appears on the surface), the underfold (turn-under), the underlay (return). In other words, each pleat is three layers thick. So, to create a 1”pleat, you’ll need 3” of fabric.
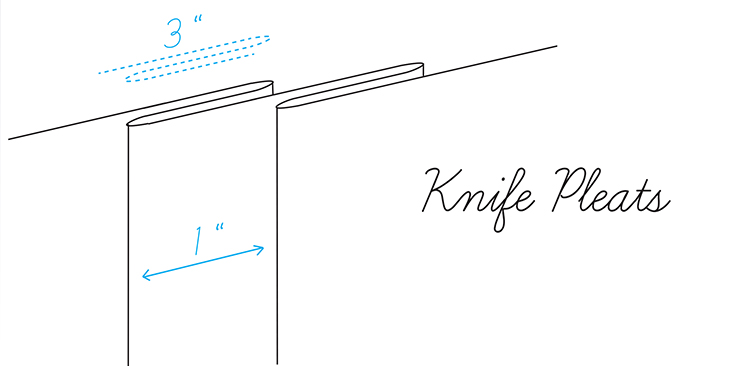
For example, if your waist measurement is 25” and you want to create a fully pleated skirt, with 1”-wide pleats, you’ll need to multiply the waist measurement by 3 and add seam allowances for each edge. 25 x 3 = 75 + 1 (2 x1/2” seam allowances) = 76.
However, the width of each pleat depends on the desired design effect and is totally up to you. In this example, we’ll be creating a set of 1”-wide pleats.
In order to create our template, we need to draw two markings for each pleat: one line for the fold of the pleat (usually referred to on patterns as the foldline), and one line for the line to which the fold is brought (the placement line).
Let’s take a look at what a template for knife pleats looks like:
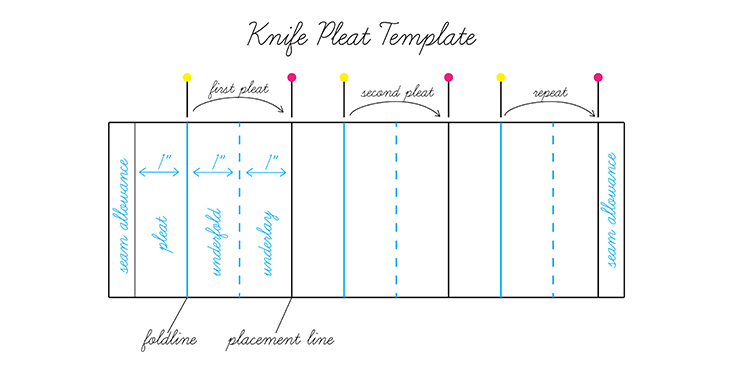
HERE you can download a printable template for 1″-wide pleats.
If you wish to add some pleats to an existing pattern that doesn’t feature any pleats, you can do it pretty easily in these 3 steps:
- Trace the pattern.
- Draw slash lines for the desired amount of pleats parallel to the center front/back.
- Slash the pleat lines and spread for two depths of each pleat.
Forming Knife Pleats
NOTE: If your pleated piece is part of a garment, any hemming should be done prior to pleating. It can be done afterwards, but you would need to repress the bottom of your pleated project.
In general, knife pleats are formed from the right side, especially if you are working with striped or plaid fabric that requires careful pleating to position motifs.
Because you are working in multiples, you need to mark your fabric very accurately. Some sewists like to use basting stitches to mark the foldline and the placement line for each pleat. Personally, I find this technique pretty time consuming and prefer to mark the pleat foldines and placement lines with different colored pins. Choose your preferred method and use pins, basting stitches, fabric marker, chalk etc. Regardless of the method you select to mark your fabric, it can help to use two colors: one for the fold lines and a second for the placement line.
Use your template as your guide and pin-mark the pleat fold lines with different colored pins along the edge you are about to pleat: yellow pins for the foldline and pink for the placement line. Shift the template as you go and remember to leave seam allowances at both ends.
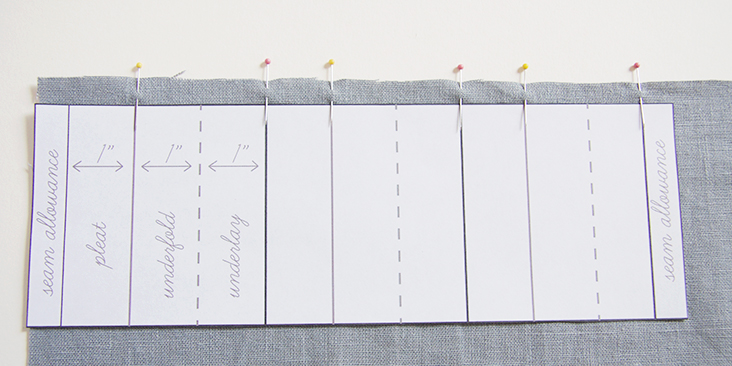
Fold the first pin (yellow) to the second pin (pink) to form the first pleat.
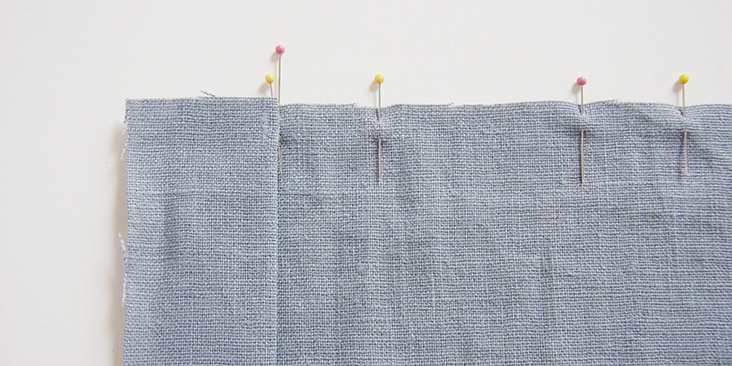
Fold the next yellow pin to the pink pin following it.
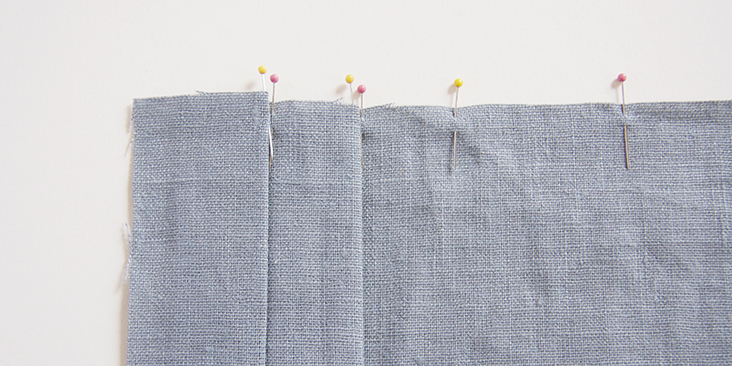
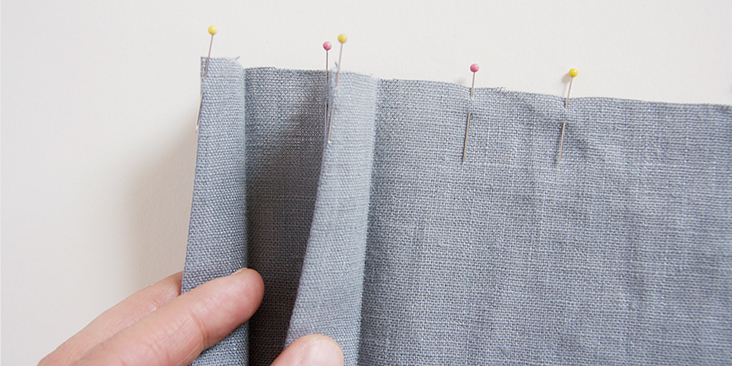
Repeat the same steps until you reach the end.
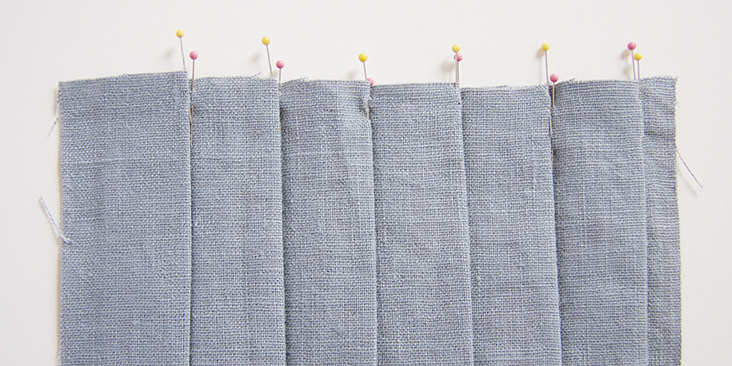
Pin in place to secure.
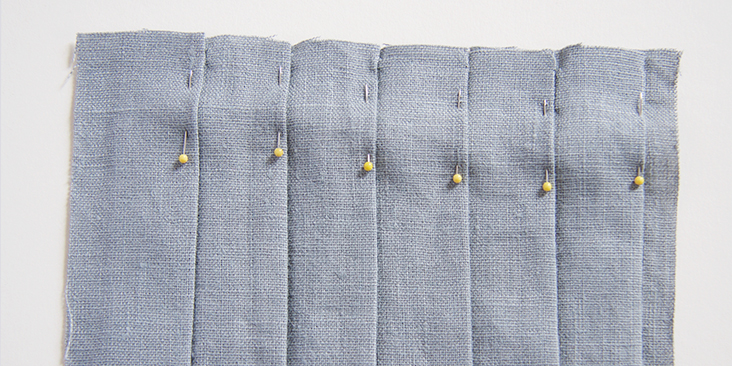
Note: If the fabric to be pleated has joining seams, you can plan to hide the seam inside a pleat.
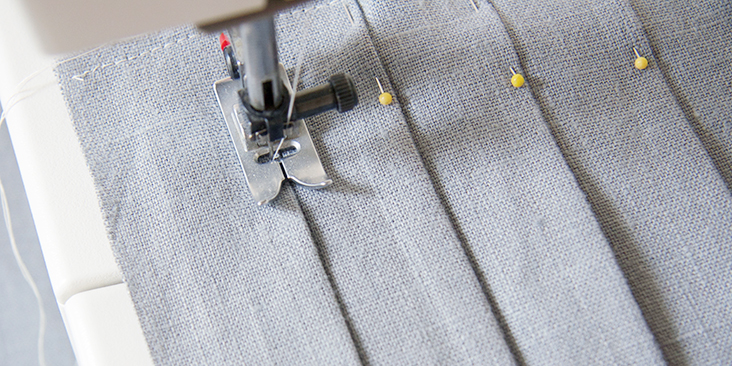
When your pleats are all formed and pinned in place, and you’ve doubled checked that it all measures up and fits your waist, take your fabric to a sewing machine and run a line of straight stitching to baste them in place. Sew about ¼” away from the edge, taking out the pins as you go. You’ll remove these basting stitches once you have your seam in place.
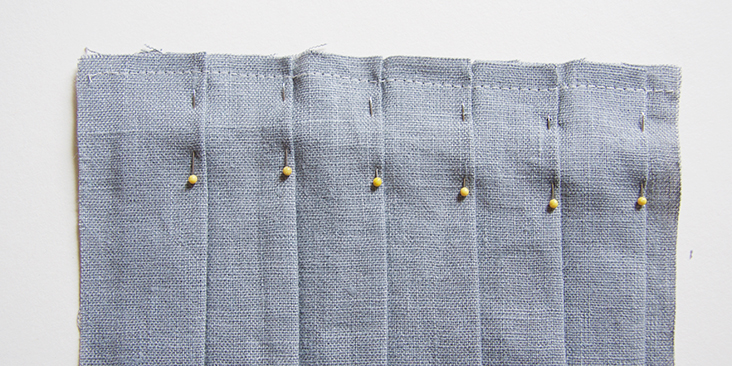
Tip: Sew with the fold of the pleats instead of going against them.
Press pleats along the fold for a crisp look using steam and a press cloth if necessary, press lightly or leave them unpressed to create soft folds. Remember, your pleats may be soft or sharp, but they must be accurately measured to look good.
When folded and positioned, all knife pleats usually go in the same direction. But to achieve a certain stylistic effect, they can also go in two directions. These pleats are formed in two separate sets. Each set faces in the opposite direction from the center, on either side of the center front and the center back.
If you wish to give your pleats more definition and secure them in place, you can run vertical lines of topstitching as close to each folded edge as possible and going down a few inches (or whatever inches you want), backstitching at both ends. The decision is totally up to you as this is simply a matter of style and personal choice. This technique is often used on crisp skirts to secure pleats from the waist to the hip and will give you a nicely defined top but will allow your pleats to open at the bottom.
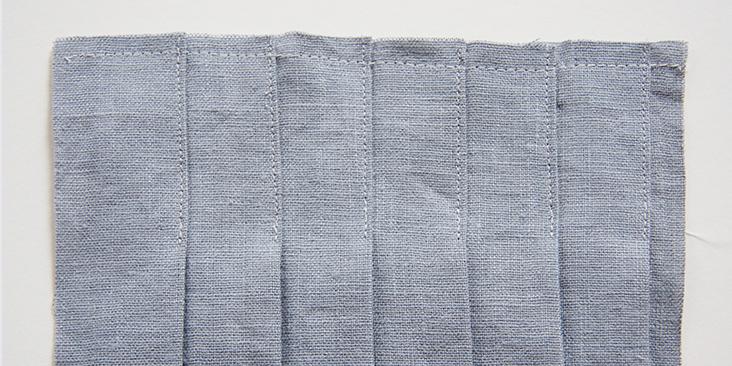
Continue on with however your project calls for finishing the garment.












17 Comments
Pingback:
Exploring Different Types of Pleated Skirts and How to WearPingback:
A Fun And Summery Pillowcase Sundress - Berries & BarnaclesSusan Scarbrough
Hello – does this pattern include the seam allowance?
Rima Khusainova
Hello Susan! You mean the dress pattern, right? Yes, all the seam allowances are already included in the pattern.
Susan Scarbrough
Me again!
Is there errata for this pattern, by any chance? The skirt front pleats are not matching up. I’m an experienced pleater, so maybe a math error (by me)?
Thanks again!
Susan
Rima Khusainova
Hi Susan! They should match! When I made a test version in size 6 (pictured in this tutorial) it worked perfectly. Do you mind telling us what size you are making and I’ll ask our patternmaker to double check? Thanks!
Susan Scarbrough
24.
And I’m so excited about it I can’t stand it. I am going to wear this dress ALL SUMMER LONG!
Maureen
This is a great dress and terrific color!
Is this dress linen?
If so, is the linen from fabrics-store.com?
If it is, what weight linen is it?
also..
Does anyone know who made the dress?
Rima Khusainova
Dear Maureen! thank you for your comment. This dress has just been posted on the blog with a free multi-sized PDF pattern and all the sewing instructions. It’s made from our Autumn gold medium weight linen that can be purchased HERE. It is a gorgeous color and the linen is extremely soft and ideal for summer!
Maureen
Rima, the Autum gold featured in the tutorial looks yellow gold, and so way different than the “HERE” green tab that looks like an orange rust.
Rima Khusainova
Dear Maureen, thanks for the observation. I guess the difference is due to the different light in the picture but i can assure you that it is the same color and that it looks more like the picture in the “materials” section of this tutorial – https://blog.fabrics-store.com/2018/05/29/knife-pleated-button-up-dress-tutorial/
MonicaAD
Thanks for sharing! Such a helpful tool 🙂
Rima Khusainova
Thank you Monica!
Kenzie
Is the pattern for the yellow dress available anywhere? So cute!
Rima Khusainova
Dear Kenzie, it will be available on the blog next Tuesday!
Kenzie
yay!
MARTHA N YOUNGER
I love the mustard color of the dress and the dress.