How To Bind Inverted Corners With Bias Tape Tutorial
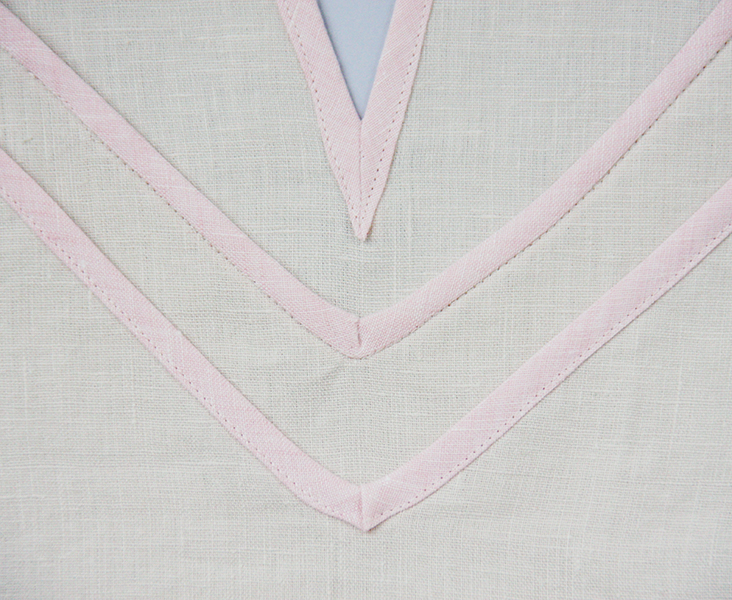
Have you ever wanted to apply a bias tape to a V-neck and did not know how? Or to bind a narrow slit and just couldn’t figure out what to do with the excess bias tape at the corner? In this last tutorial of our bias tape series, we will show you two easy ways to bind an inverted (inside) corner with a bias tape.
The first technique works best with straight or wider angles like a V-Neck, scallop hem etc. Whereas the second technique is ideal for narrow corners like back or front slits.
Materials & Tools
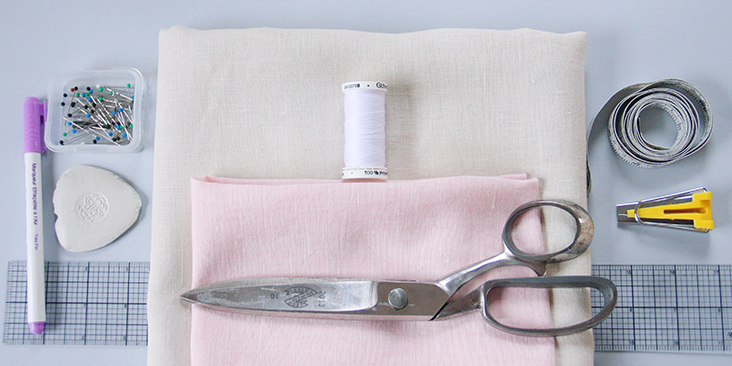
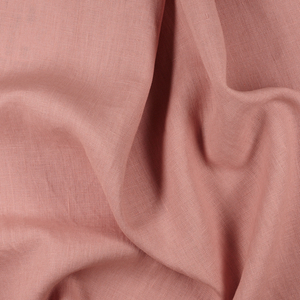
For the purpose of this tutorial, we are using two contrasting fabrics. IL042 894 Premier Finish for the bias tape and IL019 ANTIQUE WHITE Softened for the bodice.
Matching sewing thread (for the purpose of this tutorial we are using a contrasting white color thread), ruler, bias tape maker, fabric pen or chalk, scissors, sewing machine, iron
Difficulty
Beginner
Steps
Note: Prewash your fabric and tumble dry it until it is still slightly moist, let this dry in room temperature. Iron the fabric so it is easier to work with.
Make your bias tape using the traditional method or the continuous method.
Since we’ve already learned how to attach bias tape and bind mitered corners, you’re going to combine these two techniques when you do your inside corners with bias tape.
The First Method
This method works best with straight or wide corners and consists in sewing one side of the bias tape first, then flipping it over, folding the corner and attaching the other side.
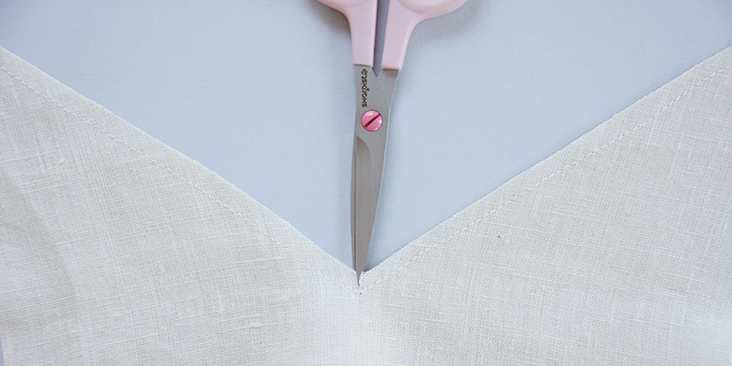
Note: If you are working on a V-neckline, prepare it by stitching 1/4″ (0.6 cm) away from the raw edge to reinforce the corner of the V-neck.
Clip into the center of the V to release the tension as close to the stitch line as possible (be careful not to cut through). This step will keep your neckline free from any puckering at the center.
1. Unfold your bias tape and pin one of its raw edges along the first straight edge right sides together and aligning the two.
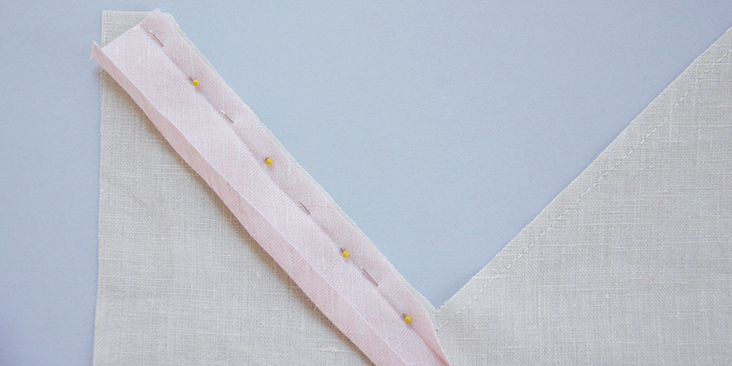
2. Sew the pinned edges together in the crease of the bias tape. When you come to the V, with the needle down, pivot the fabric to the other straight edge. And because you clipped into the V, you can now pull the first side to the left to get a straight line. Put your foot back down and continue sewing down the second edge.
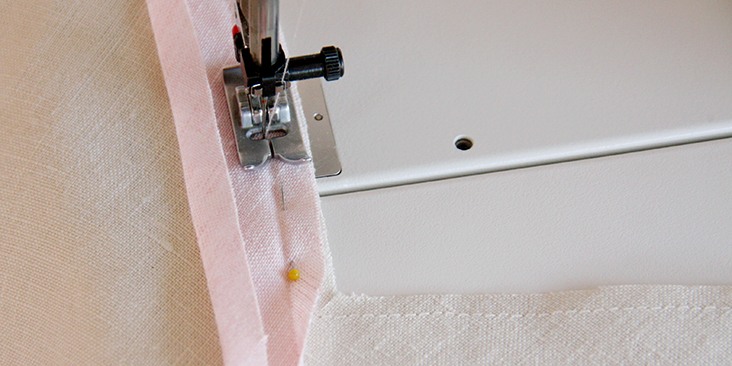
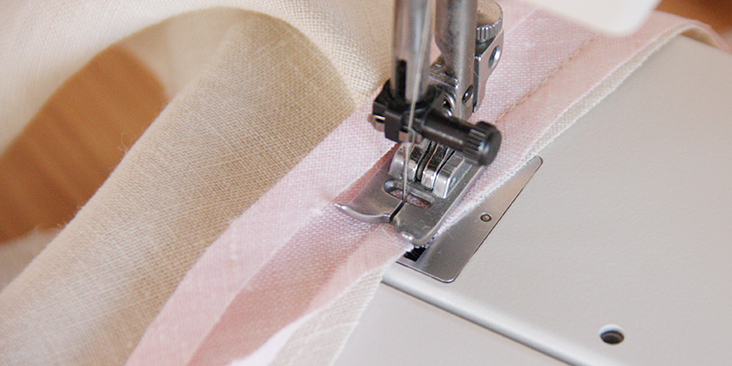
Make sure your seam allowance is wider than your reinforcing stitching line.
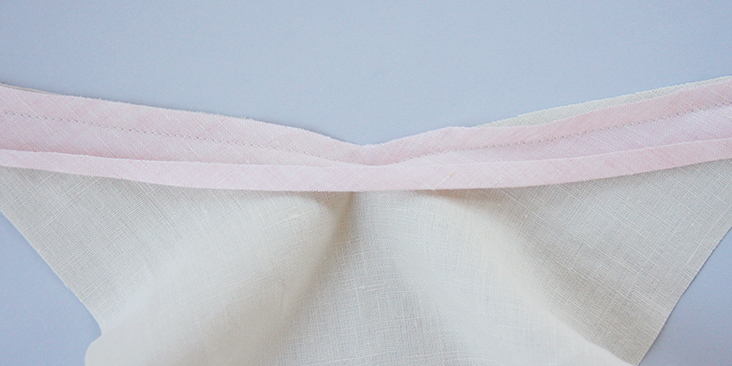
3. We recommend trimming the seam allowance to 1/4″ but this step is optional.
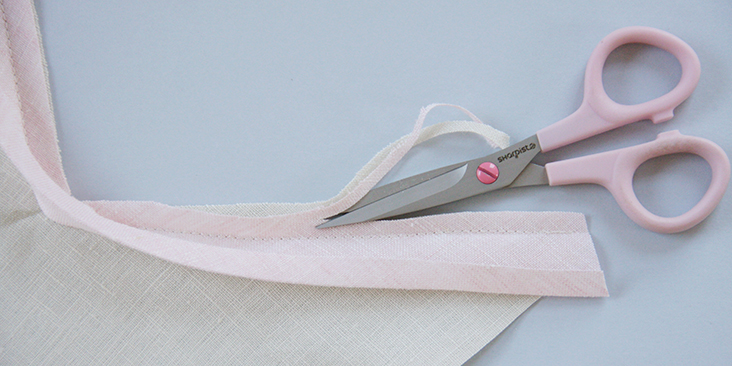
4. Cut a small V in the binding fabric (in the raw edge that you’ve just attached) to get the excess fabric out. This way your fabric will lay flatter.
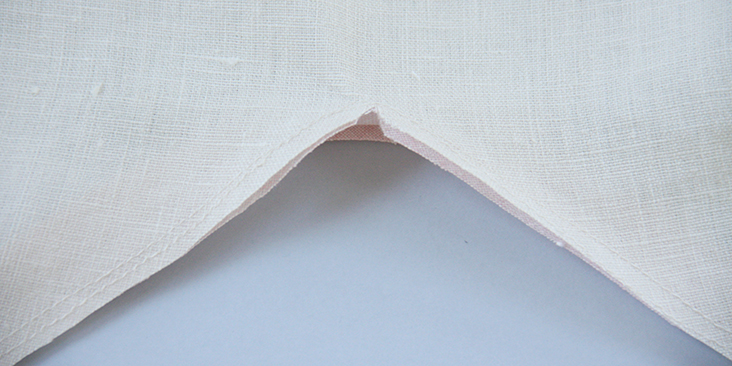
5. Lightly press the bias tape away from the fabric.
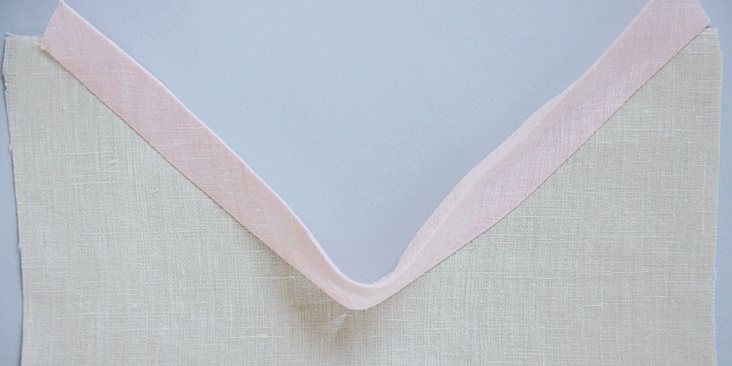
6. With your bias tape pressed away from the fabric, miter the corner by carefully folding it one side down and the other one on top, so that you have that 45 degree angle.
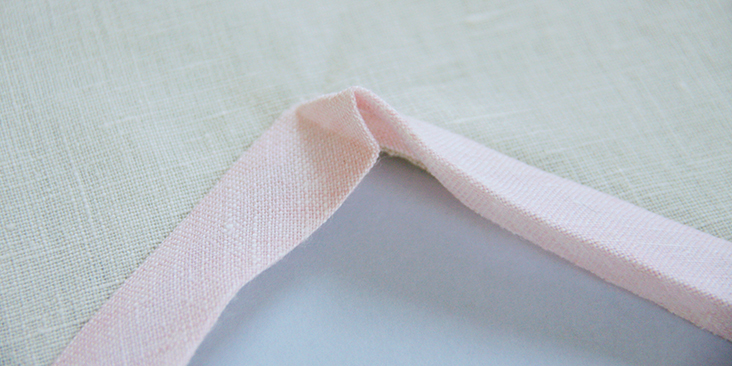
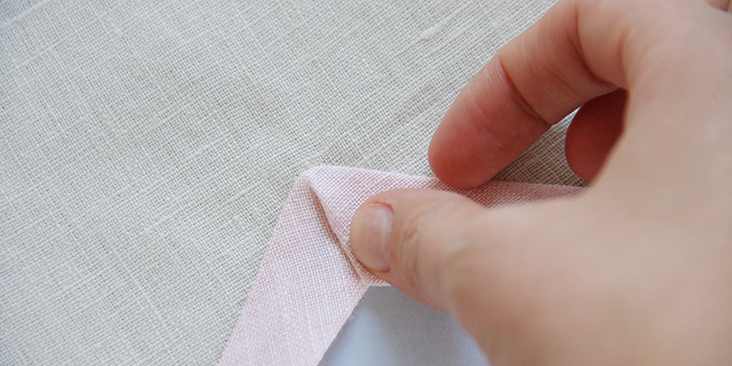
7. Fold the rest of the tape to the wrong side and pin making sure to cover the stitching line as you fold.
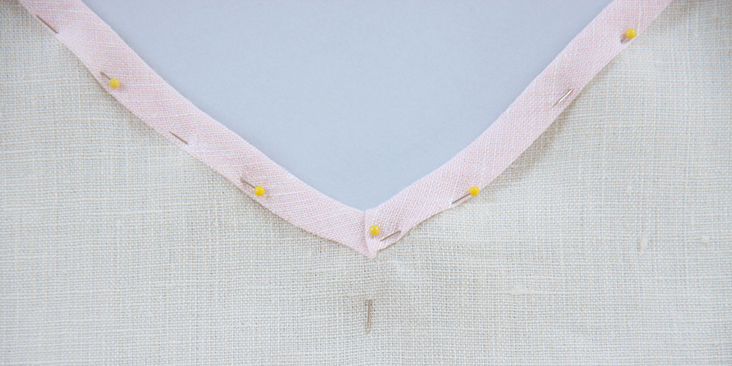
Normally, your corner on the wrong side would fall naturally at a 45 degree angle, but if it doesn’t, wiggle it a little bit to get a perfect angle and pin in place.
8. Topstitch the tape in place (from the right side) in the crease or as close to the bottom edge as you feel comfortable.
9. Take your needle and some thread and sew up the corner by hand to secure the fold.
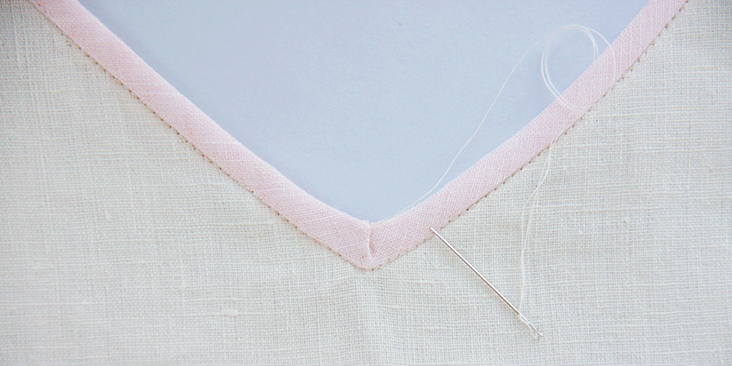
Et voila! Admire your nice flat inside corner!
If you are working with a double-fold bias tape, here’s what you should do:
1. Slip the first straight edge of the fabric between the folds of a bias tape, placing the raw edge against the center crease and the wider folded edge of the tape on the inside/back of your garment and pin.
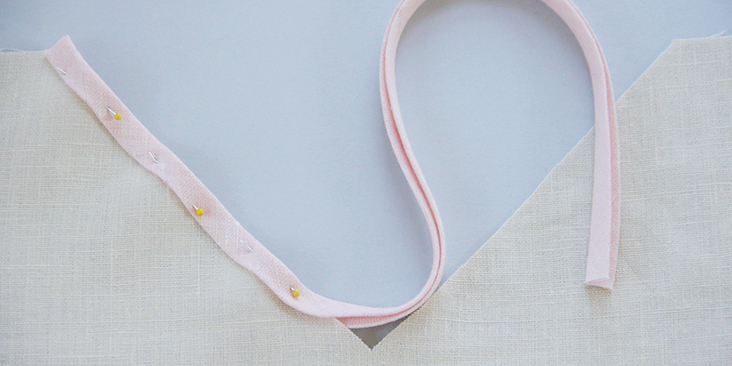
Just a reminder that one side of the double-fold bias tape should be slightly wider than the other. For more information about this check our tutorial HERE about attaching the double-fold tape.
2. When you come to the V, miter the corner by carefully folding the unpinned edge of the bias tape over the pinned one, tucking in the excess binding (so there’s a tuck on the inside of the binding) at a 45 degree angle. This sometimes is a bit tricky, so just hang on and try it until you get it right. Pin.
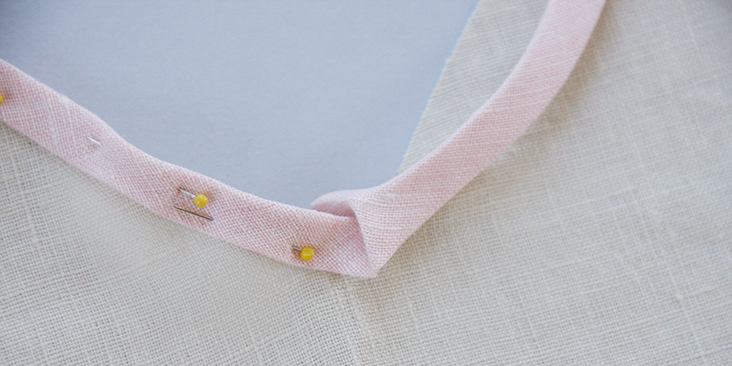
3. Pin the rest of the bias tape to the second straight edge.
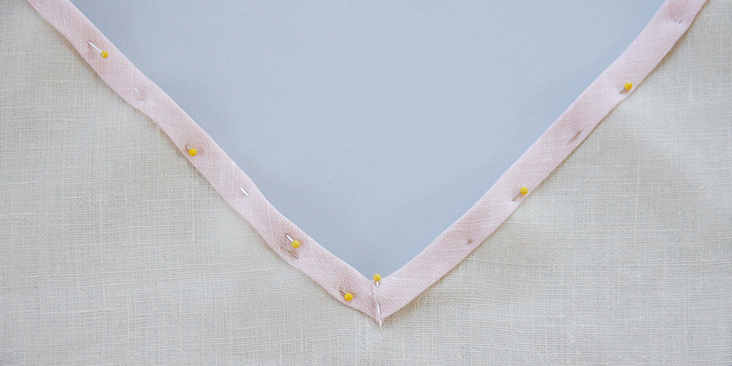
4. Working from the right side, stitch through all layers at once as close to the bottom edge as possible, removing pins as you go. Pivot the needle when you get to the corner, stop the machine with the needle still in the fabric, pivot your piece and keep stitching. Remember to backstitch at the end.
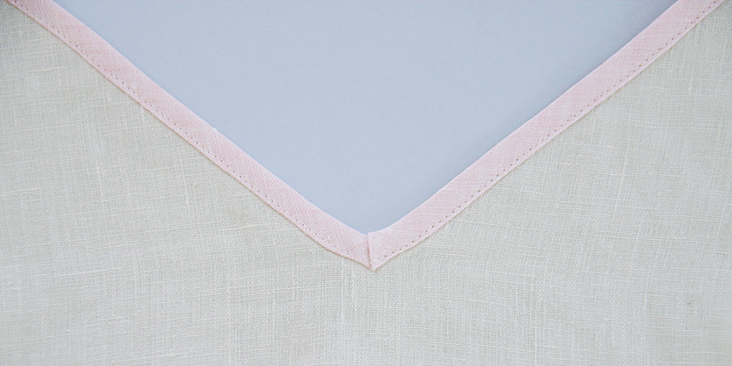
5. Take your needle and some thread and sew up the corner by hand to secure the fold.
The Second Method
This method works best with narrow angles and allows you to get a sharp point (as opposed to a softer, rounded look). It consists in sewing a pre-made replica of your corner into your binding. You’ll be working with two bias tape strips that will meet at the V-point.
1. First, at the center of your binding fold it in half, right sides together, and press.
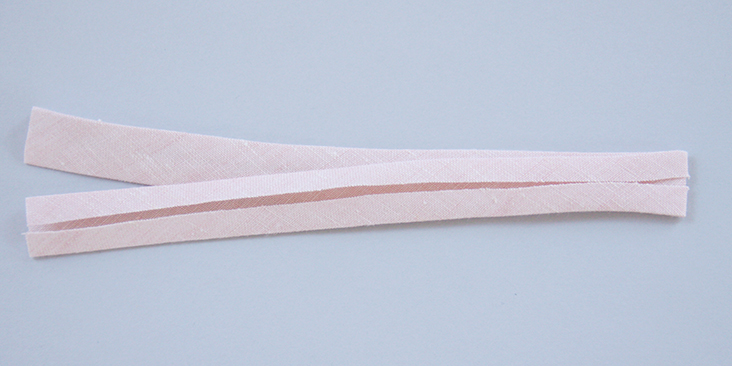
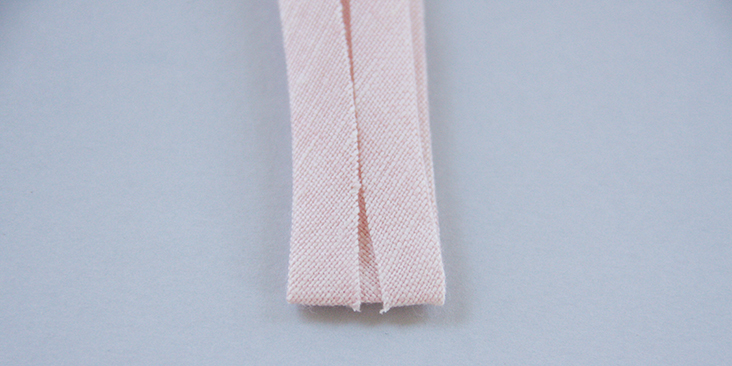
2. To determine the angle that you need to sew, lay the fabric to be bound over the folded bias tape as shown in the image below.
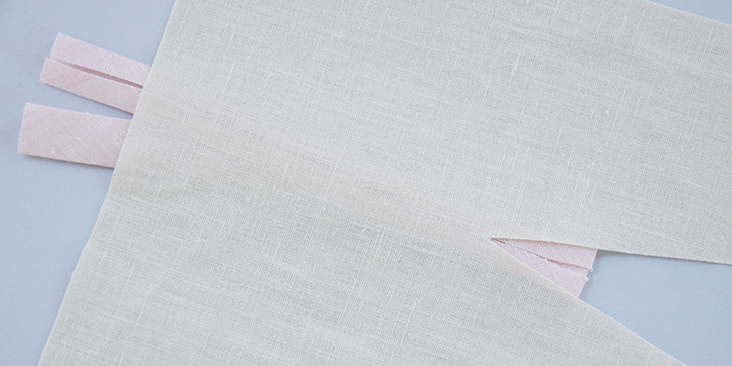
Make sure that the folded end is visible through the V and the long ends are hidden under the fabric.
3. Using a fabric marker, draw trace the angle of your V onto your bias tape. This will be your cutting line. Pin the fold to make sure it doesn’t shift when you sew.
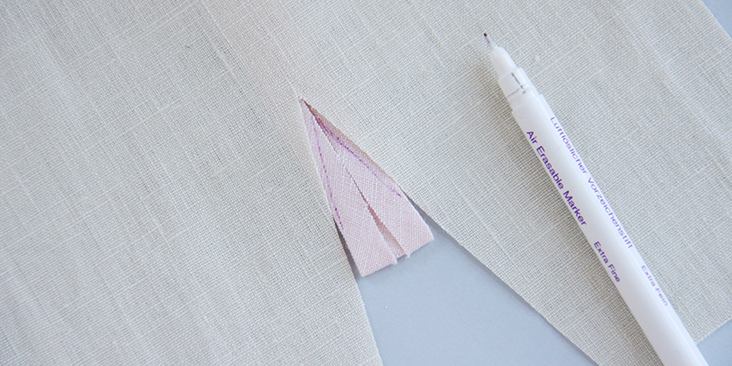
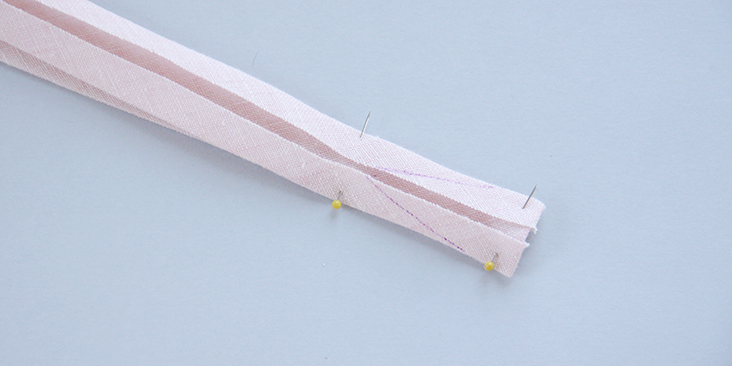
4. Stitch along your drawn lines, backstitching in place at the edges and then trim closely to the stitch line.
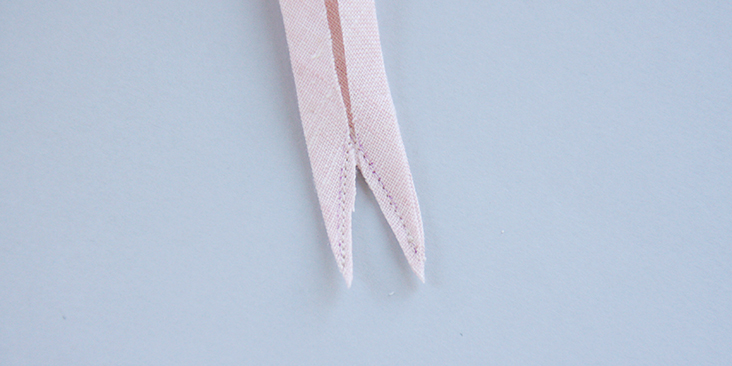
Your trimmed corner should be the same angle as your inverted corner to be bound.
5. Finger press the trimmed seam allowances open and unfold your bias tape so that the right sides are now facing outwards.
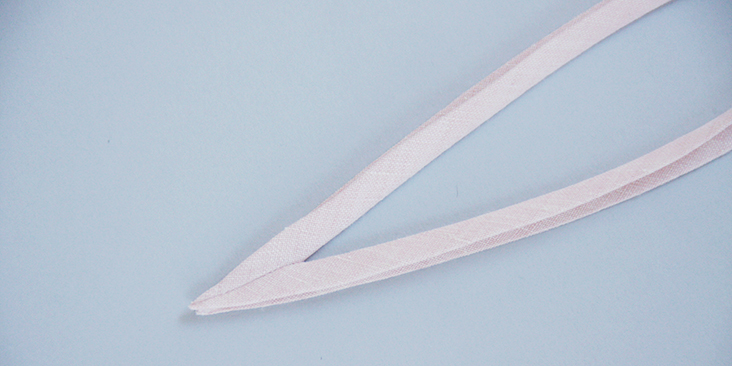
You now have the exact replica of your V-point in bias tape.
6. Trim any excess threads or fabric to get a neat corner, press it and pin to the fabric by slipping it between the folds of your pre-made piece and matching the Vs.
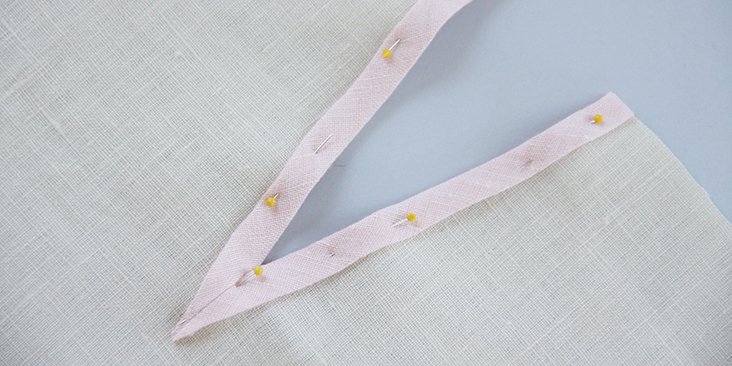
7. Working from the right side, stitch through all layers at once as close to the bottom edge as possible, removing pins as you go. Pivot the needle when you get to your corners, stop the machine with the needle still in the fabric, pivot your piece and keep stitching. Remember to backstitch at the end.
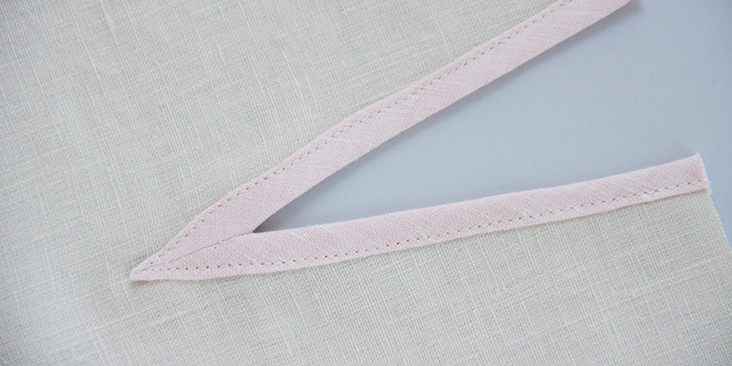
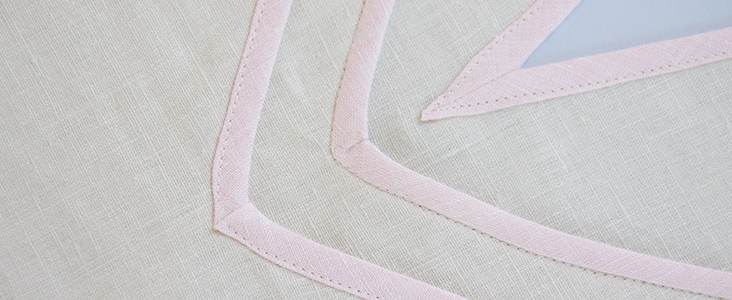
We hope these tips will make your next bias bound project easier!













14 Comments
Susan Baggett
Very nice tutorial.
Kristi Williams
Your tutorials and patterns are such a gift to the sewing community. I’m shouting from the housetops your praises. Thank you from a very happy Arizona USA sewist!
Lynette
This is brilliant, and I would have never thought of this approach. Thank you for the super clear tutorial
Patricia
Loved the instruction method and excellent photos. Would the exact same instructions apply to knits or jerseys?.
Rima Khusainova
Thanks for your kind comment Patricia! To be honest, I’m not a pro of sewing with knits/jerseys. In theory, I think it should work as well as with linen but I think you should double check – there are so many sewing tutorials specially for knits out there.
Mary
Great tutorial!
barbara
thanks for yet another great & inspiring tutorial
Rima Khusainova
Thank you very much for your kind words Barbara!
suzy
Thank you so much for the tutorials. I find them very helpful.
Suzy
Cee Ragin
This is a great tutorial! I have been sewing for many years and did not know these techniques. Goes to show you can always learn something new when sewing. Thanks.
Rima Khusainova
Thank you so much Cee!
Jaimn
as always, thank you for the wonderful tutorial!!
Mildred Garner
Great tutorial, explained it so well!
Kay
Perfect! Thank you!!!