Sewing Glossary: How To Draft And Sew A Sleeve Placket With Cuff
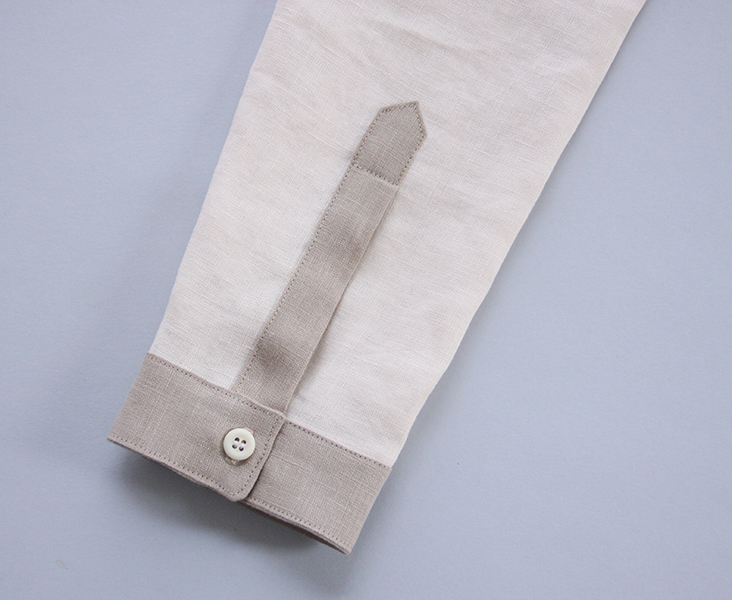
A sleeve placket is an opening at the end of a sleeve that allows your hand to fit through a narrow space easily. It’s most often seen on shirts or blouses and is generally finished with a cuff. Not only it is functional, it can also be used as a design detail.
At first glance, a sleeve placket might seem complicated to sew. So we hope that with this tutorial we’ll be able to show you that it’s actually much easier than it looks and that by the end of this post you’ll be able to draft and add a sleeve placket to your own projects.
Materials
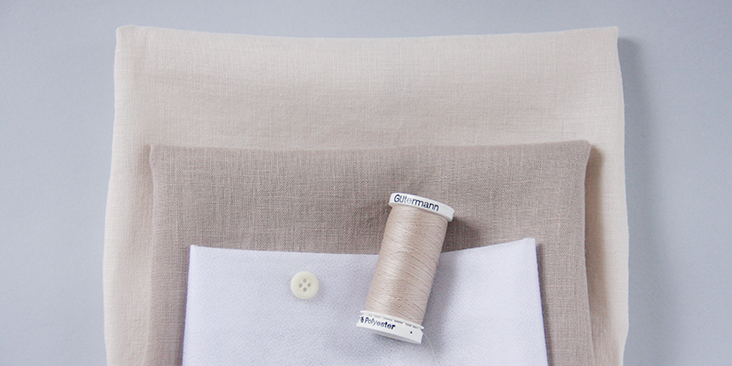
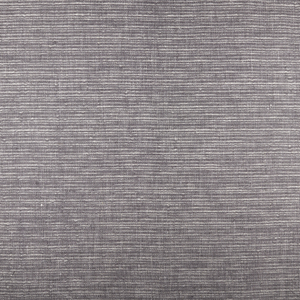
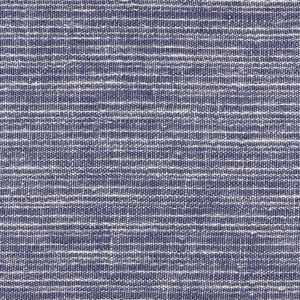
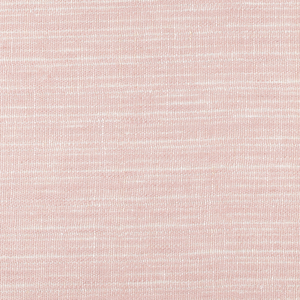
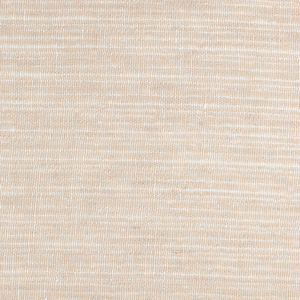
Fabric of your choice (for the purpose of this tutorial we are using two contrasting medium weight linens 1C64 WHITE SAND Softened 100% Linen and IL020 100% Lightweight Linen
Matching sewing thread, small buttons, fusible interfacing (optional)
Tools
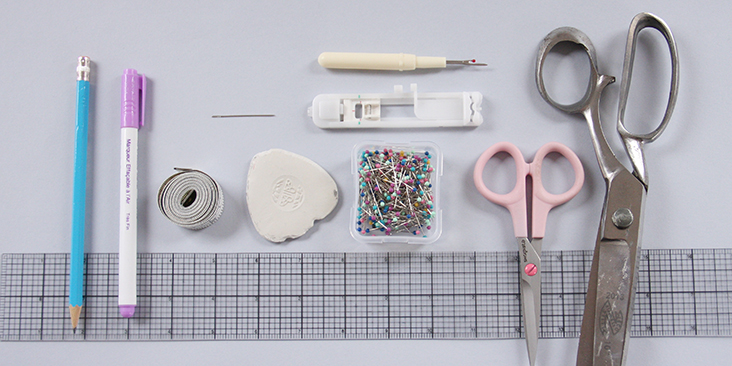
Pattern paper, scissors, ruler, pins, chalk, fabric marker, pen, buttonhole foot, needle, seam ripper, a sewing machine
Difficulty
Advanced Beginner
Time
1 hour
Drafting the Pattern
If you are working with a pattern featuring a cuffed sleeve placket, it would give you all the measurements and cutting instructions. However, if your pattern doesn’t call for a placket sleeve and you would like to add one, you can easily draft your own template in just a few easy steps and add it to any sleeve. All you need is a piece of paper, a pen and a ruler.
Refer to the diagram below to draft your own sleeve placket template (this template is for 0,75 inch wide placket) :
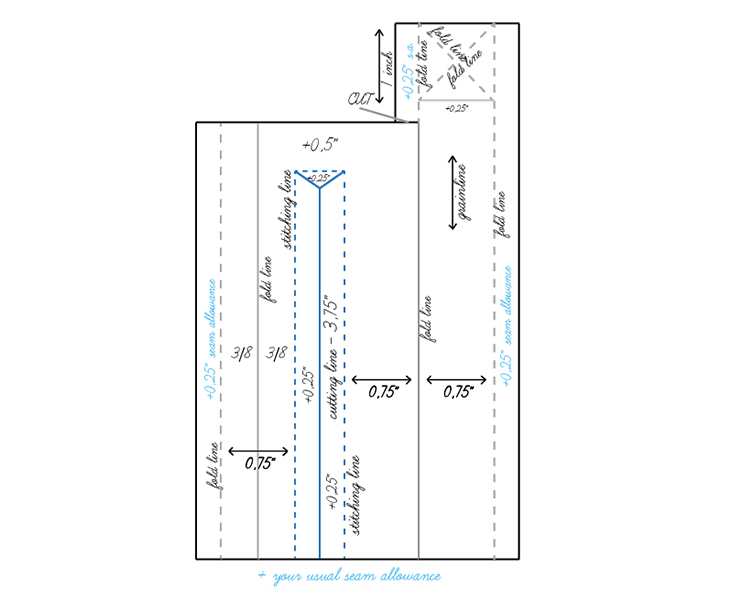
The finished placket is generally 3/4″ (2 cm) wide x 5″ (12,5 cm) high for womenswear and 1″ (2,5 cm) wide x 7″ (18 cm) high for menswear. Note that this template is easily adapted to make plackets of all sizes.
Note that this tutorial is for the left sleeve. To make a right sleeve, inverse the position of the placket on the sleeve so that it is a mirror image to the left sleeve.
Here’s how you position the placket for the left sleeve:
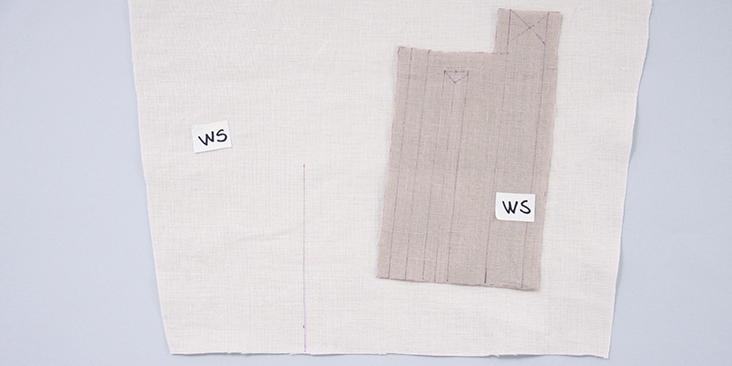
And for the right sleeve:
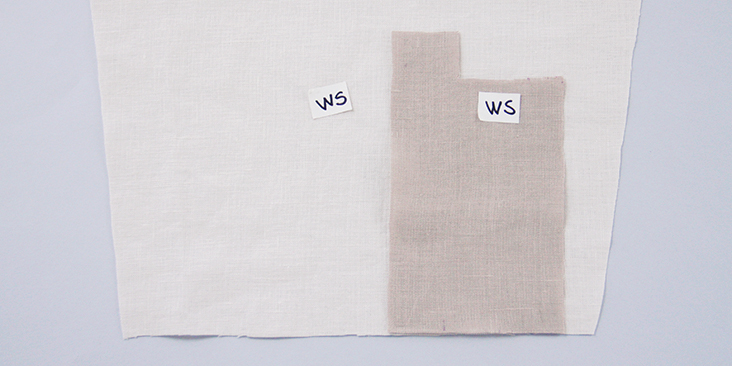
In this tutorial we will be showing to you how to sew a women’s version of the placket which is ¾” wide and 5″ high.
Steps
Note: Prewash your fabric and tumble dry it until it is still slightly moist, dry in room temperature. Iron the fabric so it is easier to work with.
Depending on the weight of your fabric, you need to decide if you want to strengthen your placket by applying fusible interfacing to the wrong side of your fabric. Whereas collars and button bands are usually interfaced, as far as the sleeve plackets are concerned, interfacing is optional. If you’re not sure whether you need to use interfacing or not, just ask yourself if the fabric you’re using needs more support in that area. Since we are working with medium-weight linen which has a good natural support, we decided not to interface our sleeve placket.
Once last thing before we start to sew, make sure you position your sleeve placket at the center back of your sleeve, at the bottom. Refer to the previous pictures.
1. The key to sewing a great placket is to carefully mark and sew precisely. Which is why we recommend transferring your template markings to the wrong side of the fabric to help you know what goes where once you start press and sew.
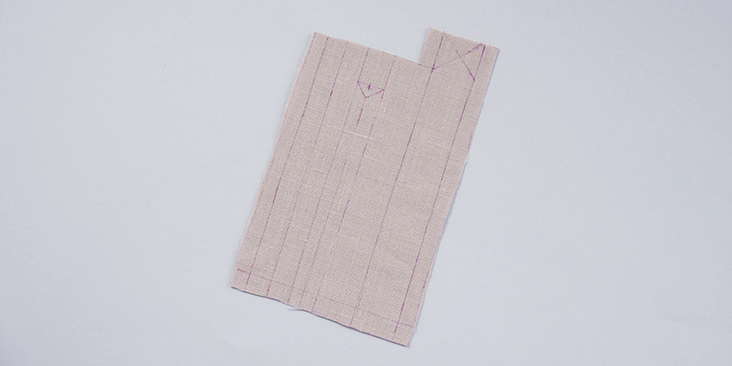
2. Make a small snip in the seam allowance (where it says “cut” in the diagram) to meet the second fold line.
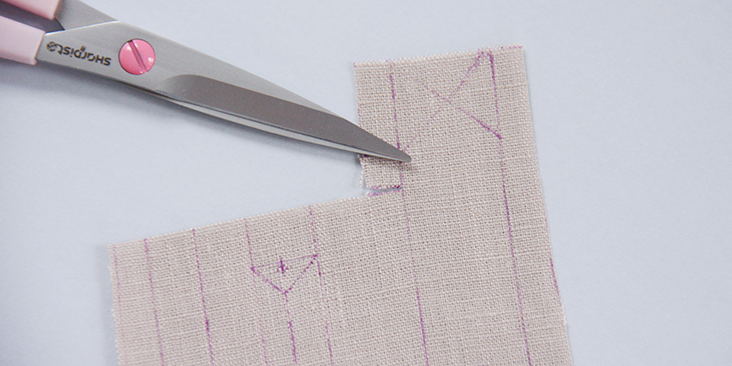
3. Press the placket’s seam allowances to the wrong side as shown below:
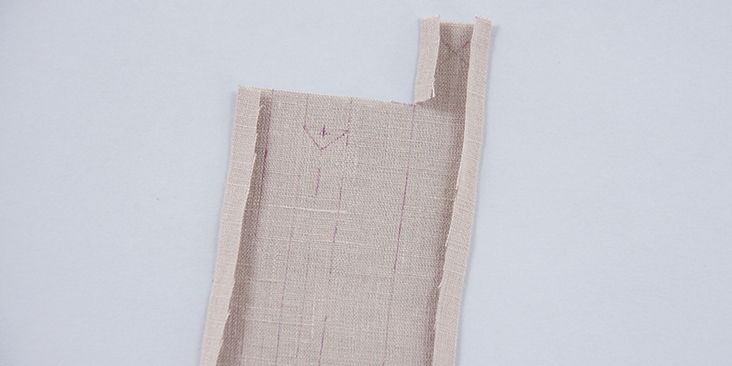
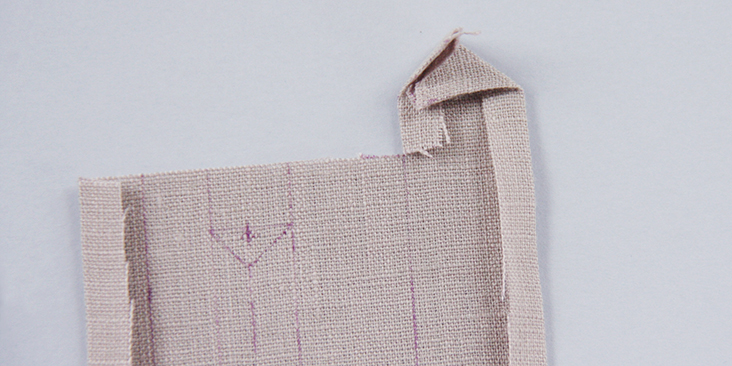
4. Position the placket fabric on top of the sleeve fabric with both wrong sides facing you. Match markings (the slash lines) on sleeve and sleeve placket and pin.
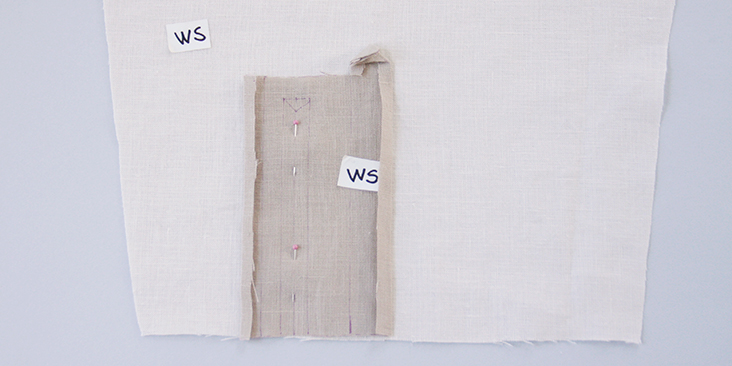
Note that the higher column of the placket should be closest to the center of the sleeve and the shorter one – to the side of the sleeve.
When you start working on the second sleeve, double-check that the plackets on the two sleeves are mirror images of each other
5. Stitch around the box that surrounds the slit line, pivoting at the corners. Use a shorter stitch length when you come to the corners as you’ll later need to clip quite close to them.
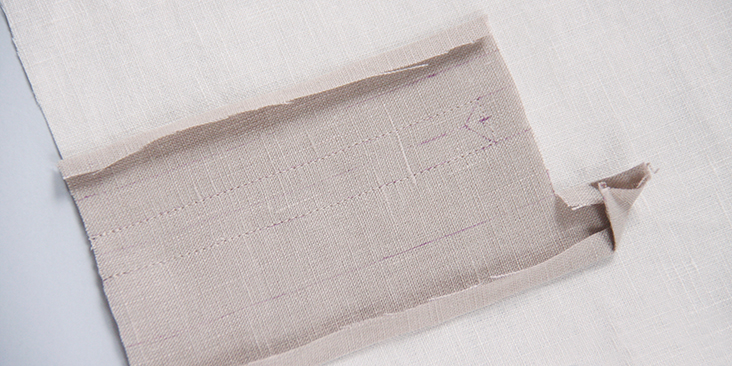
6. Now that you’ve stitched your box, carefully cut in the middle but stop 0,5” from the end and clip diagonally to create a «Y». Clip as close as possible to the stitch line but don’t snip through it. You should be cutting through both layers (the sleeve and the placket).
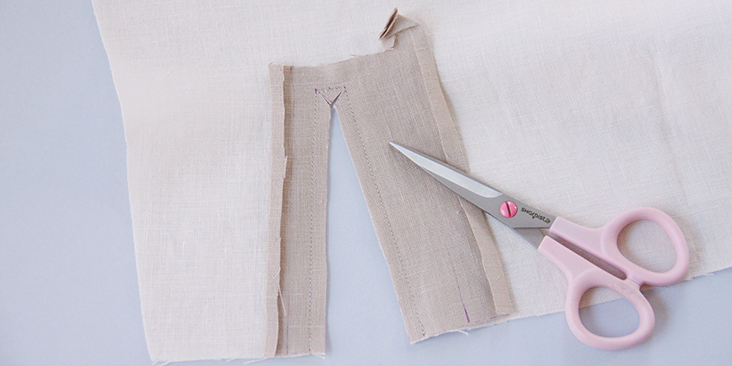
7. Turn the placket to the right side of the sleeve and gently press the seams flat to smooth out any possible wrinkles.
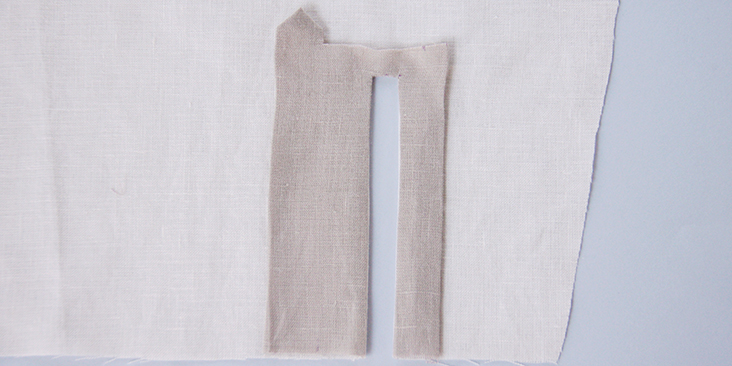
8. Fold the narrow side of your placket along the line slightly covering the line of stitching. Press and pin.
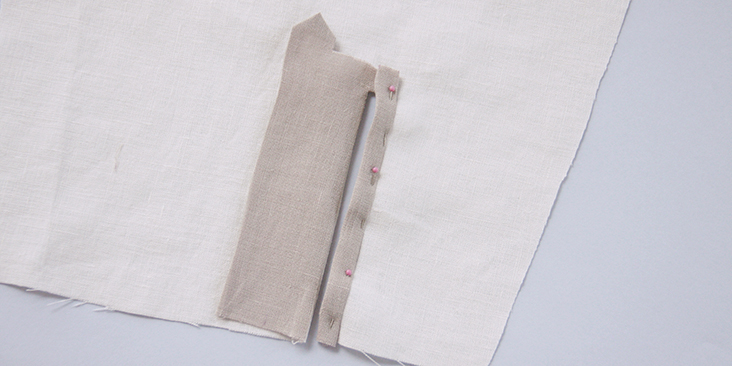
9. Working from the right side, topstitch the folded edge to the placket.
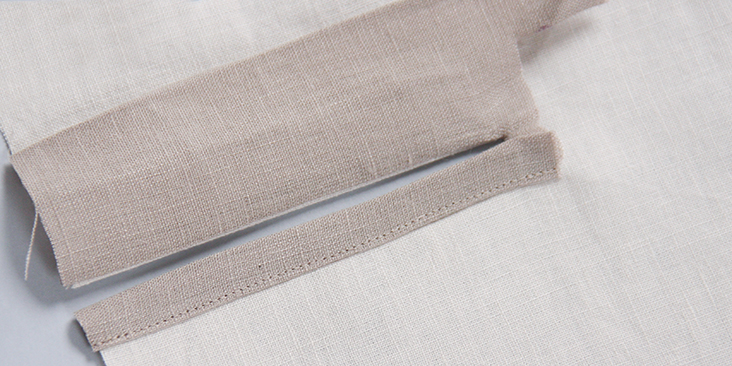
10. Now fold the wider edge of the placket along your marked line, covering the gap and the line of stitches of the narrow edge. Press but do not pin yet.
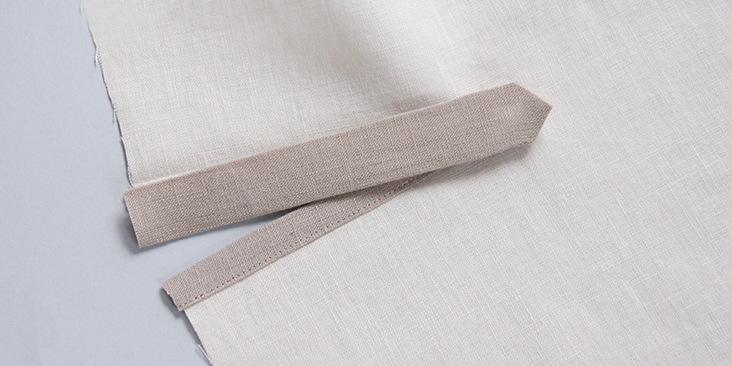
11. Before you edgestitch our triangular side of the placket (often called “tower”) in place, you need to check where the top of the opening is as you want to make sure that you don’t topstitch too far away from it or over it. Make a small chalk mark at the point or place a pin.
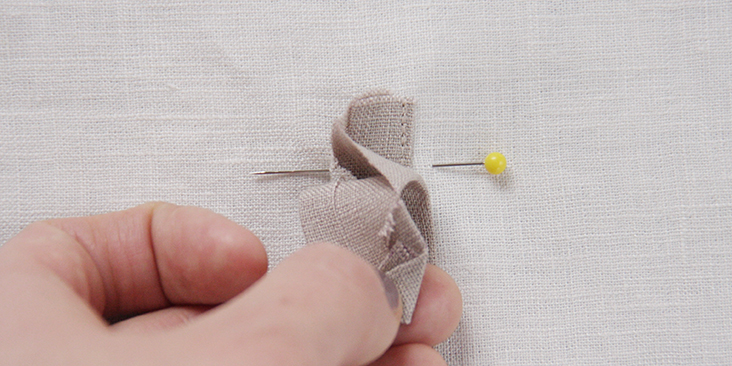
Now you can pin the tower section.
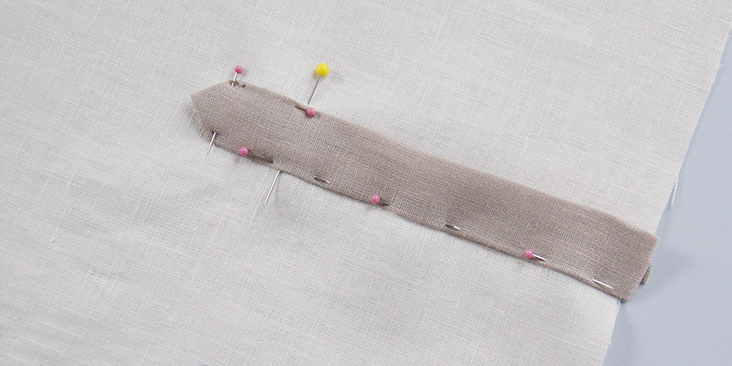
12. Edgestitch your tower placket piece in place, starting at the bottom and sewing up towards the point. Use a smaller stitch length when you approach the point and pivot your fabric with your needle still in it when you reach the lower edges.
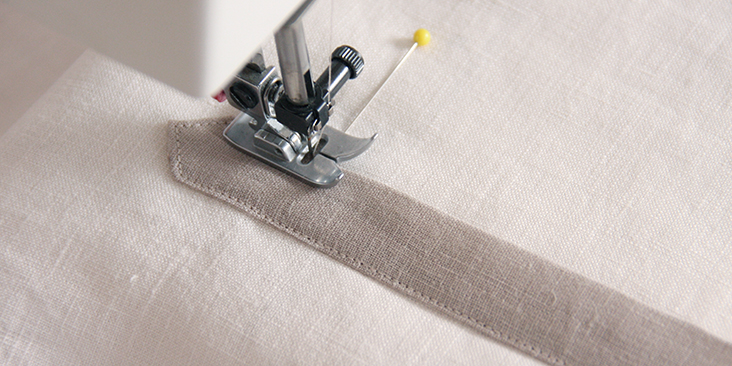
When you reach the mark, stop, pivot your fabric again and sew straight across the placket. Remember to backstitch when you reach the end.
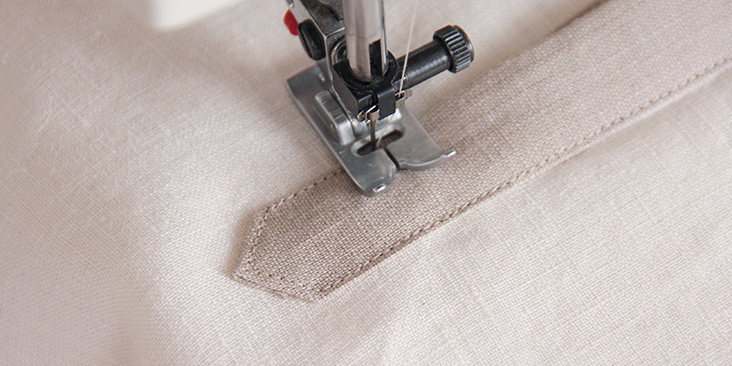
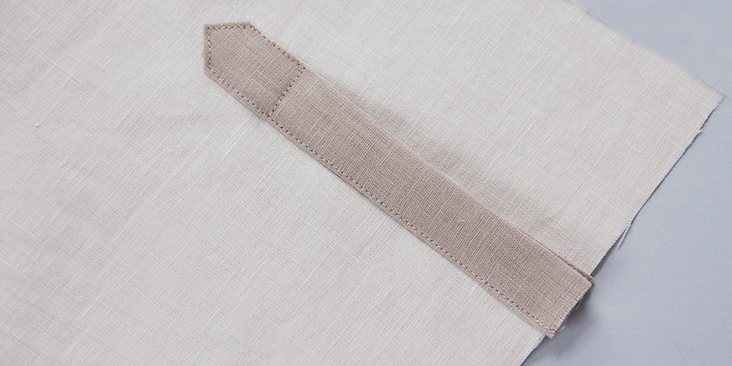
If you wish, you can even create a decorative X to stabilize the seams.
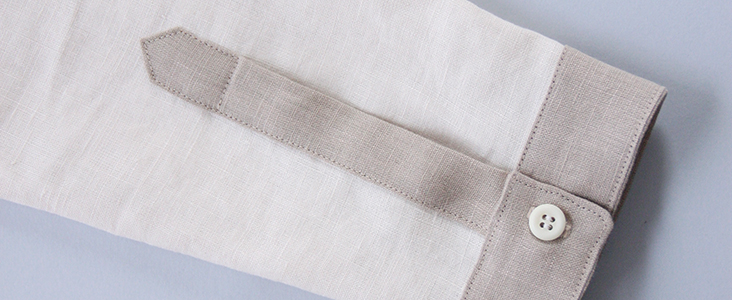
13. Press your finish sleeve placket one more time and you are all done!
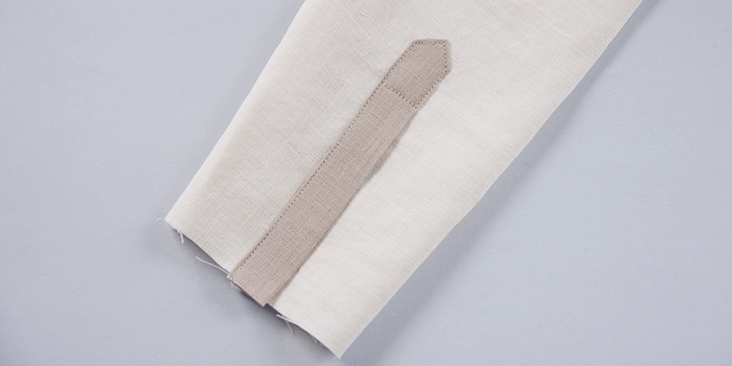
Now, you need to finish the sleeve with a cuff.
Drafting The Cuff
Note: At this point, your sleeve should be already attached to the garment and closed up at the sides to form a tube. Follow the instructions in your pattern to attach the sleeve.
Depending on the width of your sleeve opening and your finished cuff, you might need to gather or pleat your sleeve fabric first. In our case, the sleeve opening is quite narrow so our cuff’s width is identical to our sleeve’s width – 9,25″.
Start by drafting your cuff.
1. Measure the length of the wrist line on either your finished sleeve or directly around your wrist and decide how long you want your cuff to be.
2. Take a piece of paper and draw a horizontal line that corresponds to your measurement.
Then draw two perpendicular lines to the desired width of your cuff. If you are not sure what width to choose, you can always refer to a shirt in your wardrobe to get an idea of an appropriate cuff width for your project. We went for 1,5″ (3,8 cm).
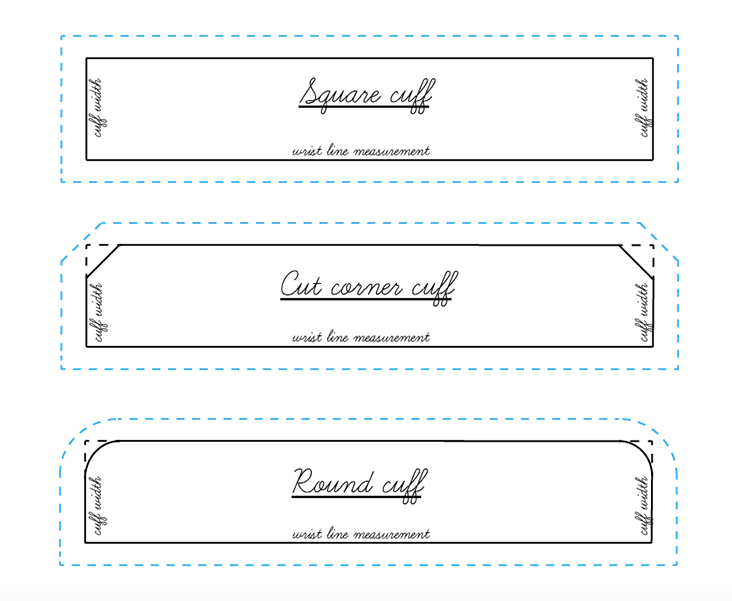
Connect the dots to complete your rectangle and decide what shape you would like your cuff to be. The most common cuff types are: round cuff, cut corner cuff or square cuff. We chose the latter.
3. Add your usual seam allowances around all edges (we work with a 3/8″ (1 cm) seam allowance) and for one cuff cut 2 pieces in fabric and one in interfacing (without the seam allowances for the interfacing).
Here’s a little diagram that will help with the drafting:
It’s time to assemble and attach the cuff.
Sewing And Attaching The Cuff
1. For one cuff, cut 2 pieces from fabric and one from fusible interfacing.
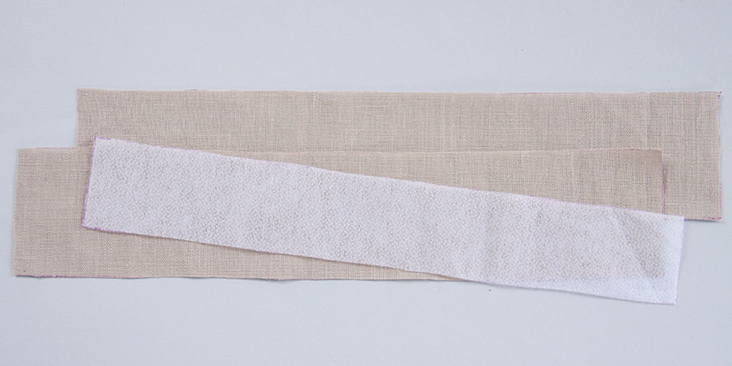
2. Apply fusible interfacing to the wrong side of one of your cuff pieces and press the top edge under 3/8″ (1 cm).
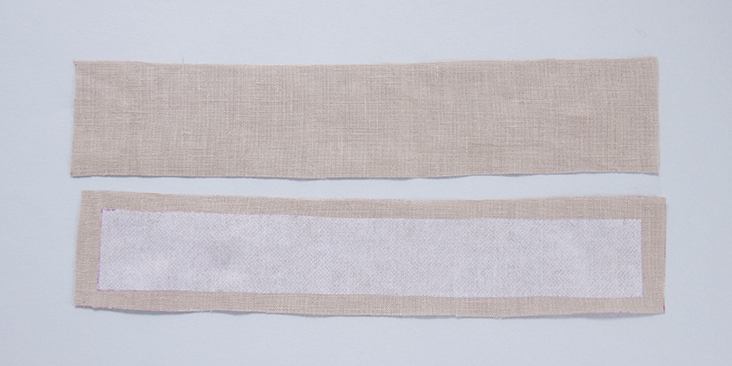
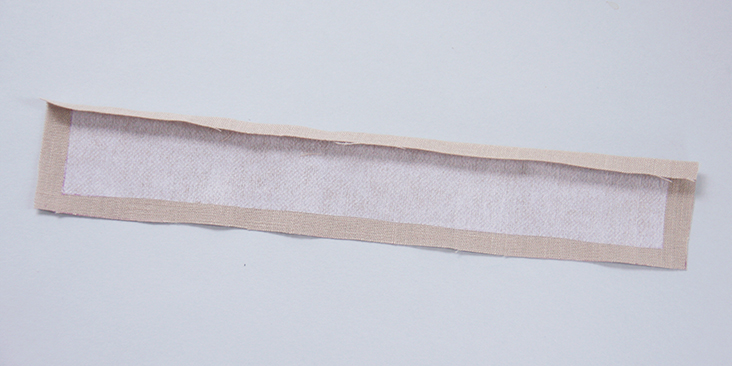
3. Take your non-interfaced (outer) cuff piece and pin the two right sides together, aligning the curved edges.
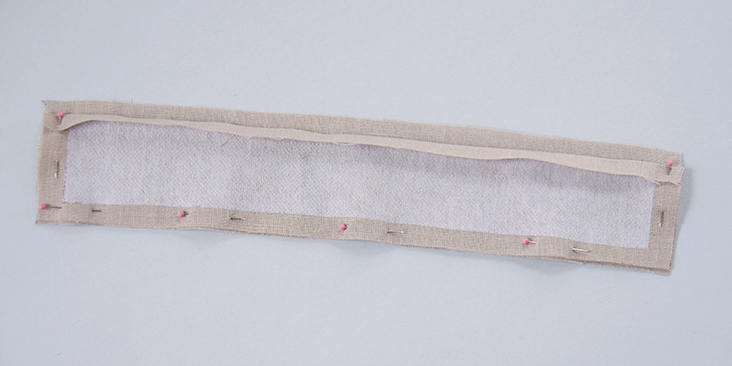
4. Stitch the outer cuff to the inner cuff all along the curved edge at a 3/8″ (1 cm) seam allowance.
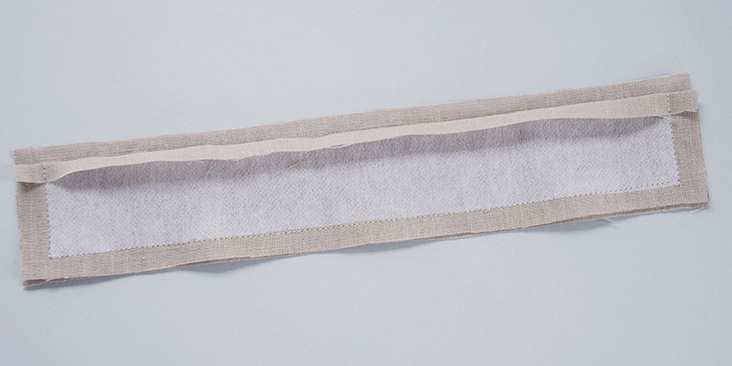
5. On the wrong side of the sleeve, pin the non-interfaced cuff panel to the sleeve sandwiching the folded cuff panel in between but making sure not to catch it when you pin. Both wrong sides should be facing you.
Match up the finished sleeve edges to your cuff’s line of stitching so that when you turn your cuff right side out, they’ll be aligned.
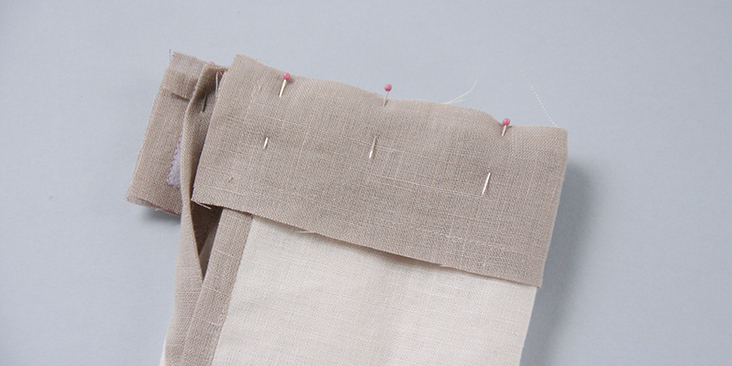
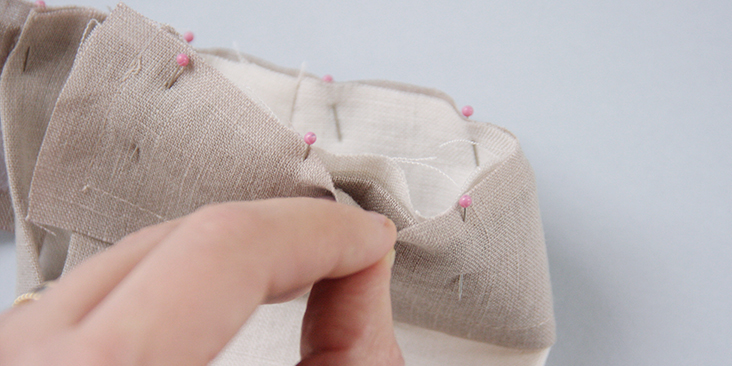
6. Stitch the cuff to the sleeve making sure that the folded cuff edge is not caught.
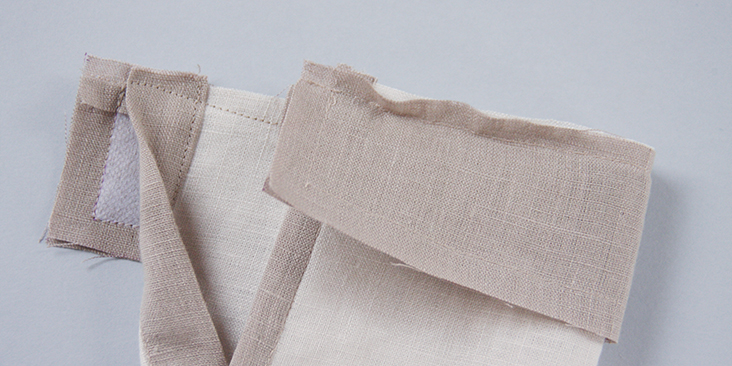
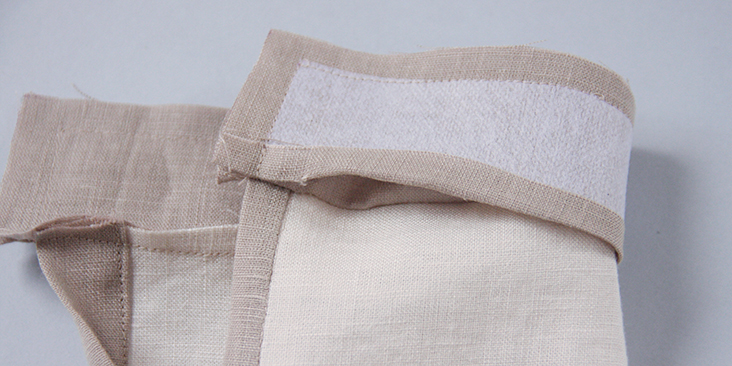
7. Turn the cuff right side out and press the seam flat folding the seam allowances towards the cuff. Use a dull pointed object like a chopstick to get the corners.
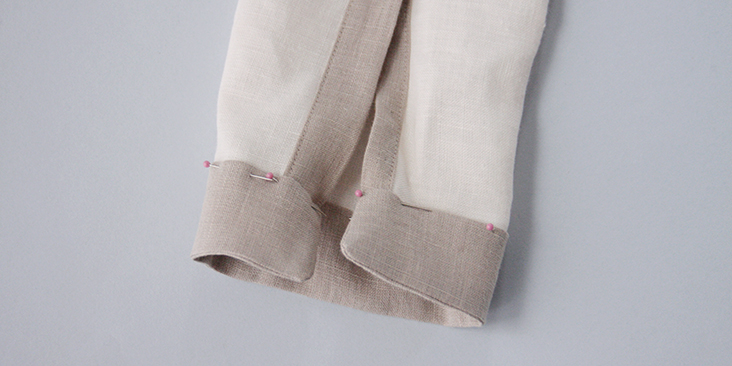
8. Edgestitch the remaining edge of the outer cuff to the sleeve through all layers.
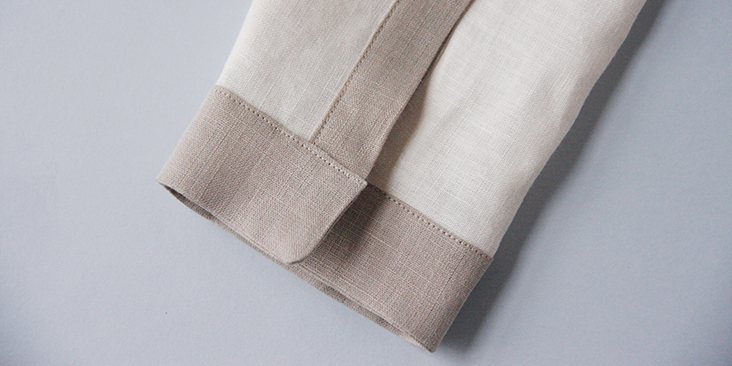
9. To make sure that your sleeve cuff stays in place, topstitch around the curved outer edge 1/8″ from the edge.
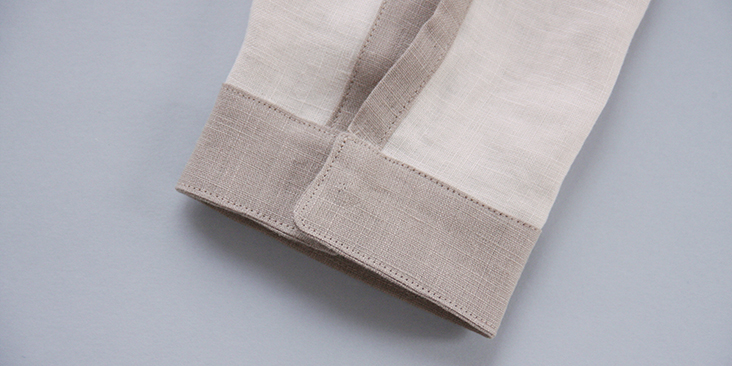
10. Overlap the cuff and decide where you want to place your button. Make a small mark and sew a buttonhole and attach a button following these easy tutorials HERE and HERE.
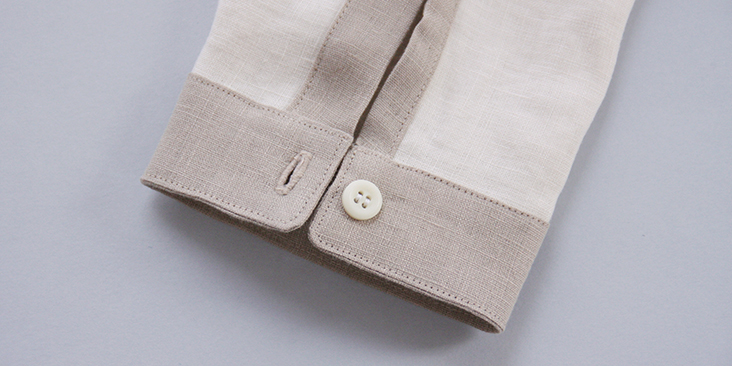
Your cuff is now finished! After you’ve been through this process once, you will be stunned at how easy it is.
You can add a sleeve placket to a garment that you are sewing from scratch, or be creative and customize something that you already have in your wardrobe.









_bfpfj_l.jpg)






9 Comments
Pingback:
Alligator Jacquard Roxy Shirt – Weekly Shonen HikaruStacey F.
This is the best placket tutorial I’ve found! Revisiting today to refresh my memory, but it’s so simple I only needed to double-check one bit (where to stitch before cutting and turning).
Thank you so much for this. My plackets are turning out so well, thanks to you–I was so nervous to try doing one, but this made me feel confident.
Andrea Turkalo
Love the patterns and fabrics on this website. One comment about positioning the plackets, could you be more precise on where to position them, perhaps in the photos. I find little information on positioning plackets. You say in the instructions about positioning them in the center of the sleeve, do you mean position the edge of the “arrow” side to the center of the sleeve ? There are no markings on my printed pattern of the sleeve. This would also be helpful.
E N
One book I have says to go one third the width of the bottom of the sleeve, from the back of the sleeve…
Fay
Thank you i have seen it now
Ros Thornbury
Thank you so much for this, wonderful step by step instructions with very clear diagrams. I’ve never attempted a cuff like this but now feel I can.
Rima Khusainova
Dear Ros, thanks a lot for your comment! It’s really much easier than it looks when you know the steps 🙂 Good luck with your sewing and let us know if you need any help!
Rima Khusainova
Dear Fay! Thank you very much for your kind words and I’m surprised to hear that you didn’t receive a notice for my answer. I replied to your question a few days ago directly in the post. If you go there now – https://blog.fabrics-store.com/2017/10/03/sewing-glossary-how-to-draft-and-sew-button-bands-the-shirtmaking-way/ – you’ll see my reply in the comments!
Fay
Bravo another great tutorial i am definitely going to try sewing a shirt for my son now considering the wealth of information that you guys have provided. Thank you so much. But i still haven”t received a response from the question that i posted earlier but how far apart to position the buttons on the buttonstand and about how many inches to start placing the buttons from the neck.