Clara Linen Peasant Blouse Tutorial and Pattern
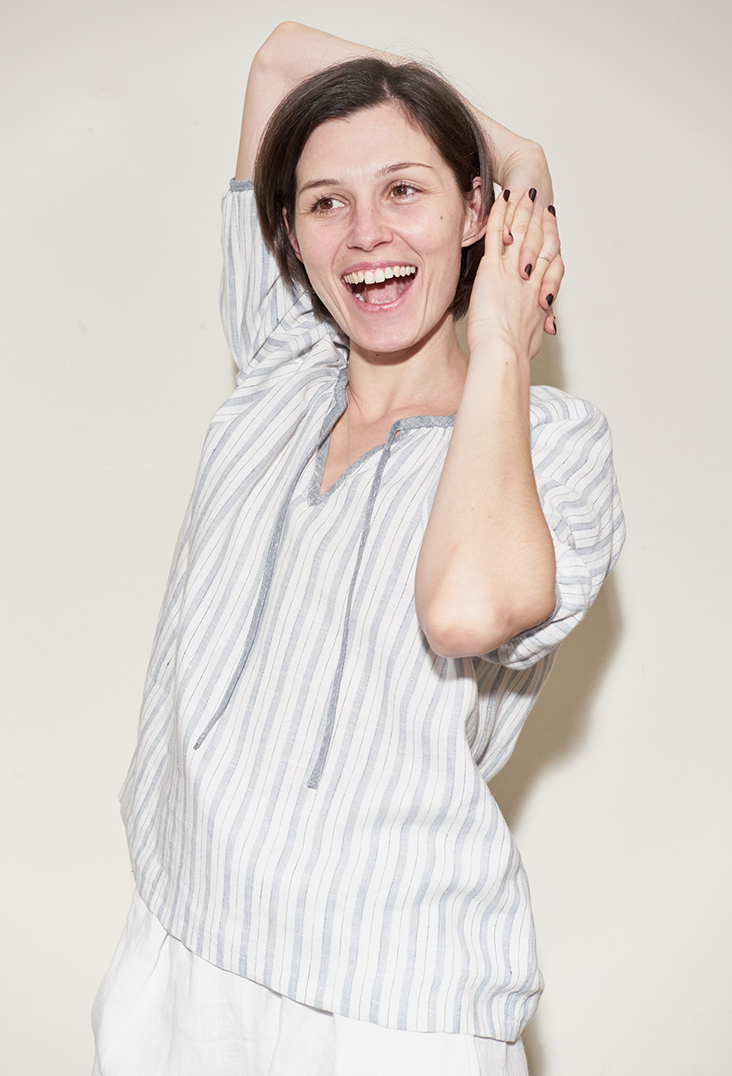
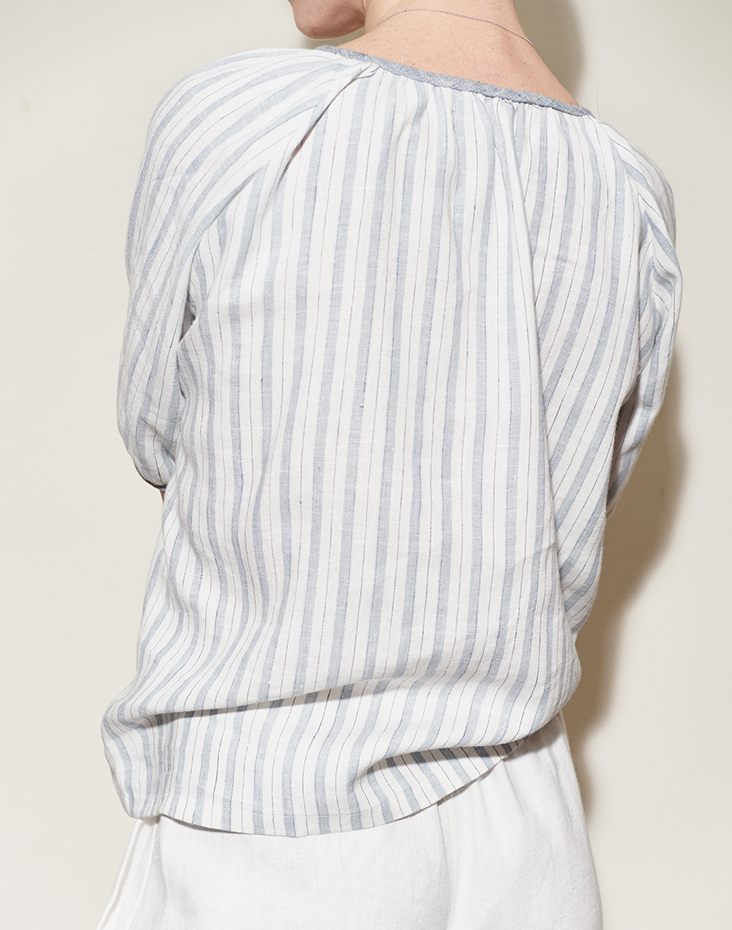
Peasant tops are making a comeback at the moment. With its signature, bohemian-enthused aesthetic, Clara peasant blouse is the perfect choice of clothing for summer and a great way to add some effortless chic to your everyday wardrobe.
Plus, a peasant top made from linen makes so much sense! Linen fabric is breathable, allowing air to pass quickly through the fibers and keeping the skin cool. Its gently crinkled texture feels incredibly romantic and creates that lived-in look that we love so much about this fabric!
Add a touch of sun to your wardrobe with our lovely Clara blouse!
Materials
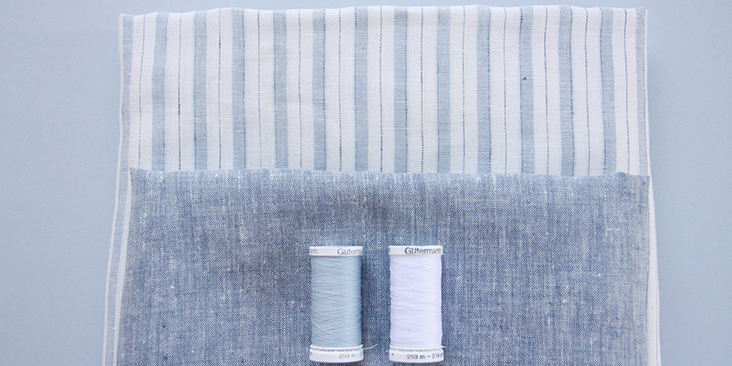
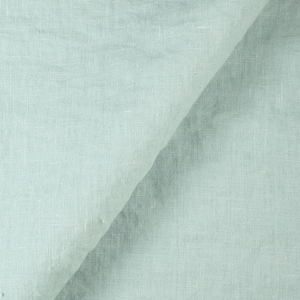
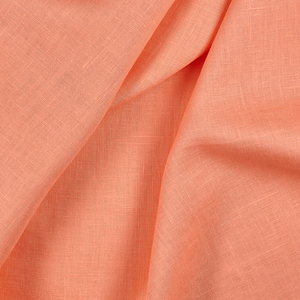
1.5 yards of IL042 901 – FS Premier Finish – 100% Medium Weight Linen
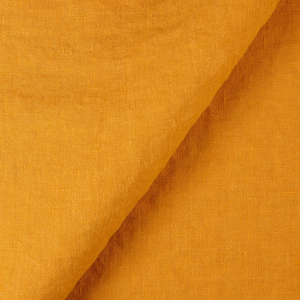
1 fat quarter of IL042 907 Premier Finish Medium Weight linen for the ties, binding and cuffs.
Matching sewing thread
Tools
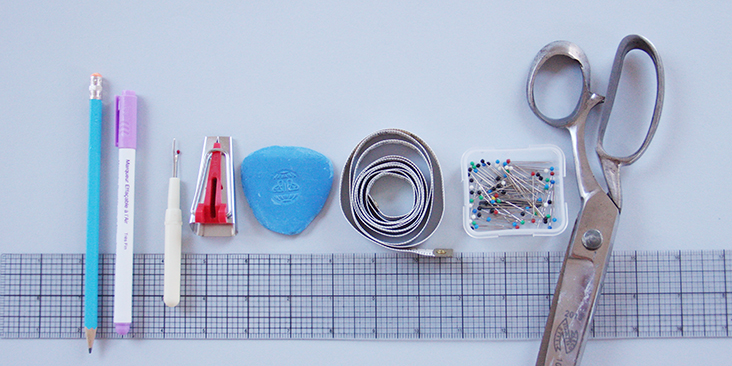
Pattern paper, scissors, fabric marker, pins, ruler, seam riper, chalk, measuring tape, 18 mm bias tape maker, sewing machine
Difficulty
Beginner
Time
3-4 hours
Pattern
You can access the multi-sized PDF pattern HERE.
Note that you’ll also need to make on continuous strip of bias tape for neckline binding and ties (around 35-40 inches long and 1.5 in wide) and 2 small strips for the slit binding ( 1″ x 9″ long) and 2 for the cuffs (2″ x 10,5″ or to the measurement of your elbow). For detailed instructions on how to cut and make your own bias tape please follow this tutorial.
Steps
Note: Prewash your fabric and tumble dry it until it is still slightly moist, dry in room temperature. Iron the fabric so it is easier to work with.
1. Let’s start with the front slit. Bind your slit with contrasting bias tape by following this detailed tutorial HERE.
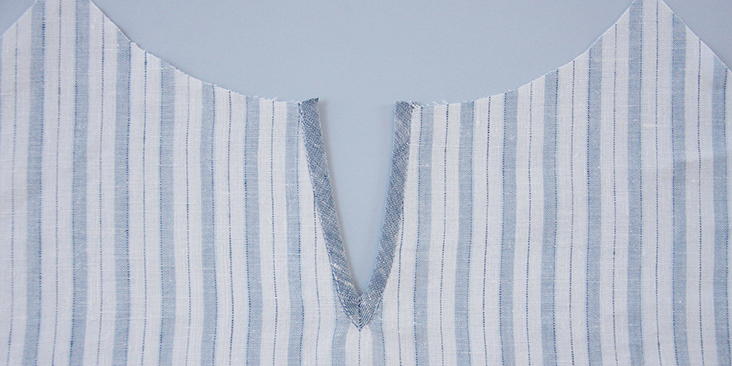
2. Pin and sew the sleeve to the armhole right sides together.
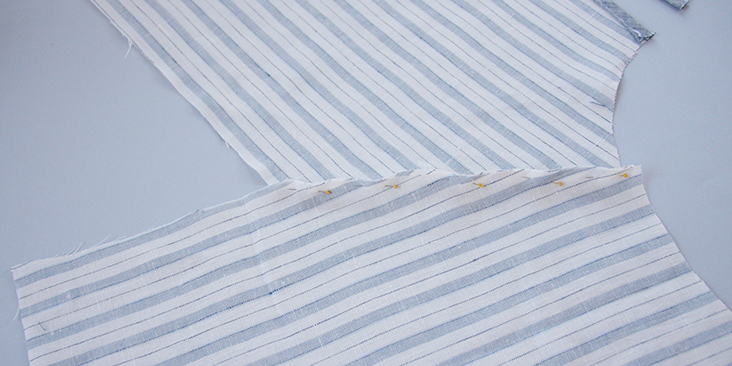
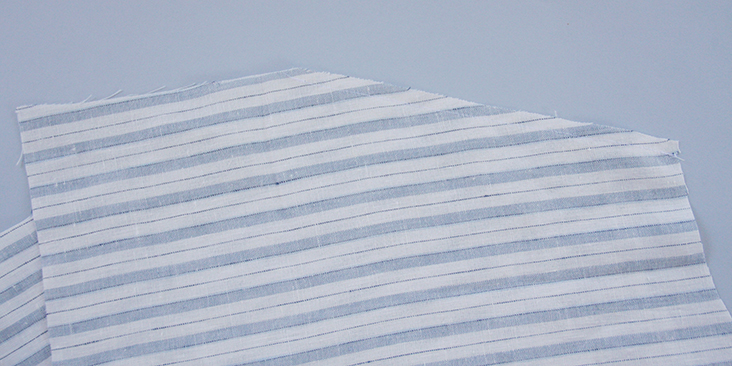
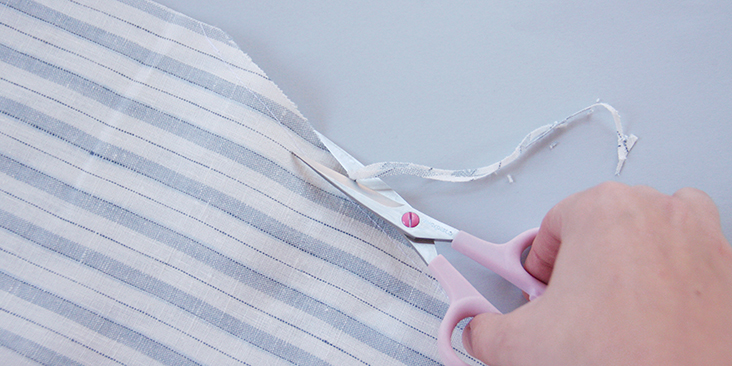
3. Trim the seam allowance down to 1/4″ (6 mm) and serge/zigzag the raw edges together to prevent the fabric from fraying.
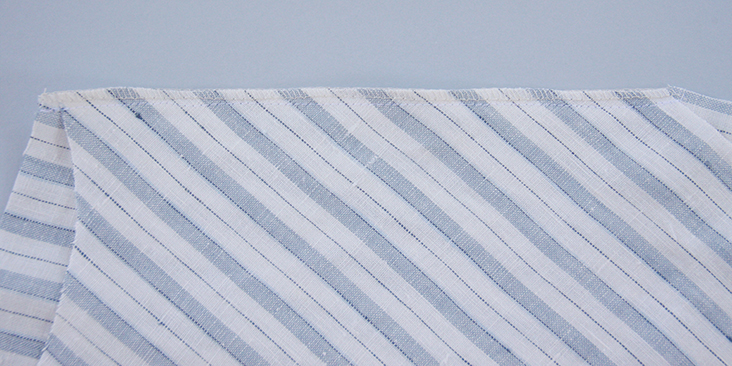
4. Press the seam allowance to one side (preferably, towards the back of your blouse).
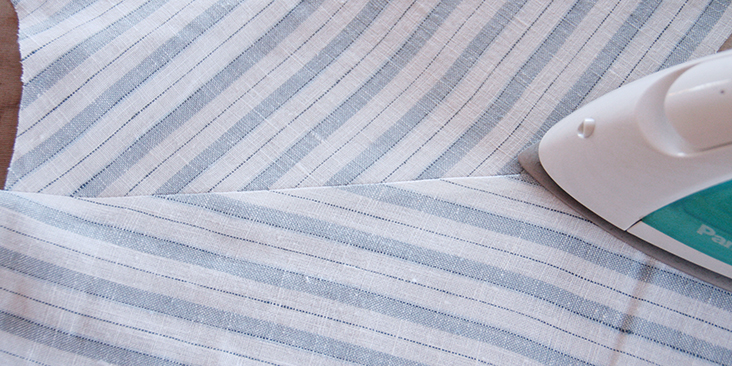
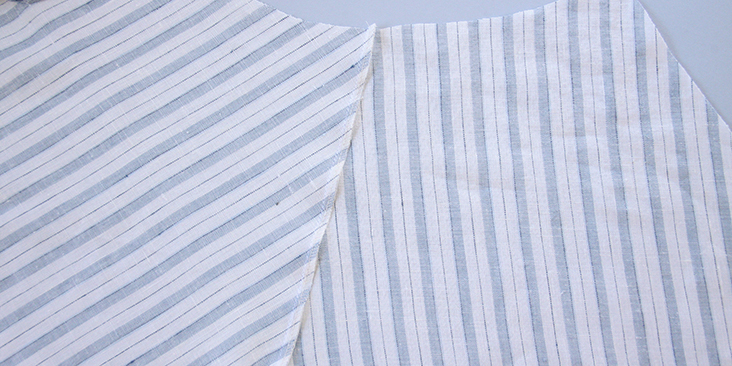
5. Repeat with the other sleeve.
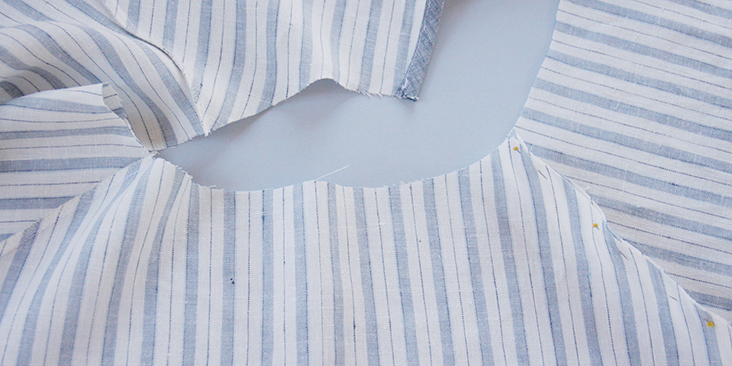
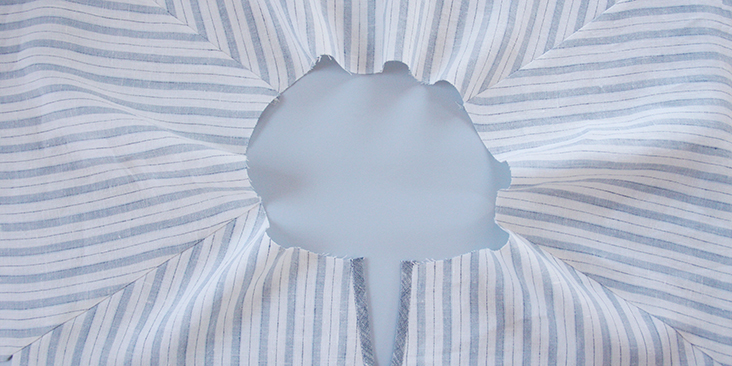
6. Pin the sleeve at the underarm and the side seams right sides together.
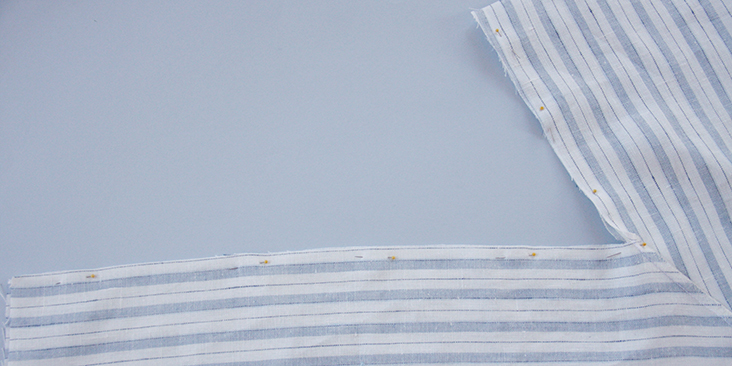
7. Sew the sleeves and the sides all in one seam at a 3/8″ (1 cm) seam allowance. Trim the seam allowance down to 1/4″ (6 mm) and serge or zigzag the raw edges together. Press the seams flat folding the serged/zigzagged edges to one side.
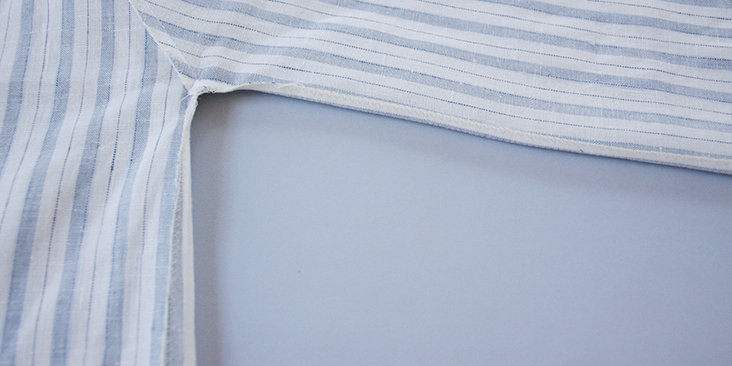
8. Use your two 10,5″ bias tape strips as cuffs. To assemble these cuffs, unfold your tape, join the two ends right sides together and stitch.
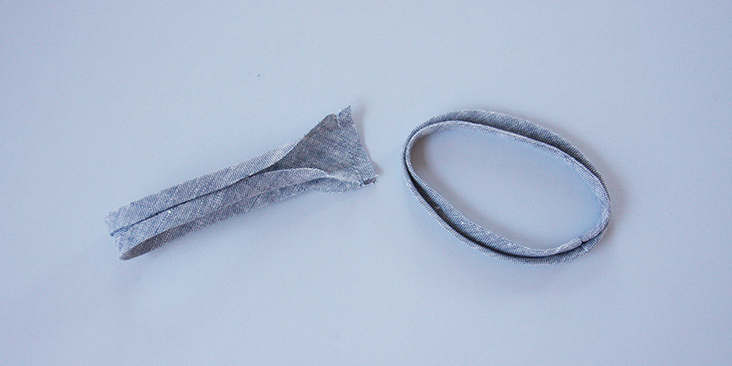
9. Gather your sleeve opening to the length of your finished cuff. Follow this step-by-step tutorial that explains how to gather fabric.
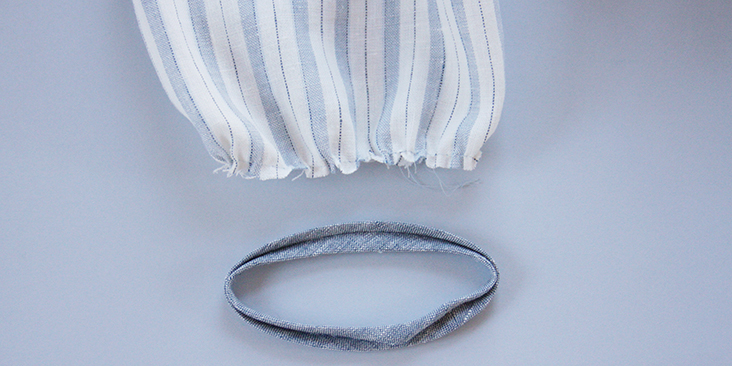
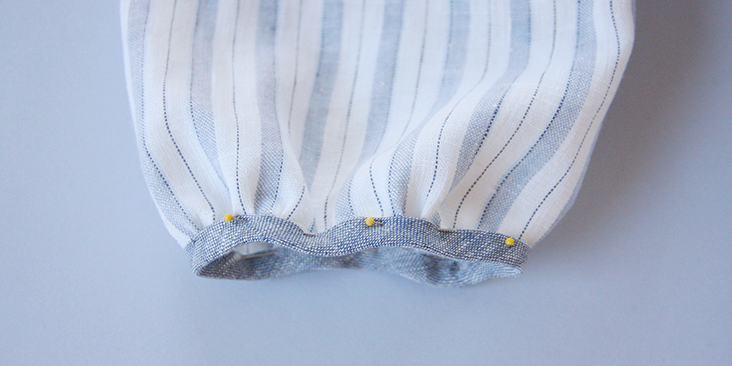
10. Follow the instructions in this tutorial and complete the gathered sleeves.
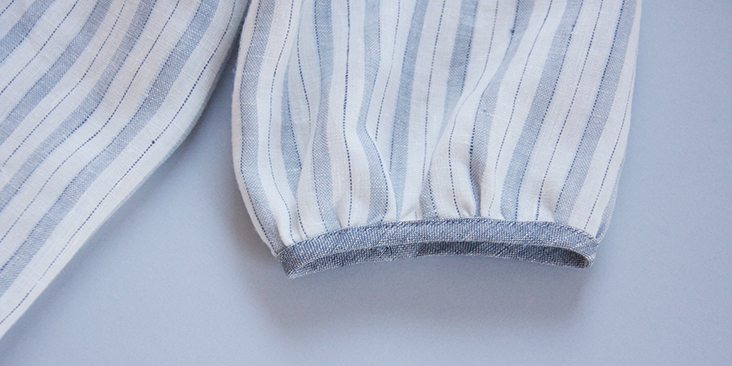
It’s time to gather the neckline, attach the bias tape binding and create the ties.
11. Gather your neckline the same way you did with the sleeves. Take your long strip of bias tape, press it in half lengthwise then find the center of the strip by folding it in half. Pin to the center back matching the centers and “sandwiching” the gathered neckline. Use plenty of pins to make sure your neckline is seated correctly. Make sure the neckline edge is inserted all the way into the crease of the tape and that the bias tape is not too lose nor too tight. Otherwise your finished neckline might gape at the shoulders.
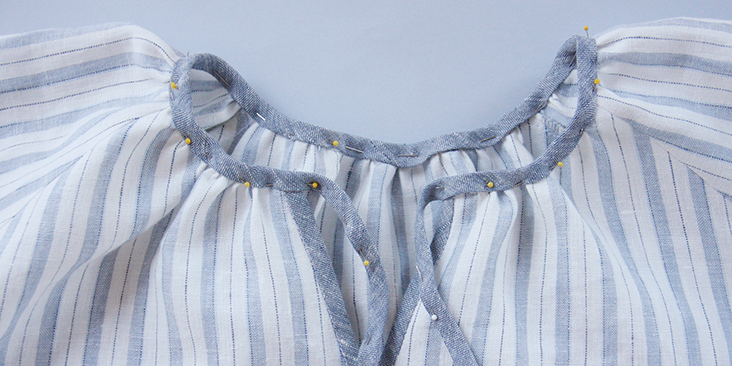
12. Fold one of the ends towards the inside as shown in the picture below:
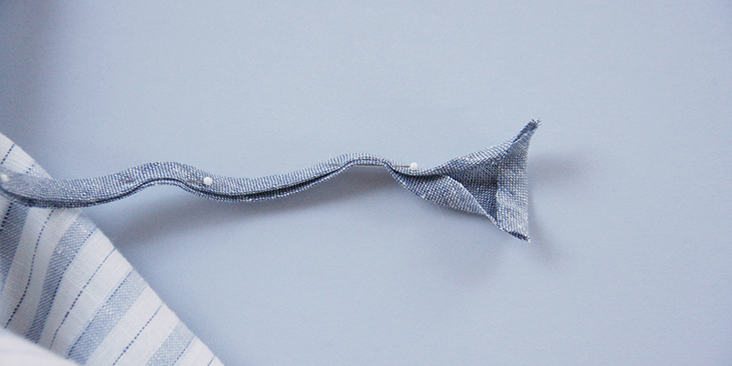
13. Clip the corners to eliminate bulk.
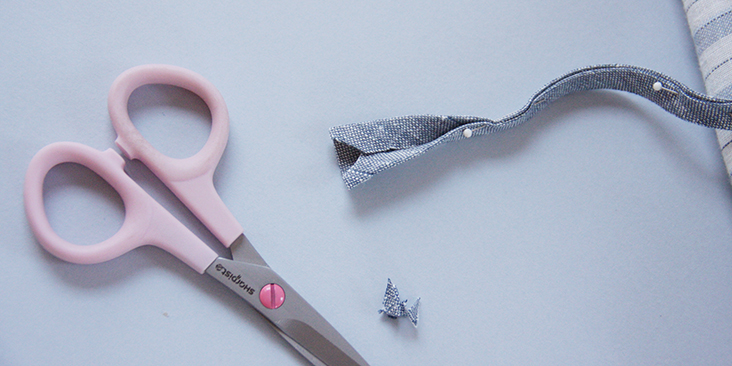
14. Now fold your end in half lengthwise in the continuity of the bias tape and pin to form the ties.
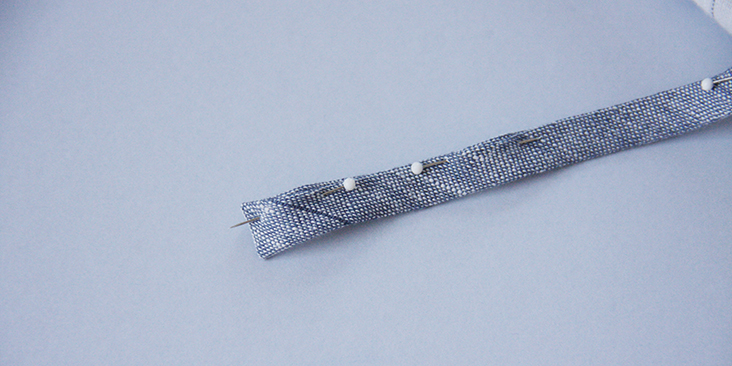
The length of the ties is really up to you. Ours are 18” (46 cm) long.
15. Start edgestitching the tie from the folded end and all the way around the neckline until you reach the other end. Repeat steps 12-14 and stitch the other end. Don’t forget to press when you are done.
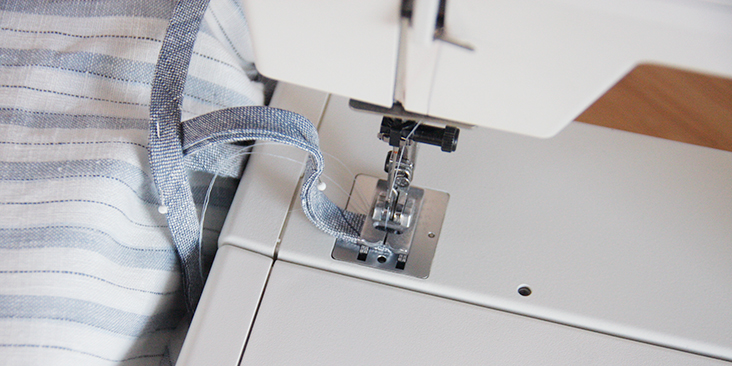
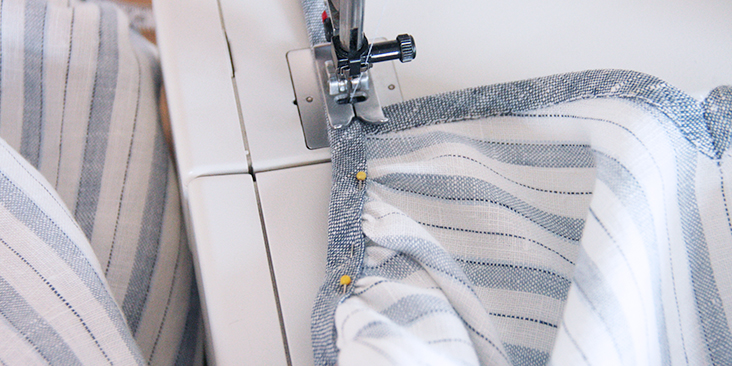
Here’s what your finished neckline should look like:
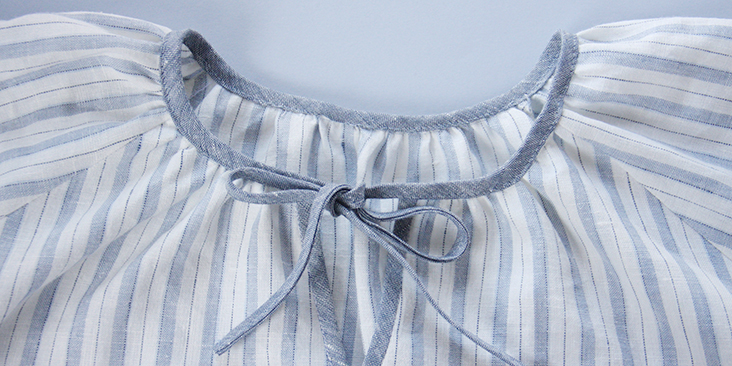
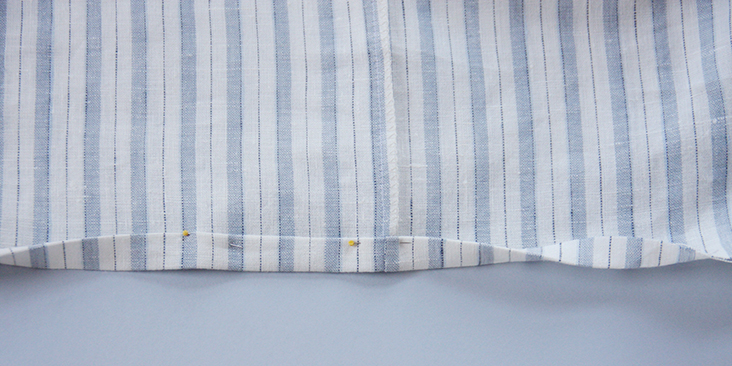
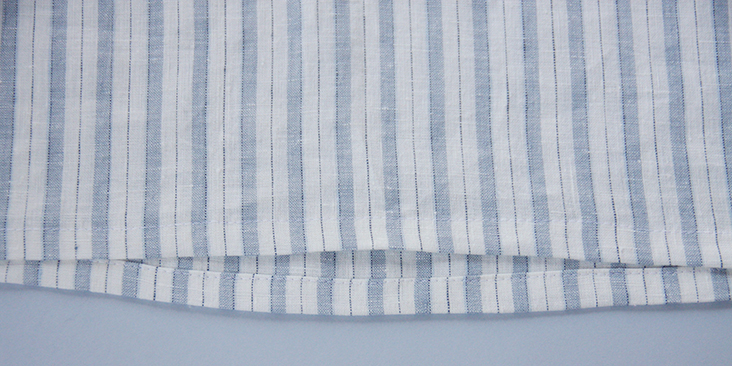
16. Lastly, finish the bottom hem by folding and pressing the fabric twice to the wrong side (3/8″ to 1/2″) and stitch as close to the folded edge as possible.
Give your blouse a good press and you’re all done! Such a great summer basic perfect for packing away on your next vacation!













72 Comments
Pingback:
Free Sewing Pattern Friday #9: Clara Peasant Blouse - Fabric-Store.com - Wool Wren Studiosuzanne witthoft
i have a question about the neckline. i am making a size 18. when I gather the neckline how many inches of bias tape go to the back, (how many inches do I gather the back to?) how many inches go to each sleeve, and how much for the fronts? there is no measurement for each size for the neckline except to leave 18″ for the ties. sorry, I find the instruction to just “gather the neckline” to be vague, at best. i really like this pattern and want to finish it. i suppose I could put it on and adjust the bias tape around these areas that way . . . also do I add the seam allowance? i saw that someone brought that up.
Linda Boyer
I need help printing from my iPad any ideas?
G. Nelson
It would be helpful if you could say which pieces of binding are used for each step. I have 2 pieces of 1″ x 9″. I assume this is for the slit opening. What do I do with the second piece of the same size???
I assume the 10.5″ pieces are for the sleeve. And the 40″ piece is for the neckline and ties.
I’m unsure why the pattern calls for 3 different widths for the binding. The 1″ binding is tiny when applied to the slit. It is meant to be single fold or double fold? It seems they could all be the same width for ease of constructing both the bias tape and for application.
Olga A Gubarev
Lovely pattern.I am a plus-size woman. It’s hard to find a suitable design or really find it at all. Thank you for including plus sizes. I really appreciate it.
I lowed the neckline on the front another 2″. And did’t do elastic on the sleeves. I think for bigger sizes would be nice to make the front a little longer to adjust the stomach area. I will try it in the next project.
I used a sheet, that I found at a thrift store .
Tess Fisher
Yikes. I printed out the size 28/30, but the pattern lines are so light it’s impossible to see them at some parts. I know it’s not my printer because the text prints clearly and page 7 printed all the size lines (even though only size 28/30 was selected).
I spent my evening tracing off of my laptop screen. I’d happily pay for this pattern in the size I need to get a better quality.
Deb Eberly
Page 7 printed all the sizes for me as well.
Gail Nelson
I am wondering if this pattern runs large. I’d love to make it and my measurements don’t align with the measurements given. Thank you!
Lauren Linen
Hi Gail, you can always compare a similar item of clothing you already have that you love the fit of, and compare it to the finished garment measurements or the pattern itself to find your best size.
Michele Bender
HELP! When I click on the link to access the Clara Linen Peasant Blouse Pattern, I am redirected to the main pattern page. There seems to be a glitch with accessing the pattern. Please advise how I can access the pattern for this beautiful blouse. I can’t wait to make it. Thank you!
Lauren Linen
Thanks for letting us know Michele. Here is the link:
https://fabrics-store.com/sewing-patterns/clara-linen-peasant-blouse-pattern
I will fix up the link in the tutorial now 🙂
Mo Olguin
Gosh, I don’t know why you guys make these patterns so difficult to obtain. You have to have Adobe, the pattern pieces are found in one area, the bias instructions in another, the step by step instructions in another and yardage requirements in another. Jeez, how about just a\being able to access pdfs on one page, like the main original page????
Lauren Linen
Hello Mo,
We have heard you loud and clear. So we are going to be slowly transforming some of our most popular patterns into this easy-to-download format. We originally made our patterns in this format since it allowed us to organize large patterns into multiple smaller, easy-to-manage attachments, while also having a consistent method to access all of our patterns.
We then upload our pattern instructions on our blog to ensure that file sizes are kept to a minimum, and to allow our pattern to be available to you for free. We also have branched out some techniques into other pages so they can be linked up for multiple patterns easily, or searchable if you are ever stuck on a technique.
We are sorry you find this aspect of our patterns hard to manage, but we have found this to be the best way for us to offer you so many patterns and tutorials, completely free of charge.
Rachel Askey
I really appreciate the great patterns, the detailed instructions with step by step photos and the tutorials for techniques that can be used for other projects. And all for free. Amazing and well worth the minimal effort of a few mouse clicks!!
Sally Gradle
I really don’t mind a little extra work for a free pattern of this quality. I am looking forward to improving my skills with a few of these so I can confidently take on the premium ones.
JANET MORTON
“Note that you’ll also need to make on continuous strip of bias tape for neckline binding and ties (around 35-40 inches long and 1.5 in wide) and 3 small strips for the slit binding ( 1 x 9? long) and the cuffs (2 x 10,5? or to the measurement of your elbow). For detailed instructions on how to cut and make your own bias tape please follow this tutorial.”
For the “3 small strips for the slit binding ( 1 x 9? long),” does this mean the strips should be 1″ wide? Or 1.5″ wide like the neck bias tape? (The tutorial doesn’t mention how wide to make the slit bias strips, nor does it mention how much seam allowance for the slit. It says to stay stitch 1/4″, but then later it says to “trim” the seam to 1/4″, so was it 3/8″ seam?) And why 3 strips?
And also, should the sleeve bias strips be 1.5″ wide also?
Lauren Gates
Hello Janet,
The slit binding strips should be 1″ wide sewn with 1/4″ seam allowance. There is a typo in the tutorial which I have corrected, you can use one continuous piece for the slit opening or two smaller pieces depending on which method you select from the linked tutorial for binding the V neckline.
The sleeves can be 2″ wide.
Alana Chambers
Took me a while to find but managed to find the pdf for anyone else struggling!! You have to open it on adobe and it is included as an attached file to the main PDF (should be on the side)
https://fabrics-store.com/sewing-patterns/clara-linen-peasant-blouse-pattern#reviews_all
Jean Bevans
not been able to access the attachment files.
Jean Bevans
Lauren Linen
Sending you an email to help out Jean 🙂
Theresa Crause
Can’t download the pattern. Link is not working. I download a lot of pdf’s so k no one Adobe well. Can you send me the link to the pattern please
Lauren Gates
I’ve sent you an email Theresa 🙂
Desti Utami
Can’t you email me too? I can’t download the pattern. This is my email pangestuti23@gmail.com . Thank you
Michelle James
I am also having problems finding the pattern. Could you please email it to me michellejames@gmail.com Many thanks
Michelle James
Sorry my email address is wrong. michellejames489@gmail.com
Pingback:
30 Gorgeous Free Sewing Patterns for Tops (Women)Mariela Markuleva
Dear Rima, thank you so much for this pattern! Super easy to print and cut. Everyfhing match perfect and so easy to make it with the detailed pictures and instructions, and all helpful links. I finally have the perfect pattern for a comfortable summer blouse! ?
Shannon Carroll
I am trying to access this pattern. When I click get pattern here it does not take me to the pattern. Would love. a fresh link please?
Christine van Beelen
After a very long search, I finally found this pattern. I made a muslin. But it is way too big! I’m going to make a smaller one, based on the body measurements. It is great that the pattern give both measurements.
Thank you so much for all your efforts. I love your patterns.
Chloe Leroy
Hi I can’t download it, would you accept to send it to me at chl.leroy@free.fr ? Thanks a lot
Pingback:
The Daily SewJenni-Hope Kelland
This looks like it would be an awefully comfy nightgown made a little longer of course.
Elana
I hope you can get the pheasant blouse on soon! Thank you love your tutorials,thank you for all the tips and tricks
Rima Khusainova
Dear Elana, thank YOU for all your kind words. So sorry it’s taking so long, we are doing our best to get it back online as soon as possible.
Chloe Leroy
Hi I wanted to download it but still doesn’t work !!!
linda
When I press “HERE” to get the pattern, I am taken to the “pattern’ page of the site, but it is not on there. There are only about 8 patterns there. Where is it ? Thanks so much.
Rima Khusainova
Hi Linda, we’ve updated our website recently and needed to do the same with the patterns. We are working to get it back online as soon as possible so the pattern should be available again shortly! So sorry for the inconvenience, please come back and check again in a few days.
AmyCat =^.^=
One suggestion I’d make: it’s easier to finish the neckline with the bias tape if you do that step BEFORE sewing up the side seams! The neck-hole will lie flat on your work surface, and you won’t have to maneuver with the fabric bunching up as much.
Jenni-Hope Kelland
Clever! Thank you.
Kelly Furr
Hi, I am wondering how big to gather the neck with the binding tape? If I have a 40 in long tape minus 18 in for the ties. Would that be the correct width around?
Kelly
Rima Khusainova
Dear Kelly, yes, this is correct.
Leah Cuneo
I’m in the middle of construction and wondering why the back is 1″ longer than the front? Did I do something wrong?
Carolyn
Hi! Just wondering about the difference in length in the sleeve seam and the shirt front seam and the sleeve seam and the shirt back seam. When I calculate the length of fabric for the seamline in the sleeve, it is 9.65″, versus 9.01″ for the shirt front. For the back, the sleeve seam is 10.54″ and the shirt seam is 9.72″. Is there a reason these lengths do not match up? I am trying to make adjustments in the arm hole widths, so it would be nice to know if my numbers need to match up or if there is a reason behind these lengths that I am missing. Thanks!
Rima Khusainova
Dear Carolyn, unfortunately I don’t have the paper pattern that I’ve used to make this blouse in front of me to double check, but when I was sewing it everything seemed to match. However, since the raglan sleeves edges are part of the neckline curve and the front neckline is deeper than the back, that could explain that the front is shorter than the back.
Alice
I didn’t notice that seam allowances were to be added. By using 1/4″ seam allowance I find the blouse fits fine over my 38″ bust with plenty of ease. Next draft I’ll add them and try to figure out how to make the sleeve seams equal.
Rima Khusainova
Dear Alice, sorry if the instructions for the seam allowances were not very clear but I’m happy to hear that you are pleased with the result anyway!
Alice
The draft has the sleeve back seam 1″ longer than the front sleeve seam. You don’t show any dart or ease in instructions. Was this a design error? Seems wrong to just cut the bottom edge off grain.
Rima Khusainova
Hi Alice, the reason why the sleeve back is 1″ longer than the front is because of the shape of the neckline (the front is a little bit deeper).
Alice Elliot
Not the sleeve/bodice seam. The sleeve front/sleeve back seams are different. If you want the underarm seams to match you need to adjust something. Look at the pattern again. The sleeves attach to the front and back at bodice just fine.
Alice
From the suggested cut length of the neck and tie binding bias strips , 35-40″ and your stating you left 18″ ties there would only be 4″ at most for the neck. I think you must have meant 18″ for 2 9″ ties. Then it se me we are to gather the neck to about 17-20″. I can see it will be tricky to try on for fit at the neck with all those pins!! I’ve. Drafted my pattern and cut my wearable muslin. Wish me luck with the neck.
Rima Khusainova
Dear Alice, sorry for the confusion but the two 9″ strips of fabric were meant to be used for the gathered sleeves. As for the neckline binding+ties, you need to cut one continuous strip of fabric cut on the bias around 35-40″ long (or longer if you want longer ties). Hope this helps.
Kathryn Dokoupil
How many inches are reserved for the neckline only (minus the ties)?
Sara Schrader
I still can’t find the pattern. I have the tutorial
Rima Khusainova
Dear Sara, to download the diagram with the pattern, simply click on the word HERE in pattern section (just under the introductory text and list of materials and tools.
Alice
It’s an easy draft from the picture. Look closely and you’ll see the drafting lines to get the neck and armhole shape. Take the time to measure carefully and you’ll have it!
Patty S.
Judy, I did do that, and based on this pattern’s panel measurements, it appears that it will measure 47″ across the bust. BUT, I STILL want to know where to find their pattern size measurements 🙂 Just so I have them. I don’t know if a “M” is a pattern medium or a ready to wear medium. Which are completely different things. I would like to see a hyperlink in their tutorials, when they mention the sizing, to their sizing chart. That would be very nice. And/or a sizing table added to their pattern tutorials. Simple thing. The linen is just too nice to cut into, and feel apprehensive about the sizing.
Sherry
How is a person supposed to print off this pattern? When enlarging it to 100% it will only print a small portion of one piece of the pattern. I have been looking for a simple top just like this one without luck. Would love to make this out of the lilac linen I bought from you. Hope you can supply me with instructions to print an actual pattern and not just a line drawing. Thank you for your tutorials and lovely fabrics.
Sherry
Sherry
I guess there is no real pattern. The line drawing indicates inches and we are supposed to take it from there. Sorry if this sounds ungrateful. Perhaps I’ll make this top out of muslin first prior to cutting into my nice linen. Thank you.
Rima Khusainova
Dear Sherry, unfortunately this pattern is not real size printable pattern. It is a diagram that you can easily copy onto a large sheet of pattern paper. Trying the fit on muslin first is always a great idea!
JAB
At least one photograph should show the tie tied so that we can see how the shirt fits.
Masha Karpushina
Thank you for your suggestion, JAB.
Katherine
Love it!
Masha Karpushina
Thank you, Katherine!
Karen Flagg
Hi, I love and appreciate your tutorials. I do have one suggestion though, and that is to request straight-on shots by the photographer, so we can see the proper sleeve type, length of the blouse, front and back neckline and the way it fits in all areas. This is very important to sewists when selecting a pattern, I do understand that the model will not be able to use all the cute and interesting poses, but maybe you can include one cute pose and make the others basic, front or back-on shots. That would be very helpful.Thank you
Masha Karpushina
Thank you for the suggestion Karen, we have taken it on board for our next collection of tutorials. Thank you.
Patty S.
Love this little peasant blouse pattern! You mention the pattern will fit an XS to M, but I can’t find where you have measurements for pattern sizes? Not sure if I would fit a M?
Judy
It looks like this is a “one size fits most” garment. You can calculate the measurements from the pattern. For a “blousy” fit, take your bust, waist and hip measurements and add 4″. Good luck!
Patty S.
Judy, I’ve already done that, and based on the pattern dimensions, looks like the pattern would be 47″ finished across the bust line. BUT, I still want to know what their pattern sizes are. A “M” can mean something very different in pattern sizing, versus ready to wear sizing. I wear a medium in ready to wear, but in a pattern, probably a large (40″ bust). So, it would be very nice is they had a hyperlink in their tutorials when they mention sizing, that would link to a sizing table with measurements. And/or had the sizing table in the article as well. The linen is just too nice to take a chance cutting into it, without a bit more verification. At least, for me 🙂
Adele
The verbiage above suggests you add an inch all around for larger sizes – personally, I’ll probably add 2 inches!
Diane
The front and back are cut on the fold and they are 11.75 inches wide that equal 47 inches around the body. How big is your bust and hips id your hips is 22 inches from your back neck bone. 11.75 X 4 = 47 minus seam allowances. I wear and extra Large or a side 16 so I will be adding a little more than 1 inch for comfort.
Rima Khusainova
Dear Diane, thank you so much for this clarification and your help! I’m sure a lot of our readers will find it very useful.
Rima Khusainova
Dear Patty! The measurements we use for our patterns are based on general sizes like Small (S) Medium (M) and Large (L). So if you normally wear one of those sizes, then you’ll most likely find the fit of our pattern similar to your store bought items. You can however double check the fit but measuring yourself with a measuring tape and comparing it with the measurements provided in our diagrams. As in case of this blouse, the finished bodice width will be equal to 47″. If your personal measurements are smaller than this number, then the blouse will most certainly fit you. This being said, I do agree with you that it would be nice to come up with some kind of measurements table in the future so I promise, I’ll look into it soon!