Linen Tunic With Tassel Belt Tutorial
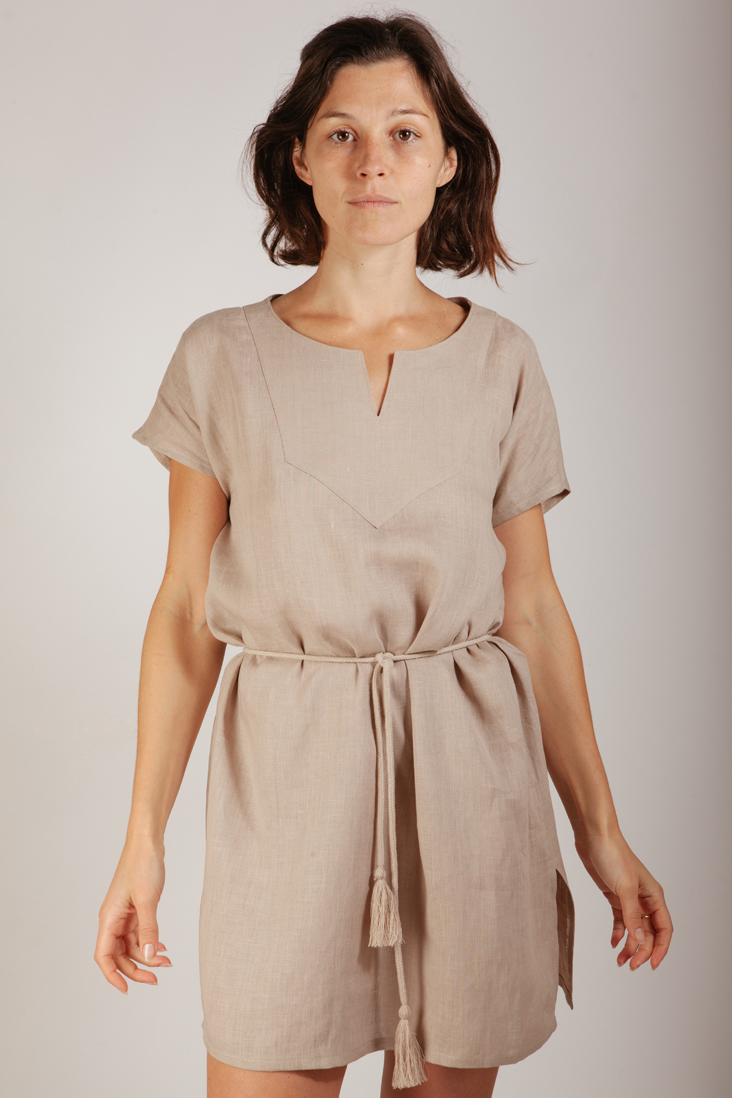
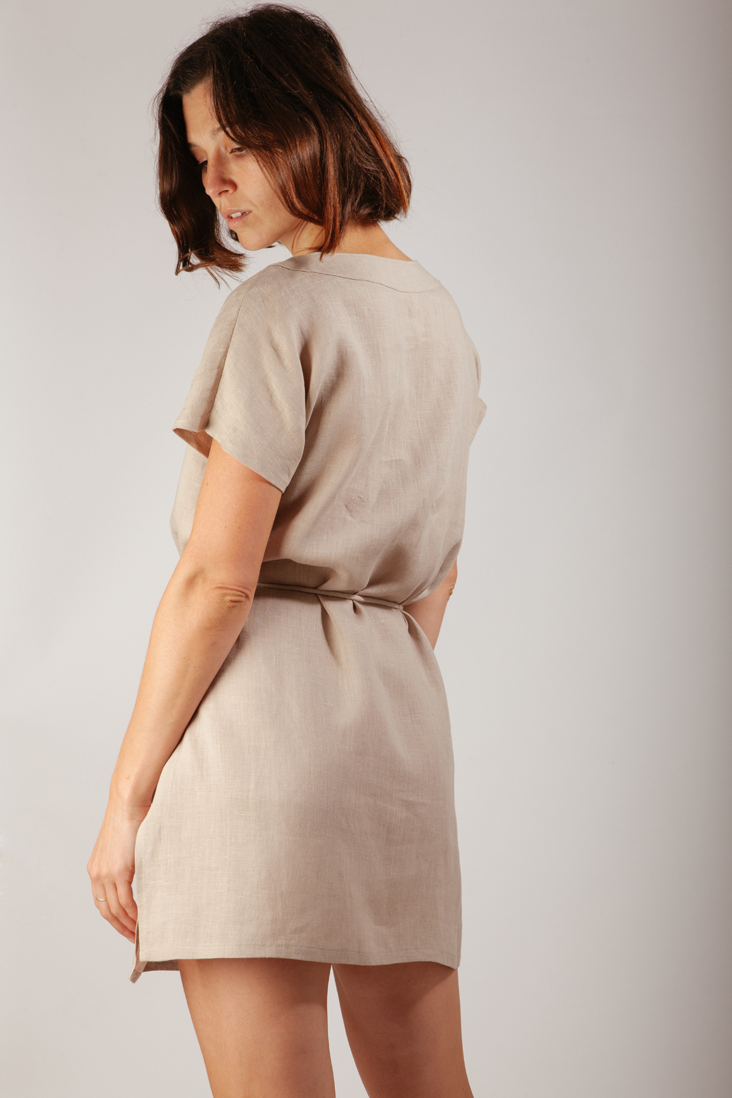
This week’s tutorial is a bohemian inspired tunic featuring a topstitched bib front and slit V-neckline, side slits and a DIY tassel belt that completes this feminine, minimalist look.
Made with our gorgeous lightweight linen, this tunic has a delicate natural look and a unique, textured feel. Wear it with skinny jeans, leggings or a pair of tights and a denim jacket to transform it into a cute little dress.
Materials
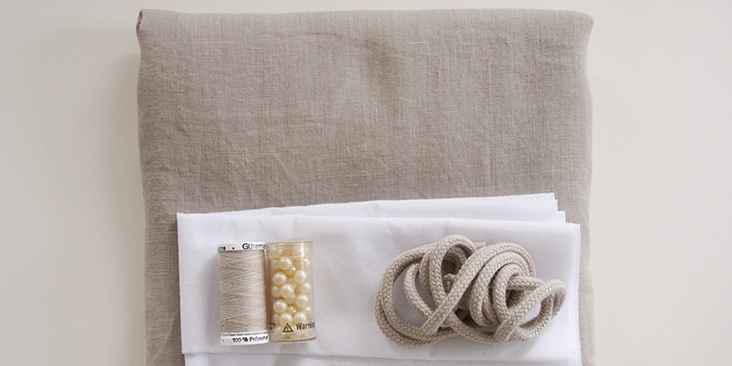
2 yards of IL020 NATURAL Softened 100% lightweight linen
Matching sewing thread, lightweight fusible interfacing, 2 beads, 2 yards of matching cotton rope
Tools
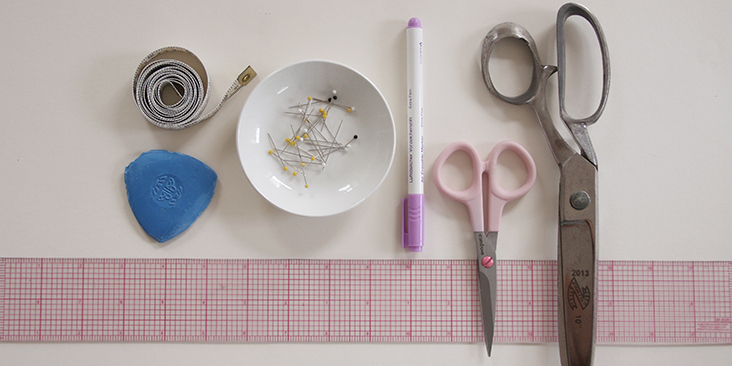
Pattern paper, measuring tape, scissors, pins, chalk, fabric marker, ruler, sewing machine
Time
4-5 hours
Difficulty
Beginner
Pattern
You can access the dress pattern by following this link HERE. Remember to add seam allowances as indicated in the pattern.
The diagram shows the pattern for US size 6-8 (UK size 10-12). If you need help grading your pattern, please follow this tutorial.
We are working towards publishing multi-sized printable PDF Patterns for you, so please be patient with us. In the meantime, if you are particularly keen on getting a multi-sized pattern on this project, please comment below so we have an idea of which tutorials to prioritize. Thank you!
Steps
Note: Prewash your fabric and tumble dry it until it is still slightly moist, dry at room temperature. Iron the fabric so it is easier to work with.
Let’s start with the bib.
1. Apply fusible interfacing to the wrong side of your facing and pin the back and front shoulder seams right sides together
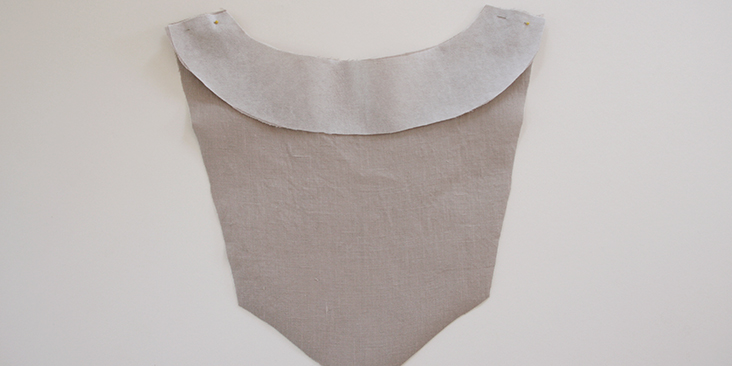
2. Stitch at a 3/8in (1cm) seam allowance and press the seams open. Fold the outer raw edge 3/8″ towards the wrong side and press. Make a few notches (1/16″ away from the fold) around the back to avoid wrinkles.
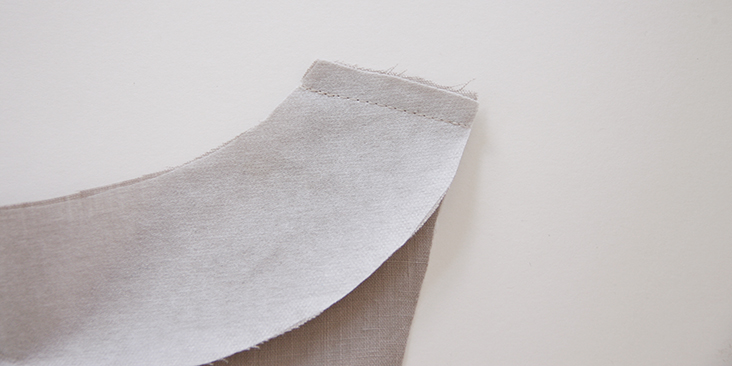
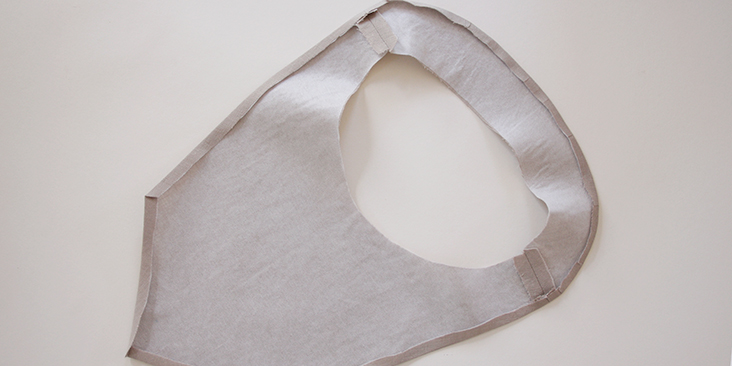
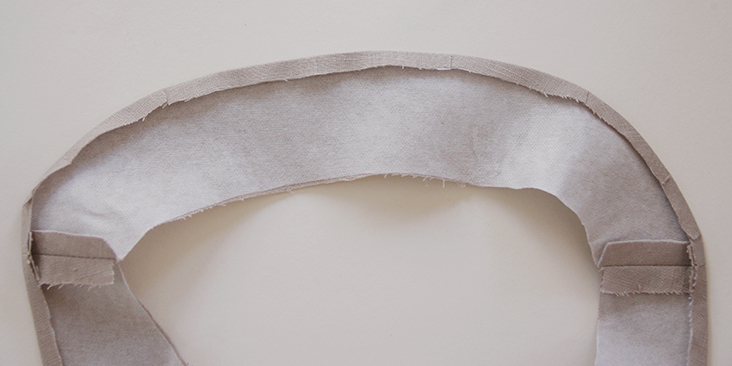
3. Draw a V in center front of your bib (wrong side). 3 3/8″ deep and 1 1/4″ wide. You’ll later stitch over this shape to create a V-neck opening.
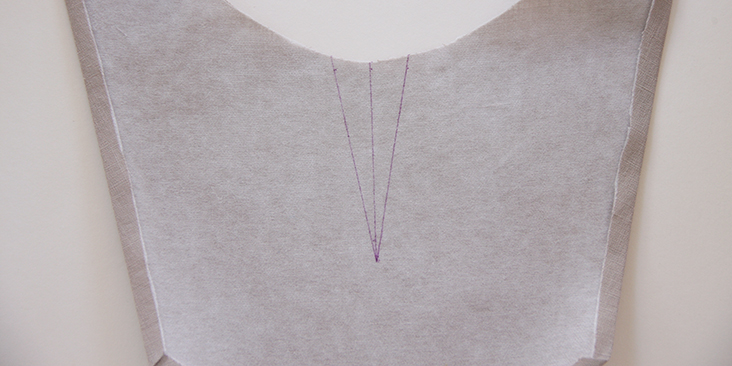
Before attaching the bib onto the tunic, you need to assemble the front and back pieces of the tunic together.
4. Start by pinning the shoulder seams right sides together.
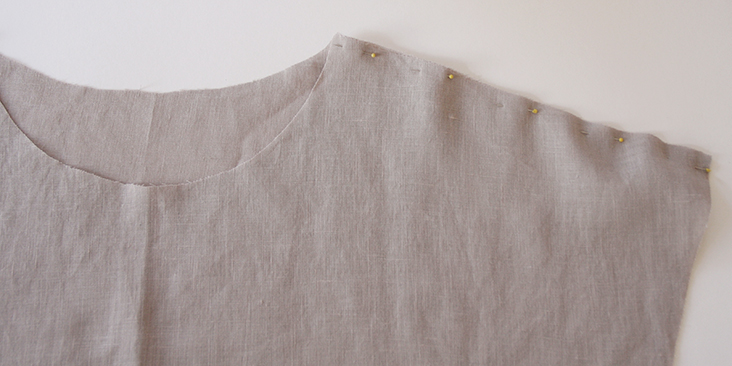
5. Sew at a 3/8in (1cm) seam allowance and remember to backstitch at both ends. Trim the seam allowance down to 1/4″ (6 mm) and serge/zigzag the raw edges together to prevent them from fraying.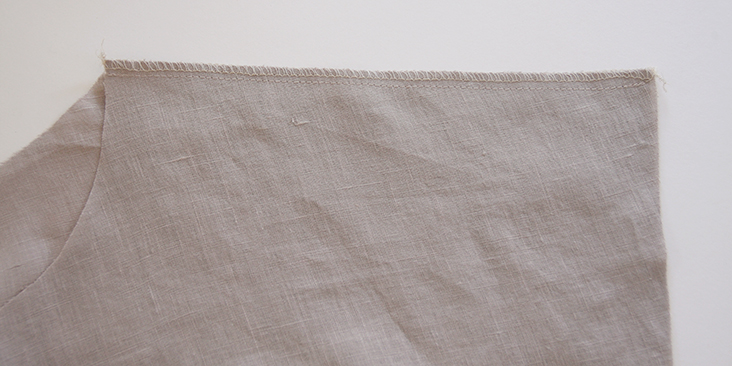
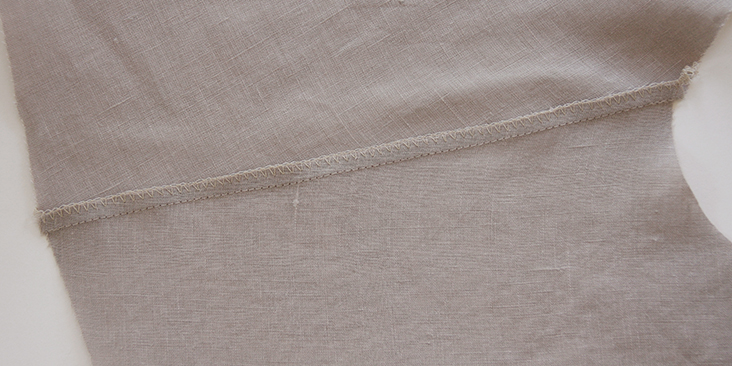
6. Press the seams flat folding the serged/zigzagged edge towards the back.
7. Place the right side of the facing on top of the wrong side of your garment matching up the shoulder seams and pin. Use plenty of pins to get the facing seated and make sure it’s centered.
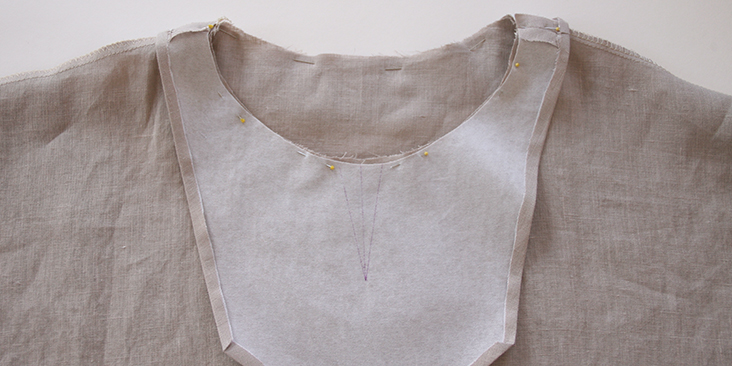
8. Stitch the facing onto the neckline in a continuous circle at a 3/8in (1cm) seam allowance.
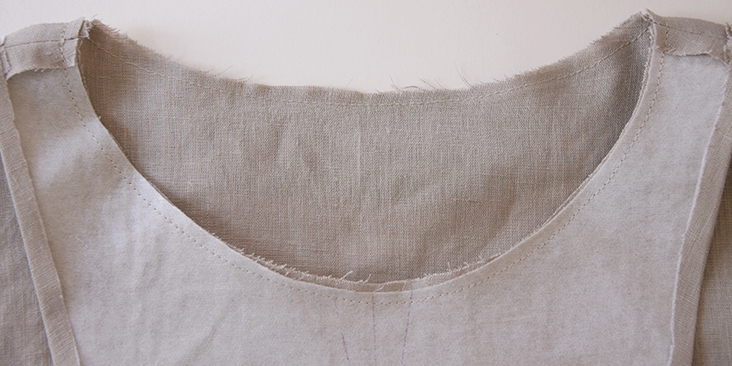
9. Now stitch on top of the V-mark. When you come to the V, stop the machine with the needle still in the fabric, sew one or two stitches straight on and turn the fabric to sew the rest of the V. Adding this tiny horizontal stitch makes it easier to clip and turn the bib to the outside.
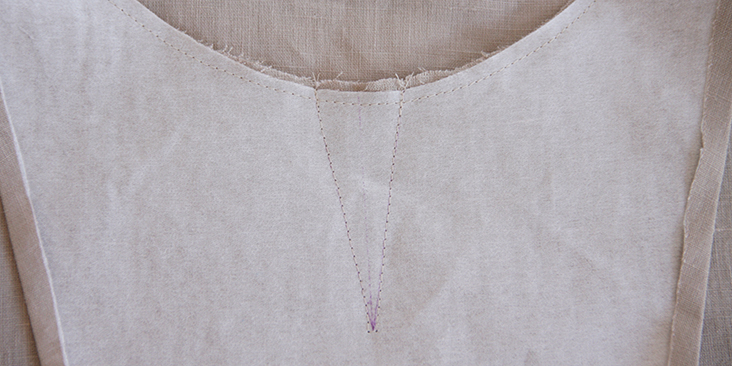
10. Take your scissors and cut the V in the middle all the way to the point. Clip as close to the stitch line as possible but be careful not to cut through.
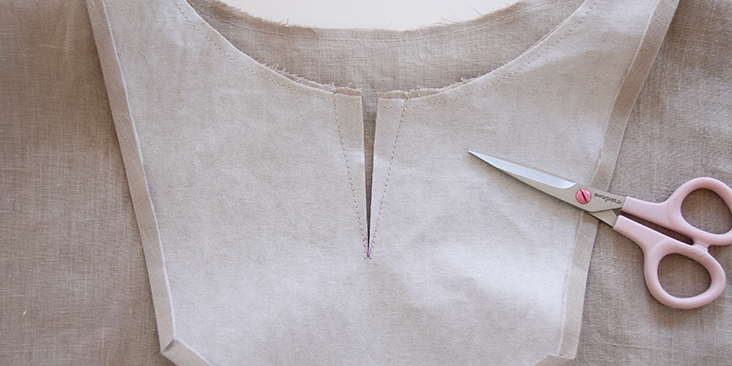
11. Trim the seams to 1/4″ (6 mm) and make notches (clip to but not through the seam line) around the neckline opening and trim the corners to release the tension.
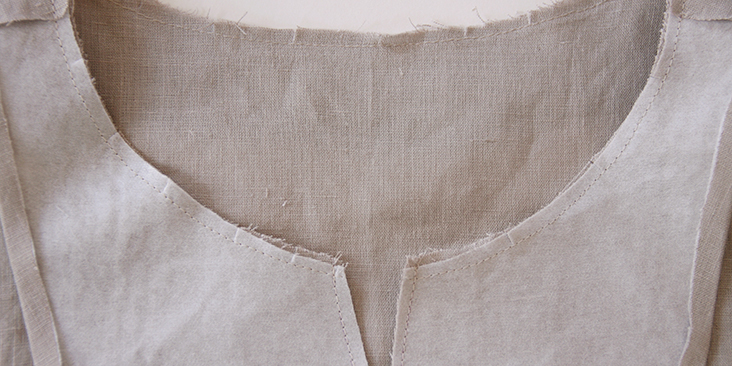
12. Flip your bib from the inside to the right side of your tunic and press the seams flat. Use a pointed object like a chopstick to get the corners out.
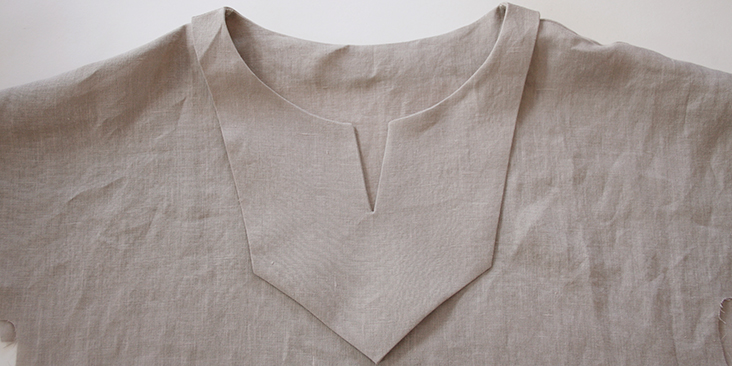
13. Pin the bib to the front of your tunic. Make sure it’s centered.
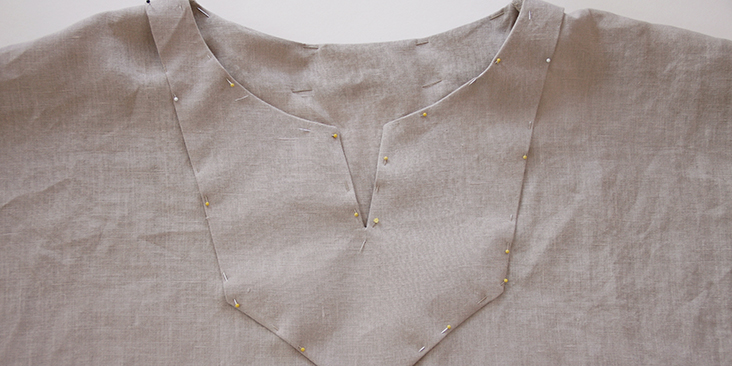
14. Topstitch the top and bottom edges to the front of your tunic 1/8” from the edge to secure the bib and press again.
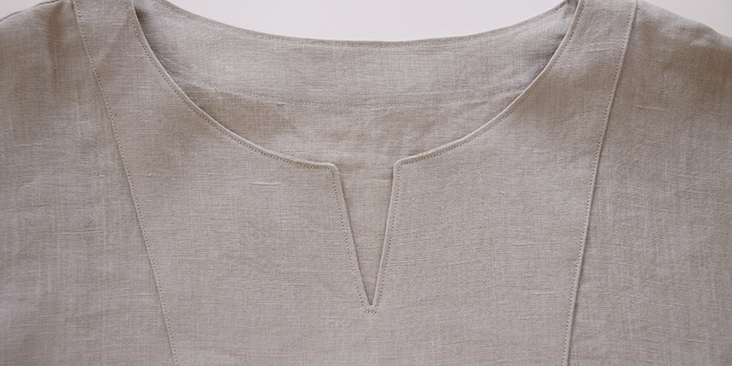
With your bib attached to the neckline, you can now assemble the front and the back of the tunic together.
15. Start by serging/zigzagging the side seams’ raw edges to make sure that they don’t fray in the future.
16. Pin your side seams right sides together. This tunic features side seam splits. In order to create them, you need to measure a 7” (13 cm) distance from the bottom hem and make a mark (place a pin or use a marker). Repeat for the other side. We went for a 6″ slit (1″ will be used for the hem finish), but it is really up to you to decide where you want your seam to finish and your slit to start.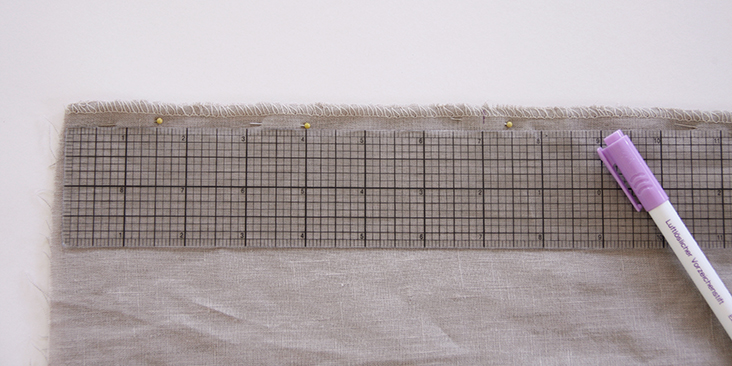
17. Sew the side seams together at a 3/8” (1 cm) seam allowance and stop at the mark indicating the beginning of the slit. Remember to backstitch.
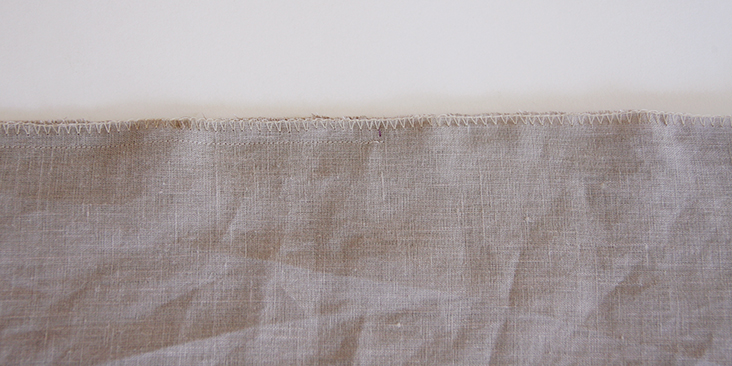
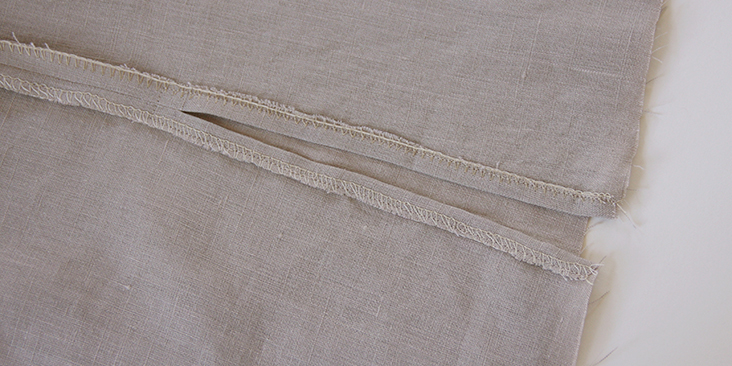
18. Press the seams open, including the side splits’ seam allowances.
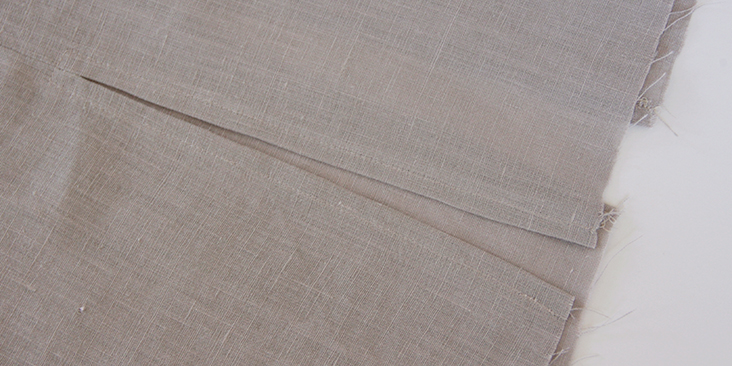
19. Stitch the edges of the side slits in place as close to the outer edge as possible.
Here’s what it looks like from the right side:
And the last steps are to finish the sleeves and the bottom of your tunic with a rolled hem.
20. Fold the fabric twice to the wrong side (3/8″ to 1/2″), press and pin.
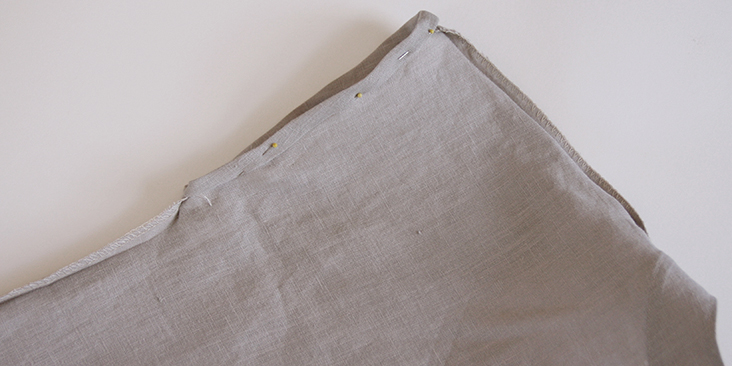
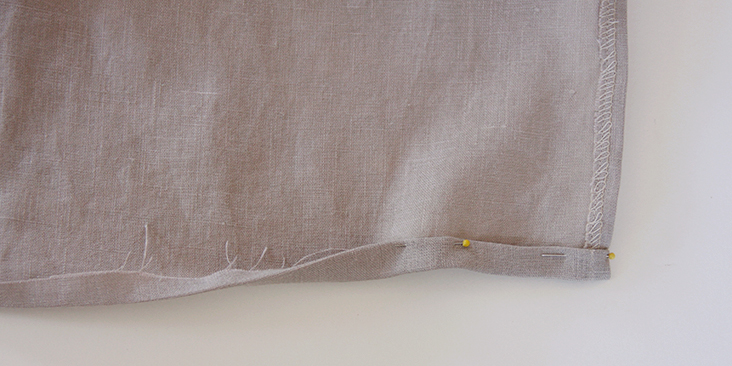
21. Topstitch as close to the inner edge as possible and press.
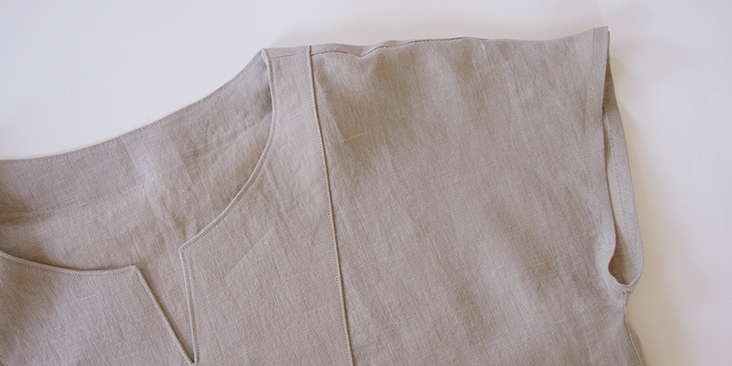
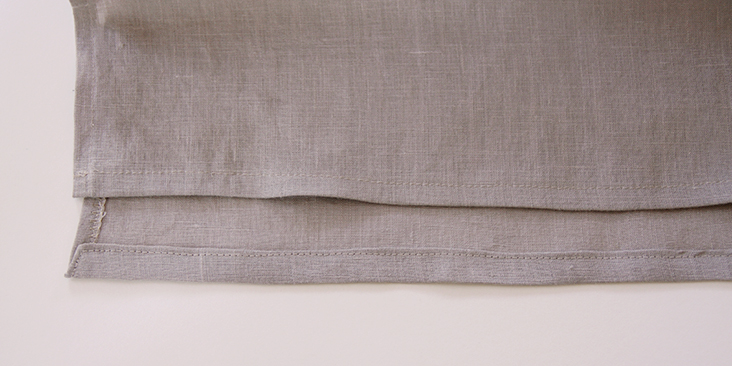
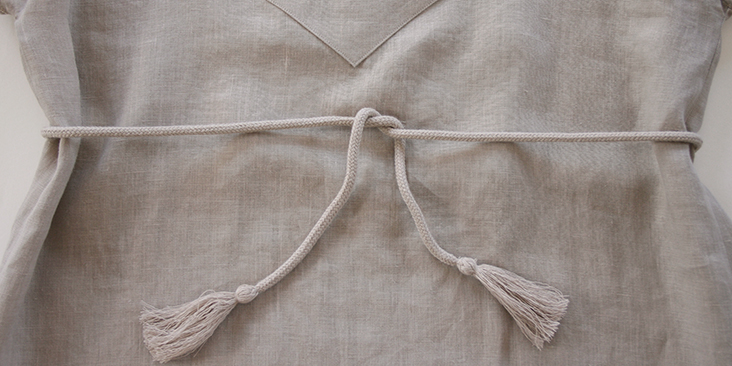
Your tunic is now done but the whole bohemian look won’t be complete without a tassel belt. In the next steps we are going to show how to make such belt with a simple rope and a couple of beads.
22. Cut two 7″ long pieces of rope and untangle the threads.
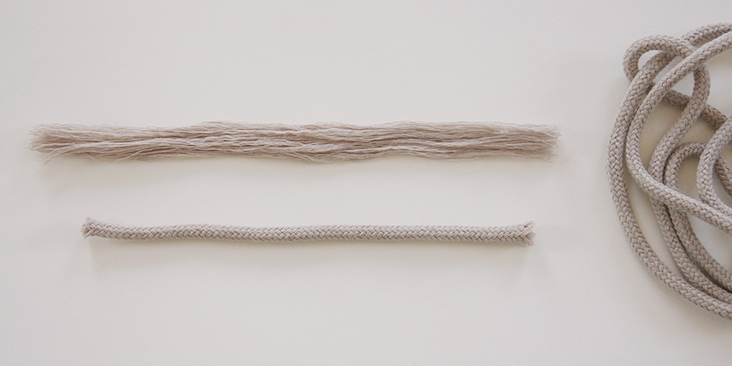
23. Fold the untangled threads in half, insert a rounded bead under the center fold and tie a knot with one of the threads.
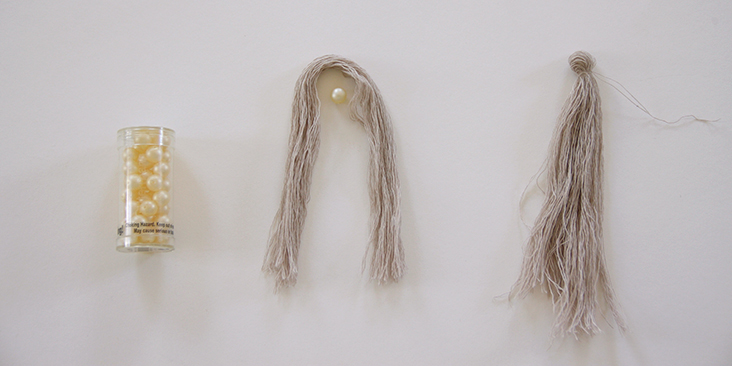
24. Take your long piece of rope and untangle 3 inches of threads on each end.
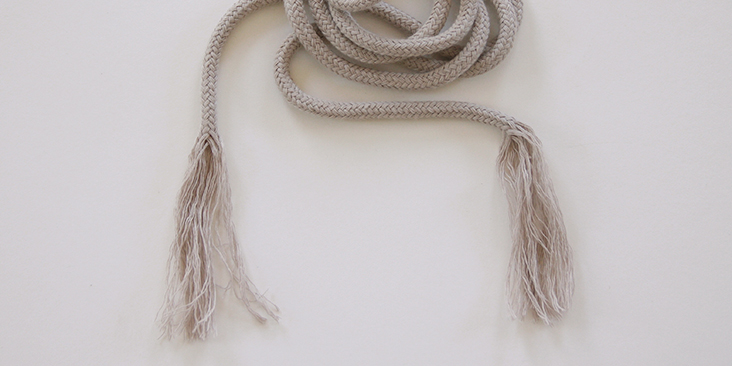
25. Now insert the beaded threads into the middle of your untangled ends, distribute the threads evenly and tie 2 knots: above and below the bead.
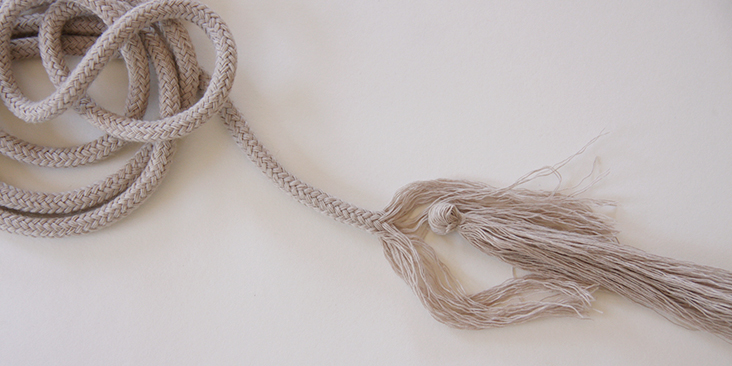
26. Tuck the ends of your knots into the threads and cut the excess threads to make an even and neat tassel.
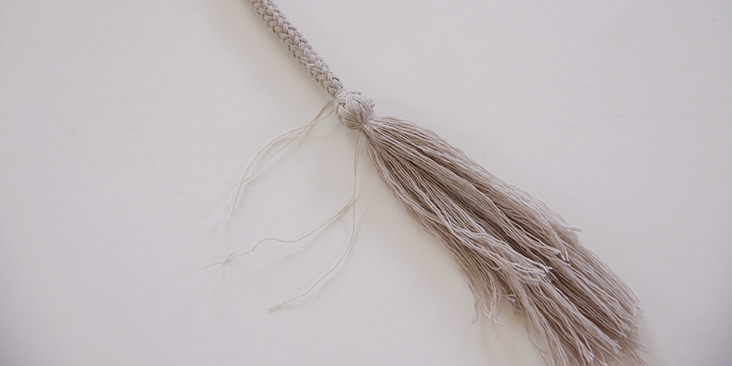
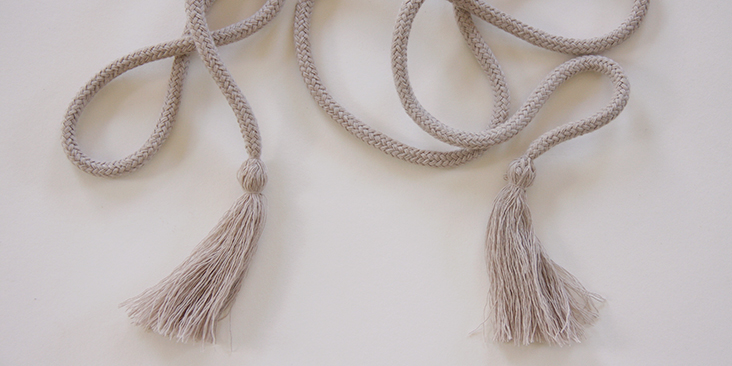
You’re all done! Cinch your belt and rock the bohemian look with this cute little tunic.










32 Comments
Maureen Quintin
Re: Linen Tunic with Tassel Belt Tutorial…I would like to grade this up a size but am confused by the drafting. It seems to show a bustline of 12.5”, but the hemline indicates a measurement of 11.5”, and there’s no base measurement to add on for the wedge. I am very new to drafting but would love to give this tunic a try. Any help appreciated and thanks for all the free resources. Love your linen!
Thuy Craveiro
Hi,
I would like to download the pattern for this dress but the link gave me an error. Please help. Would love to make the dress for my next project.
Thank you
Thuy
Es Be
Hi, I’m also having the same issue! Hopefully it will be resolved soon.
Merry Christmas to all!
Lauren Gates
Hello! This pattern link has now been repaired 🙂
Thuy Craveiro
Thank you for updating the link! I can download the pattern now.
Johanna Fagerås
Pleeaase prioritize! Its so pretty!! And Thank you for all the other amazing patterns!
Fay
Please I would really appreciate it if you could do this in lager sizes please. We are not all 6-8 or 10-12
Rima Khusainova
Dear Fay, we are currently working on updating all of our patterns and they soon will be available as multi-sized pdf files for sizes 4 to 22. So please bear with us, we are doing our best to accommodate all body types.
Shellie
These patterns do not print out as multi-page PDFs which is needed for home printers. I can draft them from the drawings or take them to an office supply that can print, but it would be nice to just print at home like pattern companies do. It would be so much more convenient and time-saving.
Rima Khusainova
Dear Shellie, thanks for your comment. Yes, we understand that it would be much easier for our subscribers to have multi-page PDFs and we are trying our best to provide that at least for our most popular tutorials. We are not a pattern company and all our patterns are free and are supposed to give you an idea of how to use our linen. We try to keep our patterns pretty simple so that it’s quick and easy to draft them from the measurements.
Caryn
I would love to see this pattern in plus sizes. So versatile as a top, tunic, dress, or caftan.
Rima Khusainova
Dear Caryn, thank you very much for your comment. Unfortunately this pattern is not available in multiple sizes yet, but it is pretty simple to grade it to plus sizes. The cut is so simple that you basically just need to add extra inches around all panels.
Sharon
I’m with you. Larger size patterns please.
Sherri Mecke
I love this tunic! I think a PDF for this pattern would be used by a large population!
Thank you!!!
Rod
Nice, I’d love to see a variety of tunic styles featured here. It’s a timeless garment for a timeless fabric. How important is the interfacing? I’d like to skip that if it won’t be a showstopper.
Rima Khusainova
Dear Rod, we are interfacing the placket just to add some body to the fabric so that it’s easier to work with. But you can totally skip the interfacing!
Rochelle Yospe
?I/ am also interested in size16 pattern for this tunic.
Carroll
Multi-size pattern please! And if it had a sleeve, it would be even better.
Laura
I agree! If this site had bundles of multi size patterns (going up to plus sizes – this is a major reason for learning to sew our own clothing!!) and fabric, with these visual step by step instructions, I would buy one in a heartbeat!
AmyCat =^.^=
An easy way to adapt this for larger figures: use the pattern here as the main body, and add side gores and sleeve pieces as shown here:
http://www.renaissancetailor.com/demos_rectangles.htm
or here:
http://island.net/~doerksen/notebook/clothingNotes/kamis.html
The pattern here, and the neck facing, would be good for any size, as long as you make the body the full width of your shoulders plus seam allowances, and then add side pieces. If you want, use a contrasting fabric (maybe a scrap of fancy fabric) for the neck facing to make it more decorative. (This would be a good place to use “doggie bag” scraps of fancy jacquard linen. If you have enough, add cuff bands to match on your sleeves!)
Check out this Pinterest site:
https://www.pinterest.com/multimediamuse/sca-garb-patterns-tutorials/
for more how-to links. A lot of historic costume sites have instructions to make basic garments (tunics, comfy baggy pants, etc.) to your own measure rather than by trying to up-size an existing pattern. (After all, the VIkings and Tudors and such didn’t have Simplicity and Butterick and Vogue, or even Burda or Folkwear patterns at their local Joanne’s!)
Rima Khusainova
Dear AmyCat, thank you soooooo much for sharing your tips with us! This looks great and I’m sure will be very useful for a lot of people here!
Jenn
I love this pattern and I think this a great step forward for the blog-the PICTURES! Some pictures of the patterns are so hard to see what the garment actually looks like and these pictures are just fantastic.
Rima Khusainova
Thanks a lot for your kind words Jenn!
Judy Kizler
I make ankle-length caftans for myself, with two measurements: shoulder to desired length plus SAs and hem. Second measurement is around the widest part of the body (for me, that would be hips) plus SAs and wiggle room. My hips measure 49″ and my favorite caftan measures 66″ finished — a bit generous but not by much. I love my wiggle room. The pattern in this post is well constructed, and if made to caftan length, side seam pockets are a good addition. See the tutorial for these at this site. I use a cotton/linen fabric, which holds up well while gardening or housecleaning. I might be the talk of the neighborhood, puttering around the radishes, but I’m comfortable. By using this tutorial, my next caftan won’t look like an accident. Thanks for legitimizing my dress code.
StacyV
I’m with you sister!
Although for me any below calf to ankle length dress will do, as long as the sleeves are below the elbow or longer (my arms always get cold or sunburned), it is roomy with plenty of ease and made of pure soft linen! Because I live in the Southwest we over Aircondition all summer so I love to dye my own fabrics, usually a solid for my dress but I love to make big wraps for wearing out that use Shabori dyeing techniques. Or dye everything the same color and use bleach to remove color for a pattern. I also have an embroidery machine to keep things changed up! I loved the suggestion of using different colors/patterns for the placket and cuffs! I’m going to do this with my dyed fabrics, you should try this too.
Best of luck to you in your sewing endeavors!
P.S. Try the pure linen once, I’ll bet you’ll love it!
Rima Khusainova
Hi Judy! Thanks a lot for this funny comment 🙂 Please share your next caftan pics with us, we’d love to see what you’ll make!
Johanna
I love this tunic! I already have the perfect linen (yours, of course!) to make it in contrasting colors. But I am a size 16-18 (U.S.). I look forward to the issue of larger size patterns from you!
Ann Martinson
And of course, since you’re in the business of sellling fabric — larger sizes = more fabric!
Love this tunic! I’m up for the XXL size whenever it’s ready.
Geralyn Sparough
I agree on multi-size pattern for this tunic, I could use this in so many ways!
Lorraine Newman
Please please please will you supply your patterns in larger sizes? Including this one which would be ideal in a plus size.
Cris
I’d love to have the multi-size pattern for this. I really appreciate all the patterns and tutorials that you do but don’t manage to get the time to learn how to resize them myself. Thank you!
Sophie
Now, this is the type of pattern that you should have available in multi-sizes!