Diana Button-Down Pleated Linen Dress Tutorial
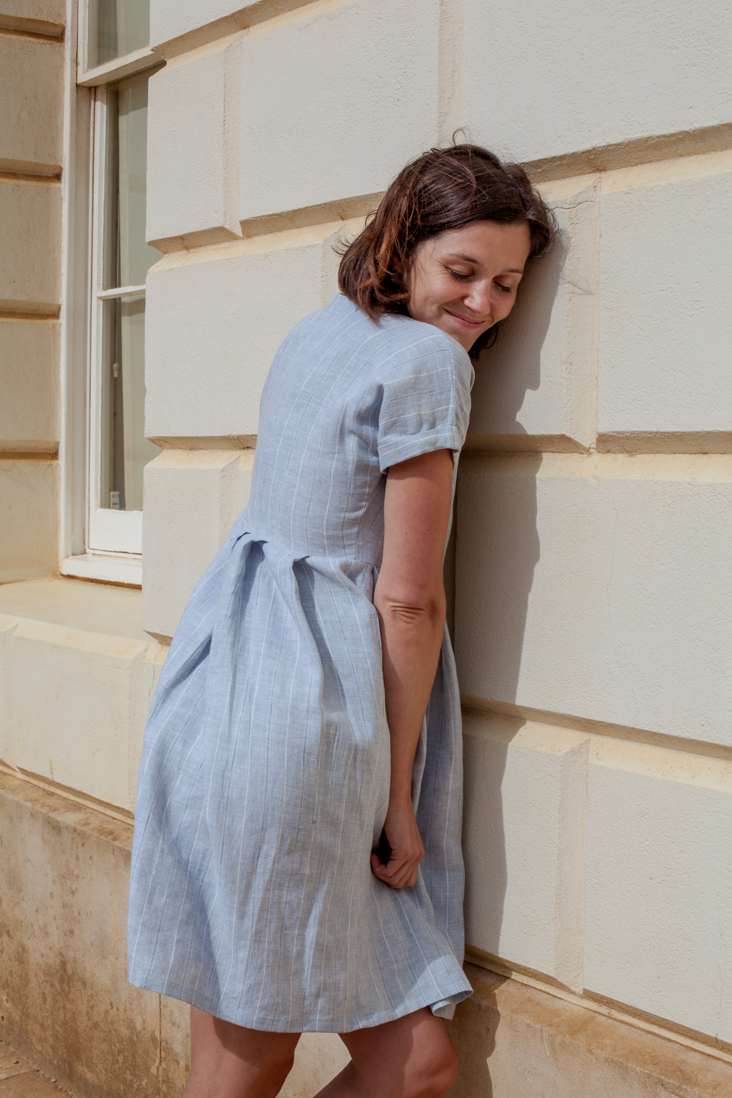
Looking for a project to enrich your sewing skills? This cute little dress we named Diana has it all: interfaced neckline, button down front, sleeve cuffs, pleats and inseam pockets. In this tutorial we are going to show you how to sew all of it using linen fabric, which is a pure pleasure to wear and to work with. In case you are already a pro at all the listed techniques, Diana is a sweet little dress to make for yourself, as a gift to your friend, or to size down to make for a little girl. Enjoy!
Materials
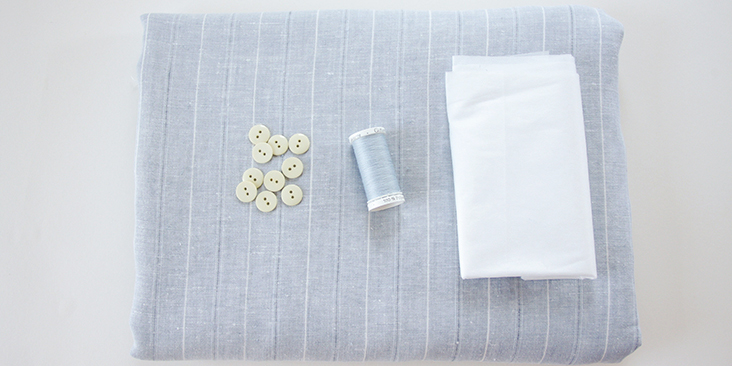
2.5 yards of IL042 904 FS Premier Finish 100% linen
Matching sewing thread, fusible interfacing (medium weight), 10 small buttons
Tools
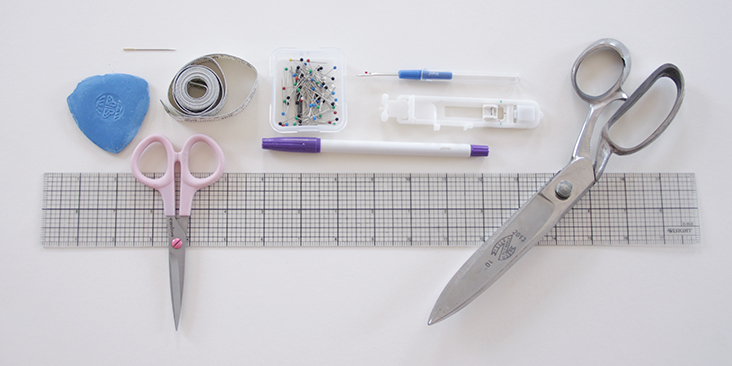
Pattern paper, scissors, fabric marker, pins, ruler, measuring tape, seam ripper, chalk, needle, buttonhole foot, sewing machine
Time
5-6 hours
Difficulty
Intermediate
Pattern
You can access the multi-sized printable dress pattern (sizes US 4-6 to 20-22) by following this link HERE and the printable pocket pattern can be found HERE.
Steps
Note: Prewash your fabric and tumble dry it until it is still slightly moist, dry in room temperature. Iron the fabric so it is easier to work with.
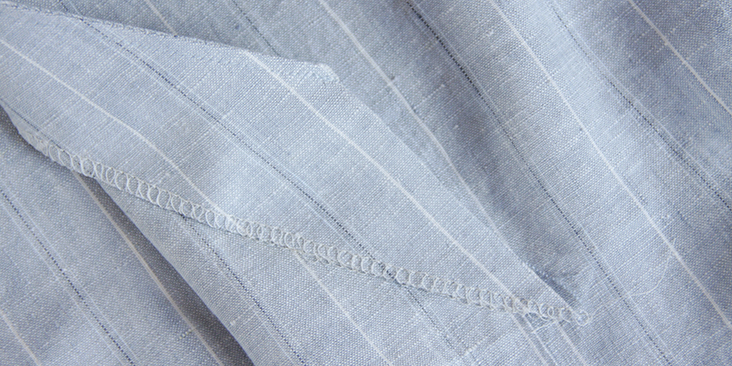
Before we can actually start sewing, we need to serge/zigzag some of the raw edges to make our sewing process easier and to prevent the fabric from fraying in the future. Serge or zigzag all the side seams (bodice and skirt), the shoulder seams and the pocket panels and set all these pieces aside for now.
1. Let’s start with the neckline facing. Apply fusible interfacing to the wrong side of your neckline facing pieces. Pin your facing pieces along the shoulders with right sides together and stitch at a 3/8in (1 cm) seam allowance.
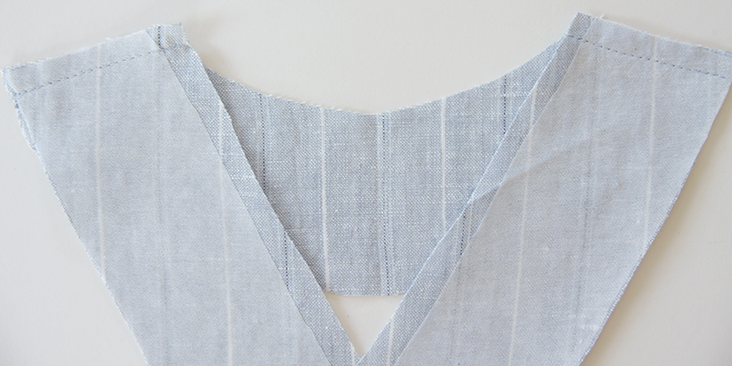
2. Press the seams open.
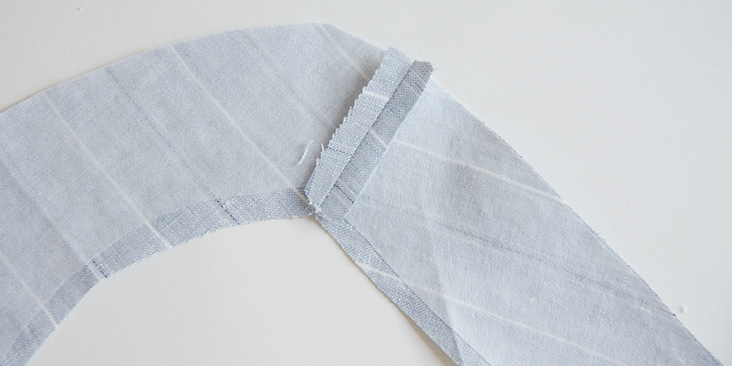
3. Serge or zigzag the bottom edge of your facing to make sure that your fabric doesn’t fray in the future.
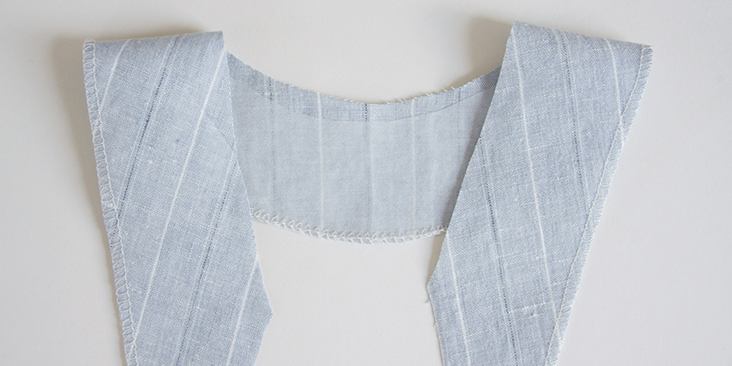
Before attaching the facing onto the dress, you need to assemble the front and the back pieces of the bodice together.
4. Start by pinning the shoulder seams right sides together.
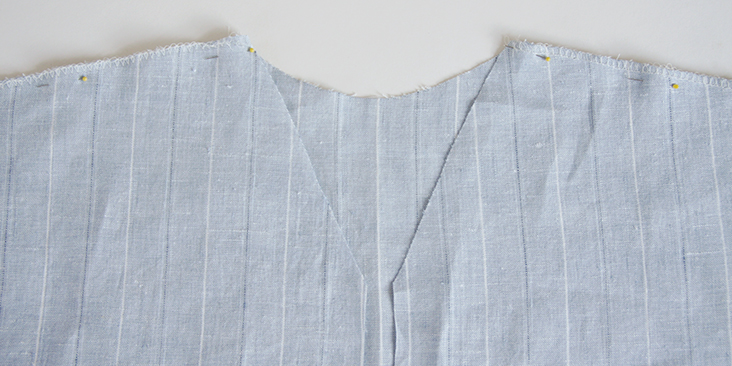
5. Sew at a 3/8in (1 cm) seam allowance and remember to backstitch at both ends.
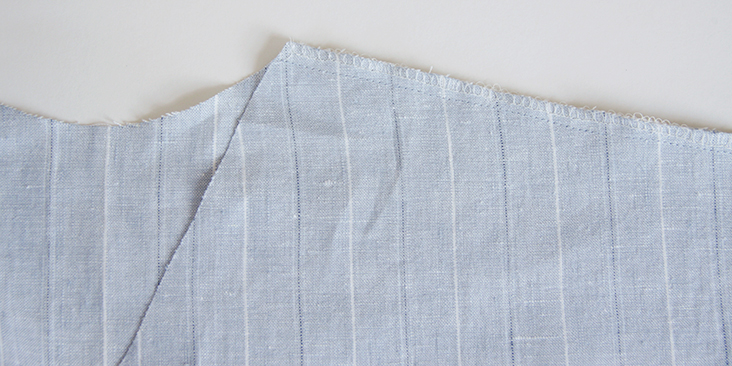
6. Press the seams open.
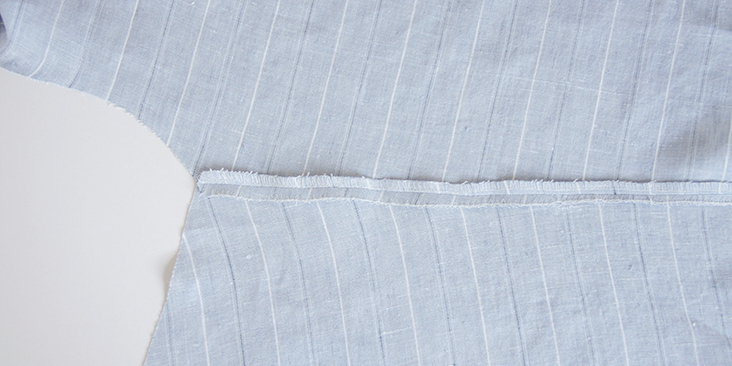
7. Place the right side of the facing on top of the right side of your garment matching up the shoulder seams and pin. Use plenty of pins to get the facing seated in the neckline as much as possible.
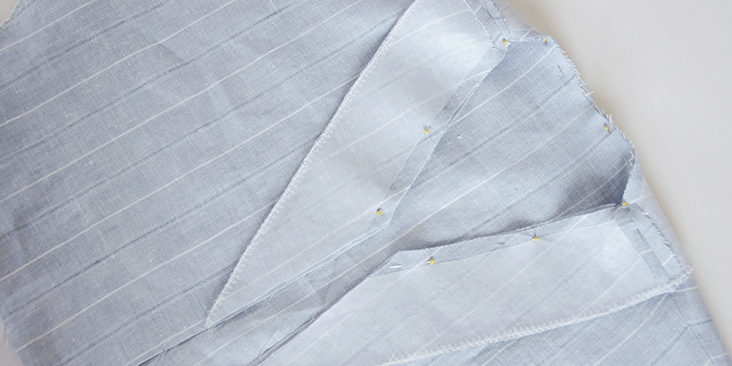
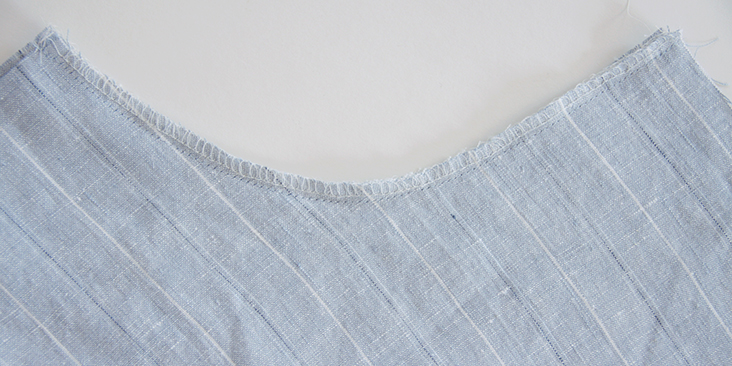
8. Stitch the facing onto the neckline at a 3/8in (1cm) seam allowance. Trim the seams to 1/4″, make a few notches around the curves to release the tension.
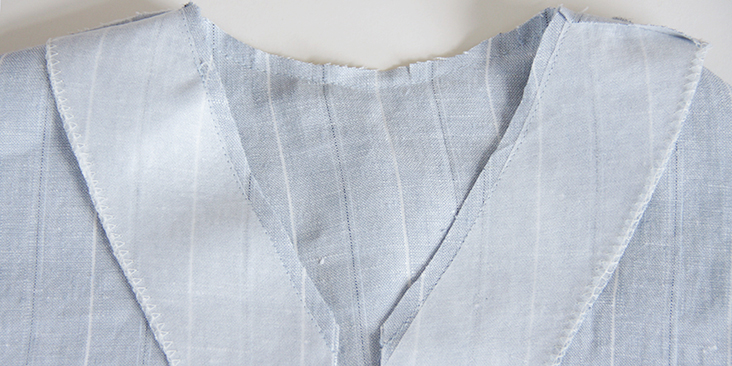
9. The next step is to pull the facing to the wrong side of your dress. Pin the fold making sure that the seam isn’t showing on the right side and press it.
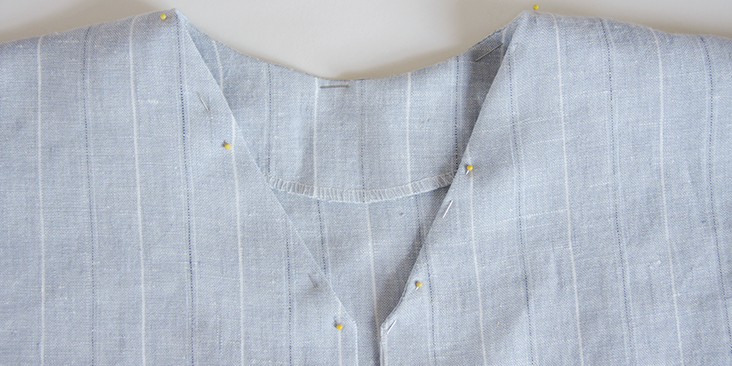
10. Topstitch the entire neckline as close to the seam as possible. It will help to prevent the facing from popping back out and lay flat on the inside. Don’t worry about the side raw edges, they will later be enclosed under the button band.
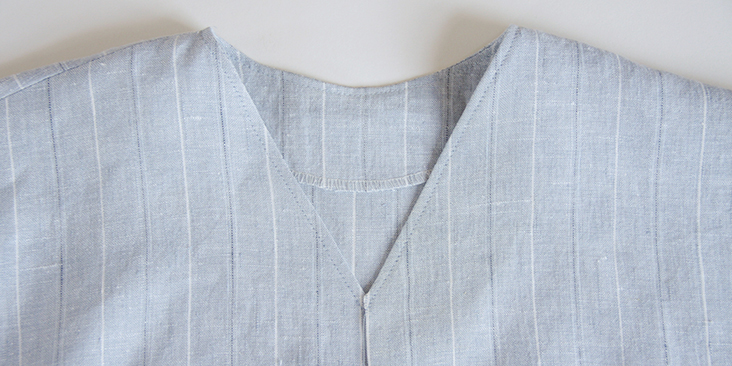
11. Pin the side seams of the bodice right sides together.
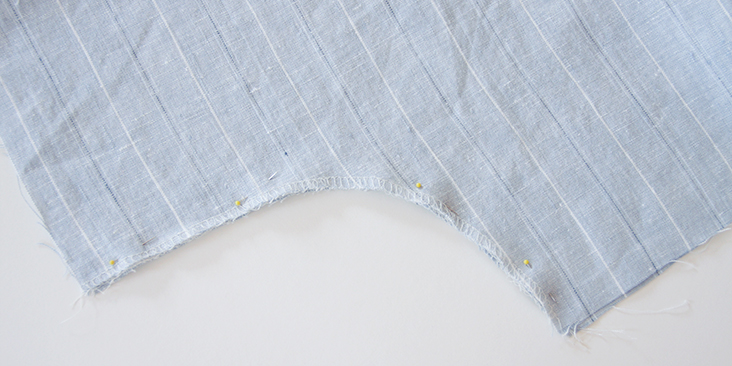
12. Sew at a 3/8in (1 cm) seam allowance and press the seams open.
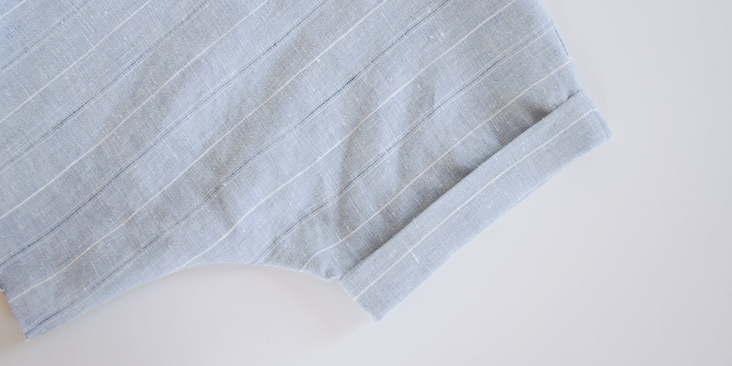
13. It’s time to sew the sleeve cuffs. HERE‘s a step-by-step tutorial which explains how to do it. Note that the cuffs seam allowances are already included in the pattern.
Set your bodice aside for now and let’s concentrate on the skirt and the pockets.
14. Let’s start with the pockets. Pin the pocket panels right sides together.
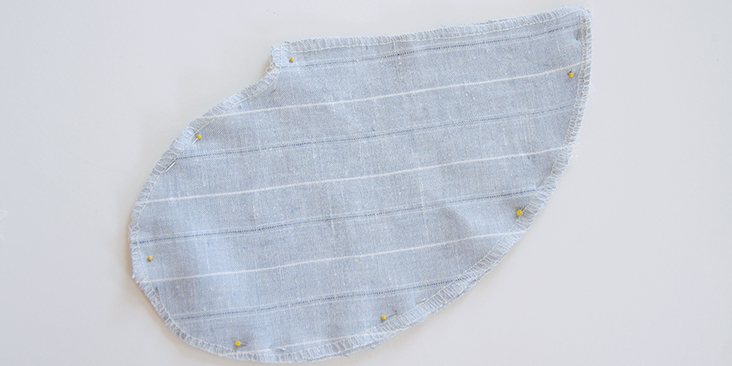
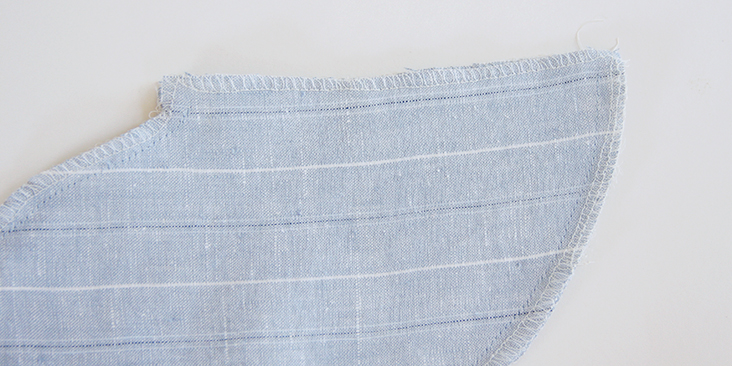
15. Stitch along the pinned edges but leave 3/8″ (1 cm) on both ends unstitched. It’ll make it easier to pin the pockets onto the skirt.
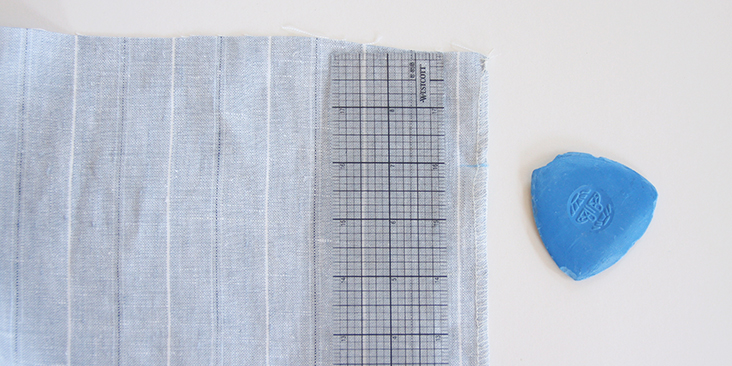
16. On the serged/zigzagged side seams of the front skirt panels, measure 2″ from the waistline and make a mark. This mark is the beginning of your pockets.
17. With the wrong side of the front skirt panel facing you and the pocket’s wrong sides facing outwards, take the top pocket panel and match it to the mark you’ve made. Pin the top pocket panel to the skirt panel (right sides together) making sure the bottom panel of the pocket is not caught. Repeat for the second pocket. Make sure your pockets are facing the right way: the rounded edge should be looking down towards the bottom of your skirt.
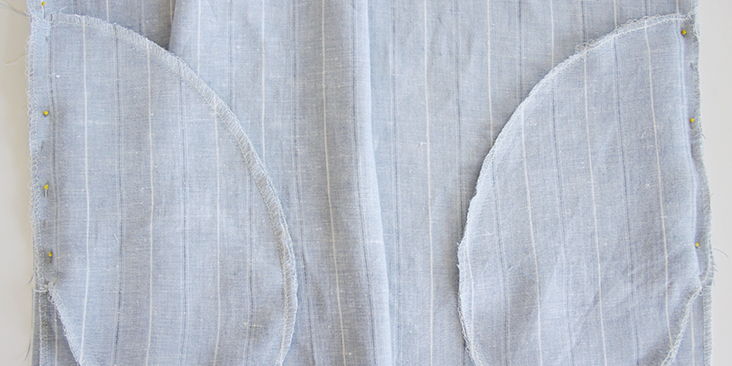
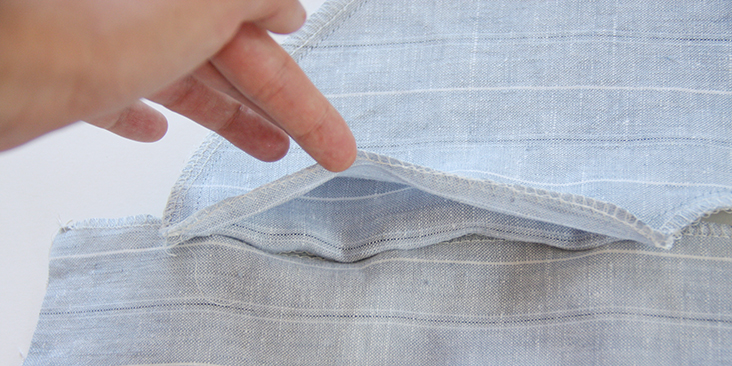
18. Sew the pinned edges together (only the pocket) at a 3/8 in (1cm) seam allowance backstitching at both ends.
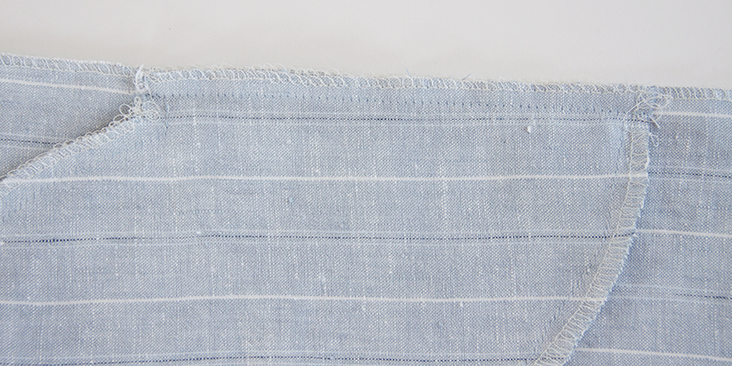
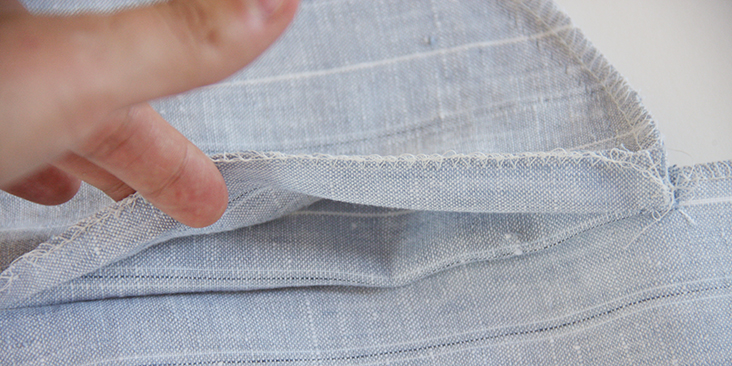
19. Pin the side seams of the skirt right sides together. When you come to the pocket, pin the other pocket panel to the other dress panel (right side to right side).
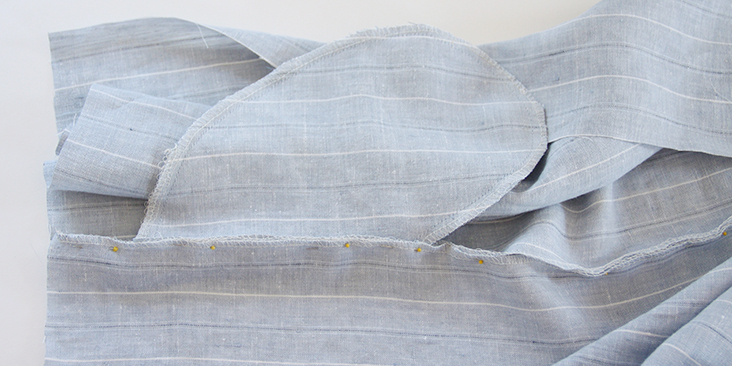
20. Stitch the second pocket panel to the dress.
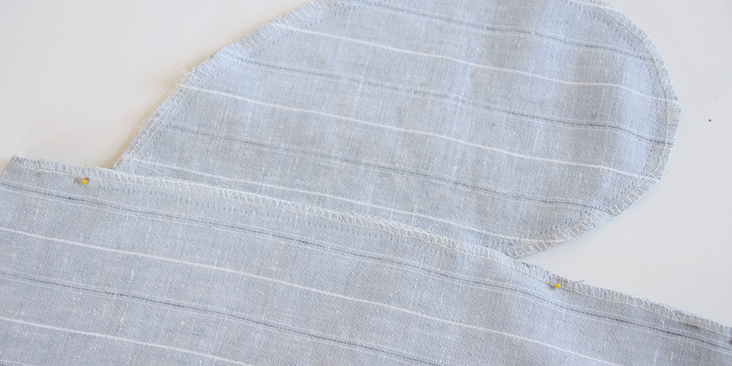
21. Now sew the side seams together up to the pocket opening and then from the other end of the opening down to the bottom hem of the skirt. Remember to backstitch.
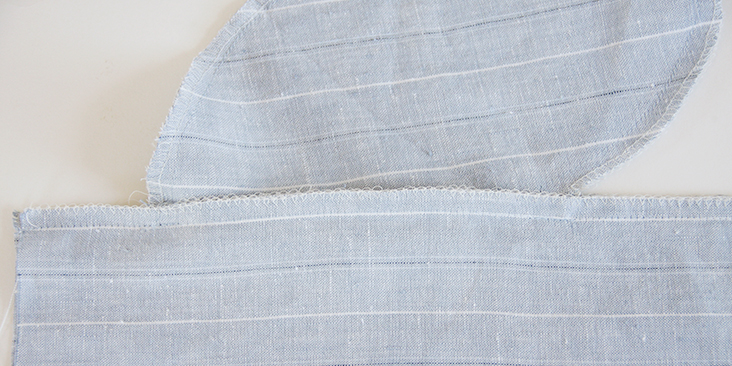
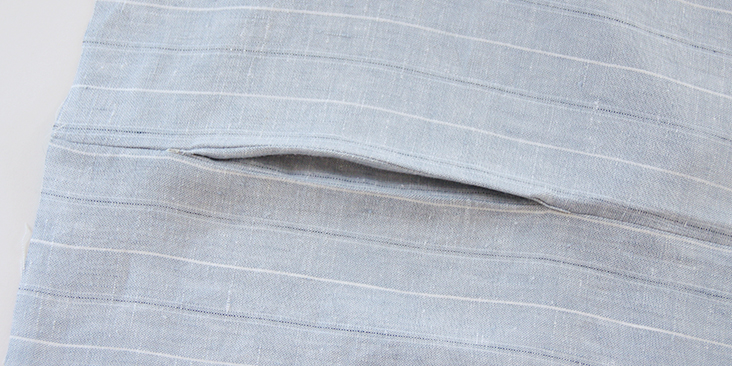
22. Press the seams open and carefully press the pocket seams to create two neat folds.
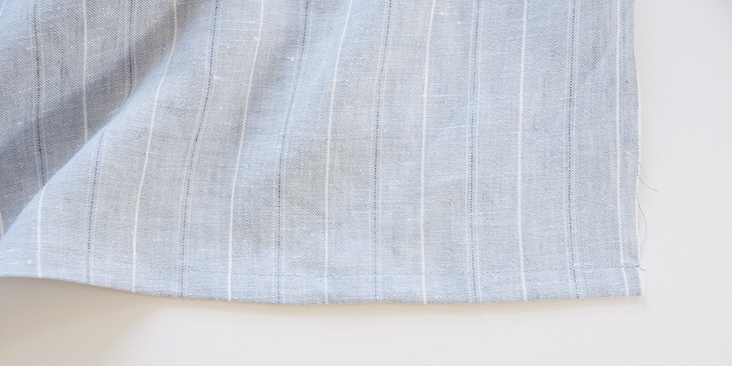
23. Finish the bottom hem by folding the fabric twice (3/8″ to 1/2″) to the wrong side. Make sure both front panels are aligned. Press and pin.
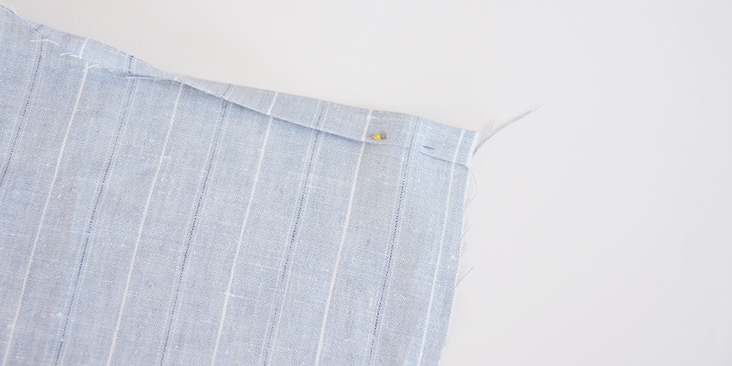
24. Stitch as close to the inner edge as possible. Give the entire hem a good press.
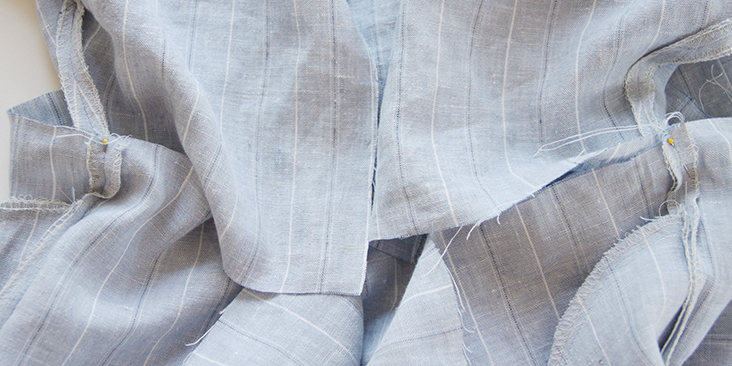
25. The time has come to attach the skirt to the bodice. Start by aligning and pinning the side seams at the waist.
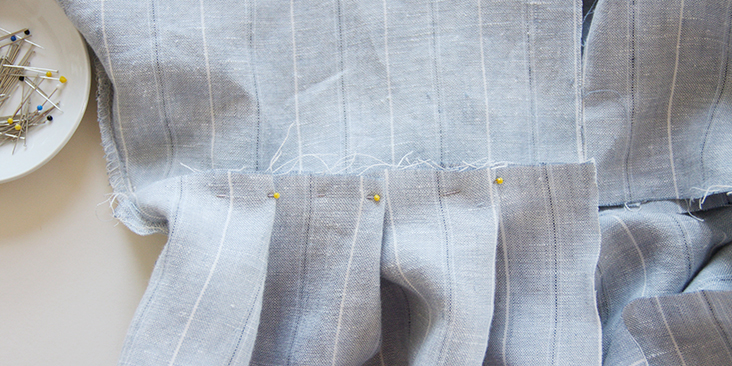
26. Pleat your skirt to the width of your bodice. Create 3 evenly-sized and evenly-spaced pleats on the front and 6 on the back and pin them directly to the bodice. Right side to right side.
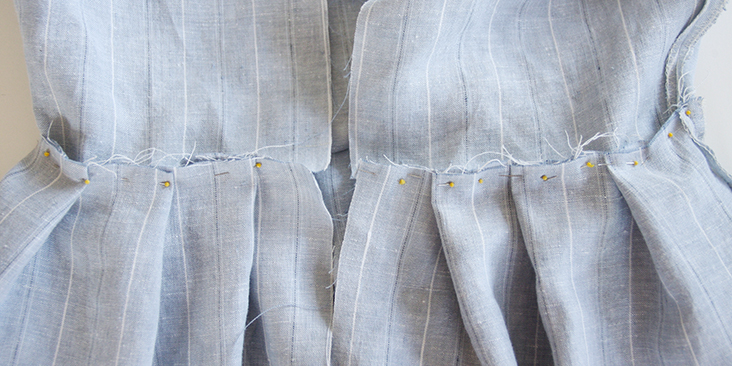
27. Stitch the skirt to the bodice at a 3/8in (1cm) seam allowance.
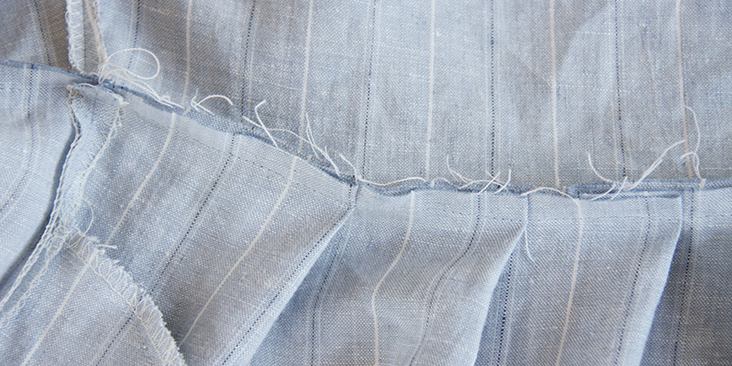
28. Trim the seam allowance to 1/4″ and serge or zigzag the raw edges together.
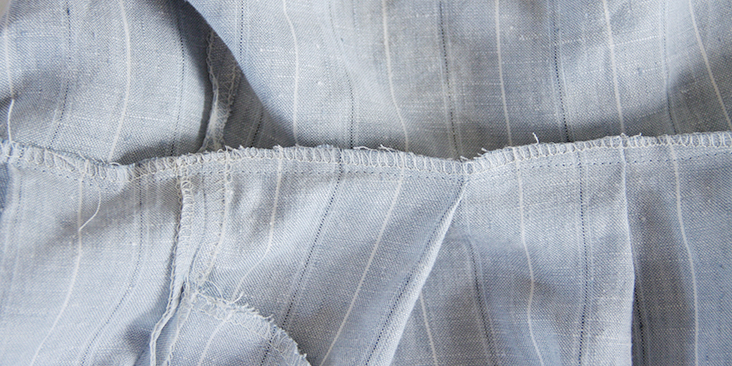
29. Working from the right side, press the seam flat folding the serged/zigzagged edge down towards the skirt.
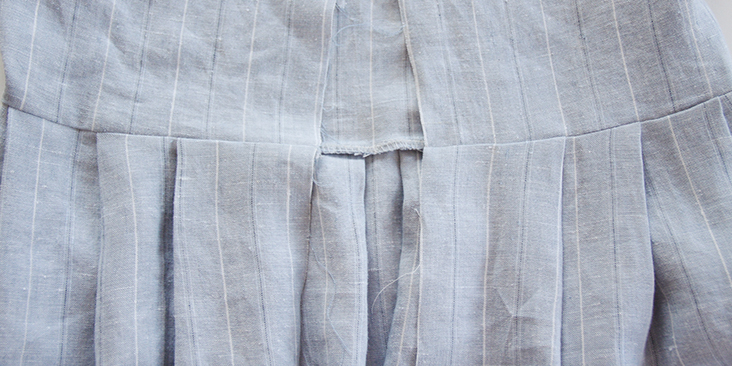
Your dress is finally assembled and the last thing to do is to attach the button band, sew the buttonholes and place the buttons.
30. Take your button band strip and turn two long raw edges 3/8″ (1 cm) towards the wrong side. Then fold it in half lengthwise.
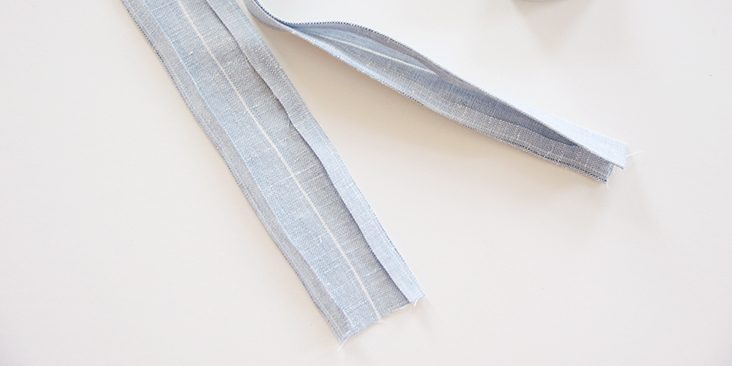
31. Tuck one of the shorter raw edges in and refold again lengthwise.
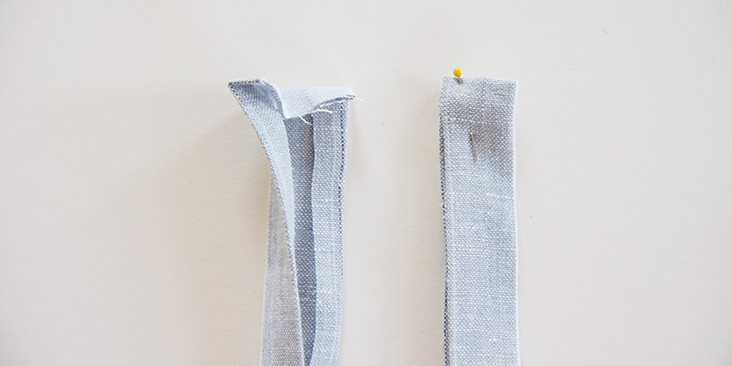
Repeat for the second strip of fabric.
32. Pin the button bands to the dress. Insert the dress’s raw edge only 1/4″ into the button band, not completely.
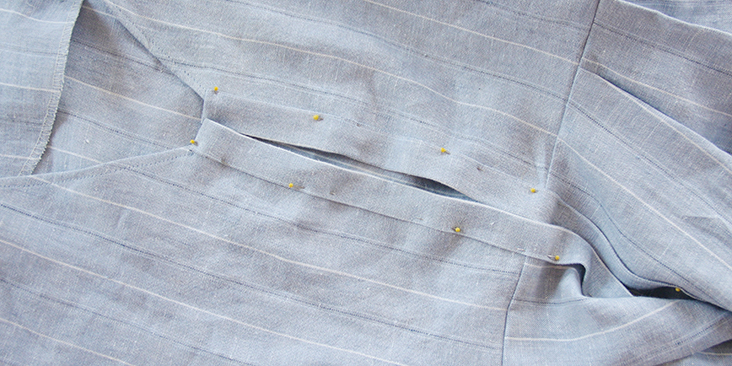
33. Set your machine to a longer straight stitch (# 4-5) since you have a lot of layers to stitch through and attach the band to the dress.
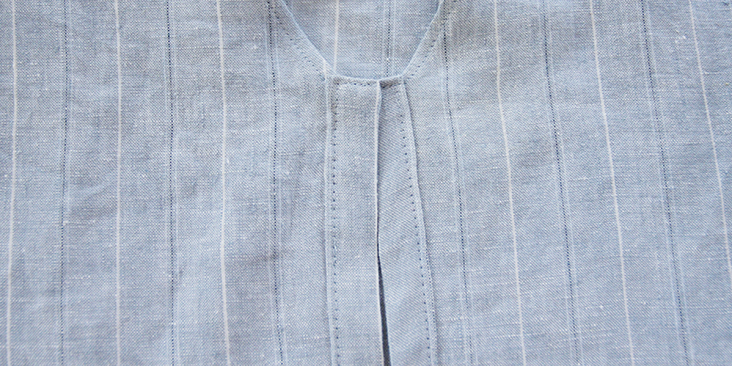
34. Since we cut longer strips of fabric than needed (to make sure we have enough fabric in the end), cut any excess of fabric when you come to the other end and close the raw edge as you did in step #32. Stitch over.
Repeat for the other side.
35. The last steps are to sew buttonholes and attach the buttons. Start by making your buttonholes following this tutorial HERE. The number and the spacing are really up to you. If you want your buttons closer, just leave smaller gaps between them. We decided to space our buttons 2,75″ (7 cm) apart.
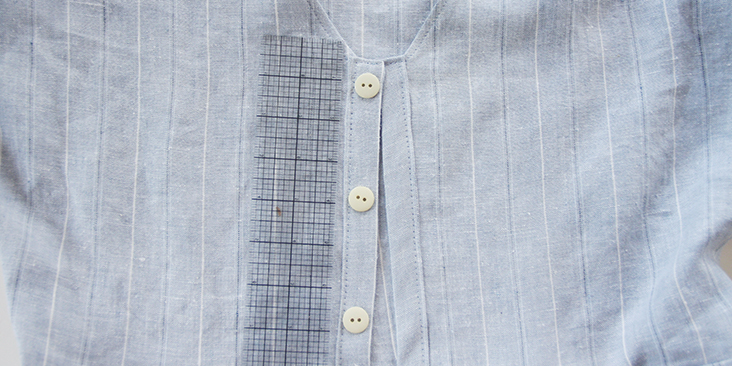
36. Overlap the button bands and place a pin into the center of each buttonhole. This is where you’ll need to attach the buttons. Here’s a very easy tutorial on how to attach the buttons.
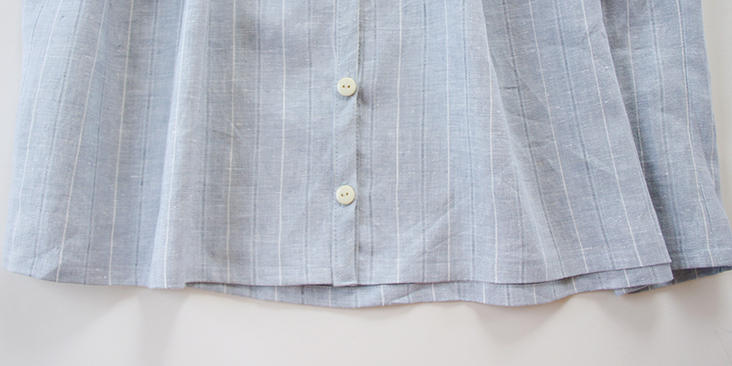
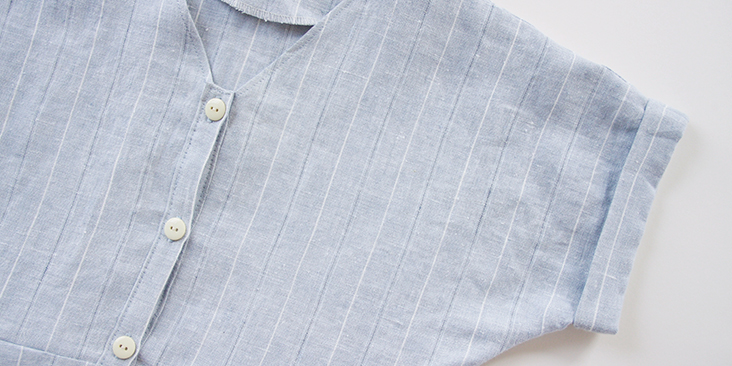
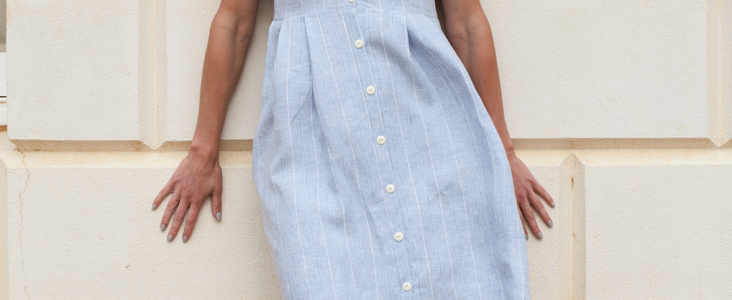
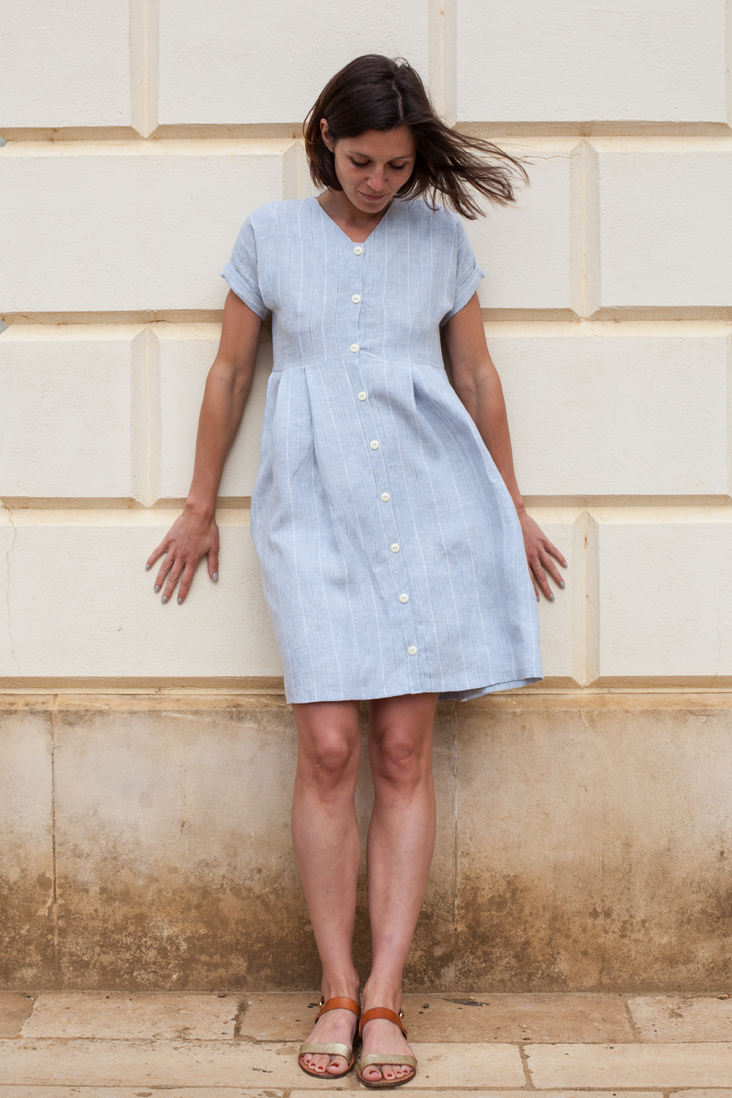
Give it a good press and your new dress-up-or-down, chic, versatile dress is finally done!




















70 Comments
Pingback:
Diana Button-Down Pleated Linen Dress Pattern & Tutorial - Do It Yourself For FreeWanda Jollymore
Where can I find measurements to help me determine which size I need. Also yardage requirements for each size. They are not on the pattern, as far as I can see, and I do not see them in this post. Depending on the pattern, I can take anywhere from a Size 16 to a Size 22. I don;t really want to print out both sizes just to see which it is for this pattern.
Lauren Gates
Hello Wanda,
This is one of our oldest free patterns, so it was designed for you to choose your size based on your desired finished garment bust measurement. This is listed on the first page of the download.
To figure out the yardage for your size, I’d recommend assembling your pattern and doing a mock layout on a flat surface, and measuring the length your pattern takes up. We used 2.5 yards for the sample size.
Elonda Hogue
I have never used a free download pattern. Do I just print it off as is or does it need enlarging ?
Lauren Linen
Hello Elonda,
We have some great articles and tutorials in our Help center which covers everything you need to know about printing and assembling your free .pdf pattern. Here are the links which will help you print and assemble the patterns:
1. printing: https://support.fabrics-store.com/hc/en-us/articles/360000217423-Printing-Pattern-Pieces-at-Home-PC-and-Mac-Computers-
2. assembling:https://support.fabrics-store.com/hc/en-us/articles/360058206312-How-to-Assemble-our-Free-PDF-Patterns-
If you would like any further assistance please email us over in customer service. For speedy replies, use the following email address and link:
Email: ask@fabrics-store.com
Web Form:https://support.fabrics-store.com/hc/en-us/requests/new
Kelly Potocki
This is such a cute dress! I would love to make one. The link to the pattern is not working. Could you please re-link it? Appreciate it!
Lauren Gates
Hello kelly, The link has been fixed up in the post. Here it is for your convenience:
https://fabrics-store.com/sewing-patterns/diana-button-down-linen-pleated-dress
Marie Bleue
Hi !
Where can I find this beautiful pattern ?
There is a link but it doesn’t work…
Thank you a lot !
Marie
Kathleen Kunysz
Finished this dress today in a nice stripe fabric. I widened the top front and back for bust and broad shoulders and adjusted the pleats accordingly. The dress lost a little of it’s fitted look around the empire seam in back. Next time, I would add some darts in the back. Empire seam in front also rides up a little-next time I would slope the seam in the front or modify to add bust darts. I had trouble with the cuff–the edge would not lay flat when turned up 2.5 inches. I ended up using a 1.25 inch hem and turning that up though that leaves the seams at the edge. Perhaps use french or felled seams. But the dress is definitely cute and very cool in the hot weather. The yarn-dyed, striped linen is very straight and it was easy to lay out the fabric to get matching stripes all around.
Yuanyuan Liu
Dear Lucy,
Where can I find the pattern for this lovely dress? I think the link in the original post is not working.
Thank you so much! Can’t wait to start making this dress!
Jazmin Hooijer
Do you have any suggestions or tutorial link for adding an fba to this pattern?
Sonia Valente
Thank you so much for a great pattern and tutorial!
Yuliia Nielsen
The Dress I made is just AMAZING!!! I’m very happy! Just got a little confused on a description how to sew Pockets. I think it’s a little bit strange, but I got it done and a Pattern fits perfect! Love this dress!!!!
carolyn spangler
I was also confused about how to sew in the pockets. However, I gave up and made the dress without them. I was surprised how fitted the bodice was and wondered if it would fit me considering I used the size 8/10, but when I added the skirt and the button strip it all fit quite nicely and I like that it’s not so baggy. I made this out of the color “Sand”. The first dress I’ve made in decades.
Lucy
Hello,…
How can I get the cutting pathern for this dress?….please…. I just finished buying 5 yards of your linnen…
Your reply is greatly appreciated…
Rima Khusainova
Dear Lucy, the multi-sized printable pattern for this dress can be found here – https://fabrics-store.com/sewing-patterns/button-down-pleated-dress/. Just download the file, open it in Acrobat and pick your size to print!
Deb
Thank you for the lovely Diana dress pattern. I have it printed out and ready to tape together. Looking forward to a lovely breezy summer dress! Deb
Rima Khusainova
You are very welcome Deb! Happy sewing!
Melanie June Bent
I want the length to be just below my knees so how much more fabric do I need for a size US 12?
Rima Khusainova
Dear Melanie, sorry for a late reply. It’s hard to determine the length on the size as it’s really a matter of how high you are. What I’d recommend is to print out the pattern and to measure the total length of the bodice and skirt pieces from high point shoulder to hem, then measure yourself to the desired length and add the difference plus a couple of inches (it’s easier to shorten it before you hem if you see it’s too long). However, be mindful of the seam allowances that are already included in the pattern and make sure you measure without them. Hope this helps!
Beth Woodward
Beautiful dress, I would absolutely love to tackle this pattern but it’s just one size shy of what i wear. Any chance of adding that?
Rima Khusainova
Dear Beth, did you know that there’s a free multi-sized (US 4-6 TO 20-22) printable pattern that is available for this dress? You can find and download it from the “Pattern” section of the tutorial. If none of these sizes fits you, we have a great tutorial here – https://blog.fabrics-store.com/2015/06/01/how-to-grade-a-pattern-tutorial/ – that explains how to grade your patterns.
merry
Where does it say how much fabric i need for a particular size?
Rima Khusainova
The yardage is indicated in the “Materials” section. For sizes XS to M you’ll need to yards of fabric, for larger sizes and especially if you’d like a more gathered skirt – we recommend using 3 yards.
Stacy D
Hi, I have a quick question. When attaching the pockets, wouldn’t it be easier to just sew one piece of the pocket to the front and back then sew it continuously? I know you have a tutorial on how to sew pockets. I thought that might be a little easier, so I wouldn’t have to worry about catching the other side of the pocket. Would I just measure down 2″ on the front and back panel of the skirt part?
Great patterns love the tutorials! Can’t wait for a printable pdf pattern for the whimsical linen bow dress.
Rima Khusainova
Hi Stacy! Yes, you can totally attach the pockets the way you’ve suggested. There are several ways to do it so choose the method you like 🙂 And yes, position the pocket panels 2″ from the waist.
Laurie
The pattern pieces indicate that a 3/8″ seam allowance is included, but the instructions say to remember to include seam allowances as indicated on the pattern. Not sure I am understanding correctly…. are there some pieces to which I add the seam allowance? I’ve gone back over the pattern and don’t see any but maybe I’m just not seeing them?
Rima Khusainova
Dear Laurie, sorry for the confusion. The printable PDF pattern does include all the seam allowances so no need to add anything else to it.
Laurie
Thanks so much!
Jessica
Is there a more seamless way of creating the button placket? The straight lines of stitching at top of button placket don’t go so well with the neck interfacing stitching .
Jessica
Is it possible if I cut the dress a hair bigger around the bodice , that I can just add bust darts where I see the pulling and natural fold of the fabric? The FBA is frightening to me!
Rima Khusainova
Hi again! Just sent you a reply to your other comment which should make the FBA easier (and less frightening). But you could indeed eliminate the bulk by creating some bust darts where you see the pulling. My only concern here could be that it might alter the side line a little since you won’t be accounting some extra fabric for the dart jog. I think you should really try to do the FBA! It’s much easier than it looks!
Jessica
Thanks I just might!
Shirley
I love the dress! Where can I buy the pattern. Also could you make it with longer sleeves?
Rima Khusainova
Dear Shirley, this dress is available in a fully printable pdf pattern in sizes US 4-6 TO 20-22 and is absolutely free! You can download it by following the link in the “pattern” section and print at home. As for the longer sleeves, you can easily alter the pattern yourself by adding some length to the sleeves. However, I would not recommend adding cuffs to long sleeves, just finish them with a rolled hem.
Louise Loughrey
Is there a PDF for the instructions? Love the pattern. I am losing weight and this is great being multi-sized. Thank you so much.
Catina
There isn’t a PDF of the instructions, but you could print out the blog tutorial if desired.
Lindsey
Love this dress so much. What size buttons did you use?
Rima Khusainova
thank you Lindsey! Mine are 1/2″ but you can use any size you want. Just increase/decrease the width of the button bands.
Pamela McCandless
Thank you so much for the pattern.
Have a wonderful weekend!
Esther
Thank you for kindly providing a multi sized pattern! God bless you!
Masha Karpushina
Thank you Esther!
Koko
Thank you so much for the pattern. Can’t wait to make one for me :).
Masha Karpushina
Thank you for your kind comment!
vic
Thanks so much for free, multi-size pattern! This so great that you would do this and will be a great pattern for using up some of the lovely linens I have. I love fabric store.com!
Masha Karpushina
Thank you Vic, do share what you make with us!
sheila
I can’t even see where to download it! Help, anyone?
Thanks
Masha Karpushina
Sheila, the pattern link is under PATTERN in this tutorial. It says in capital letters that this is a digital PDF which you can download HERE. Press on the word ‘HERE’.
Sharon
The pattern is printing out as I type. I’m very eager to start on this one. Thanks so much for all the hard work putting together a multi-sized pattern!! Now, I just have to decide which piece of gorgeous linen I’ve been hoarding…..uh… SAVING to use for this pattern. 😉 Thanks again!
Masha Karpushina
Thank you for this gorgeous comment. We are so happy you’re pleased!
Nancy
Sizing DOWN would also be helpful. I’m a 4US. The last (and first) pattern I made, without grading up, was size HUGE.
PLEASE!
Masha Karpushina
This pattern starts at size US4.
Lorraine Newman
Thank you so very much for this pattern, and for sizing up! I love it, and I’ve been looking for a pattern exactly like this for ages! Thank you thank you thank you! Lorraine xxxx
Masha Karpushina
So happy to hear this, thank you Lorraine!
Kathy
I have tried several times to download this pattern and all I can see is the original diagram but no pdf pattern with sizing and pieces. Could you help me with that?
Kathy
I just tried again and it worked. Thank you, I can’t wait to make this dress!!
Masha Karpushina
Brilliant, thank you!!
Kathy Jones
I just tried to download the pattern to DropBox and it says the Pattern doesn’t exist?
Rima Khusainova
Hi Kathy! Sorry to hear you having troubles downloading the pattern. I just checked everything and everything seems to be working just fine. Have you tried to save it to your computer? Do you see the diagram when you open the link? Sorry for all these questions, just trying to understand what could be wrong…
Masha Karpushina
Apologies. Thank you for your comment. All fixed. Please try again, Kathy.
Claudia
Wow, thank you so much for making your pattern in larger sizes !! And what is nice I can understand your directions too!!
Rima Khusainova
Thank you, Claudia! There are a lot of steps but all of them are really easy to follow. Let us know if you need help or have questions.
Maureen Donovan-McLaughlin
Simply beautiful. Looks so cool and comfortable.
Rima Khusainova
Thank you so much for your kind words Maureen!
sandra pipitone
love it
Rima Khusainova
Great to hear it, Sandra! Thank you!
Doris Roten
My printer will not print these patterns as they need to be printed. I purchased 3 yards of linen and got the FREE pattern, but can not use it.Can I buy the pattern from you. I would like to buy some more of the linen, but until I can get the pattern I will not be ordering any more. The linen I purchased is very nice and of great quality.
Deborah
I just wish your patterns were available for plus size ladies. The average size is a US 16 not 6-8. I never have been able to successfully grade up to that from a tiny size. Other then that I love all the things I have seen here and wish I could make them for myself.
AmyCat =^.^=
I’m with you, Deborah… Size 6-8 is TINY. I’d love to see an occasional pattern here that’s made and modeled in a “plus” size. This dress would probably look nice on a larger figure, too.
Masha Karpushina
Deborah, thank you for your feedback. We are working on this. Hopefully soon, we will have digital patterns for some of the more popular items we have made. So watch this space. thank you!