Mona Trapeze Linen Dress and Pattern Tutorial
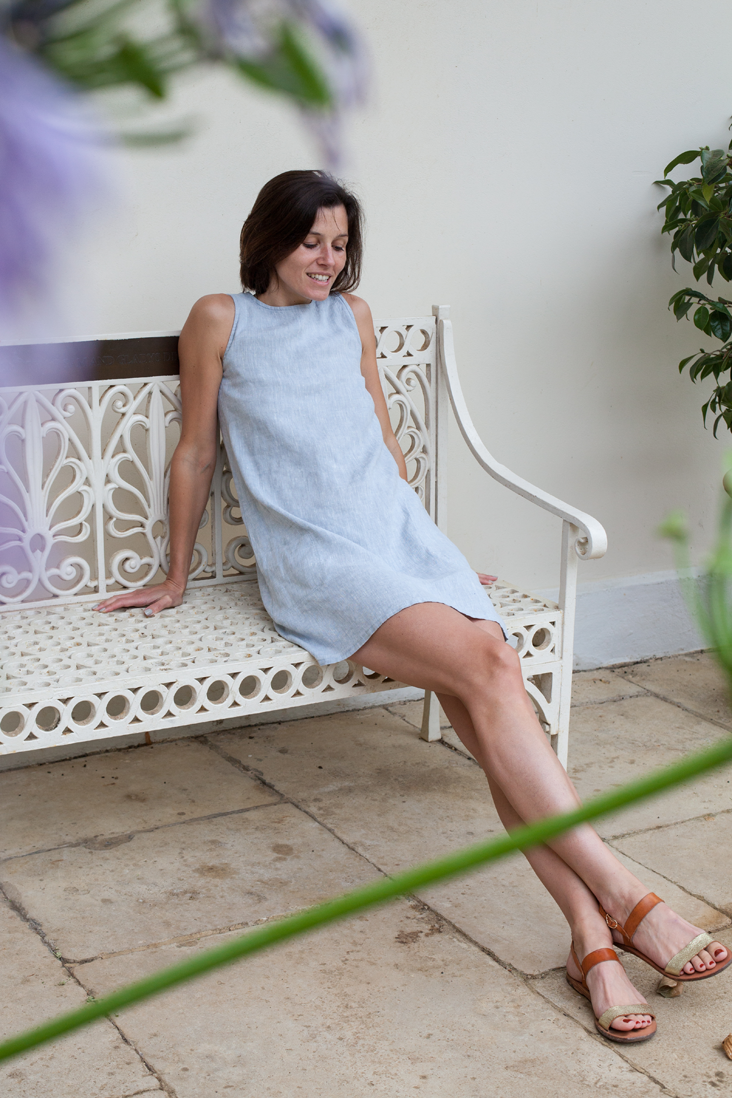
Even the simplest design can be transformed into something special. This cute little dress is a perfect example. With its loose-fitting trapeze silhouette, Mona features a couple of original details like the button loop opening at the back and “faux” patch pockets at the front, which make it special, feminine and very comfortable.
Cut from beautiful yarn-dyed Premium Finish 100% linen, this dress feels and looks great! It’s one of those timeless pieces that every woman should own so we thought we’d show you how to make one.
Materials
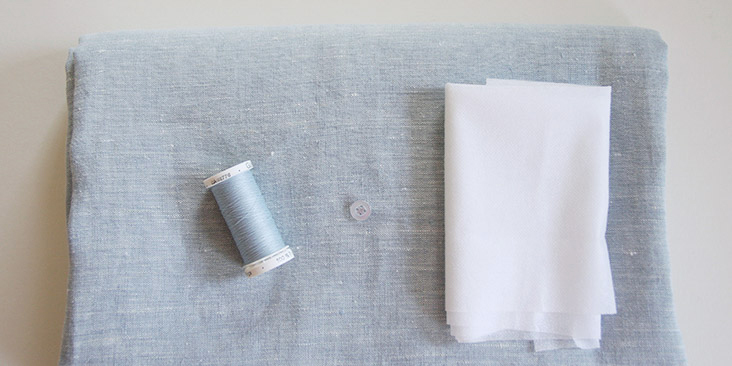
2.5 yards of IL042 903 FS Premier Finish 100% Medium Weight Linen
Matching sewing thread, one button, fusible interfacing
Tools
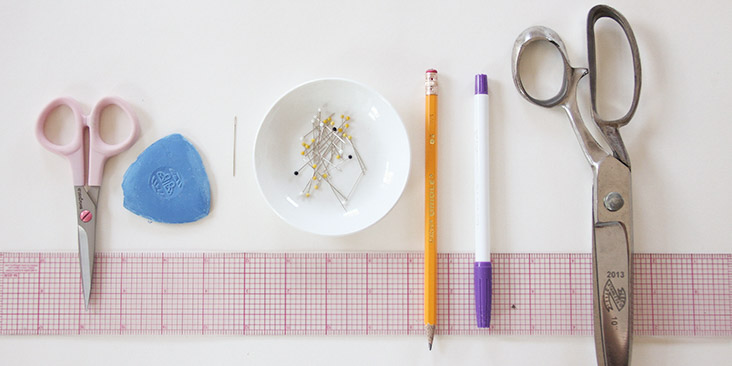
Pattern paper, ruler, pen, scissors, pins, fabric marker, needle, chalk, sewing machine
Time
3-4 hours
Difficulty
Beginner
Pattern
You can access the FREE Multisized downloadable PDF patter HERE.
Note that you’ll also need to cut three 1″ (2.5 cm) large strips of fabric on the bias in order to make the bias tape for the neckline and the armholes. For detailed instructions on how to cut your bias tape please follow this tutorial.
Steps
Note: Prewash your fabric and tumble dry it until it is still slightly moist, dry at room temperature. Iron the fabric so it is easier to work with.
1. Before assembling the front and the back together, you need to sew the back slit and the button loop closure. HERE is a step-by-step tutorial on how to do it.
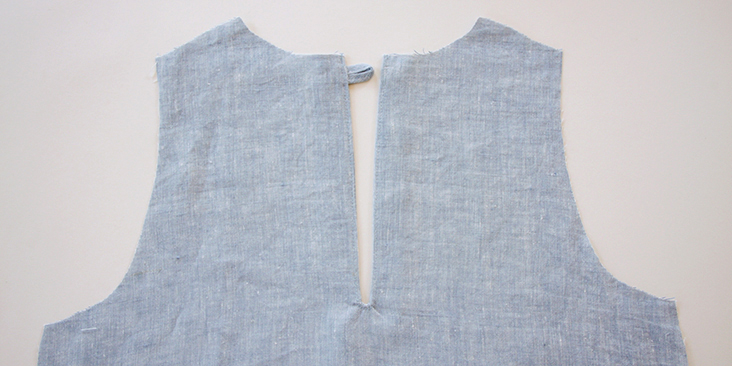
2. When you finished sewing your back slit and the button loop (do not attach the button yet), you may assemble the front and the back of the dress by pinning the shoulder seams right sides together.
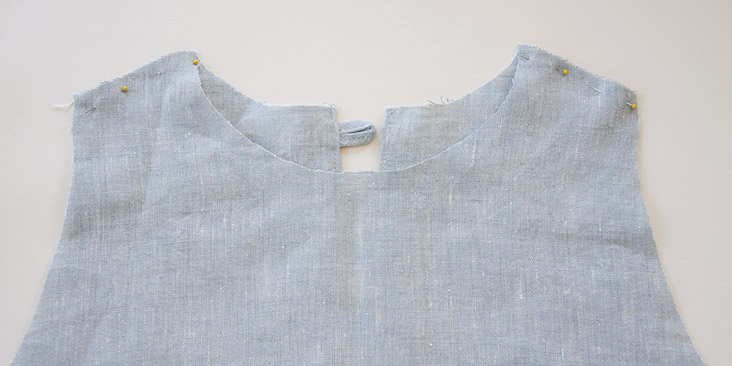
3. Sew the shoulder seams right sides together at 3/8” (1 cm) seam allowance, remember to backstitch.
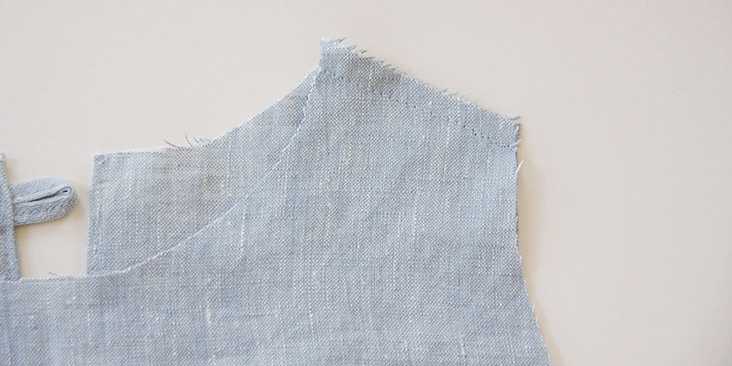
4. Trim the seam allowance down to 1/4″ (6 mm) and serge or zigzag the raw edges together to prevent the fabric from fraying. Press the seams flat folding the serged/zigzagged edges towards the back of your dress.
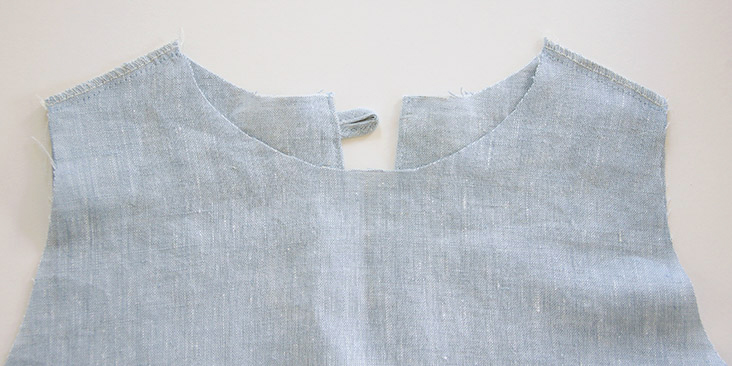
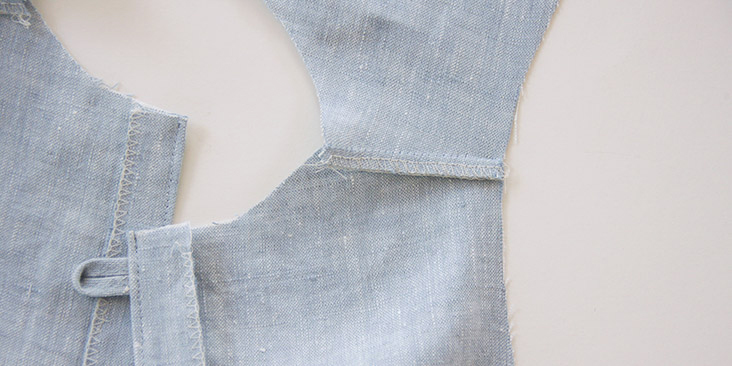
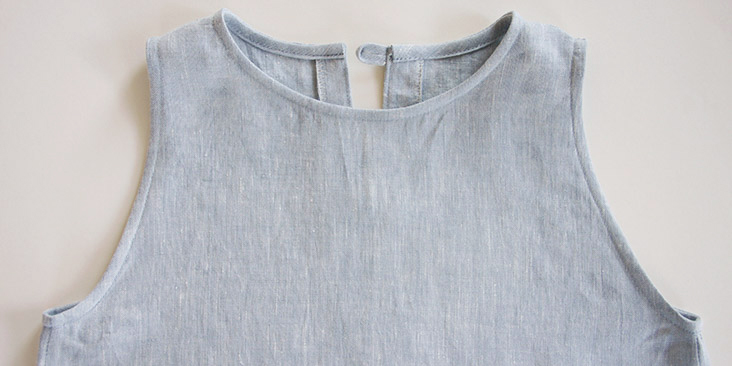
5. Bind the neckline following this tutorial. Make sure that when you attach the binding the serged/zigzagged shoulder seam edge is folded towards the back of your dress.
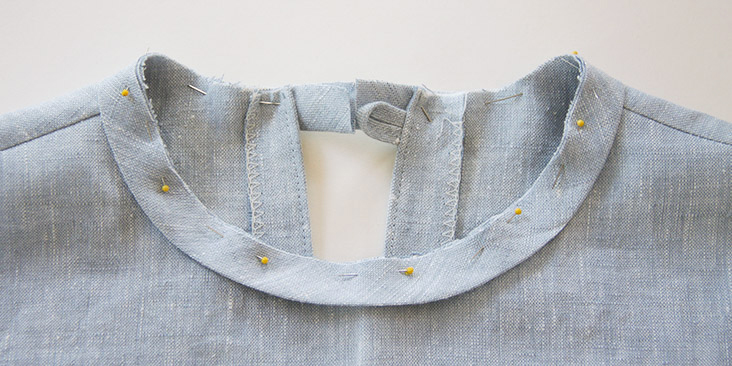
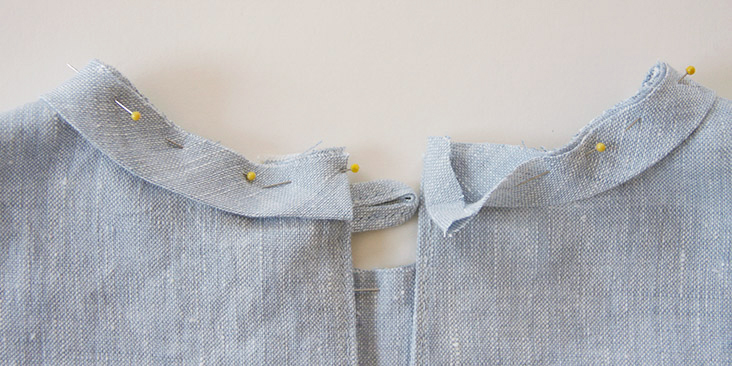
When you come to the back opening, tuck in the ends of your bias band as shown below:
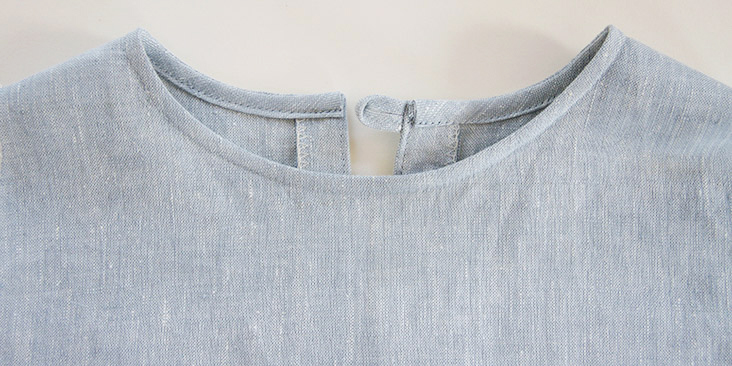
Here’s what your finished neckline will look like:
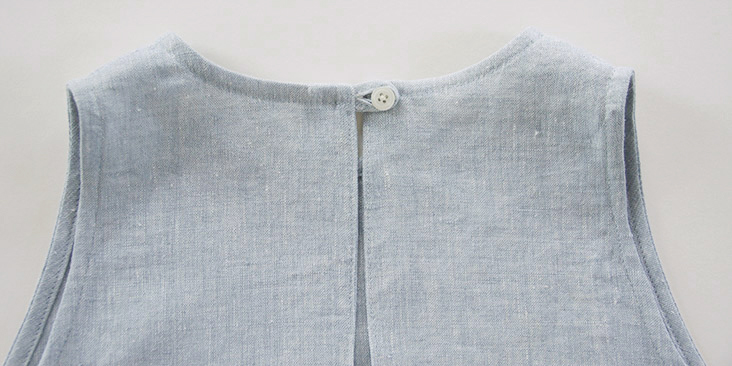
6. Now is the time to attach the button.
7. With the right sides together and the pockets matching up, pin the side seams together.
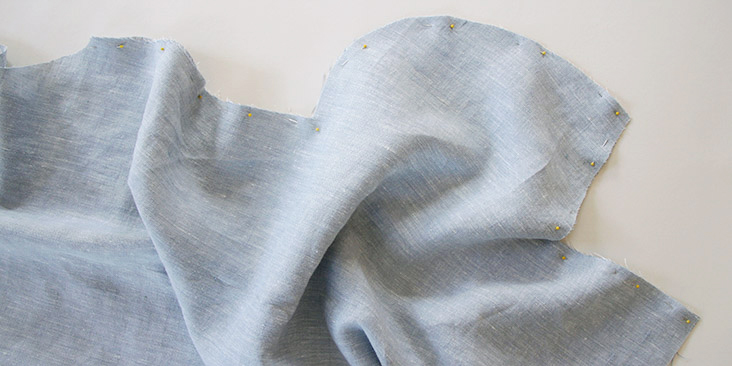
8. Sew at 3/8” (1 cm) seam allowance all along the pinned edges. Trim the seam allowance to 1/4″ (0,6 cm) and serge or zigzag the raw edges together to prevent the fabric from fraying.
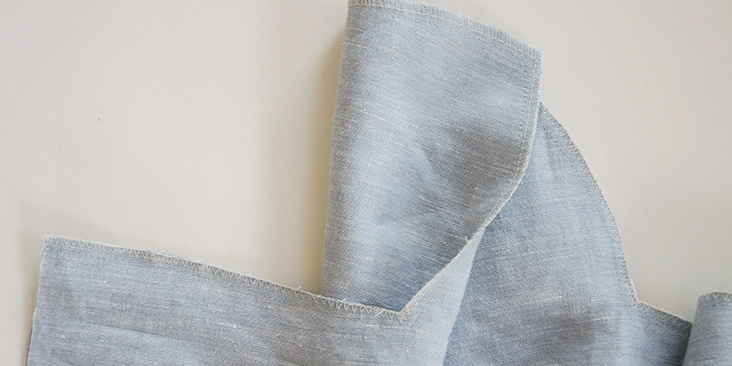
9. Take your ruler and draw a 4″ line from the bottom of your pockets in the continuity of the side seam.
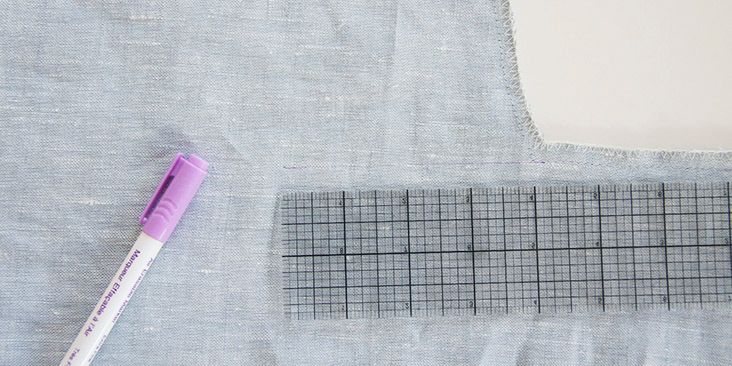
10. Stitch over that line to create a pocket opening. Remember to backstitch at both ends.
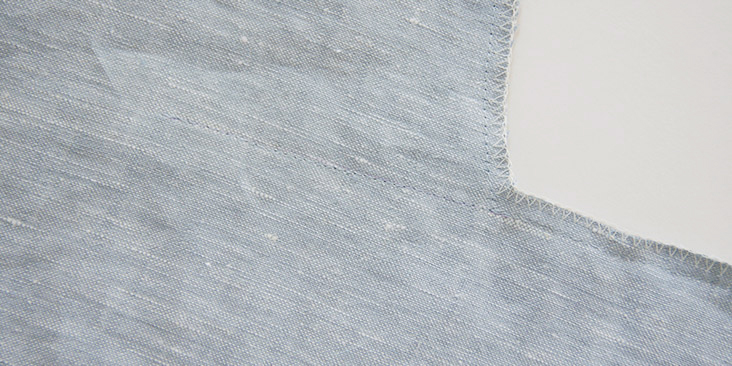
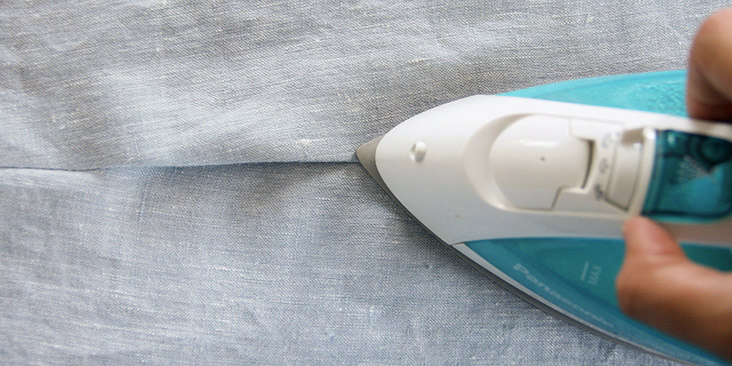
11. Turn the dress right side out and tuck in the pockets. Press the seams flat folding the pockets towards the front of your dress.
12. Working from the wrong side, pin the pockets to the front of your dress. Make sure the back is not caught.
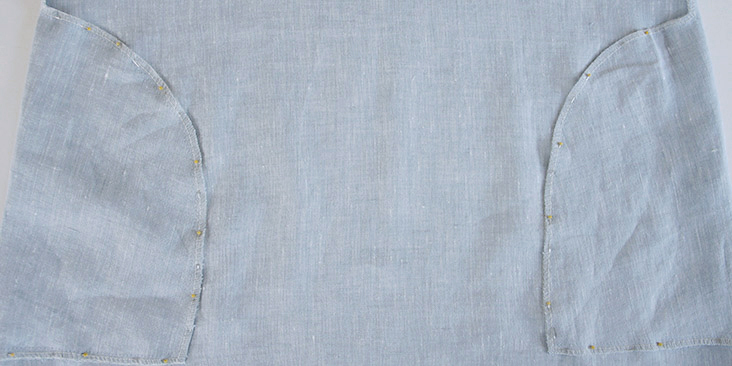
13. Stitch the pockets to the front panel of your dress (make sure the back panel is not caught) just on top of the stitched line that was used to assemble the pocket panels together.
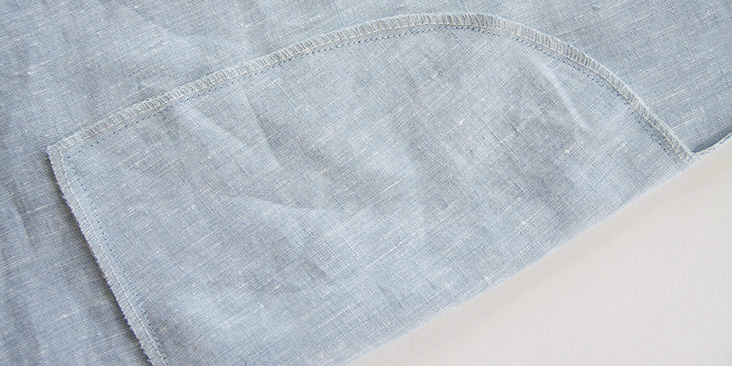
14. Now topstitch the pockets again but this time about 1/8″ from the serged/zig zagged edge. This second line should be parallel to the first one.
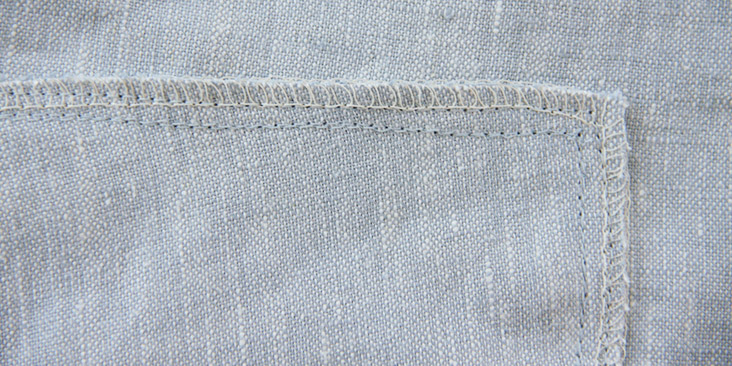
These two stitched lines will create a beautiful outline of your pockets on the right side of the dress. You can even use a different color of the thread for more contrast.
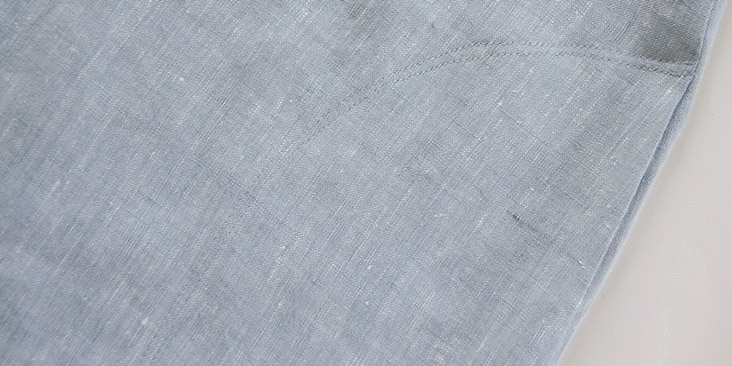
15. Bind the armholes using the same tutorial as in step #5.
The last thing to do is to finish the bottom edge with a rolled hem.
16. First, fold and press the edge of the fabric 3/8″ to the wrong side and then another 1/2″ to enclose the raw edge within this second fold. Pin.
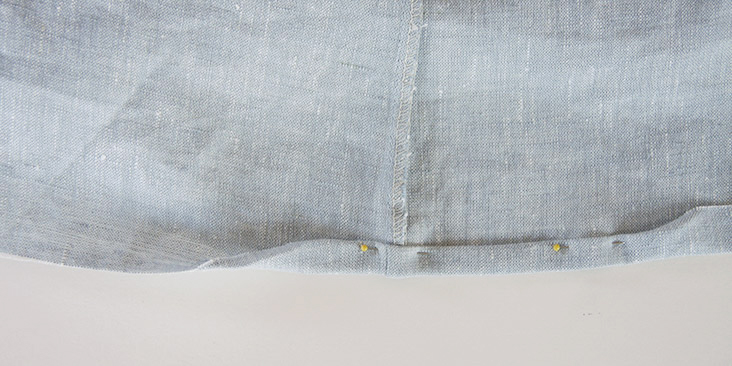
17. Stitch the fold from the wrong side as close to the inner edge as possible. Press.
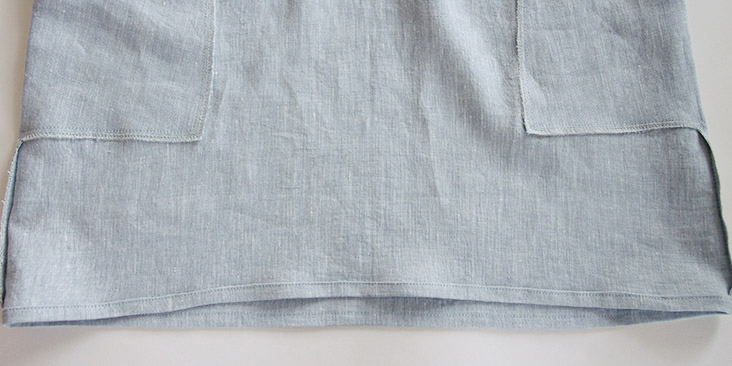
Give the dress a good press and you’re done! Such a great everyday basic that will easily become your wardrobe essential.















70 Comments
Pingback:
8 modèles de vêtements à coudre à partir du linge – couture – ETHAN PIKEPingback:
8 Clothing Patterns to Sew From Linen – Sewingterese scuncio
This was a fun little project. Only took a few hours start to finish.
Lisa Maille
Cancel my previous comment. Evidently I have too many pdf patterns and opened up the wrong one in Adobe. I will have to devise a filing system for pdf patterns
Lisa Maille
I’ve just downloaded the trapeze dress pattern and it only shows small, medium and large as the available sizes not the number sizes that some commenters have mentioned. I didn’t see a size chart so I don’t know what bust sizes the small, medium and large correspond to.
Carolina Nikolic
I´m having trouble printing this. I can´t print it in US letter since this is not available on the printer I´m using. When I print it on A4 in actual size and scale 100% the 2 inch square becomes 4,8 cm instead of 5,08 which is the equivalent to 2 inches. Do you think I can still use the pattern even if there is a 2mm difference ?
Barbara Sandifer
I am having one heck of a time getting this to print at 100% – my printer keeps wanting to print it a 108% even if I change the settings – any help would be appreciated.
Lauren Linen
You could try selecting ‘actual size’ if that is an option for you 🙂 Then double check the printer is recognizing the right printer paper, sometimes mine switches to A4 when I have US Letter in the tray!
Julie Miller
This was fun and EASY to sew up. I found the top of this dress tight across the chest. I measure 36′ and made the 12/14 (37.5″ according to the pattern). Glad I made the first one out of an old shower curtain! Hope to give to a friend it may fit. Sad because it came out very cute…….Now to print the 16/18 to make one for me.
Michelle Caldwell- Shaw
If you are more than a B cup perhaps do a full bust adjustment on the correct size in order to have suffient room in the bust/top area before going up a size.
Patterns, unless they state for multiple cup sizes, are drafted for a B cup.
Jennifer Toews
Hi,
This is going to a silly question. The pattern calls for 1 inch bias tape for the neck and arm holes. Does this mean that when I make the bias tape – I would cut, make pieces 1 inches in width or ? do I add seam allowance? double it? I am a bit confused.
Thanks again,
Jennifer
Lauren Linen
Yes, your total bias tape will be 1″ in width.
Kathleen Smith
1″ after folding the bias tape or before folding the bias tape? Thank you.
Robyn Wright
Before folding. Cut it 1” wide
Planchot Dominique
Bonjour je souhaiterais Faire la robe mona j’ai un tour de poitrine de 96cm quelle taille dois je prendre. Merci pour votre réponse
Pingback:
Mona Trapeze Linen Dress Free Pattern & Tutorial - Do It Yourself For FreeSusan Jo
Lovely dress, look forward to making it. I don’t see the fabric requirements on the pattern…maybe am not looking in the right place. I would also help to have the fabric requirements on the face page(before downloading) or on the blog so that we have a quick view to see whether to proceed to download or not. Thanks
Lauren Linen
Hello, thanks for your feedback. This pattern along with our other older patterns are in the process of getting an update to include all of this information. Thanks for being patient with us while we trawl through our catalogue of over 100 patterns!
For the Mona, 3 yards will suffice for all sizes.
Vicki Morabito
Hi there
I’ve just cut the pattern according to my bust measurement but I’m a little concerned that it might not fit my hips. I’m trying to adjust the pattern but there are no waist or hip line markings. May I suggest you indicate this on the pattern and update. It’s a beautiful dress I guess I’ll have to make a toile first before cutting my linen. Thank you
Lauren Gates
Hello Vicki,
Thanks for your feedback we truly appreciate it. We are in the process of updating some of our older Free patterns to include a more detailed size guide with waist and hip measurements too. I will pass on your feedback to our patterns team and see if we can’t also add these markers to this pattern too.
Given this dress is a trapeze shape, the waist and hip areas aren’t defined in the dress’s ‘free’ shape. So in order to find where your body’s waist and hip fall on this dress, you could measure your waist and hip length from your high shoulder point, and then mark these on the pattern pieces. This will give you an idea of the fit at these key points and help you adjust your toille effectively.
If you’d like any further assistance I’m always happy to help, just email me at; ask@fabrics-store.com
– Lauren
Jane Weisbaum
Whoops, please forgive my previous comment about the armhole binding. I see it now.
Jane
Jane Weisbaum
I am not certain if I should do the binding for the arms holes before sewing up the sides. I don’t normally do it that way. The arm holes are not mentioned in the instructions, but show in the photo before the directions for sewing up the sides. Thanks. I love this sweet little dress and learn so much from your patterns.
Jane
Margaret Scaia
Hi, I’m not seeing the pattern for the arm and neck facings in the pattern PDF
Heidi Ruffalo
I just cut out the 8/10 size but I have no idea if it’s correct as I didn’t see any measurements to go by. Also, in the comments others were asking if the seem allowance is already added or was I supposed to add it. Doesn’t seem like it was ever answered. At this point I feel like I just may have wasted a bunch of really pretty linen and will have a dress that may not fit anyone!
Lauren Gates
Hello Heidi,
All of our Free.pdf patterns from our website have seam allowance included, this listed on the pattern pieces themselves and the tutorial will mention seam allowances as well.
For this pattern we have recommended you choose your size based on your desired finished bust measurement, this is located on the first page of the pattern document.
I’ve sewn two of these dresses myself, and I have also adjusted the pattern for a top version too! So if you have any further questions, please feel free to email me: ask@fabrics-store.com
Michelle Caldwell- Shaw
If you dont see any measurements, print out multiple sizes and measure the pattern ;pieces as those will be the finished garment size.
Stacie Rodrigues
Is the seam allowance built into the pattern? The instructions say “Remember to add seam allowances as indicated in the pattern”. It’s a bit confusing.
Also, when I print the pattern should the quarter circles be right to the edge of the paper or a 1cm or so away from the edge?
Thank you.
Madeline Scholl
I have the same question about the circles. Did you ever solve? I printed 100% and the circle is NOT to the edge of the paper.
Lauren Gates
Hello Madeline, We solved this one. It seems some printers need you to manually set the printer paper to the correct size, even though you have selected ‘actual size’. I had to go into my printer’s advanced settings in the print screen, and manually change it from A4 to letter. So strange!
It is also worth noting, the circles will not be at the edge of your paper. They are designed to have a border around them so the document is compatible for both A4 and letter without having to download different files. to assemble your pattern, you can fold or trim this border away.
if you’d like extra help with this please email me at ask@fabrics-store.com
nedita sanchez
Love this dress, great pattern! I’m only 5’2″ tall, so I made it 2 inches shorter. Next time, I will try to make the pockets 1-2 inches higher and perhaps 1-2 inches shorter, to make it more playful. Thanks for the free pattern!
Masha Karpushina
Thank you for sharing!
Filiz Zevadin
Where to use the interfacing? I just cut the material and tomorrow will be the day to sew this wonderful dress!
Matsuko Friedland
I was looking for this, too! Turns out it’s used for the button loop:
https://blog.fabrics-store.com/2016/09/16/how-to-sew-a-button-loop-tutorial/
Sunly K.
Hi. Thanks for this lovely pattern. However, I must have overlooked something: there is a back neck facing included, but none in the instructions. Just binding all the way, if I’m understanding it correctly. Can you please verify?
Filiz Zevadin
I have the same dilemma…
Sahar Mostafa
Is the pattern still available? Can’t download the pattern for the dress only the pocket is available
Masha Karpushina
Hello Sarah, yes indeed, the link must have broken. But I have replaced it, so if you click on Pattern, it should all work from now on. Also here is the direct link: https://fabrics-store.com/sewing-patterns/mona-trapeze-linen-dress-pattern
Rebecca Schlough
The tutorial under PATTERN states “You can access the dress pattern by following this link HERE and the printable pocket pattern can be found HERE. Remember to add seam allowances as indicated in the pattern.” As I look at it, the pocket pattern is not needed for the Trapeze dress. Also, when looking at the pocket pattern, it states to add seam allowance, but on the pattern it states seam allowance included. This is very confusing…..
Masha Karpushina
Rebecca, please follow the pattern, and ignore the separate pocket link. I’ve removed it, so not to confuse anyone.
Nelly Desiatnikov
I made this dress and love how it turned out! A bit of forewarning, the pockets were really low for me (I’m 5’2) so I had to remove them. If I were to make it again, I’d just print the individual pocket pattern and move it higher. But very easy and fun dress to make! Thanks for sharing!
Alicia Ringstad
Hi, I just made the trapeze dress in 12/14 size. I’m a fairly experienced sewer – there is no way you can get this dress out of 2 yards of fabric due to the way the pocket is attached to the dress, I used about 2.5 yards. Also the tutorial had a separate pattern for pocket 4 pieces which are not used in the dress. That might be a bit confusing and a waste of fabric. Otherwise I LOVE the dress.Your linens are amazing. Thank you!
beth Folz
Does anyone know how to layout the pattern? There were no instructions on how to cut out the pattern. So I am not sure if I am supposed to fold the material wrong sides tog or right sides tog? Since I am new to sewing I am not sure what to do?
Tonya Davillier
I have not seen the pattern so I don’t know the layout instructions. Usually the right side is on the outside. The wrong side is folded inside. If the instructions are to turn a piece of the pattern on the wrong side; that pattern piece will be shaded to indicate it should be on the wrong side.
Elaine Rutledge
I love the pattern. I plan to modify it to a V Back Neck to eliminate the need for a button closure. I have long hair and if wispy ends get caught in a back zipper or button it drives me crazy.
Kim M.
Is this pattern cut out on the bias?
Rima Khusainova
Hello Kim! No, this dress is cut on straight grain.
Laura Sharp
I really love the neckline of this dress and am hoping to perhaps alter it into a pregnancy tank top for this summer and was wondering if you guys thought that it would work as is or if I would need to alter it to fit my growing belly? What are the approximate waistline measurments for sizes for both 4/6 and 8/10. I’m assuming I am closer to a 4/6 right now. Any other suggestions for alterations if you think they may be necessary would be super appreciated!!! (I’m not super advanced in my sewing skills, but I love learning new things!)
Rima Khusainova
Dear Laura, this would make a great maternity tank/dress! I’m not sure about the exact waist measurement without the printed pattern in front of me, but it should be easy to check. Once you’ve printed out the pattern, tape it together and measure the front and the back at the waist level (minus the seam allowances). This would be your full waist. What you could also do is to go for a bigger size for the bottom part and use your usual size for the neck/armholes and then blend the two together (you’ll need to redraw the side seams). Hope this helps and happy sewing!
Laura Sharp
Thank you so much!!! I will be doing that, and it all sounds simple enough for me to accomplish, yay!!! I am super excited to try this pattern out!
Rima Khusainova
Sure, Laura! Good luck and let me know if you need more help 🙂
Laura Sharp
Am I correct in my assumption that the instructions are found right here and not in the printable pattern as a couple other patterns have been?
Julie Miller
I just made this dress very easy but SIZE up because you will have boobs and this is very narrow in that area…….
Amanda
Hi – when clicking on the link to the pattern, it doesn’t seem to be available? Unless I am doing something wrong…
Rima Khusainova
Dear Amanda, thanks for pointing this out to us! It’s all fixed and available now!
www.prohunters.club
I go to see every day some blogs and blogs to read posts, except this web site gives quality based
writing.
Rima Khusainova
Thank you so much for your kind words!
Susan
I made a 4/6 tank and it fit perfectly. If I understand these measurements correctly, I will need to make this dress in a 12/14 in order for it to fit me. I have put the tank pattern on top of the dress pattern to compare, and it does appear that the 4/6 tank pattern is approximately equivalent to the 12/14 dress pattern. Admittedly, I have limited experience sewing, but this disparity confuses me.
Susan
I love the dress, but I am hoping it will fit my daughter because the 10/12 is too big. I think the 8/10 size would be perfect.
Like Lori, I too added 2″ to the length, requiring me to cut the back in two pieces. 2 yards is not long enough to cut both front and back on the fold if you have added 2″in length to both pieces. Because I had a seam at the neck opening in the back I was able to finish the slit by turning under the raw edges in the seam twice and edge stitching all around, saving me the trouble of making the facing. The loop edges are exposed because of that, but I don’t believe anyone will notice. Instead of making bias tape I ironed under 1/8″ of the neck and arm openings, then turned under again and stitched a thin finished edge for all three openings. I am a casual (lazy) seamstress!
Susan
Oops, I made the 12/14, not the 10/12 as stated in comment above.
Susan
It fits her perfectly! I’ll be making more of these for the both of us.
Rima Khusainova
Dear Susan! Thank you so much for sharing your sewing experience with us! I’m sure it’ll help a lot of sewists here! Finding the right size is always tricky! That’s why testing the patterns with muslin (before cutting into linen) is always a great idea!
Stacy D
I would love to know what the measurement in length when the dress is completed. I need to see if I need to add a little length to the dress. Thank you. Once again beautiful patterns and much appreciated multi-size pdf.
This would be my 4th thing that I would make from your linen and patterns. I live in South Florida so warm weather and linen are a perfect combination.
Lori
Stacy, Did you already make the Trapeze Dress? I am 5’8″ and I added 2″ to hit just above the knee. The pattern length for size 8/10 is 35 1/2″ shoulder to hem. If you add length, you need a little more than 2 yards. I cut the back separately and made a seam up the back. It was easier to do the back opening. I love my dress! I made a mock-up in cotton and added an inch at the bust. I am very small in that area so I was surprised that it was tight. I am so happy with the fabric and the product. Hope your project turns out well too!
Lori
Stacy
I would love to see this pattern available in a pdf version, I’m not the best pattern drafter!….Can’t wait for it.
Robin
I’m feeling like I must be a bit thick – I can’t seem to find the yardage requirements. Looks like about 2 yards, but wanted to be sure.
Rima Khusainova
Dear Robin, yes, we are using 2 yards of Medium Weight Linen to make this dress. Check the “materials” section for the rest of the materials you’ll need.
Taryn
Just the classic, simple dress pattern I have been hoping for! Thank you for this tutorial Rima! I also like the choice of fabric and color selected. I have learned SEW much from your tutorials, from different ways to bind a neckline to adding an attractive side slit to my garments. Thank you for all your creative ideas and effort put into making these tutorials. They are an essential part of your website! Keep up the great work. 😀
Rima Khusainova
Dear Taryn! Thank you so much for your comment! I was very touched by your kind words, really and am so happy you liked the pattern and found our sewing tutorials helpful and easy to follow. Thank you!!!
Valerie
I agree – a standing pose would be helpful. I would love if there were short sleeves on this!
Christie
It would be so very helpful to show the dress on the model STANDING so that we could see the lines of the dress and pocket application.