How to Bind a Neckline With a Bias Band Tutorial
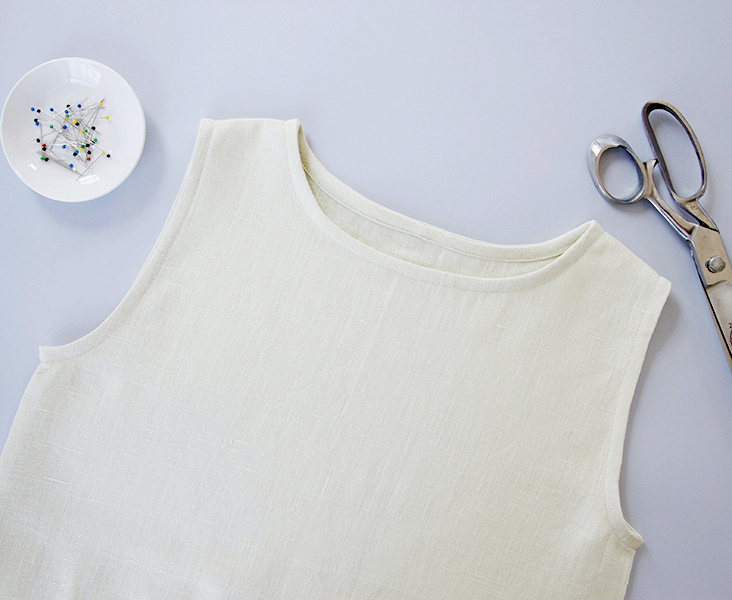
There are several ways to finish a neckline: you can either use a bias tape, invisible (or visible) binding or opt for a facing. But we decided to share with you this very simple band binding method which is a great (and quick) alternative to the traditional techniques. It consists in folding a band of fabric cut on bias in half and then stitching it directly into a neckline opening. The seam allowance is then turned to the wrong side and stitched in place enclosing all the raw edges under the seam. With this method you won’t need to make a bias tape if you don’t have a matching one from the shop or to fold your band twice to hide the raw edges.
It’s a great and neat finish that can be used both for necklines and armholes.
Materials & Tools
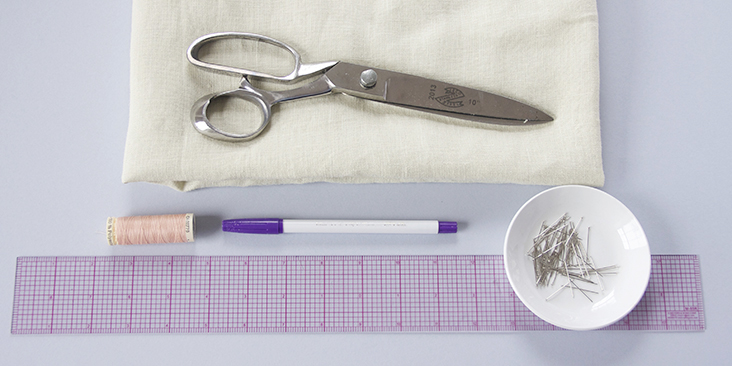
Fabric of your choice. We are using our beautiful medium weight linen in IL019 KRISTA NATURAL Softened.
Matching sewing thread (for the purpose of this tutorial we have used a contrasting colour thread), pins, scissors, ruler, fabric pencil/marker, sewing machine
Difficulty
Beginner
Steps
Note: To avoid shrinking and wrinkling, prewash your fabric and tumble dry it until it is still slightly moist, let it dry in room temperature and then iron.
1. Iron the fabric so it is easier to work with.
2. Let’s start by making our bands of fabric for the binding. Place the fabric flat onto the table and make sure that the selvage line is straight.
3. Draw a diagonal line ( at a 45° angle) across your piece of fabric, from one corner to the opposite corner, using your ruler. Then draw a second parallel line 1,5” apart.
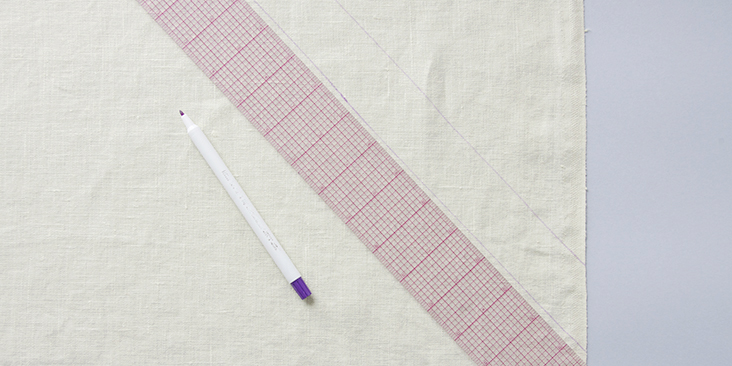
4. Cut your bias band. Try to make a continuous band a few inches longer than your neck opening.
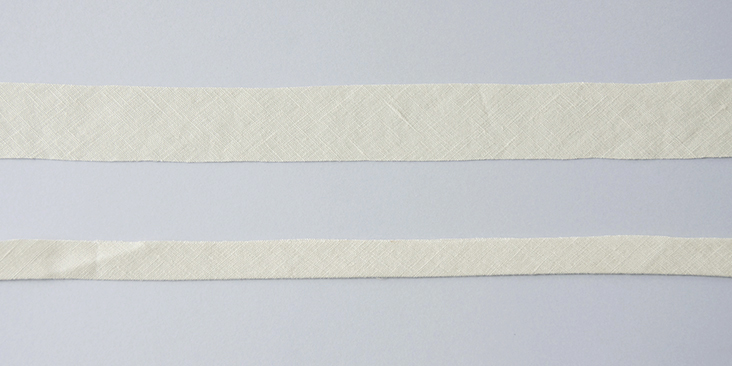
5. Fold it in two lengthwise (wrong sides together) and press. Be careful not to stretch the fabric too much.
6. Prepare your garment by pinning and sewing your shoulder seams right sides together. Note that its best to leave the side seams open for now as it will be easier for you to attach the binding when you have an easy access to the neckline area.
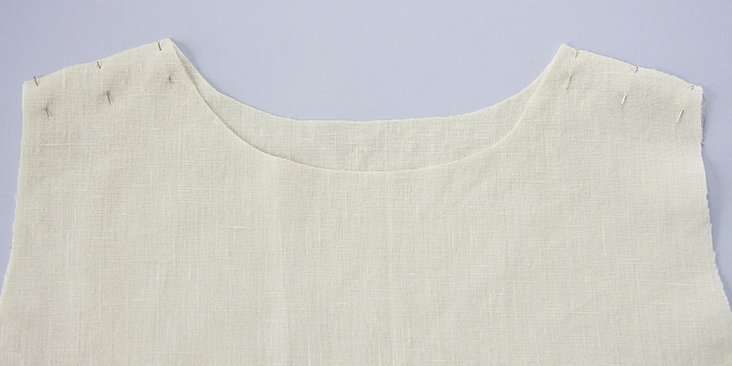
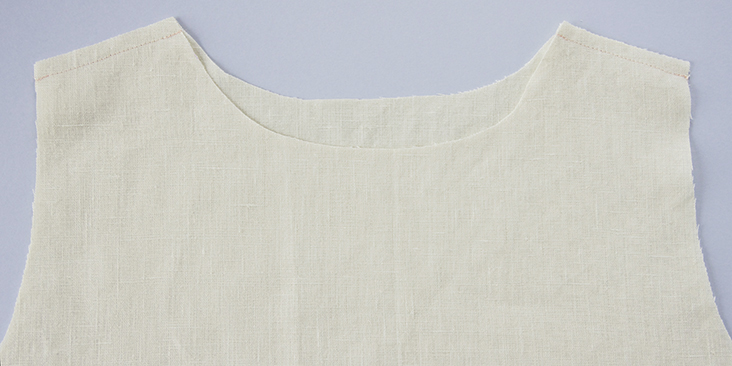
7. Press the seams open and turn your garment right side out.
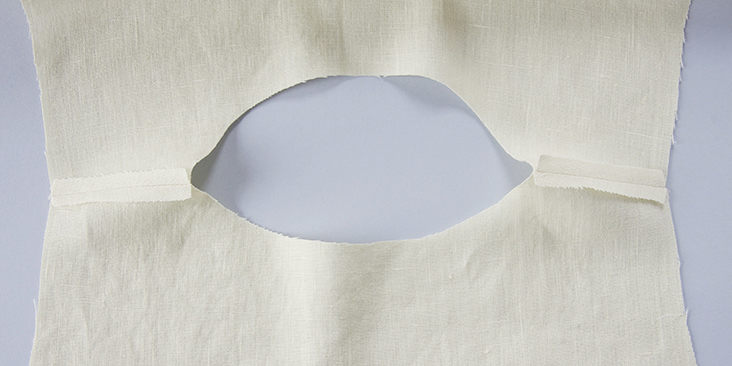
8. Take your bias band (folded in half) and pin it to the right side of your neckline starting and ending in the center back and leaving a couple of inches on each side for the overlap. Make sure that the band is evenly distributed (use as many pins as you need), if it’s too long or too short your neckline may not lay flat.
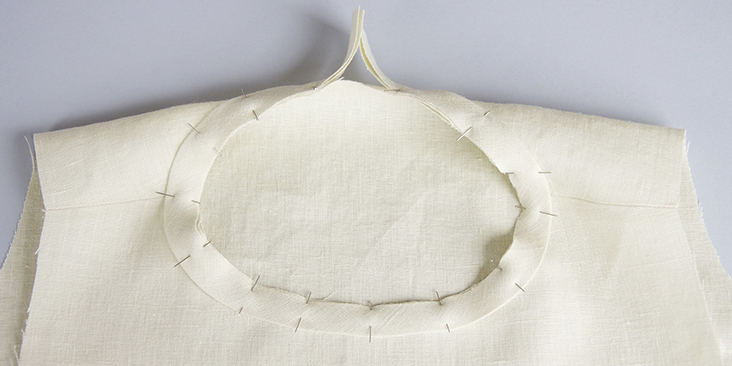
9. When you reach the center back, unfold and overlap the two ends of the band and pin them right sides together to perfectly fit the opening.
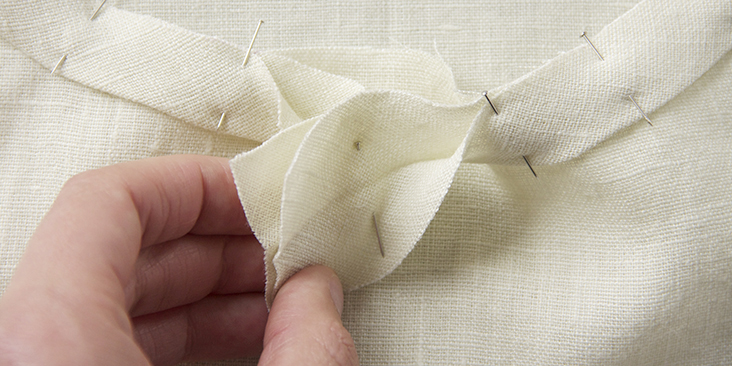
10. Sew along the pinned spot and press it open.
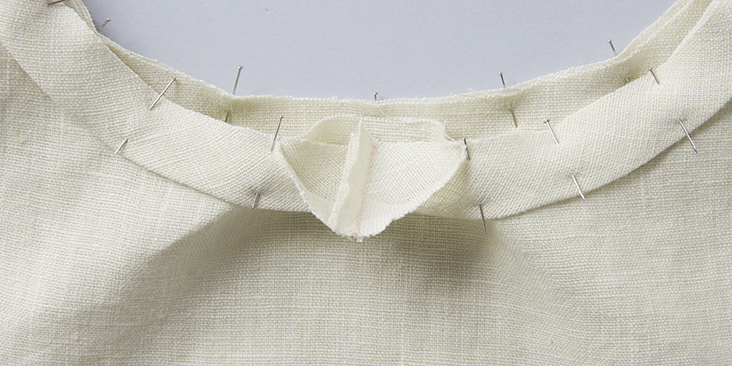
11. Fold the band again and pin it to the neckline.
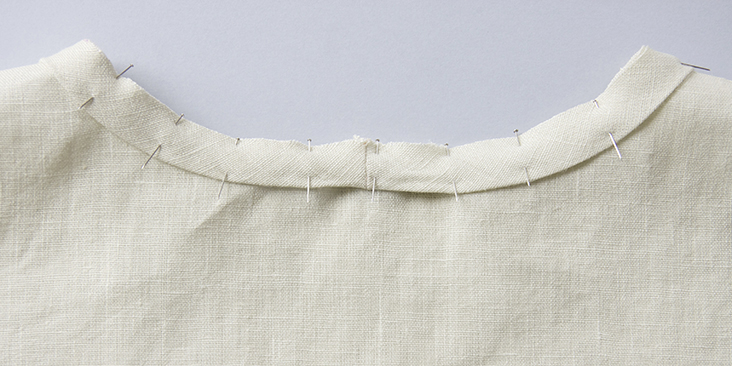
12. Stitch the band to the neckline at the usual 3/8” (1 cm) seam allowance. Start and end at the center back and remember to backstitch. Keep your sewing line parallel to the fold edge (and not to the raw edge).
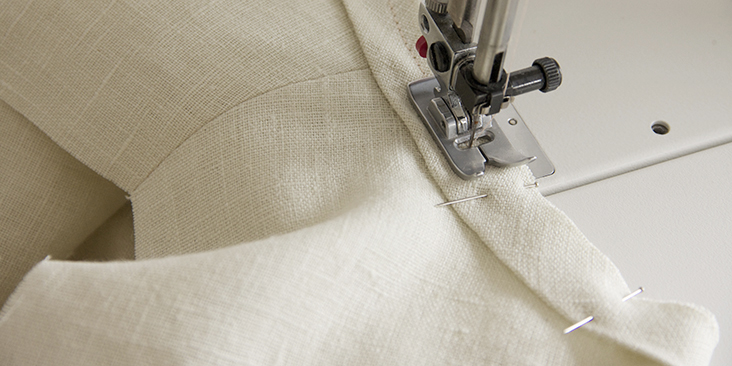
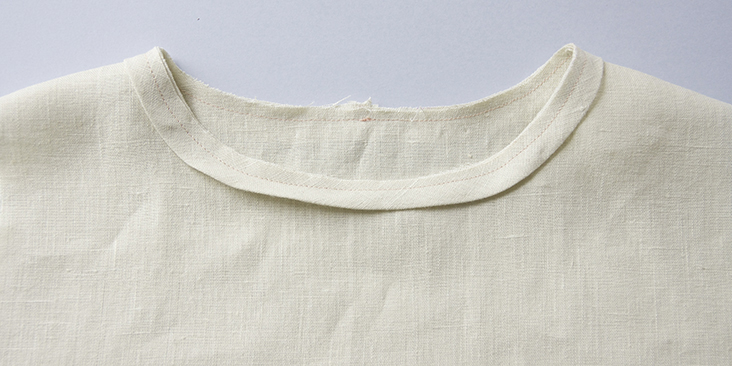
13. Make a few notches along the curves. Take your scissors and clip to (but not through) the stitched line.
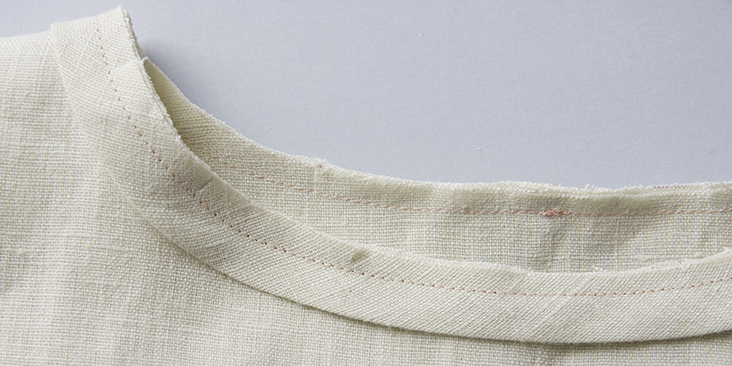
14. Press the binding away from the right side.
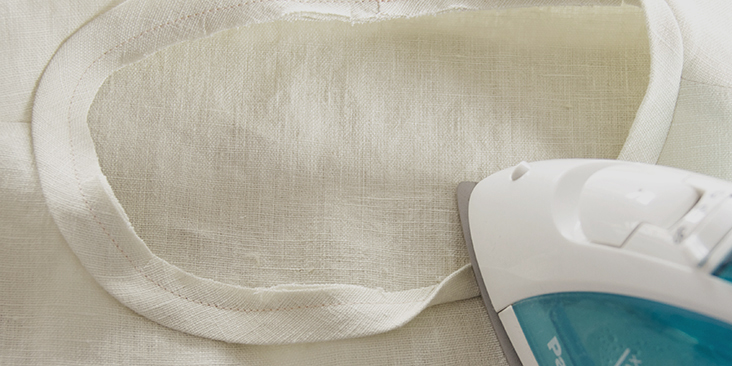
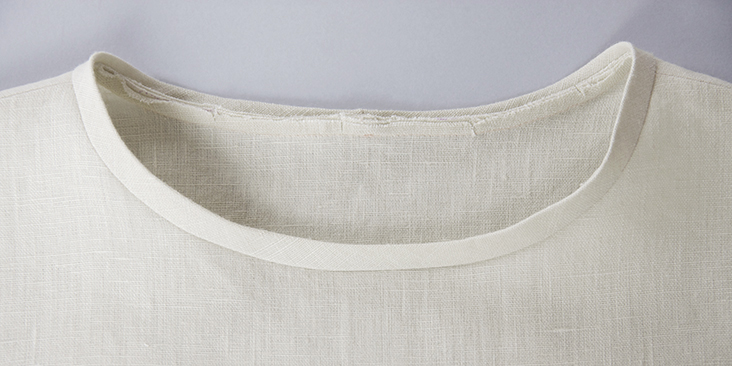
15. Turn your garment wrong side out and carefully press and pin the folded binding to the wrong side to create a neat curve. You don’t want your binding to peak out or be visible from the right side.
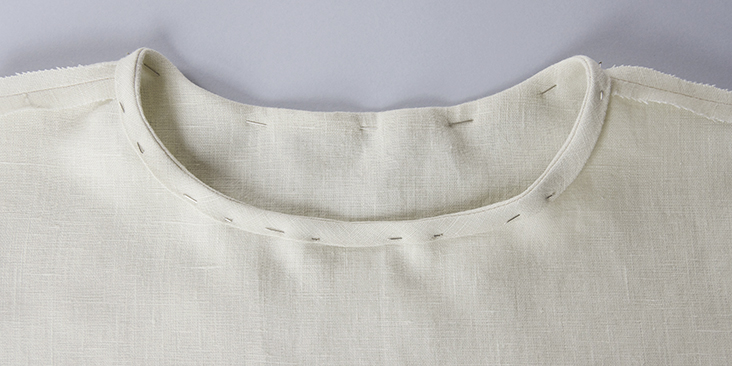
16. Stitch around the entire neckline (starting and ending at the center back) right along the fold of your binding. Again, keep your sewing line parallel to the outer folded edge.
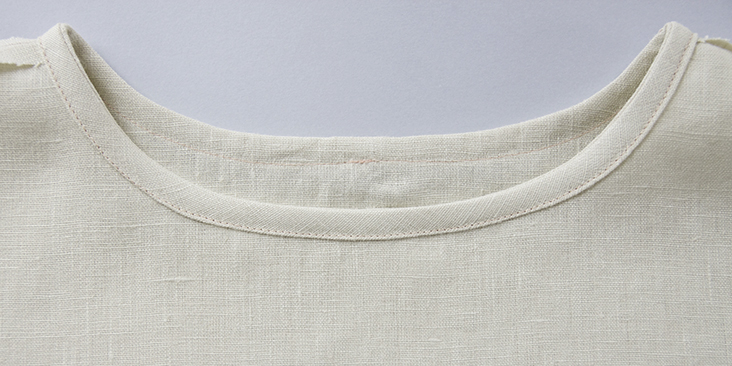
17. Give the neckline a good press and you are all done!
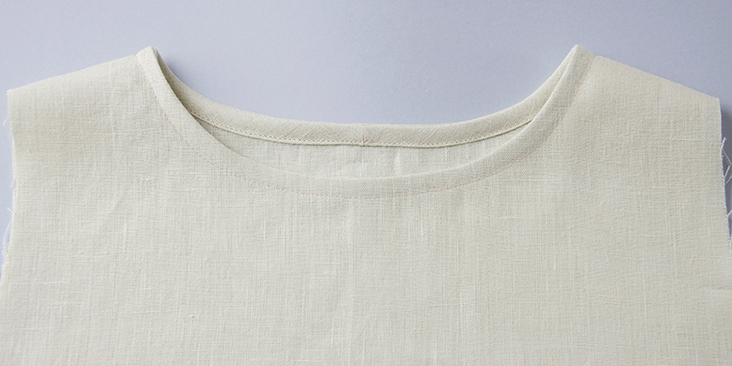
As you can see, all the raw edges are now enclosed and you have your lovely bound neckline.
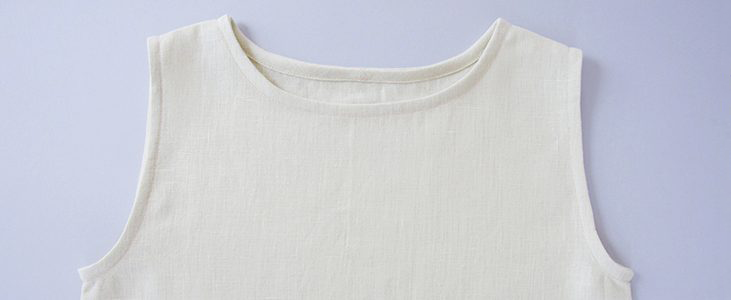
You can also use this technique for binding the armholes.










61 Comments
Heather Robinson
Best neck binding tutorial! Super easy to follow the first time I went through the process. Now I don’t need to refer to the tutorial anymore, it is that easy!
Tamara Johnson
Excellent tutorial! As an advanced beginner, I’ve tackled a few projects with bias binding but none have used this method, which is amazingly easy and the results are great. I can’t imagine that I’d use any other method ever again. Thanks for all the free patterns and clear instructions.
Roxy Lentz
I painfully taught myself this method, except for the way the join the bias on the ends. I also baste the binding in, with needle and thread I will never use for anything else, before sewing so it all relaxes, and the pins aren’t in the way. and sometimes press. Then I fold over and baste again. It is a pain going through the extra steps, but easier in the long run.
Brooke Sycamore
Can I use these instructions for my first hand sewing project?
Miyoung Schuler
Hello, trying my first sewing project (other than curtains) with this pattern. I’d love to try this method of binding my neckline but I’m confused. You lost me between steps 15 and 16. Is there a video of this technique on your website? It would be so very heplful. Thanks!
maggie purnell
Thanks so much for this tutorial, I just made two lovely tops out of linen! The bias binding of the armholes was so much easier and neater than other methods I’ve tried! my body measurements indicated a 10/12 but I made a 12/14 as I wanted a comfortable fit. I knew i’d need a full bust adjustment so I followed your link and it worked perfectly. The darts for the first top were a little high and close together so i followed your advice of laying the cut pattern piece on the body to perfect the apex point! Also… a size D Full bust adjustment gives quite a large dart – it looked like the arm hole would be a weird shape but it worked out fine.
I had a rather pointy boobed dart on the first go so I moved the point back away from the nipple apex – slightly more than suggested on the FBA tutorial and I also curved the end in at the dart point – like a knife edge rather than a straight line to the dart point, which worked perfectly. Thanks again for a great pattern and tutorials. I’m so pleased I now have the perfect pattern for a simple, classic top.
Kim W
Hi there – can’t wait to sew this. I created a muslin and adjusted the neckline down a bit.
Question – does the seam allowance at shoulders and sides allow enough room for French seams, or best to keep with enclosing the raw edge?
Thanks!
Lauren Linen
Hi Kim, Seam allowance for your shoulder seams will depend on your pattern, but the seam allowance included with the binding technique here will suit most seam finishes. Be sure to test this out first if you’re suing thick fabrics.
Matilda Ostow
Hello I am very new to machine sewing so still getting a hang of the lingo! When you say “Keep your sewing line parallel to the fold edge (and not to the raw edge)” where should the edge of the machine foot be lined up with? In the photo that corresponds to that instruction (#12) it looks to me like the edge of the machine foot is “parallel” to the raw edge so I feel confused about which edge I should line up the foot with. Similarly confused by instruction #16 where we are told to “Again, keep your sewing line parallel to the outer folded edge.” Is the outer folded edge the edge further from the inside neckline? Thank you!!!
Lauren Linen
Hello Matilda,
Thanks for your question. The think with sewing machine feet is that they come in different widths so they aren’t always a good metric for accurately instructing people to line it up. Further to this, you can move your needle position horizonally, which would then change the place the outside edge of your presser foot will be lined up.
So in this instance, line up your needle to sew a straight stitch parallel to the fold edge, and instead of using the side of your presser foot as a distance guide for sewing straight lines, pay attention to the folded edge to sew straight.
Sarah Kaiser
I love this pattern! But I always get stuck at the same step. Your comment has been helpful. I’m still a bit confused about the seam allowance. Should I use the 1cm seam allowance as a guide for the folded edge or raw edge (both step 12 and step 16)? Normally, the seam allowance refers to the raw edge, but if I’m supposed to use the folded edge as a guide, should I be sure to keep the distance of 1 cm here? Thanks for your help!
Heidi Dewalt
Will this neckline finish work on a garment with an invisible back zipper?
Lauren Gates
Yes Heidi, Be sure to insert your zipper first, then bind the neckline. You may also like to leave some room at the top of the zipper to turn the fabric down, so you aren’t folding down the zipper teeth which could make the opening bulky.
Cathy Troyer
Do you trim the seam before you fold over? I saw where you said to clip the curves, but wondering about bulk with the seam.
Lauren Gates
For this tutorial, we have only clipped the seam allowances in areas with a high curve to release some tension. We didn’t trim the seam allowance since this fabric isn’t too bulky and the seam allowance provides a nice guide for folding over. You can trim or ‘grade’ your seam allowances if you are using bulky fabrics if you desire.
Amanda Marshall
Thank you for the free pattern, and tutorial. I like the top but I bought the fabric elsewhere due to your high shipping costs. Free shipping for over $1000? – I guess your target market is businesses, not at home hobbyists such as myself as we would never buy that amount of fabric at one time.
Lauren Gates
Hello Amanda, we have free shipping days for purchases over $150 on select days (continental US only), and regular deals which include free shipping which is sent out as part of our mailing list.
I highly recommend signing up for our emails using the form on our main website 🙂
Beth DeBusk
I have found that with the ILOVELINEN code the price of ordering this fabric even with shipping is better or comparable to anything I can get locally and better quality too. I love sewing and wearing it.
Pingback:
Free Pattern Review: Augustina Top from The Fabrics Store – Comedy of ErrorsE Tobin
Thank you for this tutorial. It worked perfectly.
I think I will add contrast color to neckline on my next tee.
emily christine cote
I’m working on the Skye dress right now, and I love this clear tutorial. My question is, what is the purpose of cutting the neck band on the bias? I love the way it looks, but I’m afraid to waste fabric.
Kathleen McMillan
Cutting on the bias gives the fabric a stretchiness that it doesn’t have when cut on the grain. The stretch allows you to attach the strip to a curved neckline. You can save fabric by joining sections of bias strip to make one piece that is long enough to fit around the neck. Since the bias strip will end up inside the neckline, the seams where pieces join won’t show. Hope this helps.
emily christine cote
Thank you Kathleen! When I actually did it, all of those things started to make sense to me. Thank you for the clarity.
Jess Martens
Loved using this tutorial while making the Agustina top! I’m quite new to sewing and this was so easy to understand. Wondering if this technique would work well with satin fabric? ..worried it might be bulkier than when using regular single-fold bias tape technique?
Judy
I am making a blouse for my daughter and been stuck on the neckline. I am so pleased to see this easy application. Going to finish asap. Thank you so very much.
Rima Khusainova
This method is the easiest ever for binding necklines, you’ll see! Happy sewing and good luck with your blouse!
Jacqueline
Does your pattern include a seam allowance? if so how much?
Rima Khusainova
Dear Jacqueline, yes, in these instructions we are using our standard 3/8″ seam allowances that are included in the pattern.
Cynthia Taylor-Luce
I find that the joint lays smoother if you join it on a 45 degree angle rather than a straight seam. It’s a little more fiddly but I’m much happier with the result. That’s how I join bias on armholes and hem edges too, and the joint is practically invisible.
Sharon P. Reesman
I am planning to do a linen top and this tutorial will make it much easier! Which linen did you use for this top?
Rima Khusainova
Dear Sharon, for this tutorial we’ve used our beautiful medium weight linen in IL019 KRISTA NATURAL Softened – https://fabrics-store.com/fabrics/linen-fabric-IL019-krista-natural-softened-middle/
Maria Eugenia
I’ve always felt intimidated by linen. Your tutorials give me confidence. Great site!
Rima Khusainova
Thank you so much for your comment! Sewing with linen is fun! I’d say the key to successful linen projects is a lot of ironing 🙂
Denise
Excellent tutorial. Definitely pinning this one!!
Rima Khusainova
Thank you so much for your nice words Denise!
vernie
Thank you for the excellent instructions for the neckline. Must follow them for my next garment.
Rima Khusainova
You are very welcome Vernie! Glad to hear you found the tutorial useful.
Tracey
Thank you, thank you, thank you! Just finished a beautiful white handkerchief linen summer shirt using this technique. The pattern called for a facing, but the fabric is slightly transparent and this method finished the neckline beautifully.
Very grateful for your tutorial:)
Rima Khusainova
Dear Tracey! I was so happy to read this comment, thank YOU! I’m really glad you found it useful and that you are pleased with your results!
Patty S.
Thank you, Rima, great tutorial! How wide did you cut your bias binding strip?
Rima Khusainova
Thank you Patty! Since I wanted i wanted my finished binding to be not too wide, I cut a 1.5″ strip of fabric on bias. But you can adjust the width depending on your design. If you want a larger binding, cut a larger strip and vice versa.
Christina
Very nice tutorial,classic.Can you give suggestions for patterns that are simple clean construction like your demo top? Thank you
Rima Khusainova
Dear Christina, I invite you to check our TUTORIALS section where you’ll definitively find some inspiration for using this binding method. I’m currently preparing a tutorial for a ruffle tank top that has exactly the same shape as the demo top and that will be posted shortly.
Veronica
I learned this process about two years ago and it is now my go-to method. Very easy and results in a neat and fast finish. I also like to stretch the bias tape on some garments to add a little ease if needed. Terrific tutorial!
Rima Khusainova
Thank you Veronica! This method is the best!
AJones
Hallelujah! I have always avoided that sort of neckline. Very helpful and great results.
Rima Khusainova
Glad we could be of help!
Helene Chutjian
Hi, and thanks. I have sewn many necklines over many years using only my ead for directions but you have shown me an easier way. I will use this. Thanks again.
Rima Khusainova
Thank you Helene! Glad to hear that you find this tutorial useful!
Ivy
Very helpful! I can’t wait to try this on my next nightgown.
Anni
Great Tutorial. Thanks!
Rima Khusainova
Thank you Anni!
Paulette Hackman
Will this work on a V neck?. Any tips for the point? I like this type of finish much better than a facing. Thanks
,
Rima Khusainova
Hi Paulette! It’s possible but you’ll need to do a mitered corner (fold the band to create a V-corner). I think it’s a great suggestion for a separate tutorial 🙂
Paulette
I’d like that….
Michele
I read the instructions. There were no photo’s though.
Rima Khusainova
Dear Michele, this must be some technical issue, the photos are there but are probably taking some time to load. Have you tried to use a different browser or relaunch it?
Cynthia
Can’t wait to try this. It looks considerably easier than my current method! Thank you!
Rima Khusainova
Thank you Cynthia! It is the easiest binding method that I know and it always gives a very neat finish.
Willa
This would also be nice done on the outside of the garment rather than the inside. Also nice either way done in contrast. Linen is so very easy to manipulate for something like this.
Rima Khusainova
Dear Willa! Yes, indeed! It would work great if you want to add some contrasting color to the neckline!