Linen Block Dress Tutorial
If you are anything like me, you would have gathered a generous heap of fabric cut offs over time. You might also be a fan of our Doggie Bag cut offs. In any case, this tutorial is meant to use those very-hard-to-use-for-anything bits of fabric you don’t want to throw away. A ‘ girl can never have too many dresses, so we are showing you how to make a simple dress shape with the addition of color blocking to use up’ left over fabric. Let us know how you get on.
Materials
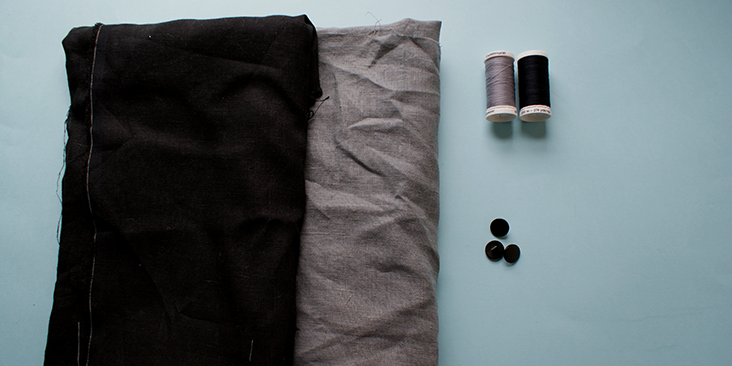
1 yard’ of’ IL019 Asphalt Softened
1 yard of IL019 Black Softened
Matching sewing thread
Buttons
Tools
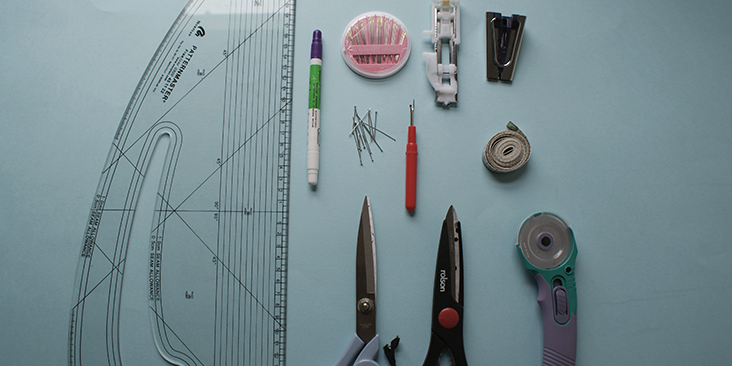
Pattern master, pattern paper
Paper scissors, fabric scissors
Fabric marker, pins, tape measure
Bias binding tape foot, rotary cutter
Button hole sewing foot
Time
5-6′ hours
Difficulty
Intermediate
Step
Note: Prewash your fabric and tumble dry it until it is still slightly moist, let this dry in room temperature. If you are using cut offs, these fabric would be washes already, so just give them a good iron.
1. Iron the fabric so it is easier to work with
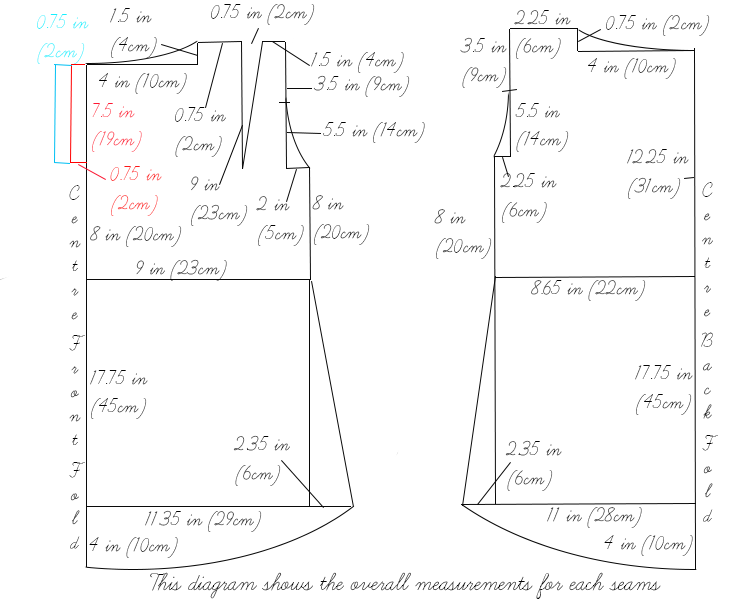
2. The diagram shows the pattern for a size US8-10 (UK12-14). Remember to add 3/8in (1cm) seam allowance around all panels. If you need help to grade your pattern, please follow this tutorial. It will be useful to notch the centre point on the color blocking panels to allow matching easier. Due to the nature of the diagrams being quite complicated, I have created three different graphs to show you different measurements.
The first diagram shows you the overall measurements for all the seams. This is to use if you want to draft the dress blocks as a whole, and then separate each colour block sections, and then add on the seam allowance separately.
Note: As you can see below on the left- there is an extra area on the Front Bodice panel’ colored’ in Red and Blue. The red represents extra material you need to fold away in order to create the button stand on the Front Bodice. The blue represents further extra material you need for the overlapping side of the panel for the button stand. If you find this confusing, scroll down to step 5 for photos’ to help you understand.
This second diagram is for those brave souls, who want to draft out each individual color block from the start, this includes all the measurements you need to do so, straight out of the gate. The advantage of doing it this way, is you can add on your seam allowance as you draft out each panel without having to copy and redo them.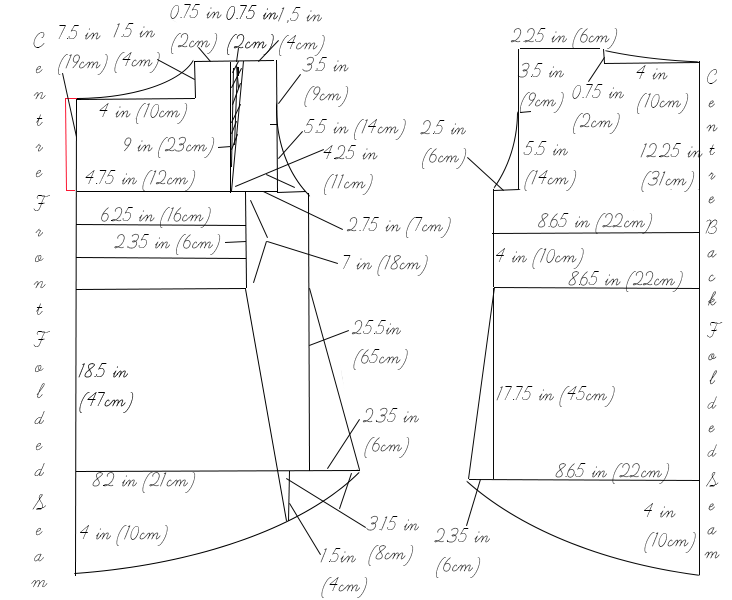
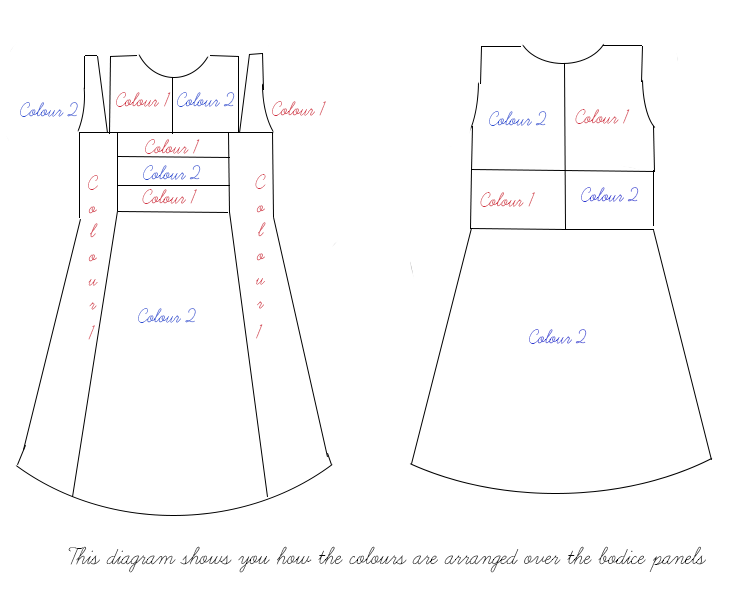
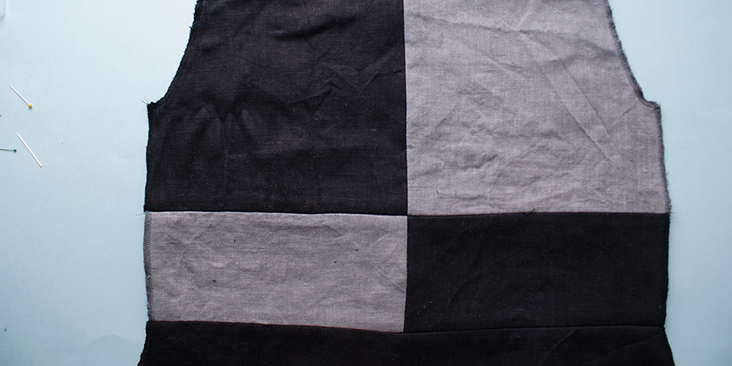
This third diagram shows you the overall color blocking order for the dress. I am only using two colors for this tutorial, however, this design is a tool’ to inspire you, so feel free to work out your own color blocking combination. This diagram is optional for you to follow.
3. Use a serger, or choose your own method to protect the seams from fraying. Make sure the method you choose does not add weight to the fabric.
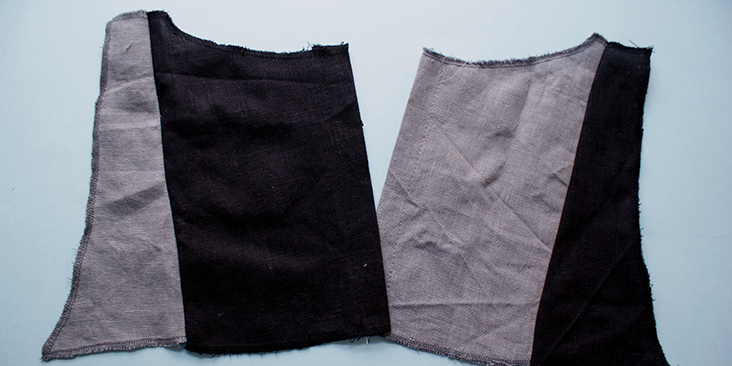
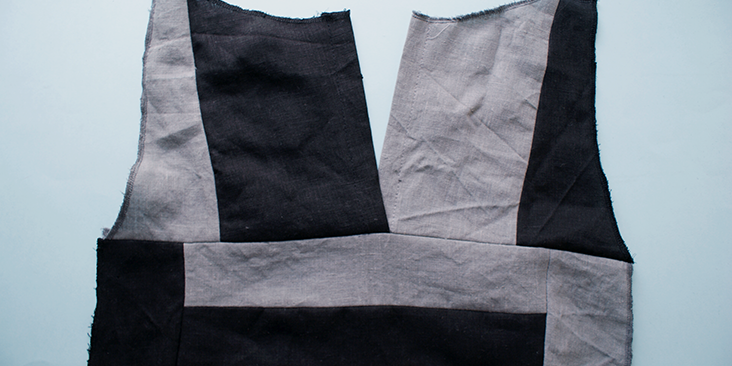
4. Following the above diagram, join together all the panels for the front bodice, and back bodice, sew them together whilst matching all the centre notches.
5. For the top front panels that are meant to be left open, press the given measurement of the button stand inwards, onto its wrong side and top stitch over this on the right side. Then pin these two panels onto the rest of the bodice accordingly, making sure one panel overlaps the other as this is where the buttons are going to be sewn onto. Press all the sewn seams.
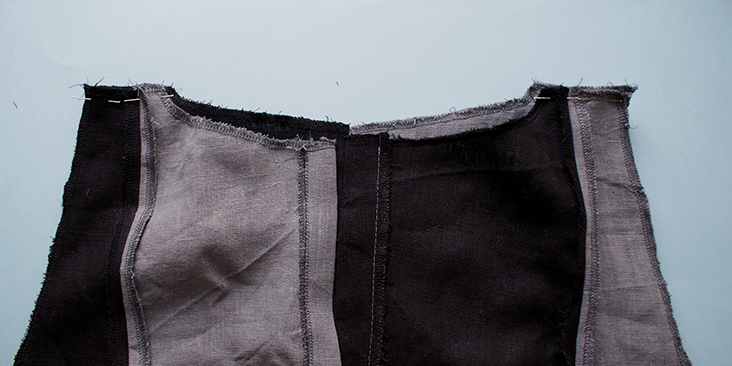
6. Once the front and the back bodice have been assembled, with the wrong side of the panels facing outwards, pin together the shoulder seams and stitch. Then press.
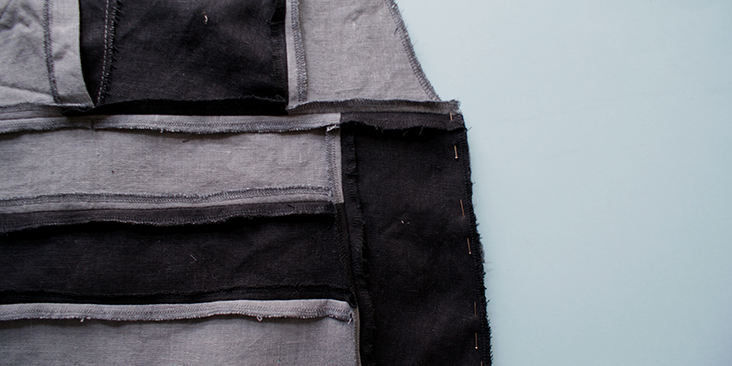
7. Next, pin together the side seams of the dress and sew them together, and press it open.
8. Next, following this tutorial, create about 1 yard of binding tape from IL019 Asphalt Linen, and 0.5 yard from IL019 Black Linen.
9. First, proceed to bind around the armhole of the dress first.
10. Leave’ about 1.15 inch (3cm) of tail unpinned, then process to pin the tape along the curved edge, leave around 1.5 inch (4cm) of gap from the beginning of the pinning and leaving about 1.15 inch (3cm) of tails at the end of pinning as well.
11. Stitch along this pinned edge.
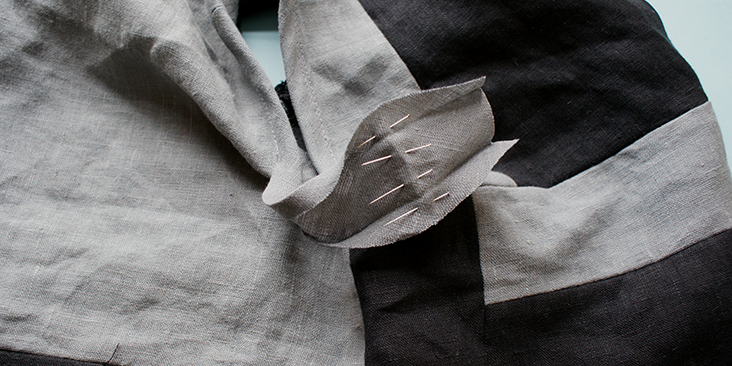
12. Then, manually match up the remaining unpinned edge and fold the tape backwards, forming a distinctive folding line.
13. With the wrong side of the tape facing outwards, pin along this folded line. Stitch on that and press. Trim away any excessive fabric.
14.’ Refold the tape onto its right side and pin onto the remaining hem, top stitched over and press.
15. Repeat this for the other armhole.
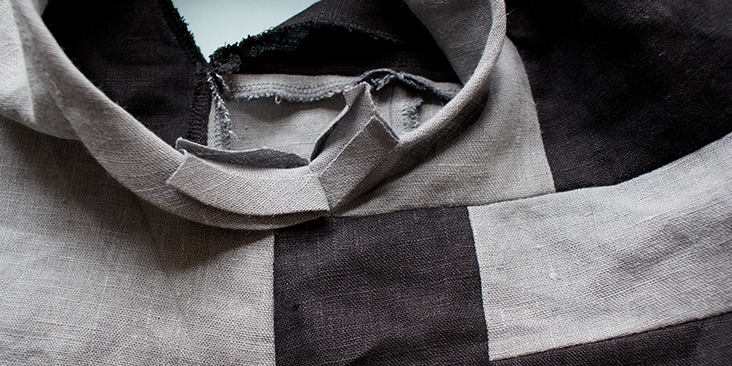
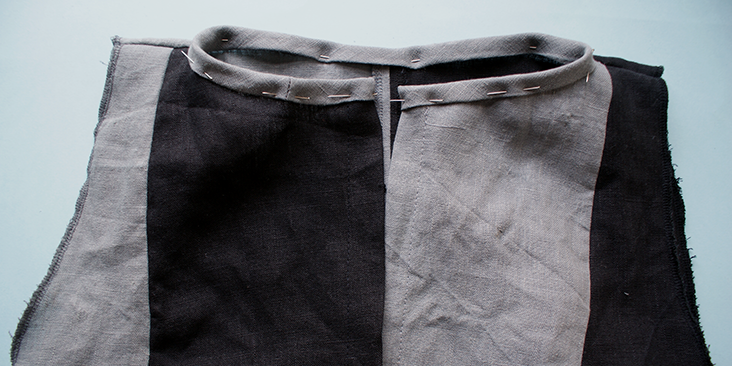
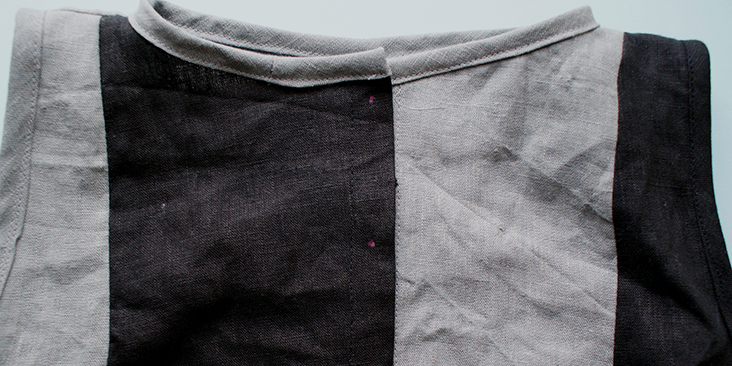
16. For the collar, I will pick the lighter colour, but you can always decide for your own design. Fold the beginning of the tape inwards to secure its placement, and then pin the tape all along the collar. Fold the end of the tape inwards again and make sure there is no space. Top stitch along and press the curved seam.
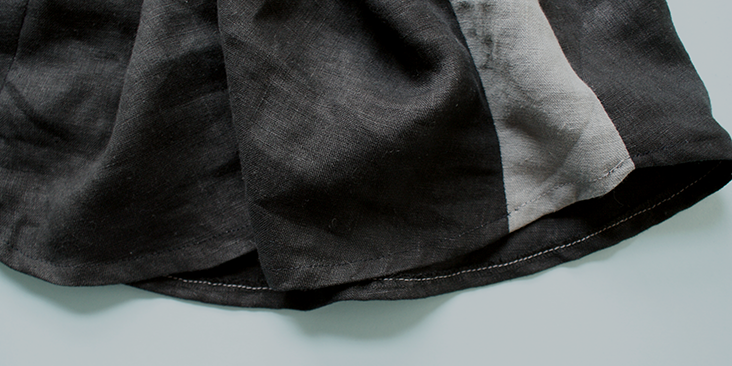
17.’ Then, press the hem of the skirt panels onto its wrong side and top stitch over these edges.
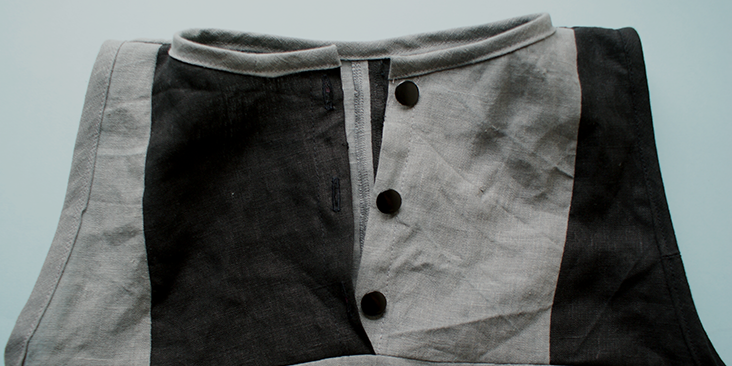
18. Following this tutorial,’ mark and create the essential numbers of buttonholes on the button stand of the overlapping front panel. (For this tutorial, I have opted for 3)
19. Then, following this tutorial, at the corresponding part of the panel below, sew on the right amount of buttons.
















5 Comments
Marilyn
Lovely design and very clear instructions. Thank you!
Hunny13
Charming! Thank you 🙂
Deepika
What a chic looking dress. Thanks for the tutorial.
Sophie
Cute! I’d just leave the collar as is and omit the buttons and buttonholes.
Audrey
I really like this color block design on this sleeveless shirtdress style. I hoard my linen scraps. I will have to get them out and play around. What fun! Thanks for the tutorial.