How to Grade a Pattern Tutorial
Following on from our previous tutorial, this week we will look at’ how you can’ grade a pattern.
This’ tutorial is’ aimed at those who are new to sewing, therefor the methods shown will cover the most basic techniques. In the future, we will revisit methods of grading for more complex seams or patterns.
Continuing on from the previous tutorial, we will be grading the bodice of a dress tutorial which we will post next week.
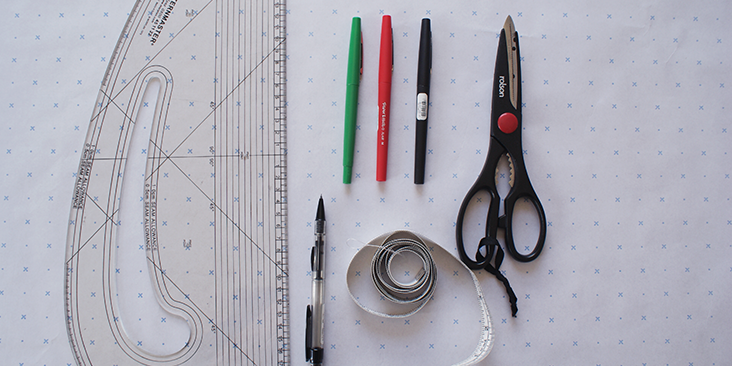
Tools
Pattern Paper
Pens (in various colours if it helps)
Tape measure
Pattern master/French curve
Paper scissors
For the pattern paper, it is always better to have a long continuous roll, or a big piece of paper. However if you do not have access to it, you can always attach smaller pieces of paper together with sellotape. Also having markings on your pattern paper will help a great deal when you are drawing straight lines.
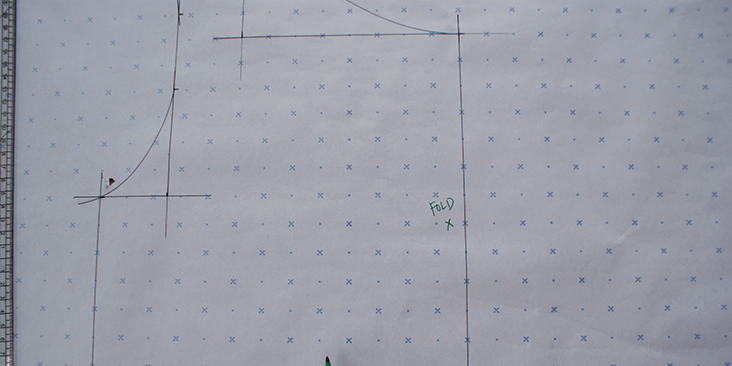
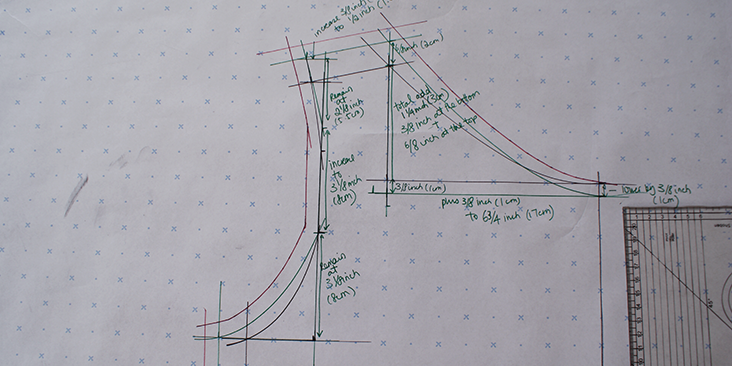
Below is the pattern diagram depicting the front panel of a bodice pattern.
1. After drafting this pattern, following our‘ tutorial from last week, you begin by making sure you won’t tamper with the centre seam. This is because when you are enlarging a pattern, you always want to expand it outwards, instead of inwards.
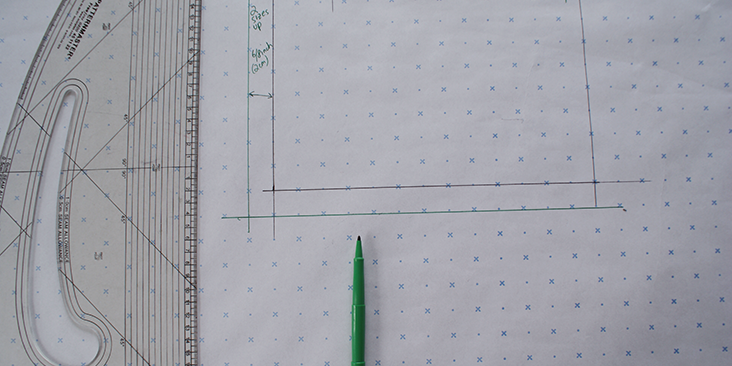
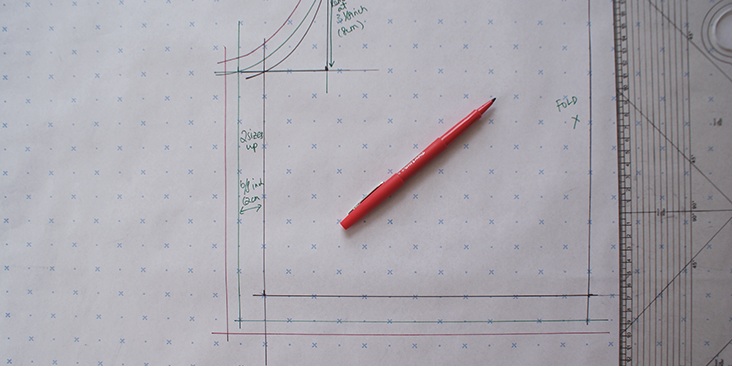
2. Following the specification of the tutorial, work on the straight seams and expand the bottom and side seams. In this tutorial we have decided to grade’ the pattern up by 2 sizes and will add 3/4 inch (2cm) to the specified seams.
3. For the width of the armhole, you want to expand it by adding to it from the side seam, without tampering with the inner part of the curve. So we will just add 3/4inch (2cm) from the already marked side seam to the original start point of the width.
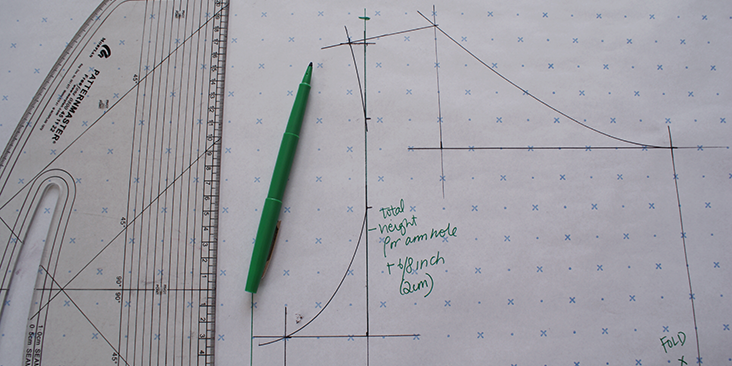
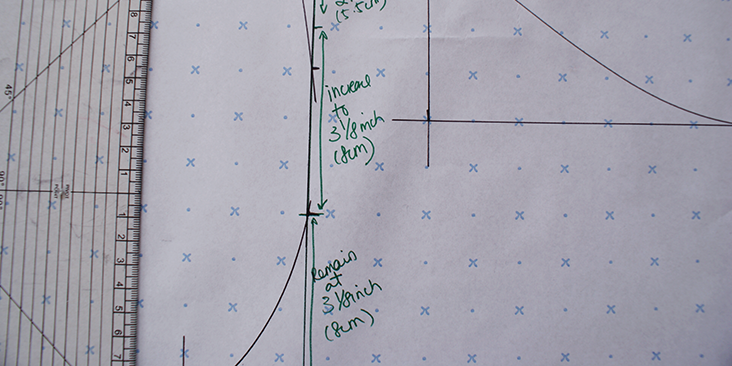
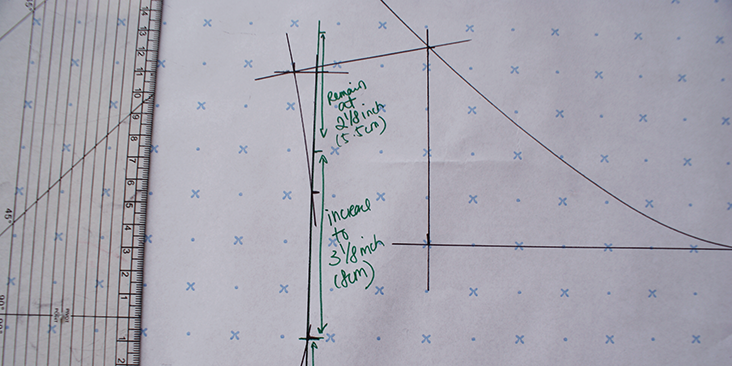
4. Next, increase the length/height of the armhole. When working on a curve, you never want the beginning and the end of the curve to have expanded the same distance, as this will just have an effect of adding on seam allowance and doesn’t increase the size of the opening. So for this tutorial, as we have broken the length of the armhole into three parts, we will keep the bottom and top part the same length, only adding in 3/4inch (2cm) to the middle part (also the straight seam) of the armhole seam.
5. For the bottom section of the armhole curve, just use a french curve and join the side seam and the start of this section. Making sure the curve is wider than previously marked.
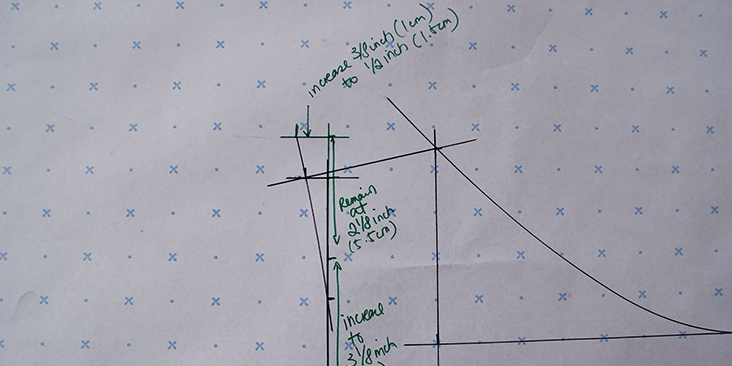
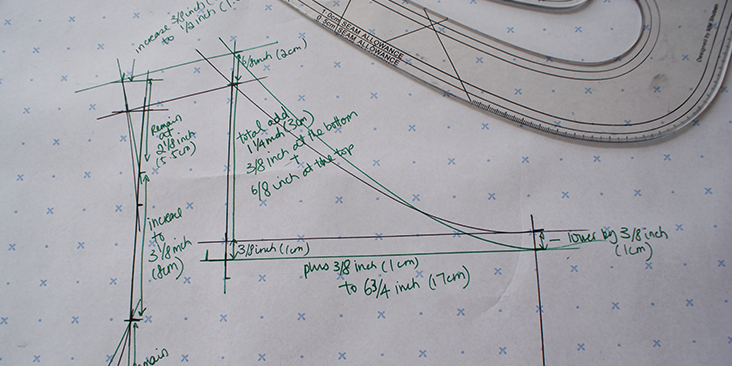
6. For the top of the armhole, increase the width of the armhole (from the top point of its length) by 3/8 inch – 1/2 inch depending how much more coverage you would like on your shoulder strap. This new measurement is done at a right angle to the armhole length.
7. Next, join the two points with a french curve, again remembering the curve to be wider than the previously marked one.
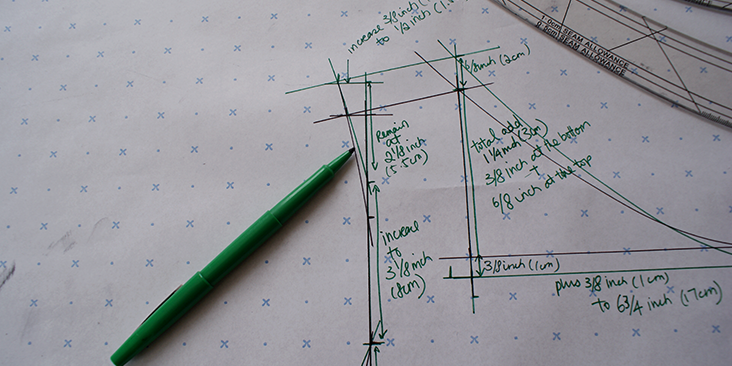
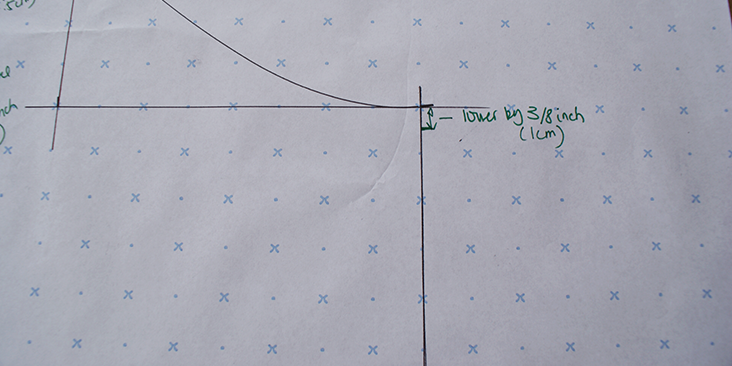
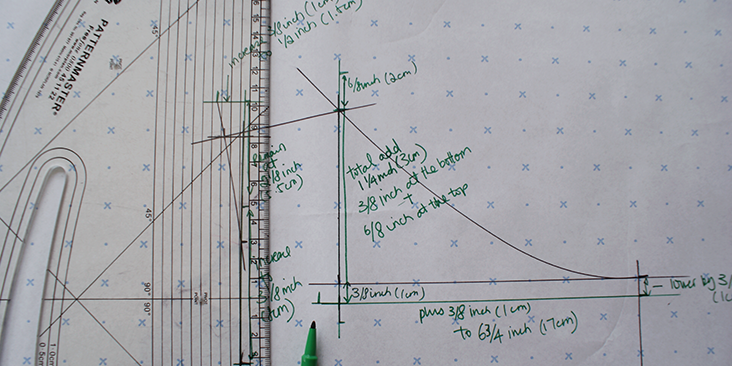
8. For the collar, this is a little trickier as you do not add the usual 3/8 inch (1cm) per size to expand its curve because your chest and neck area does not measure the same way as your bust and waist would. So instead, you will add half of what you need for your required size, and add it below the seam indicated on the pattern diagram. So in this tutorial, we will lower the width of collar seam by 3/8 inch (1cm).
9. For its height, aside from adding on the 3/8 inch (1cm) extra from lowering the width seam, you will also add on 3/4 inch (2cm) at the top because not only will the collar need to be bigger, the strap will need to be longer in order to go across the shoulder.
10. Join the top of the new height seam to the new lowered width seam with a french curve. Also, join the new width of the top section of armhole to the new point for the collar height. Because both of these seams were increased by 3/4 inch (2cm) in terms of height, this should lie parallel to the original shoulder seam.
11. Now following the previous tutorial, add on the seam allowance to the new graded seams of the pattern.
With this tutorial, you will now be able to draft plenty more patterns without difficulties and realise some of the projects which you might not have been able to complete before.
Also, check out our great range of linens and see what you would like to create next.











24 Comments
Fay
I am sorry but. I still don’t understand but how much should you increase by per size
Harriette
So incredibly grateful for these beautiful FREE, treasure of a trove sewing patterns. Even tho the patterns aren’t in my 10-12 Uk size, I found this tutorial very helpful, along with some extra googling. Thanks for posting this tutorial, anything is helpful. I love all the patterns and always excited to see whats new. Love your work.
Molly
I am a size 0 and would love to grade this pattern to my size, but this only shows how to grade up, there’s no info about how many inches you would reduce the pattern to grade down and there’s notthing that explains why grading up 2 sizes means adding 3/4 inch. A chart that showed how many inches to increase and decrease a size 6/8 pattern would be the minimum I’d hope for. This is really not easy stuff! I love the dresses you offer but non of them have graded patterns for my size! I’m ready to buy linen for all of these patterns if I could get my size easily printed out. I think many people on this forum would feel the same way!
AmyCat =^.^=
I agree with all the people asking for larger sizes and instructions on sizing down as well as up. Upsizing a pattern more than 10 sizes is problematic!
I’d suggest making three sizes: the Small (6-8) you’re offering now, a Large, and a 2XL.
Another thing to consider: for plus sizes, sometimes adding side gores, underarm gussets, &/or additional panels will work better than just “upsizing” the existing pattern pieces.
Chrystal
On adjusting a pattern that is already designed I highly recommend Fitting Finesse by Nancy Zeeman
That is where I started when I wanted to learn how. Her method uses the pattern to draw the lines….easy peasy.
Gail
Providing patterns in plus sizes would certainly increase interest in the website, and sales.
Masha Karpushina
Hello, Gail
we do have PDF multi sized patterns for some of our most popular patterns. You can access them here: http://www.fabrics-store.com/first.php?goto=sewing_patterns
Joan
PLEASE show us how to grade down. If you show both ways, then everyone can grade up or down as needed. Not everyone wants to grade larger. Some of us are smaller. Thank you!
Joan
Or smaller grading techniques for this of us who want to go smaller
gayle
I agree. Very discouraged that you don’t at least offer size 14-16
Robin Beeson
You need to have a variety of bigger sizes. Us beginners find it intimidate to grade a pattern then have cut your fabric only to find it is too small and you’ve wasted time and materials
Masha Karpushina
Dear Robin, all our multi sized PDF patterns are here: http://www.fabrics-store.com/first.php?goto=sewing_patterns
Christina
I wish you had some plus sizes or at least somewhat larger sizes we could work from to enlarge. The average US woman is a lot bigger than 4/6.
Masha Karpushina
Dear Christina, try these patterns: http://www.fabrics-store.com/first.php?goto=sewing_patterns
Georgene Bodis
The printed tutorial stops at page 9. What do you do after page 9
KImberly hInes
How do I make the pattern smaller
Nancy
What to do if you want to make a pattern smaller?
Joan
AGREED!
Leslie
Do you have a general size guide for sizes larger than US4/6?
Janet
Since manufacturer’s sizing varies, when you say your starting size is a 6/8, what body measurements are you using? Also, how much ease do you allow on your patterns?
Thank you.
Karen Flagg
Hi Janet, I am a US 6/8 according to these patterns, and my measurements are 33/34, 28 1/2, 35
Deborah Newman
This is a good way to explain how to expand to larger sizes. As an extra suggestion, if you want to make it even larger, it is sometimes easier for a beginner to grade the 2 sizes up first and then trace that off and grade up again using the same process until the desired size is reached. The mid armhole should increase a little when expanding 4 or more sizes, whatever the width of the shoulder is, approximately 1/8″ in the tutorial. Each persons body varies, so it is important to cut and sew a sample of the new pattern and adjust the fit.
Cynthia Fong
Thank you for your comment and suggestion! This is very useful information so thank you very much for suggesting.
Barbara
The word is tamper not temper.