Linen aprons for the whole family Tutorial
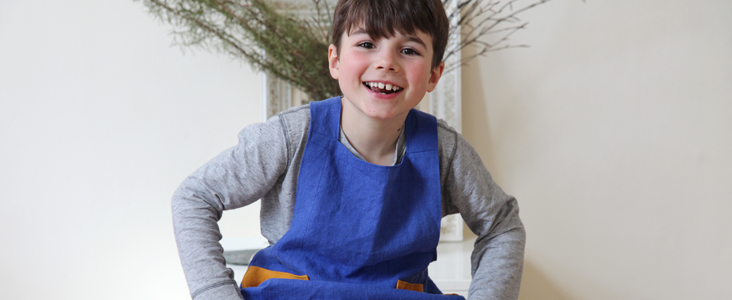
Family time is so important, to get to know each other and create a stronger bond. It is especially fun when everyone regardless of age can be involved; making, baking, creating something physical, to represent the precious time spent together. But of course, these are activities that could be a little messy, so this week, we will be making some child sized aprons, in some bright and bold colours, ready for when spring and summer arrive.
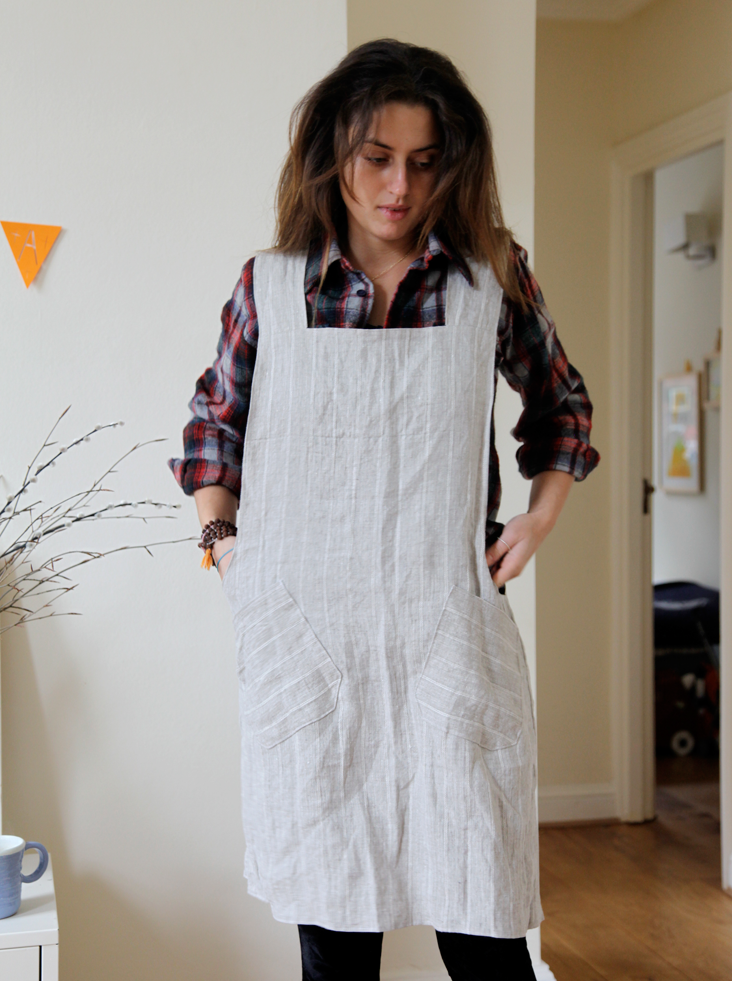
We have even included a pattern for adult sized apron if you would like to make some matching ones for you and your whole family.
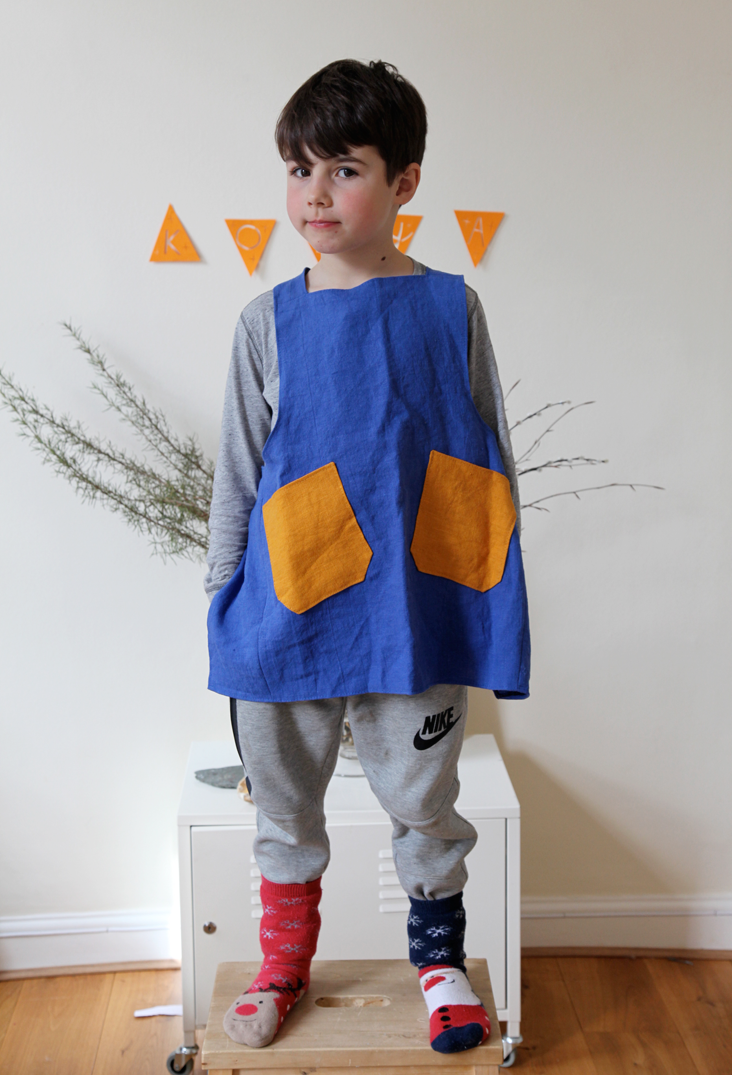
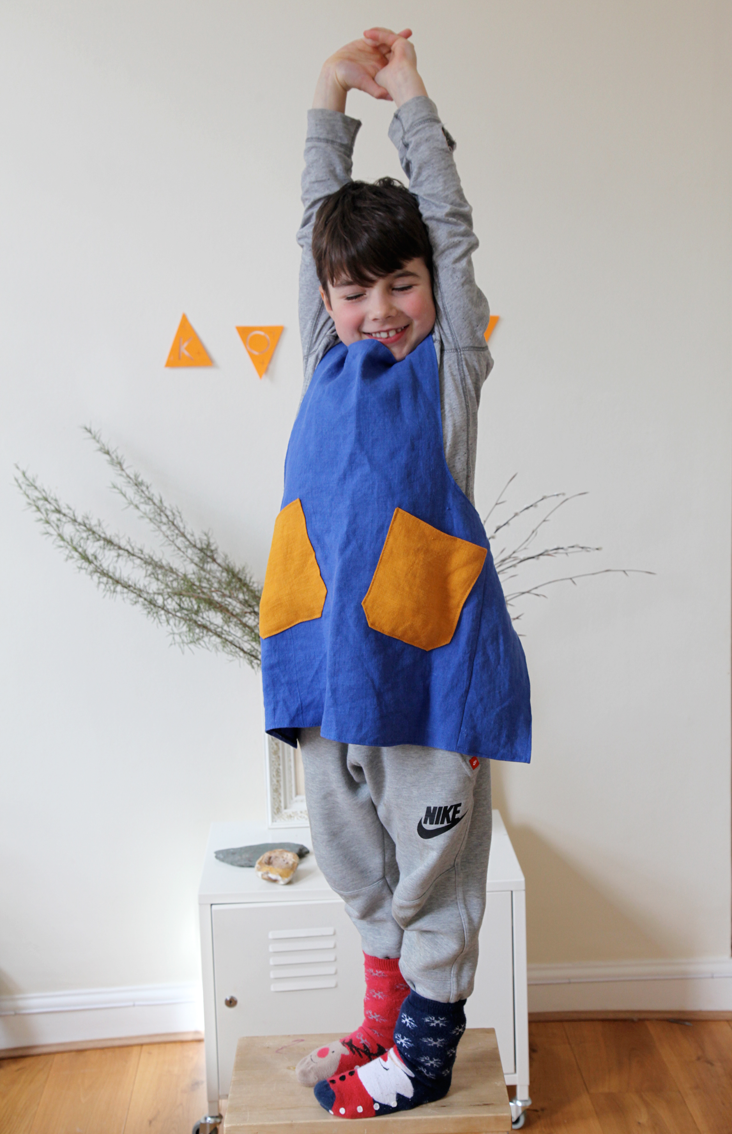
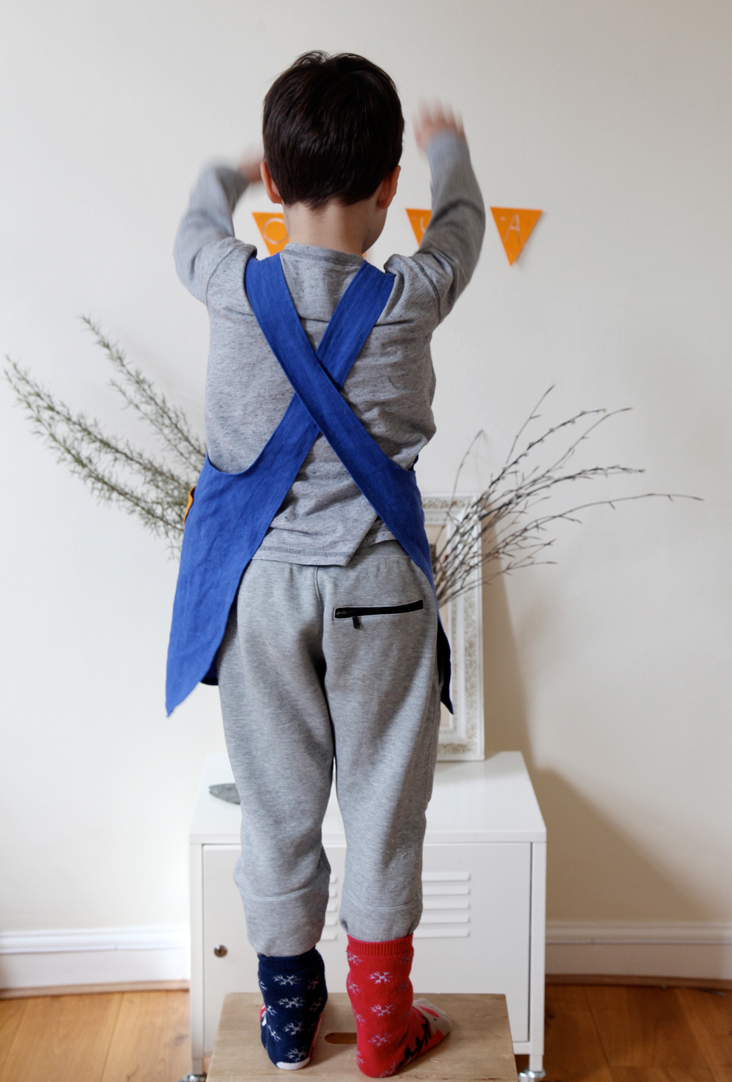
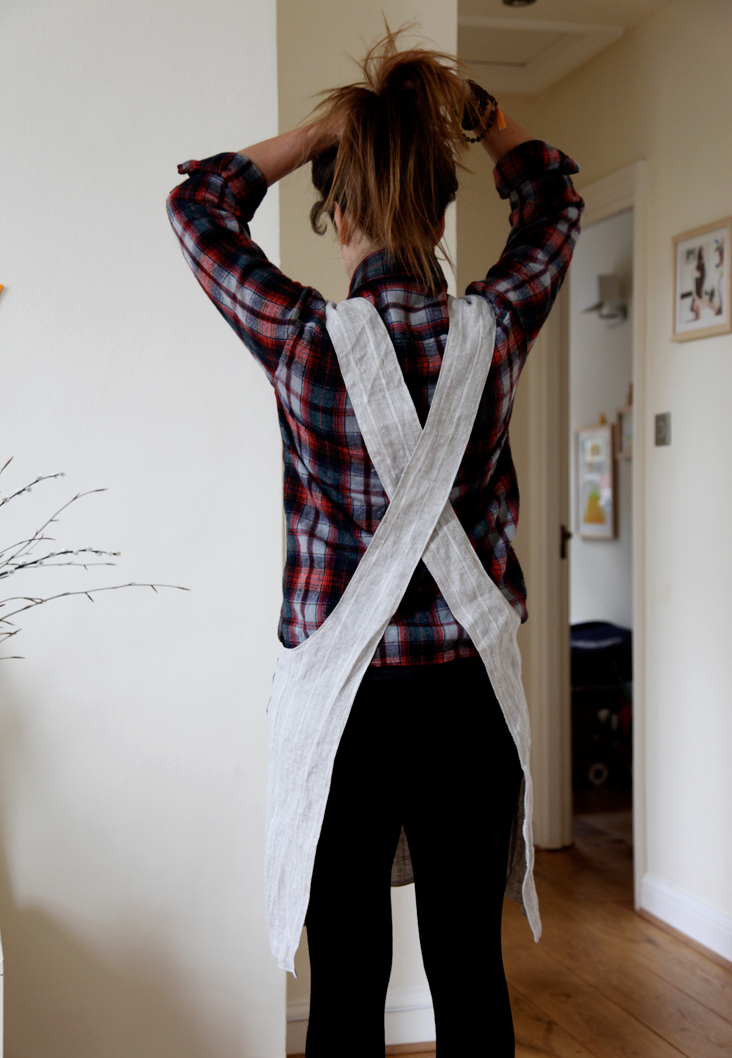
These aprons are inspired by Japanese designs and have no strings to tie for small fingers- instead you simply slip them on over your head and you are ready for action.
Material
1 yard of 4C22 Ultra Marine Softened
0.5 yards of 4C22 Autumn Gold Softened
(Note: In the photos, for the adult sized apron, we used 1.5 yards of IL042 889 FS Premier Finish)
Matching sewing thread
Tools
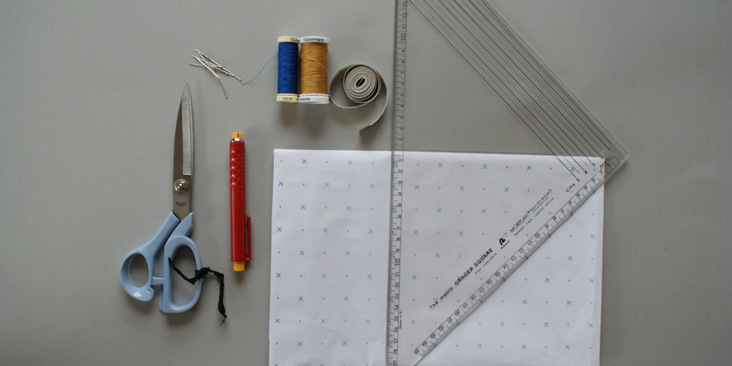
Pattern paper, Pattern master, Erasable fabric marker/chalk, Tape measure, Pins, Paper scissors, Fabric scissors
Sewing machine, Overlocker, Iron
Time
1-2 hours each apron
Difficulty
Beginner
Step
Note: Prewash your fabric and tumble dry it until it is still slightly moist, let this dry in room temperature.
1. Iron the fabric so it is easier to work with
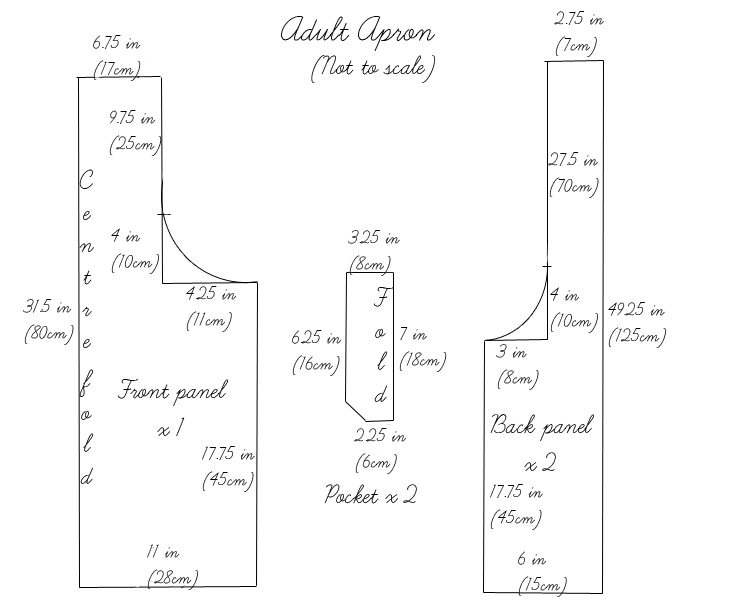
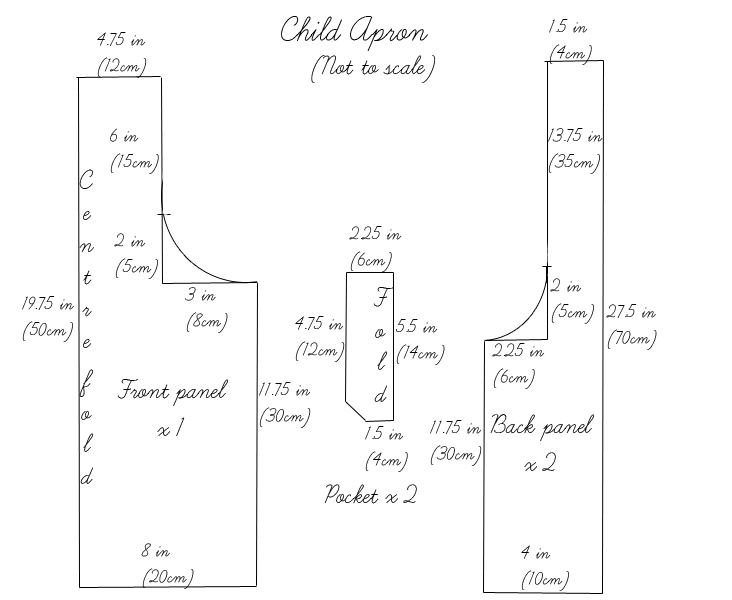
2. Follow the diagram and cut out the pieces, adding on 3/8 inch (1cm) seam allowance on all seams, apart from the centre fold/fold ones. For this tutorial, we used the Ultramarine for the main body for two kids aprons, suitable for ages 3-8, and the Autumn Gold for the pockets.
3. Use an overlocker, or choose your own method to protect the seams from fraying. Make sure the method you choose does not add weight to the fabric.
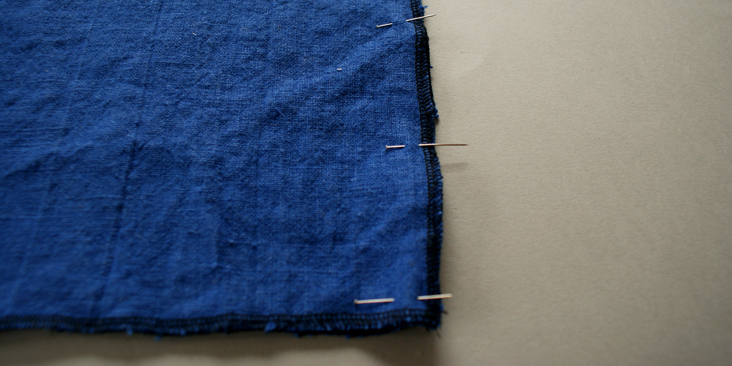
4. Pin together the side seam of the front and back panels. Straight stitch it. Iron the seams open.
5. Repeat this step for both right and left side.
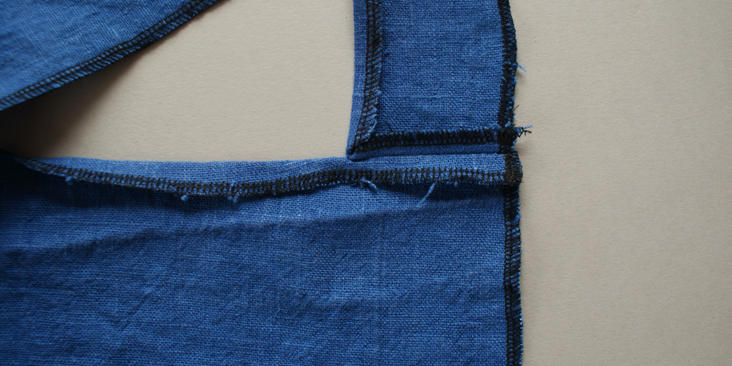
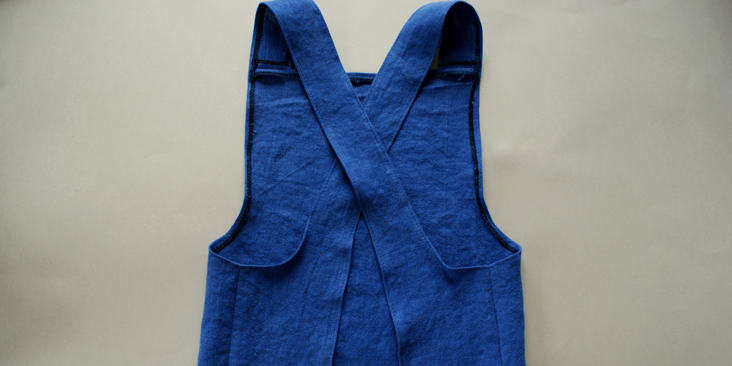
6. Now, take one of the shoulder straps and match it to the top of the front panel. Make sure the strap from the left back panel goes across to match the right side of the front panel, and vice versa for the other side.
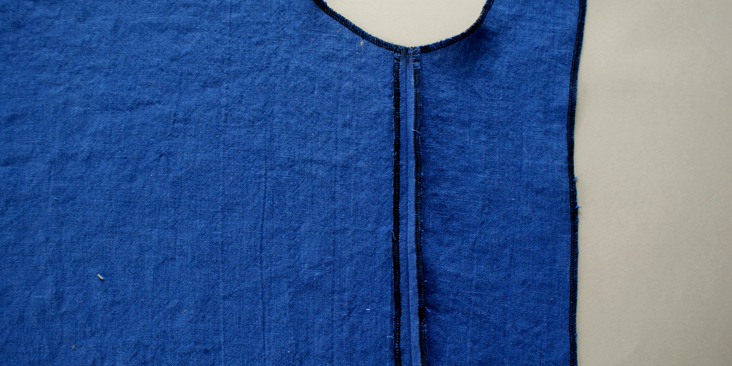
7. Pin the seams together, leaving 3/8 inch (1cm) of the inner seam of the strap unpinned, this is for the following step. Straight stitch it. Press the seam open. Repeat on the other side.
8. Now is the part you will iron 3/8 inch (1cm) of the seams along the apron in towards the wrong side. This will be done on all the raw seams.
9. Once all the seams are pressed, top stitch from the right side, along all ironed edges.
10. Be extra careful when stitching over the strap onto the top seam on the front panel.
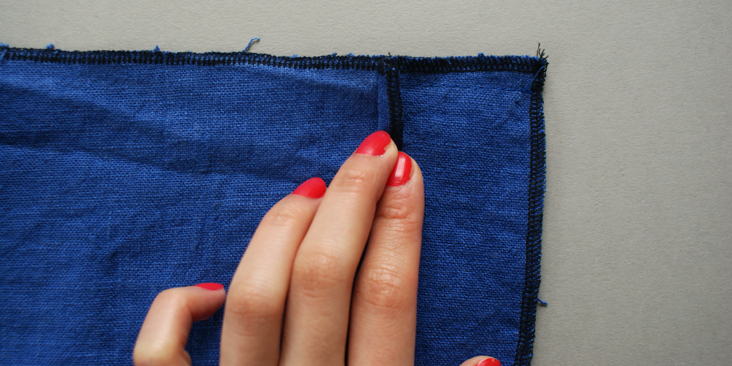
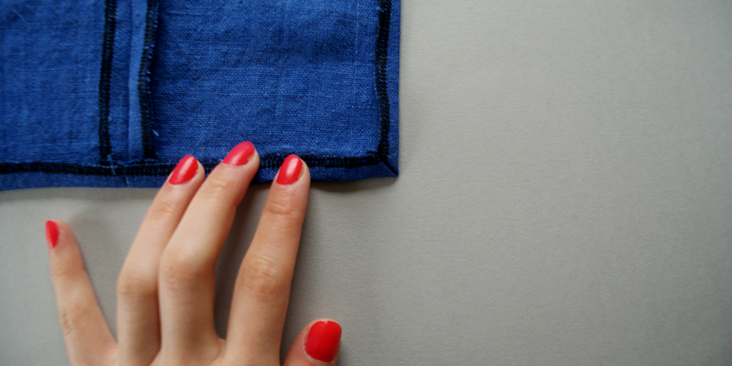
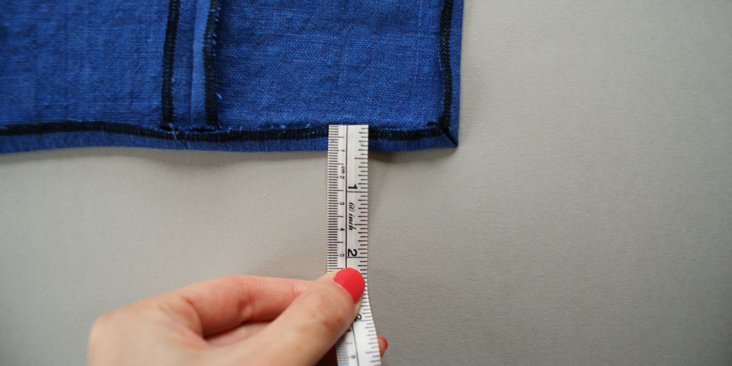
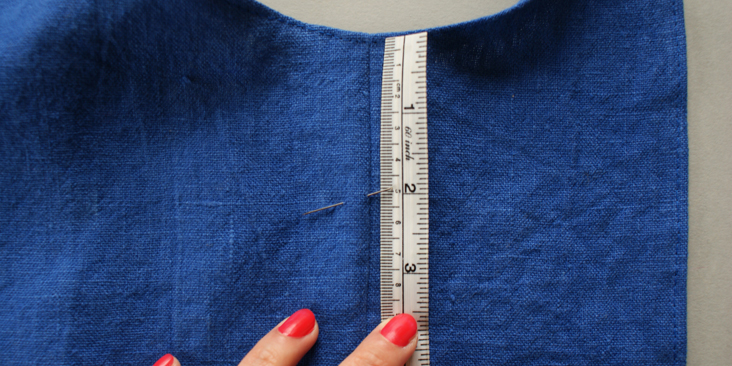
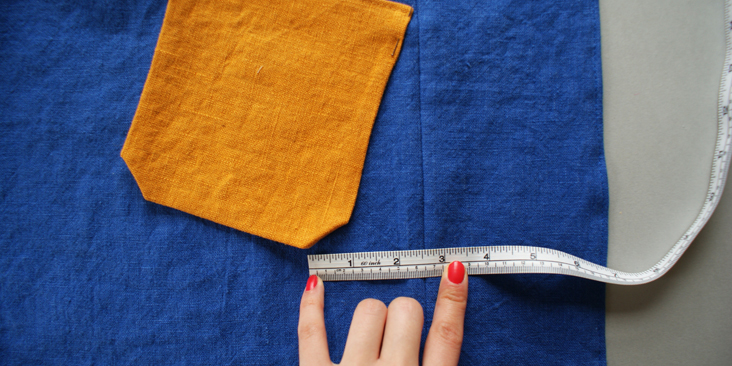
11. Now, measure 2 inches (5cm) from the top of the side seam, and put a pin as a marker onto the fabric.
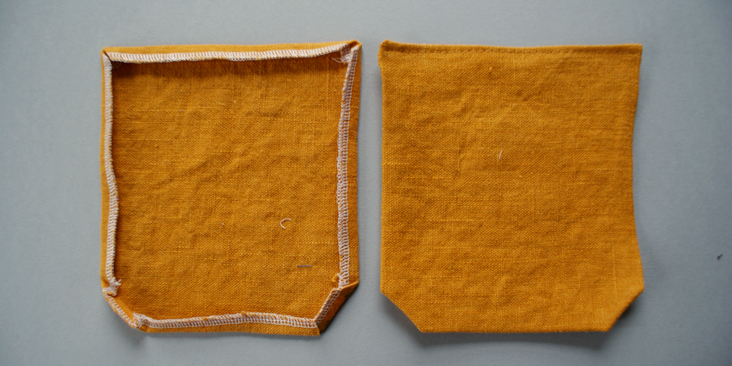
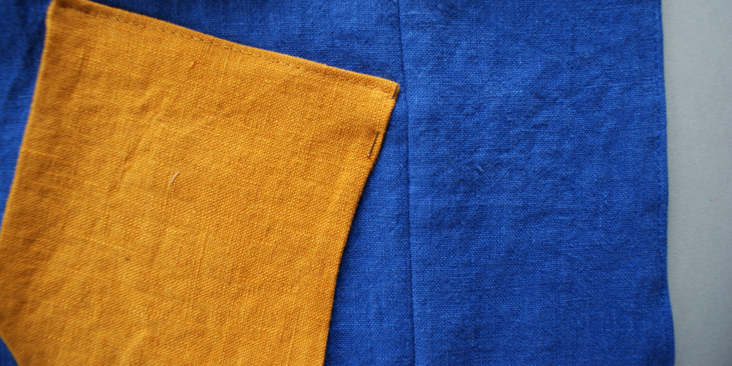
12. Next, iron 3/8 inch (1cm) of the top seam of the pocket towards its wrong side. Pin it and top stitch over the ironed edge. Press it.
13. Iron 3/8 inch (1cm) of the seams all around the pocket towards its wrong side.
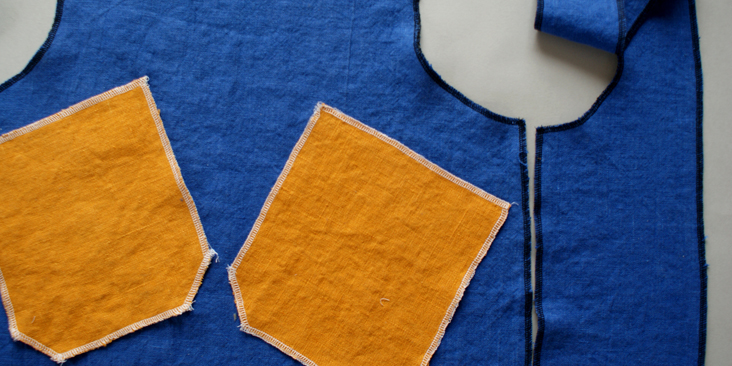
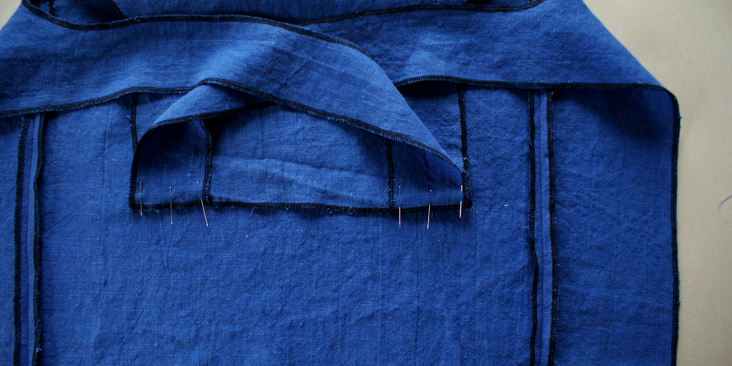
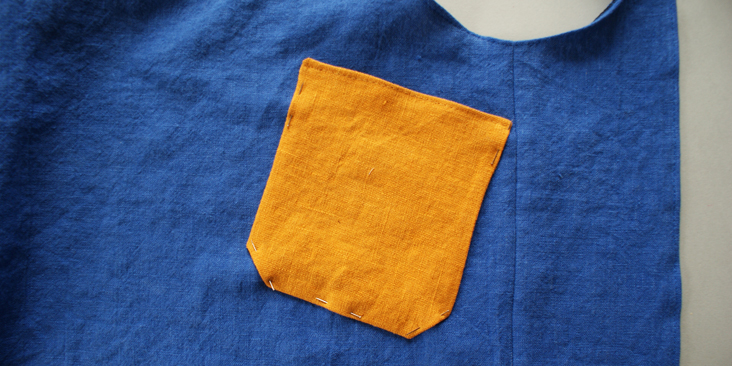
14. With its right side facing you, place the pocket onto the front panel of the apron. The top corner of the pocket should meet where you marked the panel with the pin. Pin the pocket and secure into place.
15. Next, slightly slant the pocket outwards, so its bottom corner is around 2 1/2 inch (6cm) away from the side seam of the apron. Pin the corner down.
16. Make sure the pocket lies flat on the fabric and pinned the other corners down to secure its place.
17. Repeat the same for the other side.
18. With the pockets pinned down, top stitch over all edges apart from the top one, onto the apron body. Press the fabric.
These aprons are easy to make, and a great way to bond with your children, choosing matching colour and patterns. Why not check out the plethora of colours and options that we have?


















57 Comments
Pingback:
What I made in 2020: Roasts and toasts - Thread & Therapyenza
How much material do i need for the child apron?
Joy
I can’t wait to try this. I am going to make these for 4 members of my family for Christmas cookie baking. One member probably wears a 3xl and is around 6′. I would just need to add length and extra seam allowance on the sides to add width, correct? I love the pattern. It looks simple and has a great look to it. Thank you
Jae
Hi, Thanks so much for this tutorial and pattern. I think I have noticed a small error on the back panel. The bottom width should read 5.75 inches I think (from the 3 in + 2.75 in) it hopefully wont make much difference but wanted to mention it:)
Jae
Susan
How do you lay out the pattern pieces on the linen?
Gabrielle
This is the very first sewing project that I actually drew out the pattern myself. I normally use a store bought pattern. I love how easy this was to follow. Made one change to the neck line and made it a scoop neck cause I wanted it to look like a hipster style apron dress to layer it and wear it for fall.
Lisa Rowney
Hi
What a gorgeous pattern.
I am very new to sewing, do I add 1cm seam allowance when cutting out, or cut to the exact measurements? Hope my question is clear?!!
kris
my gramma has arthritis and has trouble with buttons or ties so this looks like it will be great for her.. thanks so much!!
Laura
I made this today! Turned out great 😀
http://imgur.com/a/0qtrN
Janet Manahan
Do you have dimensions to enlarge for older child?
Deanna
Love this apron pattern! Your detailed measurements made it easy to draft my own patterns. I used a novelty quilting cotton instead of linen. I absolutely hate overlock stitching raw edges so made a few of my own modifications to the directions … flat felled the side seams … cleaned finished all other edges … rather than making a seam where the straps joined the apron front, I put the right side of the strap on the wrong side of the front and stitched a square with an X to attach and reinforce where the straps joined. The adult size apron turned out beautifully. I made a child sized one and think it is about the right size for a 3 to 5 year old. I think I’ll have to modify it for a school age child though. Great job!
Rachel
Would like to see a picture of how yours looks like!
Alpha
Genial!!1 me ha ayudado muchooo!! Gracias!!
Sandra
I have been looking at many apron patterns and instructions online. I am not sure this is the pattern I will use, but it struck me that your instructions were absolutely the best. From the pattern drawings to the pics with the measuring tape, etc. Just very well done. I finally was feeling like… “yeah, I can do this”. It was kind of like the background music in a movie, sometimes it’s just there and good and sometimes it’s so good you actually notice it specifically. Really nice job on this. Thanks.
Masha Karpushina
Thank you Sandra! we are so happy to inspire! That’s the whole reason why we do these.
Elaine Moore
I want to make several of these. Reading through the instructions, I don’t (or have somehow overlooked) the pattern piece or measurements for the shoulder straps. Can you tell me what to do? Thanks and eager to get started.
Ann Martinson
Measure from your back waist, over the shoulder, and down to where you would like the front to hit, approx 2-4″ below your neckline. Add 3-4 inches. Make up the garment completely except don’t attach the shoulder straps. Try on, adjust the straps in front as you prefer. Attach permanently. Make a note of the length you chose and whether you liked it.
If you make it too short, cut a small piece the length you need and just add it to the ends of the straps. This would be fun in another color too … like color blocking.
Patsy
Is this a one size fits most pattern. If I need a larger one would I just move the front fold over to Inlarge the front. And if I need it for a taller person would I just increase the length of the straps to make it longer. I’m new to sewing and have a much taller person I’m making this for.
Ann Martinson
Take a look at the person. Generally you don’t make the “middle” wider, you make the sides wider. This is because most adults have relatively the same head dimensions. You would add the width in the sweep of the sides.
So let’s say the person is 55″ around the largest part of their middle (my husband’s measurement) … and let’s say he is 6’2″ tall (also my husband). Right now the front panel on the adult size is 11 inches. Move the center back from the fold line 1/2″ which will add a full inch in the very center of the apron. Then extend the width of this front panel to 15.5″ … which means you will add 4″ to the side of the pattern piece on the smaller side-seam side. This will make the front full width 31″. On the back side piece make the side grow from 6″ it is currently to 10″ … we add 4″ to both sides. This will make the finished size of the apron piece 31″ + 10″ + 10″ =51″ minus seam widths. This apron hangs loosely so it will still have room in the back to hang loose on his large frame.
Add about 10″ to the length of the straps, or cut a separate piece 10″ the width of the straps top and have a seam to make the straps longer. Adjust the fit as described in the comment I left on the October note above. Good luck!
Marjorie
Muy bello y es mucho mas practico,la feicito
Roseanne
Great Pattern!
I am making an Apron for my new Job as an Atelierista, I just have the pockets left to do.
Thanks Heaps x
Lesley Adams
I don’t have an overlocker. What would be the best way to finish the edges? (I am new to sewing!) I have a fairly heavy denim fabric, instead of linen.
Roseanne
you can use a zig-zag stitch which most machines have?
LT
Turn under raw edges under 1/4″ twice (1/4″ and then 1/4″ again), press and stitch down.
Ann Martinson
Bind the edges like the edge of a quilt. Looks lovely, lasts forever, very sturdy. Cut a lighter-weight fabric in 1.5″ strips. connect the strips into a jelly roll so you have something easy to work with. Sew right-sides together along every seam line after it is complete, then wrap the seam and stitch again on the seam line. When you have the work complete, wrap the outside in a continuous binding all the way around. If you double-turn denim it will be way too heavy to hang nice. If you wrap with a lighter-weight fabric, such as their light-weight linen, it will be smooth and look great.
GERI
I am making mine reversable. That means I am using lighter weight material than I would if I had followed the directions exactly. Make sure you add your pockets to the front side and reversed side before you sew them together. You have lots of options, enjoy!
Julie
Was thinking about making it reversible as well, but I’m not sure I’m advanced enough to wing it… any tips, Geri? Thank you!
MICHELLE
I don’t have a serger either. I just zig zag. But, use a close stitch.
Laura McGinty
I just bought some gorgeous linen and decided a pinafore apron would make for wonderful Christmas presents. I was looking for a pattern and these must be a “thing” right now. The patterns to purchase are $45 and $60 everywhere I looked! I wish I had seen this sooner LOL. I will check this site next time…
Lise Petrauskas
Thank you for the tutorial! I have made the pattern and it looks great. I can’t wait to sew it up in linen!
Pingback:
Saturday Antics | Darned if You Don'tJB
I recognize this apron — I made one for my baby doll in the sixties, when it was circulating on newspaper. The adult size was a very good maternity apron. We called it a “moebius” apron even though it has two sides — it does have only one edge.
The newspaper version had rounded corners to make it easy to bind the one edge with bias tape, and smaller armholes so the toddler size could be worn as part of a sun suit.
Jo
I love this apron and appreciate the tutorial. I am confused about some of the numbers and would appreciate any help someone is willing to give me.
Along the side of the adult diagram, is says 17.75inches and at the very bottom 11 inches. this is what is confusing me.
Is this right: cut front on fold, 9.75″ wide, length is 315′ long, at side-come in 4.25″ and curve. Am I right so far??
Thanks so much ladies.
Cynthia Fong
Hi Jo, thank you for your comment. So for the front panel, it should be at 11 inches wide on fold, and on the centre front folded seam it is 31.5 inches long. on the front side seam, it is 17.75 inches long from the bottom. Then you come in at 4.25 inches width, and the remaining length should come to a total of 13.75 inches. The reason that there is a separate measurement on this seam, is because the armhole curve only comes up to 4 inches of that length. The remaining 9.75 inches will be a straight line. The shoulder seam of that strap will be 6.75 inches wide.
Does this make sense?
Jo
Hi Cynthia,
Thank you so very much for such a quick reply. It now makes sense to me and I am making a practice apron tonight .
I thought I would have to wait days for a reply and it was a pleasant surprise to see your reply yesterday morning .
I will come back and report on my progress. 🙂
Kind Regards,
Jo
ines2015b@gmail.com
gosto muito deste avental seguindo seu molde consegui fazer continue a nos ajudar com novos projetos
muito obrigado
Inês
Nina
using the child’s pattern front panel, 4.75 top, down 6 in. then add 2 inches for a total 8in. down? Or 6 down and measure two inches up to angle over. I’m probably making this more complicated than it needs to be, but I would appreciate some assistance. Thanks so much!
Cynthia Fong
Hi Nina, sorry for the confusion, it is down 6 in as a straight line, and then add 2 inches for a total of 8 inches. The reason the numbers are written out separately because the arm curve only comes up to 2 inches of that 8 inches along the seam.
I hope this has helped. Let us know if you need anymore assistance!
Sharon
These are so very cute.
I haven’t made one yet but I plan on making one this week
Thank you.
Claudia
Beautiful! Thanks for sharing.
Barbara
Genius idea, just love it. Have recently bought both of my daughters a sewing machine each. This woul be the perfect starter project for them. Thanks for sharing. Xxx
Masha Karpushina
I’m glad this was an inspiration Barbara 🙂 We would love to see what they make!
Diana Dunn
Awesome pattern – made it out of ticking for yard and house work and I absolutely love it!
Cynthia Fong
Thank you for your comment. We are glad this has been a useful design.
Janet
LOVE this apron pattern! It’s quick, easy and can be dolled up (although it doesn’t need it!) with different shape pockets, rick rack trim, a range of fabrics, etc.
Your apron is a real winner, Cynthia. Thank you so much!!!
Peri Kujawa
I have made a version of this with adjustable straps for my chef son. He loves it. It does not hang on his neck so it is comfortable to wear all day.
Patti Lebens
How do I get the pattern for the cute apron for a child and Adult?
Cynthia Fong
The image file is designed so you can draft your own pattern. With all its measurement written, it will be easier if you wish to make any changes for a better fit.
Athena PN
I’ve seen these on-line & am not a pattern designer – thank you! My busy husband said he’d appreciate this style apron to shrug into, especially those days he’s forgotten to “apron-up” & already has gunk on his hand(s). For me they’re simply charming apron patterns … and free is a very good price! 😉
Cynthia Fong
Thank you for your comment. I am glad you enjoy them. Hopefully your husband will have no more ‘apron-up’ing problems in the future!
Pamela Boyntn
My first thought was that it would be good for seniors with motion problems, or arthritis, who can’t always tie the aprons. I will have to check out whether they can shrug into one.
Cynthia Fong
Thank you very much for your feedback. It is always great to see how a simple design can be of help for a much larger community. Hopefully they will fit them. Remember to keep us updated how your sewing projects are going!
AmyCat =^.^=
Also nice to see that you’re using ironed fabric in the photos, and that you include pre-washing and ironing the fabric in your instructions…
One thing I’d consider: either add or move a pocket at chest-level for things which must be kept dry. If one’s washing things with a sprayer or stirring vigorously, the lower pockets will get splashed. 🙁
OTOH, you could waterproof your linen (one method: http://www.instructables.com/id/Tincloth/ )… 🙂
Linda Murphy
Thank you for the tutorial on the aprons they are just what I’ve been looking for.
Cynthia Fong
Thank you for your comment. We are glad this has inspired you. Show us your progress with your sewing!
AmyCat =^.^=
Yay! A *real* Tutorial instead of a fashion article this time!
The adult design looks good for wearing over a variety of different outfits while giving full coverage (unlike tie-around-the-waist 1/2 aprons). I may try it for something to wear over reenactor costumes while working in the kitchen cooking medieval feasts… 🙂
Cynthia Fong
Thank you for your comment. That is fantastic! Remember to snap a photo and show us your full look!