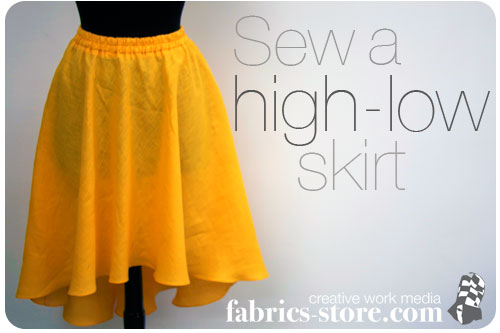
Sew a High-low skirt.
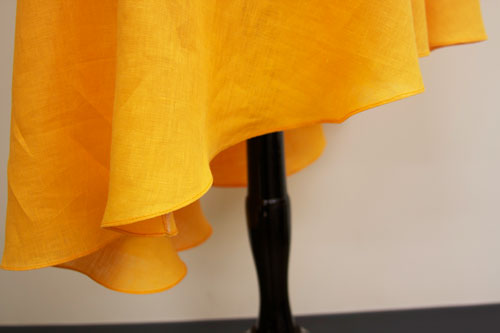
One of my favorite trends right now is the high-low skirt. I love how the longer tail of this skirt creates a carefree vibe and stylish touch. The design is really easy to sew, making it the perfect DIY for this week.
The color is this brilliant new orange shade from our new lightweight linen, called Apricot. I can’t get over this color and I am completely obsessed with this style.
I am really excited to share this latest linen project with you all and hope you enjoy it as well. You may use the pattern I’ve provided to make this skirt your own! Adding your own creative flair will create a unique new article of clothing to your wardrobe for the Spring season!
Materials:
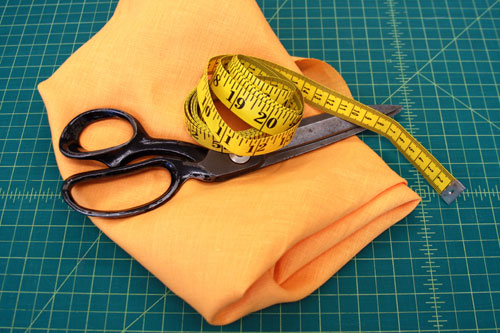
- Linen. I ordered and used two yards of IL020 in Apricot.
- Scissors
- Sewing machine
- Pattern paper
- 1" wide elastic
- Safety pin
- Measuring tape
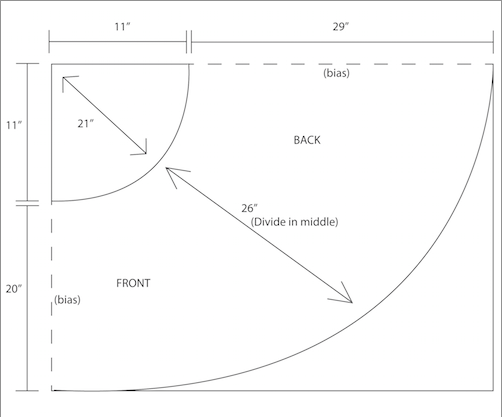
This is the pattern I used and it will create two separate pieces; one for the front and for the back. Cut this from a big piece of pattern paper.
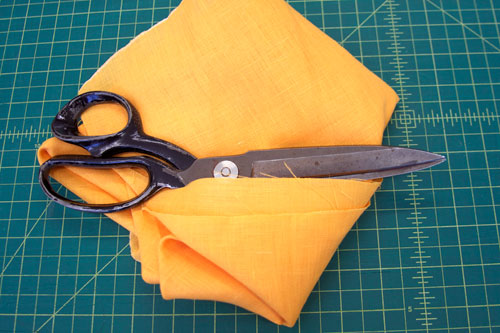
Place each piece (the front and back patterns) along the fold of your fabric where the dotted line indicates to do so. The fold should be made at a bias, meaning you just need to fold and cut your fabric diagonally (rather that straight up or down). This will make the skirt fall and flow better.
To find the measurement for the waist on your pattern, measure you waist with the measuring tape. Divide the number you get by two and then add this result number to your original waist measurement. For example, if you measure your waist at 30" then add 15 to this in order to get your final waist measurement of 45"
The measurement is larger than your actually waist size because of the elastic waistband. It will all fit when everything is done!
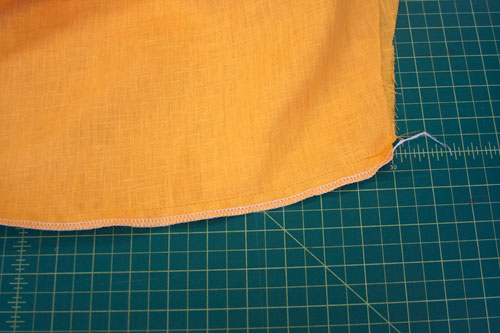
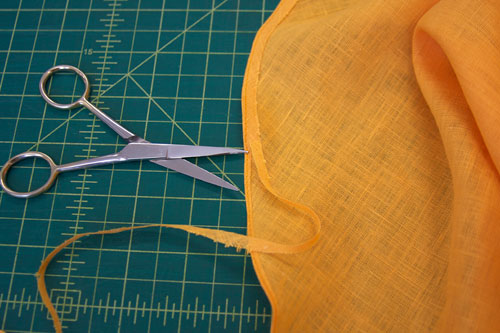
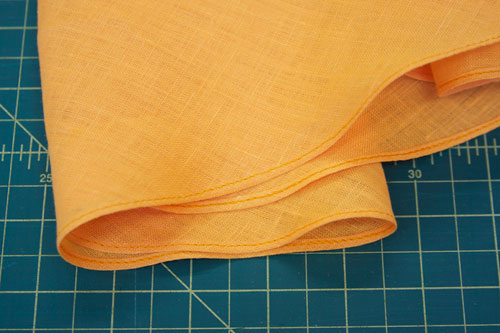
Fold the seam you made over once more and create another seam. This is an easy way to make a tiny hem along the bottom of your skirt.
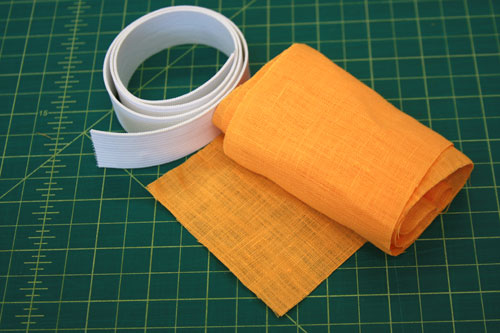
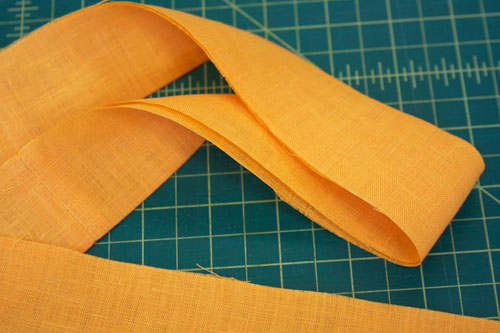
The waist of the skirt is really easy to do! Just cut a 3.5 inch wide piece of linen in the same color. The length should correspond to the waist measurement you made earlier.
Cut a length of 1 inch wide elastic to fit your waist. It should feel rather tight and be slightly stretched.
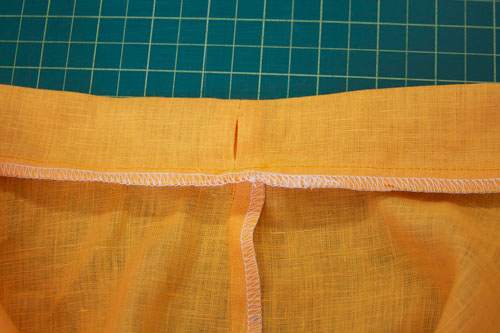
Fold the strip of fabric in half and sew the open edges to the top of the skirt.
Leave a small opening where the two ends of the strip meet. This is where the elastic will slip though. (I used the outerlock machine for this seam as well)
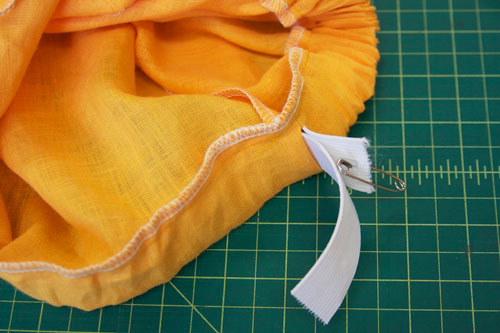
Secure a safety pin onto one end of the elastic and work its way around the entire waist. Don’t lose hold of the other end! It’ll be hard trying to reach for it if it slips in.
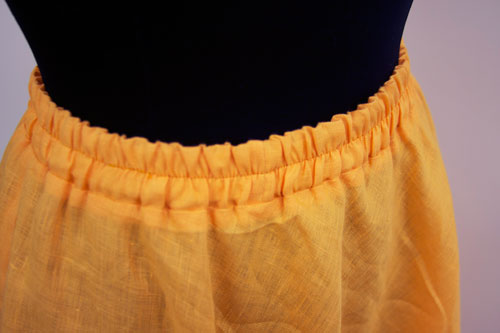
When the safety pinned side comes out the other side, sew the ends of the elastic together and stitch the opening shut. Play with the waist fabric and elastic so everything is scrunched up evenly.
I made an additional seam along the center of the waistband for a subtle detail.
I love how the linen falls on this skirt!
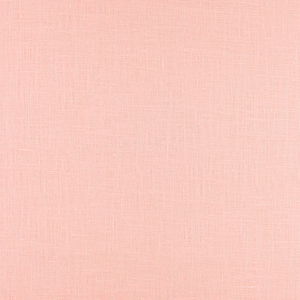
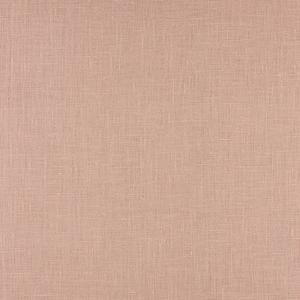
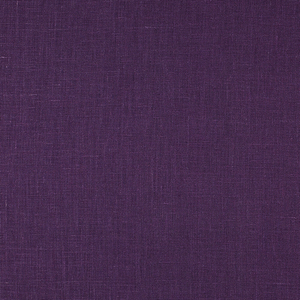
Gorgeous! There are so many colors I want to make this in. I might try longer or shorter styles in the future, which will be super easy now that I have a basic pattern all ready.
*Note* I accidentally labeled the color of the linen as "Melon" when it is actually "Apricot." Sorry for the mix-up!










46 Comments
Esther Martin
Dis anyone find out if drafting the pattern showed above and cutting it once on bias the result is the skirt of size 8/10?
I really love the pattern but being quite a beginner I don´t understand very well the instructions.
Thank you very much.
I love this website and all the patterns on it.thank you very much for sharing.
Paulette Paradiso
The diagram you show with 11″ to cut out the waist, is for what measurement of a person’s waist size? (before doubling and dividing the waist size for the pattern.
On your diagram, what is the FINAL measurements for both the front and back after sewing and hemming?
When you sewed in an additional seam on the waistband, did you do it into the center of the elastic which had already been inserted, or did you sew the extra seam in BEFORE you put in the elastic? If so, then wouldn’t you need a smaller elastic or larger waistband?
ella
What would be a good project for someone learning how to sew? I have only sewed a few headbands before, so I’m definitely a beginner. I really want to make something but I have no idea where to start!!
Emily
Hi, my 8 year old daughter would love this skirt. It is so pretty.
Emily
My 8 year old daughter would love this skirt. How do you deal with the show through with a skirt of this shape???
Dawn
I would like to make this, but longer-what would be the “how-to?” Please and thank you
Sandy B
Where it says 29″ on the top of drawing… Extend the length, say 7″ to make it 36″ for example… And where it says 20″ extend it the same 7″ to make it 27″! 😊
B. Lutes
It looks amazing! I just have one question, would you say its an easy project for beginners?
Masha Karpushina
Yes, absolutely. If you have any questions, do get in touch.
Confused
Your instructions say to have the waist circumference of the pattern measured at 1.5 times the actual waist measurement. Going by this instruction, your pattern above would make a skirt for a person with a 46 inch waist, or a 69 inch waist circumference on the pattern. 11 X 2 X 3.14 = 69.08, 69.08/1.5=46.
For a 30 inch waist as you mention in the instructions, and a waist measurement would be 45/2=22.5, 22.5/3.14=7.16. For a 30 inch waist, the radius of your circle for the waist should be 7.16, not 11. Wow, I didn’t think I’d need math after college.
Sarah
A TRULY B-E-A-U-T-I-F-U-L HIGH-LOW SKIRT. . . THE APRICOT LINEN FABRIC IS GORGEOUS! I LOVE THIS “NEW & STYLISH LOOK!” I like the look of the waist also with the extra stitching in the elastic. I’m retired and rarely wear skirts, so this is not a project for me. I plan to tell a couple younger friends who sew about your excellent skirt design & detailed tutorial. THANKS for sharing. Sarah Helene in Minneapolis
Jessica
Hi, my 10 year old daughter would love this skirt. However, would I need to change the measurements other than the waist. Would I simply reduce the lengths? thanks
Paula
I am in the process of making this skirt. I figured out how to cut it making one big piece with only one side seam to sew up. Start with a big rectangle of fabric, almost 2:1 side ratio. Fold it in half hamburger-style and mark that crease, maybe iron it so you can see it. Unfold the fabric and then fold the corners in to the crease- much like a paper airplane, but the point should be on the longer side. Then you can draw out your pattern and the two edges should meet on the “dividing line”. Cut it out like the pattern says, but if you don’t cut the bottom piece of fabric on the dividing line you wind up with only one side seam to sew and the other already attached.
Bianca
I understand all else except for the waist measurement on the diagram. When I do the math, well, I just can’t figure it out. I would like to know how since I want to make this skirt for my daughter.
Michaela Smith
Hi Bianca! It’s a little bit complicated to explain.
Take your waist measurement and multiply it by 1.5. (This measurement is how big around the waist’s curve will be when the pattern is cut and assembled.) Divide that number in half. That number is how long you’ll want the curve at the waist to be on your pattern.
The pattern is cut in half diagonally and each half is cut on a fold.
So for example, if my waist measurement is 30″, then the size I want the waist to be when it is assembled will be 45″ (before sewing in the elastic 😉 ). Before cutting the pattern in half diagonally, the waist curve measurement on the pattern will be 22.5″ (I usually draw a curve and then measure it with my cloth tape, but there are also nifty bendable rulers out there that you could use to achieve this).
Does that help explain it? If you have any more questions or need clarification, please let me know! I haven’t made this pattern yet, so I’m not 100% certain these instructions are correct, but at worst you’ll end up with a really full circle skirt. 😉
Mischief Maker
I LOVE this skirt! I am about to make one myself. 🙂 I hope it turns out as beautiful as this one!
Lisa
Posts like this britghen up my day. Thanks for taking the time.
Lynn Gorges
I looked at the pattern one more time and I think that “divide in the middle” must mean to CUT the PATTERN along that line to give you 2 pieces to the pattern. That would create the side seams and make it so that the pieces could be placed on a bias fold. Will try that.
An —- AH HA Moment! Hope this helps others.
Lynn Gorges
This skirt can’t have a side seam. It could only have a front and a back seam. Would look awful. You need to cut out the pattern. Then using 2.5 yards of fabric fold it on the center fold and then fold the yardage in HALF. Think of how you would fold a blanket in 1/4’s. You then put the pattern on that. This way you have your side “seams” that say bias on the folds. The side ARE NOT on the bias and the front is an inch or so shorter than 21″. (You will have a large oval.) The front and back are on the straight of the grain. The only way to cut it on the bias it to fold the fabric like a bandana triangle. That way you will have a seam up the front or up the back. Doesn’t seem possible to not have at least one seam this way. You would have to cut the pattern into 2 pieces to get a side seam and have it on the bias using 45″ wide fabric. The concept of this pattern is interesting, but it needs to immediately be edited and changed to not annoy beginner sewers. I am an advance sewer and it frustrated me and took up a great deal of my time. I had wanted to use it as a “project” for my beginning sewer daughter. I will have to make a couple of skirts to get it so she can make this skirt. It is very cute…but the model’s leg must hide the seam up the BACK.
jeri
I get the 2 pattern pieces, and the fold of each on the bias.There are two seams on the skirt body…both side seams. I am guessing that the skirt will need to be gathered to the waistband…the perimeter of the waist circle is definitely larger than the length of the waistband, but the directions and pictures don’t seem to show the gathering at this stage.
Linda Dudley
For those that need an adult size, there is another link within the “fishtail” link. It is just below the pic of the full circle/waist cutout (scroll down to the bottom for the adult directions): Dana’s circle skirt http://www.dana-made-it.com/2008/07/tutorial-circle-skirt.html
There is also a link for a layered skirt (two fabrics or lining like a slip or tulle for fullness) zippered skirt: perfectly fitted circle skirt http://www.mesewcrazy.com/2011/09/project-run-and-play-tutorials-week-1.html
All-in-all, a very neat concept!
Anne Storms
Love the skirt, but I need a longer skirt as I am almost 87.
I have sewed nearly all my life. I received the light linen
green, apricot, lavender, blue and yellow. I love the
colors.
Ida
I would like to sew this skirt, too, but I wish the suggestions that folks have made would be taken and incorporated into the directions as “corrections” or “hints” so that we don’t all have to read the “fine print” in the comments. The pattern drafting part is the unclear part but so necessary in how this skirt hangs. I’m glad I wasn’t the only one who has trouble with it.
Cathy Walsh
I, too, cannot figure out the exact instructions. What is the relationship between the inner circle radius and the waist size? And, it seems that the larger the waist, the shorter the skirt… How do you accommodate for this? I am an experienced sewer but not pattern designer. Would like to make the skirt, would consider buying your linen for it, but cannot do either unless further information is available.
Susana
Elizabeth’s comment about using the idea from the Me Sew Crazy site is fine if you’re sewing for a child, but for most adults, the fabric isn’t going to be wide enough to cut the skirt in one large circle. It’s going to need side seams. Having made several circle skirts in my life, I know from experience.
Susana
As the pattern is laid out above, the center front falls on one grain line (let’s say lengthwise)and the center back falls on the other (crosswise) grain. The center front and back are not labeled as such but have the word “bias” on them instead, so I believe Nicole intends the sides to be on the straight grain. This would be where seams should be.
By “divide in the middle” I believe Nicole means we need to draw a solid line where the arrows are and cut for seams–adding seam allowance of course. Then swing those seam lines to the straight grain of the fabric, either selvedge or fold side (depending on how wide the pattern pieces are). Obviously, the piece cut on the fold side would have to be cut again down the fold. This would move the center lines to the fabric bias.
Since the linen does not have a nap, it can be cut in either direction along the lengthwise grain, so you could place the back with wide end near one crosswise cut and place the front pattern piece in the other direction sliding it down into the fabric left by the back until they almost touch. (This would be easier to understand if I could draw it.)
Nancy Rhodes Collins
Nice style with easy instructions. I will make several for the girls.
Carolyn Crowder
Love this skirt
Nina-CostaRIca
I’m going to try too. 😉
Sandra Beck
You could also safety pin the other end to hold in place. Make sure you do not close off the opening though. This way you have 2 hands to use in threading the elastic through.
Cute skirt.
Elizabeth
After much frustration trying to figure out the pattern and folding to cut for this skirt I found the blog link below that is brilliant! You fold and cut like a regular circle skirt and then just move your waist circle over to create the high-low – SOoo simple! http://www.mesewcrazy.com/2011/11/pr-tutorials-week-5-fishtail-circle.html
Sally
I love this skirt, but I am slightly confused.
Do you use the pattern and create two of them and sew the sides together. Wouldn’t this create seams on the front of the skirt? I also don’t understand the division in the middle & the waist measurements.
Carolyn
I must say I like the look of the skirt. I’m not a real advanced sewer but I usually do just fine. I was confused with your instruitions. What do mean by divide in middle? Plus I can’t figure out the waist. I to agree with another person that the 21 should be 11. Thank you for your time. Carolyn
خياطة وتÙصيل
Pattern looks great. Will tryout as soon as possible
Kitty
How do you deal with the show through with a skirt of this shape. it looks real cute and practical but I can see through your skirt so I thought I’d ask what your thoughts were or what you do about that.
nicole novembrino
I mistakenly labeled the linen color I used for the skirt as “Melon” but it is actually “Apricot”
Sorry for the confusion everyone! Complete brain fart on my part! I have changed it in the article and the link should be correct now. -nicole
AmyCat =^.^=
You could use the same pattern, but doubled and one side reversed, with really sheer fabric (thin enough to be translucent if not doubled) to make a layered look, almost like flower petals… You’d have the cut-away of the top layer revealing the longer side of the lower layer.
Laurie Filipiak
Thank you so much for sharing your ideas! I just love your linen fabric and always look forward to seeing the different projects you sew up, you really inspire me to get sewing!
Josephine Thomas
Pattern looks great. Will tryout as soon as possible
Josephine Thomas
The pattern looks inviting. I will see if someone in the office can print it for me. If I have luck, I will let you know. I’ll try it as soon as possibl
Josephine
Camille K
Thanks so much for this pattern! I love the color you chose to use for it and have been dieing to make a skirt like this too! Love how the linen falls. I pinned it so I will remember to make it! So excited!
Patricia Branton
I absolutely love this skirt! It falls just beautifully, rayon would be a good choice tooI think. But I LOVE how it looks in linen ( and there are so many sweet colors to choose from….) So thanks! I am going to go make one now
Patty
jeanette
im trying to figure out where are the seams at on the high low skirt,the way im seiing it there is no seams.just sewing the waistband and the hem,so what am imissing on the pattern?
Michelle Lynch
I understand the basic concept, but would like more information on how you drafted the pattern. How do you determine the size of the center (waist) circle? Should the number on the diagonal arrow there also be 11″ not 21″? Did you just fold the paper so the edges that will be placed on the fabric bias meet up at waist edge and down their length then cut on the fold?
Frances Ellsworth (@FranEllsworth)
I am going to try this. Looks nice. Shared on my pinterest. Thanks for sharing.
April Bauer
Thanks for sharing this! It is so pretty. I like all the ideas you keep giving. It makes me want to sew all the more. I just need more time. Thanks again.