


Sewing Essentials: A Guide to Sewing Scissors
 Just like you’d use a bread knife for bread or a pizza cutter for pizza, sewing scissors are designed for different materials and tasks. From dressmaking shears and embroidery scissors to snips, pinking shears, and thread clippers, each one has its place in your sewing toolkit.
There are plenty of brands to choose from too—Prym, Fiskars, Clover, Kai, Mondial Tissus, and many more. While it might seem a bit much at first to have so many different pairs, once you get to know what each type does, you’ll see how the right scissors for the right task can make a huge difference in how smooth, accurate, and enjoyable your sewing becomes.
Before long, you’ll figure out which ones you reach for most often, which feel best in your hand, and which suit your sewing style. Quality definitely matters, but comfort and practicality are just as important.
Now, let’s take a closer look at some of the most common types of sewing scissors and what each one is best used for.
Note: I am right handed, so all the scissors featured in this article are designed for right handed use. Left handed versions are usually available for those who need them.
Fabric Scissors (aka Dressmaking or Tailor’s Shears)
If there’s one pair of scissors worth investing in, it’s a good quality pair of fabric scissors. These will be your go-to tool for most sewing projects. A great pair can last for years, sometimes even a lifetime, and they make a huge difference in how smooth, clean, and accurate your cutting feels.
I have two pairs that I reach for depending on the fabric type and weight I’m working with. Here’s a closer look at each and when I use them.
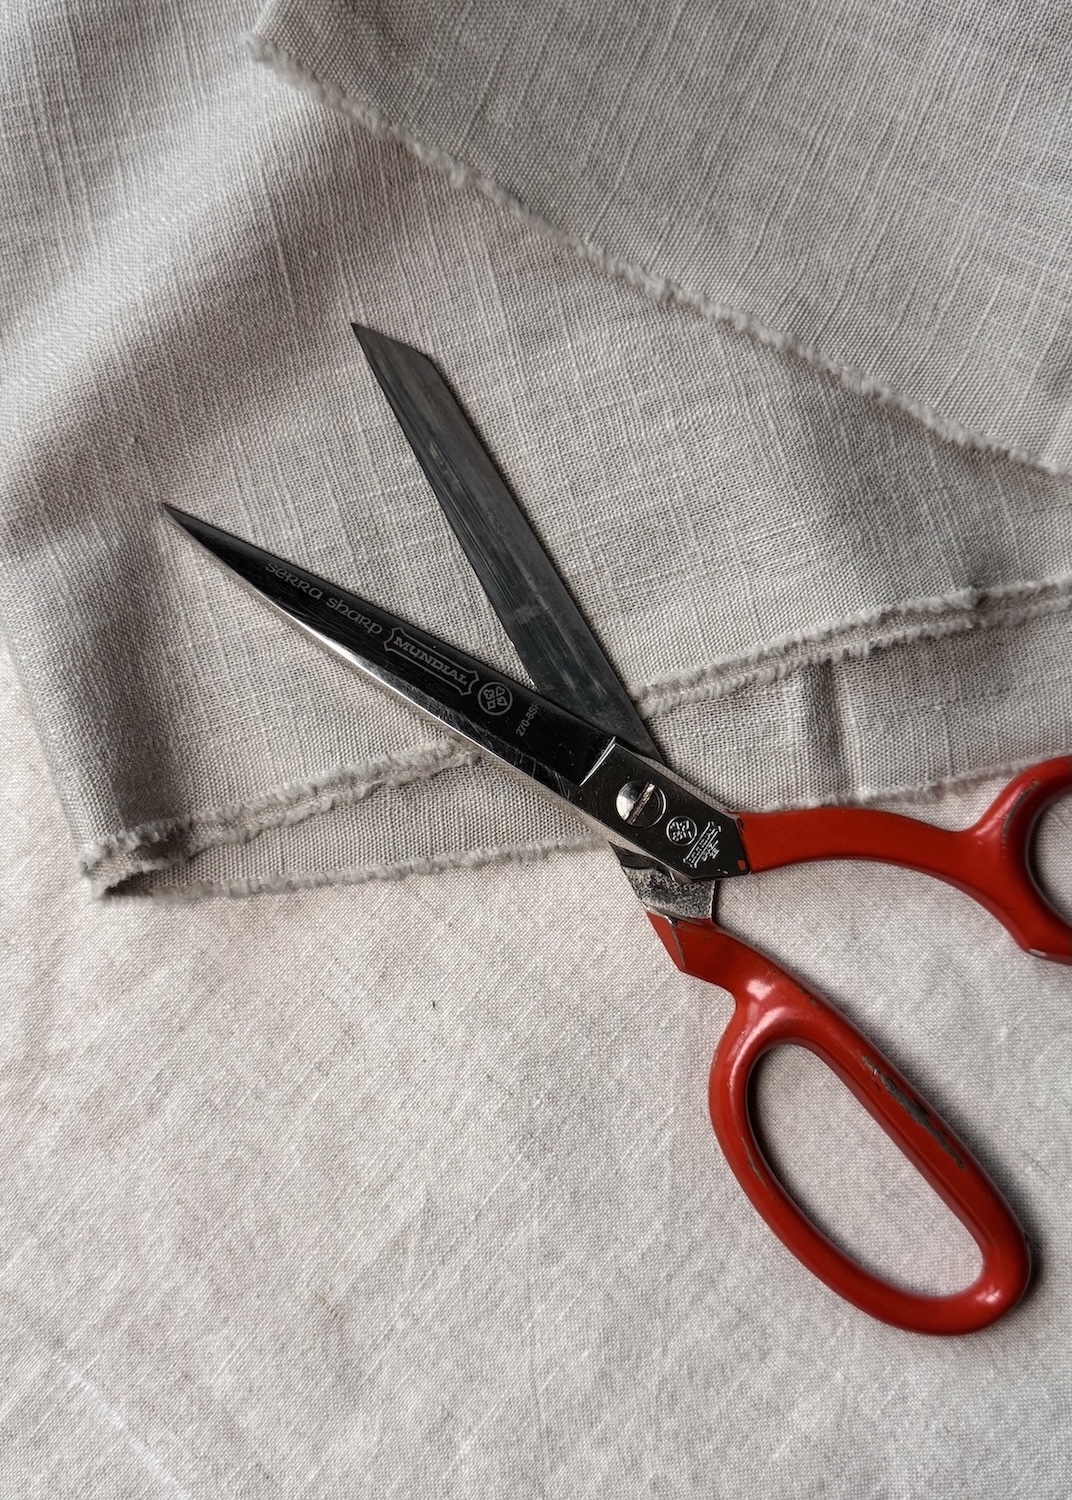
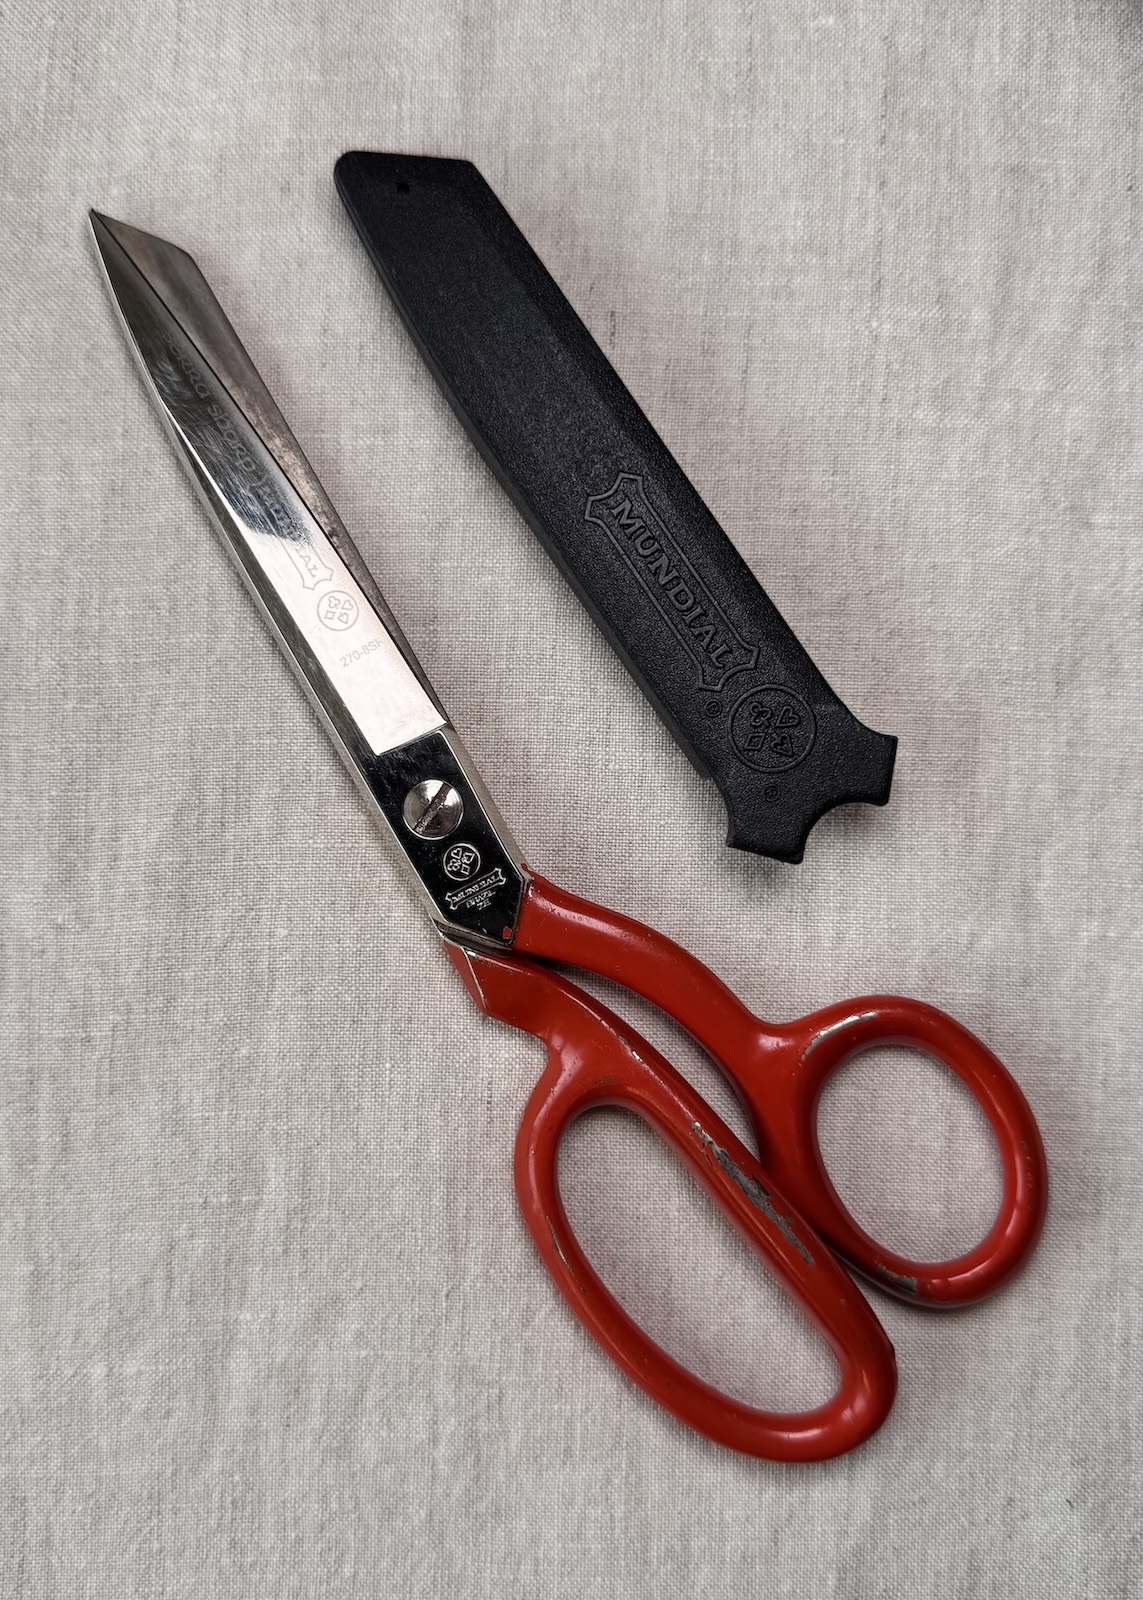
My first pair, the Mundial 20.5cm (8″) Red Handle Serra Sharp Scissors, is a classic all metal set. Made from carbon steel, they’re built to last, and you can really feel the quality when you hold them. When I worked in a fabric shop during my late teens, these were the exact scissors we used to cut fabric straight from the bolt.
This particular pair of mine came as part of my patternmaking kit when I started university, and they’re still going strong nearly 18 years later. The red enamelled handles are definitely show some well earned wear, but they remain comfortable and reliable. Honestly, I don’t think I’ll ever need to replace them.
These scissors have micro-serrated blades, which provide a better grip on slippery fabrics. With their relatively short blades, I find them ideal for light- to medium-weight fabrics and for cutting on flat surfaces like a table or the floor.
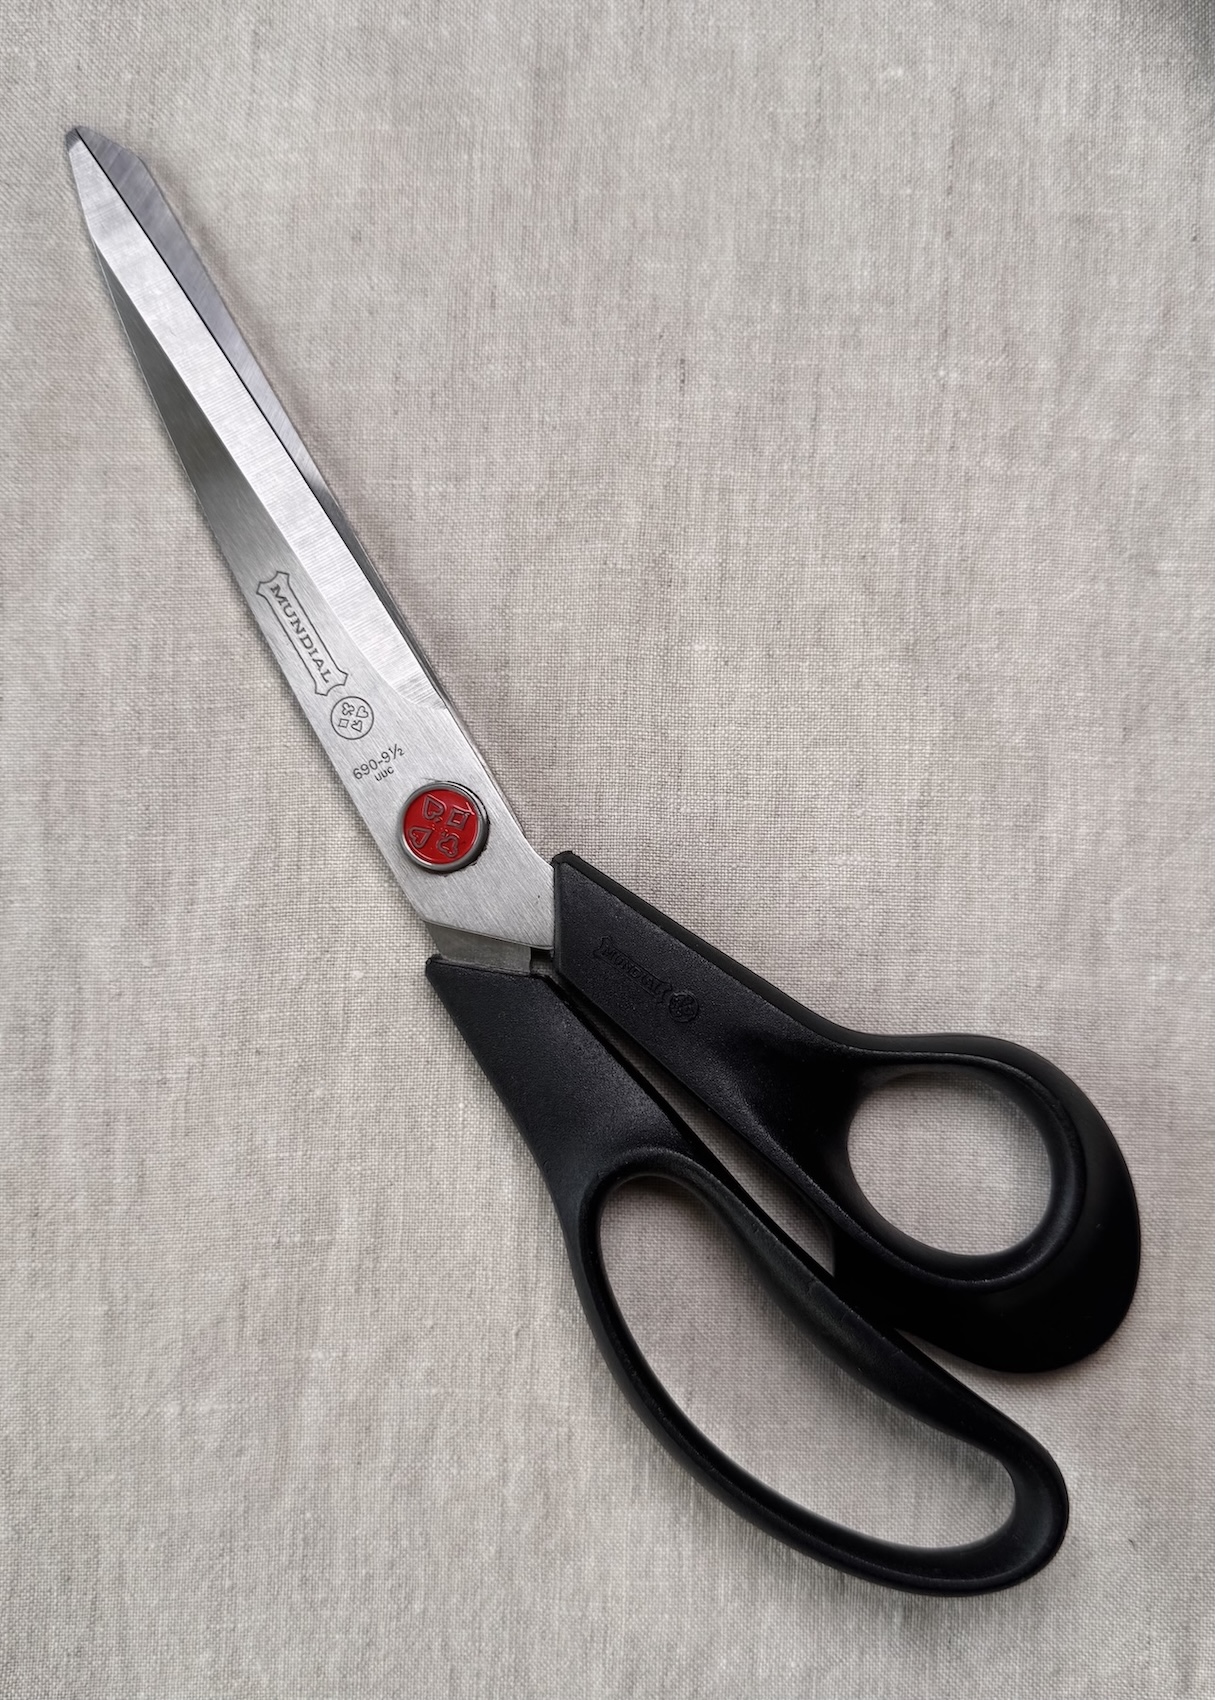
I also have a pair of Mundial 24cm (9½”) Red Dot Fabric Shears, a lovely gift from that same fabric store, even complete with my name engraved on the blade. With their longer blades and slightly lighter feel, I tend to use these for heavier fabrics like denim or for cutting through multiple layers. The longer blade makes it easier to create long, straight cuts with less effort, and the larger plastic handles feel especially comfortable in my hand. Made with stainless steel blades, they’re a reliable choice whenever I need smoother, more controlled cuts through heavier fabrics.
I think it’s worth having at least two pairs of fabric scissors; a backup for when one might be out for sharpening, or to simply have a spare within reach when you’re in the middle of a project.
Thread Snips
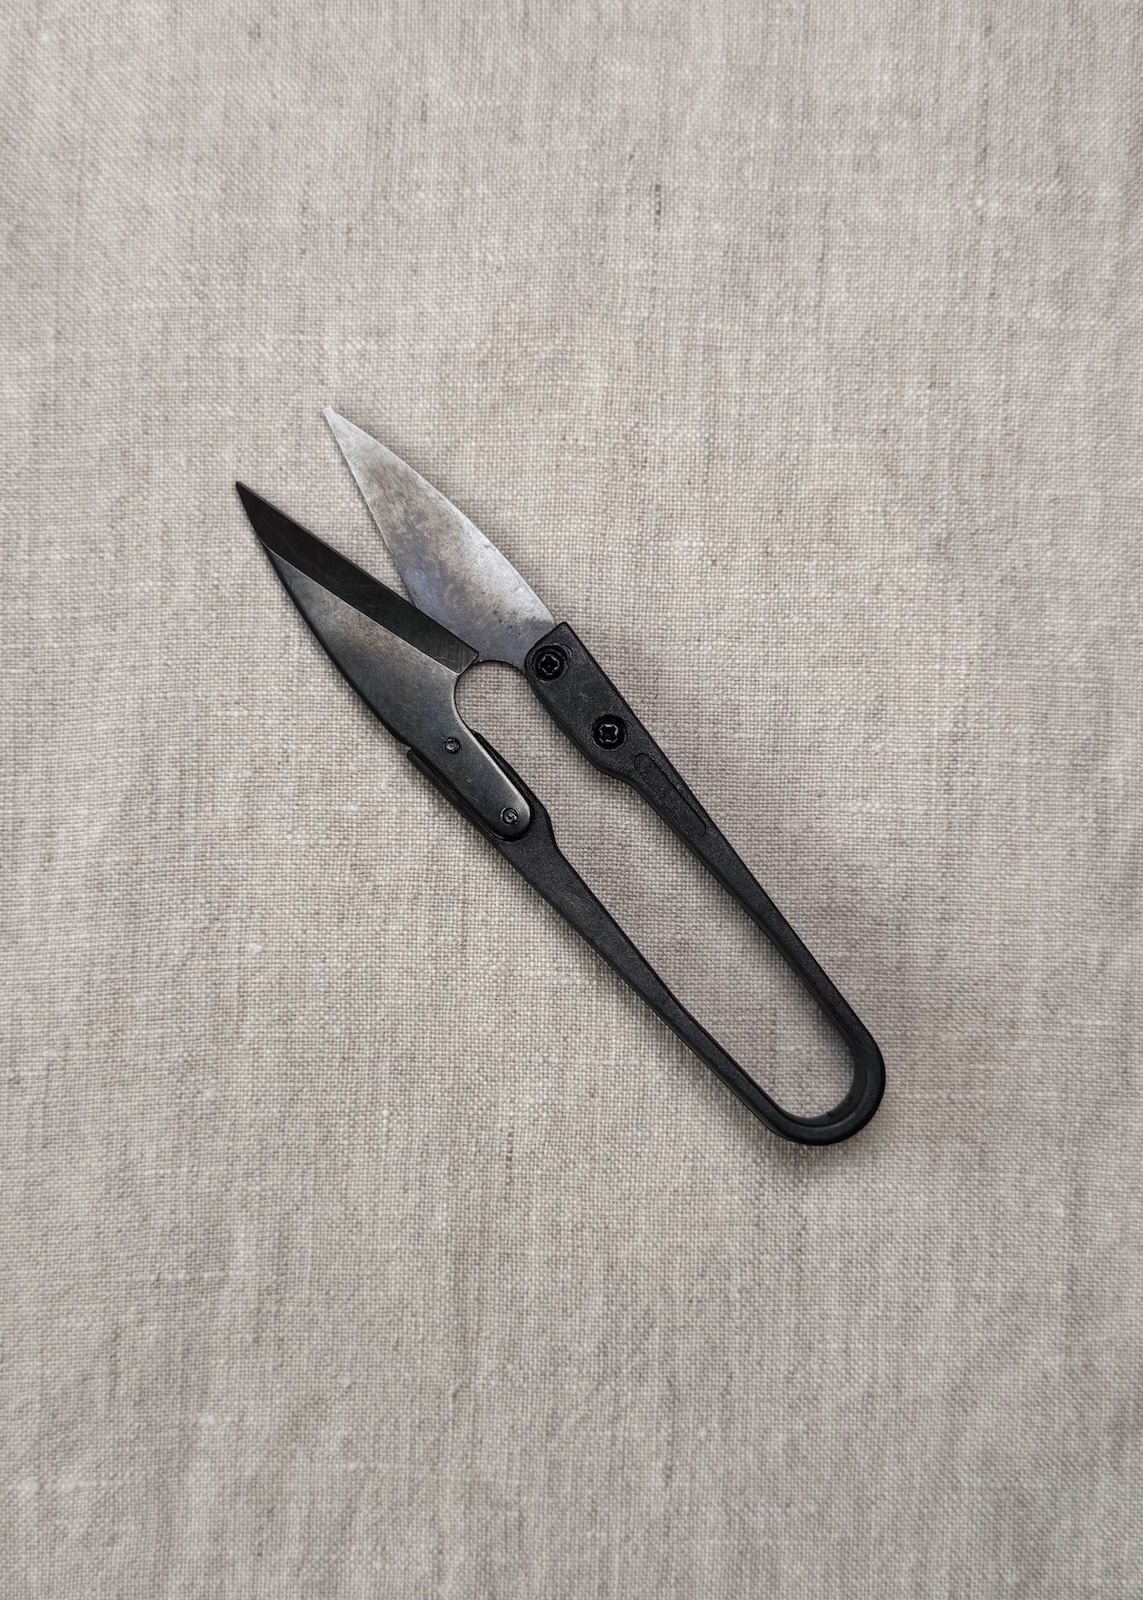
These little scissors live next to my machine, always within reach when I’m sewing or overlocking. In my opinion, they’re a must have for any sewing kit. Back when I was sewing day in and day out during my studies, I even wore mine around my neck so they were always close at hand, that’s how much I used them!
The beauty of thread snips lies in their spring-loaded design, made specifically for quick and easy thread cutting. Instead of having to open and close the blades like traditional scissors, you simply squeeze to cut. The spring then reopens the blades automatically, making them super efficient for fast, continuous work. They’re especially handy for snipping threads at the end of seams or trimming loose threads while you sew.
Honestly, once you’ve had a pair, you won’t look back. They’re one of those tools you’ll find yourself reaching for constantly.
Embroidery Scissors
If I had to describe embroidery scissors in three words, they’d be small, sharp, and precise. Their fine, pointed blades make it easy to snip threads cleanly, accurately, and very close to the fabric. With their compact, lightweight design, they’re perfect for intricate work, such as trimming threads, or finishing off hand sewn or embroidered details. Some even come with a curved tip, which helps protect the fabric and reduces the risk of accidental cuts.
Are embroidery scissors a must have? That really depends on the type of sewing you do. I tend to reach for my thread snips more often since I don’t do a lot of delicate sewing or embroidery, but I do use embroidery scissors when I need to trim threads very close to the fabric. So while they’re not essential for everyone, having a pair can be really handy.
What I love about embroidery scissors is how many shapes and decorative styles they come in, some of them are quite fancy! They can even reflect your personality, which makes choosing a pair more fun. I have two black pairs myself: a sleek and simple pair, and a classic stork shaped pair you’ve probably seen before.
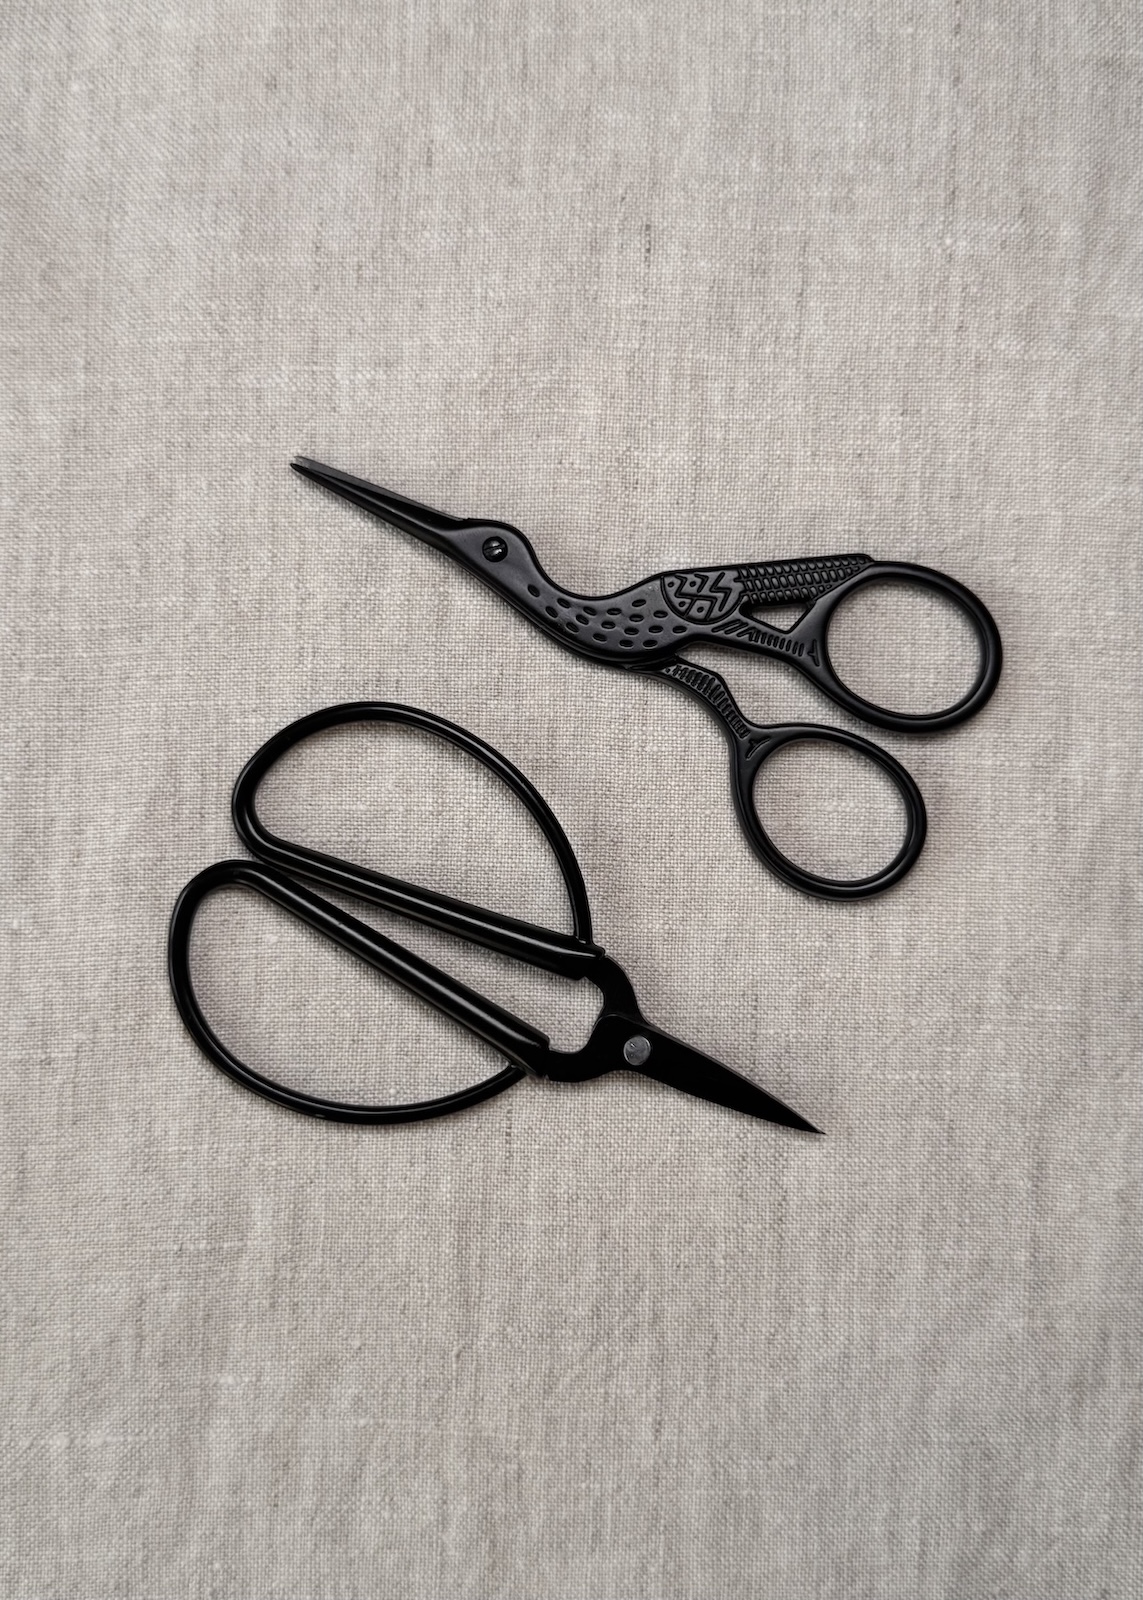
You might be wondering, why the stork? I know I was at the time of writing this article. From what I’ve read, the stork design dates back to 19th century midwives. Back then, these “scissors” were actually small clamps or shears, and since storks have long been symbols of birth and babies, the design made perfect sense. Over time, the shape evolved and found its way into the sewing room, possibly because fine, delicate tools like these were also ideal for embroidery and needlework.
Paper Scissors
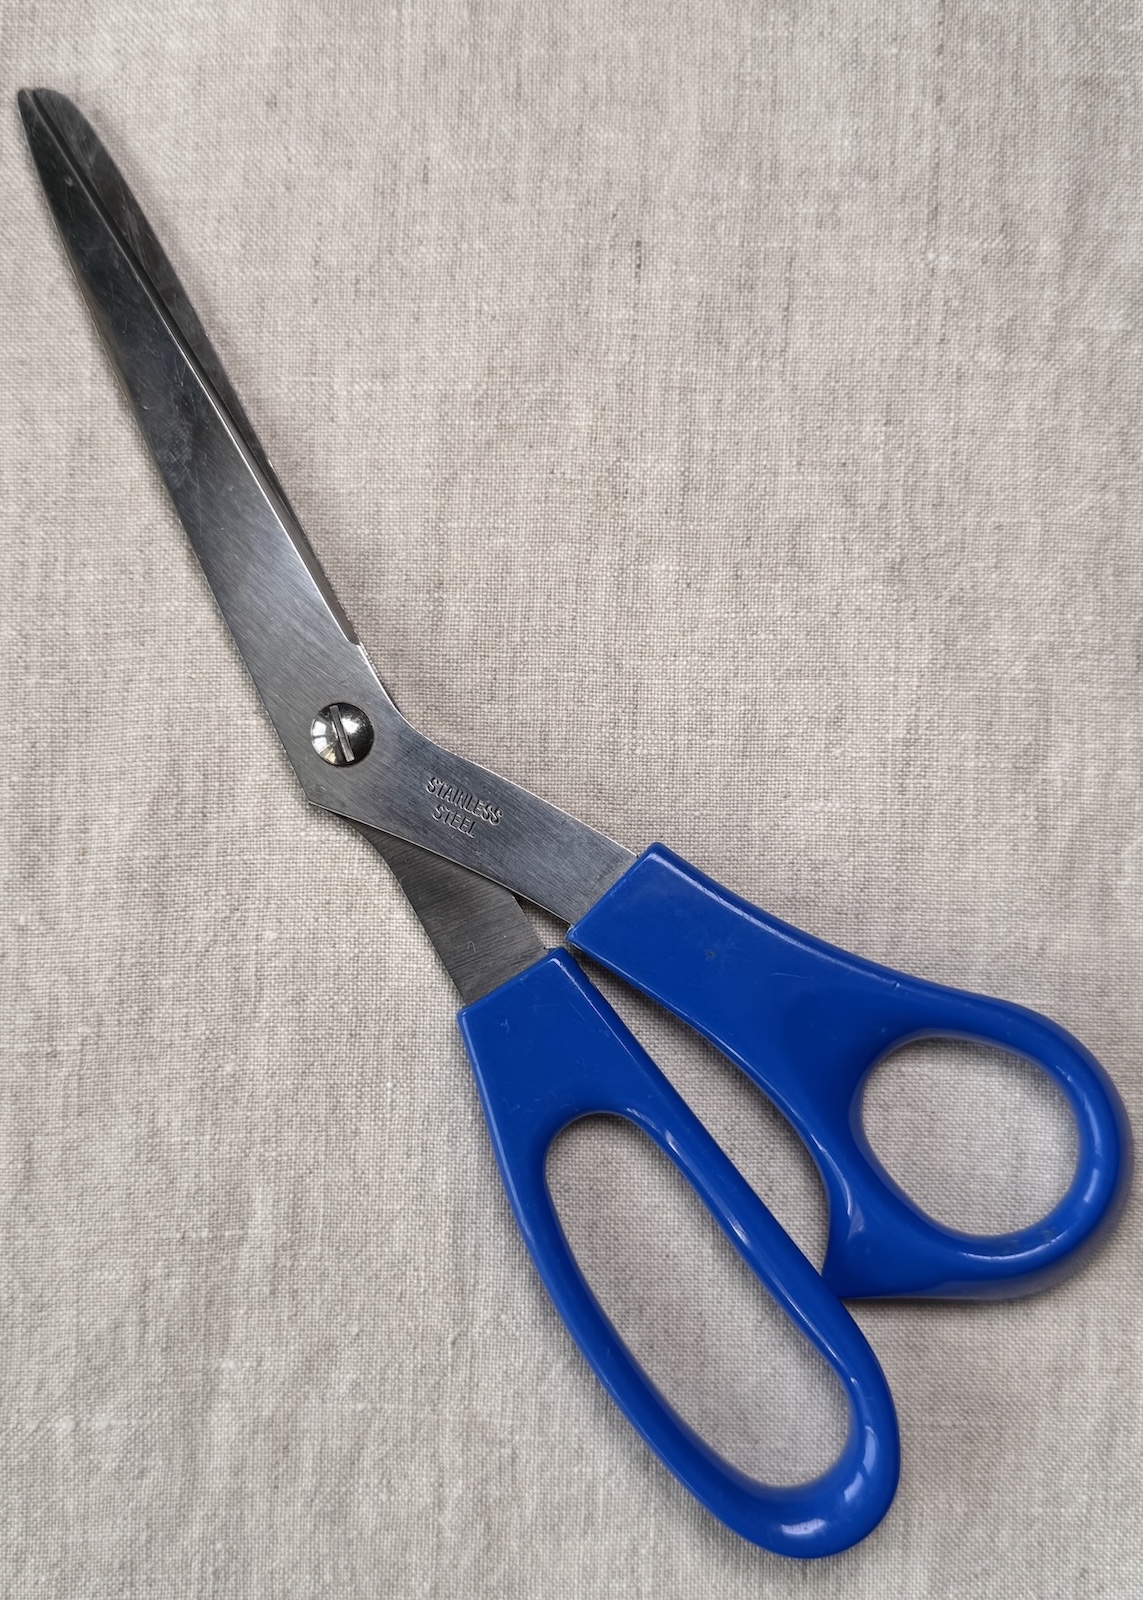
Most households will already have a pair of paper scissors lying around somewhere, but having a dedicated, larger pair in your sewing kit, always within reach, is definitely a worthwhile investment.
Paper scissors are typically lightweight, with finer, straight and sharp edged blades designed for clean, smooth cuts. Since they’re meant for paper (not fabric), they’re generally less heavy duty than fabric scissors. In saying that, my pair are nothing special, but I have had them for almost 20 years and I use these almost daily. They’re perfect for tasks like cutting out patterns, trimming tape, making alterations, or anything else that doesn’t involve fabric.
Just remember: never use your fabric scissors on paper as it will dull the blades. Keep fabric scissors strictly for fabric to ensure they stay sharp and in good condition.
Rotary Cutter
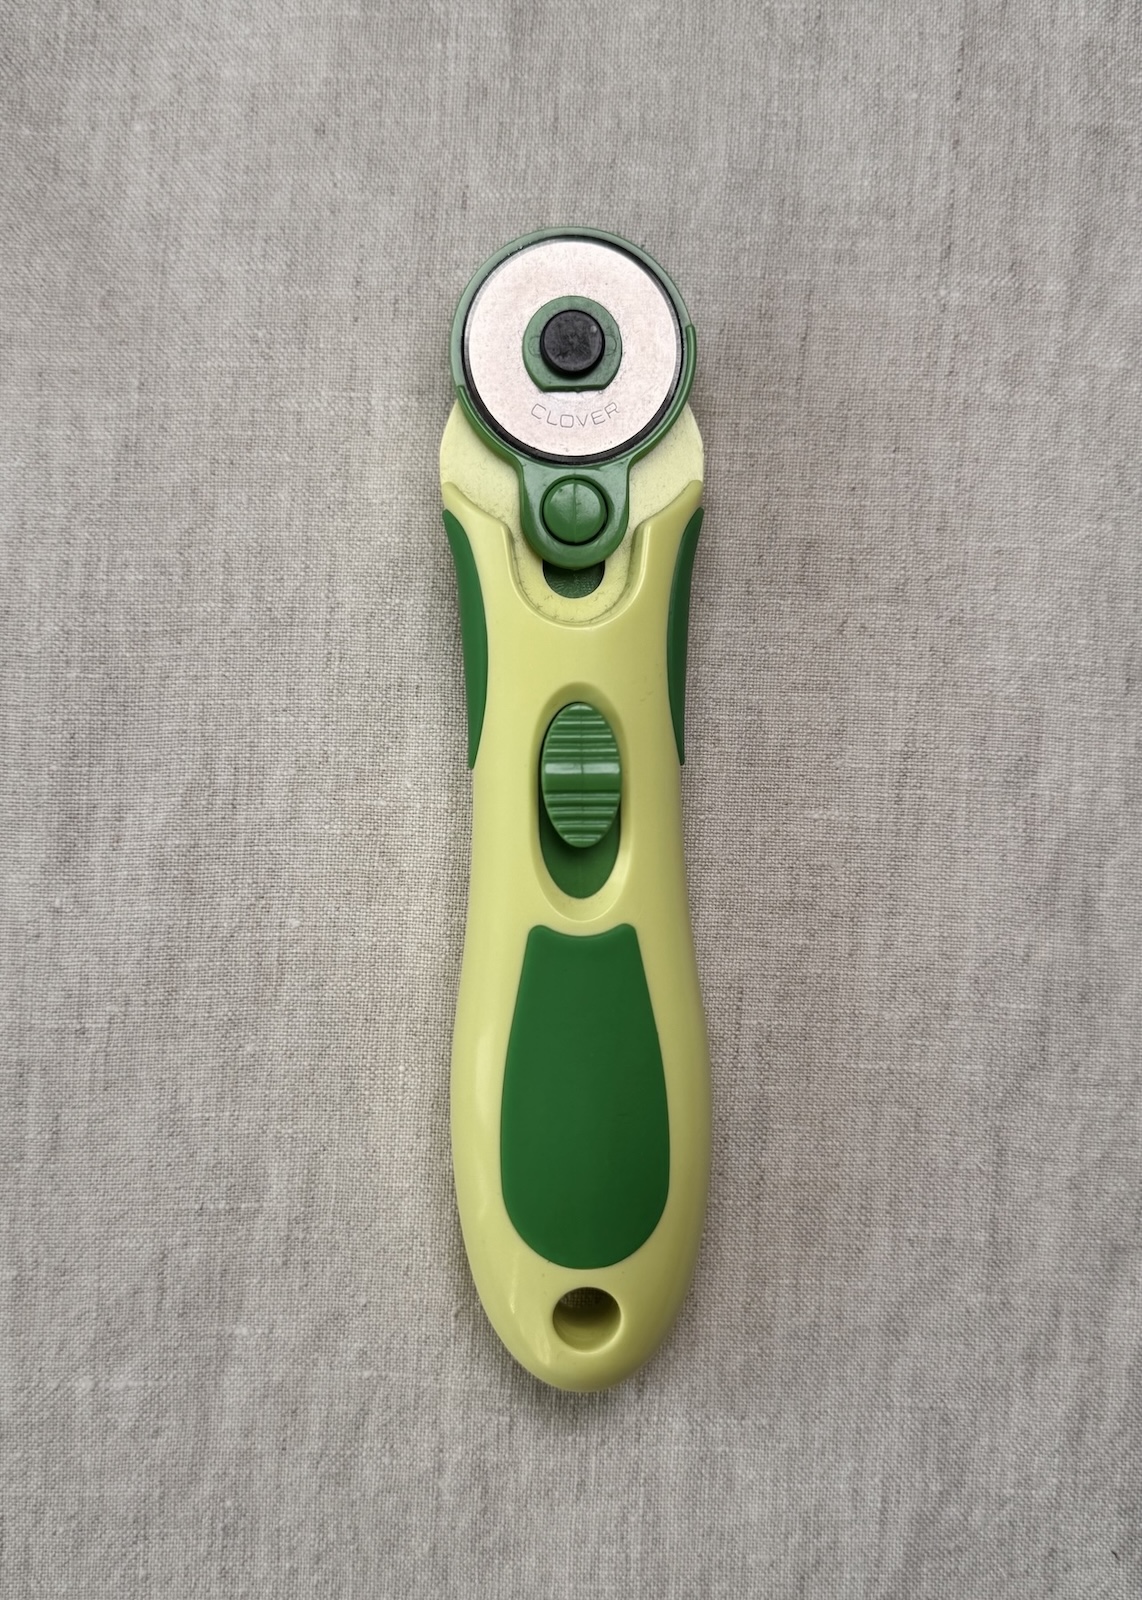
A rotary cutter is a handheld tool with a circular, rotating blade, used in sewing, quilting, and crafting. They come in a range of blade sizes, from 18mm for small, detailed work to 60mm for larger projects and heavier fabrics.
Rotary cutters are one of those tools that really depend on the types of projects you usually work on and your personal preferences. I keep a rotary cutter in my kit, but I tend to reach for my fabric scissors more often, simply because they’re what I’m used to and find most comfortable.
Mine is a Clover 28mm Soft Cushion Rotary Cutter. It’s not fancy or expensive, but it’s perfect for precise, smaller scale cutting, such as small garment pieces like a collar, or binding strips. The soft cushion handle gives a comfortable grip and good control, making it easy on your hand during lots of cutting. For larger patterns or thicker fabrics, a bigger blade (45mm or 60mm) would definitely be much more efficient.
Using a rotary cutter is simple, you just roll the blade along the fabric, applying even pressure. A good rotary cutter will make long, smooth cuts and can even slice through multiple layers of fabric at once. Most rotary cutters have replaceable blades and a retractable or locking mechanism for safety. You’ll also need a cutting mat underneath to protect your surfaces and keep the blade sharp. The downside of this is that larger projects (think a pair of trousers) will require a pretty large mat. A thicker ruler, like an acrylic quilting ruler, is also great for guiding your cuts, and many mats include measurement grids and guides to help make this even easier.
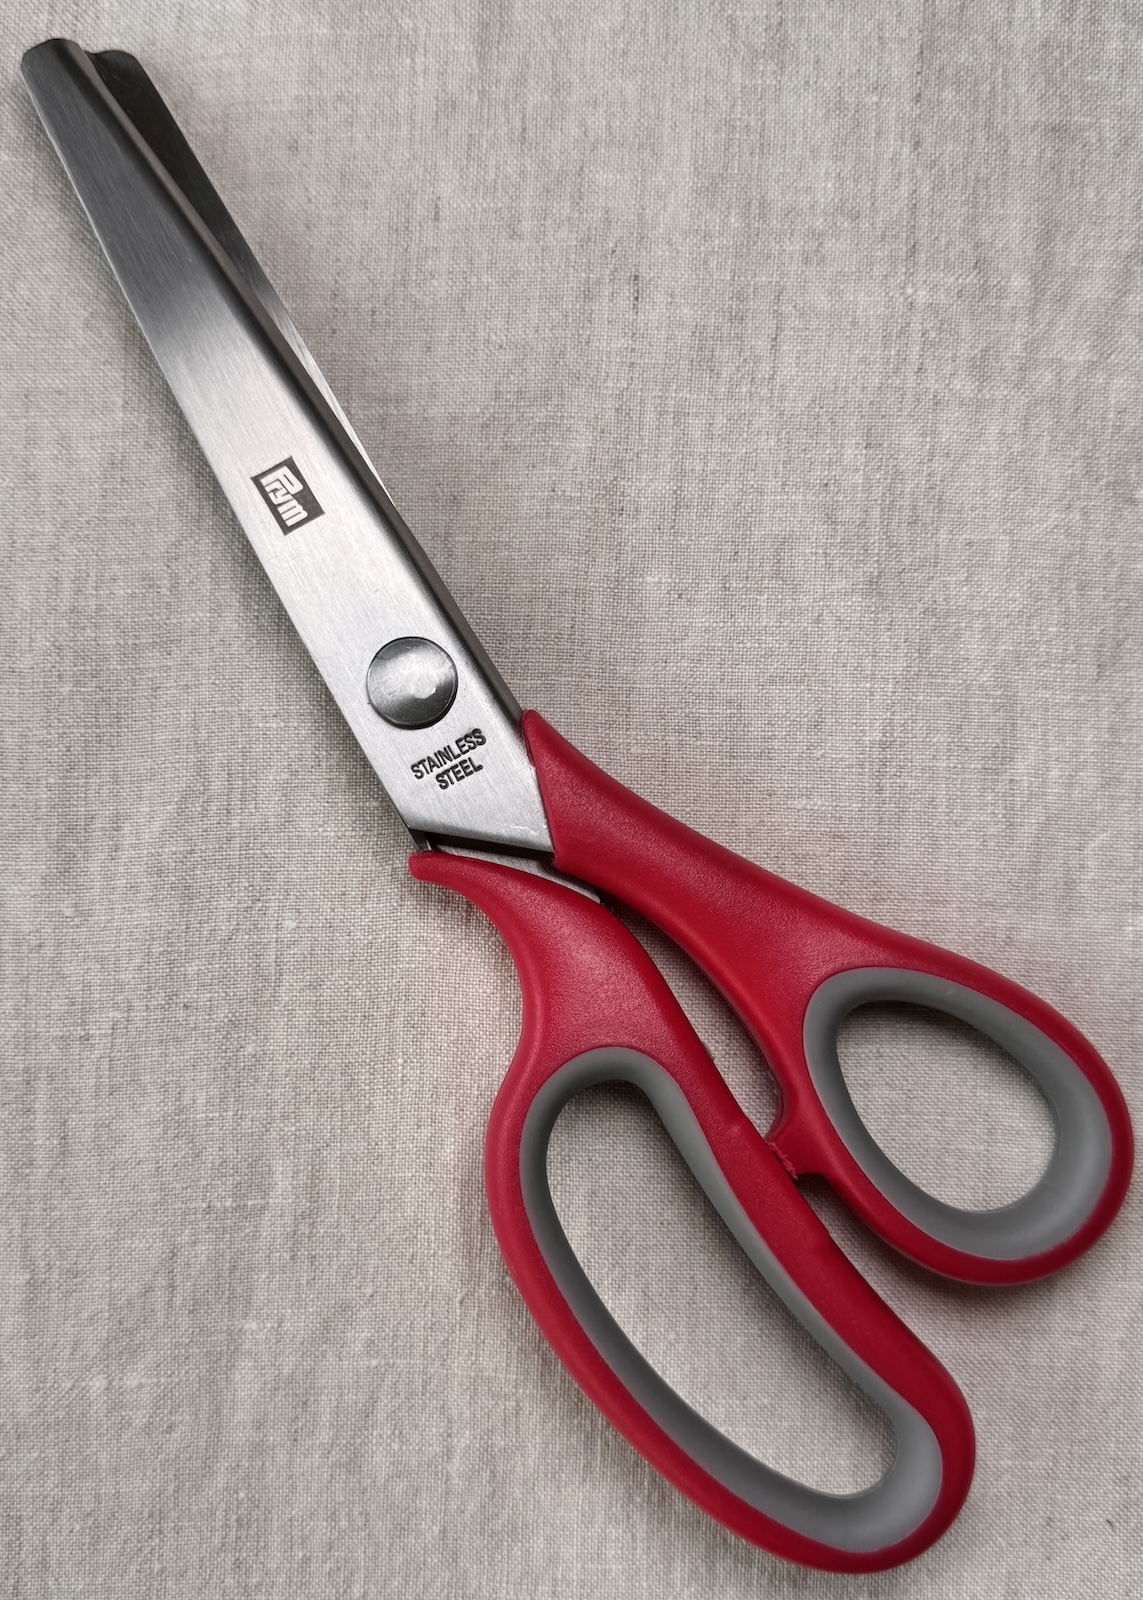
Pinking Shears
Pinking shears are easily recognisable by their zigzag blade, which creates a jagged edge on fabric. They’re traditionally used on woven fabrics to help reduce fraying, though it’s worth noting they don’t completely prevent it. Before overlockers (sergers) and the zigzag stitch became widely available, pinking shears were a go-to tool for finishing edges.
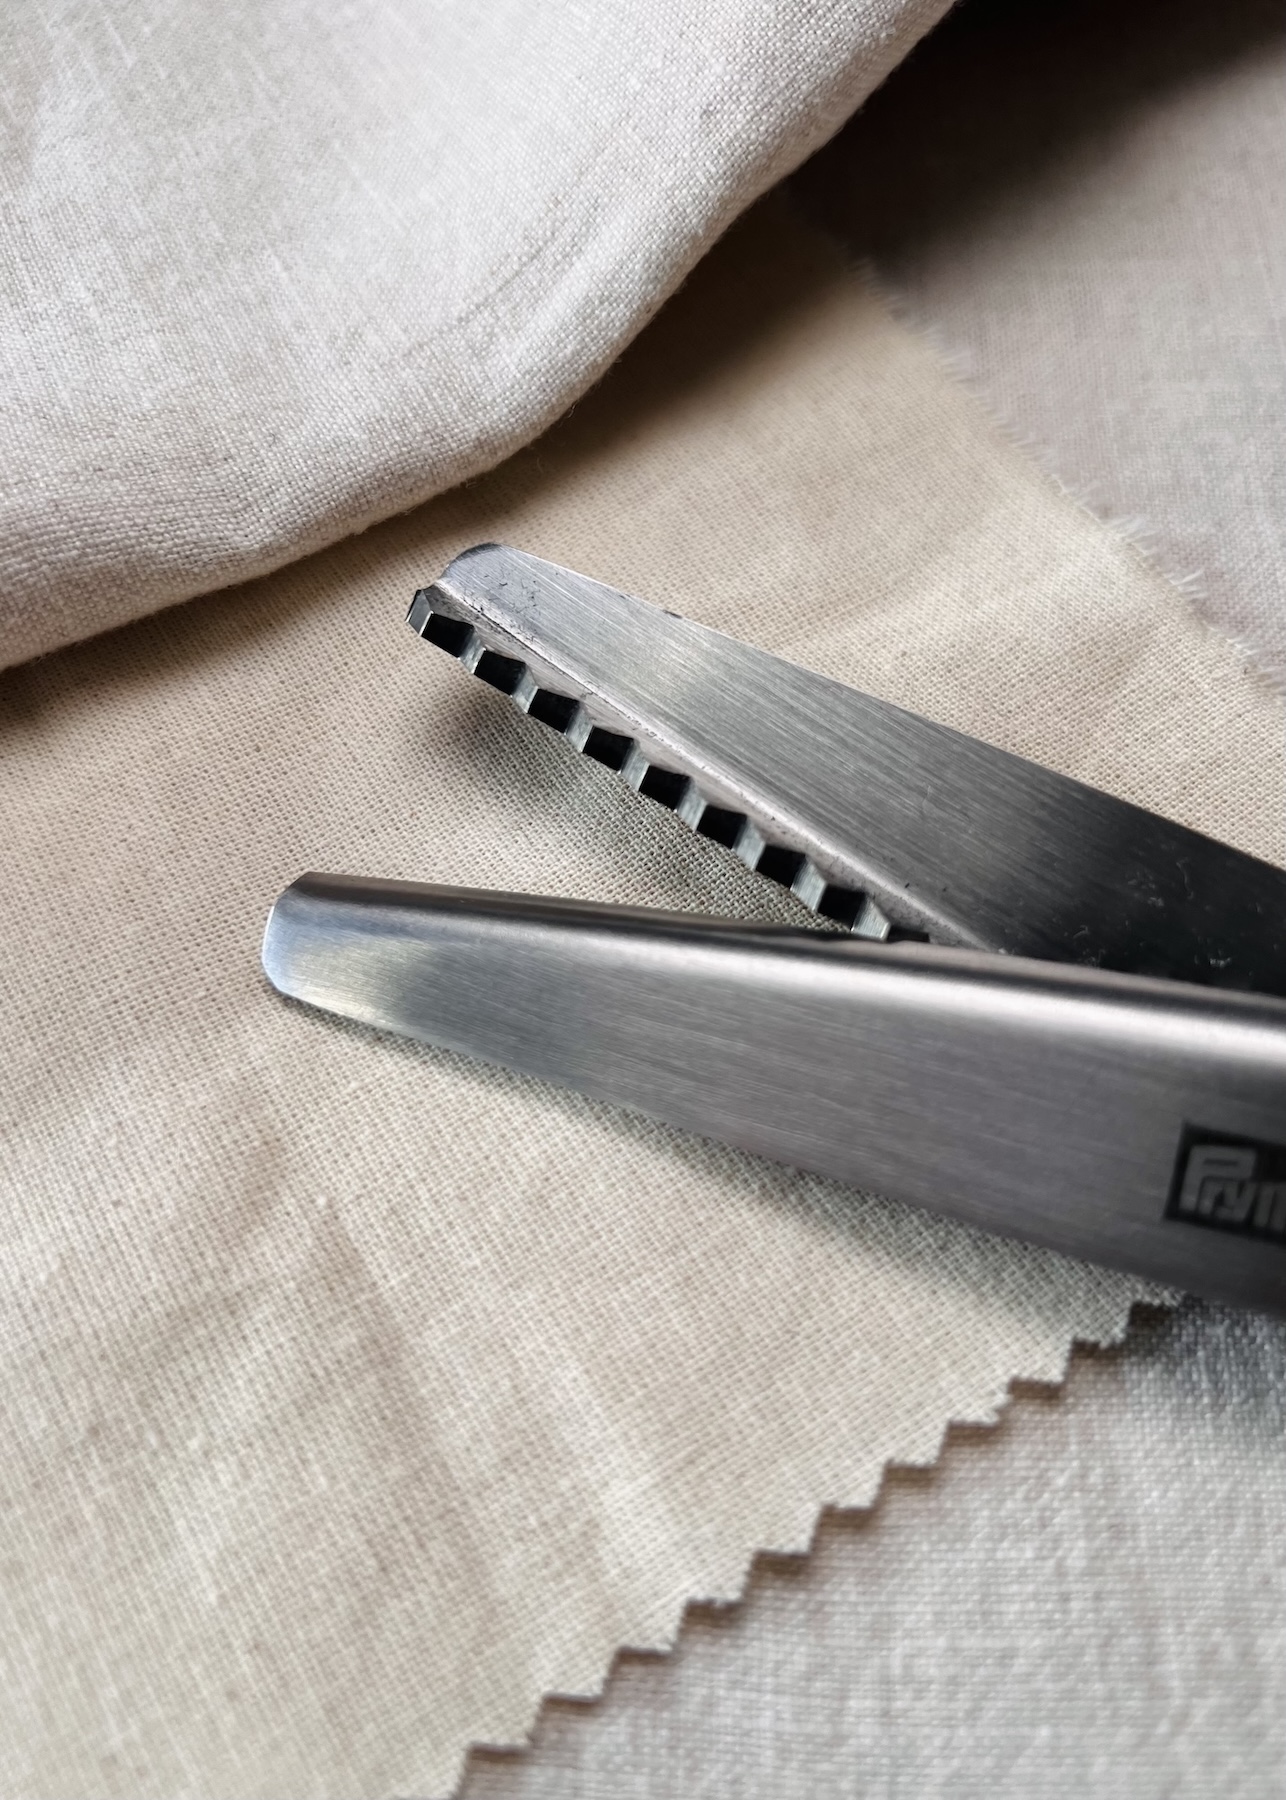
When you think about regular scissors making a straight cut, long threads become exposed at the edges, which, as we all know, can unravel easily on some fabrics. Pinking shears work differently. Their zigzag cut shortens these fraying threads and helps slow or minimise fraying, especially when cutting along the grain. Each “triangle” cut technically exposes more bias or diagonal threads, which are less prone to fraying.
Pinking shears can feel a bit heavy in the hand, particularly when cutting thicker fabrics or multiple layers. They also need to be sharp to create clean, crisp zigzags. Dull shears will only create messy edges. Since pinking shears are tricky to sharpen, it’s essential to look after them.
For the best results, I recommend cutting one layer of fabric at a time, working slowly and steadily. After each cut, realign the teeth to keep the zigzag pattern even.
I have a pair of Prym 23cm (9”) Pinking Shears with a plastic handle. I don’t really use them for regular sewing since I overlock all my raw edges, but I do reach for them when making small fabric samples for my sewing journal.
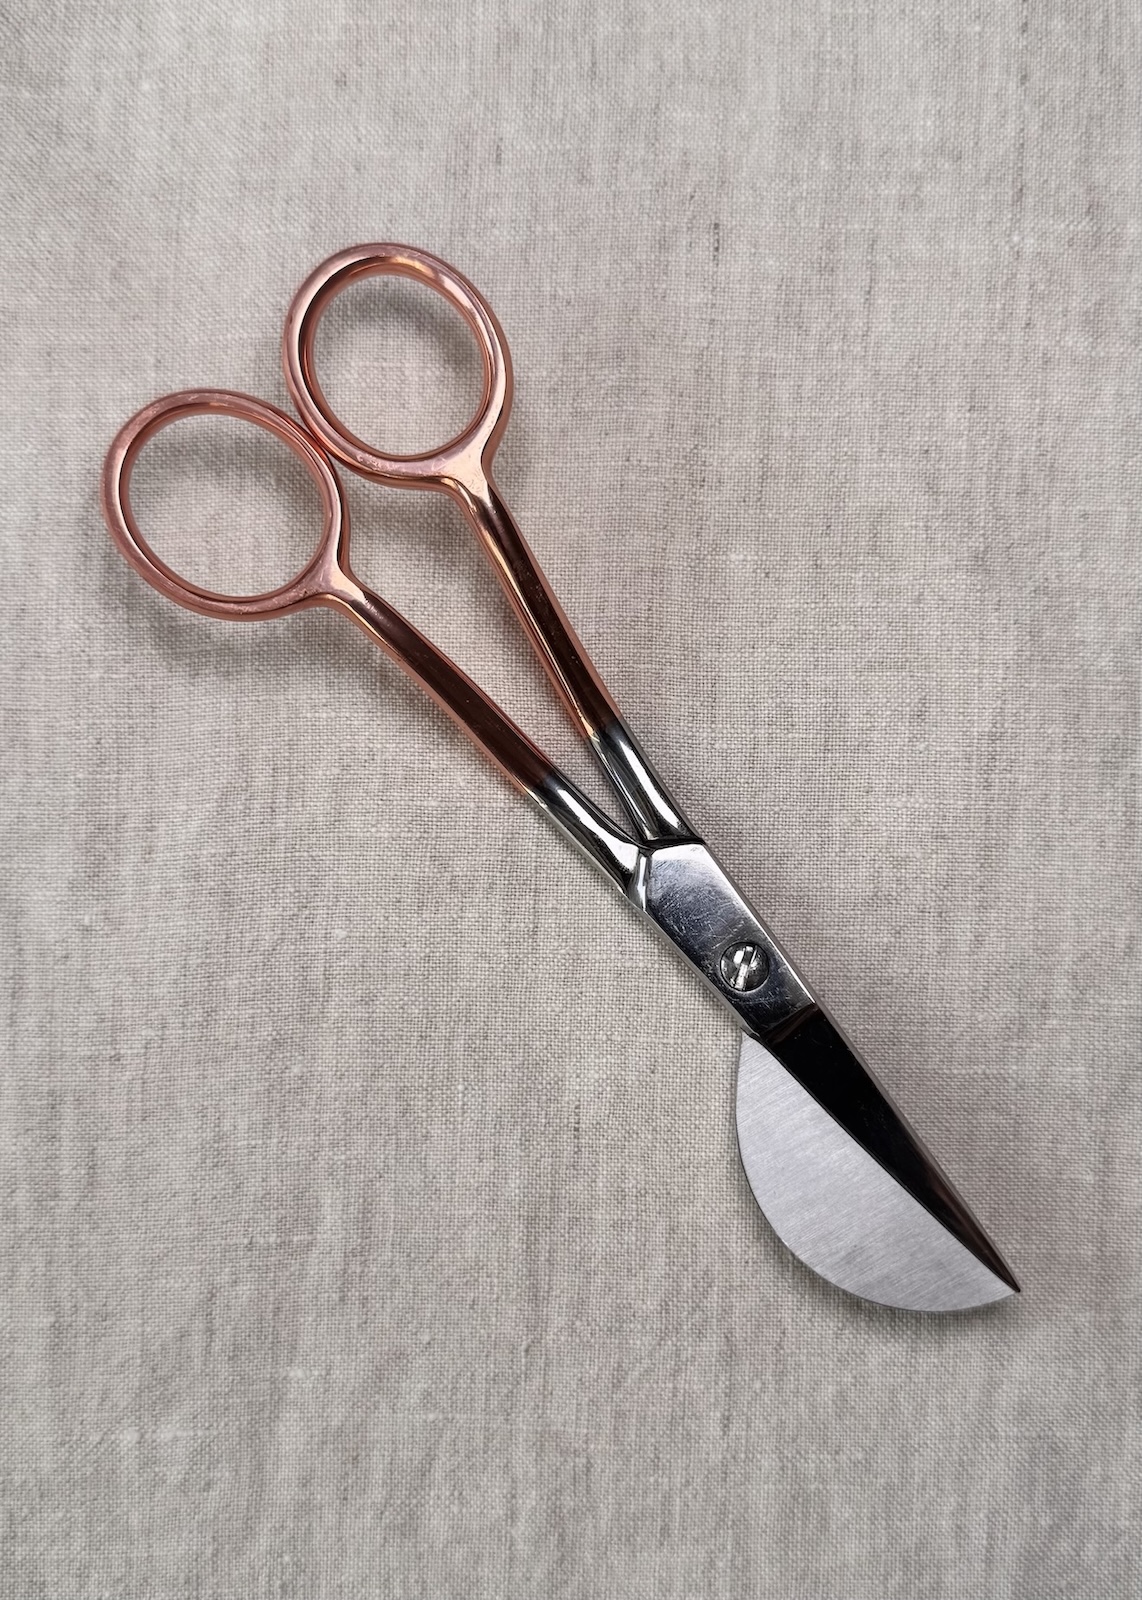
Appliqué Scissors (aka Duckbill Scissors)
Appliqué scissors are a relatively new addition to my toolkit, but thinking back, I can think of several occasions when they would have made my life a lot easier, helping to avoid accidentally snipping into the fabric (we’ve all been there!).
The most distinctive feature of appliqué scissors is the paddle shaped blade, often referred to as a “duckbill”. This wide, flat blade is designed to push away the bottom layer of fabric while cutting the top layer, creating a protective barrier between the two. This cool design lets you trim close without worrying about accidentally snipping the base fabric underneath.
They’re especially useful for:
- Appliqué work: Trimming excess fabric close to the stitching without cutting into the base fabric.
- Grading seam allowances: Reducing bulk by trimming one seam allowance narrower than the other.
You might not reach for them every day, but if you’re working with appliqué or layered fabrics, appliqué scissors can be great. I have a pair of Prym Appliqué Scissors 15?cm (6”) in Rose Gold, and I recently found them incredibly helpful when working with a heavier weight fabric that required a lot of seam grading.
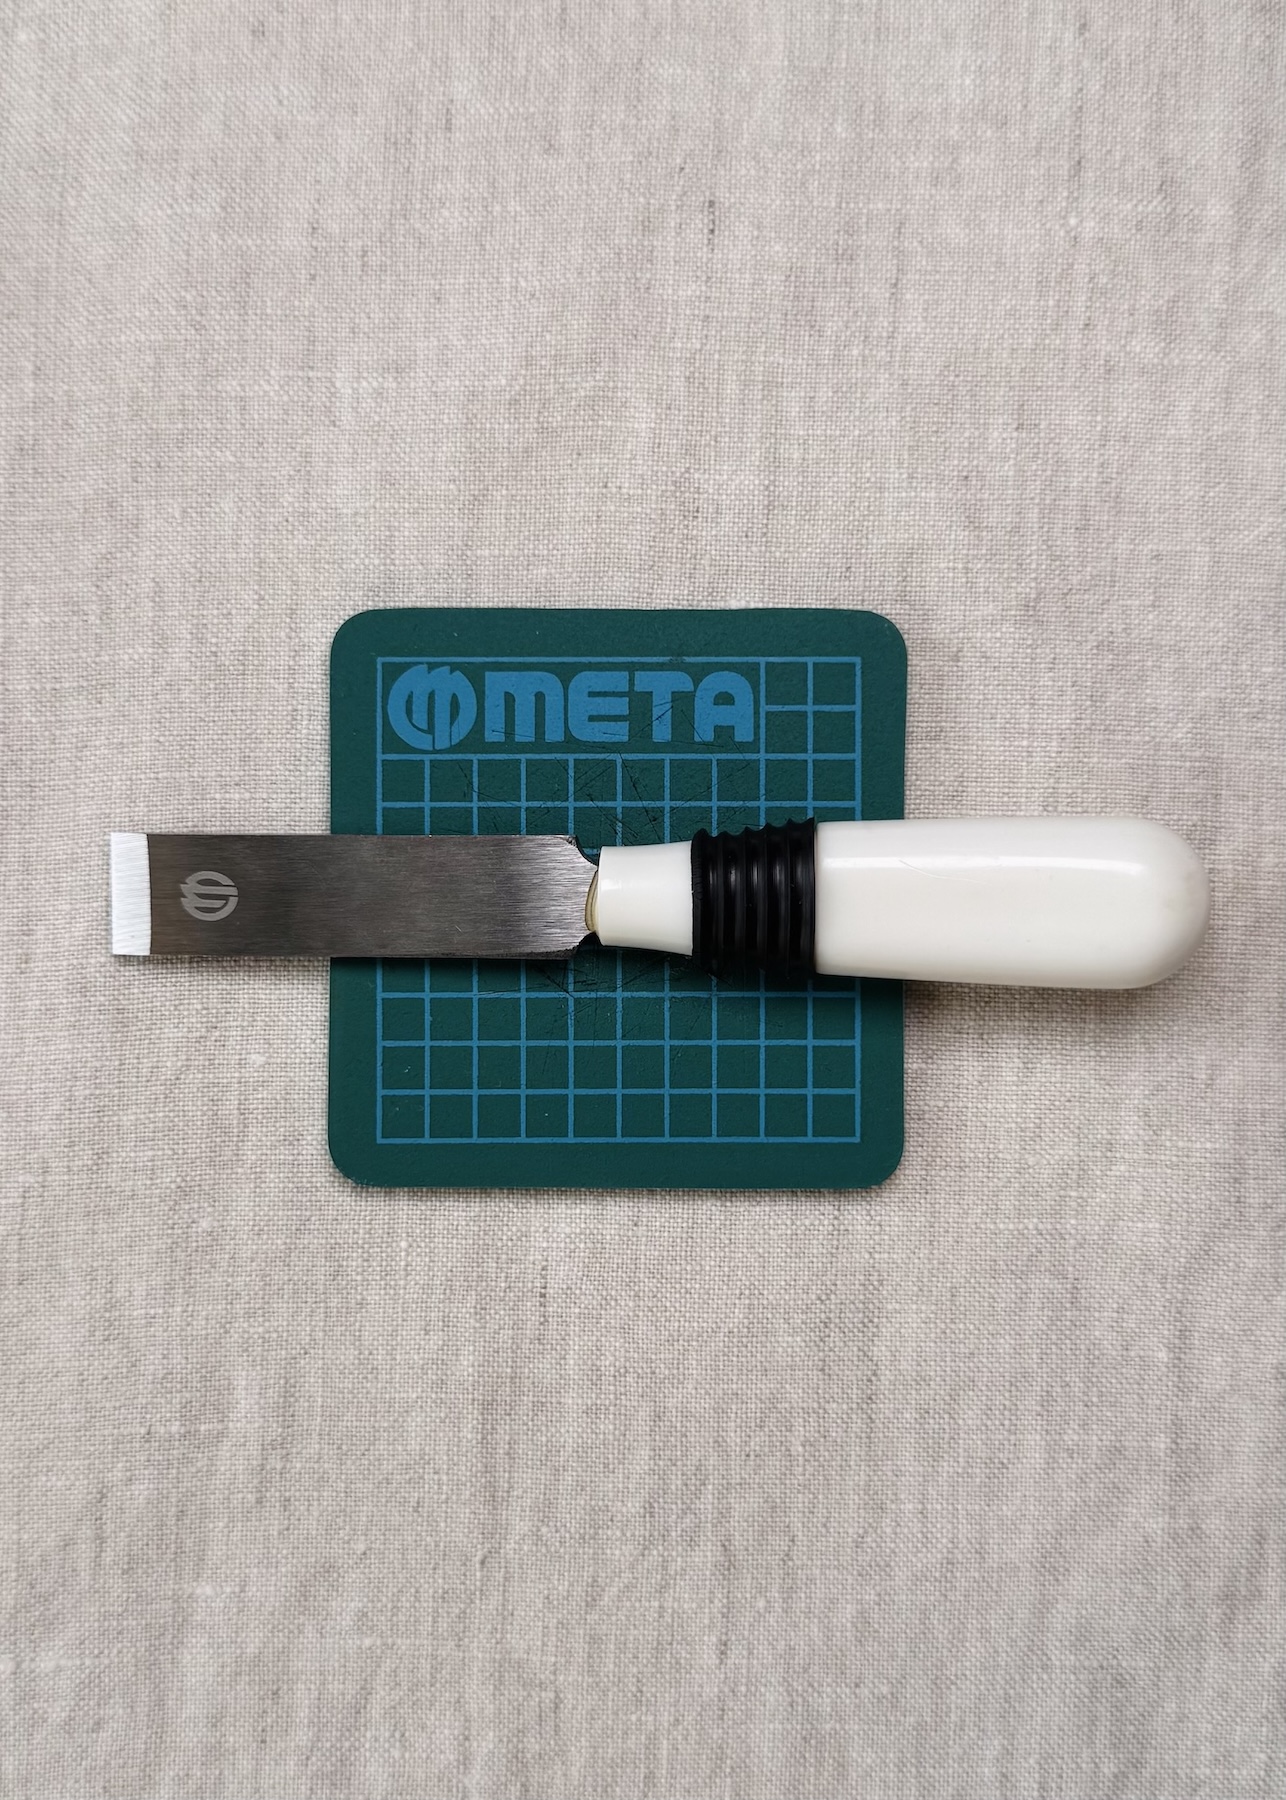
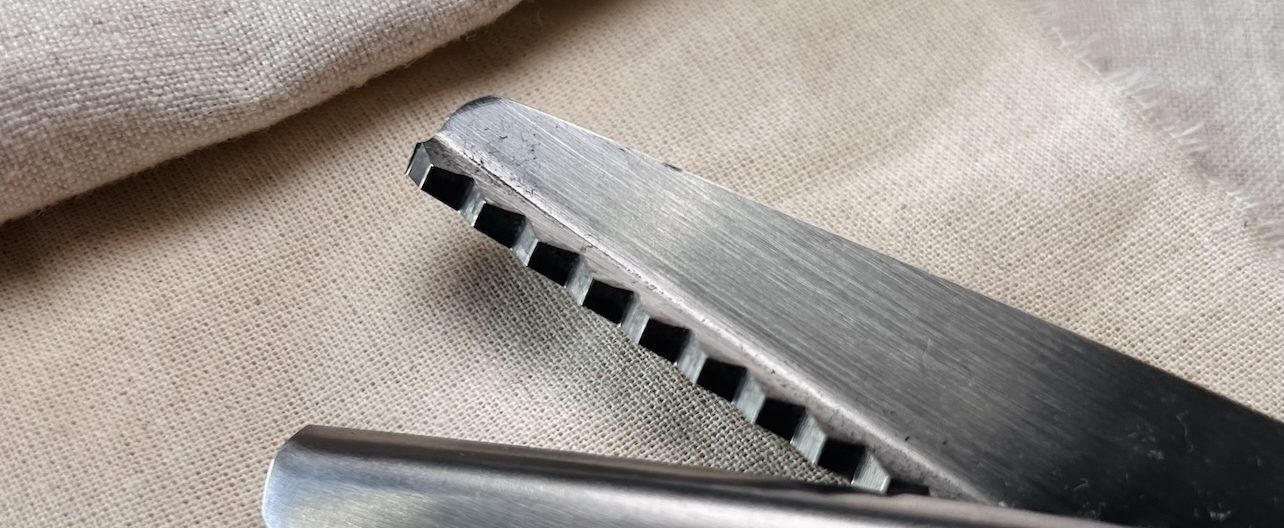
Buttonhole Cutter
Not exactly a pair of scissors, but since it cuts fabric, I thought it was worth including.
A buttonhole cutter is just that—a blade used to cut an opening for a button after the buttonhole has been stitched. The tool features a sharp, single cutting blade that reminds me of a chisel. It allows you to make a clean cut without snipping the threads that form the sides of the buttonhole, helping to avoid fraying or distorting the fabric.
I have a Buttonhole Cutter Set, which comes with blades for both straight and keyhole buttonholes, along with a cute 5cm (2″) mini cutting mat to place under the fabric. Other sets may include a small wooden block or similar surface protector to protect the cutting surface. If you don’t have one of these, simply placing a thick newspaper or similar underneath works just as well.
To use a buttonhole cutter, simply position the blade within the intended buttonhole opening, taking care not to cut any of the stitching. Gently rock the blade from side to side to cut through the fabric. Afterward, depending on the fabric, you may need to tidy up any minor fraying with thread snips or embroidery scissors for a neater finish.
Caring For Your Scissors
To ensure your scissors last it’s important to take good care of them. Here are a few simple tips:
- Keep them sharp: Regular sharpening helps ensure the scissors cut smoothly, protecting the fabric. It’s best to have your scissors professionally sharpened, as this usually provides a longer lasting, sharper edge. While home sharpeners are available, they tend not to be as effective.
- Watch out for pins: Always position pins away from the cutting edge. Cutting into pins will only damage the blades.
- Use the right scissors for the right job: Fabric scissors should only be used on fabric. Avoid cutting paper, cardboard, or other non fabric materials, as this will dull the blades.
- Keep them clean: Wipe the blades with a soft, dry cloth (like a microfibre one) and brush off any lint from the hinges, especially when working with fluffy fabrics like fleece. For that sticky residue can sometimes accumulate (like interfacing glue), clean the blades as soon as possible with a cloth and a little dish soap or rubbing alcohol. Be sure to dry them properly to avoid possible rust.
- Apply some oil: Every now and then, apply a drop of oil (sewing machine oil will do the trick) to the pivot point of the scissors, then open and close the blades to work it in. This will help to keep any movement smooth. Just be sure to let the oil settle in before cutting so as not to stain your fabric.
You might think scissors are just scissors, but there are so many types out there, each designed for different materials and tasks. I’m not suggesting you need every pair, just the ones that suit the fabrics you work with and the kind of sewing you do. Using the right scissors for the right job will simply make the cutting process smoother and more accurate.
About Author
Emma Cartmel
Heya! I’m Emma, and I'm an Aussie living in beautiful Munich with my husband Ben, and our pug Harley. I am a designer, pattern maker, and sewist, and I share my expertise and experience through my ‘cartem.sewing’ page. You can follow me on Instagram @cartem.sewingRelated posts

Sewing Essentials: Stitch Width, Stitch Length & Needle Position
Thinking back to my high school textiles days, I remember having to test stitch settings on every fabric we planned to use for our projects. We would cut out little squares of fabric and experiment with different stitch lengths and widths, and edge-finishing techniques. At the time, it felt unnecessary, not to mention tedious….

Sewing Essentials: A Simple Guide to Notches
I love a notch, so much so that I’ve decided to dedicate this article to these small but important markings. Here, I’ll explain why they’re so helpful, when to use them, and how to add them to your own patterns or adapt them for existing ones. What exactly are notches? Notches are small markings found…

How to Select and Use Interfacing: A Simple Guide
Iron-on or sew-in, woven or non-woven, lightweight or heavyweight. With so many different types, weaves, and weights to choose from, how do you know which interfacing is best for your project? In this article, I will explain the two main types of interfacing before diving into the differences in weave and weight. Hopefully by the…

Sewing Essentials: A Simple Method for Reversible Seams
There are so many ways to finish a seam, from good old overlocking to French seams and binding. I recently stumbled across another method that’s pretty nifty, and honestly, I kind of wish I had known about it sooner. It is a bit like binding, but topstitched in place so it doesn’t move or flap…

Sewing Essentials: Understanding Different Types of Sewing Elastic
Elastic is a really common notion used in sewing. You’ll find it on everything from waistbands to cuffs and necklines. It plays a crucial role in giving garments both support and shape. Have you ever had the waistband of your pants twist and never sit quite right? Or maybe you’ve noticed the leg opening of…


SEW THIS LOOK


Latest Posts

Leave a comment