Sewing Glossary: How To Draft And Sew A Shirt Collar Tutorial
Adding or changing collar designs is one of the easiest ways to vary a style of your homemade garments. This fine detail adds character and frames the face, offering a more tailored look to an outfit. But there’s nothing more homemade looking than a poorly sewn collar. Luckily, with this easy-to-follow detailed tutorial and some practice, you’ll learn how to draft, assemble and attach a classic shirt collar that looks store bought perfect.
The shirt collar is the most traditional type of collar mostly found on shirts, dresses and jackets. It consists of the collar fall and the collar stand, which is a separate piece of fabric that raises the collar fall off the neckline.
If you are familiar with our tutorial on mandarin collar, you’ll find a lot of similarities in the process of creating a shirt collar. In fact, the shirt collar stand is basically the mandarin collar also known as a stand-up collar. The only difference is that before attaching the collar stand to your garment, you construct the collar fall, sandwich it between the collar stand pieces and stitch everything together.
It might sound pretty complicated on paper, but we assure you that after we’ve walked you through all the steps of this tutorial, you’ll be surprised how easy and straightforward the collar construction process really is.
Materials
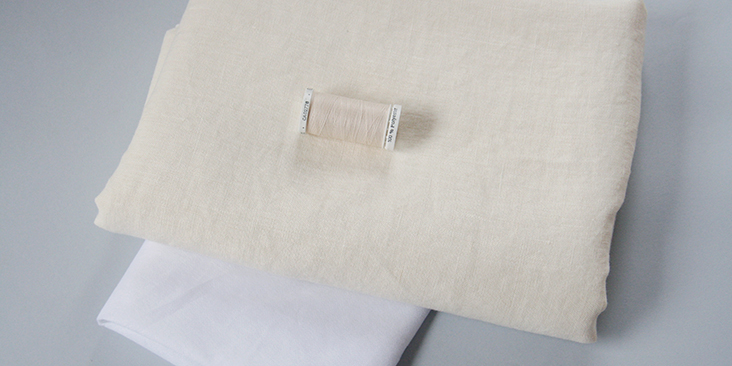
Fabric of your choice (we are using our IL019 PRISTINE Softened Medium Weight Linen)
Matching sewing thread, fusible interfacing
Tools
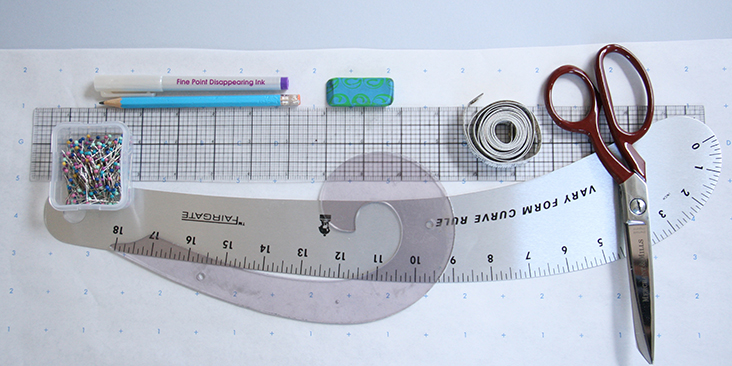
Pattern paper, pen, scissors, French curve or hip curve, ruler, tape measure, pins, sewing machine
Difficulty
Intermediate
Time
1-2 hours
Drafting The Collar
Please note that before you start drafting your collar block pattern, you need to sew the button bands or the button placket and assemble the front and the back of the bodice together as instructed in your pattern.
Since the collar follows the curve of the garment neckline, the garment neckline and the inside edge of the collar stand have to be the same length.
Traditionally, the color block is made from Center Front (CF) to Center Back (CB), hence across half the length of the collar – it is made symmetrically for the other half, with a fold at CB.
Steps
1. Find the center back (CB) of your garment (fold the back panel in half and place a pin to mark the spot). Measure the length of the neckline from center back (CB) to center front (CF) using a flexible tape measure and the length from the CB to the shoulder seam. Be sure you measure only the finished stitching line of the neckline and do not include the seam allowance. It means that you have to position your measuring tape at the line where your seam allowance ends and not at the raw edge to ensure you get the right length.
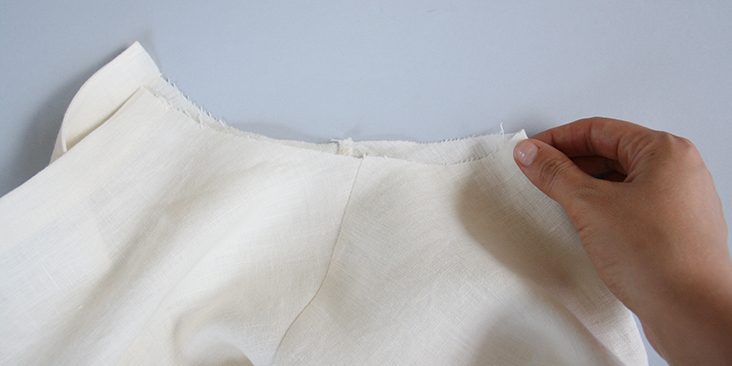
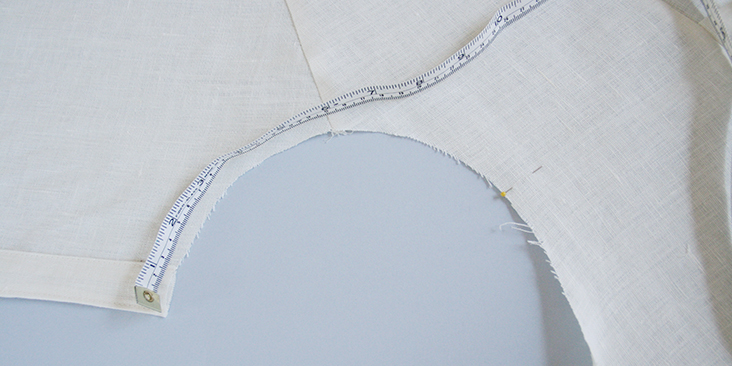
Now that you know the length of your collar and the distance between the CB and the shoulder seam, gather your supplies – pattern paper, ruler, curve ruler and a pen – and let’s start drafting!
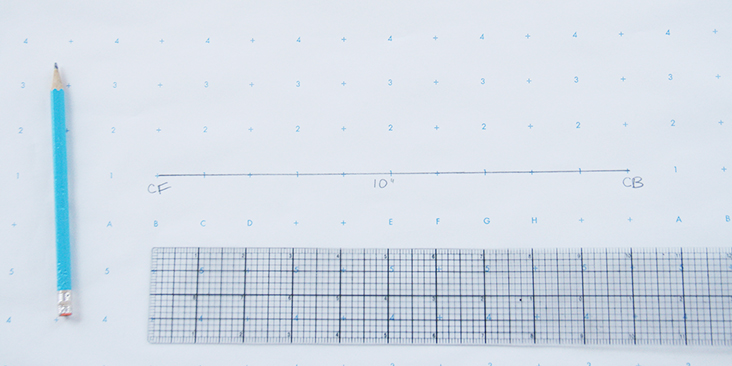
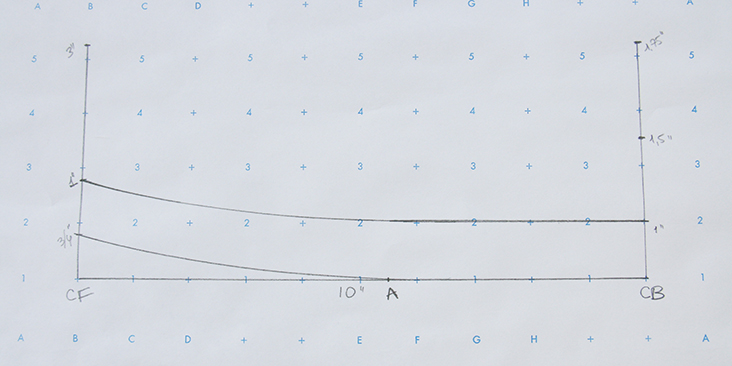
2. Draw a straight horizontal line to the length of your CB to CF measurement (a distance of half the neck size measurement). In our case, it’s 10″. We’ll call this line CB – CF.
3. At CB, draw a perpendicular line 4.25 inches (11 cm) high and mark the following increments:
1 inch (2.5 cm) for the stand
1.5 inches (4 cm) for a gap
1.75 inches (4.5 cm) for the collar fall
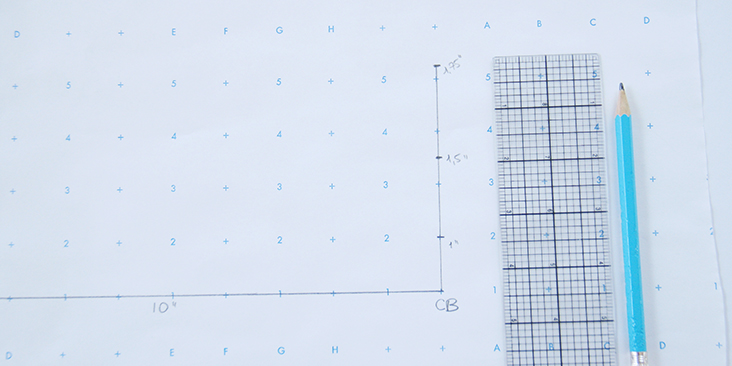
The height of the collar stand and the collar fall are totally up to you. However, as a general rule for a women’s garment, the collar stand is 1″ (2.5 cm) high and the collar fall is somewhere between 1.5 – 2 inches (4 – 5 cm). These are the traditional measurements that we are going to use in this tutorial but you are welcome to vary this. You could also use one of your store-bought shirts as a guide.
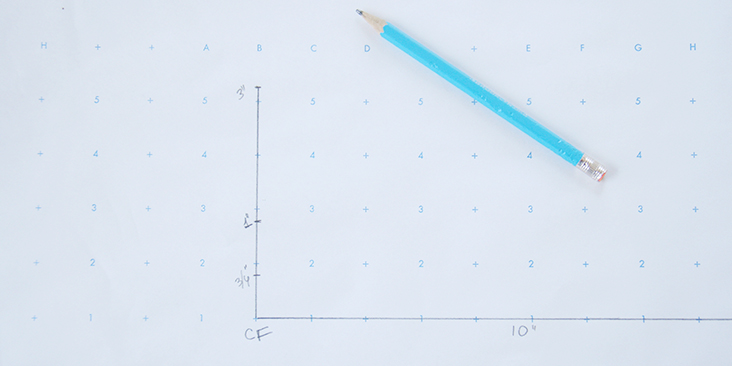
4. At CF, draw a perpendicular line 4.25″ (11 cm) high and mark the following increments:
3/4 inch (2 cm) for the curve of the stand
1 inch (2.5 cm) for the stand
3 inches (7.5 cm) for the collar
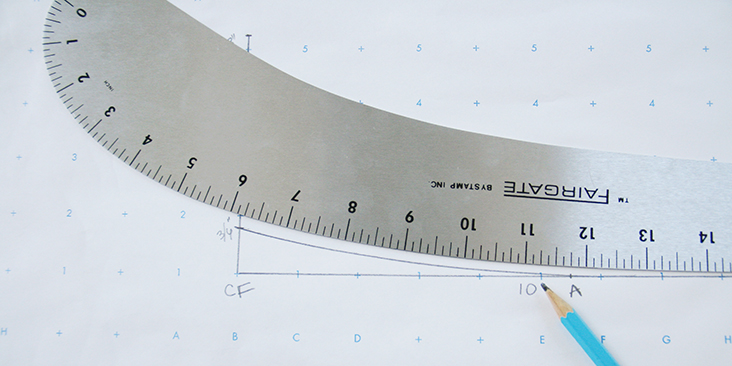
5. On the CB – CF (starting from the CB) mark the CB to shoulder seam measurement that you took earlier (4.5″ in our case). We’ll call this point A. Using your hip or French curve, draw a curve from this mark up to the 3/4 inch (2 cm) point on the CF line.
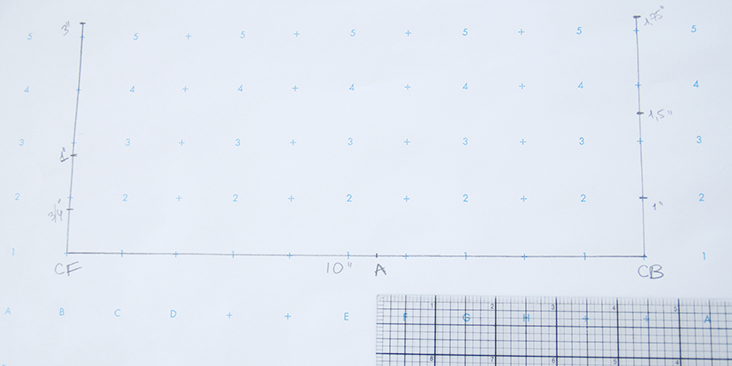
6. Measure up 1″ from the line and draw a parallel curvy line across the full length.
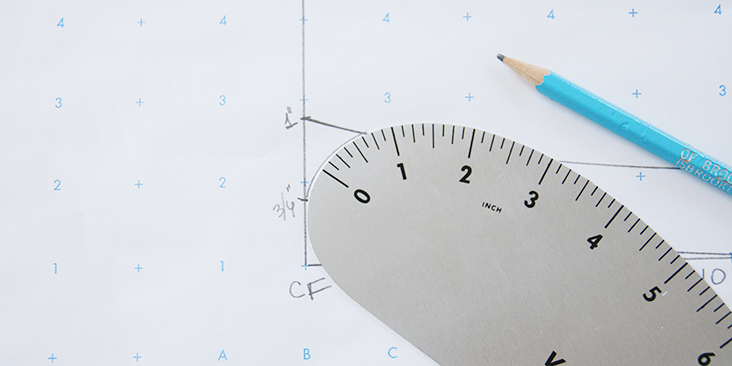
7. Draw a smooth curve between the two parallel lines at the tip of your collar stand.
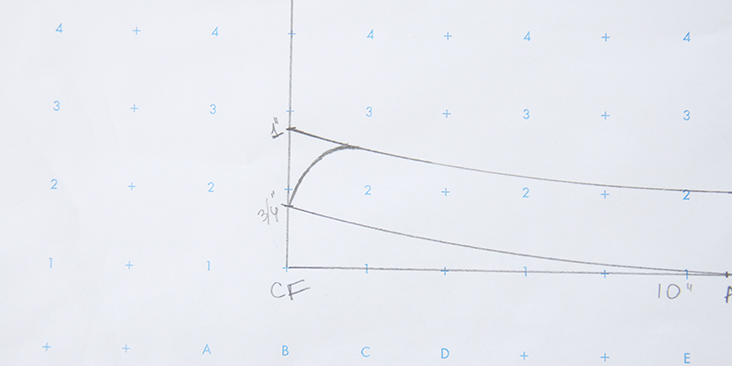
Your collar stand is now complete and should look something like this:
Time to draw the collar fall!
8. To make sure that your collar fall fits perfectly between the collar stand pieces, we’ll make our collar base slightly smaller. On the collar stand, measure in 1/8″ (3 mm) from the start of the tip curve. We’ll call this point B.
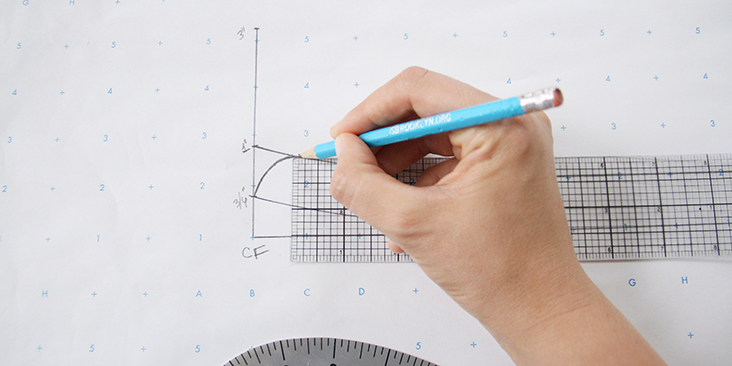
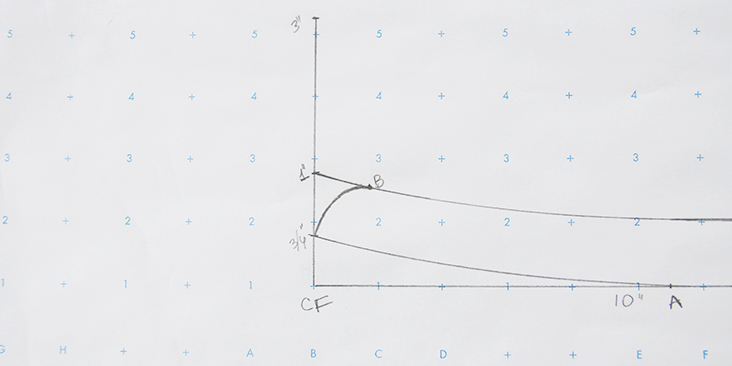
9. On the CB line, draw a straight parallel line from the 1.5″ (4 cm) mark to the measurement of your CB to the shoulder seam. We’ll call this point C.
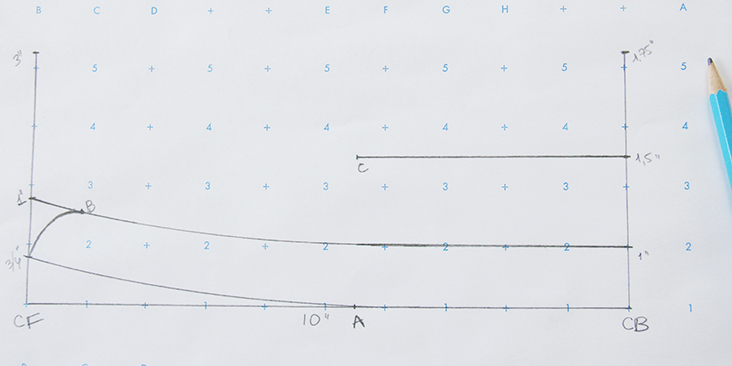
10. Take your curve ruler and measure the distance between point A and B on the collar stand. Turn the curve over and match the numbers to the same points to replicate the exact line along the collar from point C to point B on the collar stand.
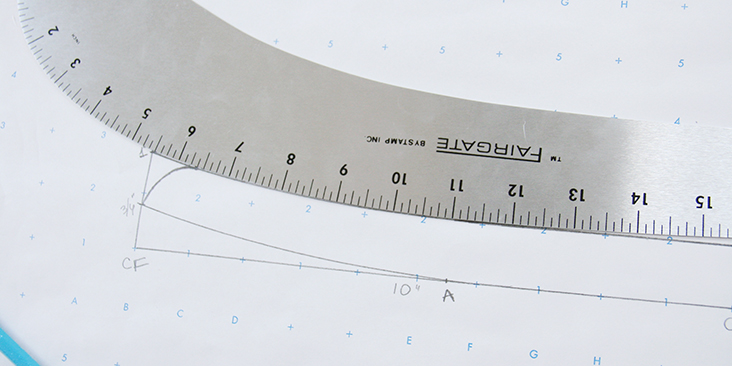
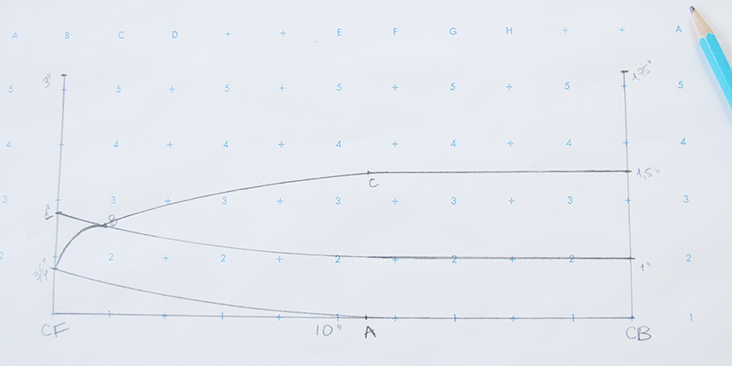
11. To create the collar fall points, draw a 2″ (5 cm) line from point B to the CF line. Pivot your ruler until you get a 2″ long diagonal line. We’ll call this point D.
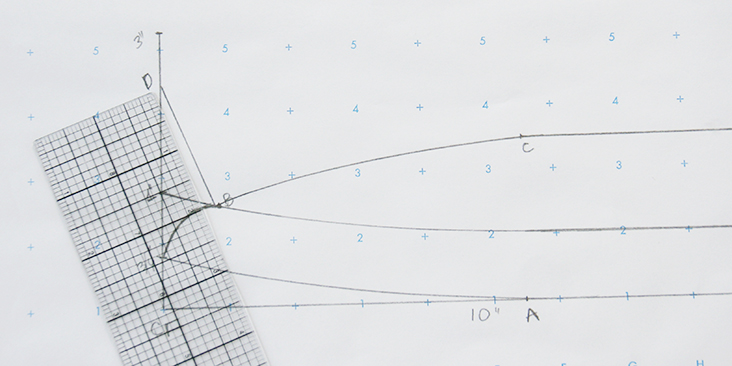
Note that you can vary the shirt collar design by making the points longer or shorter. Or give it a different shape: make it rounded, for example. The only thing to consider here is when changing the shape of the collar, be sure you do not add to/take away from the collar neckline. Otherwise, the collar will not fit the collar stand.
12. Just as you did in steps #5 and #9, draw a straight parallel line from the 1.75″ mark on the CB line to the measurement of your CB to the shoulder seam. We’ll call this point E.
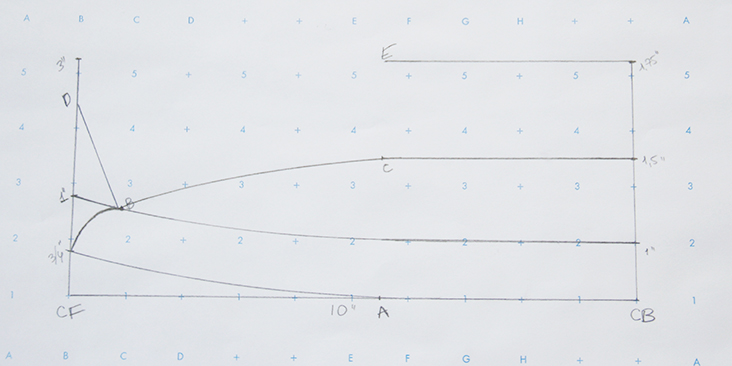
13. Lastly, draw a smooth curve between points D and E to complete your collar.
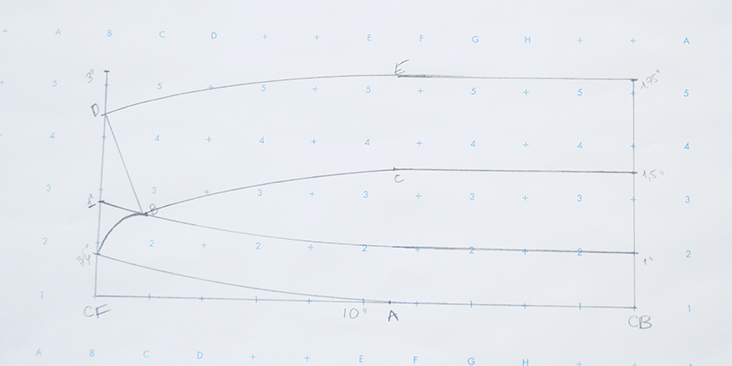
Cut out the collar fall and the collar stand to separate them, take a new large sheet of pattern paper and trace both pieces to create full collar shapes. Add your usual seam allowance (we use 3/8″ (1 cm) seam allowances) around all edges and cut out your pattern again. Double check all the measurements before you go any further and make adjustments if necessary by adding or subtracting fabric from the CB fold end of the collar.
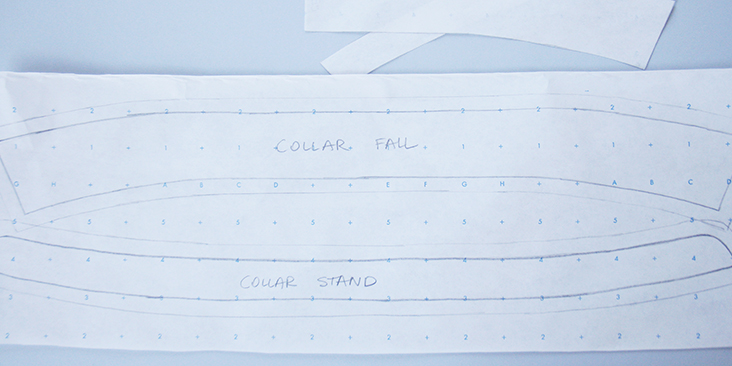
Sewing The Collar
1. Cut two collar stand and two collar fall pieces (inner and outer, respectively) on the grainline of the fabric. Cut one collar stand and one collar fall pieces in fusible interfacing but cut away the seam allowances to eliminate bulk in the finished garment.
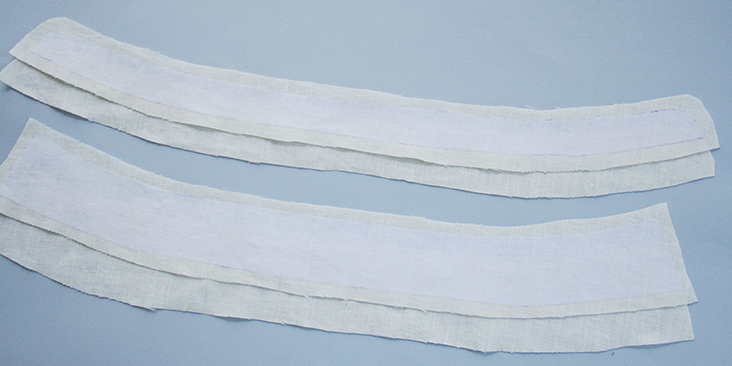
You can decide not to use fusible interfacing but if you want to add to your collar a crisp look and give it some extra support, we recommend interfacing your pieces.
2. Apply fusible interfacing to the wrong side of one of your collar fall pieces, and one of the collar stand pieces. The interfaced pieces are your undercollars and the non-interfaced – main collars.
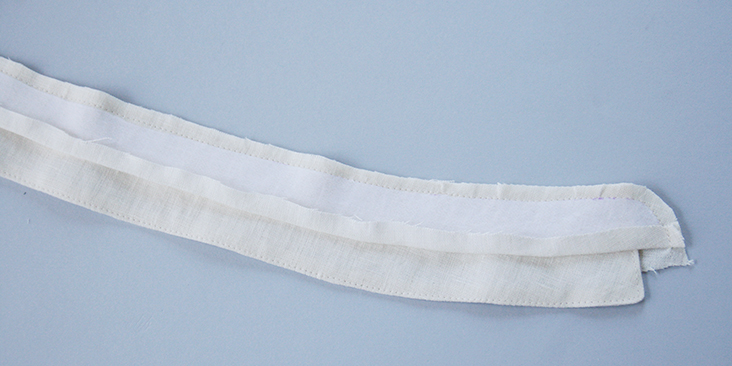
3. The assembly starts with the collar fall. Pin the undercollar and collar right sides together and stitch around the outer three edges.
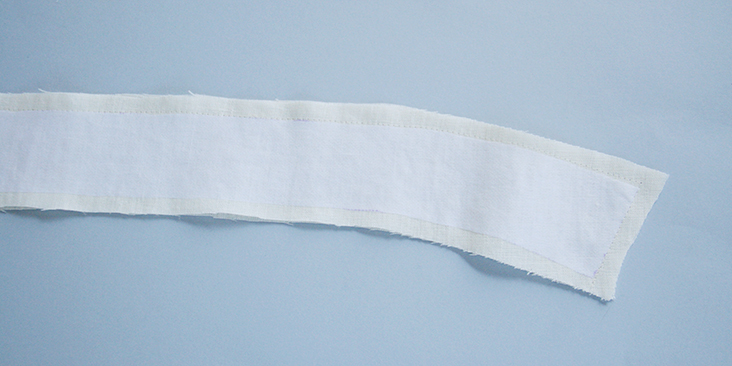
4. Grade the seam allowance and clip the corners.
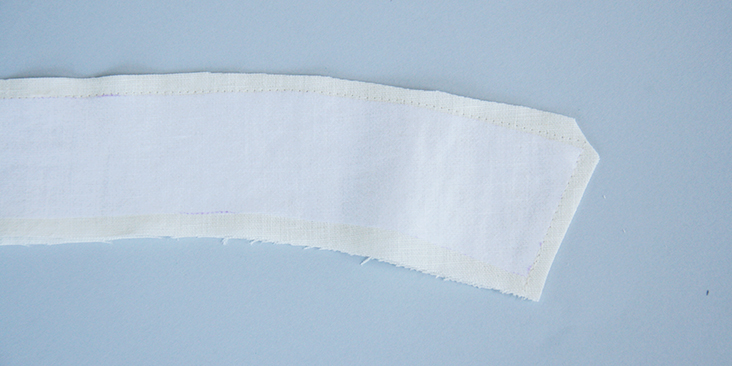
5. Turn your collar right side out and press. Use a sharp dull object like a chopstick to get the corners out. When you press, make sure the seam rolls to the undercollar (interfaced piece) so that you can’t see it. This will result in a much neater look.
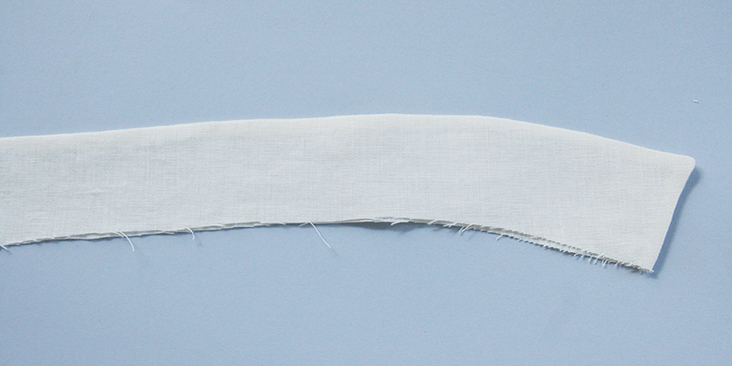
6. Run a line of topstitching as close to the edge as possible around the outer edges of the collar.
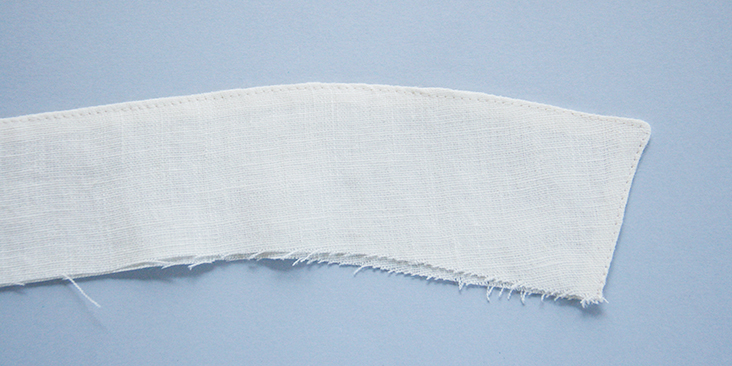
7. Take you’re your interfaced collar stand piece and press the 3/8″ (1 cm) seam allowance towards the wrong side.
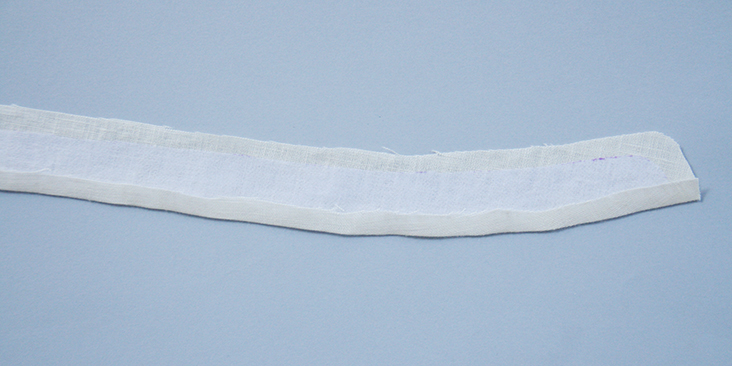
8. Sandwich your assembled collar between the two collar stands right sides touching and aligning the raw edges. Pin around the curved edge.
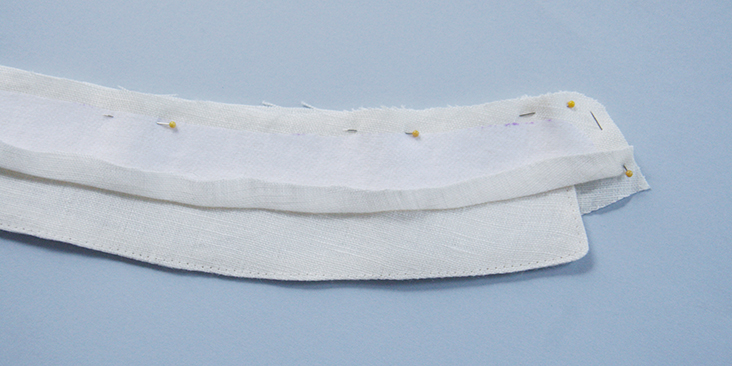
Please note that the non-interfaced/pressed collar stand piece should touch the interfaced collar fall piece and vice versa: the interfaced collar stand piece is positioned on top of the non-interfaced collar fall piece.
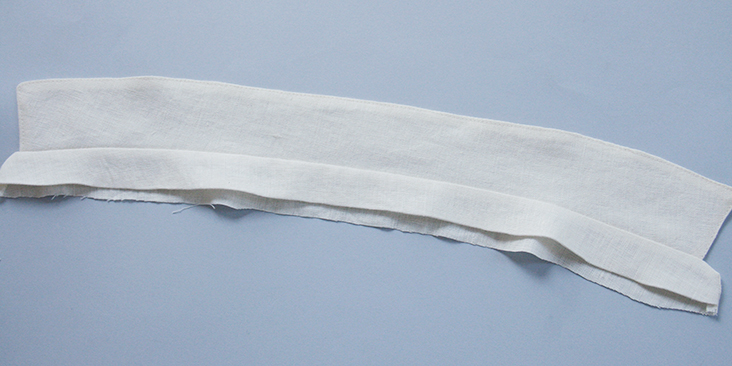
9. Stitch around the pinned edge all layers at once at a 3/8″ (1 cm) seam allowance. Trim the seam allowance down to 1/4″ and make a few notches around the curve to release the tension. Clip to but not through the seam line.
10. Turn the collar stand right side out and press it away from the collar.
Now it’s time to attach the collar block to the shirt.
11. Pin the right side of collar stand without interfacing from end to end to the right side of your garment. Use plenty of pins to make sure it sits well.
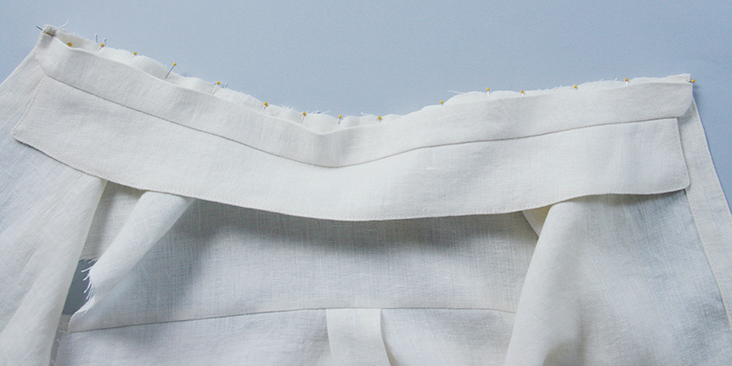
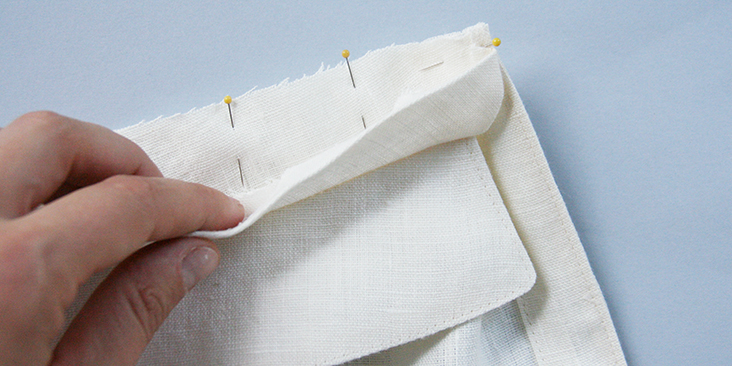
12. Stitch through these two layers from one end of the neckline to the other at a 3/8″ (1 cm) seam allowance then trim to 1/4″ (6 mm).
13. Working from the right side, press the collar away from your garment folding the raw seam allowance towards the collar.
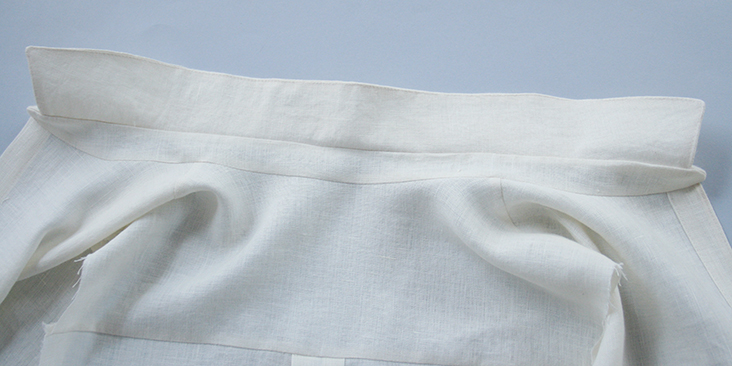
14. Take the other collar stand that has the interfacing and the pressed seam allowance and fold it over to the inside of your garment enclosing all the raw edges. The folded edge should go a little pass the stitch line that we’ve just created. Pin in place.
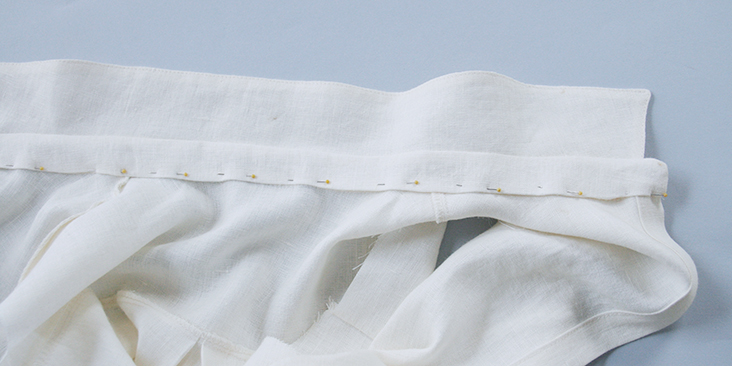
15. Working from the right side of your garment, topstitch the collar in the crease to attach the back section.
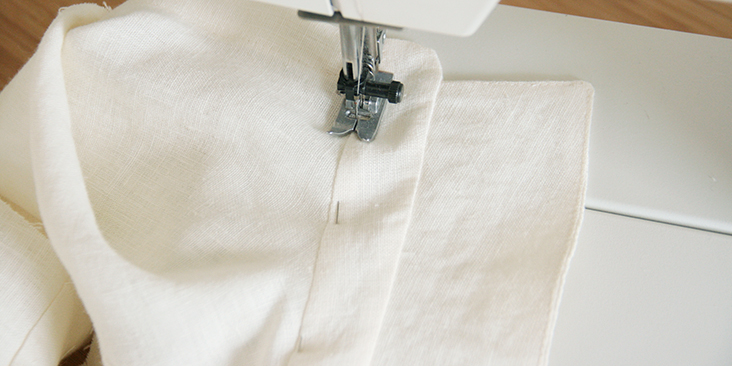
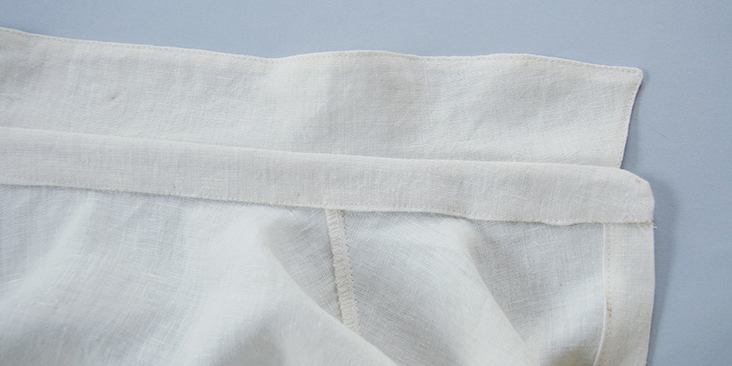
16. Topstitch around the collar stand.
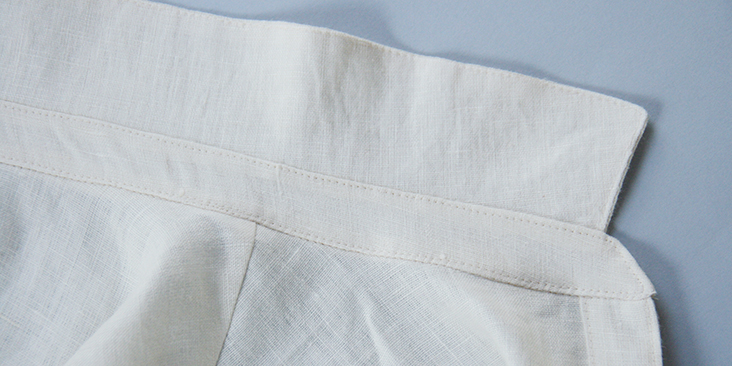
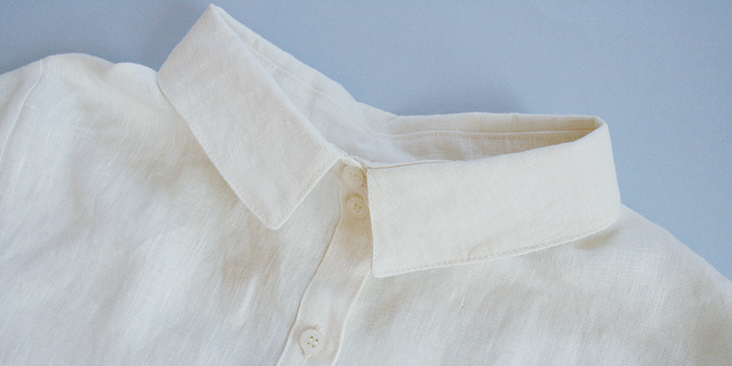
Give your collar a last good press and you are all done! Follow the rest of your pattern instructions to finish your project.


14 Comments
Pingback:
Cloud-ixRobin Hatton
Hi! I used your tutorial to draft collar pieces for a shirt pattern I was making for my boys that only had a mandarin collar, and it worked so beautifully!! I’m only going to make one adjustment to the angle of the point but I felt like a super star being able to do this!! Thank you so much for taking the time to share!!
Yolanda Wilkins
Hello, I have finished drafting and I am wondering if I can simply use the pieces I’ve created (plus seam allowance) on the fold instead of creating a new full piece? Would something be lost in the design by doing so? Thanks so much.
Alice Elliot
The next to last photo shows that little bump where the collar stand sticks out beyond the shirt front. I’m still looking for instructions that show how to avoid this “loving hands at home” tell.
Tomoko H
Thanks for the tutorial!
Question about step 10. The picture shows the ruller on the top edge of the collar stand, but the instruction says “measure between points A (on the base line) and B (on the collar stand)” – thank you.
Lauren Gates
Hello, To clarify, this would be the parallel of point A, but on the upper edge of the collar stand as shown in the photographs 🙂
Rebecca Jacobs
I’m just astounded at the wealth of (free!) information you have posted in these tutorials! I am a moderate beginner and it’s hard to find detailed descriptions and instructions, even in paid patterns. These are incredible! I’m downloading all of them and will use them as my reference library. Thank you!
Masha Karpushina
thank you so much, this means a lot to us.
Susan Rice
I have been sewing since I was 9 years old and I cannot believe how much I am learning from your tutorials. I look forward to each new garment that I start and am going to read every tutorial that pertains to the garment I am making. I am making the NOA linen shirt and this is my fourth garment I have made with your patterns and am very pleased with all but one and the only problem I had with the first one I made is it just wasn’t my style. I’m picking patterns now that suit me better and am very happy with them. And the free patterns are great. Thank you so much for the free patterns.
Jennifer in KS
Is there really any reason that I can’t use what was drafted and cut on the fold rather than using the drafted piece (which is half of each piece) to draw a full piece?
Thanks! (this has challenged my geometrically challenged brain. LOL!)
Jennifer
Igor
Nice
Rima Khusainova
Thanks Igor!
Jenn
I really like this top and I hope the whole thing winds up as a pattern/tutorial.
I have a question about step 11. Was it meant to write point B instead of point A? The line was drawn from B to CF. And the line between B and D appears to be 2″ long. In the first sentence it said two, but in the second it says 3″, which is correct? Or are they talking about different lines?
Rima Khusainova
Dear Jenn, thank you so much for pointing this little typo to us! You are absolutely right – the line goes from point B and is 2″ long. I’ve just updated the post with the correct info.