Tutorial: Shirring with Elastic Thread

 Shirring with elastic thread is a great skill for you to add to your sewing knowledge. Shirring on tiny baby clothes, a flirty summer tank top or even a great additional panel on the back of a dress that adds interest and size flexibility to a piece much like the FS Rhea Dress.
This technique is not difficult to learn. Here are some steps to help it go smoothly:
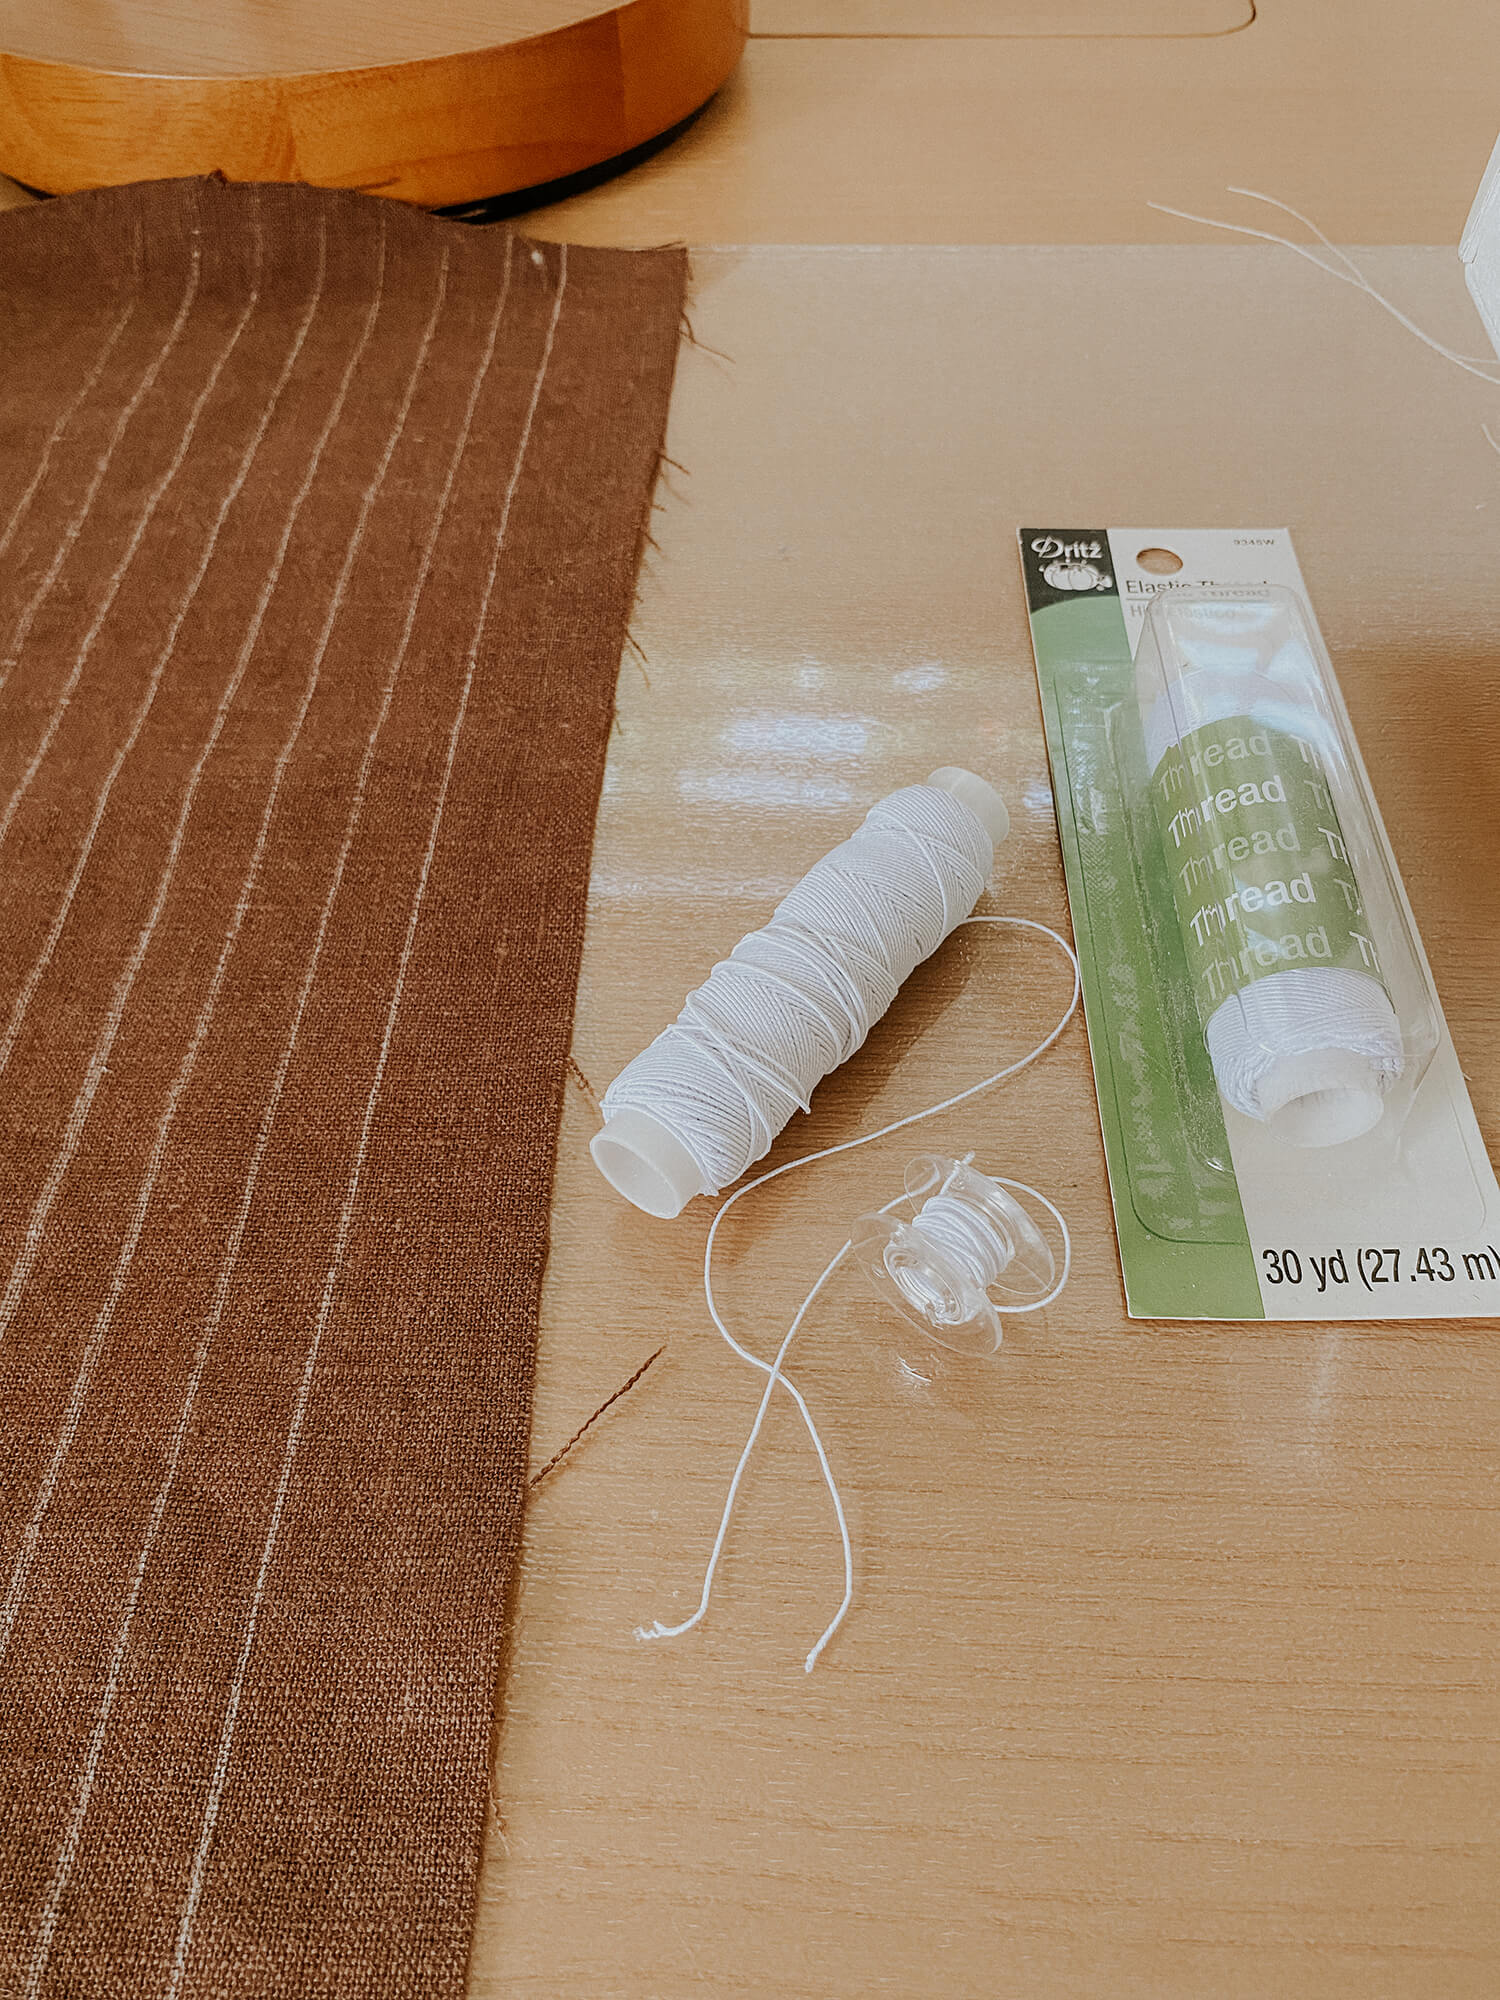
1. Purchase Gutermann, Dritz or another brand of elastic thread for sewing. Hand wind or fill the bobbin. Do not use your machine for this step so as to avoid over stretching. Gently hold the bobbin in one hand and with the other hand, wind the elastic around the bobbin without pulling until it’s full. Take your time to do this smoothly, it really won’t take long at all. The bobbin is then loaded into your machine base as usual and you can use the regular thread at the top to pull the elastic thread up through the plate leaving a long tail so it doesn’t get sucked back in. Set your stitches to one of the wider settings and the machine is ready to start sewing.
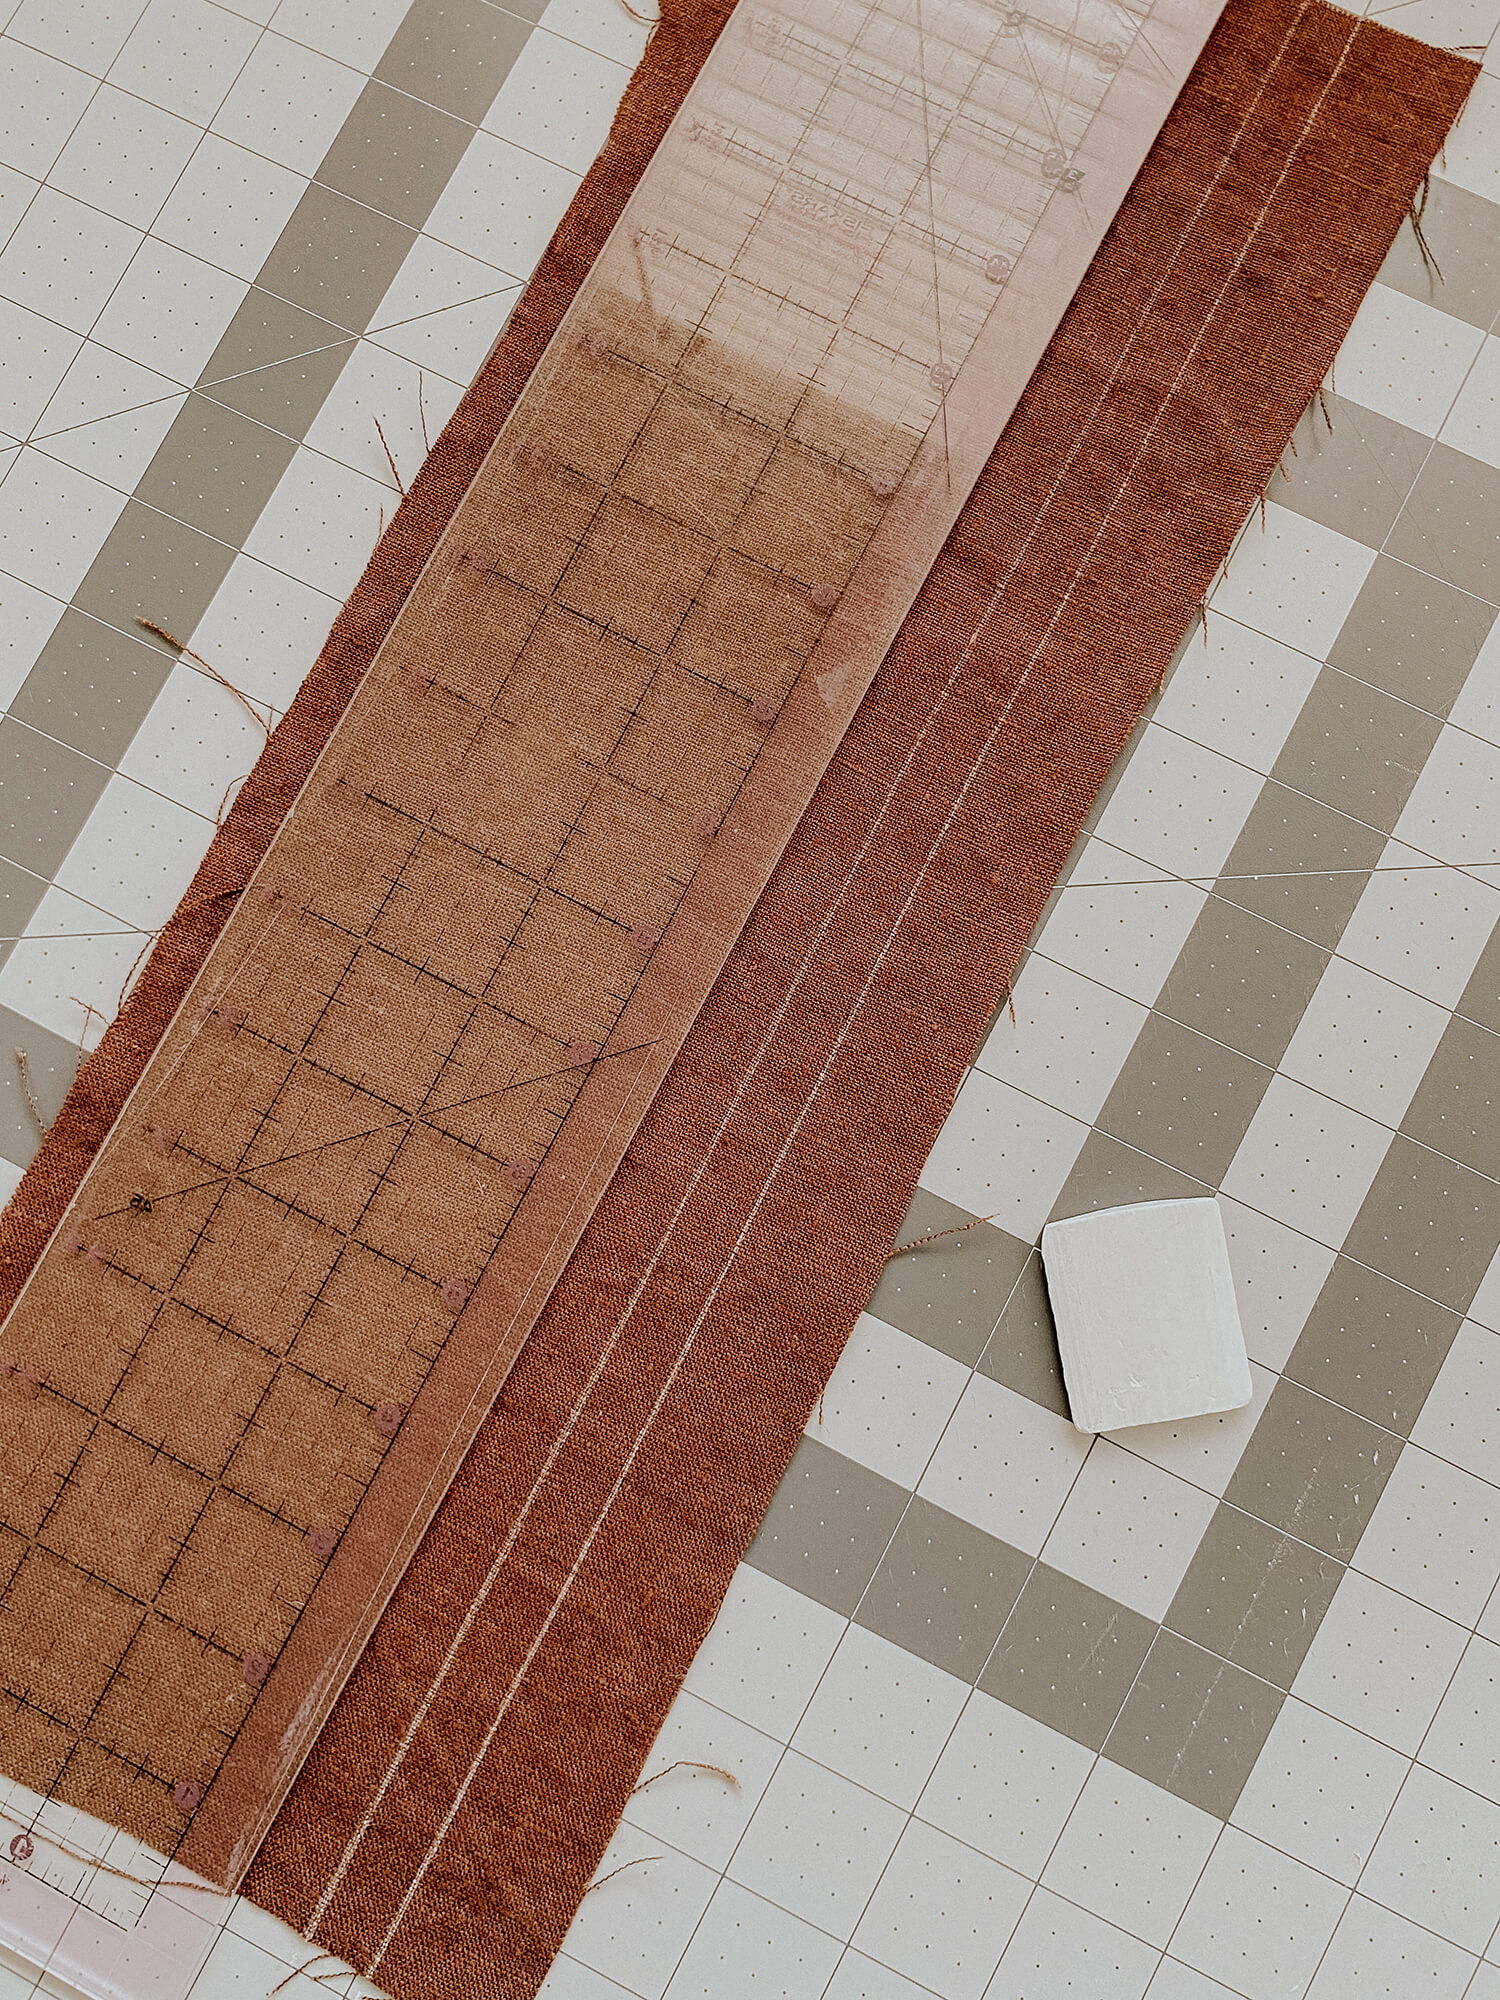
2. Now you will want to make lines on your fabric so that you can keep your shirring straight. Use chalk or a fabric pen and a ruler to mark these lines as far apart as you’d like. I marked mine at ½” between each line. You can start and stop each row separately or continue an ongoing line at the end of each row as long as you do it outside of the seam line as my photo shows.
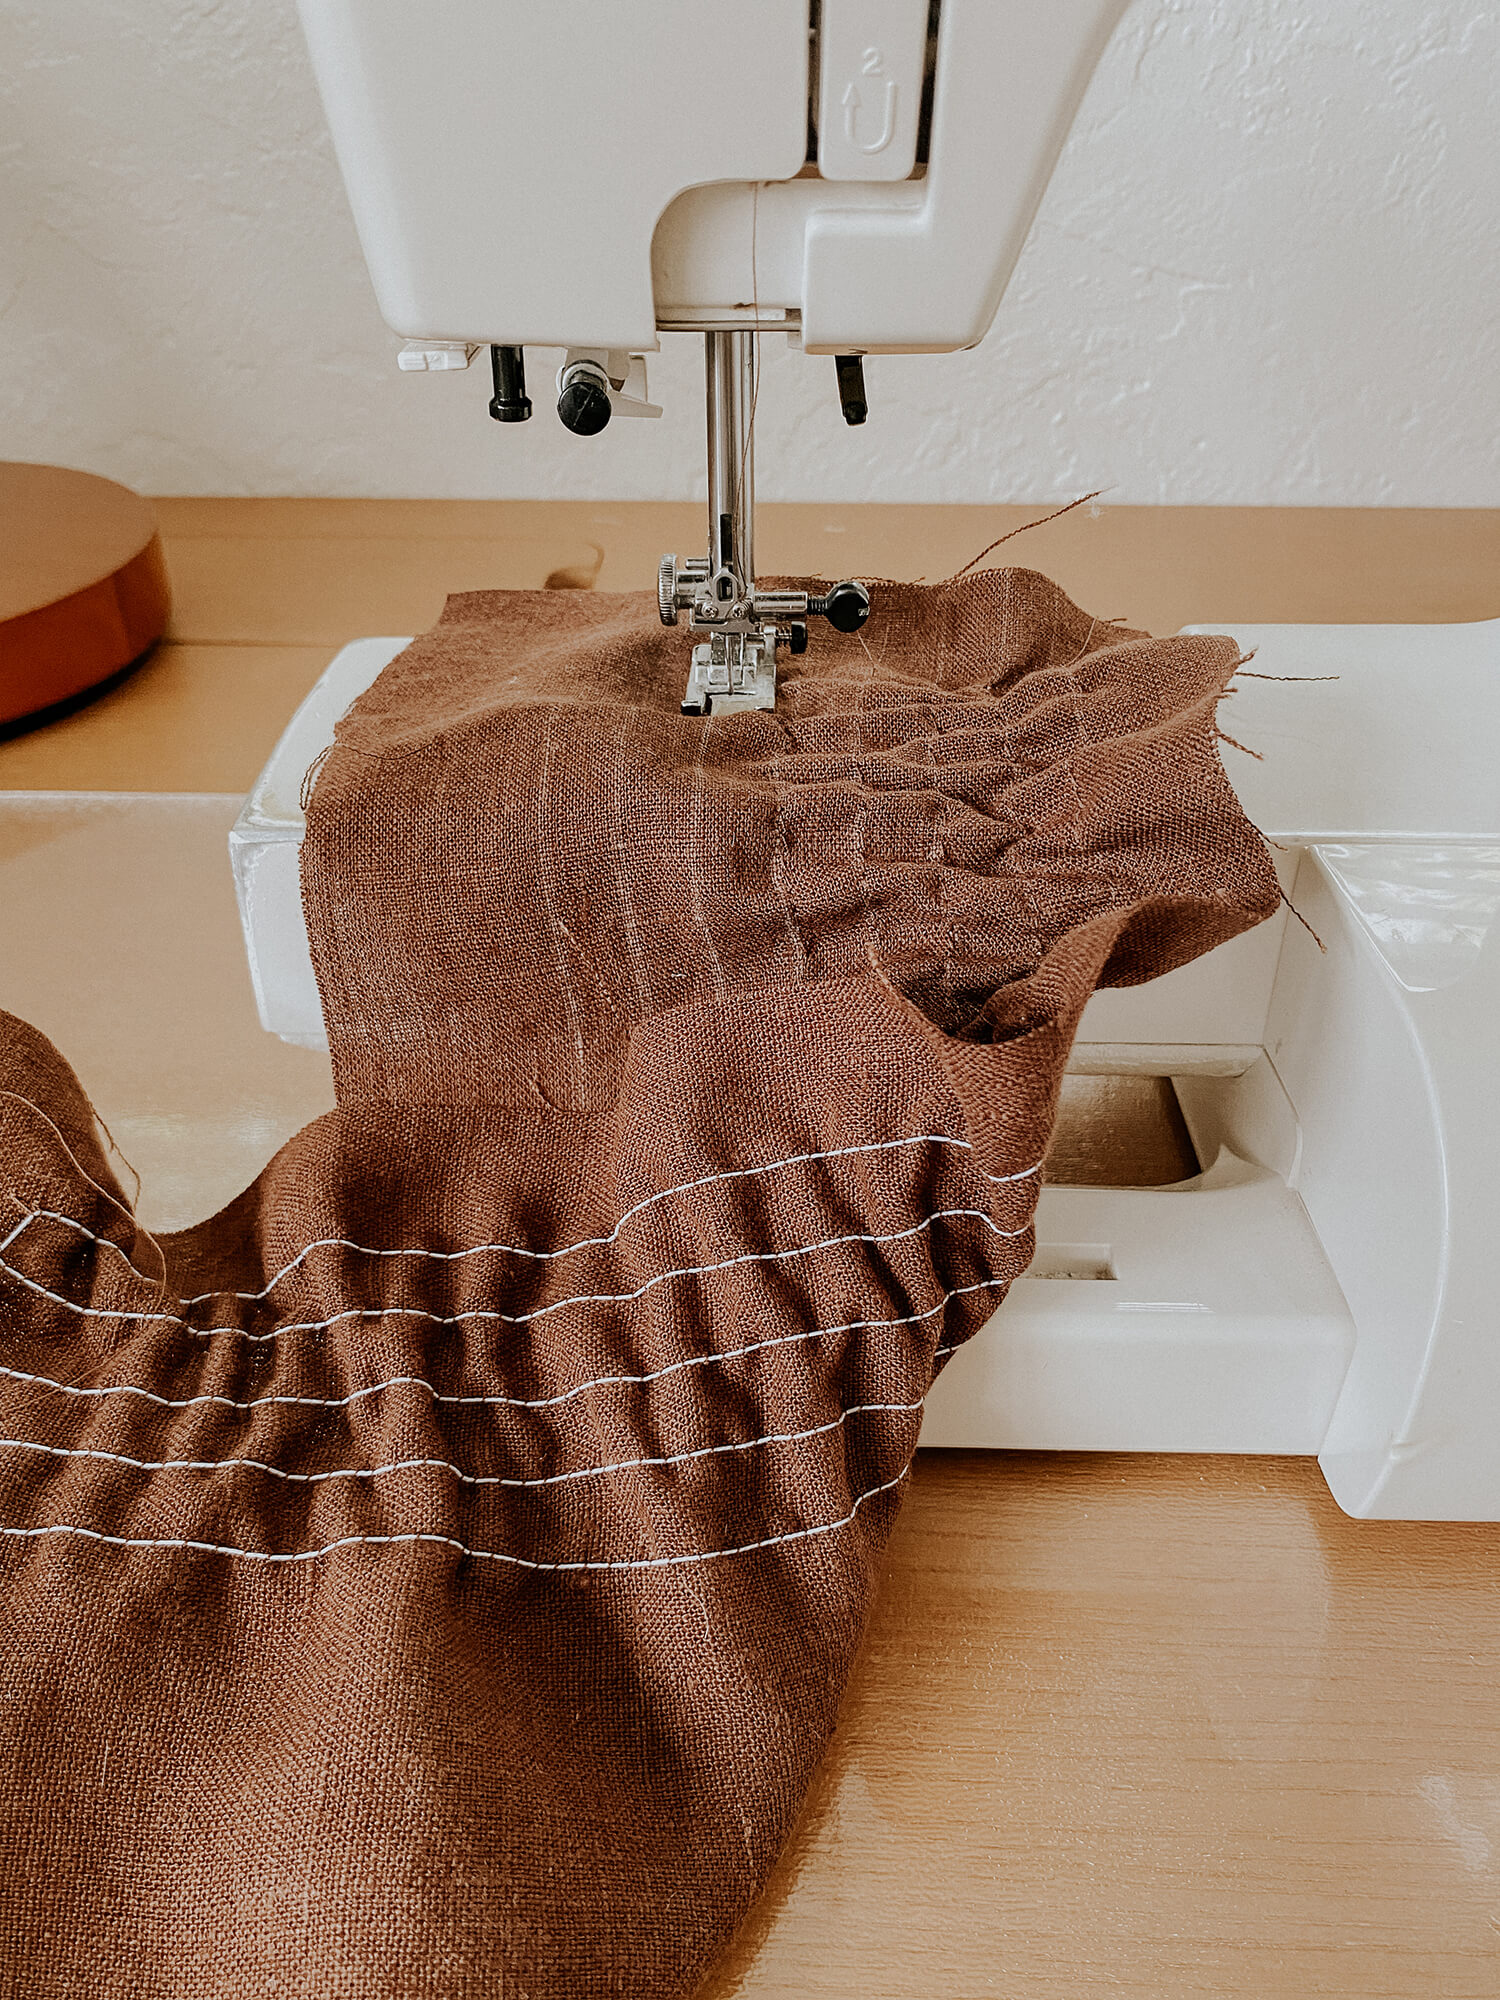
3.You will be sewing on the outside or good side of the fabric so that the elastic is on the bottom or inside. Note: The first row might not gather that much but the more rows you sew the more it will gather.
3. I usually leave a decent tail on the end of each row to tie by hand to secure once I am finished with my rows. Doing a reverse or back stitch with the elastic in the bobbin does not work well so hand tying knots using the ends of the elastic and the thread is my preferred method.
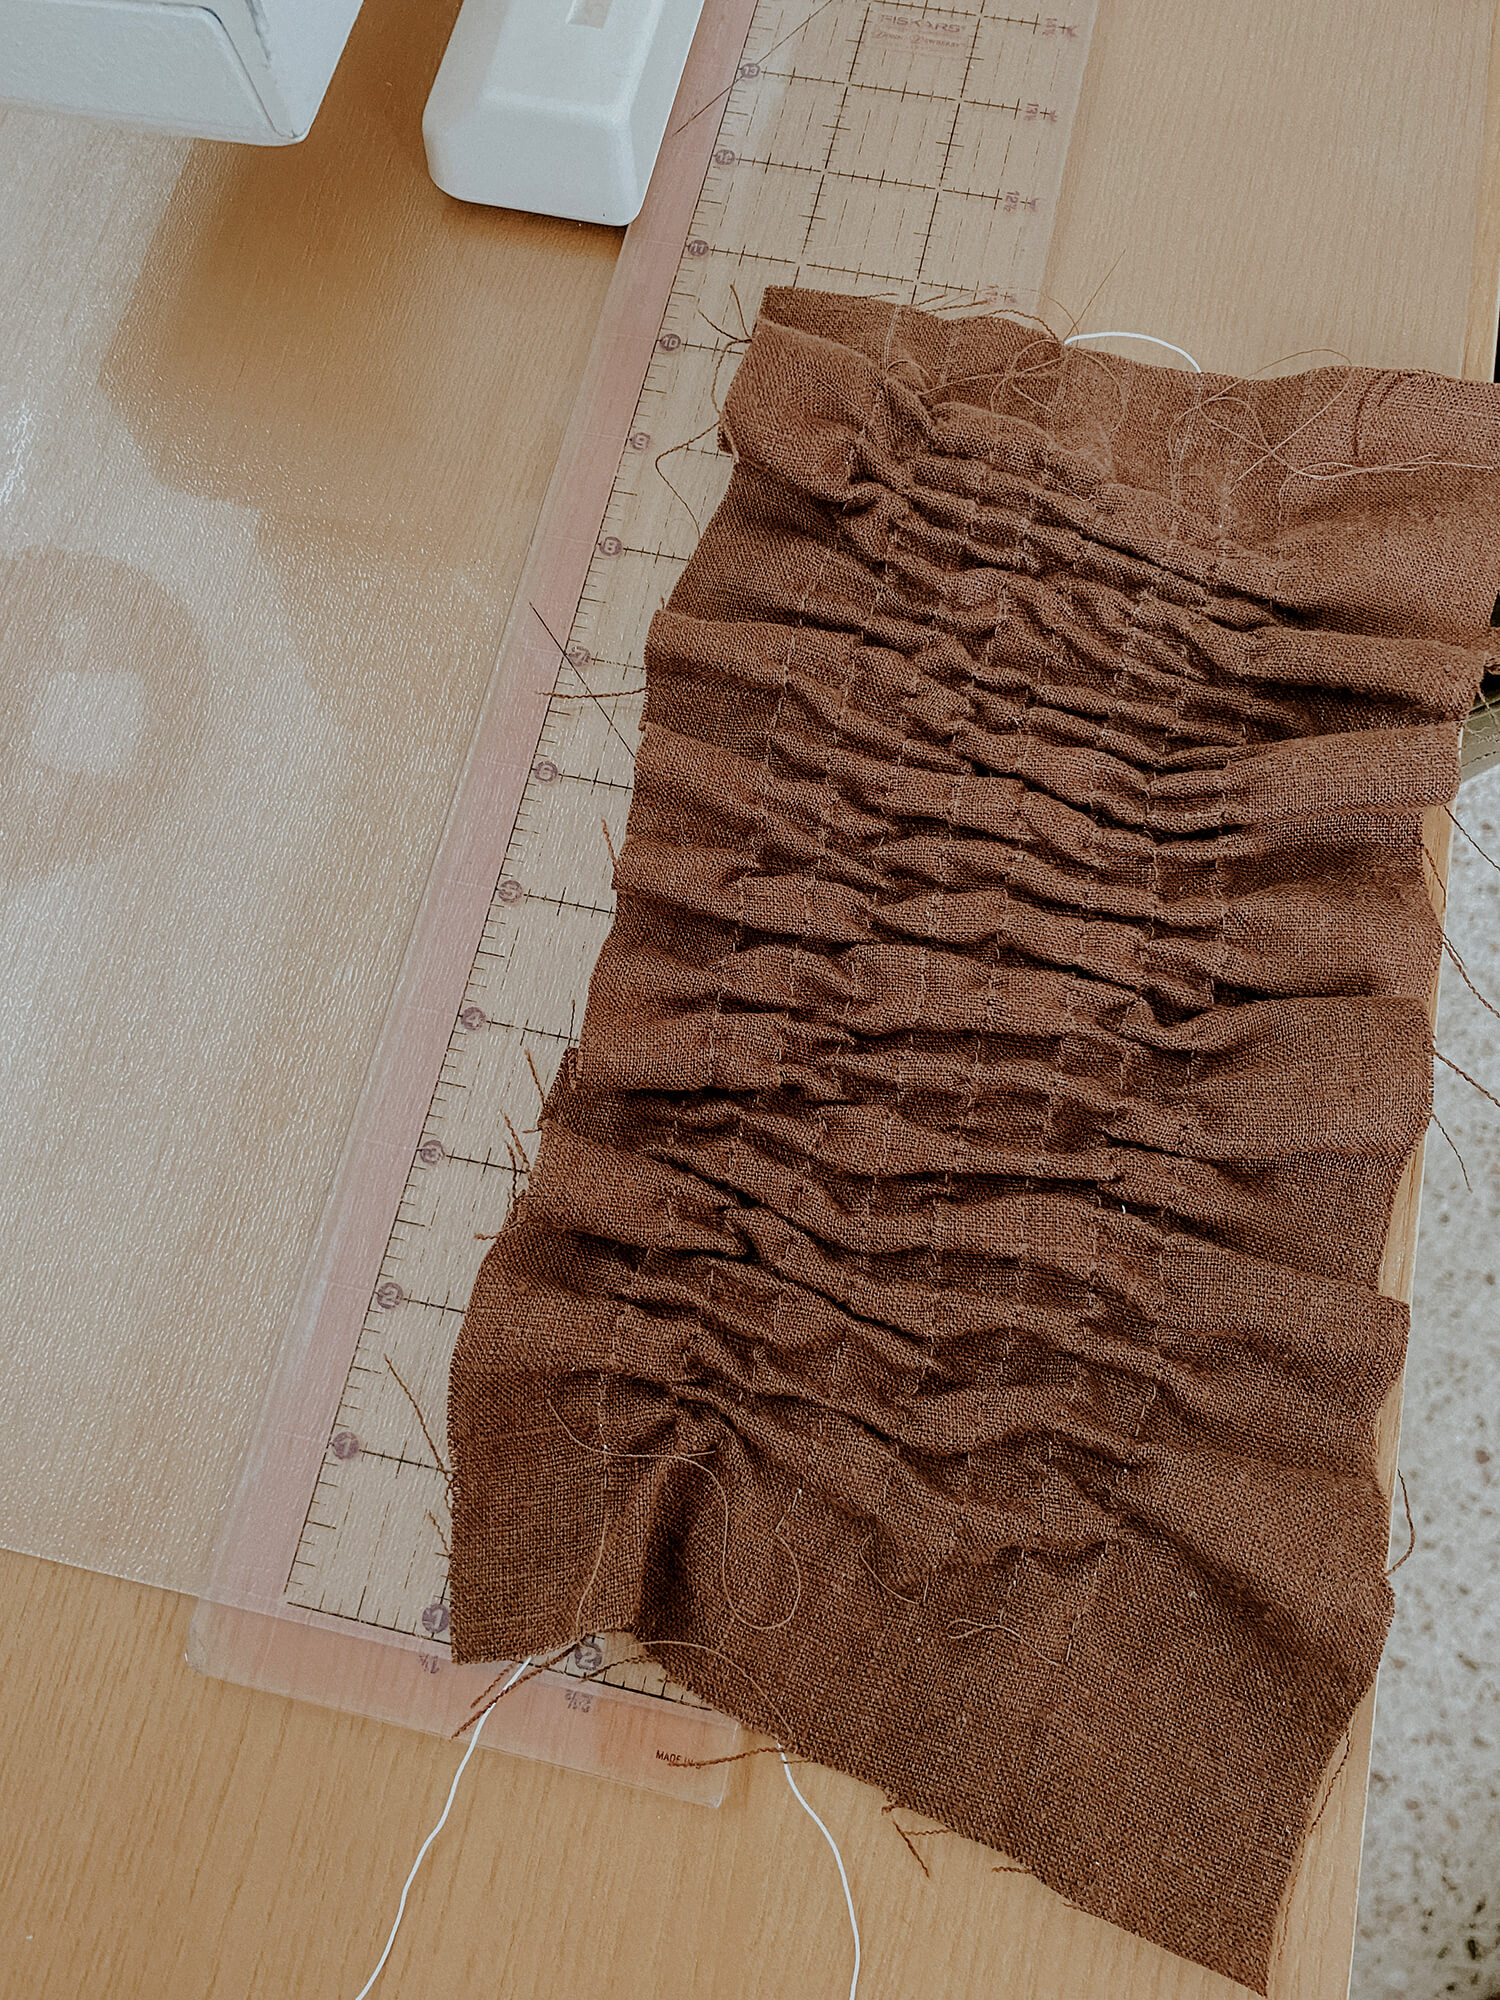
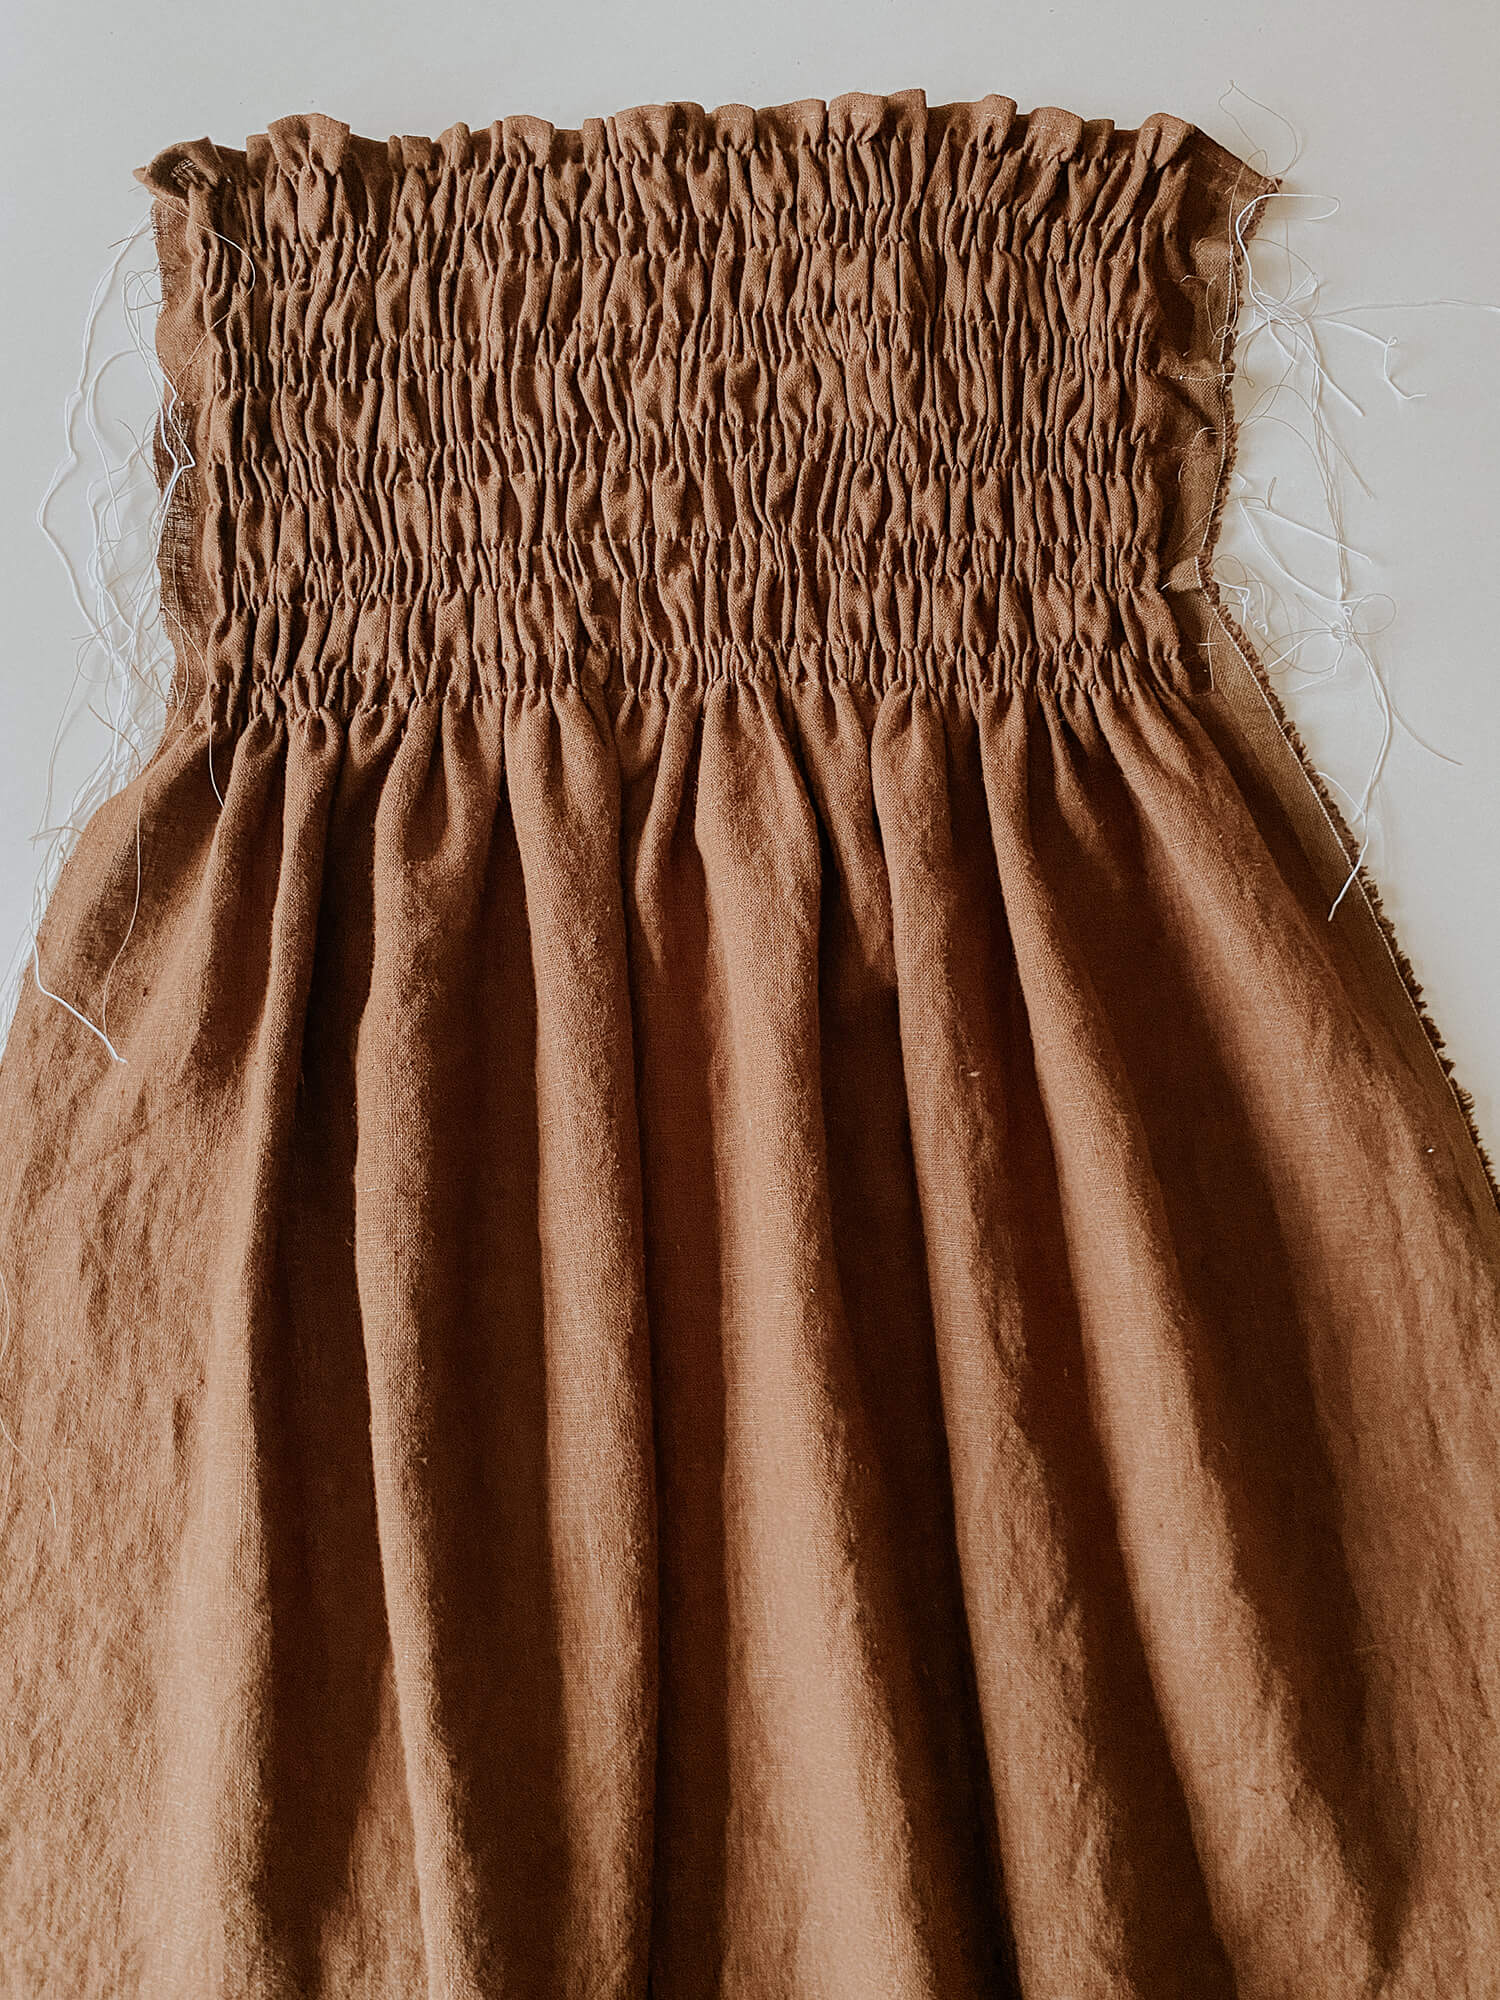
4. Once all the rows have been completed, I take the piece to the ironing board and give the shirring a gentle steam. This is done by holding the iron just above the fabric and hitting the steam function. As you can see in these two photos, the before and after the steam is pretty dramatic. The fabric gathers up so nicely.
IF you have any trouble with the tension, there are many trouble shooting videos on YouTube as well, so feel free to make a sample or start your project with confidence. Expect your shirring to shrink the size of your project by approximately a quarter. This little sample piece was 18 inches long and shrunk to almost 12 inches. I can’t wait to see what you make! Be sure to tag @fabricsstorecom on instagram.









5 Comments
Pingback:
Honest Review: Rooscier Wrap V Neck Swiss Dot Mini Dress | Style & Fit InsightsSandy Cordell
Is this a zig-zag stitch? You mention a “wider settings” indicating a zig-zag, which is width not length. But the picture shows a straight stitch.
Alisha Cooke
Hello! No do not use a zig zag stitch. Set your machine to a straight stitch but a longer stitch length.
Mary Bradley
Thank you for this tutorial! Shirring always seemed complicated to me, but this makes it look simple. I will try it!!
Alisha Cooke
Do try it! Maybe even on a small sample like the photo. It’s only a matter of getting in a grove and leaving long enough tails on the thread and elastic so you can tie them off. Have fun!