How to Make Organic Indigo Vat Tutorial
My first forays into natural dyeing began with the vibrant blue dye of indigo. Indigo is the name given to the dye that comes from plants (of which there are many species) containing the indican compound that produces an incredible blue dye. Used throughout Asia, South America & Africa, indigo has a rich and vibrant history & is one of the oldest know natural dyes used by man. The process of dyeing with indigo is unlike most other natural colourants, setting it apart from many other dyes.
I am going to show you how to make a simple indigo vat based on a recipe by French chemist, Micheal Garcia known as the 1-2-3 vat, using as the name suggests three ingredients which are indigo – Lime – Fructose.
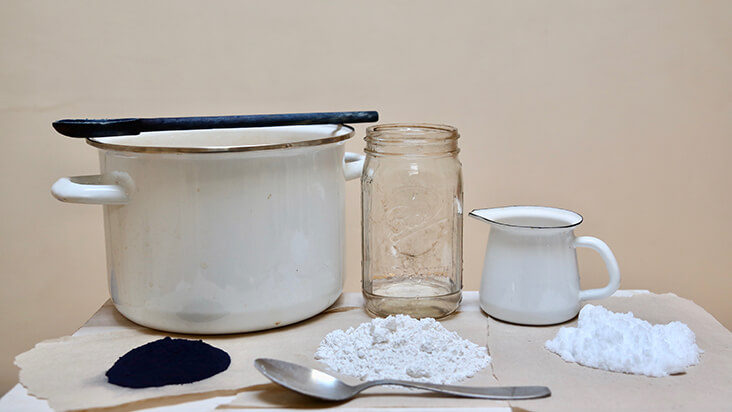
Before we get into the details let me explain a few things about the ingredients and the creating of the vat. For this recipe, you will need indigo powder which can be purchased in any dye supply store. Indigo comes in many forms such as cakes, paste, powders or granules. For this recipe, I am using indigo dye powder from indigofera tinctoria (see my resources page on the journal of my website for suppliers). The lime refers to calcium hydroxide also known as slaked lime, builders lime or hydrated lime. Fructose granules can be purchased in health shops or some regular grocery stores.
How it works: when you mix all three of these ingredients together, a chemical reaction takes place that allows the indigo molecule to be released & made available to bind with your fibre.
I am using 2 tbsp (25g) of indigo, which will dye roughly 2lbs of fibre light to medium shade.
For 2tbsp (25g) of indigo, I will need 4 tbsp (50g) of Lime & 6tbsp (75g) of Fructose.
Measure your ingredients in a 1:2:3 ratio (indigo, lime, fructose). Less indigo will give lighter shades and more indigo will give darker shades. The more items you dye in your vat the more indigo you will need. When first starting, I find it is always best to test with a small amount of indigo so you can practice the process, begin to understand how it works and understand the shades possibles. Once you have a basic understanding you can go ahead & increase the amount of indigo you use, the number of pieces you dye & the sizes. As the indigo powder is not cheap its best to start small and build your way up slowly.
Materials
1 part Indigo
2 parts Lime
3 parts Fructose
Large glass container ( or plastic if you don’t have glass) to mix Indigo. I used a 1ltr mason jar
Metal Spoon
Wooden Spoon
2 Cups Hot water, more on hand in case you need it
Non-reactive pot or bucket
Dust Mask
Gloves
Steps
- Measure out your ingredients based on the 1:2:3 ration above.
- Wearing your dust mask & gloves, you are going to start by making your stock solution, once that is ready you will add your stock to a larger pot of water.
- Add a small amount of water to your mason jar to dissolve your indigo, I have broken a few mason jars by putting hot water straight in. Now I put a small bit of lukewarm water in first before adding very hot water. Add your indigo powder & wet it out to form a paste. Add 8 fl oz of hot water (1 cup) & continue to wet out your indigo by pressing it against the sides of the jar until it is mixed fully with the water.
- Add the lime powder & stir until this is mixed with the indigo solution. If your liquid becomes pasty or thick add more hot water to dissolve.
- When both of those are mixed well, add your fructose and mix fully, again adding more hot water as you need to. At this point, my liquid became very thick and difficult to dissolve but I kept adding small amounts of hot water and continued to mix and press it out until it was completely incorporated. I then added hot water to fill the mason jar to the top & stirred the mixture for another minute, making sure all three ingredients were mixed thoroughly. At this point, my solution was a lovely dark green colour.
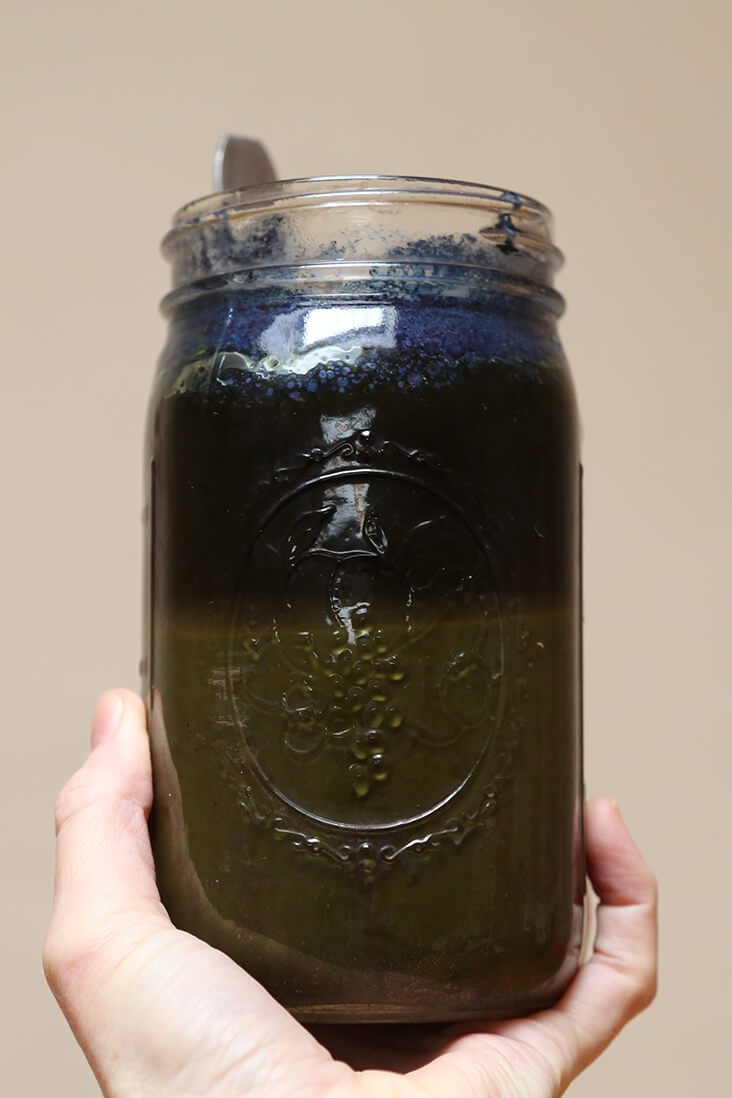
- Leave your solution to sit for one hour ( I set a timer on my phone). After one hour stir the solution to mix up and residue on the bottom of the jar, then for the next hour stir every 10-15 minutes. Then let it settle for the next hour after which your stock solution will start to separate & will have distinguished layers.
How to tell if the stock is ready
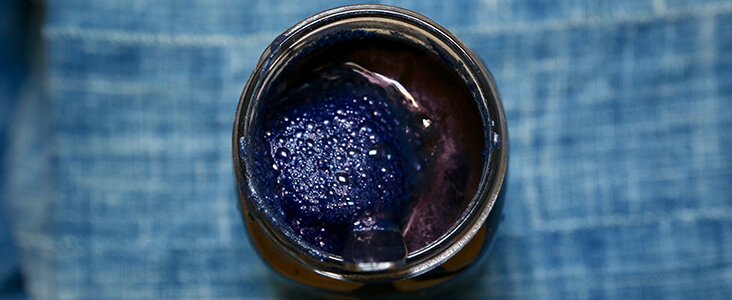
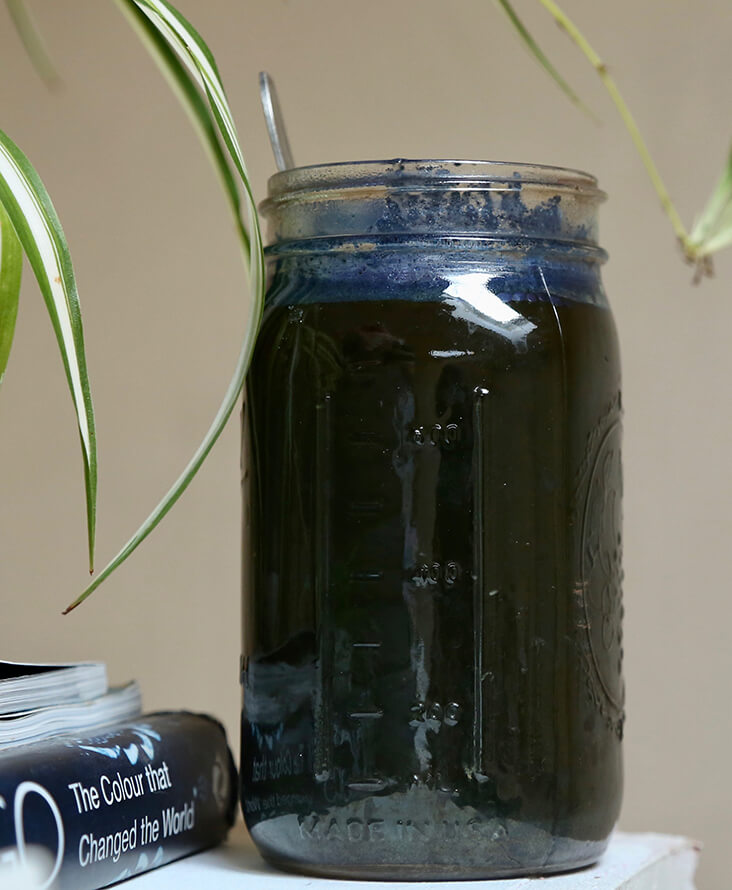
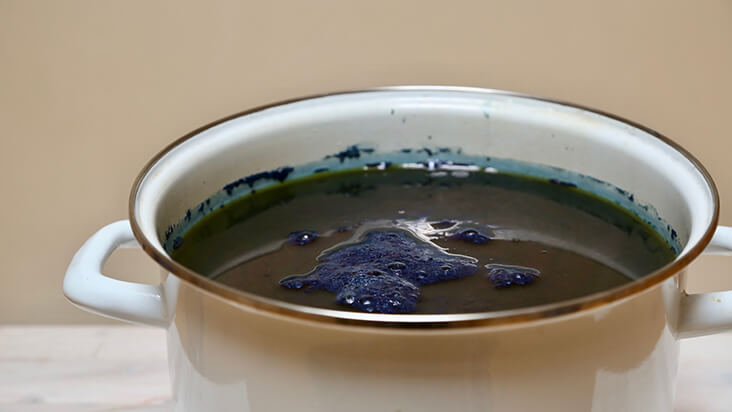
It is ready once it has a layer of coppery scum & blue flower ( gathering of blue bubbles) on top. There should be a separation of the liquid from the sludge at the bottom. The liquid should be a yellowish-green or browner in colour.
Once your stock is ready
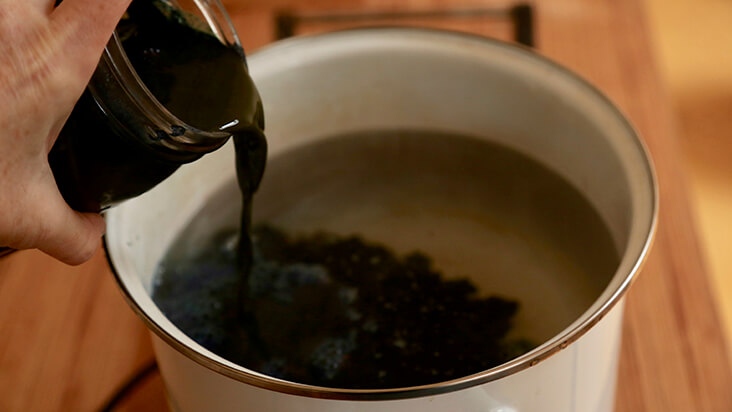
- Fill a non-reactive pot, container or bucket with hot water. Being very careful, slowly empty your solution with the indigo into the pot of hot water and stir gently. Let it sit for roughly 12-20 minutes.
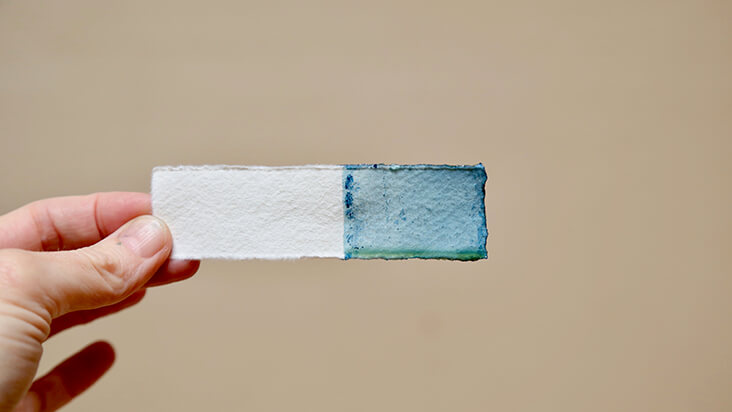
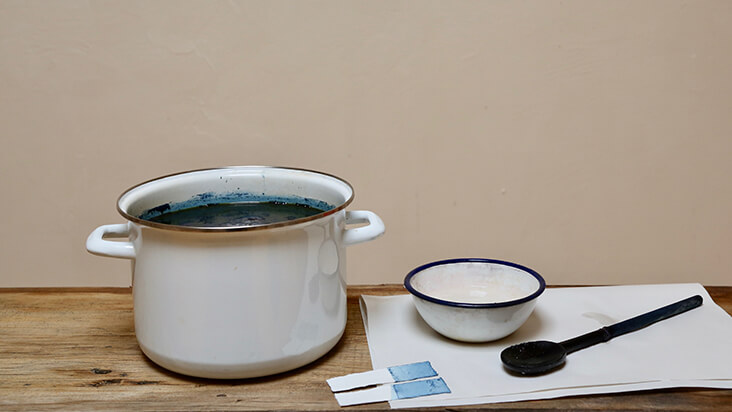
- When your vat becomes yellow-green and there’s a blue flower ( dark blue metallic bubbles ) with coppery scum on top, your vat is now ready to use. You can also test by dipping white paper into the solution, the solution should be a yellowly or golden brown. when you remove the paper it should turn from a green to blue once it oxidizes. Your indigo vat is now ready to use.
Dyeing with your Vat
When working with an indigo vat you must be careful when putting things & out of the vat as you don’t want to introduce too much oxygen into the vat.
Before you introduce your fabric, remove the flower ( blue bubbly scum ) from the top and set it aside, you will put this back when you are finished working with your vat.
When introducing fibre to the dye, make sure you do it slowly and carefully, making sure you submerge fully & leaving you fibre in the dye for at least 1 minute longer if possible.
Slowly remove your items from the vat being careful not to let the liquid splash into the vat. I like to have a drip bowl on hand to collect the excess liquid. Once you remove your fibre, you will see it turn from a green to blue as it oxidizes.
Only when it has fully oxidised can you dip it back in the vat. The more you dip it the darker your shades will be. For the lightest colours dip 1-2 times. Just remember to let the colour completely change to blue before redipping.
When you are finished dyeing, rinse your fibre fully to remove any excess dye & hang to dry. At this point, you can let it sit for a few days or wash it according to the fibre type.
Caring For Your Vat
You can continue to use your vat until it is “exhausted” or yields little colour at which point it will need more indigo powder. I always like to warm my vat up a little bit if I haven’t used it for a while. If you want to start getting into maintaining a vat, you will need to purchase pH strips. An indigo vat likes a pH of between 9-11, if the ph is too low add 1tbsp of lime, dissolve it fully, stir and let it sit. If the pH is too high add 1tbsp fructose, stir and let it sit. I find it is best to keep the solution warm and give it time to rebalance before re-testing the pH. Let it settle for a few hours, when the solution is clear brown, it should be ready to use again. If your vat gets weak and starts to lose colour you can always re-add to it using the 1:2:3 ration above.
Disposing Of Your Vat
This solution can be disposed of safely down your drain or added to your compost. You can neutralize the solution by whisking air into the vat. By doing this you are introducing carbon dioxide which reacts with the lime to create calcium carbonate which can be safely disposed of down your drain.
Next week I will be sharing a Shibori tutorial with you where I will be explaining how to prepare your fabric for dyeing & showing you how to create beautiful patterns in your linen.










20 Comments
Maren Jung
Hi, newbie here and maybe a silly question bit when you say lime powder do you mean powder made from limes the fruit or the stuff you sprinkle in your garden to shift the soil’s ph?
Thanks
Maren
margaret krakowiak
Do you pour the liquid and sludge into the vat, or just the liquid?
Sarah Tremaine
Hi Kathryn,
Nice write-up. In the USA, good sources of Indigo are Botanical Colors or directly get USA-grown Indigo from Stony Creek Colors in TN. I find that Catharine Ellis’ method for preventing crocking – 10 min soak in Vinegar-water (to neutralize the strong base of the Indigo Vat) followed by 15 min boil-wash in soapy water (to remove only lightly attached indigo and allow deeper dye penetration). For Cellulose fabrics (Linen, cotton & hemp), I strongly recommend using an Iron Vat articulated by Michel Garcia. I find that I get a much better depth of color on cellulose fabrics with the iron vat – especially for shibori.
I look forward to next week’s shibori post.
Nancy Brennan
Thank you so much for that clear and concise article on Indigo. It took the mystery out of the process.
When you reheat a vat, do you simply put it on a burner or hot plate and bring it to a simmer? I am looking forward to trying.
Nancy
Jeanne Kelsey
After dyeing with indigo, would I need to use a salt water rinse to stabilize the indigo after dyeing the fabric?
Kathryn Davey
Hi Jeanne, thanks for your question. Personally, I use vinegar to attempt to stop the rubbing or croaking associated with Indigo dye, I never use salt so I can’t vouch for that. I would rinse it as thoroughly as possible and then soak in vinegar/water solution if you think it might need it. 1 tsp vinegar: 500ml water. I hope this helps x kathryn
Ta amir Girmay
Thank you, for writing a beautifully clear tutorial on a complicated process that also educated us on the origins of this beautiful plant.
Kathryn Davey
Oh Ta amir, you are welcome and thank you for your lovely comment, I appreciate it. x Kathryn
Janet Pore
I would love to check out your website Heather Barclay Davis. Can’t find you. Please let me know.
I do love the simplicity of this post tho.
Kathryn Davey
Thank you for your comment. My website is my name: KathrynDavey.com x
Ann Wass
Tyrian purple–6,6’-Dibromoindigo–is also a vat dye. Indigo was not the only one.
Kathryn Davey
Thank you, Ann, I should have said it was unlike most other natural colourants, setting it apart from many other dyes. Kathryn
Julia barello
When introducing the fabric into the vat, do you wet it beforehand so it is evenly moist; or put it in dry?
Kathryn Davey
Hi Julia, thank you for your question. I always soak my fabric beforehand when doing any natural dyeing, with the exception of shibori techniques, then I soak it after it has been bound. I hope this helps x kathryn
Mary Anderson
Can you give sources for the indigo dye that you use?
Heather Barclay Davis
link above in 3rd paragraph: For this recipe, I am using indigo dye powder from indigofera tinctoria (see my resources page on the journal of my website for suppliers).
Kathryn Davey
Hi Mary, here is a link to some natural dye suppliers but I am sure there are many more I have yet to use or discover. https://www.kathryndavey.com/blogs/news/natural-dye-resources I hope this helps. x Kathryn
Susan Griffith
Thanks for this post. It was so interesting. I was wondering how color fast this dye is. Does it fade or lose color in the wash or from sunlight?
Ann Wass
Indigo is very fast, since it develops in the fibers. However, excess color is often present after dyeing and it may rub off or wash off.
Kathryn Davey
Hi Susan, thank you so much. I find that initially, it will rub off to some degree, but in terms of colourfastness, I find it is an excellent dye in that regard. I would always be sure to wash it with like colours just to be safe & I always recommend keeping naturally dyed textiles out of direct sunlight. x Kathryn