Sewing Glossary: How To Draft And Sew A Notched Collar
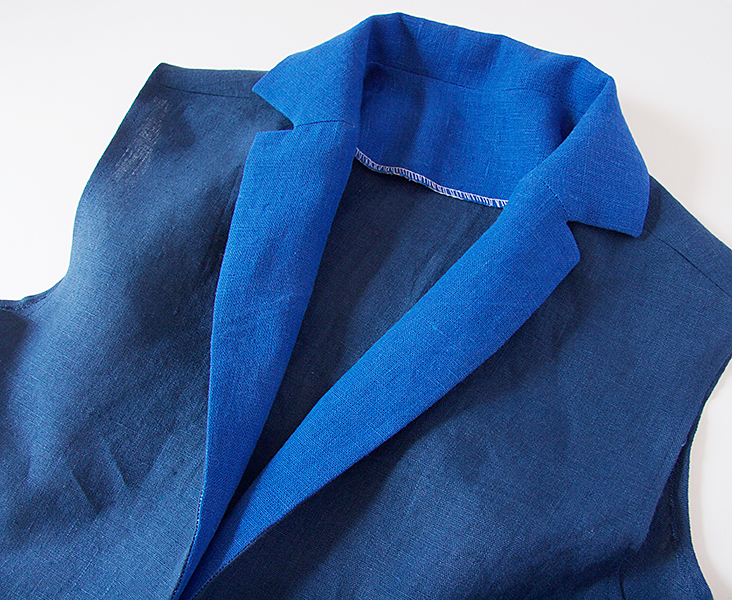
A notched collar (or «tailored collar») is mainly used on tailored jackets and coats. However, this collar style became so popular that today that it is often seen on all sorts of garments – vests, dresses, shirts and pyjama tops.
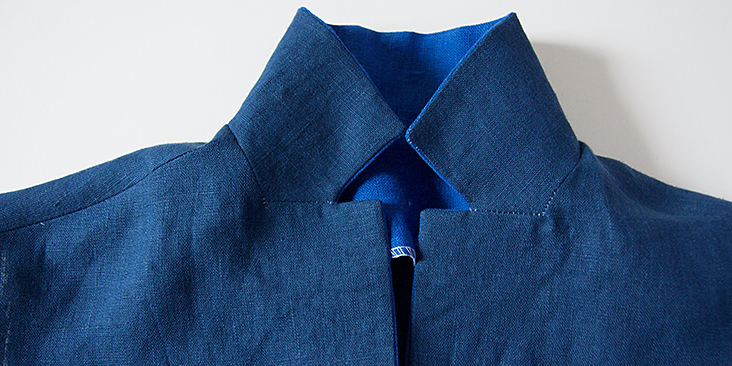
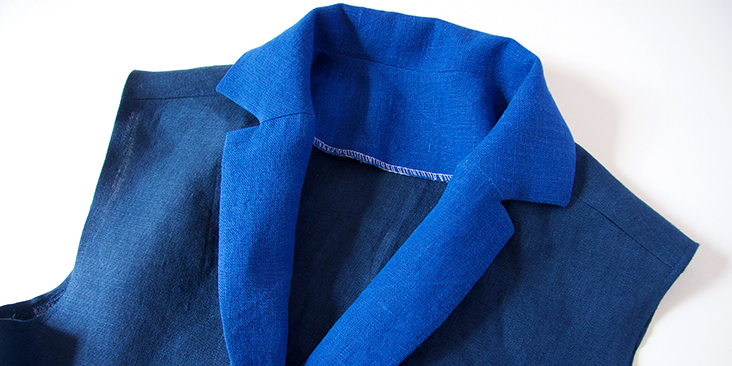
A notched collar is composed of an upper collar, an under collar and two lapels. And it gets its name from a little notch that is formed between the collar and the lapel. Among all collars, this collar takes a special place because of its method of construction. This particular type of collar is formed by folding over the front edges of your garment exposing what in other collars is usually hidden: the facing and the under collar. So, the lapel as you see it is coming from the facing on the inside and the collar is actually your under collar.
For some people drafting and sewing notched collars is one of the trickiest bits of garment making. There’s no need for frustration as once you know patternmaking and sewing techniques for creating a notched collar, that we are going to explain to you in this tutorial, you’ll be able to achieve flawless results.
Materials & Tools
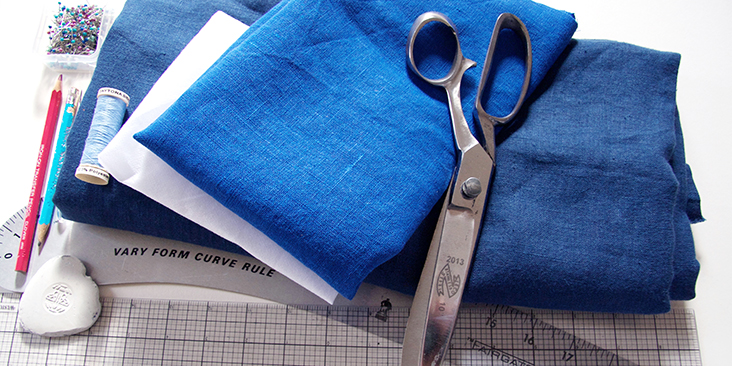
Fabric of your choice. For this tutorial we are using two different medium-weight linens: IL019 ULTRAMARINE Softened and IL019 INSIGNIA BLUE Softened.
Matching sewing thread, fusible interfacing, pattern paper, pen, ruler, curve ruler, scissors, pins, chalk, measuring tape, sewing machine
Difficulty
Intermediate
Time
2 hours
Drafting The Collar
Drafting a notched collar can be a little bit tricky and requires some basic understanding of patternmaking. This is why we’ve tried to simplify the process as best as we could so that even beginner sewists could follow the steps and get nice results.
Start by taking your personal back and front bodice slopers or a commercial pattern with simple rounded neckline (the most suitable pattern would be the one where the neckline is touching your high point shoulder (where the neck meets the shoulder) and is not too deep.
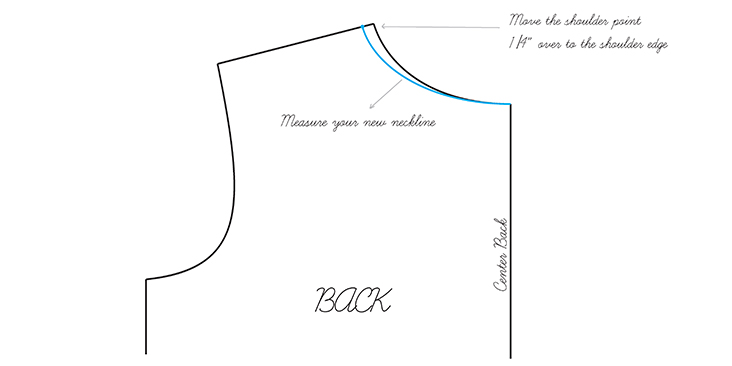
In a notched collar, it’s better to start with the back pattern piece because you need the back neckline measurement in order to draft the front.
1. Start by tracing the back pattern/sloper onto a large sheet of paper. Then move the hight point shoulder ¼” over towards the end of shoulder. Measure your new neckline and write down your measurement.
2. Now that you have your back measurement, you can trace out the front pattern/sloper onto a new piece of paper.
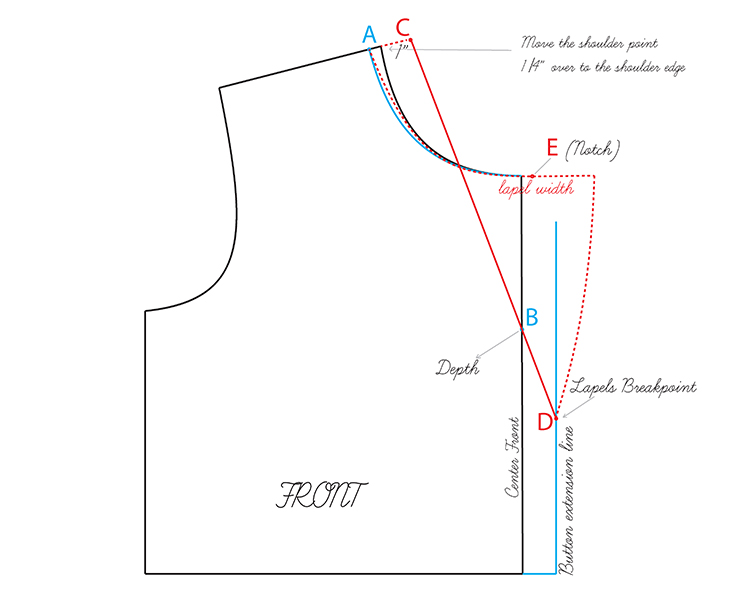
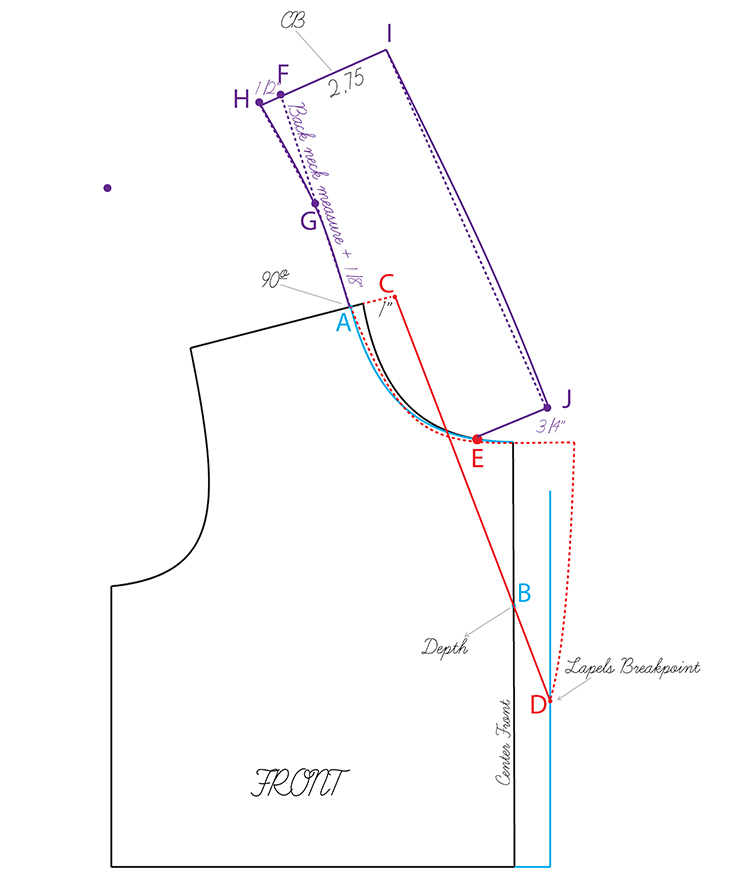
3. Next thing to do is to match up the front and back necklines. Just as you did with the back, you need to move the front high neck point 1/4″ over towards the end of the shoulder. Let’s call this point A.
4. Decide on the size of your button extension which is based on the width of your buttons. It should be at least 1/4” wider than your buttons. Draw a parallel line up at Center Front (CF), almost to the top but not quite. Then decide where you want the lapels to cross on the center front or, in other words, the depth of your V (usually 1-2” above bust level). Mark that point on the CF line (since the lapels are going to cross on the CF line and not the extension) and call it point B.
5. Make a mark 1” out from the front neck-shoulder point (extend the shoulder line, towards CF). This 1” point is where will start the V-neckline for the lapel. Call it point C.
6. Draw a straight line from point C to point B and extend to the extension line. Mark the point on the extension line point D. This is your breakpoint, the point where the lapels will end.
Time to draw the lapels. The shape and size of the lapels is the designer’s choice – they can be rounded rather than pointed, large or narrow. There are no rules, whatever works best with your style.
7. If you don’t know exactly where to start drawing your lapels, you can follow the line of your original neckline and adjust it later after you’ve tested the fit on paper or muslin.
So, starting from point A on the shoulder line and following the curve of your original neckline, extend it into the front to the desired width of your lapel (normally, around 3”) using your curve ruler.
8. Connect the end of the curve to your breakpoint (point D) using your curved ruler to get a slight curve outward.
9. Next thing to do is to choose the point where the collar and the lapel are going to start breaking off. You can choose some point in the middle of the extended neck curve, or move it slightly inward for a more dramatic look. This is not going to affect the fit so it’s purely a design choice. Mark this point E. This is your notch.
Now that you’ve drafted the lapel, it’s time to draft the collar.
10. Square a line up from the point where you came in 1/4″ (point A). The length of the line is your back measurement (Remember we asked you to write it down at the very beginning?) plus 1/8”. Label this point F. Find a midpoint between A and F and name it point G.
11. From point F square a 1/2″ line towards the shoulder and mark this point H. Using your ruler, draw a straight line from H to G, then take your curve ruler and blend a curved line from H, G to A.
This is your new back neck. Re-measure the curved line to ensure this length matches the original back measurement and adjust if necessary.
12. Square a line from 2 ¾” (standard for back collar) up from H-G line and label this new point I. This is the Center Back (CB) of your collar.
Square a short 1” guideline from I.
13. To draw the collar outer edge, trace a line starting from I and parallel with back neckline and ending approximatively 3/4″ from lapel. This is a fairly standard amount, but you as the designer can decide how much split between the collar and the lapel you want as this also doesn’t affect the fit. Label this point J.
14. Connect point J to the notch (point E) on the lapel.
15. Lastly, use your curve ruler and transform the straight line that runs from I to J into a slight outward curve.
Your notched collar draft is now complete but you still need to draft front/back facings.
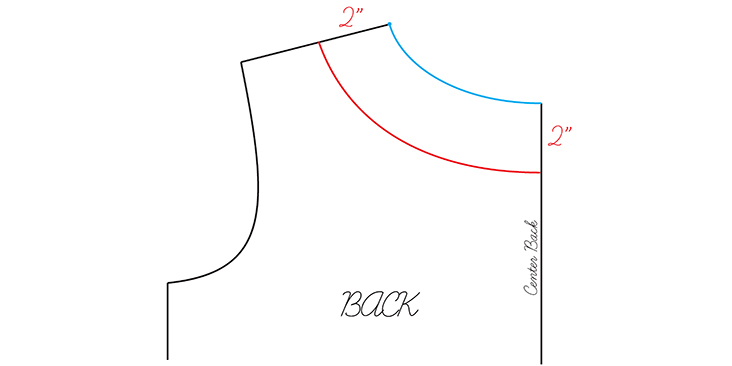
16. Let’s start with the back: draw a parallel line 2” from the neckline.
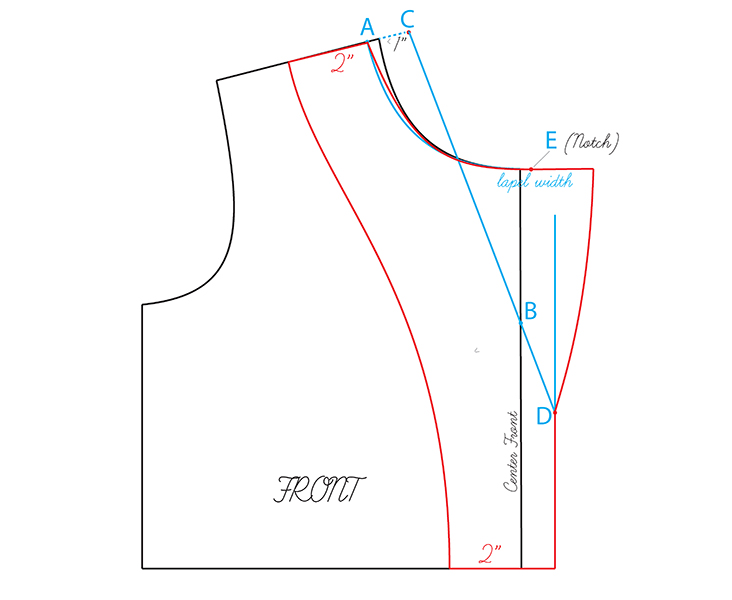
17. As for the front, measure out 2” from the CF hem and 2” from the shoulder point (A) and connect the lines using your curved ruler.
Now that you’ve drafted all the elements required for the construction of a notched collar, you need to divide them into separate pieces and trace individual patterns for each piece: the left and right front, the back, the upper collar and the undercollar, the back facing and the front facing.
Remember to transfer the notch where the lapel meets the collar and mark all the strategic points where the two seam allowances cross. Take time to check that you didn’t forget anything as it will really help you during the sewing process and improve finish result.
Turn of Cloth
Turn of cloth (or cloth allowance) is a simple but really important concept to understand if you want a professional finish to your collars. It is an allowance to compensate for the extra millimeters taken up when fabric is folded. So, in order to ensure that the seam line at the edge will lie slightly on the underside of the collar and the lapel and will not show when made up, you need to add some extra fabric to your pattern pieces. Since it’s the lapel facing and the under collar that will be exposed after you fold over the front edges of your garment, these are the pattern pieces you’ll need to add extra seam allowance to. Also, since the facing piece of a notched collar rolls outwards at the breakpoint and is seen as the right side of the garment, you’ll want to add additional seam allowance to the facing pattern piece along the lapel edge, stopping at the breakpoint.
How to know how to add on you may ask? Well, the thicker the fabric, the more cloth allowance you need. If you are working with our linen, adding a tiny 1/16” (3 mm) around the edges will just do the trick.
To sum it up, you need to add cloth allowance to the front facing around the lapel edge and the longest top edge of your under collar.
Note that in some cases you will not require cloth allowance – if for instance, you are going to pipe or bind an edge, you will want both raw edges to meet exactly.
Cutting Instructions
Once you’ve drafted your front pattern with lapel extension, your collar and your facings, and read the part about the turn of cloth, you may cut the following pieces adding your usual seam allowances.
In fabric:
– Cut 2 Fronts that are mirror images to each other
– Cut 1 Back
– Cut 2 Front Facings that are mirror images to each other and have additional 1/16” (3 mm) seam allowance along the lapel edge for the turn of cloth
– Cut 1 Back Facing
– Cut 1 Top Collar
– Cut 1 Under Collar with additional 1/16” (3 mm) seam allowance for the turn of cloth
Note: For the purpose of this tutorial, we decided to cut the Front and Back Facings and the Top Collar in a different fabric (lighter blue) as it will be easier for you to follow our instructions.
In interfacing (Please note that no usual seam allowances should be added to the fusible interfacing piece(s) as it will only create additional bulk at the seam when the collar is assembled):
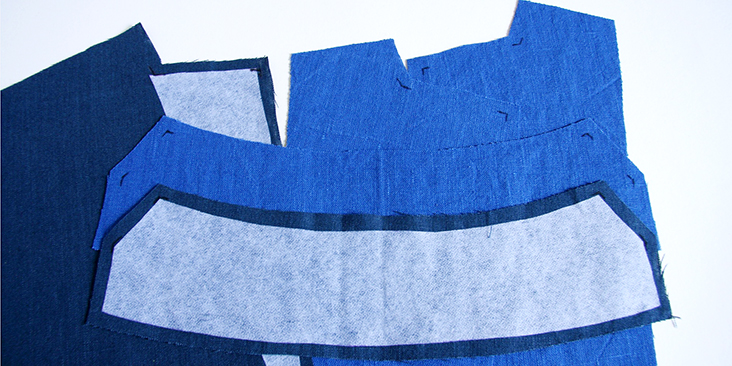
– Cut 2 triangles to the shape of your lapels that will be applied directly to the garment. From the point where the collar and the lapel break off and to the breakpoint of your overlap.
– Cut 1 Top Collar
Sewing Steps
Notched collar construction is one area of sewing where perfection and accuracy are required. This takes time. But the results are beautiful and well worth the effort.
First, join the shoulder seams of your garment as your pattern instructs. Then proceed with the steps described here:
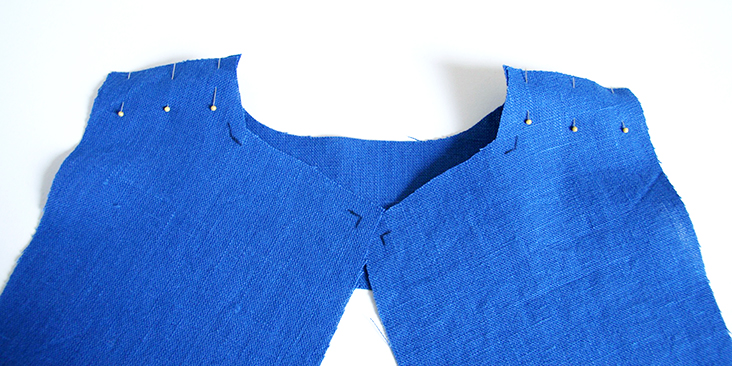
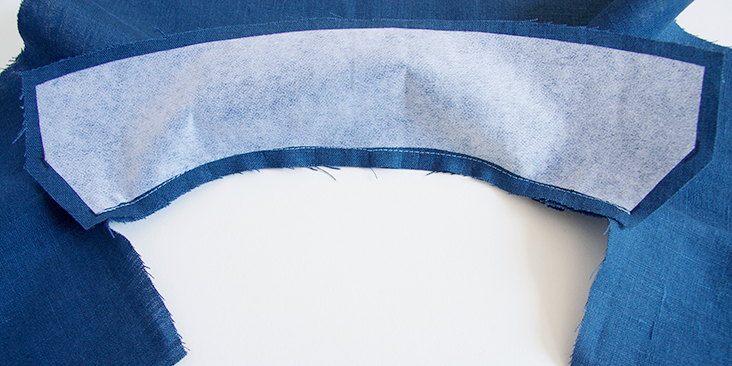
1. Interface the two garment fronts on the wrong side and your top collar. Mark all the strategic points where the two seam allowances cross.
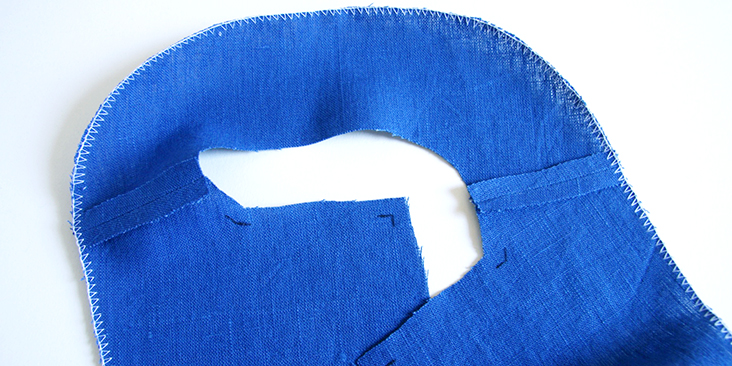
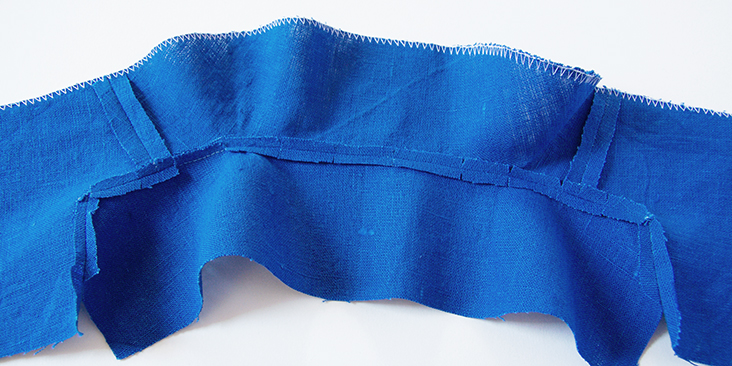
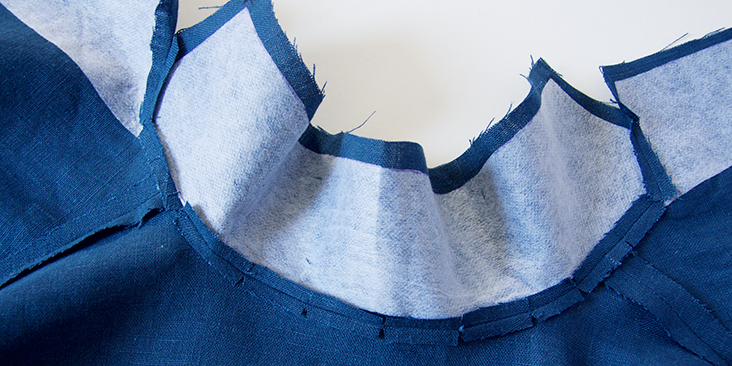
2. Create the facing. With the right sides together, pin and stitch the front facing pieces to the back facing at the shoulders.
Then press the seams open and serge or zigzag the outer raw edges to prevent the fabric from fraying in the future.
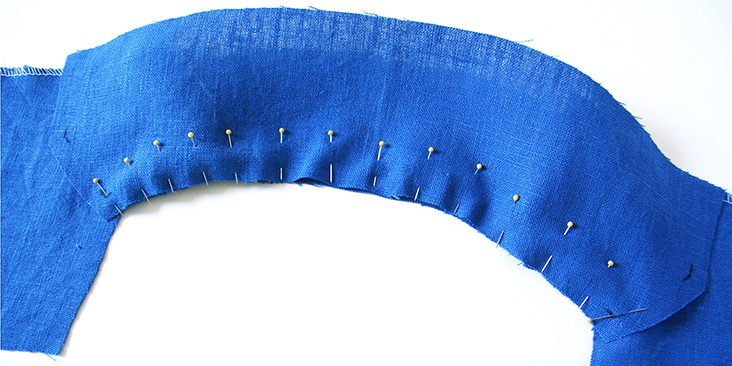
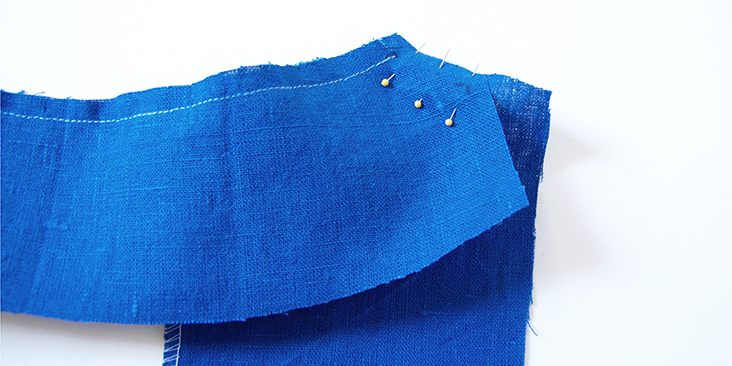
3. Attach the under collar to the facing. With right sides together, pin the under collar piece to the facing, matching notches that indicate where the collar ends and the lapel starts.
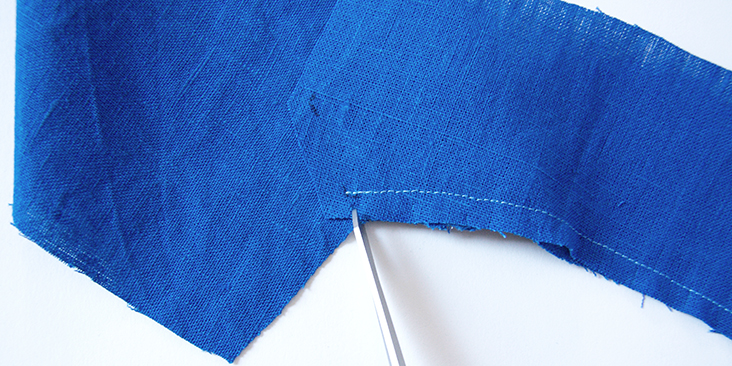
4. Stitch the collar to the facing, beginning and ending at the notches. Remember to backstitch to secure ends. Snip into the seam allowance right into the points where your stitch line starts and ends, getting as close to the stitching as you can, to release tension and facilitate pinning.
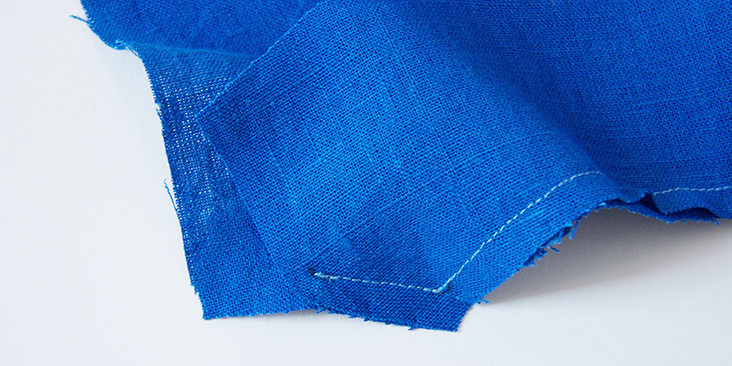
5. Now pin the short edge where the collar and the lapel are joined together, up to the point where they are going to start breaking off.
6. Insert your needle in the exact spot where your stitchline ends and sew the pinned edges right sides together up to the breakpoint.
7. Trim the seam allowance to 1/4”, clip the corners and along the curve to release the tension and press the seam open.
8. Now attach your interfaced top collar to the garment right sides together. Stitch matching the notches and backstitch to secure ends.
9. Repeat steps 5-7.
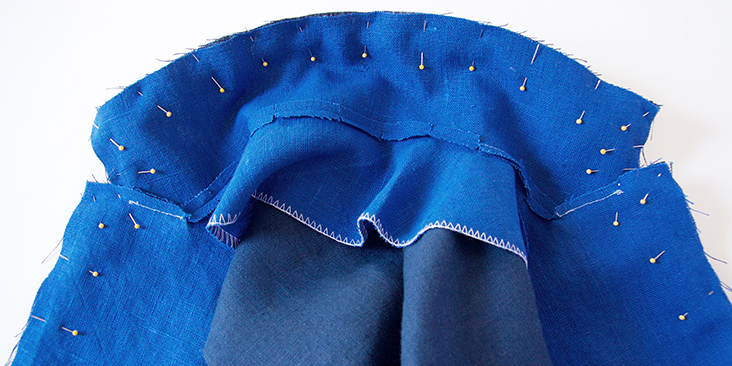
10. Place your facing and the garment right sides together matching up all raw edges. Pin.
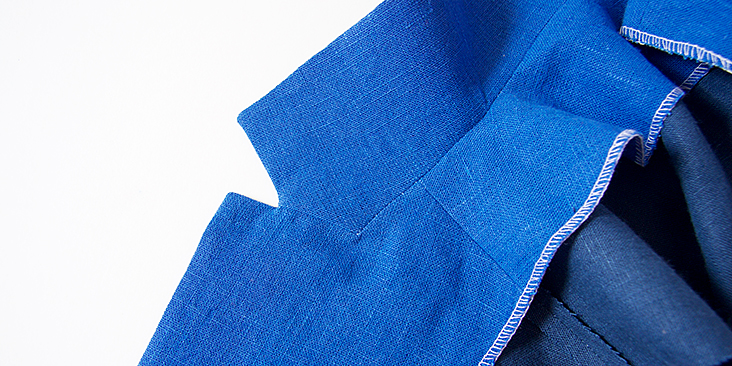
Note how the facing and the under collar are slightly bigger than the top collar and the bodice fronts. This is due to the cloth seam allowance that we’ve added. Align and match up the raw edges and the extra volume will later be smoothed out with an iron.
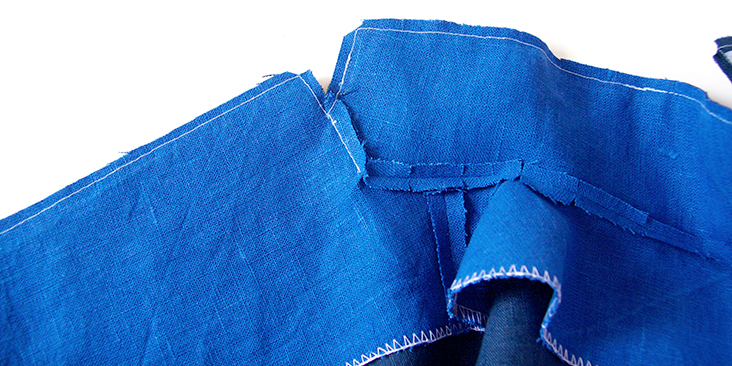
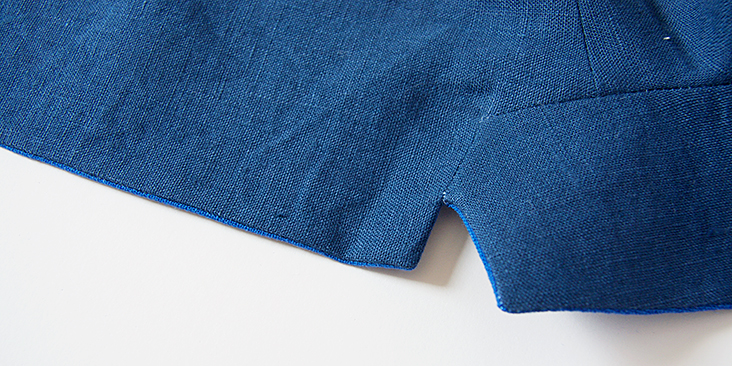
11. Stitch the two pinned edges together at a 3/8” (1 cm) s.a. starting at the centre back and sewing down to the hem (first one side, then the other).
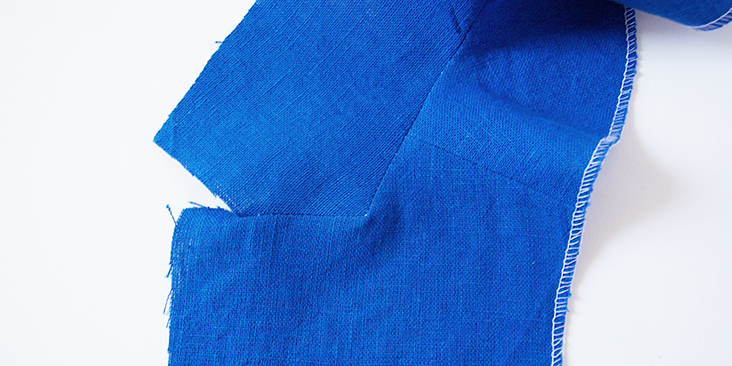
When you get to the point where the collar meets the start of the lapel, remember to stop stitching, lower your needle, lift your presser foot and pivot the fabric. Go slowly as this is the most important part of your collar construction.
Trim the entire seam allowance down to ¼” (6 mm), clip the corners and notch around the collar, in inverted corners and along any curves.
12. Turn the facing to the inside. Use a point turner or a chopstick to help push out points and edges.
13. Pressing is one of the most important steps in tailoring a notched collar. This is why it’s vital to give a good press now in order to ensure a perfect result in the end.
The collar and lapel will practically turn into position itself due to the cloth allowance you added earlier – you just need to fine tune it and press! Press the front edges from the facing side, and the lapels and collar from the underside.
Check out how the collar and the lapels are rolling smoothly and the breakpoint is folding by itself. The outer edges of the collar and lapel should be smooth, symmetrical and with no visible stitching lines.
If you wish, you can stop here as your notched collar is pretty much done at this point! However, if you want to make it perfect, you can add these two last steps to the process that are optional.
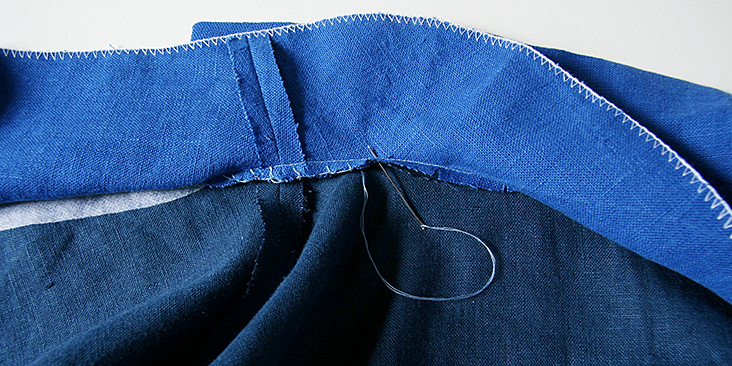
14. You can secure the neckline in place by hand stitching the collar to the under collar along the seam allowance. Work from the inside (between the facing and the garment) and use a loose stitch.
15. You can also topstitch around the entire front opening/notched collar area as close to the edge as possible. This will help the facing to lay flat on the inside.
And that’s it! Hopefully, this makes sewing the scary notched collar not so scary anymore. It gets easier with every pass!
















11 Comments
Jennifer Freeman
I’ve been looking for a simple pattern for a zipper front vest with a notched collar. This might work for what I want to make. I’ve been watching a lot of various tutorials, trying to also find something similar to what I want to create. So far I’m only finding asymmetrical vests and jackets with the notched collar. I need a symmetrical pattern, and I’m not sure how to alter existing patterns as I’m just starting out learning pattern drafting and how to sew.
Zainab Khatri
Great tutorial! I’m confused whether to attach the under collar to the facing or garment? It says it both times.
Lauren Linen
Hello,
The top collar will be sewn to the garment and the under collar will be sewn to the facing 🙂 Thanks for spotting that error.
Dianne U
Thank you for a detailed account from drafting to sewing it together. I am undertaking drafting a jacket with a notched collar and this tutorial is invaluable. Have been sewing a long time but was not interested in pattern drafting. Sorry I waited so long, – am finding it such a rewarding experience gaining a greater understanding about how ease and fit works together. Feel so lucky to have knowledgeable people like you to share your expertise with those of us eager to learn!
Michelle Wright
I plan to make the devin pyjamas, do I need to add the additional seam allowance as instructed or is it included on the pattern piece?
* Cut 1 Under Collar with additional 1/16” (3 mm) seam allowance for the turn of cloth
Lauren Linen
Hello, Your Devin pajamas pattern already contains seam allowance 🙂
Sam Ma
Hi! For the lapel, if we dont have a serger, should we zigzag stitch down the length of it and the collar? And at which point should we do it? I’m worried about my fabric fraying.
Lauren Gates
Hi Sam, You can definitely use a zig-zag stitch if you are worried about fraying. I would do the zig-zag stitch so it lays right on the edge of your seam allowances raw edge or about 1/16″ in from the edge. Play around with this by doing a few practice seams yourself and seeing what works best for you.
Sam Ma
Thank you!
Elizabeth Okoye
This was very explicit and helpful… Thanks!
Julia
This is great! I have many patterns with round collarless necks that I love and would love even more with collars. Thanks!