Sewing Glossary: How To Sew Box Pleats Tutorial
Today we are going to show you how to draft, form and sew box pleats. After knife pleats, discussed in our previous tutorial, box pleats are the second most common type of pleats you are likely to use when sewing garments. Just as with knife pleats, they are used to add volume, take in fullness and add interest to the silhouette of a garment. So, like darts, they are a useful technique for tailoring garments.
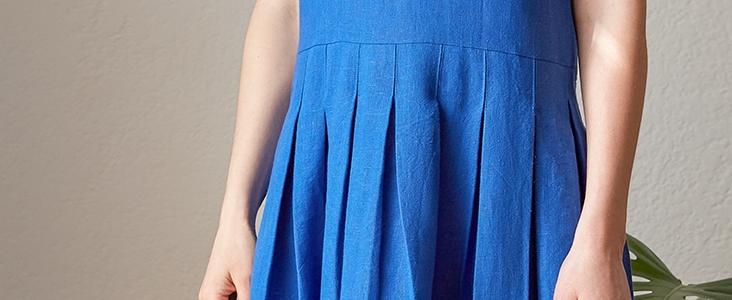
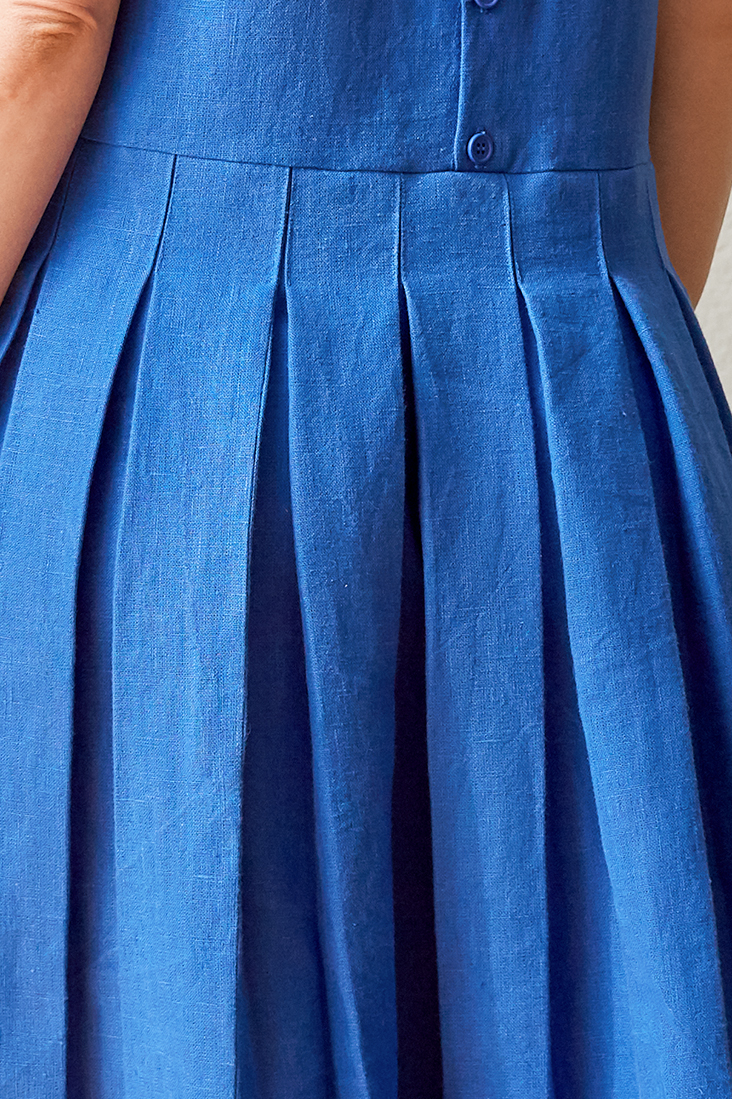
Box pleats are made up of two knife pleats facing away from each other or, in other words, they are formed when two folds of fabric are folded away from each other giving a wide vertical pleat. They are often used as stand-alone pleats on the back of a shirt or as a series of pleats on skirts or dresses.
In this tutorial, we will show you how to create a series of box pleats and an inverted box pleat. The drafting process is the same, the only difference is the direction the pleat is folded when you are sewing.
Materials & Tools
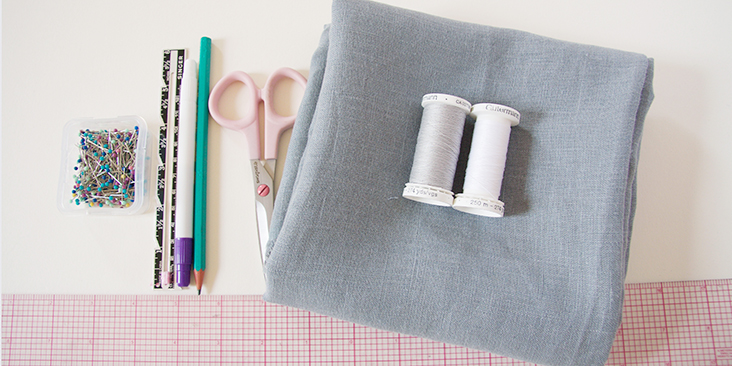
Fabric of your choice (we are using our IL019 MONUMENT Softened medium weight linen). Pleats work best with fabrics that will hold crease or have enough body to keep the shape of the pleat. Natural fiber fabrics like linen lend themselves better to pleats than their synthetic counterparts.
Matching sewing thread (for the purpose of this tutorial, we are using a lighter thread so you can clearly see how to do the technique)
Pattern paper, pen, ruler, pins, scissors, fabric marker or chalk, sewing machine
Difficulty
Beginner
Time
1 hour
Drafting the template
The most difficult part of making a box pleat is the math. In our tutorial about knife pleats we’ve already explained that each knife pleat takes three times its width in fabric: the pleat (as it appears on the surface), the underfold (turn-under), the underlay (return). So, if one box pleat is made of two knife pleats, it takes six times its width in fabric. But since the open portion of the two knife pleats form one large box pleat, this slightly changes the math but not the final amount of fabric. For example, two 1”-wide knife pleats will form one 2”-wide box pleat that will take 2” of fabric for left underfold and underlay and 2” of fabric for right underfold and underlay. As you can see, we still end up with the required 6” of fabric for each box pleat. Basically, you multiply the desired width of each full box pleat by 3.
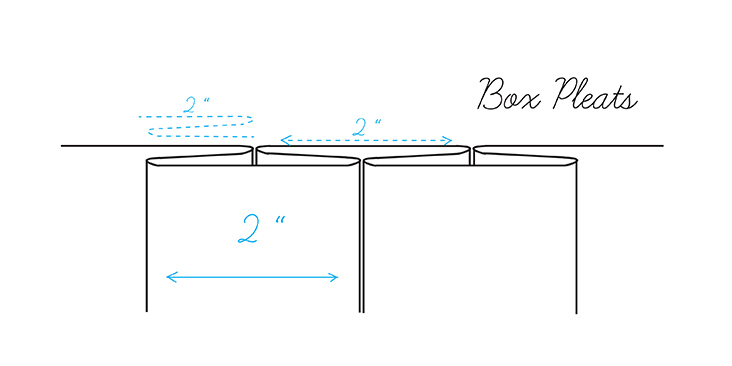
The size of your pleat is totally up to you. If you are struggling to work out the width of your pleat, have a play around with some fabric (or even a piece of paper), folding different sized pleats to get an idea of how it will look. For the purpose of this tutorial we will be making 2”-wide box pleats.
So, how much fabric do you need for a box pleated skirt? Here is how you can calculate it:
- Measure your waist. Let’s say it’s 25”
- Divide your waist measurement by the desired number of pleat. pleat width (25 waist/10 pleats = 2.5”) and you get the finished pleat width for each box pleat.
- Since each pleat takes 3 times its width in fabric, multiple your waist measurement by 3: 25 x 3 = 75 (the fabric you need to make ten 2.5”-wide box pleats).
- Add your usual seam allowances (2 times for each panel).
- Total fabric needed : 75? + 1? (two times ½”) = 75? of fabric.
In this example, we’ll be creating a set of 2”-wide pleats.
Let’s take a look at what a template for knife pleats looks like:
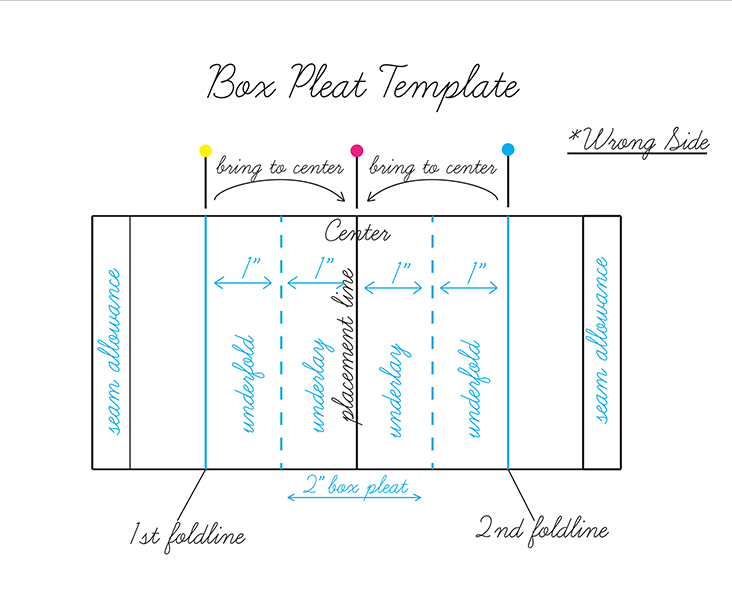
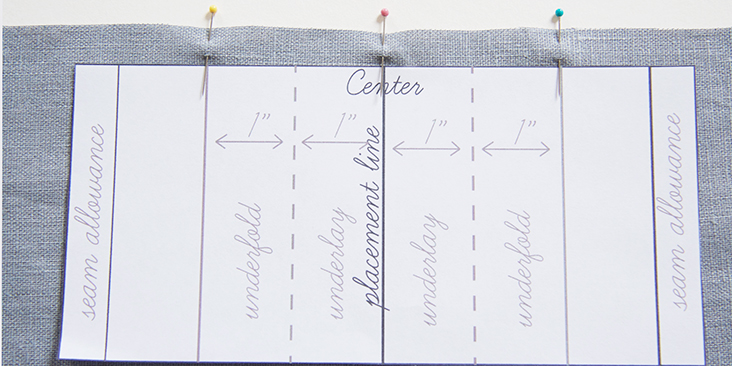
As you can see, each box pleat gets two foldlines and one placement line (the line to which the folds are brought).
HERE you can download a printable template for 2″-wide pleats.
If you wish to add some pleats to an existing pattern that doesn’t feature any pleats, you can do it pretty easily in these 3 steps:
- Trace the pattern.
- Draw slash lines for the desired amount of pleats parallel to the center front/back.
- Slash the pleat lines and spread for four depths of each pleat.
Forming Knife Pleats
NOTE: If your pleated piece is part of a garment, any hemming should be done prior to pleating. It can be done afterwards, but you would need to repress the bottom of your pleated project.
Because you are working in multiples, you need to mark your fabric very accurately. Some sewists like to use basting stitches to mark the foldline and the placement line for each pleat. Personally, I find this technique pretty time consuming and prefer to mark the pleat foldines and placement lines with different colored pins. Choose your preferred method and use pins, basting stitches, fabric marker, chalk etc. Regardless of the method you select to mark your fabric, it can help to use two colors: one for the fold lines and a second for the placement line.
Working from the wrong side of your fabric, use your template as your guide and pin-mark the pleat fold lines with different colored pins along the edge you are about to pleat: yellow pin for the first foldline, blue – for the other fold line and pink for the placement line. Shift the template as you go and remember to leave seam allowances at both ends.
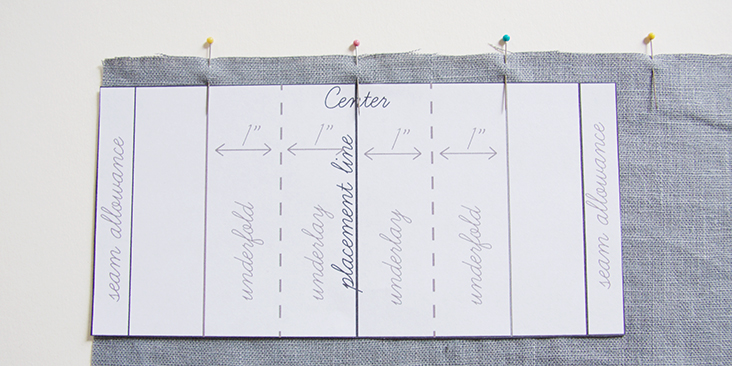
For each pleat, bring the outside foldlines towards the center (yellow to pink and blue to pink)
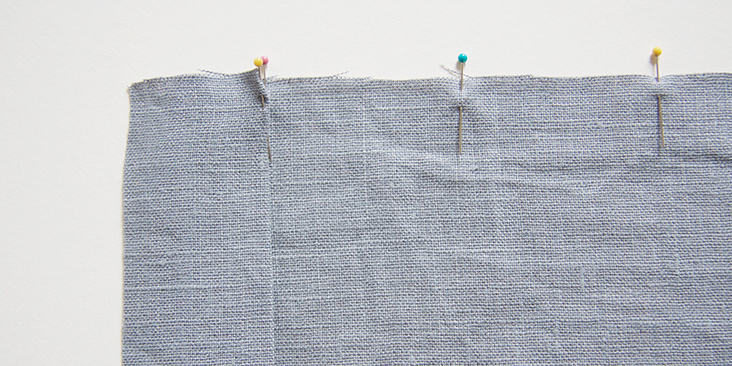
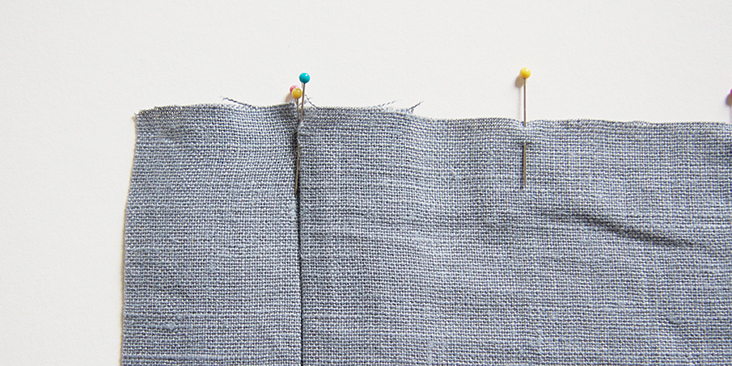
Repeat the same steps until you reach the end and pin the folds to secure in place.
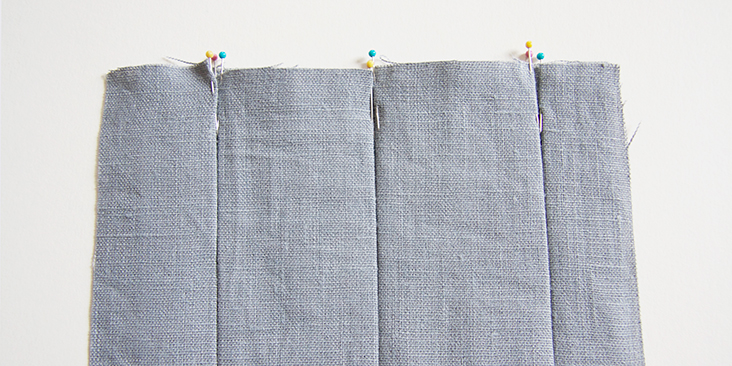
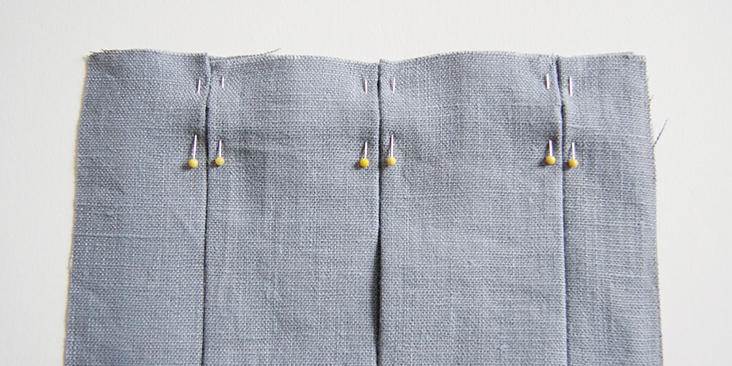
Note: If the fabric to be pleated has joining seams, you can plan to hide the seam inside a pleat.
When your pleats are all formed and pinned in place, and you’ve doubled checked that it all measures up and fits your waist, take your fabric to a sewing machine and run a line of straight stitching to baste them in place. Sew about ¼” away from the edge, taking out the pins as you go. You’ll remove these basting stitches once you have your seam in place. If you wish to give your pleats more definition and secure them in place, you can run vertical lines of topstitching as close to each folded edge as possible and going down a few inches (or whatever inches you want), backstitching at both ends. The decision is totally up to you as this is simply a matter of style and personal choice. This technique is often used on crisp skirts to secure pleats from the waist to the hip and will give you a nicely defined top but will allow your pleats to open at the bottom.
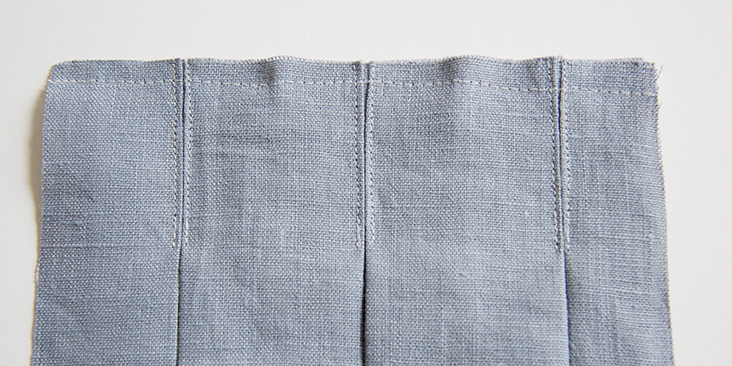
Press pleats along the fold for a crisp look using steam and a press cloth if necessary, press lightly or leave them unpressed to create soft folds. Remember, your pleats may be soft or sharp, but they must be accurately measured to look good.
Continue on with however your project calls for finishing the garment.
Inverted Box Pleat
Now that you understand how to make a box pleat, we’d like to show you how to form an inverted box pleat which is basically a reversed box pleat. Inverted box pleats have the “box” on the inside rather than the outside and are formed on the right side of the fabric. Inverted box pleats don’t work that well in large numbers. For a box pleat to stay inverted, it has to stand alone and is most commonly seen in shirt yokes or at the back of a skirt.
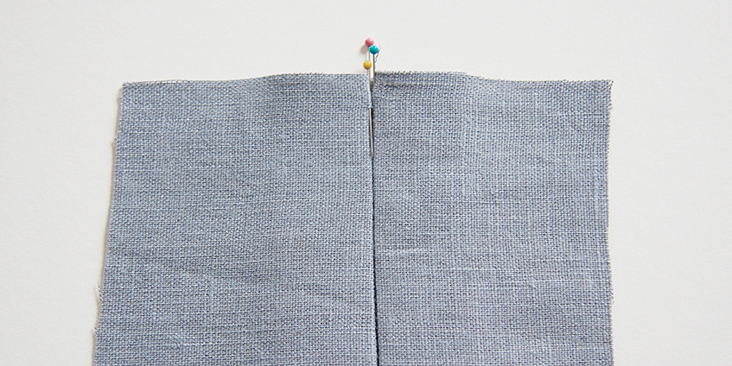
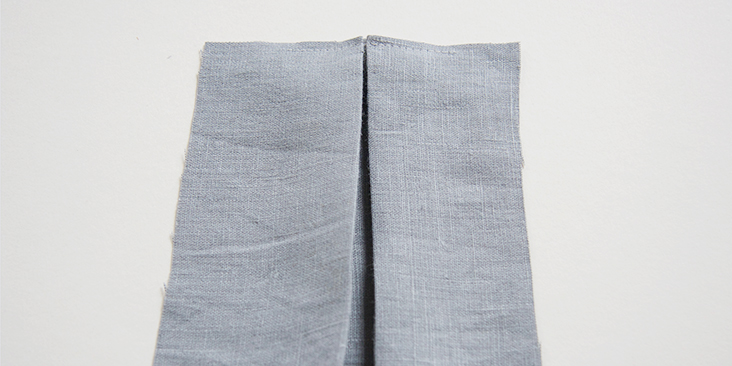
To complete an inverted pleat, work from the right side of the fabric using the same template. Pinch and crease the line on the left and move the line to meet the center line. Complete for the right side, so that the left and right lines meet with a fold at the center.
Sewing pleats is a lot of fun and a good math practice. We hope you found some useful pleating tips and techniques. Remember that adding a couple of pleats can turn any project into something special and unique!










5 Comments
Pingback:
Exploring Different Types of Pleated Skirts and How to WearPingback:
‘Outlander’ Gets It Wrong. Here Are 7 Misconceptions About NC’s Scottish Heritage. - Cardinal & PinePingback:
TYPES OF PLEATS – NaviCynthia Boehm
This was a great commentary! Please discuss further how to “fit” pleats between the waist and the hip.
JAB
One way is to stitch each pair of pleats a different distance,