Sewing Glossary: How To Sew A Continuous Bound Sleeve Placket
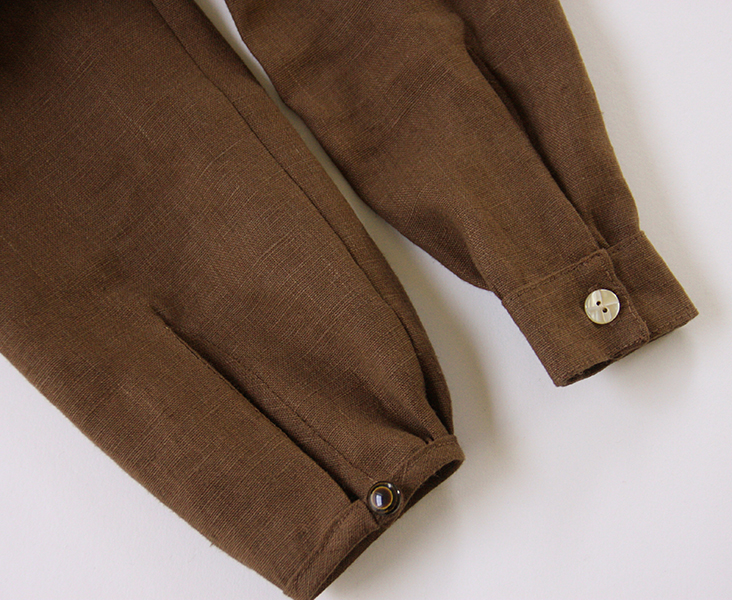
Today we wanted to show you how to sew another type of a sleeve placket – a continuous bound placket. It is called like this because it’s made from one piece of fabric that is used to bind a slash opening in the sleeve.
This method is much easier than the traditional shirt sleeve and is ideal for lightweight and medium weight fabrics. In this tutorial we are going to show you how to draft and sew the continuous bound placket and two ways to finish your sleeve: with a cuff and a button loop closure.
Make a professional-looking sleeve placket in just a few simple steps.
Materials
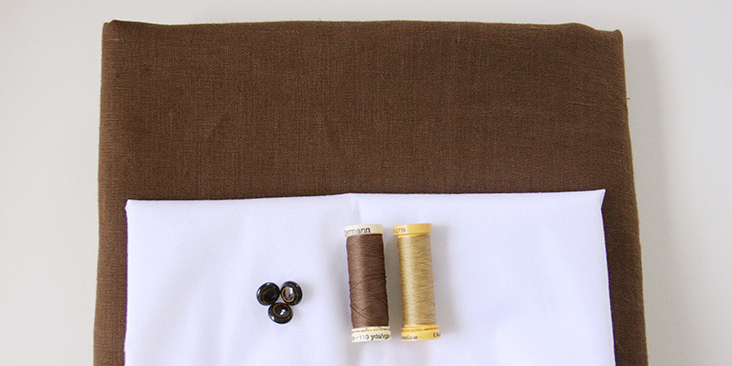
Fabric of your choice (we are using IL019 POTTING SOIL Softened Medium Weight Linen)
Matching sewing thread, contrasting sewing thread (if your sleeves require gathering), 2 buttons, medium weight fusible interfacing (for the cuffs)
Tools
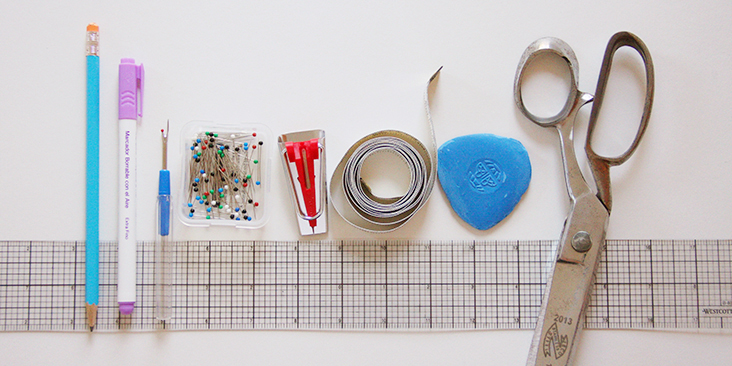
Scissors, pins, ruler, measure tape, 12mm bias tape maker, seam ripper, pen, fabric marker, chalk, sewing machine
Difficulty
Beginner
Time
1-2 hours
Pattern
If you are working with a pattern featuring a cuffed sleeve placket, it would give you all the measurements and cutting instructions. However, if your pattern doesn’t call for a placket sleeve, you can easily add one to the bottom of your sleeve.
What you need to do is to determine the placket location and mark it with a marker or a piece of chalk. If there isn’t one on the pattern, you can approximate its placement by dividing the sleeve into fourths. As for the height of your finished placket, it is somewhere between 3 and 4 inches plus the bottom seam allowance.
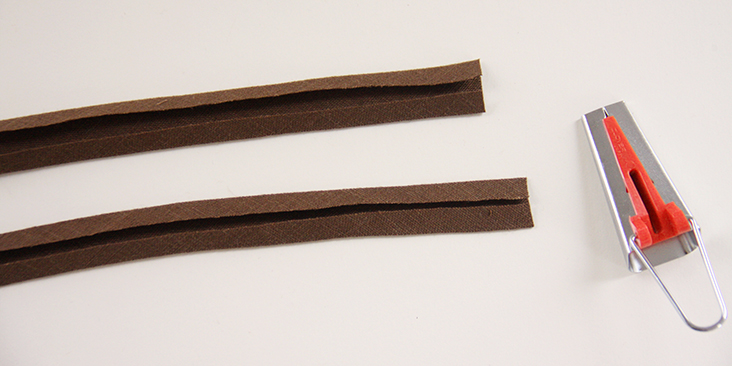
You will need to cut the binding (two strips of fabric on bias that is called bias tape) twice the length of the split and 1″-1,5″ inch wide. A cut width of 1″ (2,5 cm) will give a finished width of 6mm, and 1,5″ – 1 cm finished width. For more instructions on how to make your bias tape, check our great tutorial HERE.
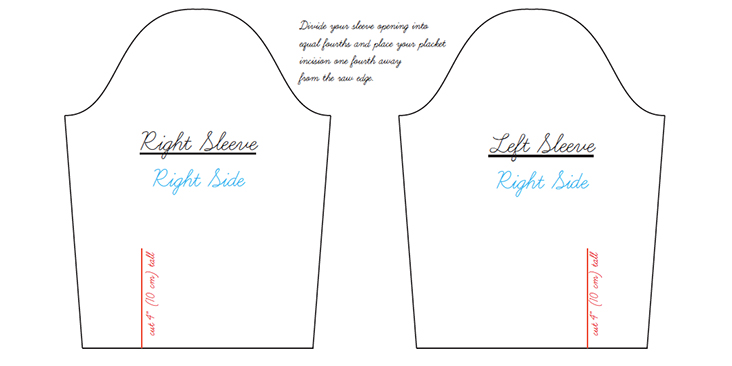
Note that this tutorial is for the left sleeve . To make a right sleeve, inverse the position of the placket on the sleeve so that it is a mirror image to the left sleeve.
Here’s how you position the placket for the left and right sleeve:
Steps
Note: Prewash your fabric and tumble dry it until it is still slightly moist, dry in room temperature. Iron the fabric so it is easier to work with.
1. Make a 3” (7,5 cm) – 4” (10 cm) long vertical cut into the sleeve fabric at the marked location.
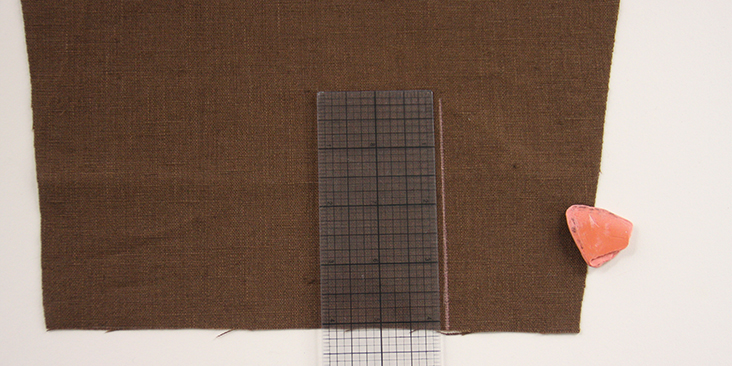
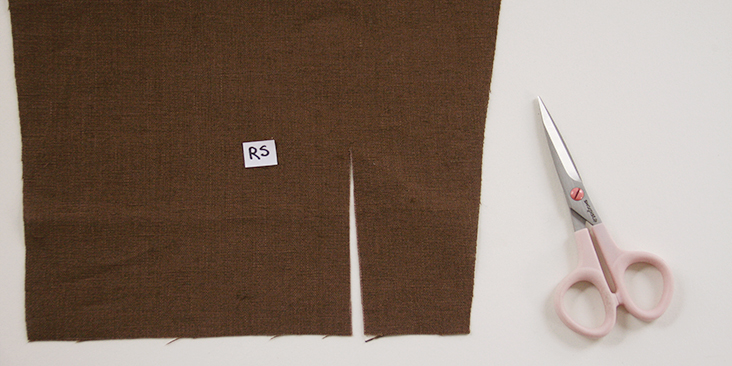
2. Make two small (1/8″) cuts at the top of the slash to form a Y. This will later help you with the binding.
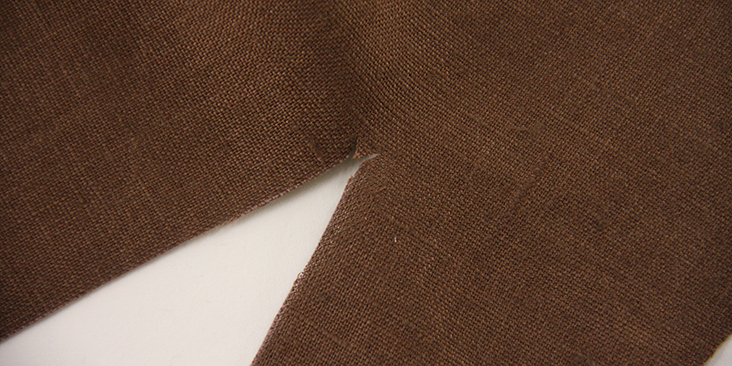
3. Open the slit so it forms a wide V shape and pin one edge of your bias tape to the slit with right sides together.
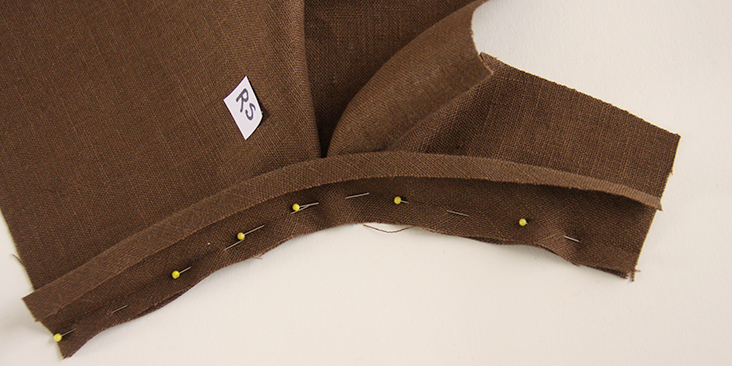
The two layers will be lined up with each other at the two ends but the center point of the sleeve slit will be slightly below the edge of the placket piece.
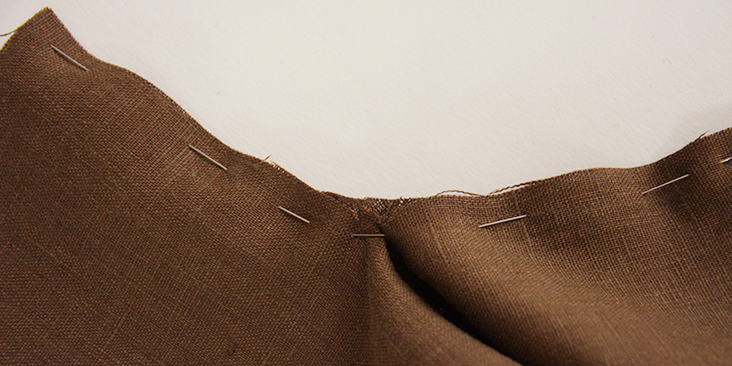
4. Sew along the pinned edges in the crease of your bias tape, just catching the sleeve fabric at the center and making sure that no folds or tuck are caught under the thread.
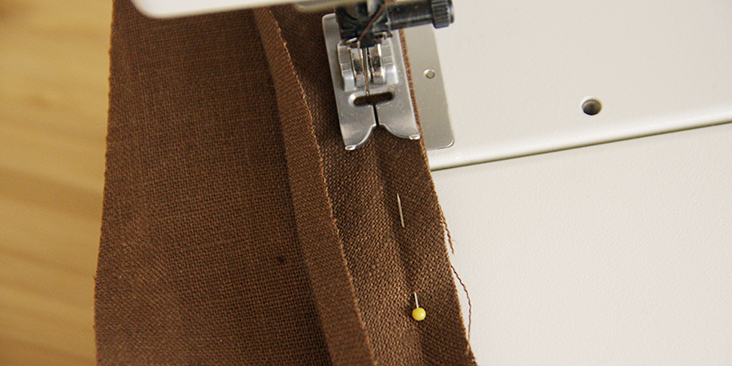
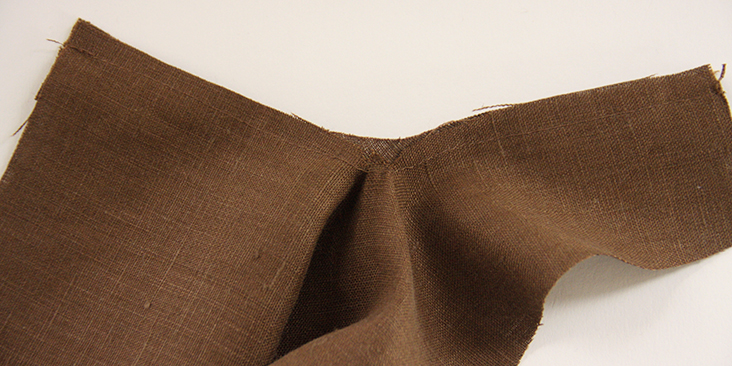
5. Trim the seam allowance down to ¼”.
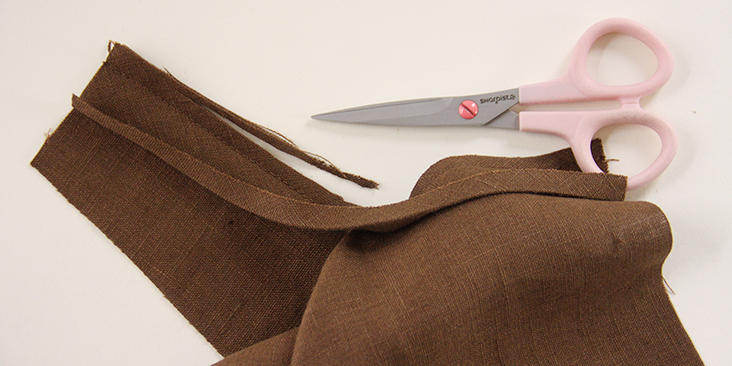
6. Press the bias tape away from the sleeve.
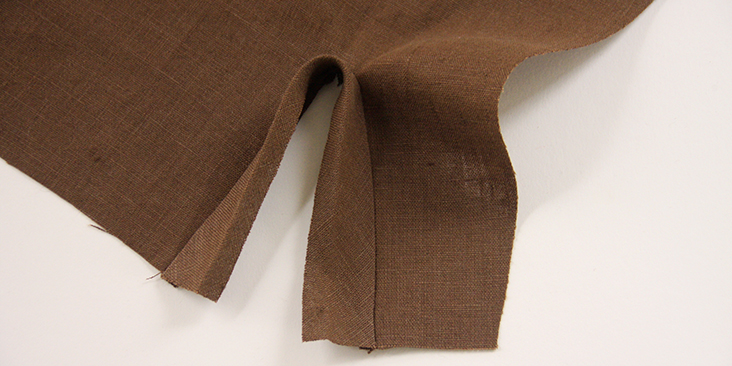
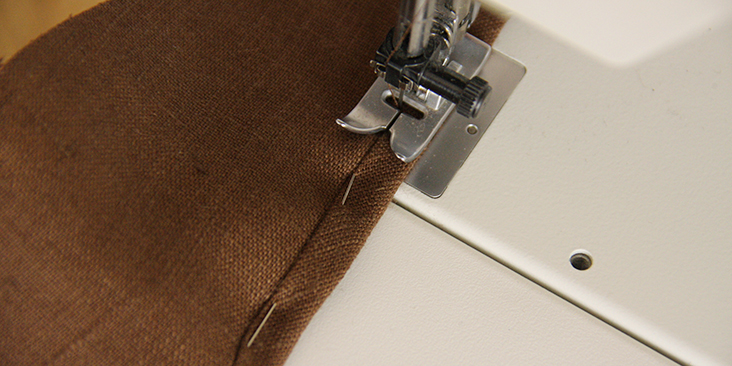
7. Fold the bias tape over to the wrong side slightly covering the stitching line and pin. This will enable you to neatly topstitch it from the right side and catch all layers.
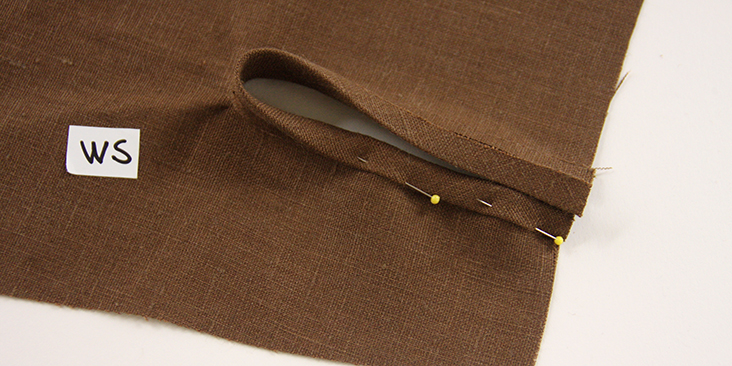
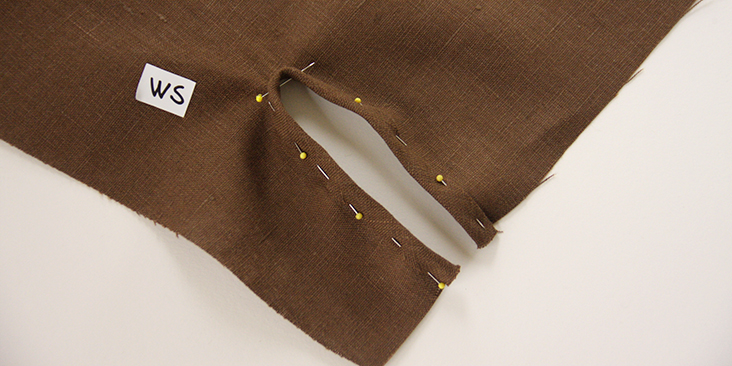
8. Working from the right side, topstitch the tape in place in the crease.
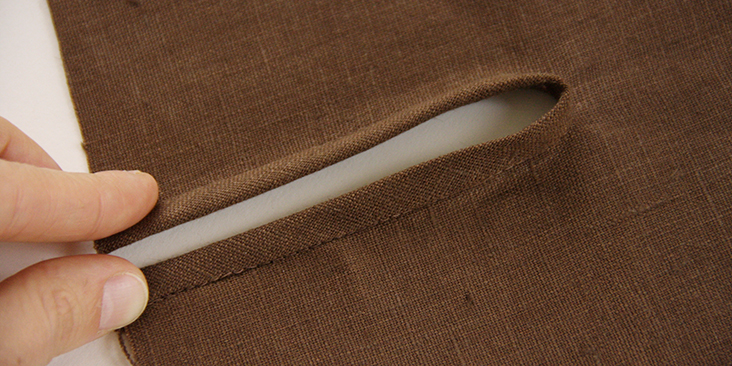
9. Fold the binding in half, right sides together, and backtrack diagonally across the fold like so:
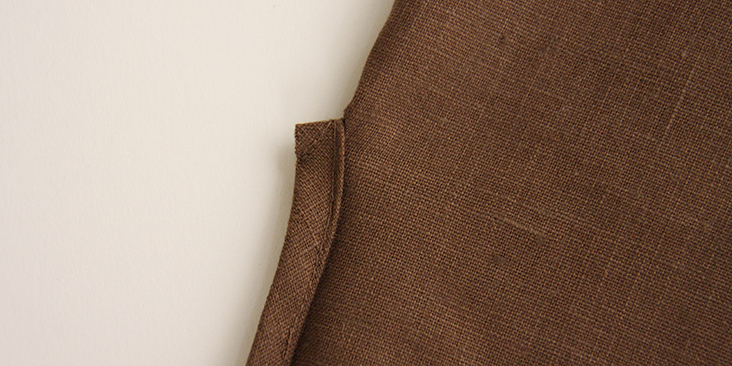
To avoid any tucks or bulk, try to stitch only to the stitching line and not to go over it.
10. Press the left side of the binding over right and your sleeve placket is all done!
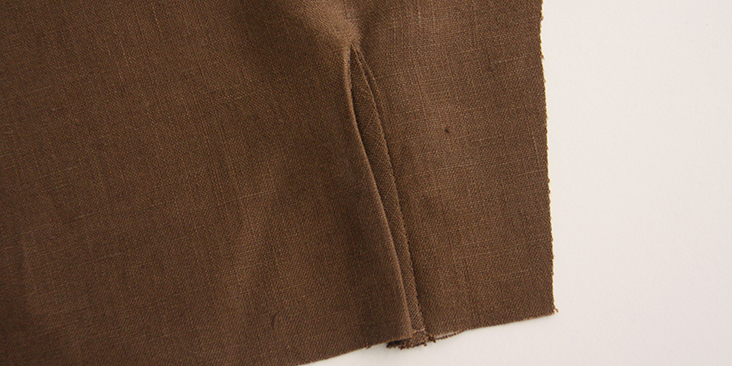
Who says sleeve placket, says cuff! So now we need to sew and attach the cuff to our sleeve placket.
Drafting The Cuff
Note: At this point, your sleeve should be already attached to the garment and closed up at the sides to form a tube. Follow the instructions in your pattern to attach the sleeve.
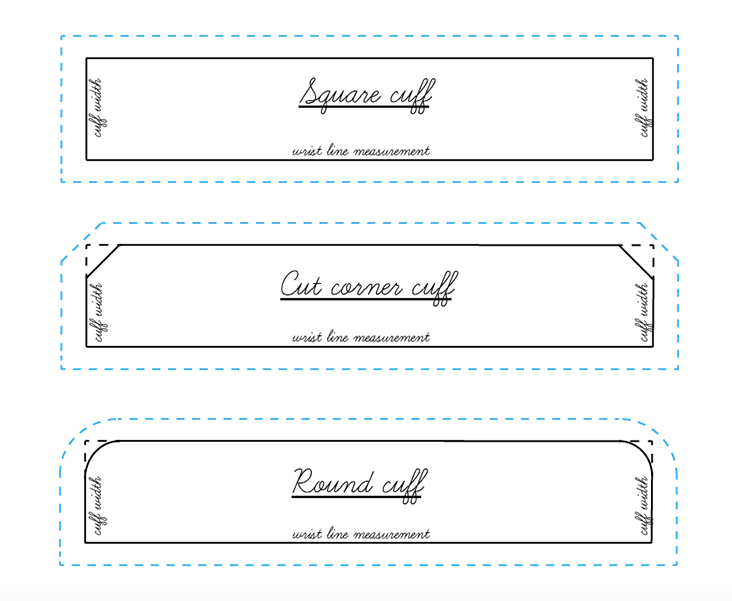
1. Measure the length of the wrist line on either your finished sleeve or directly around your wrist and decide how long you want your cuff to be.
2. Take a piece of paper and draw a horizontal line that corresponds to your measurement.
Then draw to perpendicular lines to the desired width of your cuff. If you are not sure what width to choose, you can always refer to a shirt in your wardrobe to get an idea of an appropriate cuff width for your project. We went for 1,5″ (3,8 cm).
Connect the dots to complete your rectangle and decide what shape you would like your cuff to be. The most common cuff types are: round cuff, cut corner cuff or square cuff. We chose the latter.
3. Add your usual seam allowances around all edges (we work with a 3/8″ (1 cm) seam allowance) and for one cuff cut 2 pieces in fabric and one in interfacing (without the seam allowances for the interfacing).
Here’s a little diagram that will help with the drafting:
Sewing And Attaching The Cuff
1. For one cuff, cut 2 pieces from fabric and one from fusible interfacing.
2. Apply fusible interfacing to the wrong side of one of your cuff pieces and press the top edge under 3/8″ (1 cm).
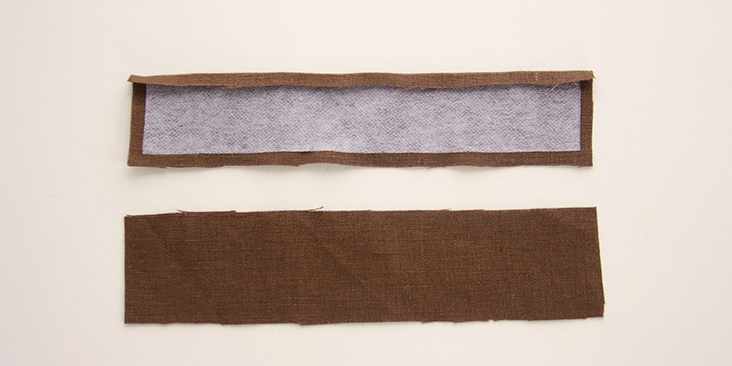
3. Take your non-interfaced (outer) cuff piece and pin the two right sides together, aligning the curved edges.
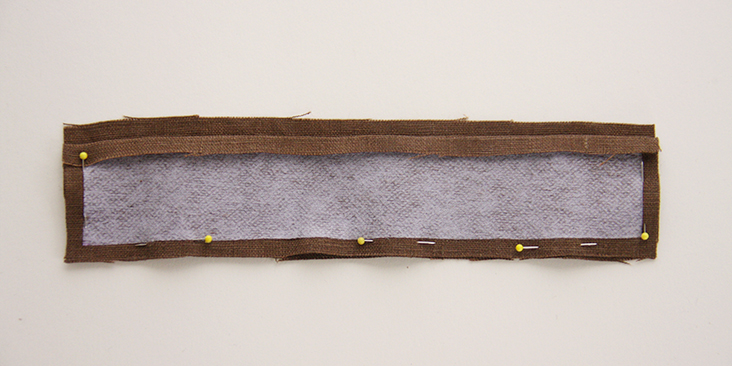
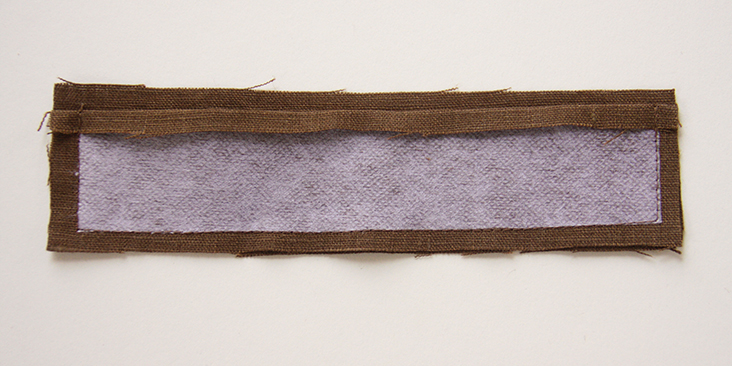
4. Stitch the outer cuff to the inner cuff all along the curved edge at a 3/8″ (1 cm) seam allowance.
Depending on the width of your sleeve opening and your finished cuff, you might need to gather or pleat your sleeve fabric first. In our case, the sleeve opening is larger than the cuff, so we decided to gather it to the width of the cuff.
6. HERE is a step-by-step tutorial on how to gather your fabric. Be sure to use a contrasting color thread and to space your gathers evenly.
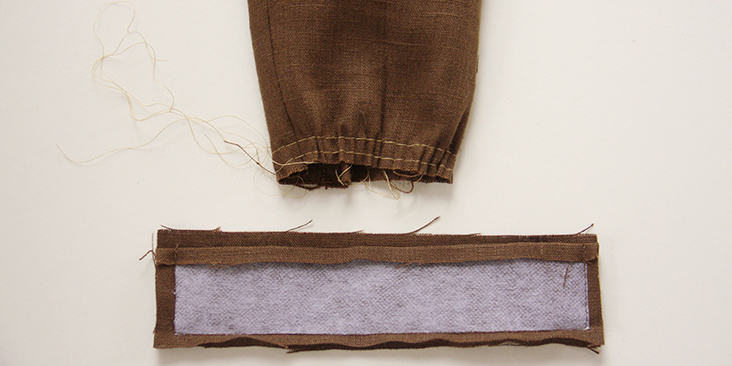
7. On the wrong side of the sleeve, pin the non-interfaced cuff panel to the sleeve sandwiching the folded cuff panel in between but making sure not to catch it when you pin. Both wrong sides should be facing you.
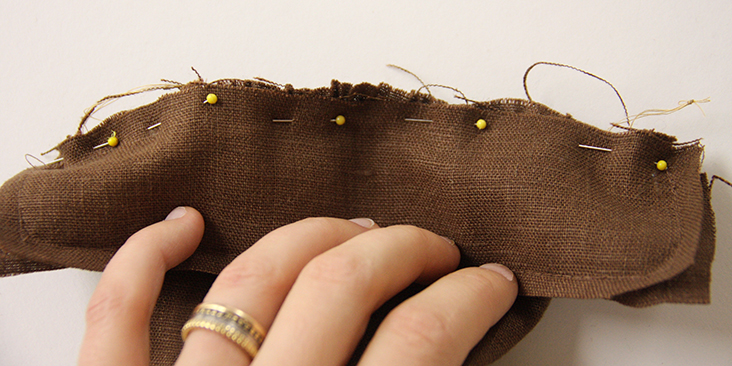
Make sure that the left (front) side of the placket is folded under to the wrong side when you pin the cuff and the right (back) side remains flat. This is needed to keep the overlap in place. Match up the finished sleeve edges to your cuff’s line of stitching so that when you turn your cuff right side out, they’ll be aligned.
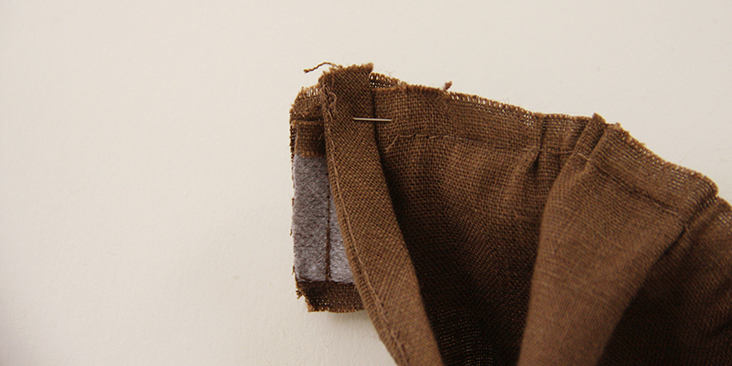
8. Stitch the cuff to the sleeve making sure that the folded cuff edge is not caught.
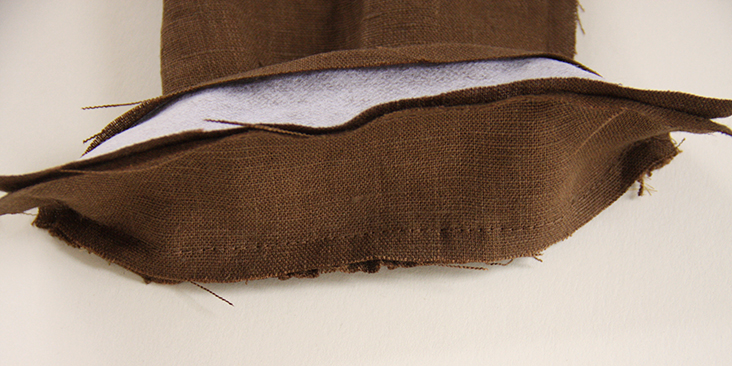
9. Use your seam ripper to cut the thread you’ve used for gathering.
10. Turn the cuff right side out and press the seam flat folding the seam allowances towards the cuff.
Use a dull pointed object like a chopstick to get the corners.
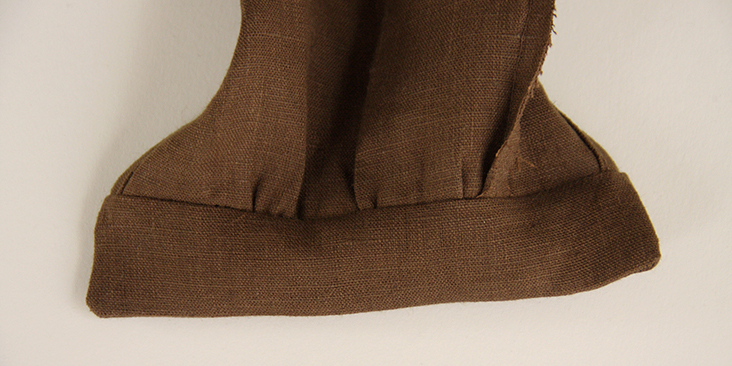
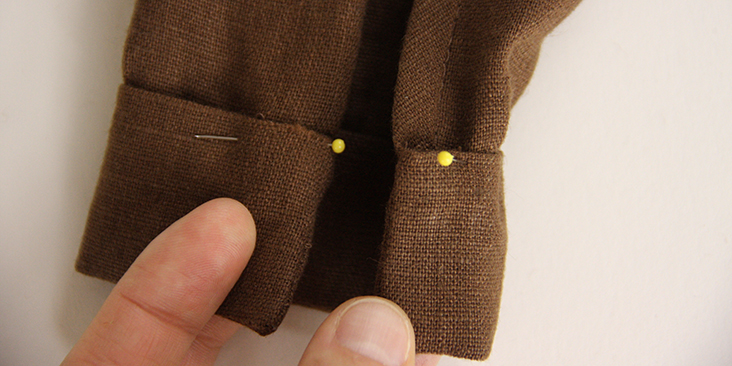
11. Edgestitch the remaining edge of the outer cuff to the sleeve through all layers. To make sure that your sleeve cuff stays in place, topstitch around the curved outer edge 1/8″ from the edge.
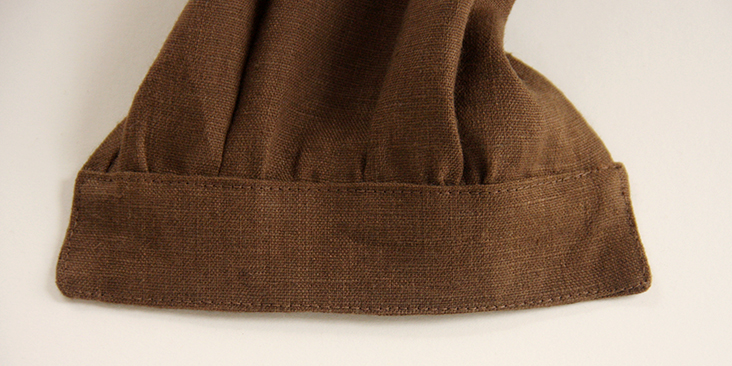
12. Overlap the cuff and decide where you want to place your button. Make a small mark and sew a buttonhole and attach a button.
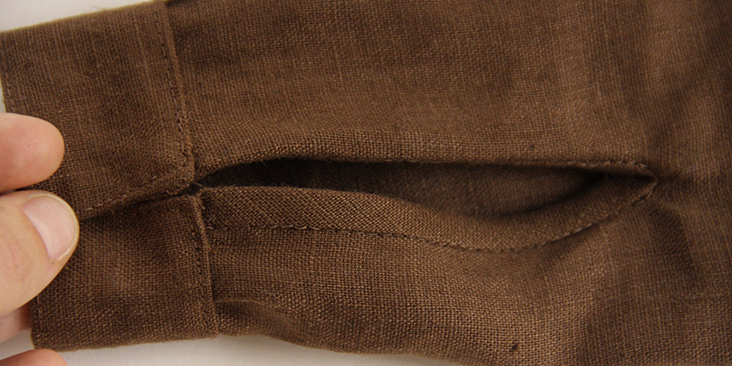
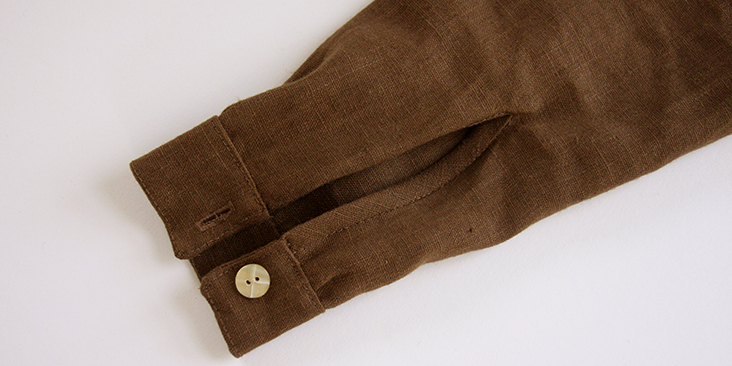
But there’s even an easier way to finish the sleeve opening – a button loop closure!
Adding A Button Loop Closure
Start by making the fabric loop.
1. Mark out a small rectangle (0,75″ wide and 1,5″ long (2 cm x 4 cm)) on the bias of your fabric, in other words, at a 45 degree angle to the grainline. Cut it out.
2. Fold your rectangle in half lengthwise (right side facing out) and press. Then fold the raw edges in towards the folded center line and give it another press.
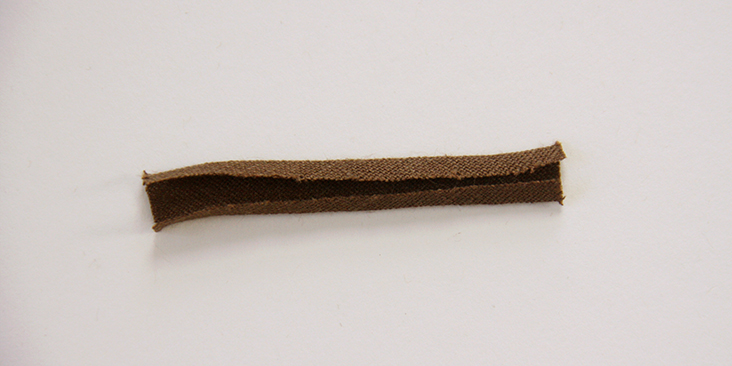
3. Fold it again in half lengthwise enclosing the raw edges and stitch over as close to the edge as possible.
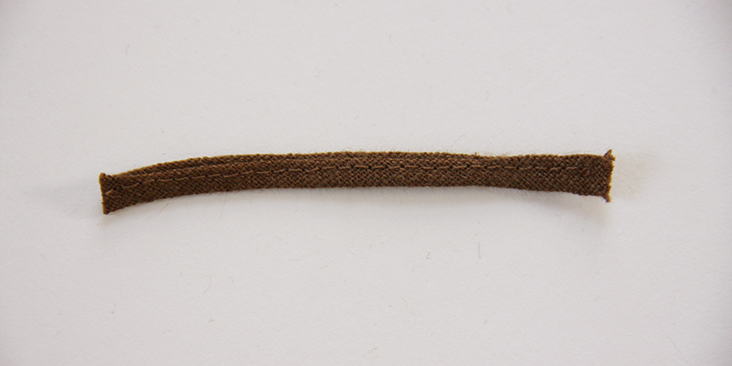
Your button loop is now ready and needs to be inserted in the binding.
4. Using an 18mm bias tape maker, make a strip of single fold bias tape to the measurement of your wristline plus two times your usual seam allowance. For example, we want our finished cuff to be 7” long and our usual seam allowance is 3/8”, so we’ll cut a strip of bias tape that is 7,75” long.
5. Press it in half to mark the center fold.
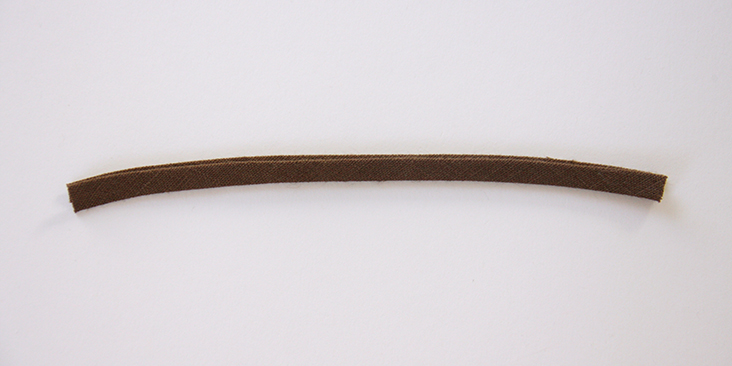
6. Unfold your bias tape and line up the edges right sides together and insert the button loop inside the tape like so:
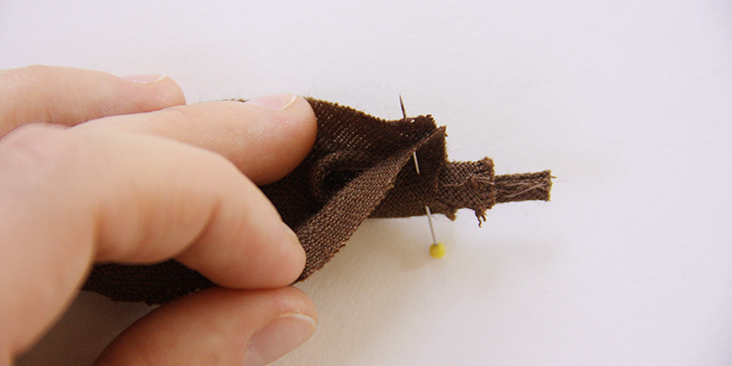
Make sure that your button loop is large enough to accommodate your button after you’ve stitched the end at a 3/8” seam allowance.
7. Stitch the two short ends at a 3/8” seam allowance and trim the ends of your loop.
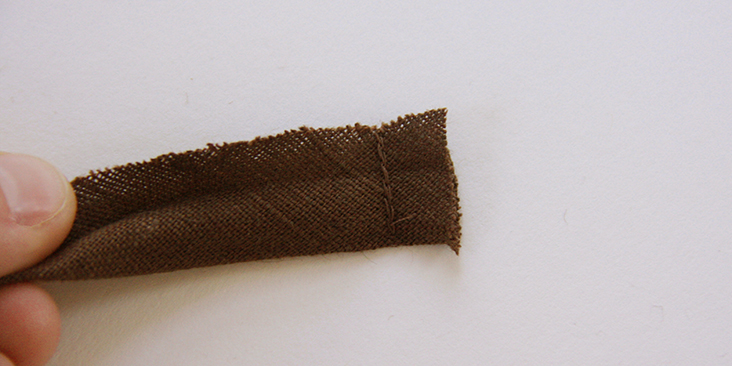
8. Turn your piece right side out, tuck in the raw edges and press.
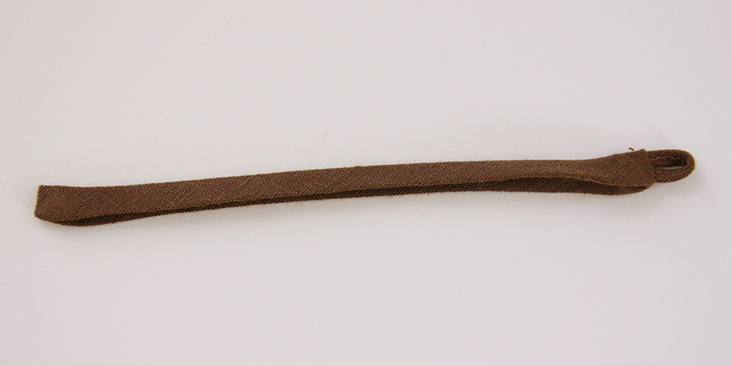
9. Gather the sleeve to the width of the cuff and sandwich it inside the folds of your bias tape. Pin all the layers together.
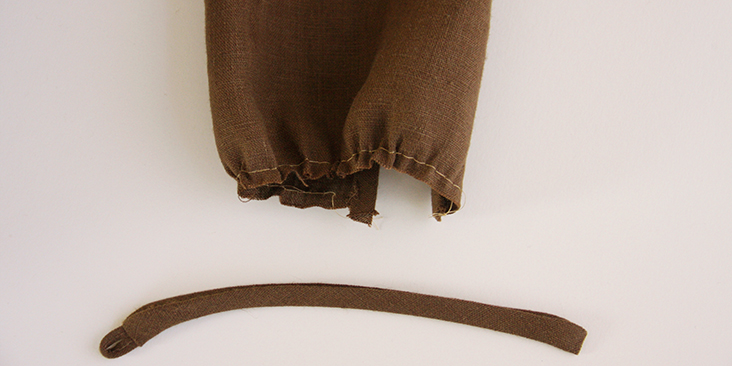
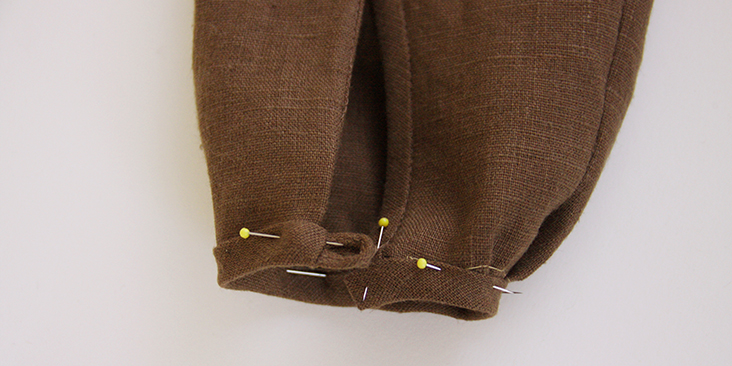
Note that the button loop should be pinned to the (left) front placket side that is folded under as it is inserted into the cuff. The right (back) side remains flat.
10. Working from the right side of the sleeve, topstitch through all the layers at once 1/8” from the edge.
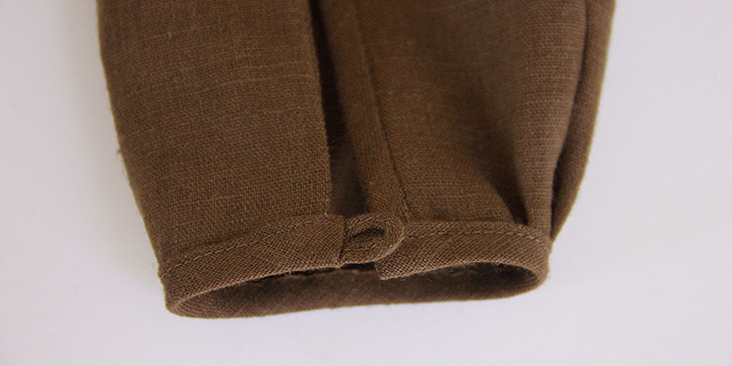
Use your seam ripper and pull out the contrasting gathering thread.
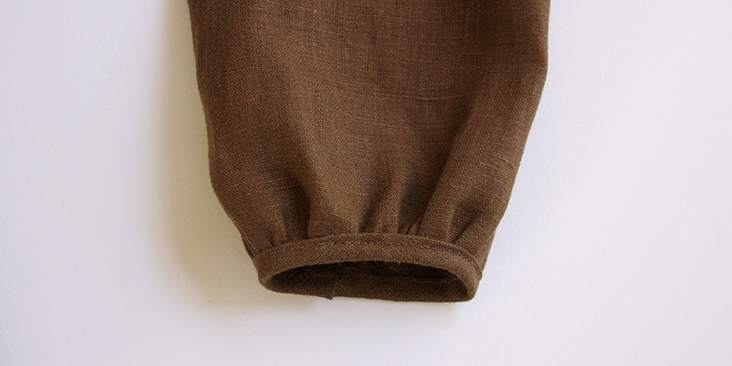
11. Lastly, attach the button and you are all done!
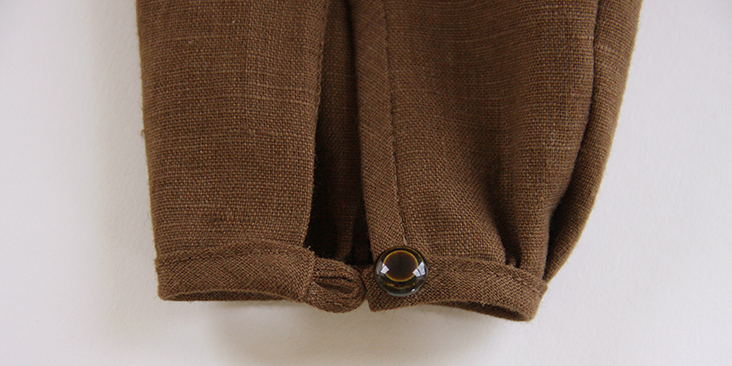
When the cuff is buttoned, the placket is practically invisible and looks just like a tuck in the fabric.
We hope you’ve enjoyed this tutorial! Next week we’ll be making a linen frock dress featuring this new technique. So tune in and happy sewing!


19 Comments
Anna Masse
Is it possible that the slit placement is reversed in your diagram? As far as I know it should be on the middle of the back sleeve. If you are showing these pieces right sides, then the slit is positioned on the front sleeve.
Anne Brown
Hello Rima,
I am trying to follow the pattern for the Jade Relaxed Linen Shirt for the sleeve placket and I can’t figure it out to save my life. I tried to paste an image of it here, but it doesn’t work. I’ve cut the pattern pieces out, but I just can’t figure out how to proceed. Could you offer me some guidance, please? I am obviously a beginner sewer.
Thank you very much!
Lauren Gates
Hello Anne,
I’d be happy to help you out. Look out for an email from me.
Lauren
anna boyle
Hi, I have the same problem – I don’t know what to do with that piece ;( Could you please help. Thank you so much.
Lauren Gates
Hello Anna, The placket piece in the Jade shirt pattern was added as an alternative to the placket shown in the tutorial. Please follow the tutorial above to sew your placket without the alternative pattern piece. We will be removing this option in a new version of the pattern which will be updated shortly.
Tabitha Thompson
I had the same problem and found a tutorial on how to this kind of sleeve placket here: https://www.threadsmagazine.com/2012/04/18/how-to-make-a-precision-placket
But I think the continuous binding as shown above might be easier!
Lauren Gates
Here is the link to our tutorial 🙂
https://blog.fabrics-store.com/2017/12/05/sewing-glossary-how-to-draft-and-sew-a-sleeve-placket-with-cuff/
Tabitha Thompson
Thank you! That’s a very good tutorial.
Rachel
Many wonderful things
Rachel
As A Beginner I see many beauiful things
Rima Khusainova
Thanks so much Rachel!
Gwen
Thank you for such a detailed tutorial. I love your fabrics and I always look forward to reading your tutorials. I’m learning a lot.
Rima Khusainova
Thank you so much Gwen! We have some really great tutorials coming up so stay tuned!
irma
This is a great tutorial! I have stopped sewing since my kids are grown and I am retired, but this site with it’s wonderful fabric, patterns an now these tutorials is encouraging me to start again. Particularly because I now have a baby granddaughter! This tutorial is so well done and understandable. Thank you.
Rima Khusainova
Dear Irma! Thank you very much for a lovely comment! Sewing for kids is the best!
Kathleen
Wonderful tutorial, Rima! Although I’ve been a sewer for decades, I learn something new every time I read a tutorial from The Threads. Thank you!
Rima Khusainova
Thank you so very much Kathleen! x
Maggie Bullock
Thank you for such a detailed tutorial. This ensures a very professional finish.
Cheers Maggie
Rima Khusainova
Thank you so much for your kind words Maggie!