Sewing Glossary: How To Draft And Sew A Mandarin Collar Tutorial
A Mandarin collar is a type of stand-up collar with Asian influence that is often used in shirt or dress making. This simple patternmaking staple can add a completely different, more sophisticated look to your outfits.
With this tutorial, we are going to show you how to draft and sew a Mandarin collar to your clothing in order to create a whole new look and add a touch of style to your wardrobe.
Materials
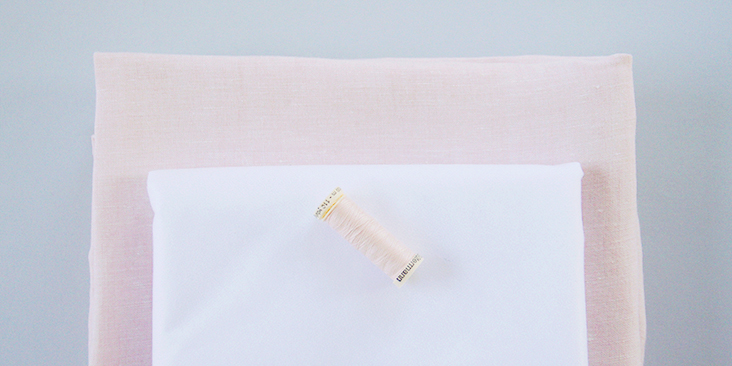
Fabric of your choice (we are using our IL042 894 Premier Finish Medium Weight Linen)
Matching sewing thread, fusible interfacing
Tools
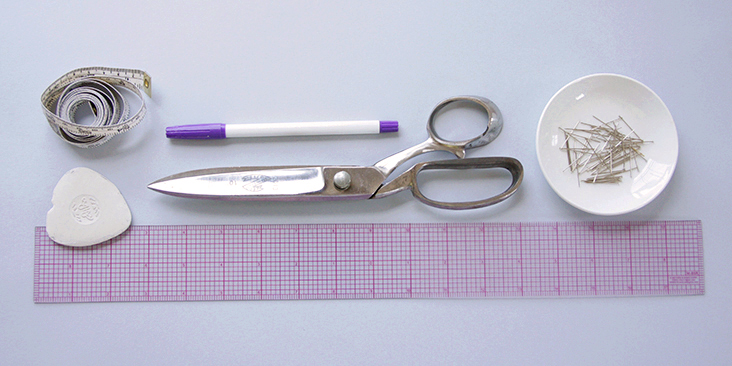
Pattern paper, pen, scissors, ruler, measuring tape, pins, fabric marker, chalk, sewing machine.
Difficulty
Advanced beginner
Time
1-2 hours
Pattern
If you are working with a pattern featuring a Mandarin collar, it would give you all the measurements and cutting instructions. But even if your pattern doesn’t call for a Mandarin collar and you would like to add one, you can easily draft your own pattern in just a few easy steps and add it to any neckline. All you’ll need is the neckline measurements of the garment you’re about to collar-size.
Here’s a diagram that illustrates what you have to do in order to draft your own pattern:
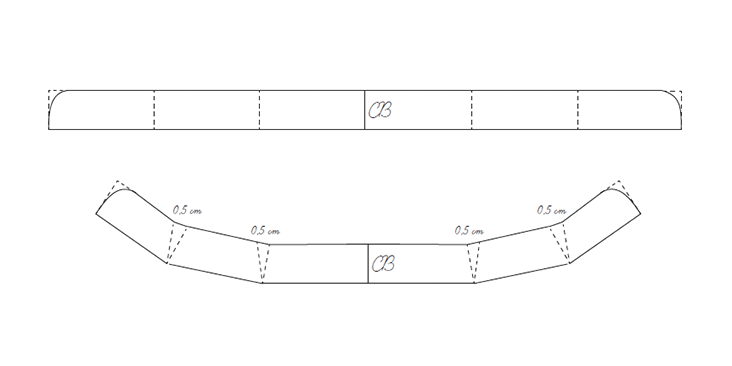
1. Measure your entire neckline and draw a rectangle that is the length of the full neck measurement and the full desired collar depth. Ours was 18,75 in long and 1 inch deep.
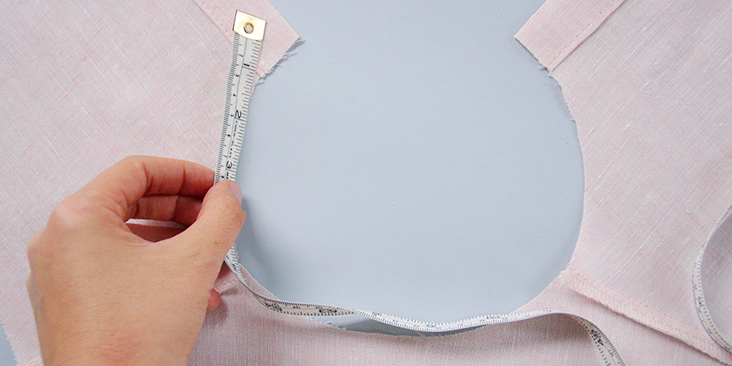
2. Curve the outer edges.
3. Mark the center back in the middle of your rectangle and divide the space on the left and on the right from this line into three equal sections.
4. Cut all the lines (except the center back line) from the top to approximately 1-2 mm to the bottom.
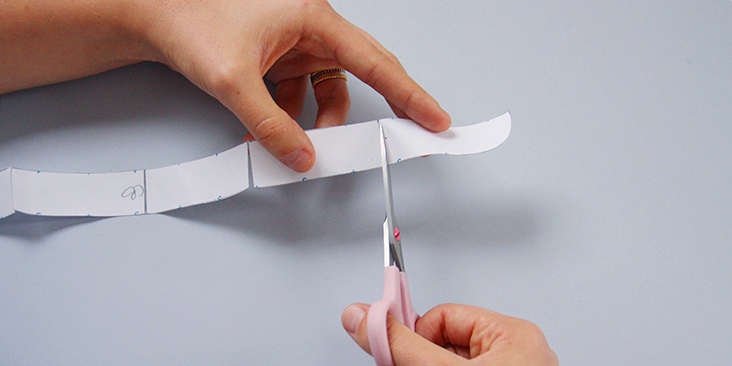
5. Overlap each section at the top by 0.5 cm.
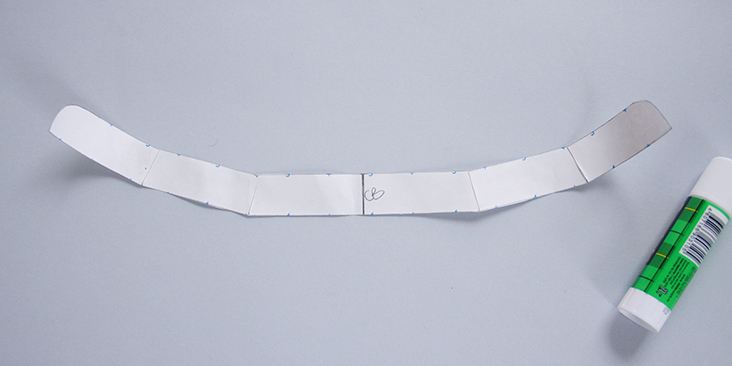
6. Trace the new shape to obtain your collar pattern.
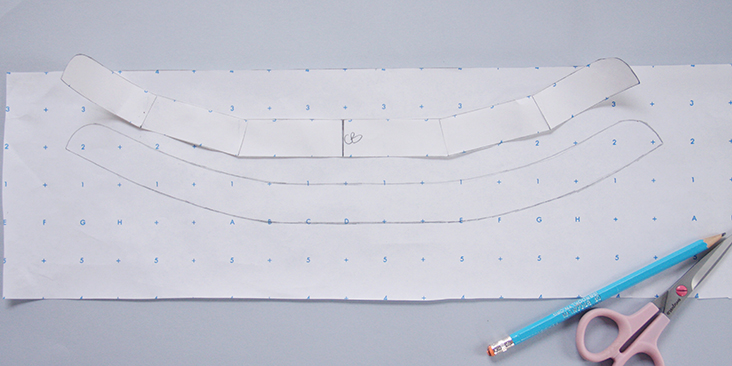
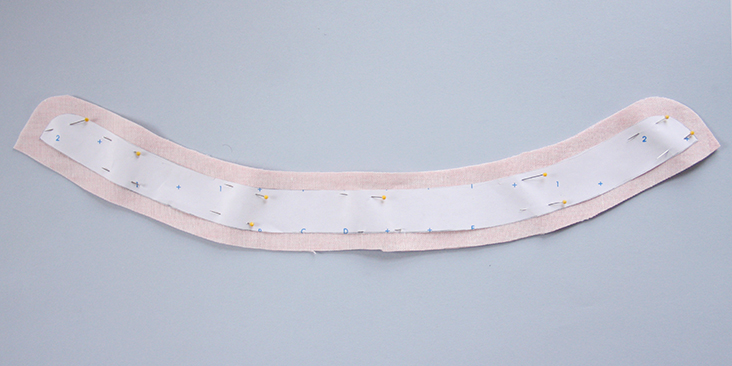
7. Add 3/8″ (1 cm) seam allowance around all panels and cut 2 pieces from fabric. Cut one piece from interfacing but do not add seam allowances.
Steps
Note: Prewash your fabric and tumble dry it until it is still slightly moist, let this dry in room temperature. Iron the fabric so it is easier to work with.
1. Start by applying the fusible interfacing to the wrong side of one of the collar stands.
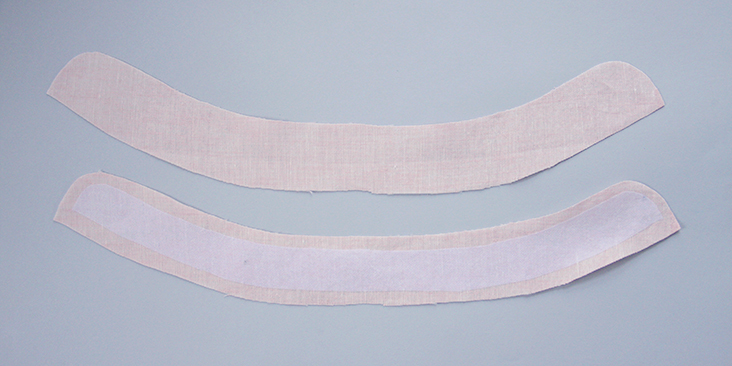
2. With right sides together, align the interfaced and non- interfaced collar stands and pin.
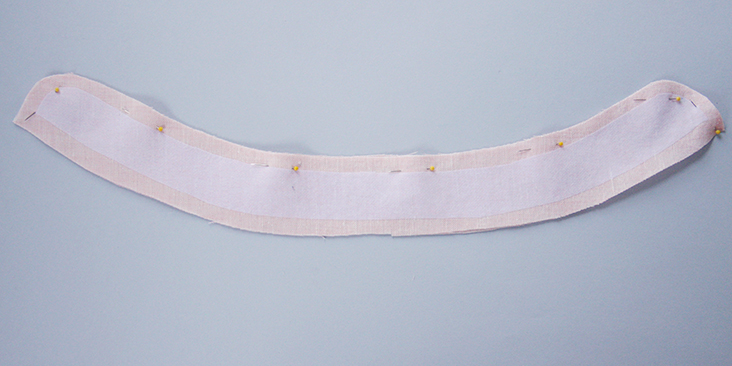
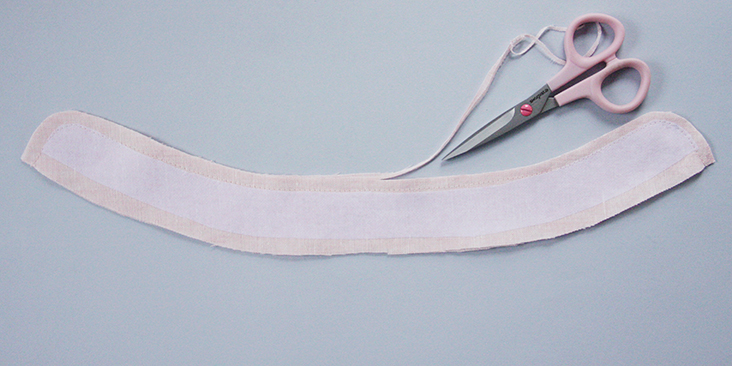
3. Stitch around the curved (upper) edge but stop 1/4″ before each end.
Trim the seam allowance to 1/4″ and make a few notches when you reach the curved ends to release the tension.
4. Press the seam open. Finger press the curves, as it might be a bit difficult to get there with an iron.
5. Press the raw edge of the non-interfaced collar stand 3/8″ (1 cm) towards the wrong side.
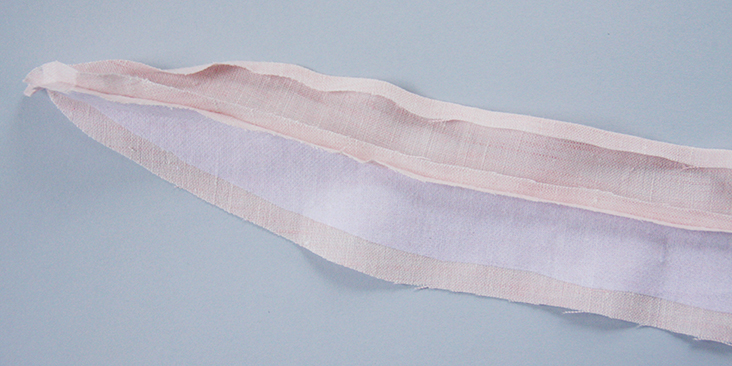
6. Turn the collar right side out and press again.
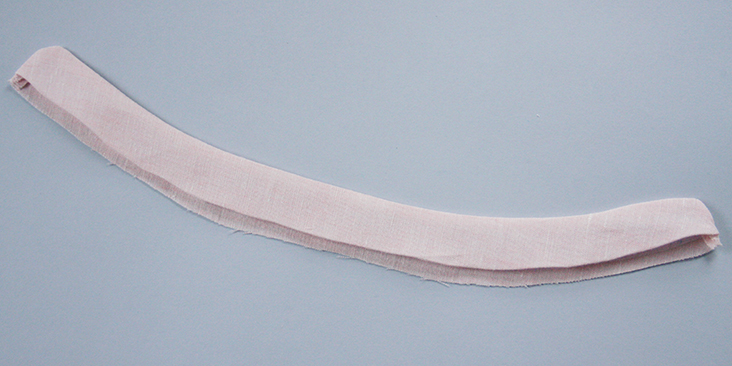
7. Staystitch the entire neckline of your garment 1/4″ from the raw edge to stabilize it.
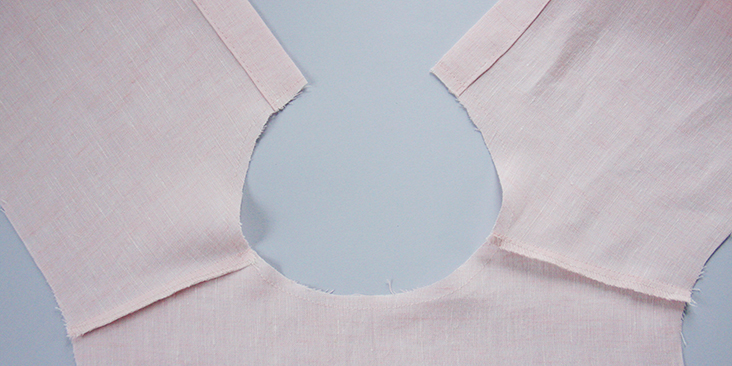
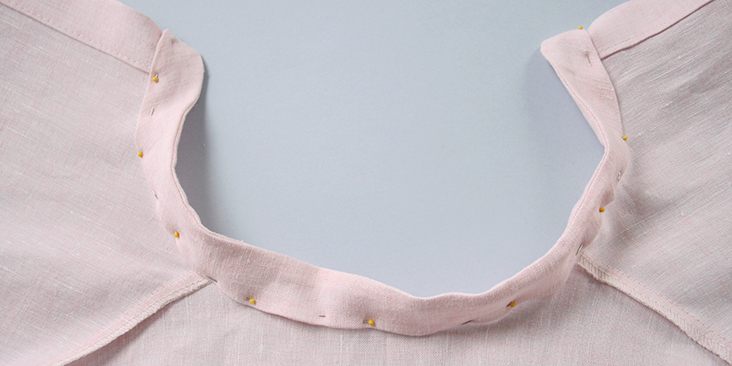
8. Pin the interfaced collar stand to the neckline right sides together. Use plenty of pins to make sure it sits well.

9. Sew together at a 3/8″ (1 cm) seam allowance. Trim to 1/4″.
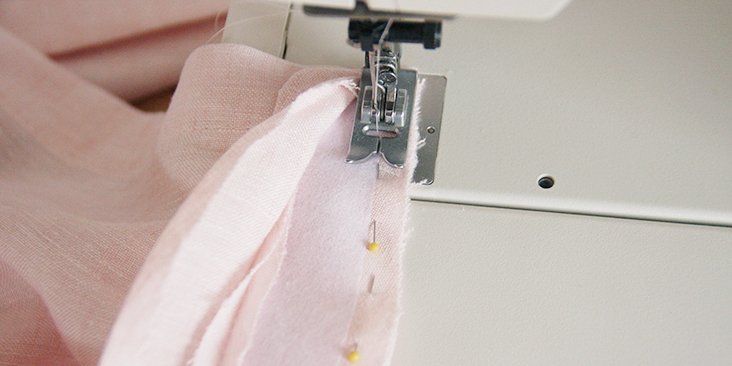
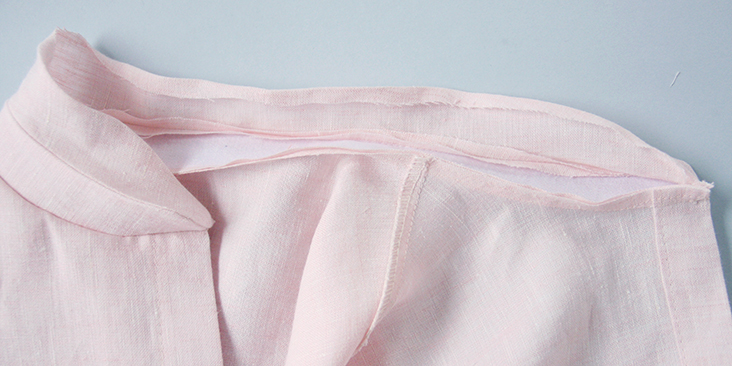
10. Working from the right side, press the collar away from your garment folding the raw seam allowance towards the collar.

11. Take the other collar stand that has the interfacing and the pressed seam allowance and fold it over to the inside of your garment enclosing all the raw edges. The folded edge should go a little pass the stitch line that we’ve just created. Pin in place.
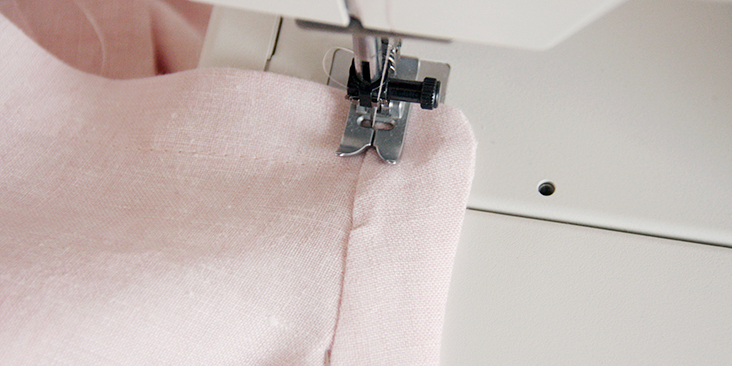
12. Working from the right side of your garment, topstitch the collar in the crease to attach the back section.
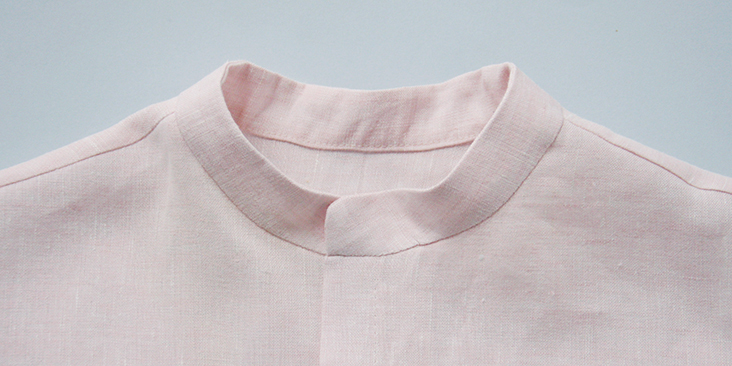
Give your collar a last good press and you are all done!















27 Comments
Maureen Farmer
Hello, Rima!
Thank you for this very informative tutorial 🙂
I have a question regarding step number 3. It states to stitch around the top/curved portion of the collar, but to stop 1/4″ before the end. It looks like in the illustration the stitching goes all the way to the end (both ends).
Is it just the poor visual on my computer that makes it appear that way? Thank you!
Kamini Raghavan
. Shouldn’t #11 say – Take the other collar stand that DOES NOT HAVE the interfacing and has the pressed seam allowance…”? The collar with interfacing has already been attached to the neckline? Or am I reading this all wrong? Thanks.
Zenny
Hello Rima,
I love your blog. Is very useful to me.
Please step 5. Overlap each section at the top by 0.5 cm, is this number constant or it changes as per the neckline measurement ?
I would appreciate your feedback.
Thanks
Zenny_Gold
Rima Khusainova
Dear Zenny, thank you so much for your kind words! To answer your question, the 0.5 cm overlap is a standard measurement and works for all necklines and sizes. You overlap to create a curve to match the neck curve.
Mary Pat Griffin
Would it be of interest to you to help me or you design a clergy blouse for me?? I love your pages.
Thank you, Mary Pat
cjmpgrif@gmail.com
Summer Smart
Found this in the nick of time / had a jacket to sew for a
Client.. .. at first I was like “how in the world am I gonna make this?”… turned out to be the easiest collar ever!!!!!! Thank you for your tutorial… it was sooooo easy to follow!!!!
Jam Jenkins
When I make my Mandarin collars, I like to curve the fabric slightly when pinning the outer and inner pieces together. This helps the inner part of the collar lay flat when curved (since it’s slightly smaller than the outside part). It also helps avoid the wavy look. Also, when working with prints, I like to make a four piece collar to make the pattern line up nicely in the back and front. This is done basically like the two piece collar except you sew the left side and right side outer together to make the pattern line up the way you want (like a chevron in the back and straight across in the front for striped fabric).
Barbara Macey
I love this Mandarin Collar tutorial. When i was younger I made several blouses & a suit jacket with these collars. They are flattering & create a great impression especially from those otherwise not able to sew clothing. And, after making the first collar the others are simple. Thank You ever so much for this.
Maree
I have been waiting for a good tutorial on mandarin collars and this is just what I have been looking for! Thank you so much! Your tutorials so simple and easy to understand.
Rima Khusainova
Thank you so much Maree, glad to hear you liked the tutorial!
Sharon Melone
It would be wonderful if your tutorials could be downloaded and saved to our personal computers and laptops, etc. Having to print the tutorials, especially this one which is 23 pages long according to my computer, seems cumbersome. Having the tutorial in digital format is much more efficient and eco-friendly.
Thanks for your consideration.
Sharon Melone
Carol Miles
Hello, Sharon! I may be entirely too late to assist you given the 2016 date of your post. You can print the instructions to PDF rather than to an actual printer. Select the area you would like to “print” by using your mouse to click at the beginning of the tutorial and dragging across and down to the end. Click at the top of your internet browser, on Chrome it’s 3 lines just under the X at the top right. Select Print (or you can press and hold the ctrl key and then press P if you can’t find anything at the top right of your browser) to print. For Destination under the Print dialogue box, rather than selecting your printer, click the down arrow and select Print to PDF. Then save to the folder where you saved the pattern. You can also highlight the tutorial, copy, and paste into a word processor like Word to save. You can then delete the photos or anything else you don’t need prior to printing.
Inge
This is just in time. I need to make a dress for a Chinese New Year’s Party and was looking to find a pattern for this kind of collar. Thank you. I will let you know how it turned out after I make the dress.
Rima Khusainova
Dear Inge, so happy you found this tutorial useful. Please do share with us the pics of your finished dress. We’d love to see how it turns out!
Ann Hargrave
Love your tutorials
Rima Khusainova
Thank you so much Ann!
Laura
Great tutorial! One of your best.
Rima Khusainova
Thank you so much Laura!
Allyson
Thank you for creating this tutorial. Very easy to understand!
Rima Khusainova
Thank you so much Allyson! Glad we could help!
Abeline noncent
I like to know how to make a v-neck
Rima Khusainova
Dear Abeline, please check our tutorial HERE where we show how to sew an interfaced V-neck.
Catherine
Lovely tutorial, but are you going to be modern and stick with metric or slide into the dark ages with imperial measurements (inches), constantly swapping between the two is annoying and confusing.
Kathy Cofrin
Unfortunately those of us in the US are still imperialists and going entirely to metric would be mind blowing to us older seamstresses just because we would keep trying to convert to inches even though it isn’t necessary. I do appreciate that F\S still uses both measurements.
laurie
Upvote.
Catherine
The US Congress passed the Metric Conversion Act of 1975 giving 10 years in which to transition. Thats 41 years ago. How long does it take to adopt a simpler way of measurement? Those “older seamstresses” would have been a lot younger then.
Australia & Canada transitioned in 1970, the UK in 1980 and many 3rd world countries have been metric from the late 1800’s to the early 1900’s. Time to change.
Rima Khusainova
Dear Catherine, thank you for your comment and I understand that inches/cm can be confusing sometimes. Our blog is based in the US so using imperial measurements is just a matter of habit/commodity for our US-based readers. We do however always try to provide measurements both in inches and cms so that you could choose whatever one you prefer.