Two Tone Summer Linen Dress
Following on from our Pattern Drafting and Pattern Grading tutorials- this tutorial will show you how to sew’ the two tone summer dress we have shown you how to draft and grade if need be.
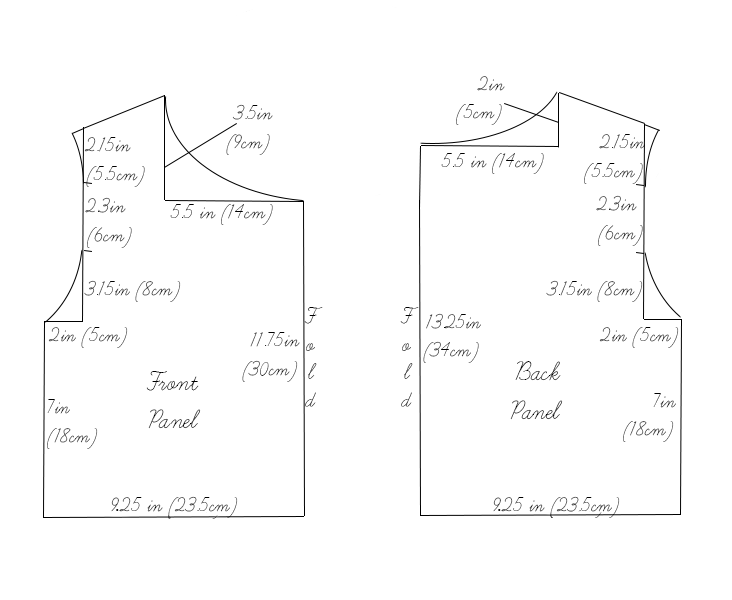
This is a slip on, no zips, no buttons and no fuss kind of dress. We have also added some pockets, as they always come in handy. The fit is very loose with a slightly raised waist.
We hope that you will now understand more on’ how to read our patterns and’ work with them to sew projects you really like.
Material
1 yard of IL020 Silver Lilac Softened
1 yard of IL020 Pewter Softened
Matching sewing thread
Tools
Pattern master, pattern paper
Paper scissors, fabric scissors, rotary cutter
Fabric marker, pins, tape measure
Biased binding tape maker
Time
2-3 hours
Difficulty
Beginner
Step
Note: Prewash your fabric and tumble dry it until it is still slightly moist, let this dry in room temperature.
1. Iron the fabric so it is easier to work with
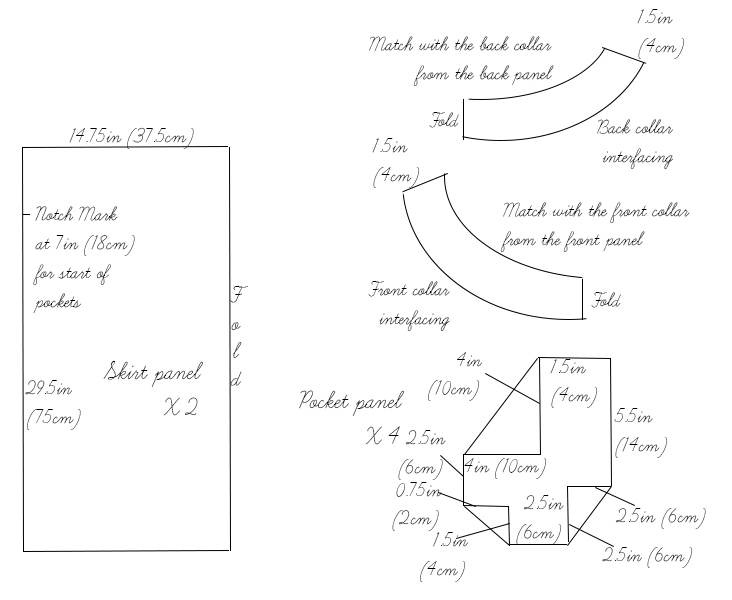
2. The diagram shows the pattern for a size US6-8 (UK10-12). Follow these previous tutorials, on how to draft‘ and grade this pattern.’ Note:’ Notching the panels as indicated on the diagram will be useful. The bodice and interfacing will be cut in the Lilac linen, and the skirt and pocket will be cut in the Pewter linen
3. Use a serger, or choose your own method to protect the seams from fraying. Make sure the method you choose does not add weight to the fabric.
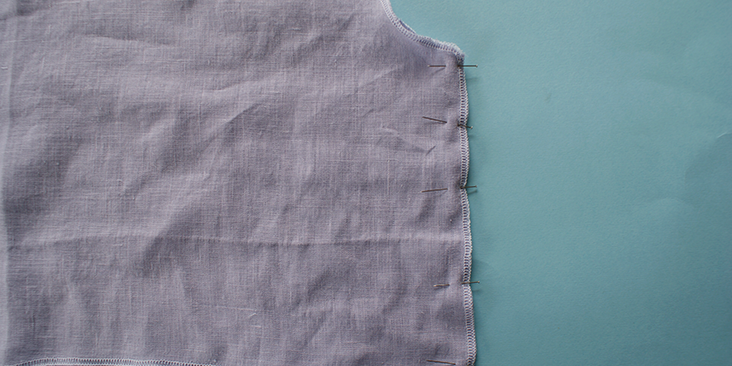
4. Pin the side seams of the bodice together. Sew along the seam allowance and press open
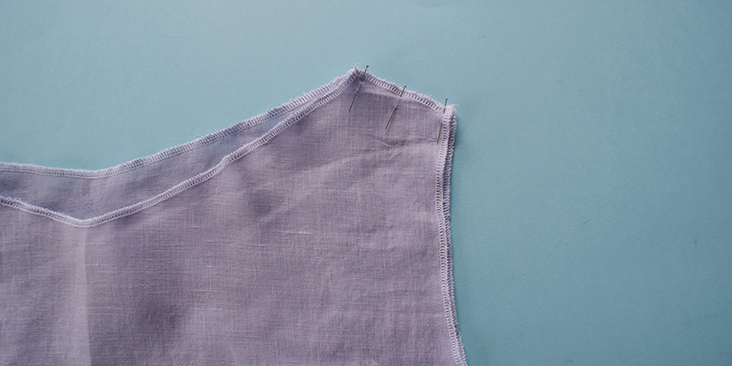
5. Pin the shoulder seams together and sew along, press open
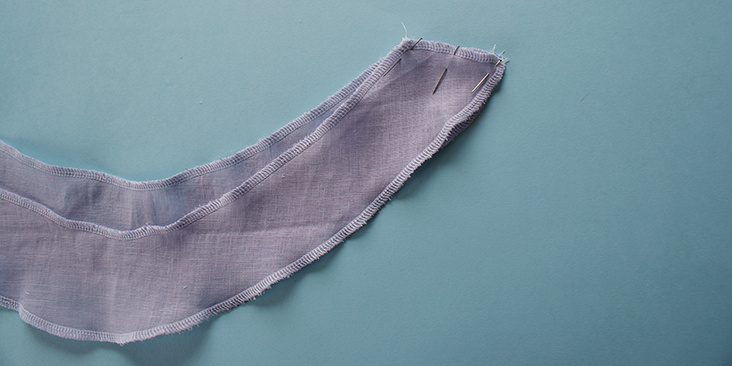
6. Match up the interfacing for the back and front collar, pin them together on both seams, sew together and press open
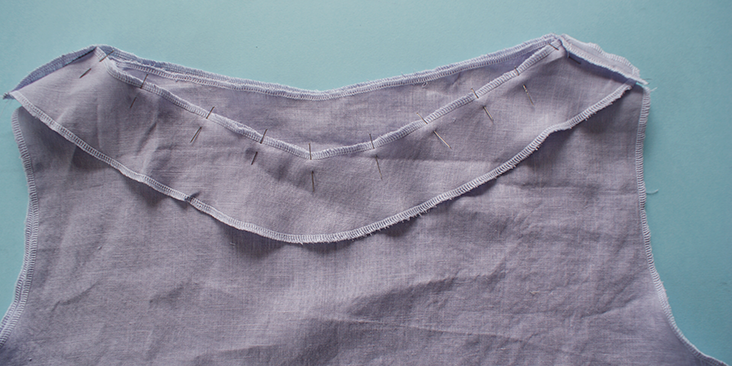
7. With its wrong side facing you, pin the collar interfacing onto the collar for the bodice (with its right side facing outwards). Sew along the curve line
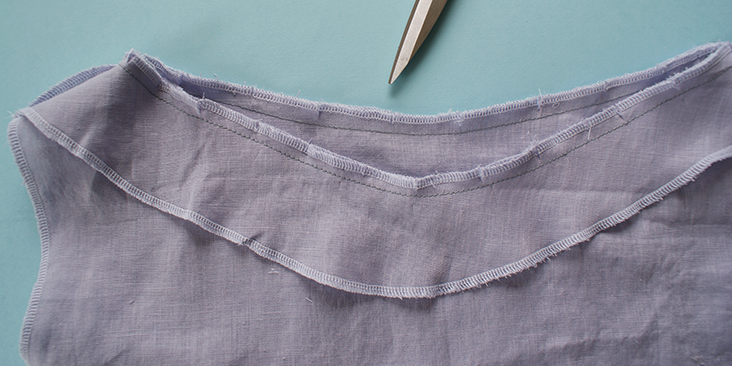
8. Create small notches along the curve line to help flatten the material while pressing
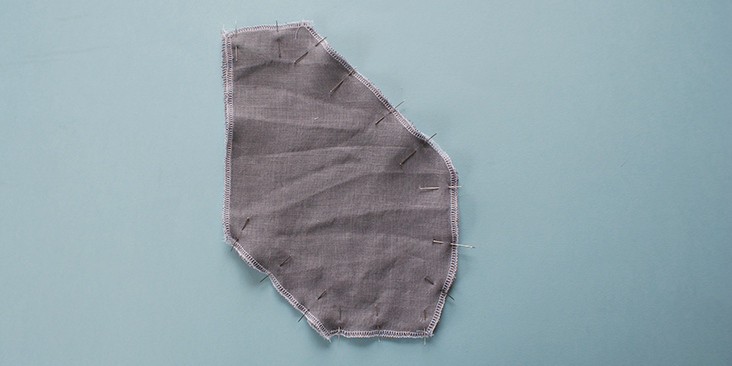
9. Pin together the pocket panels, leaving the long vertical seam open as this is the opening for the pocket
10. Sew along the pinned seam. No need to press
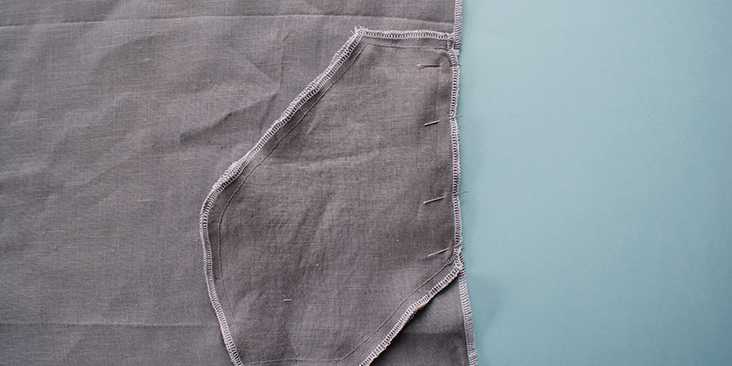
11. This is the part where you need to pay attention. With the wrong side of the sewn pocket facing you, place it on top of the right side of one panel of the skirt. Take the seam of the outer pocket panel and pin it from the notched mark on the skirt panel, and all the way down the pocket’s vertical seam. Sew this seam and press
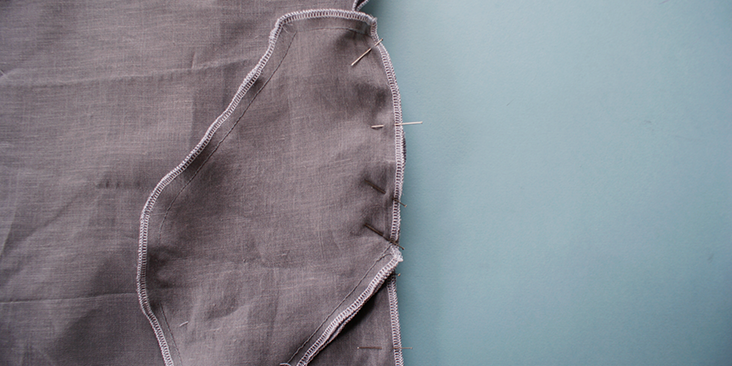
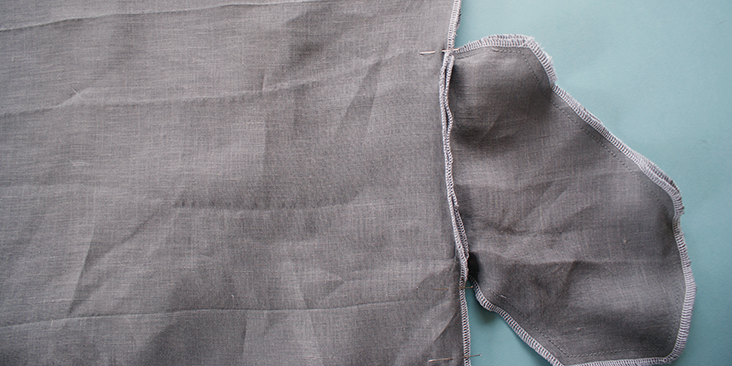
12. Now, you can begin to join the other skirt panel’s side seam onto the one you are working on. When you get to where the pocket is sewn, take the other side of the pocket opening and pin it to the new skirt panel you are working on. Continue your way down the whole skirt panel. Press the seams open once it has been sewn together
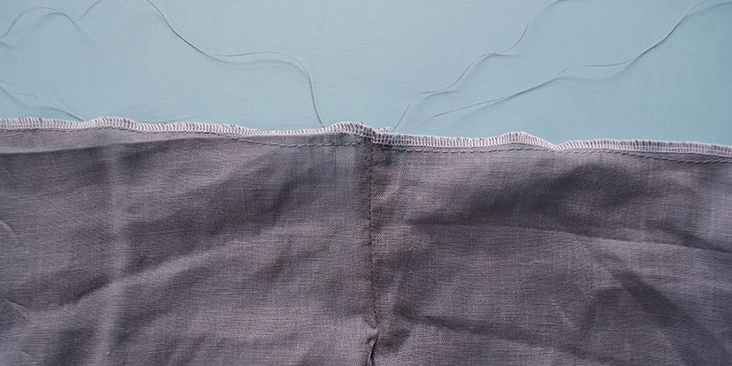
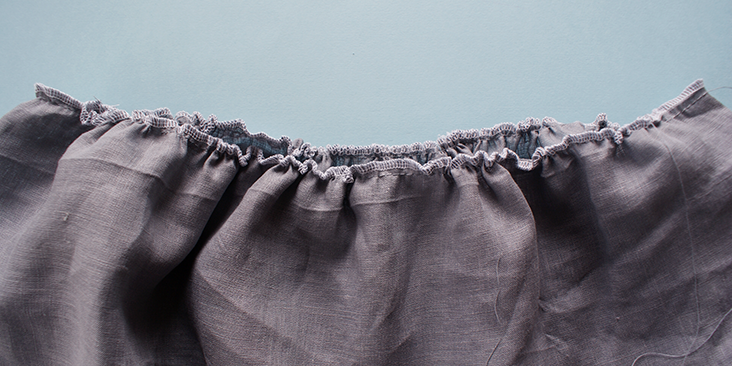
13. Change your stitching length to its highest possible length.’ Stitch along the top edge of the skirt panels, around 1/8 in (0.5cm) from the edge. DO NOT go back and forth to secure the stitching, and leave a long tail at the end before snipping off the thread
14. Lightly pull the bottom thread and gather the skirt panel together, the result width is the width of the bodice panel, so arrange the gathering accordingly
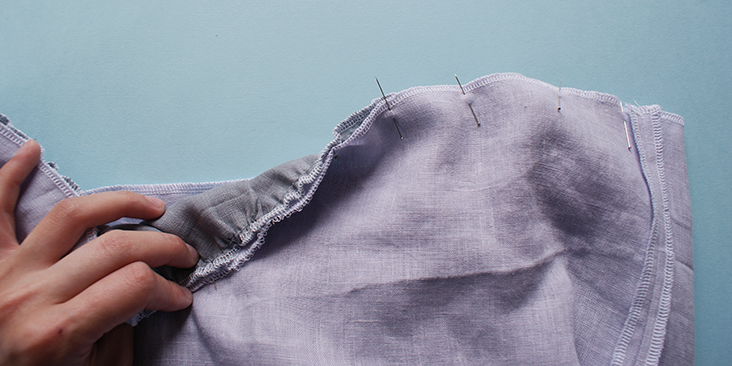
15. Pin together the bodice and the skirt part of the garment. Stitch along the set 3/8 inch (1cm) seam allowance. Press the seam
16. Following this tutorial, create enough bias binding tape with the remaining Lilac linen for the armholes
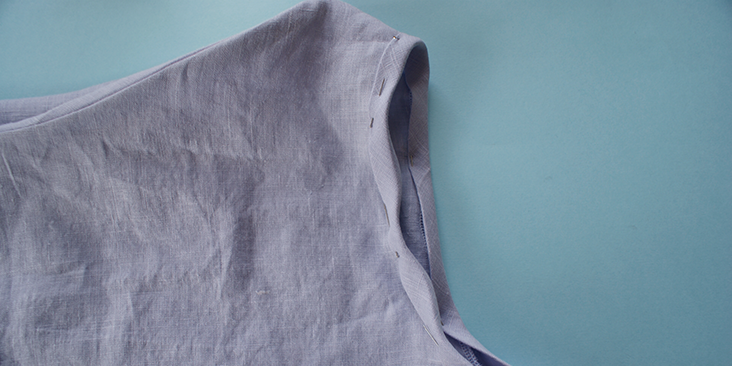
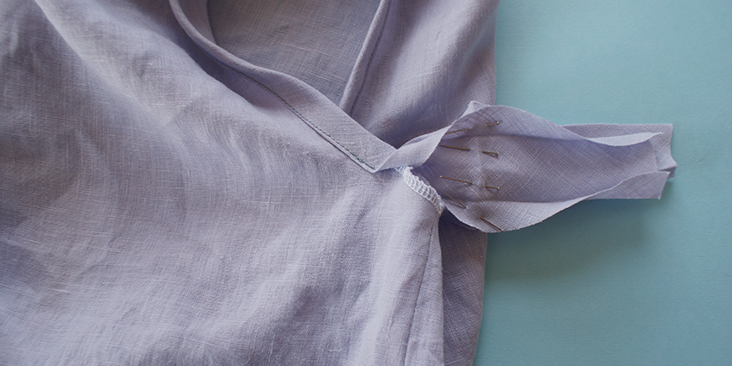
17. Pin the binding tape to the armholes, leaving around 3 inch (7.5cm) tail and 4 inch (10cm) of the seam unpinned. Make sure you catch the edge of the interfacing as you work your way around the armholes and to the shoulder seam
18. Stitch the tape on until the opening.
19. Manually arrange the tape to meet along the seam and fold backwards, making a folded line as guidance
20. Pin that folded line and stitch along it. Trim off any excess material and re-fold it in the normal way
21. Pin the remaining tape down and carry on with the stitching, matching the beginning and ending of the previous line
22. Fold the 3/8 inch (1cm) seam allowance inward towards its wrong side for the bottom seam. Top stitch along and give it a press











5 Comments
Alison Williams
What are the chances that this might become a downloadable pattern? I don’t think I have the patience to draft my own pattern. I love this dress!
JANET
In a previous tutorial I had asked what body measurements you used to determine the dress size (such as Small 6/8) of your original pattern. As I did not receive a reply, I would like to ask again. Since manufacturers body measurements vary, I think this is a very relevant question.
Thank you.
PS: In my previous comment I am referring to a set in sleeve as opposed to extending the shoulder to drape over the shoulder. Thanks, again!
JANET
This dress is lovely. However, not all of us have great looking upper arms. I could really use a tutorial on drafting sleeves to fit a sleeveless dress pattern. Is that something we can look forward to in the near future?
Thank you!
Masha Karpushina
Hi Janet. try this tutorial-(https://blog.fabrics-store.com/2014/09/19/half-sleeve-linen-dress-tutorial/) it shows you how to add sleeves to a similar dress we have made before. There, you can actually download the pattern. Hope this helps, Masha
Janet
Thank you very much, Masha. I appreciate your reply very much and will download the sleeve pattern.