Taylor Linen Swing Blouse Tutorial
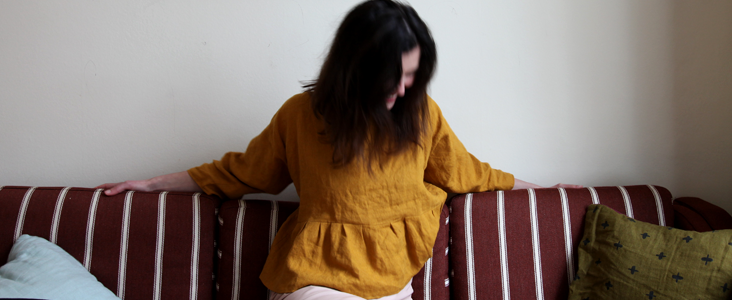
A super easy to make blouse that can be worn on all sorts of occasions. Taylor’s loose shape makes it very flattering and comfortable to wear.
Materials
2 yards of IL019 AUTUMN GOLD Softened
4 vintage buttons
Matching sewing thread
Tools
Pattern paper, Pattern master, Erasable fabric marker/chalk, Seam ripper, Tape measure, Button hole sewing foot, Pins, Rotary cutter, Paper scissors, Fabric scissors, Bias tape maker (or follow this tutorial if you do not have one)
Sewing machine, Overlocker
Time
6′ hours
Difficulty
Intermediate
Pattern
You can access the multi-sized printable PDF pattern by following this link HERE. The model is wearing US size 6.
Steps
Note: Prewash your fabric and tumble dry it until it is still slightly moist, dry in room temperature. Iron the fabric so it is easier to work with.
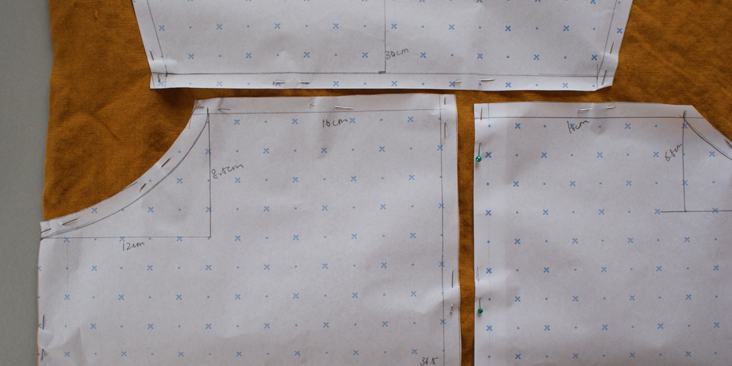
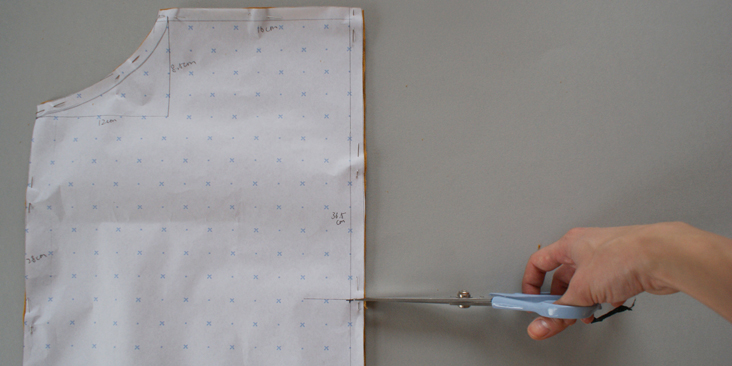
1. With the fabric folded, place the pattern onto the fabric. Remember the vertical direction of the pattern needs to be parallel to the selvage of the fabric.
2. Pin each fabric piece onto the fabric, or if you prefer, mark around the pattern onto the fabric. Remember to also mark the notch marks, this is to ensure the measurements for sleeves and center of pieces remain on the fabric.
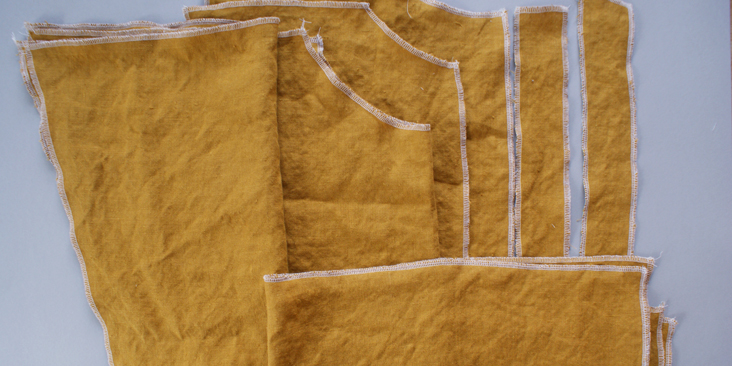
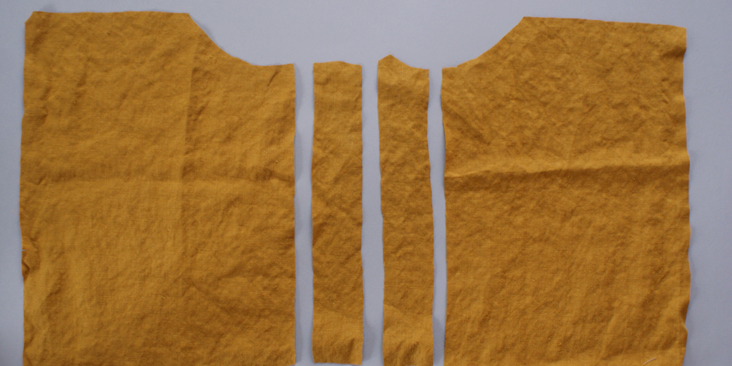
3. Cut out the pieces.
4. Overlock (or your other chosen methods) all around the pieces.
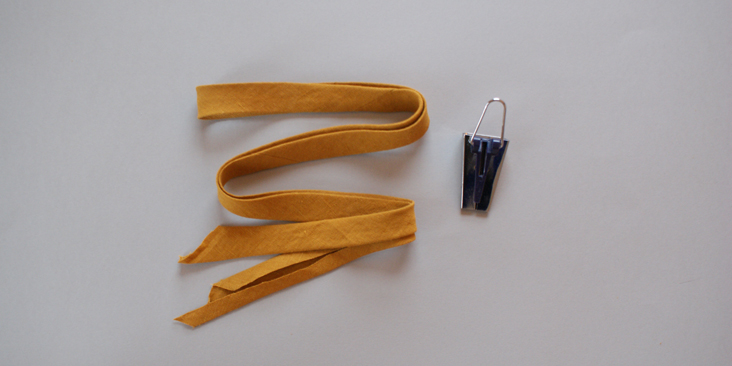
5. Make 30 inches (76 cm) of bias binding with the remaining fabric.
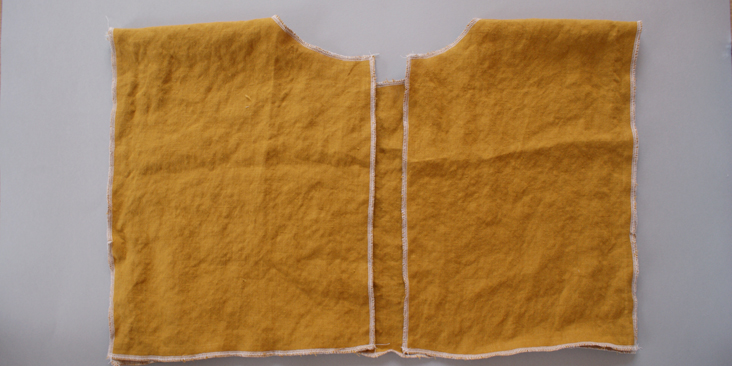
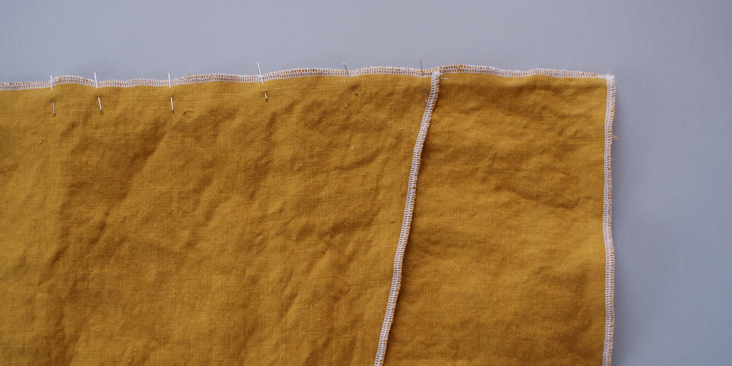
6. Pin together the shoulder seam for the front and back panel. The back panel that is wider will be your left side back panel. So make sure when you are pinning the panels together, with its wrong side facing you, the larger back panel is on your right-hand side.
7. Sew along the seam allowance for both shoulder seams and press open the seams.
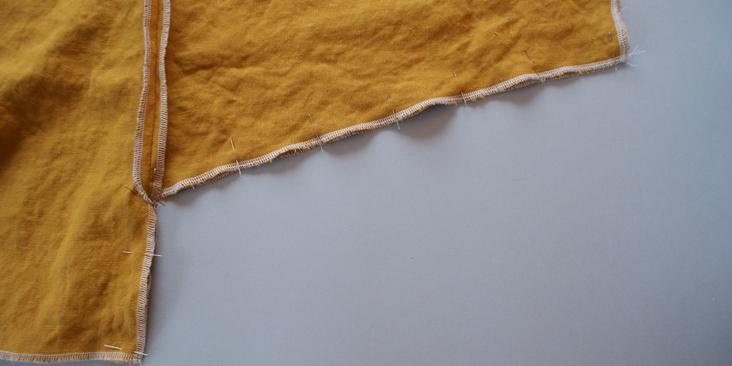
8. Now, turn the bodice sideway and place the sleeves on top on it, with its wrong side facing you.
9. Making sure the center notch on the sleeve panel matches up with the shoulder seam. This should also automatically mean your sleeve side seams match up with the sleeve notch on your front and back body panels.
10. Sew along the seam allowance for both sleeves and press open the seams.
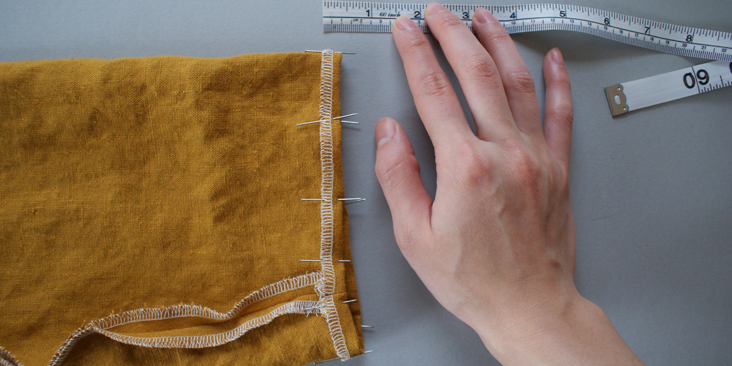
11. Now, join the sleeve seam along itself, and also the side seams for the body. Pin along the edge.
12. Sew along the seams and press them open.
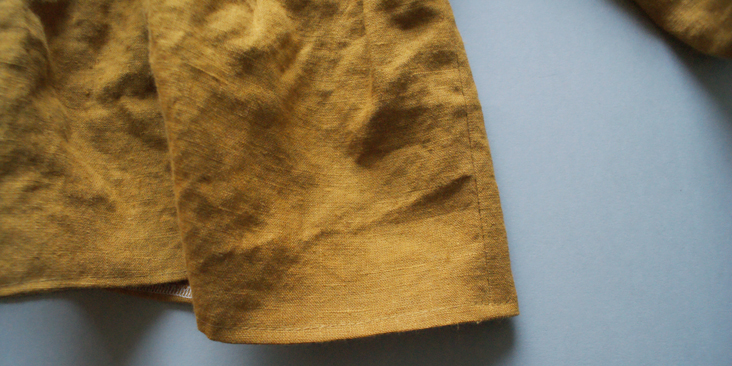
13. Fold up 3/8 inch (1 cm) of the raw edge on the sleeve onto the wrong side. Pin along it and top stitch over this fold, making sure the needle catches onto the fabric.
14. Press flat.
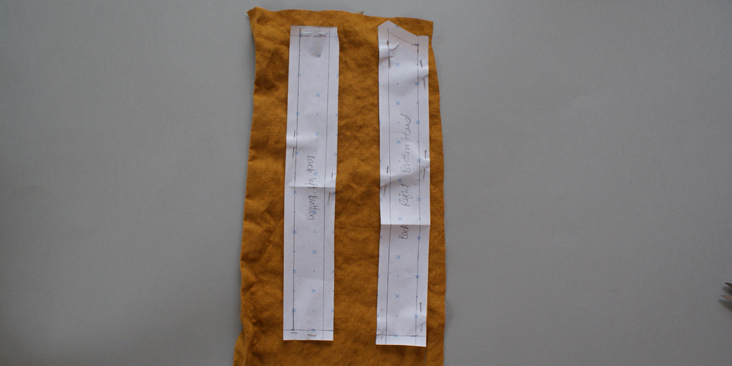
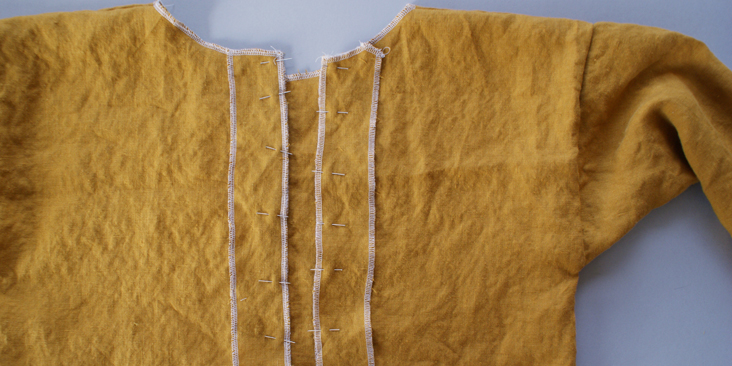
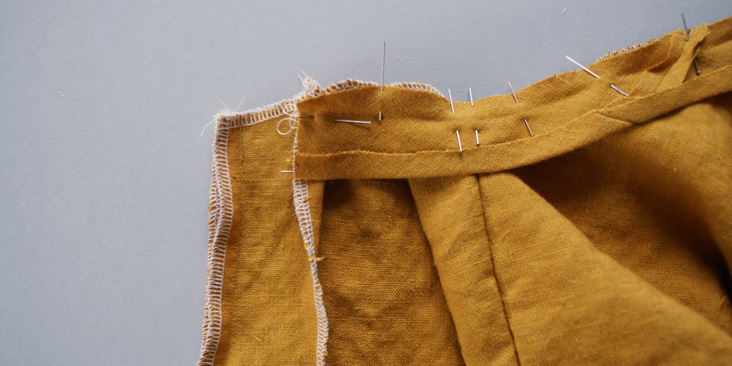
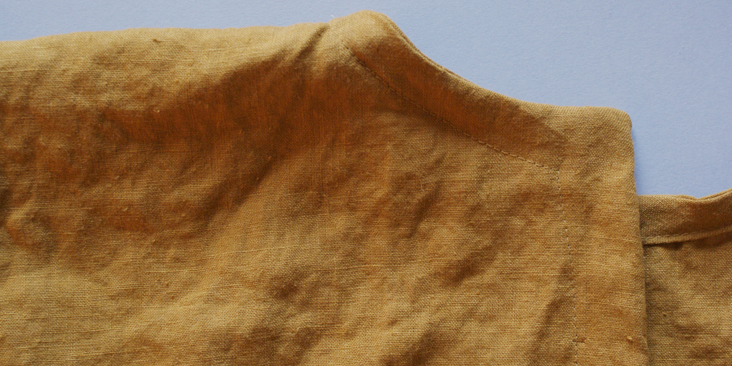
15. Now, pin the button stands onto the center seam of the bodice. Sew along this seam and press it open.
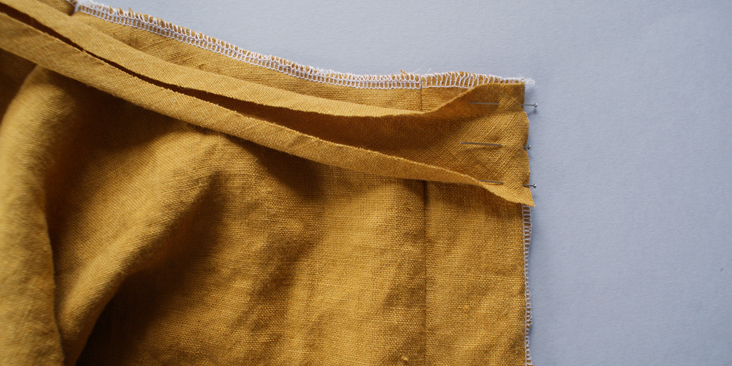
16. Take some of the bias tape and with its wrong side facing you, and right side facing the button stand’s right side, pin along its short edge.
17. Fold the button stand onto the back panels so its wrong side is facing you. Now carefully pinned the bias tape along the collar until it reaches the other back panel.
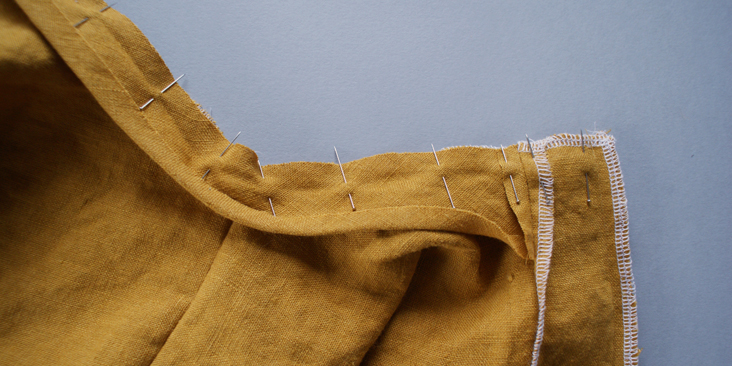
18. With the other button stand folded onto the back panel, pin the bias tape at the given seam allowance onto the button stand. Pin down the remaining open collar area.
19. Sew along the collar at the given seam allowance. This should also go on top of your bias tape folding line.
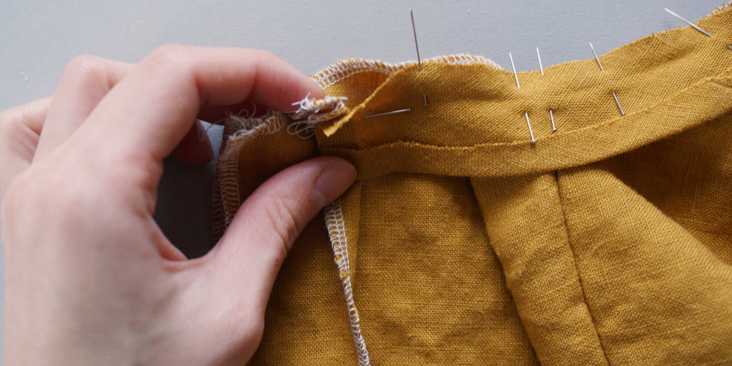
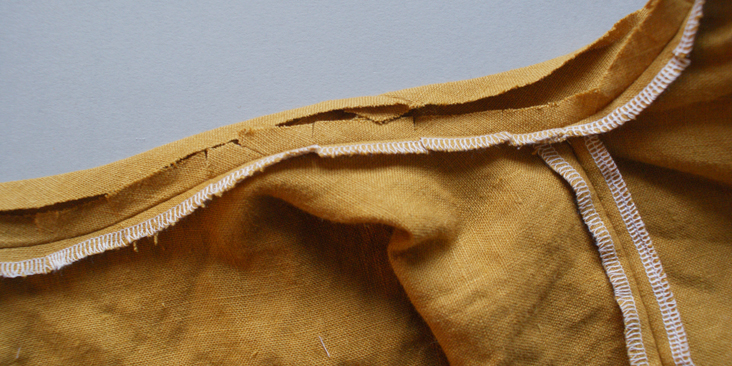
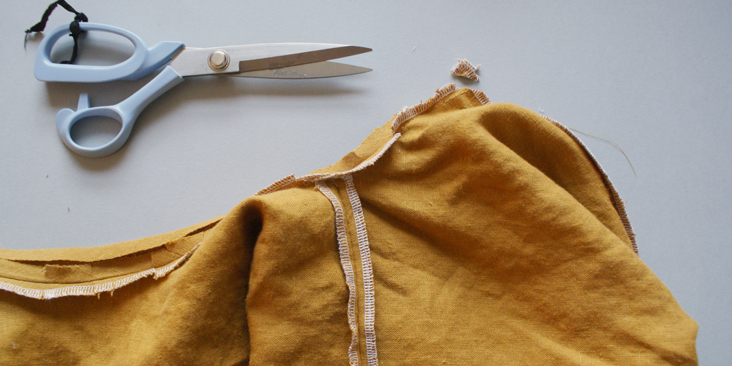
20. Press it open and notch along the collar, allowing ease to the curved fabric. Also, trim the corner where the button stands and sewn onto the back panels. This will decrease the thickness once the garment is turned over.
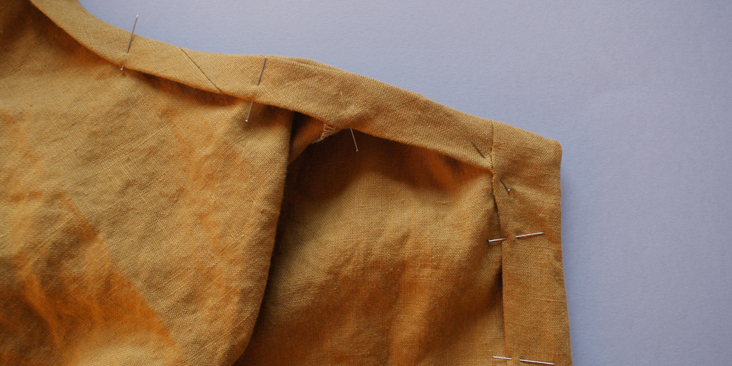
21. Turn all the bias tape and button stand panels over so their right sides are facing you. Following the tape’s folding line and the button stand’s seam allowance, pin the material down onto the bodice panels.
22. Top stitch along the pinned area. Press the sewn parts to ensure the fabric sits flat.
23. Now, join the frill panels together on both side seams.
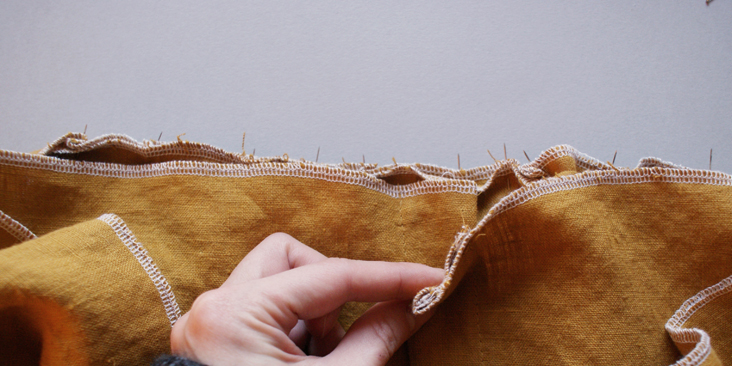
24. Because the amount that needs to be gathered is very little, we can do this manually. Lay the panels along the bottom seam of the bodice, making sure the side seams and the notches in the middle of panels matches.
25. Pin along the edge, with occasional folding to create the gathering effect.
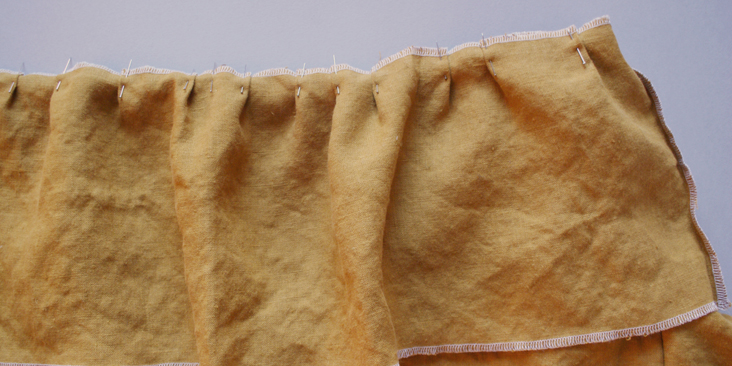
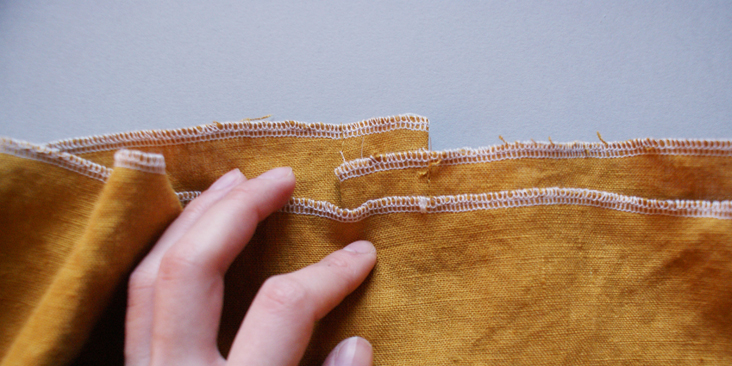
26. On the back part of the bodice, the left panel will lie 1 1/4 inch (3cm) over the right panels. Ensure the middle notch of the back frill panel matches the edge of the right back panel, and pin it on top of both left and right back panels.
27. Stitch along the pinned seam at the given allowance. Press the seam open.
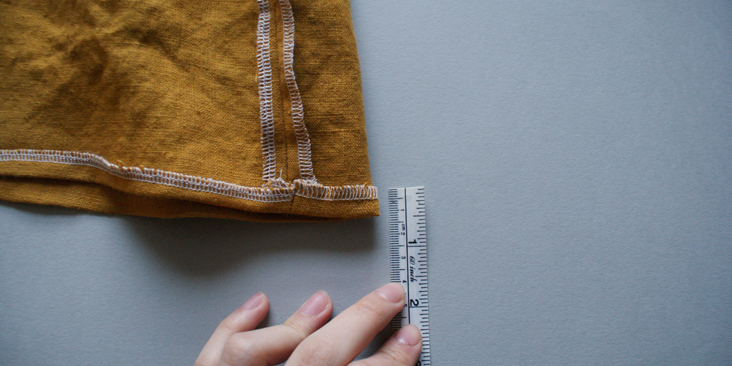
28. Fold 3/8 inch (1cm) of the bottom edge of the frill panels towards its wrong side. Top stitch over this. Give the fabric a press.
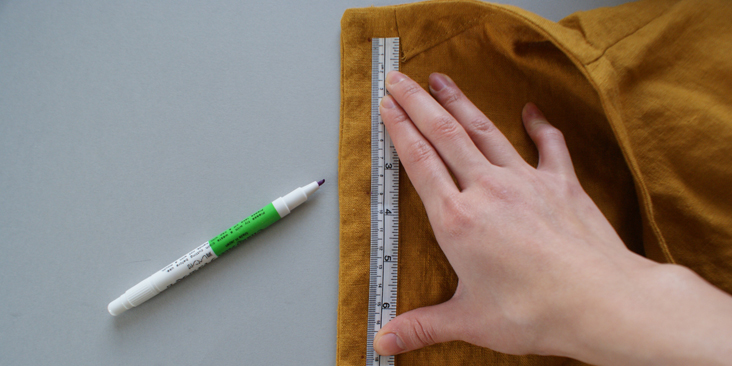
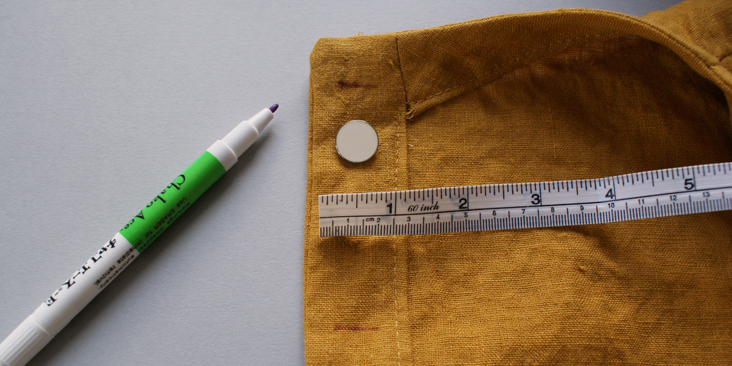
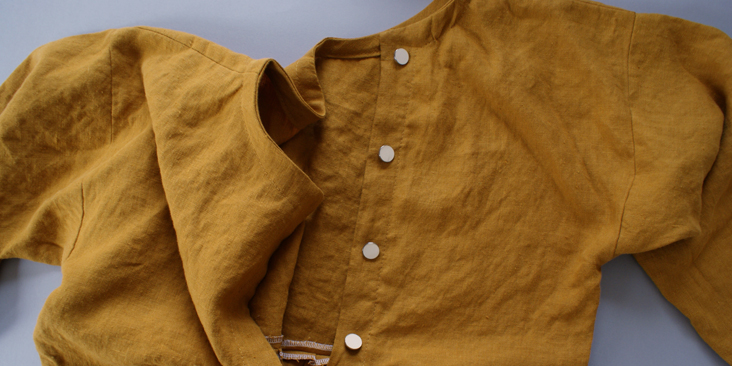
29. To make the buttonholes, measure out equally 4 points for the buttons on the wrong side of the left back panel. The buttonholes will only be sewn on the part of the bodice with a button stand.
30. Also mark the width of the button for sewing purpose also. For this tutorial, the buttonholes are sewn horizontally.
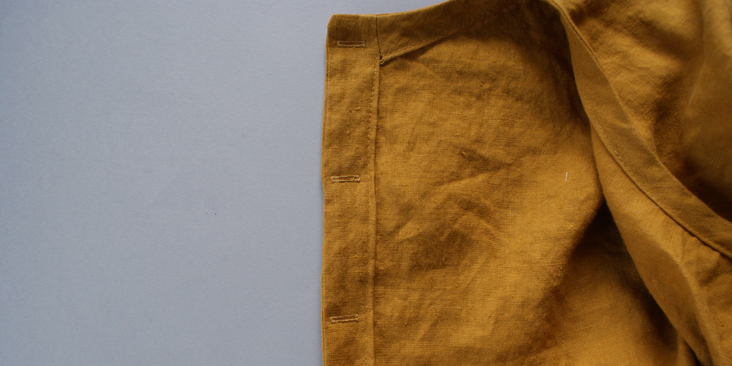
31. Sew the buttonholes.
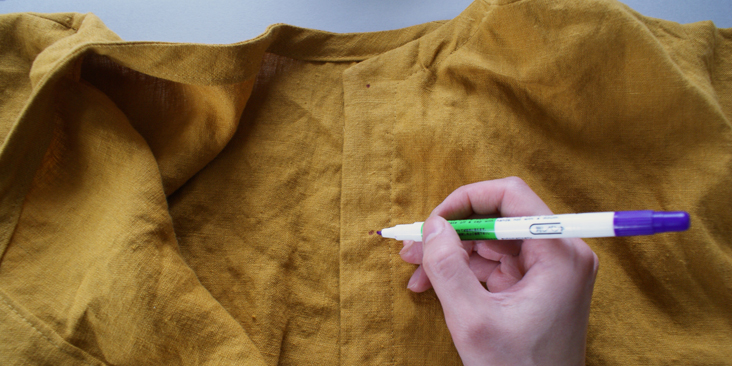
32. After opening up the buttonholes, mark where to place the buttons accordingly on the right side of the right back panels. A dot will do fine.
33. Sew the buttons onto the marked points.














68 Comments
Ainsley Muir
Looks like the pattern is still not available? Will we be able to download again??
Gris E
I would love this pattern but can’t seem to find it anywhere, Can someone please link it or send it to me? Much appreciated!
Lauren Linen
hello,
This pattern was taken down.
Jessie Munson
Has anyone figured out what to do about the front being so much wider than the back?
Kelly Morrissey
I think that is intentional since there are no bust darts. We need more room in front.
Carole Urban
Hello, for all those who need the pattern, it seems to still (or again?) be available even if the link in the description fails. It’s on the last page of the patterns list, right there https://fabrics-store.com/sewing-patterns/taylor-linen-swing-blouse-pattern/
Jennifer Blasi
I am so disappointed. I am making this top and double-checked that I cut everything correctly. I am ready to add the ruffle, but when I lay the blouse out, the difference between the back and front width is 5 inches. If I pin the back pieces together with the 1.25” overlap, the shoulder seams and neck do not look right. I do not understand why the right side is several inches shorter than the left. It just doesn’t look right.
Elaine Jiang
I do agree with you. The front bodice is much wider then back bodice which look so weird when i put it on. Now i am thinking how to solve this problem 🙁 Hoping designer could check out the pattern once more.
Celine VUITTENEZ
I’m having the same problem, obviously (should have read the comment section before cutting…).
I’m thinking about evening both back pannels and adding larger button stands I would fold on themselves to make for the missing fabric in a symetrical way… I will sleep on it though beacause I’m not so sure… I will come back and tell you if it works !
Celine VUITTENEZ
Hi there,
I ended up cutting both back panels according to the pattern for the right side (the less large one) and addind larger buttons stands for two buttons lines, military style (sorry if I’m not so clear…). This was to avoid an asymatrical back or a line if stiching across both back pannels, away and along the button stand.
I simply cut 2 rectangles 24cm x 39,5cm (for size 16/18) which I folded along their long sides ans added to the back pannels. Thus, one comes neatly over the other one for the 8 buttons I’m thinking of. Also, I will sew the buttons across both pannels and won’t make the button holes.
Hope this helps. I would unclude a picture for more clarity but I can’t find how…
Andrea
Hello, can anyone send me the pdf pattern since it’s not available on the site anymore? I’d love to make this!
My email is andreakoehler96@gmail.com.
AKL
Hi there, I’m not an advanced sewer and am slowly working through this pattern. I’m just a bit confused with your photo on number 6. You say that the large back panel is going to be on your right hand side but in the photo it shows it on the left. I’m also a bit confused why it needs a larger side than the other? Could you add any more photos to explain it further. With the current pdf you have for the pattern, it doesn’t have the rounded notch at the top of the button stands like your photos. Is this not needed anymore? I’m referring to point 15. Photo – right button stand looks cut on a curve at top?
If you have anymore clearer photos of the model showing the full back button area that would be super helpful. 🙂
Patty Harrington
I would love a copy of this pattern as well! If anyone has it, could you send it to me at
pattyharrington@yahoo.com?
I would be very appreciative!!
ann
If anyone already has the digital pattern can you email it to me ? – Anyuta272@mail.ru
Could you please help? please))
Dori
Would love to make this blouse! Please bring back the pattern! Thank you!
christine
Dear Fabric-Store: I sure hope that you can bring this Linen Swing Blouse pattern back! It’s adorable & easy & goes perfect with your fabric, colors offered & my budget!!! thank you for your time. Christine B.
ming
Hello Cynthia. the blouse looks nice but I cant download the pattern.
Could you please help?
Kathleen S.
The link for the pattern does not work, please bring this pattern back… super cute top! Thank you
Michele
Agreed, please bring back the pattern!
Darlene Watson
Yes I am new here and I wondered are you supposed to be able to download the pattern? That would be great although it didn’t work when I tried. Thanks, If anyone has it and can email it to me that would be greatly appreciated. darlenewatsonartist@gmail.com
Thanks,
Darlene
stacey
Will this pattern be added back or will the link be corrected to display the pattern?
If anyone already has the digital pattern can you email it to me 🙂 – brownlocs@sbcglobal.net
Barbara
Hey Cynthia Fong, I want to give you a big thanks for this great explanation. I am new to sewing technique. You have shared about the fitting of a blouse. I have faced this problem many times and you have solved my problem.
Kristin
Please bring this pattern back!!
Deb Morse
I’d LOVE to make this–will the pattern be available soon?
Tara
I’d love to make, too – I hope the links get fixed soon!
Pam
Another link that does not work. Please fix the link so I can make this super cute Blouse.
Betsy
The pattern for this seems to have disappeared from your site. Will you be putting it back anytime soon? I would love to make it.
Kaleria
For me, too. I have found this with a number of the “click here for PDF pattern” links on the website. It just takes me back to the main store front page.
Marine
Hi !
Love That shape and I would sew it but I can’t find the pattern.
Could you help me ?
Thank you very much !
Fiona
I also want to make this pattern. Please bring it back!
Susan
I have made two of these for my daughter, the 4/6 fits her perfectly, but swims on me. Wanting one for myself, I took some liberties with the pattern to end up with a blouse that is stylish and oversized, but doesn’t swallow me whole. I used the neckline from the 4/6 simple tank pattern, took 3″ from the width of the body, added 2 1/2″ to the length of the body and 3″ to the length of the ruffle to get a blouse that doesn’t fall off of my shoulders or look like a tent on me. And It is closer to a tunic length so I can wear leggings with it. Next time I will also take some bulk from the ruffle, although I am hoping once it is washed and dried the ruffle may not bell out so much. I love this style, and will have fun tweaking it to get different looks. I think a dress is on the horizon. Thanks for a great pattern.
Susan
I made this today, size 4/6, and luckily my daughter, who is an 8/10+ loves it, because it is way too big on me. I made it in stripes and honestly the look was too young for me anyway so I am happy it turned out this way. I had lengthened the ruffle 2″ because I am long waisted and it is just right on her. I love the look and will try to find a way to make this with a much less dramatic ruffle. This one is very full and bells out quite a bit.
As always, I hate to make bias tape, so I just made a simple roll hem around the neckline. It looks fine, and saved me a lot of time. Also I did not make buttonholes, just sewed buttons through both back panels. The neck opening is large enough for the blouse to slip easily over her head.
Thanks for another cute, easy pattern!
Klaudia
Can you possibly send me the pdf pattern? I really want to make this blouse, but the pattern is not available anymore 🙁
my mail is: klaudia.lewicka01@gmail.com
Marcy
A couple of notes that might help people while constructing. There are many ways to do things as we all know. The top is so cute no matter how it is done.
1.Something I have taught to my students while working with a fabric that is the same on both sides is that after the pieces are cut out, I go around to each piece and put a piece of masking tape on the wrong side of each piece with the initial of what that piece is. For example, RF, right front, eg.
2. After applying any kind of facing or interfacing or bias piece, pull the seam allowances towards the facing etc. and stitch very close to the edge. Then trim the excess away. This eliminates the need for clipping any curves and naturally pulls the bias to the inside or outside, whichever way you will be turning it. Then pressing will be so beautiful. This is a couture technique. It finishes all those edges perfectly! Hope you’ll try it. Feel free to contact me for further info. Happy Sewing!
Kelly Furr
How wide is the bias?
Thanks Kelly
Pixie Kempel
Can you tell me what width bias tape to make? I can’t tell from the photo, and it’s not mentioned.
Courtney
Thank you very much for such a cute, and free pattern and tutorial. I’m going to be grading this up and am wondering if you can provide the final garment measurements, bust, waist, back length, and sleeve length? (I haven’t drafted the pattern pieces yet, so I haven’t had the opportunity to measure them yet.) These would be helpful to know to double check against my drafting and construction. Also, if possible could you estimate how much ease is built into the pattern as it is modeled? 6 or more inches?
Thank you again. I really appreciate your design aesthetic. The patterns have a simple elegance to them. :o)
Monqie O
I’m not sure if anyone asked this already but….. how on Gods green earth does one make this pattern larger?
Its such a cute top I would love to make it! I have the perfect color linen for this!!!
Dee Dee
What a cute blouse! Thank you so much for this FREE tutorial.
I do have one question: I notice that you recommend use of a Patternmaster.
Do you know of a source for these in the USA? (After a thorough search, I finally found the manufacturer/vendor is in the UK.)
Thanks again!
Dee Dee
jwillis
Am also waiting word as to where in the US one can purchase the Pattern Master. Did find the UK site, but hope it’s available here across the Channel ! Jwillis
Helen Merzliakov
Does the swing linen blouse have seam allowances included?
Cynthia Fong
Thank you for your comment. No, the pattern does not include seam allowance, thank you for point it out, I have now updated the tutorial accordingly. We would advise you to add 3/8 inch (1cm) of seam allowance onto all seams.
Eileen
BTW, the pattern pieces say ‘3/8″ seam allowance included.’
Alix
At the end, is the seam allowance included or not in the pattern?? Thanks!
Lisa Burke
I have to speak up for those of us in size 4. I sew because I enjoy it and I want to create the styles that I like and can’t be found in stores. Please don’t stop posting ideas for this size. (I have several 4-6 sewing friends!)
Cynthia Fong
Thank you so much for your comment. We will definitely continue to create designs that will be suitable for all sizes, with all the measurements and details suited for all. Thank you though and please show us some of the projects you are working on too!
Diana from San Francisco
Do you think this can be sized to a ladies US size 14 or Large. I love it and can figure out how to make it longer. But any tips on sizing it up considerably would be appreciated.
Teri
I really appreciate that you have these tutorials, but not ironing your fabric (even when one of the steps specifically states to do so) makes me absolutely crazy. it just looks sloppy. I realize that linen is a natural fabric and is a dream to sew. And sure, I often take my casual linen item out of the dryer after only 15-20 minutes, hang it, pull the wrinkles out and forgo ironing before it’s worn. But not ironing the fabric before you so is the biggest no-no you can commit in my book. Please don’t encourage new sewers to skip this step by using an un-ironed example in your photos.
Cynthia Fong
Thank you so much for your comment. We will definitely take on board your feedback for future tutorials.
Chris
Too many of the photos in your tutorials show a poor view of the outfit, either the model’s hair obscures the neckline, the back, or the whole outfit is not shown, front and back. Or the photo is taken from too far away and it is next to impossible to see the details. It would be nice to be able to see the whole thing and not have to guess.
Cynthia Fong
Thank you for your feedback. We will keep your suggestion in mind for future tutorials.
Judth
Cute blouse – would love to make it – but sizes 4-6 ? who are you kidding – most women who sew their own clothes are NOT a 4-6 – that’s practically a child’s size! Please publish patterns in 14+ that most women.actually wear!
Cynthia Fong
Thank you for your comment. As you can see in the photo the blouse fits very loosely on the model. And in the pattern included, all the measurements are written out and the seams that needs to be altered for different sizing have been marked. We appreciate your comment and will adjust for future tutorials.
Karen
No! It’s perfect. We small sizes need lots of patterns too. I think the answer is to ask for a wide variety of sizes in a print out pattern. 🙂
Krista
Yes, since most of the women I know who sew do so because they cannot find decent clothes in larger sizes, a 4-6 is pretty useless to them (and myself). Look at the women you see at sewing expos and fabric stores – most of us are on the larger side and are desperate to find patterns in our sizes.
Susan C Hunter
Well said! I agree completely. Showing a size 4-6 is useless for most of us. How about showing the pattern shapes with a list of measurements they should be for various sizes?
Cynthia Fong
Thank you for your comment. The pattern in this tutorial have been marked with all the sizing and measurement to fit loosely on a size 4-6 model. Seams that can be altered have also been marked too.
Cynthia Fong
Thank you for your comment. We will keep in mind your feedback for future tutorials.
Karen Alexander
Great looking blouse. Wondering about the use of the word “frill” to describe the traditional “peplum” as my fashion books would call it? Also, more care in describing right side, wrong side and where the stand (facing?) is in relationship to the binding would be helpful. I think I figured it out. And final (but most important) Why not provide us with bust/waist measurements for this pattern rather than the obtuse US 4-6 size (I’ve been sewing all my life and have seen these sizing systems change tremendously!). I have no idea what these sizes mean in bust/waist measurements or where on Threads site to go for reference!
Cynthia Fong
Thank you so much for your comment. We realise the small changes we need to make for future tutorials in regards to sizing and using the right terminology. Thank you.
LeAnn Runge
What a very cute blouse that is! Definitely my next project 🙂 thank you for the great tutorial!
Cynthia Fong
Thank you so much for your comment. Be sure to send us photo of your blouse. Have fun with the project.
Phyllis
Thank you listening to our request for measurements! It makes the pattern usable and I will probably make this cute top.
Cynthia Fong
Thank you so much for your response. We will always keep your feedbacks in mind and are very glad that you can make this top.
marian
This is a really great pattern and a very nice tutorial. I’m going to try it when I get into my studio again. Thanks!
Cynthia Fong
Thank you so much for your comment. Show us a photo when you have made it!
Cathi
Nice blouse today. But size 4 and 6? Really? What about everybody else?
Cynthia Fong
Thank you for your response. We have included all the measurements for the seams and have pointed out which seam to alter to fit different sizes. Hope this helps.