Scalloped Hem Curtains Tutorial
A while ago, when the lovely people at the Fabrics-Store invited me to make some tutorials for them using their gorgeous linens, I started scrolling through the (many!) color and weight options in their store with menswear projects in mind. My best intentions of pairing Thread Theory patterns with Fabrics-store linens were abruptly sidelined though when I saw this beautiful jacquard linen.
It’s absolutely stunning! In fact, when I received the linen in the mail, the texture and gorgeous natural color exceeded my expectations. It achieved the perfect understated rumpled look once washed and came out quite soft. I knew, upon seeing the scalloped print along each selvage that this fabric would make the perfect scalloped hem curtains. Customers who have provided rave reviews of this fabric have had the same idea as me (and it sounds like they have had equally wonderful results!) so I can’t claim all the credit for these gorgeous curtains!
I really love how these curtains turned out – there is nothing more relaxing and refreshing to wake up to than early morning sunlight filtered through natural colored linen. The weight of the fabric is perfect (6.6 oz/yd) – it is heavy enough to hang nicely but still undulates in the summer breeze just as I had hoped!
Materials:
3 yards of IL067
Time Required: 4 hours (for two curtain panels)
Other notions and supplies: Thread, scissors, pins, drapery tape, drapery hooks (approx. two packages or as many needed to span the length of your window), lining material for the scallop facing.
Difficulty: Novice
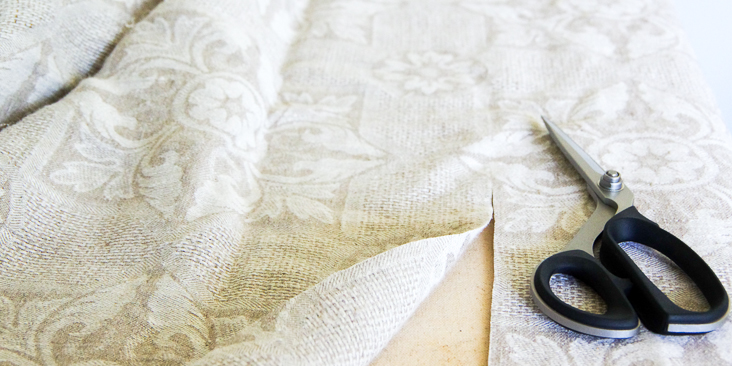
To make these softly gathered curtains I used 3 yards of fabric which I cut in half to create two panels that were 1 1/2 yards wide. I cut off one scalloped selvage to create the top of the curtains (you could keep this on if you want longer curtains but I wanted my scalloped hem to fall just above the bed which sits against the wall).
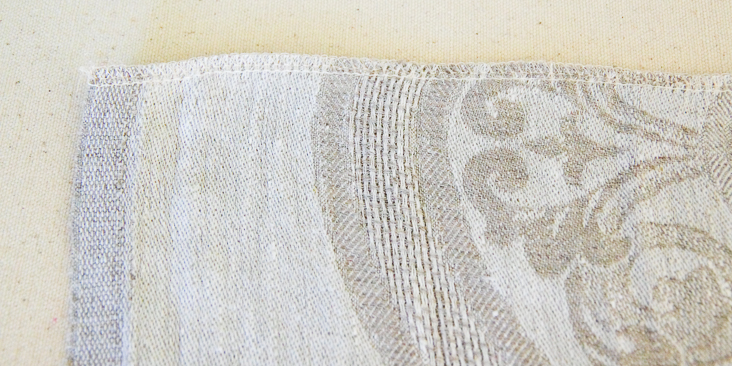
I began finishing the edges by serging the sides. You could also just zig zag stitch them to prevent fraying.
I then moved on to creating the hem. I decided to add a small facing using left over sheeting scraps I had from past projects. They were perfect for this because they were long enough to extend the entire width of the curtains and had nice finished selvages on one edge. I used the selvage as the top edge of the facing so that I didn’t have to finish this edge, but you could easily serge your facing or fold over the raw edge and stitch.
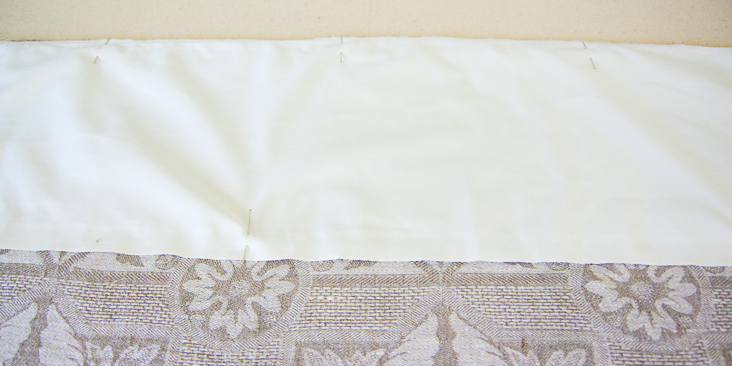
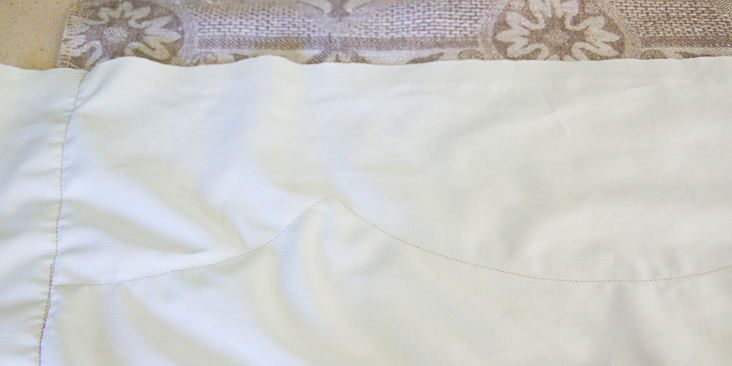
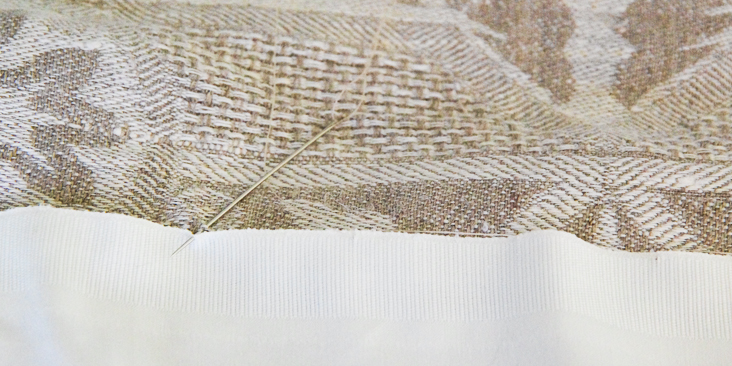
I placed the sheeting and scalloped edge with right sides together and pinned it in place thoroughly.
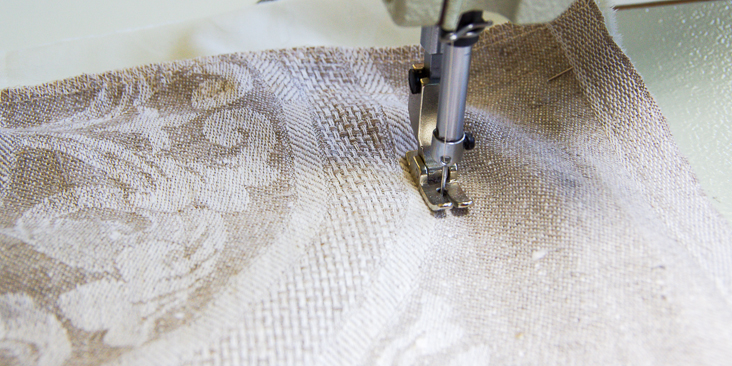
Next, I ‘traced’ the scallops with stitching by sewing from the linen side. The jaquard fabric is perfect for this because the design is clearly visible from both sides of the fabric!
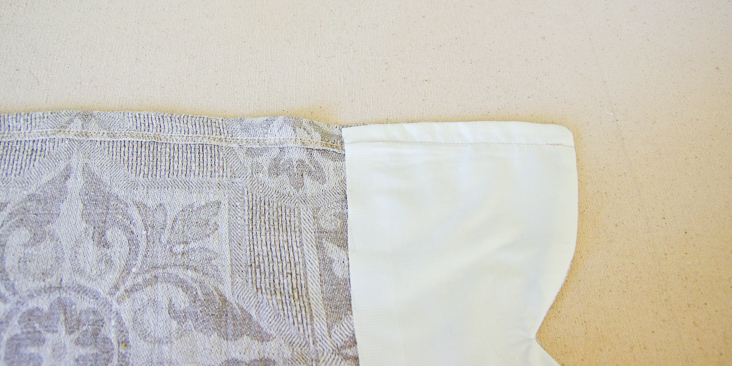
I sewed up either side of the facing and linen 1/2″ from the serged linen edge.
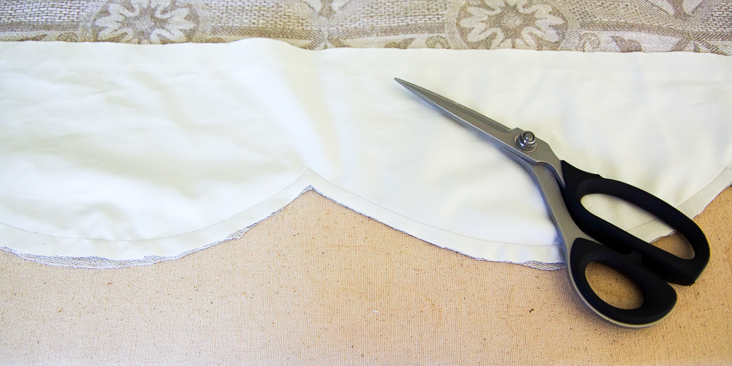
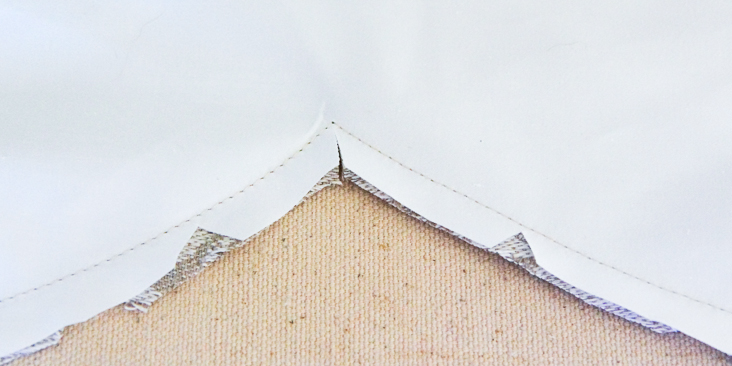
The next part is a little time consuming. I trimmed the fabric to match the scallops (leaving a 1/2″ seam allowance) and clipped at regular intervals along the curve. I took special care to clip right into the points of the scallops to help when everything was flipped right side out.
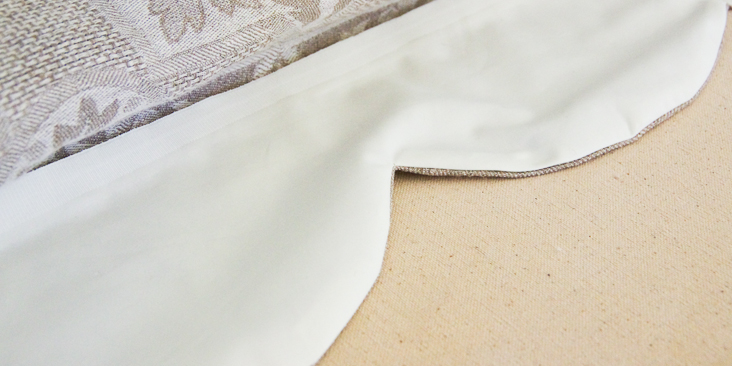
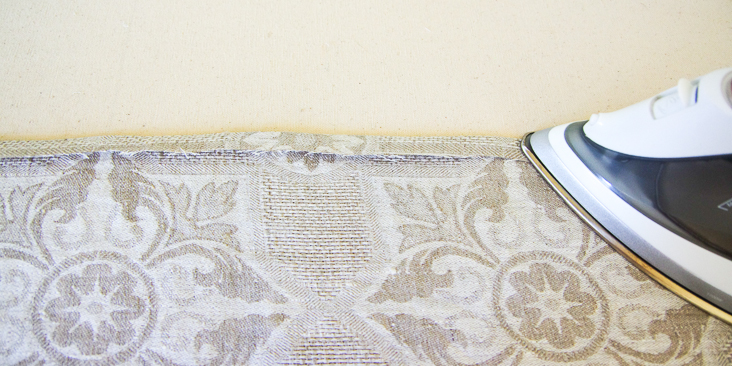
After all this trimming, I flipped the scallops so right sides were out and carefully pressed them to create smooth curves. I tried to push the facing slightly to the wrong side of the curtains so the white sheeting wouldn’t peek out at the hem.
Now, to keep the facing from drooping, I basted the selvage edge to the linen by hand.
The next step is to finish the sides. I simply pressed the serged edge under 1/2″ to match the finished facing edge and top stitched.
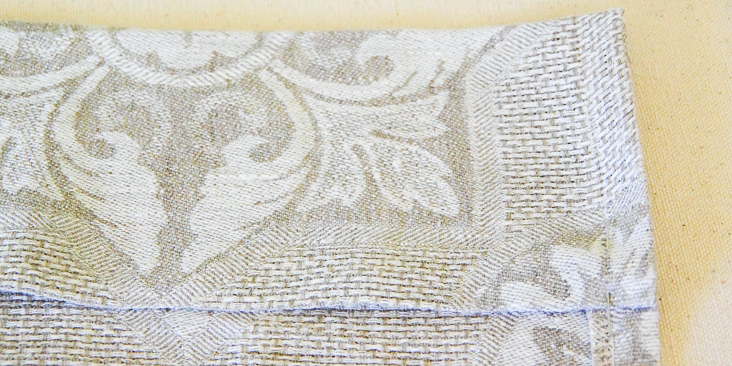
To finish the top edge of the curtains, I created a 4″ wide pocket. I folded the raw edge under 1/2″.
Then I folded the fabric again and pinned to create a 4″ ‘double folded hem’.
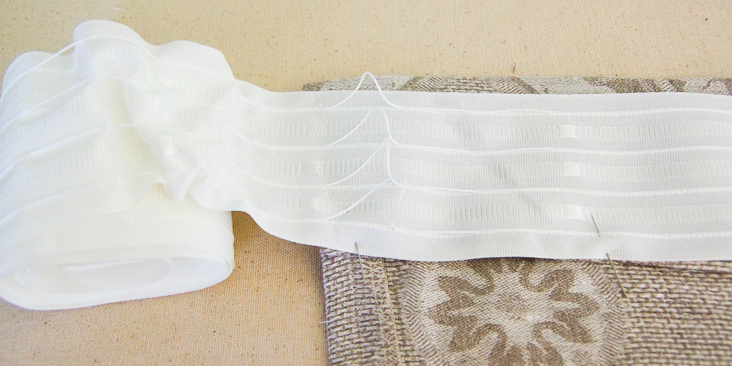
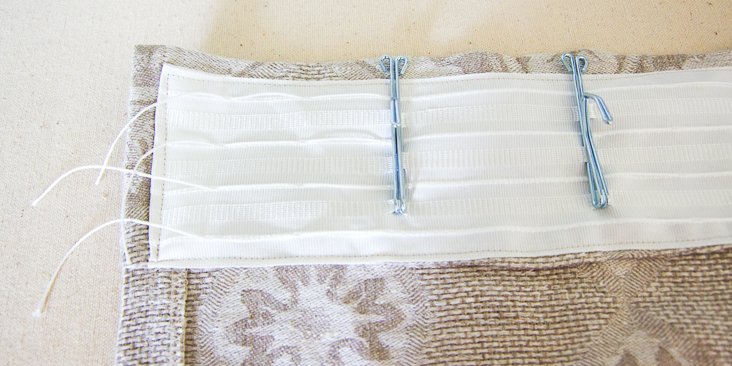
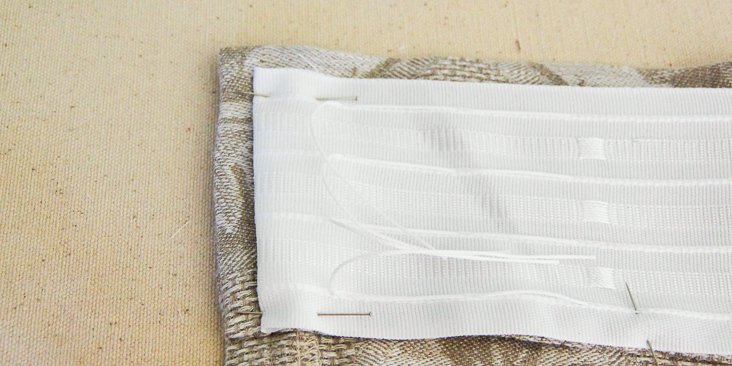
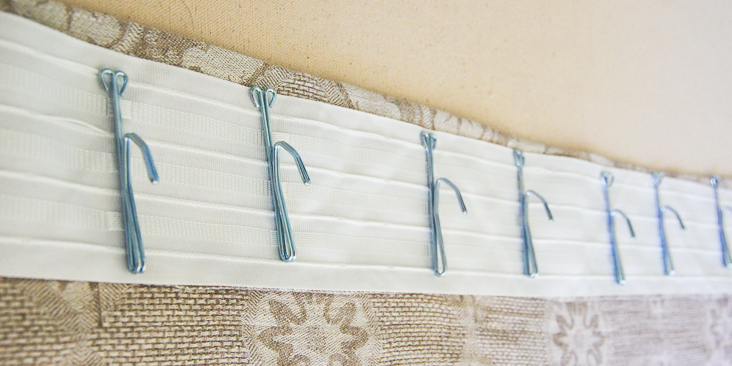
A rod could be inserted through this pocket but, in my case, I applied drapery tape so I could use an i-beam drapery system with metal hooks. I added the tape by pinning it to the 4″ folded fabric before stitching. I then stitched the tape and ‘hem’ in place at the same time (along the top and bottom edges of the tape).
When using drapery tape, there are a few areas where things could go wrong! So, follow my advice so that you avoid all the mistakes I made on the first drapery panel (and subsequently had to stitch pick!).
First off, make sure the drapery tape is facing the right direction. My tape had pockets for the hooks that could only be accessed from one side. Of course, I had a 50/50 chance of applying it the correct direction the first time and failed to do so :P.
Secondly, cut yourself extra length so that you have room to pull out the gathering strings and fold the tape ends under before stitching. This tape frays like crazy so it won’t work very well to leave the edges raw.
Third, position the tape so that there is a pocket for a hook close to each edge of the curtain so that your curtains don’t droop along either side. I laid out the tape and hooks before sewing to make sure that everything would line up.
With those tips, you shouldn’t have any problem! Now stitch away.
There are several other equally stunning jacquards with interestingly shaped prints along either selvage…it is awfully tempting to buy enough of each design to create curtains for the rest of the bare windows in our house!
Thank you, Fabrics-store, for the opportunity to sew with such gorgeous fabric! If you’d like to see more of my tutorials, come on over to visit us at the Thread Theory website.











18 Comments
Gretchen
These are absolutely gorgeous – thank you for sharing your technique.
I have a question: what is an: ” i-beam drapery system with metal hooks”?
Thanks!
eyed la
Hmm it seems like your blog ate my first comment (it was extremely
long) so I guess I’ll just sum it up what I submitted and say, I’m thoroughly enjoying your blog.
I as well am an aspiring blog blogger but I’m still new to the whole thing.
Do you have any tips and hints for first-time blog writers?
I’d really appreciate it.
Anna Griffin
Morgan, I found this very interesting and beautifully written and photographed. You explained everything clearly, and the accompanying photos were spot on. The linen fabric is gorgeous!
I’m going to SHARE this for future reference!
Marie C
Does the scallop design run down both selveges? I have a project in mind, and that would matter.
Morgan Meredith
Hi Marie,
Yes the scallop does run along both selvages! I cut the one set of scallops off for my curtains. Have fun with your sewing project – it is a lovely fabric!
Morgan
Nancy
When you are finished stitching on the tape…do you pull the strings to fit the window? I was trying to find a picture of the drape hanging….a view at the top of the drape on the rod. This is something I would like to try….thank you for the instructions,
Morgan Meredith
Darn, I should have included a photo of the top view! Yes, I pulled the tape slightly to create loose gathers. I tied the strings and stitched them in place at either end. I then attached the curtains to a ceiling-hung I-beam. Good luck with your curtains!
Jennifer
Thank you so much! This fabric is truly sublime and makes the curtains so gorgeous. Thank you for sharing the to do of these curtains.
Marie
I think in this case too much fullness would have detracted from the beauty of the jacquard weave. You can see it better the way the curtains are made. Love the fabric and the curtains!
MWehmeier
I completely agree Hilary. It is a shame to not see more fullness in the window treatment. When I made draperies I was alway taught fullness gives a more luxurious look and coverage. Even a thinner lining would protect the investment in this wonderful fabric. I could easily see this fabric used as an excellent covered cornice, with a neutral linen treatment. If all else fails use a sheer with UV protection behind this drape.
Good tutorial, I would like to see how the pinch pleating looked. I prefer to fold and tack myself, but it is not a process for everyone.
Do keep up the good tutorials.
Morgan Meredith
Thank you for your comment! That is a nice idea to add a sheer UV protection behind the drapes – I will certainly take this into consideration. As I mentioned in reply to Hilary’s comment, the curtains were made after being inspired by very rustic types of draperies (linen tied to twine for example) and so I really wanted the curtains to appear as flat as possible. I can certainly see why many people like full and rich looking drapes and I am aware of the many conventions around drapery construction…but I’m glad I broke them for my curtains because I am very happy with how they fit into the light and rustic look of my room :).
jessica
Beautifully executed!
These curtains have an oppulance that is balanced with a breezy, natural feel. I am going to do these in my mudroom, thanks to you!
I like that they are unlined. They are not formal or precious, and the light shining through will highlight the jaquard.Too much fabric would have concealed the scalopped edge, so you chose perfectly.
Linen does fade, so a natural shade is best for unlined, and these are perfect. The only thing is the lined hem will fade much more slowly, so they may develop an accent stripe across the bottom with time. Also, I have had the gatherings fade more where closer to the window, so i may need to shift the hooks to a different spot after each washing.
Morgan Meredith
Thanks Jessica! You certainly seem to have understood the look I was going for 🙂 Very informal and rustic! I think I would prefer nice blinds and no curtains to full and formal curtains that are heavy with linings and drapery weights. I can certainly appreciate their place in many homes but they would not suit the earthy and understated look that I am trying to accomplish in mine! I imagine you are right about the fading – not only are the scallops protected from direct sun due to the facing, they are also below the window and so will likely be far less faded than the rest of the curtains. The fabric has a very faded and sun-loved look to start with though so I hope there will not be a distinct line but just a subtle ombre effect when the fading takes place. We are in a little temporary rental house at the moment with strange window placements and slanted ceilings so my choice of the i-beam curtain track was dictated by these restrictions. When we move into a more permanent place I will likely switch these to a curtain rod and add a gauzy layer behind the curtains. Thanks for sharing your opinion! And good luck with your mudroom curtains!
Hilary Catron
The hem is lovely, it looks great. I am disappointed that you only had four yards to work with. The draperies are skimpy-looking and installed almost flat, so I don’t see why you used such expensive gathering tape to insert the drapery hooks. There is tape available without those gathering threads, and you certainly don’t need them for this project. The flatness/skimpiness is the real source of my disappointment.
A rich look comes from plenty of fabric, it can be nothing more than unbleached muslin but it looks better than flat silk. I know the TV home dec shows often do flat draperies, but that’s because they are trying to keep their ideas cheap, or they don’t know any better. The truth is fabric simply is NOT cheap these days.
Summer drapes need to float on the breeze, so lightness is important but the UV exposure will rot them very quickly unless they are lined. Why do all the work on the fancy hems and have them rot within a year? WalMart thinking!
The jacquard fabric featured here is lovely, but very pricy. Using it in a skimpy way seems counter-intuitive, as does not lining them. Using your tutorial, I’d make a scalloped throw for the bed, or maybe a scalloped lined valance from the appropriate jacquard and do the long draperies of a coordinating less costly fabric, 2-3 times the window width and lined.
Thanks for the excellent illustrations.
Jere
Hilary you are so right. a window is to have 2 to 3 times it width in fabric covering.
Morgan Meredith
Hi Hilary,
Thanks for sharing your opinion! I realize there are a lot of conventions and ‘rules’ around draperies and I probably broke many of them in my quest to make curtains that fit the image I had in my mind regarding how I wanted my bedroom to look. I was inspired by the many flat and ‘rustic’ curtains that I have seen floating around Pinterest (many being simply tied to a piece of twine across the window!) and wanted to pair that rustic and perhaps industrial look with the functionality of easy-to-open curtains. I have always been of the camp both with garment sewing and home decor sewing that the ‘correct’ way to sew something is the way that works for the sewer and the recipient of the garment/item. In this case, I couldn’t be more happy with my curtains, and so, even if they are unconventional, they certainly are the ‘correct’ curtains for me! In regards to the gathering tape, you are right, I could have used one without gathering threads. Thank you for pointing this out in case other readers were confused! I used the tape that I had on hand after sewing curtains for my Grandma and found that it worked quite well to loosely and unevenly gather the curtains – which of course was my aim to create the rustic and airy look I was going for.
Isabel
Loved the tutorial
Morgan
Thank you!